¶ The serial monitor control
¶ Overview
In this lesson, you will build on Lesson 18 of part 2, adding the facility to control the LEDs from your computer using the Arduino Serial Monitor. The serial monitor is the 'tether' between the computer and your UNO. It lets you send and receive text messages, handy for debugging and also controlling the UNO from a keyboard! For example, you will be able to send commands from your computer to turn on LEDs. In this lesson, you will use exactly the same parts and a similar breadboard layout as Lesson 18 Part 2. So, if you have not already done so, follow Lesson 18 of part 2 now.
¶ Steps
After you have uploaded this sketch onto your UNO, click on the right-most button on the toolbar in the Arduino IDE. The button is circled below.
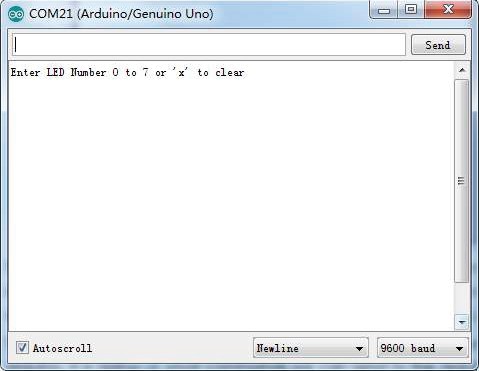
The following window will open.
Click the Serial Monitor button to turn on the serial monitor. The basics about the serial monitor are introduced in details in Lesson 4 of part 2.
This window is called the Serial Monitor and it is part of the Arduino IDE software. Its job is to allow you to both send messages from your computer to an UNO board (over USB) and also to receive messages from the UNO.
The message“Enter LED Number 0 to 7or 'x' to clear”has been sent by the Arduino. It is telling us what commands we can send to the Arduino: either send the 'x' (to turn all the LEDs off) or the number of the LED you want to turn on (where 0 is the bottom LED, 1 is the next one up, all the way to 7 for the top LED).
Try typing the following commands into the top area of the Serial Monitor that is level with the 'Send' button. Press 'Send', after typing each of these characters: x 0 3 5
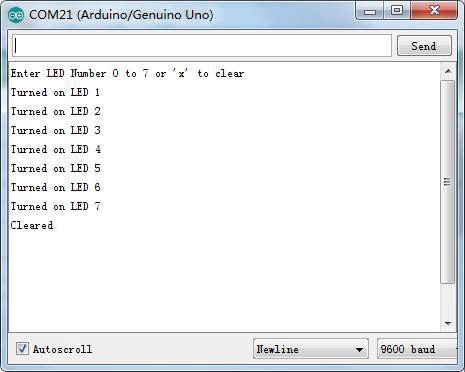
Typing x will have no effect if the LEDs are already all off, but as you enter each number, the corresponding LED should light and you will get a confirmation message from the UNO board. The Serial Monitor will appear as shown below.
Type x again and press ’send’ to turn off all LEDs.
¶ Code
You can click the blue text link to download the program file to your local device, and double-click the file to open it after the download is complete. Please note: Before opening the file, ensure that you have installed the Arduino IDE development environment and completed the installation of relevant components such as the board support package and driver corresponding to the UNO development board. If you have any questions about this operation process, you can refer to the "part 1" chapter of the document for detailed guidance .
void loop()
{
//Turn off all led
leds = 0;
updateShiftRegister();
delay(tDelay);
//Create a for loop:i 0 through 7 have gradually increased
for (int i = 0; i < 8; i++)
{
//turn on the led with the i transform
bitSet(leds, i);
updateShiftRegister();
delay(tDelay);
}
}
This code is from the previous tutorial,No manual intervention required; the program executes autonomously according to a fixed logic: first turn off all LEDs, then light each LED individually from 0 to 7 through a for loop, and repeat the process after completing one round.
This tutorial brings the way to use serial port control. In fact, there is no difference in the core principle of controlling small lights, but only a way to convert them.
void loop()
{
if (Serial.available())//judge the serial if receive data
{
char ch = Serial.read();//Read serial data and save it in "ch"if (ch >= '0' && ch <= '7') //If the data of "ch" is the character'0'~character'7'
{
int led = ch - '0'; //Converting strings to binary numbers example: '0' -> 0 or '1' -> 1
bitSet(leds, led);
updateShiftRegister();
Serial.print("Turned on LED ");
Serial.println(led);
}
if (ch == 'x')
{
leds = 0;
updateShiftRegister();
Serial.println("Cleared");
}
}
}
The main difference is that the part of the for loop is replaced by reading serial data. We can see that the for loop is automatically changed. However, after using the serial port reading mode here, the corresponding small light is lit by judging the data read by the serial port. In this way, you can artificially light the small light you want.
if (ch >= '0' && ch <= '7') //If the data of "ch" is the character'0'~character'7'
{
int led = ch - '0'; //Converting strings to binary numbers example: '0' -> 0 or '1' -> 1
bitSet(leds, led);
updateShiftRegister();
Serial.print("Turned on LED ");
Serial.println(led);
}