¶ Passive buzzer
¶ Overview
In this tutorial you will learn how to use a passive buzzer.
The purpose of the experiment is to generate eight different sounds, each sound lasting 0.5 seconds: from Alto Do (523Hz), Re (587Hz), Mi (659Hz), Fa (698Hz), So (784Hz), La (880Hz), Si (988Hz) to Treble Do (1047Hz).
¶ Component Required:
(1) x Elegoo Uno R3
(1) x Passive buzzer
(2) x F-M wires (Female to Male DuPont wires)
¶ Component Introduction
¶ Passive Buzzer:
The working principle of passive buzzer is using PWM generating audio to make the air to vibrate. Appropriately changed as long as the vibration frequency, it can generate different sounds. For example, sending a pulse of 523Hz, it can generate Alto Do, pulse of 587Hz, it can generate midrange Re, pulse of 659Hz, it can produce midrange Mi. By the buzzer, you can play a song.
We should be careful not to use the analogWrite () function to generate a pulse to the ACTIVE buzzer, because the pulse output of analogWrite () is fixed (500Hz).
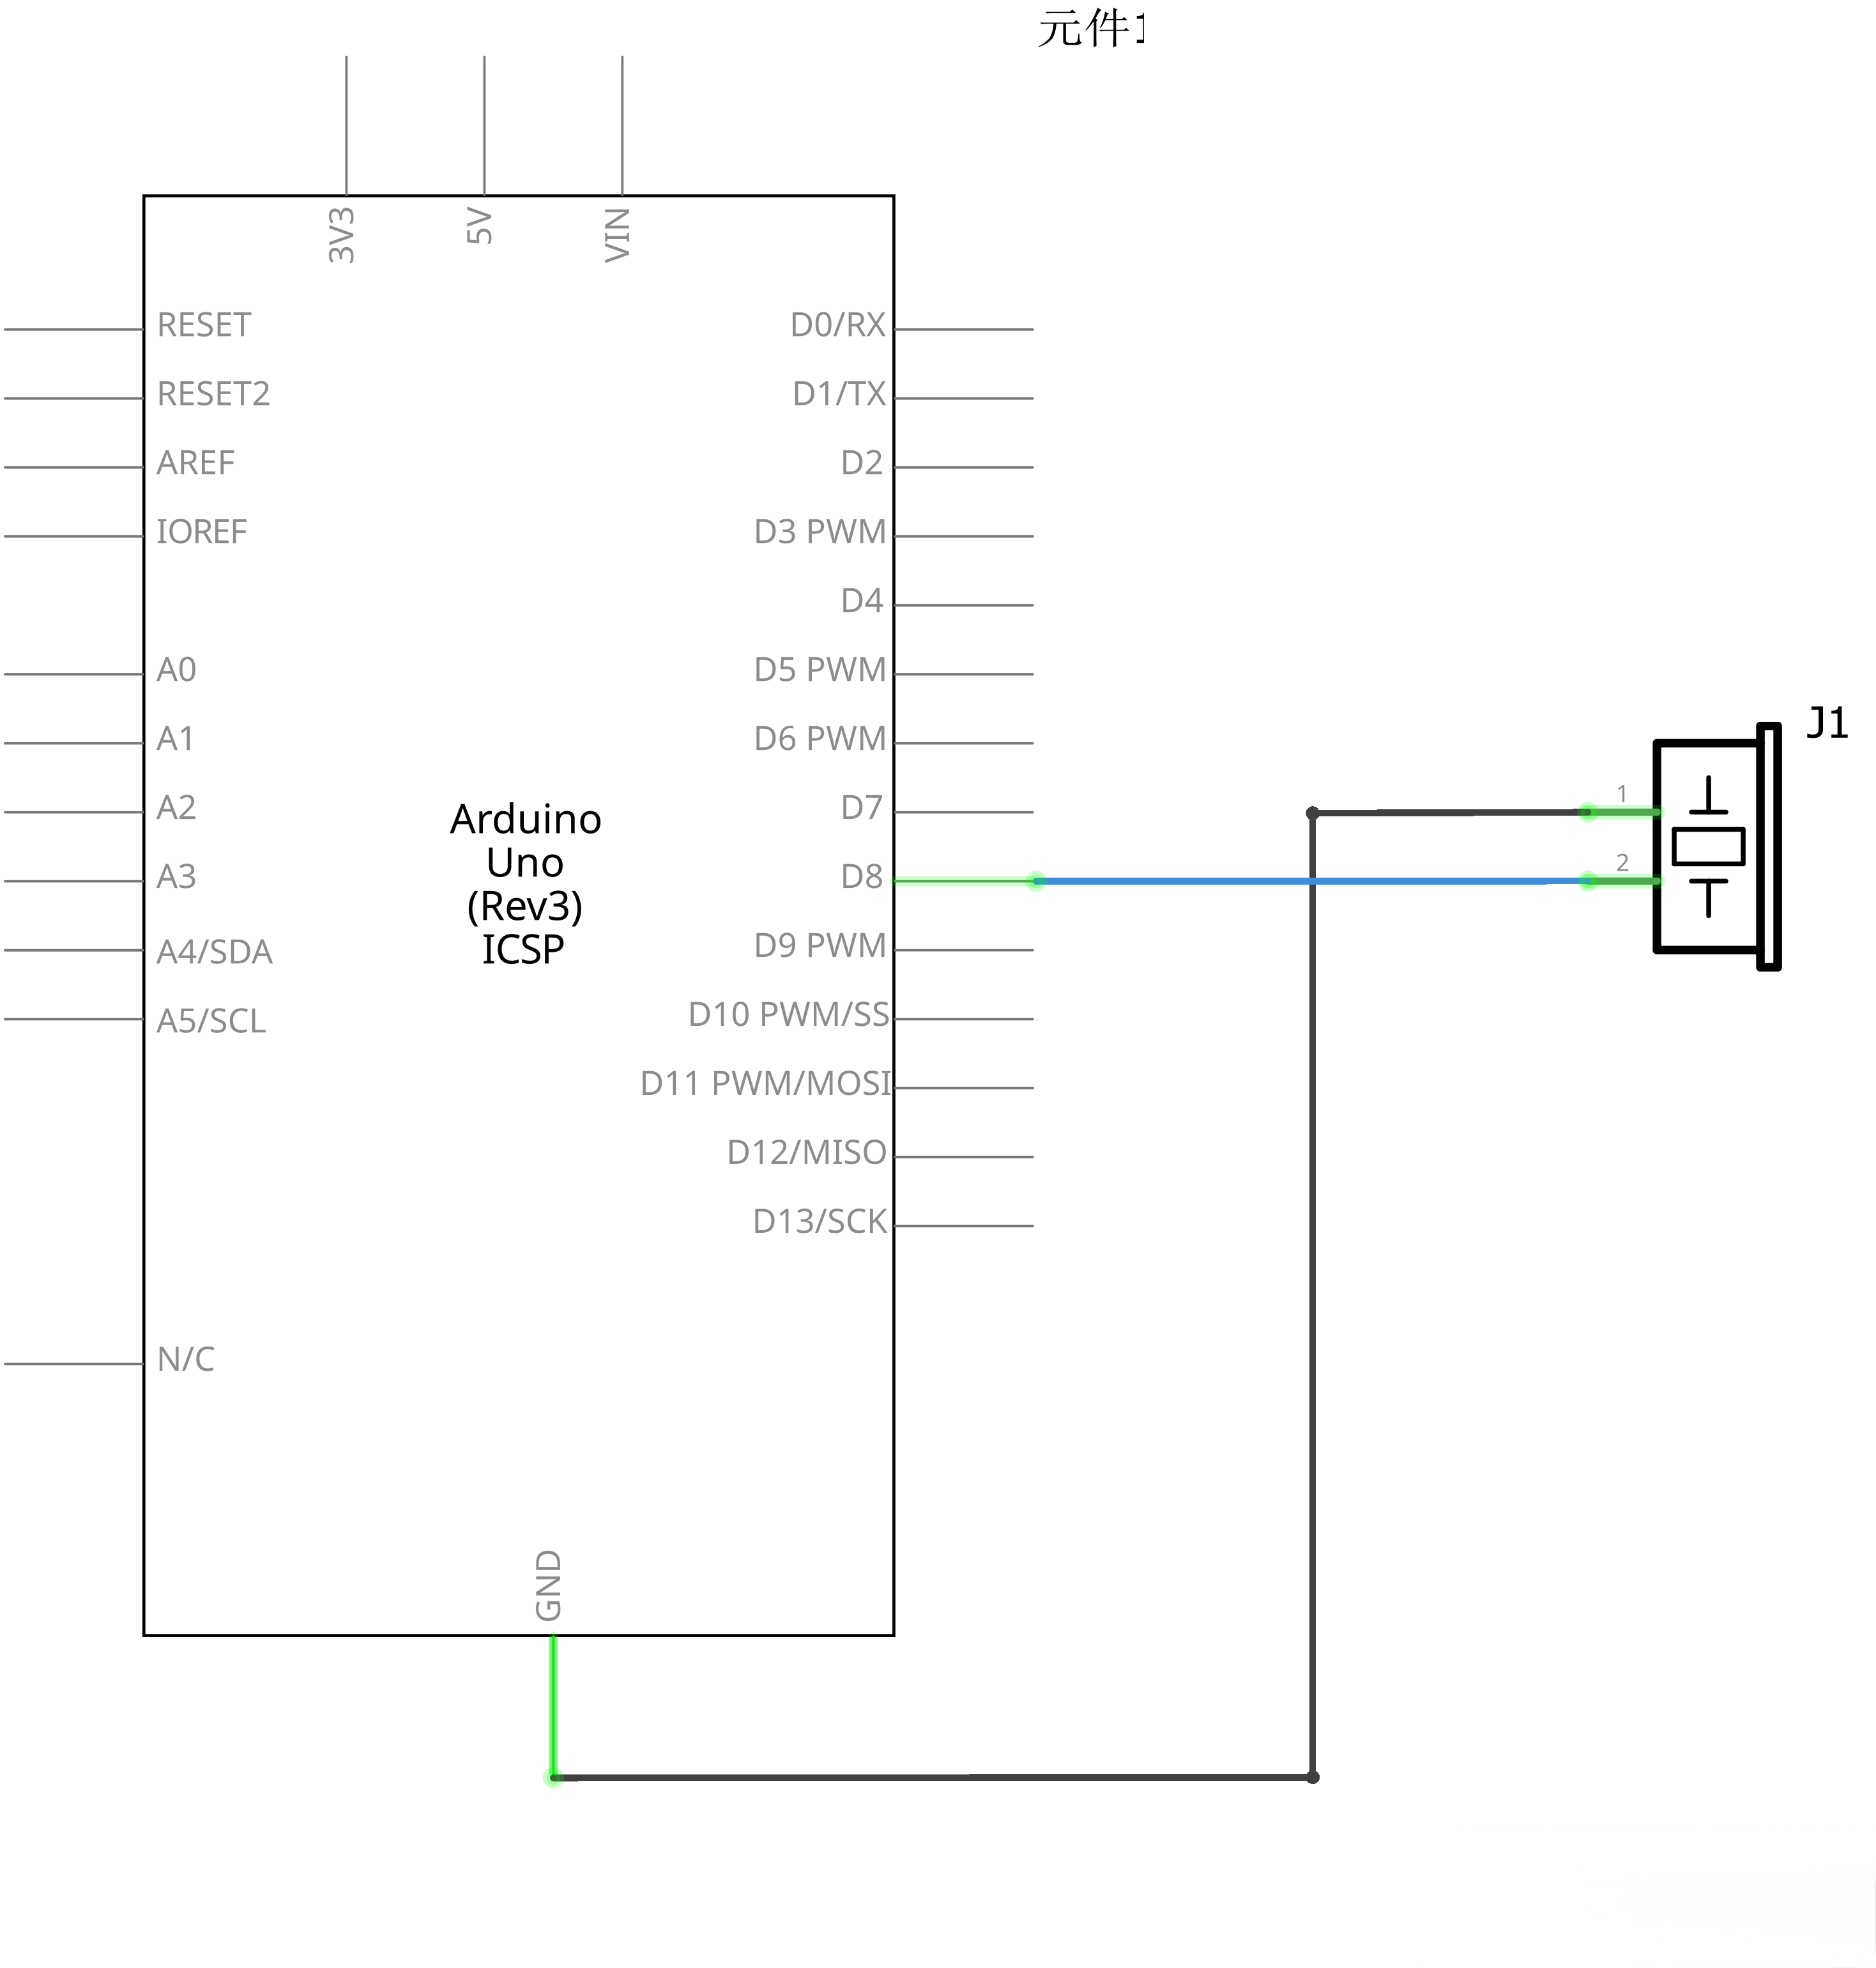
¶ Connection Schematic
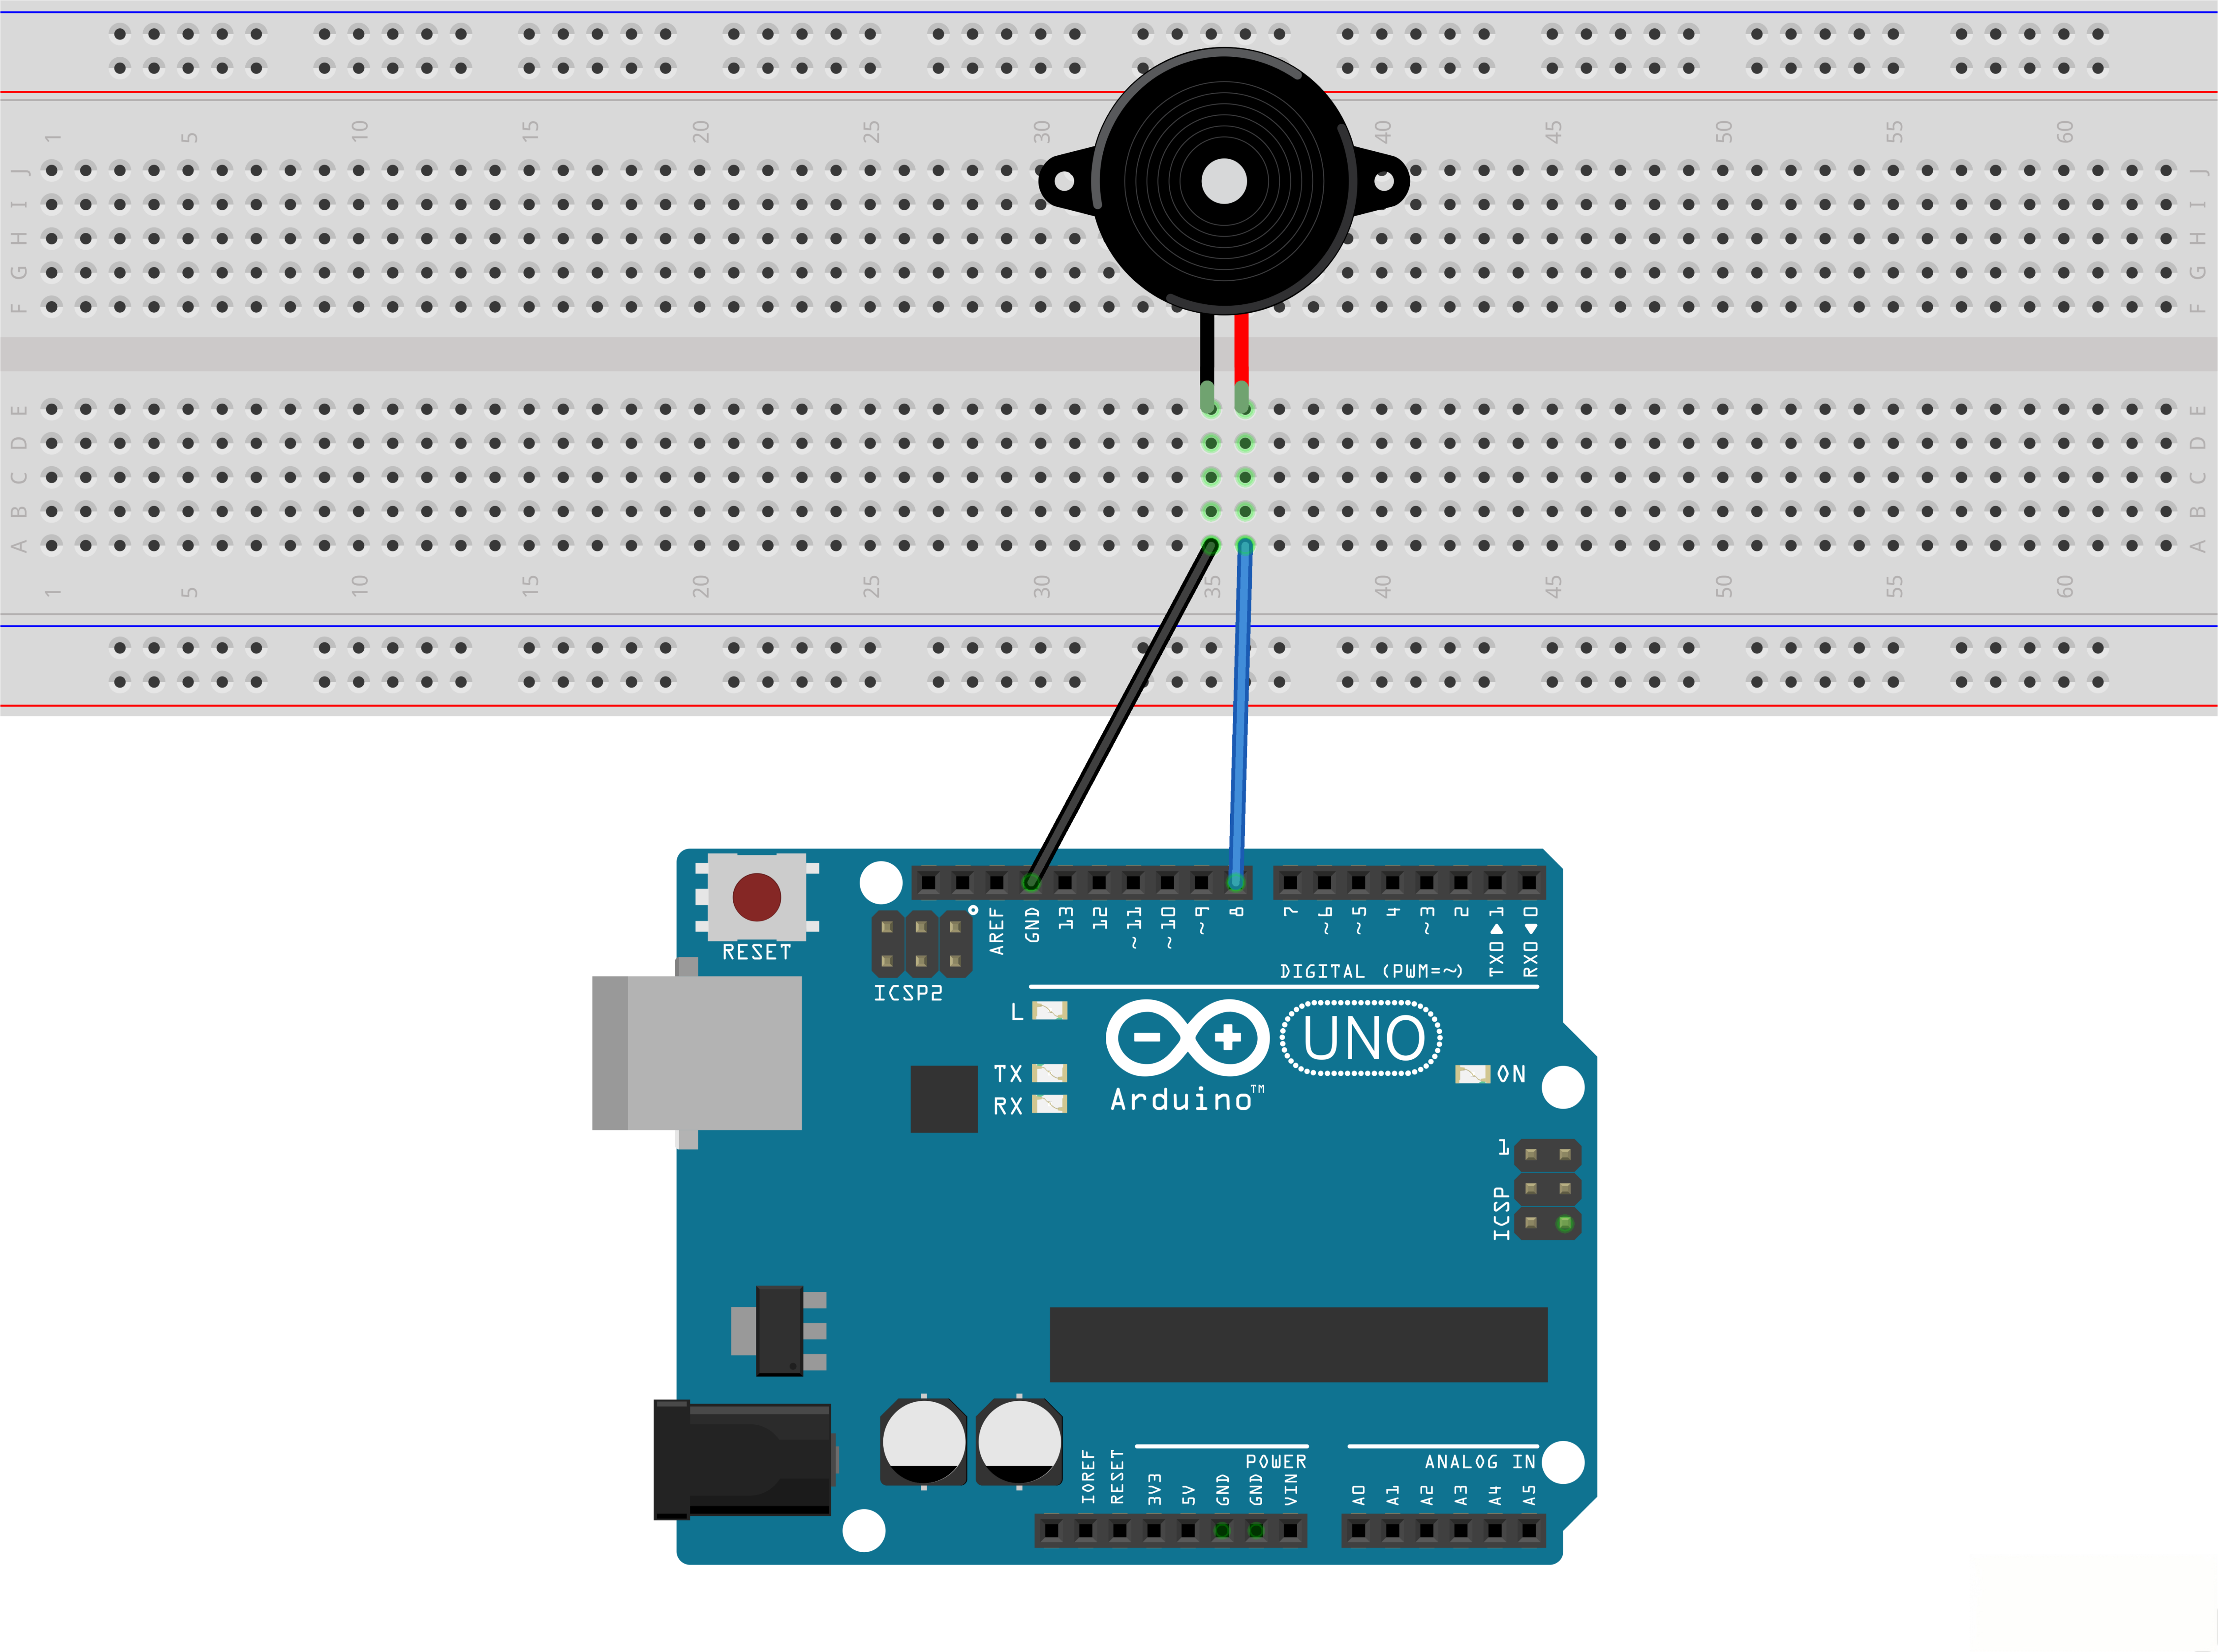
¶ Wiring diagram
¶ Code
You can click the blue text link to download the program file to your local device, and double-click the file to open it after the download is complete. Please note: Before opening the file, ensure that you have installed the Arduino IDE development environment and completed the installation of relevant components such as the board support package and driver corresponding to the UNO development board. If you have any questions about this operation process, you can refer to the "part 1" chapter of the document for detailed guidance.
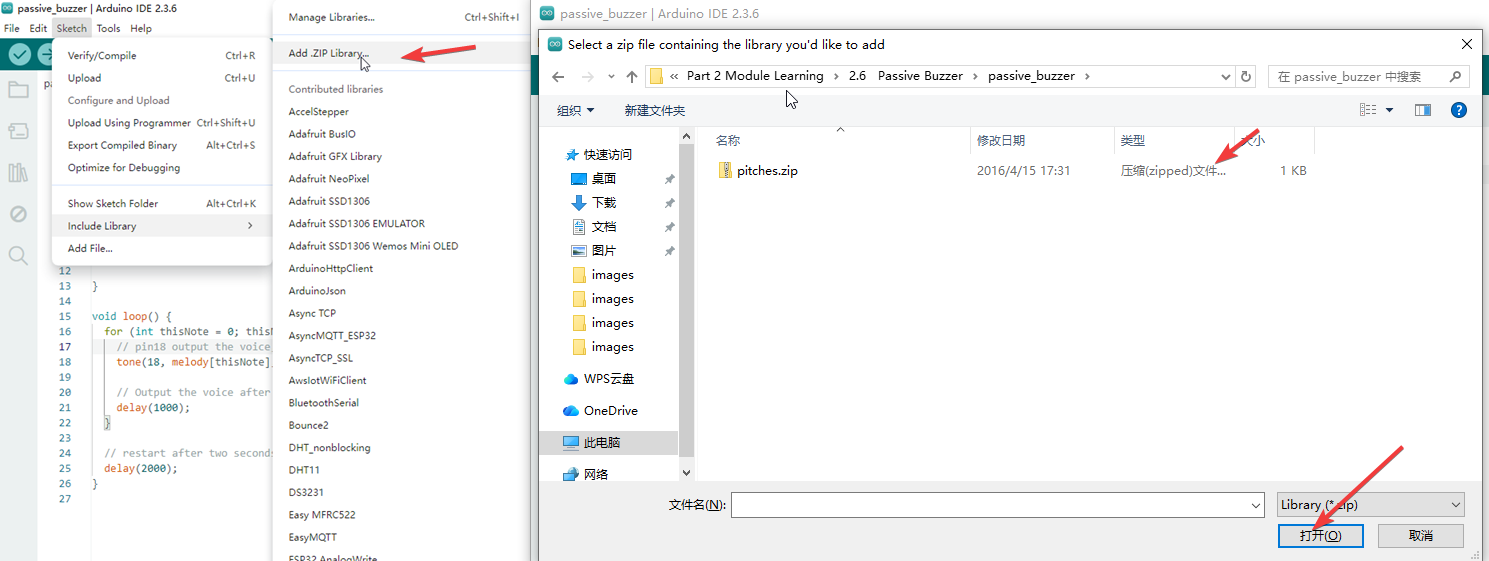
The addition of external library files can be performed following the steps shown in the figure below: The ZIP archive provided with this tutorial contains a compressed file named pitches — simply follow the operation method in the figure to import (add) this pitches compressed file into the development environment.
#include "pitches.h"
#include "pitches.h" is a header file inclusion directive in Arduino (C/C++). Its role is to "copy and paste" the content of the custom header file named pitches.h into the current code.
pitches.h is a custom header file dedicated to controlling buzzers/speakers to play music in Arduino programming. Its core content uses the #define macro definition directive to bind audio frequency values (unit: Hertz/Hz) to musical notes of different pitches:
- Basic structure:Prefix with NOTE_, followed by the note name (e.g., C, D, E) and octave number (e.g., 4 for middle octave, 5 for high octave), with the physical vibration frequency of the note after the equal sign;
- Typical content: Includes definitions of commonly used notes from low to high pitch (e.g., Middle C4 = 262Hz, Middle D4 = 294Hz, Middle E4 = 330Hz), covering core notes such as Do, Re, Mi, Fa, Sol, La, Si in numbered musical notation;
- Core function: Eliminates the need for developers to memorize the specific frequency values of each note—directly calling semantic macro names like NOTE_C4 or NOTE_A4 allows the buzzer to emit the corresponding tone.
int melody[] = {NOTE_C5, NOTE_D5, NOTE_E5, NOTE_F5, NOTE_G5, NOTE_A5, NOTE_B5, NOTE_C6};
array
[Data Types]
Description
An array is a collection of variables that are accessed with an index number. Arrays in the C++ programming language Arduino sketches are written in can be complicated, but using simple arrays is relatively straightforward.
Creating (Declaring) an Array
All of the methods below are valid ways to create (declare) an array.
For example:
int mypins[6];
int mypins[]={2,3,4,5,6};
char mywords[6]="hello";
You can declare an array without initializing it as in mypins.
In myPins we declare an array without explicitly choosing a size. The compiler counts the elements and creates an array of the appropriate size.
Accessing an Array
Arrays are zero indexed, that is, referring to the array initialization above, the first element of the array is at index 0, hence.
mySensVals[0] == 2, mySensVals[1] == 4, and so forth.
It also means that in an array with ten elements, index nine is the last element.
For example:
int myArray[10]={9,3,2,4,3,2,7,8,9,11}
//myArray[9]contains11
// myArrayl1ol is invalid and contains random information (other memory address
For this reason you should be careful in accessing arrays. Accessing the end of an array (using an index number greater than your declared array size - 1) is reading from memory that is in use for other purposes. Reading from these locations is probably not going to do much except yield invalid data.
Writing to random memory locations is definitely a bad idea and can often lead to unhappy results such as crashes or program malfunction. This can also be a difficult bug to track down.
Unlike BASIC or JAVA, the C++ compiler does no checking to see if array access is within legal bounds of the array size that you have declared.
To retrieve a value from an array:
tone(8, melody[thisNote], duration);
tone()
[Advanced I/O]
Description
Generates a square wave of the specified frequency (and 50% duty cycle) on a pin. A duration can be specified, otherwise the wave continues until a call to noTone(). The pin can be connected to a piezo buzzer or other speaker to play tones.
Only one tone can be generated at a time. If a tone is already playing on a different pin, the call to tone () will have no effect. If the tone is playing on the same pin, the call will set its frequency.