¶ Active buzzer
¶ Overview
In this lesson, you will learn how to generate a sound with an active buzzer.
¶ Component Required:
(1) x Elegoo Uno R3
(1) x Active buzzer
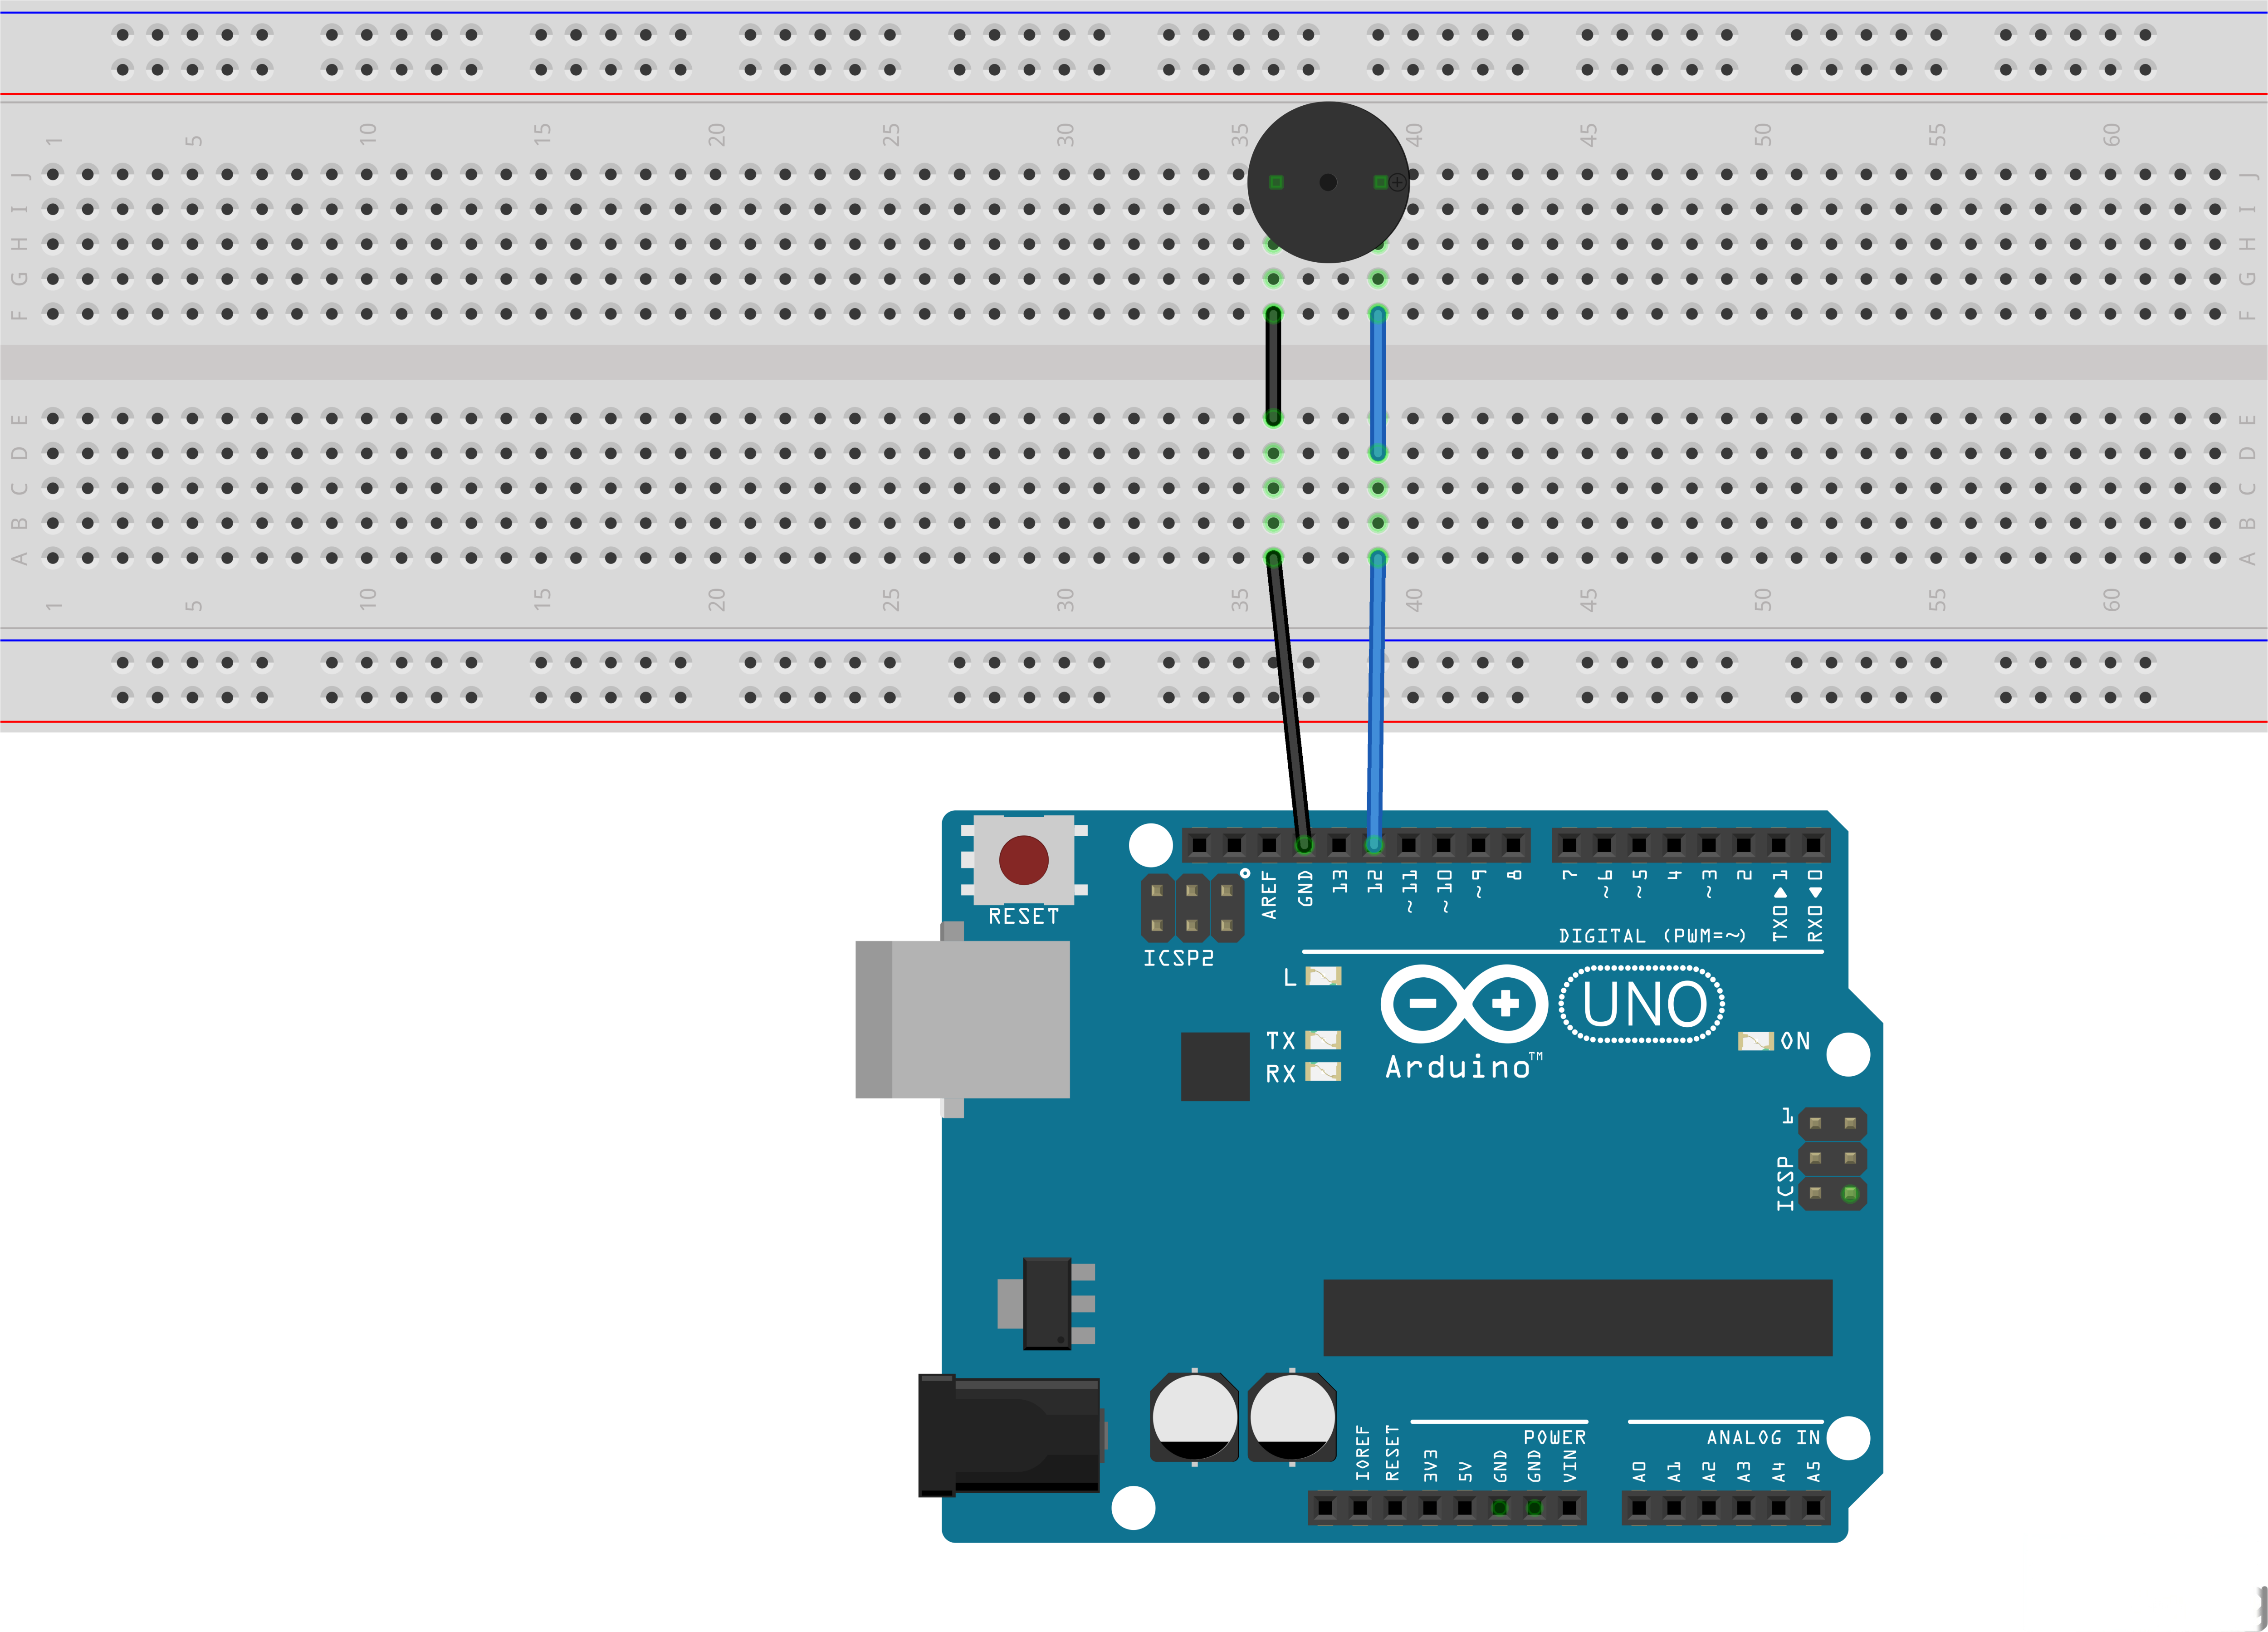
(2) x F-M wires (Female to Male DuPont wires)
¶ Component Introduction
¶ BUZZER:
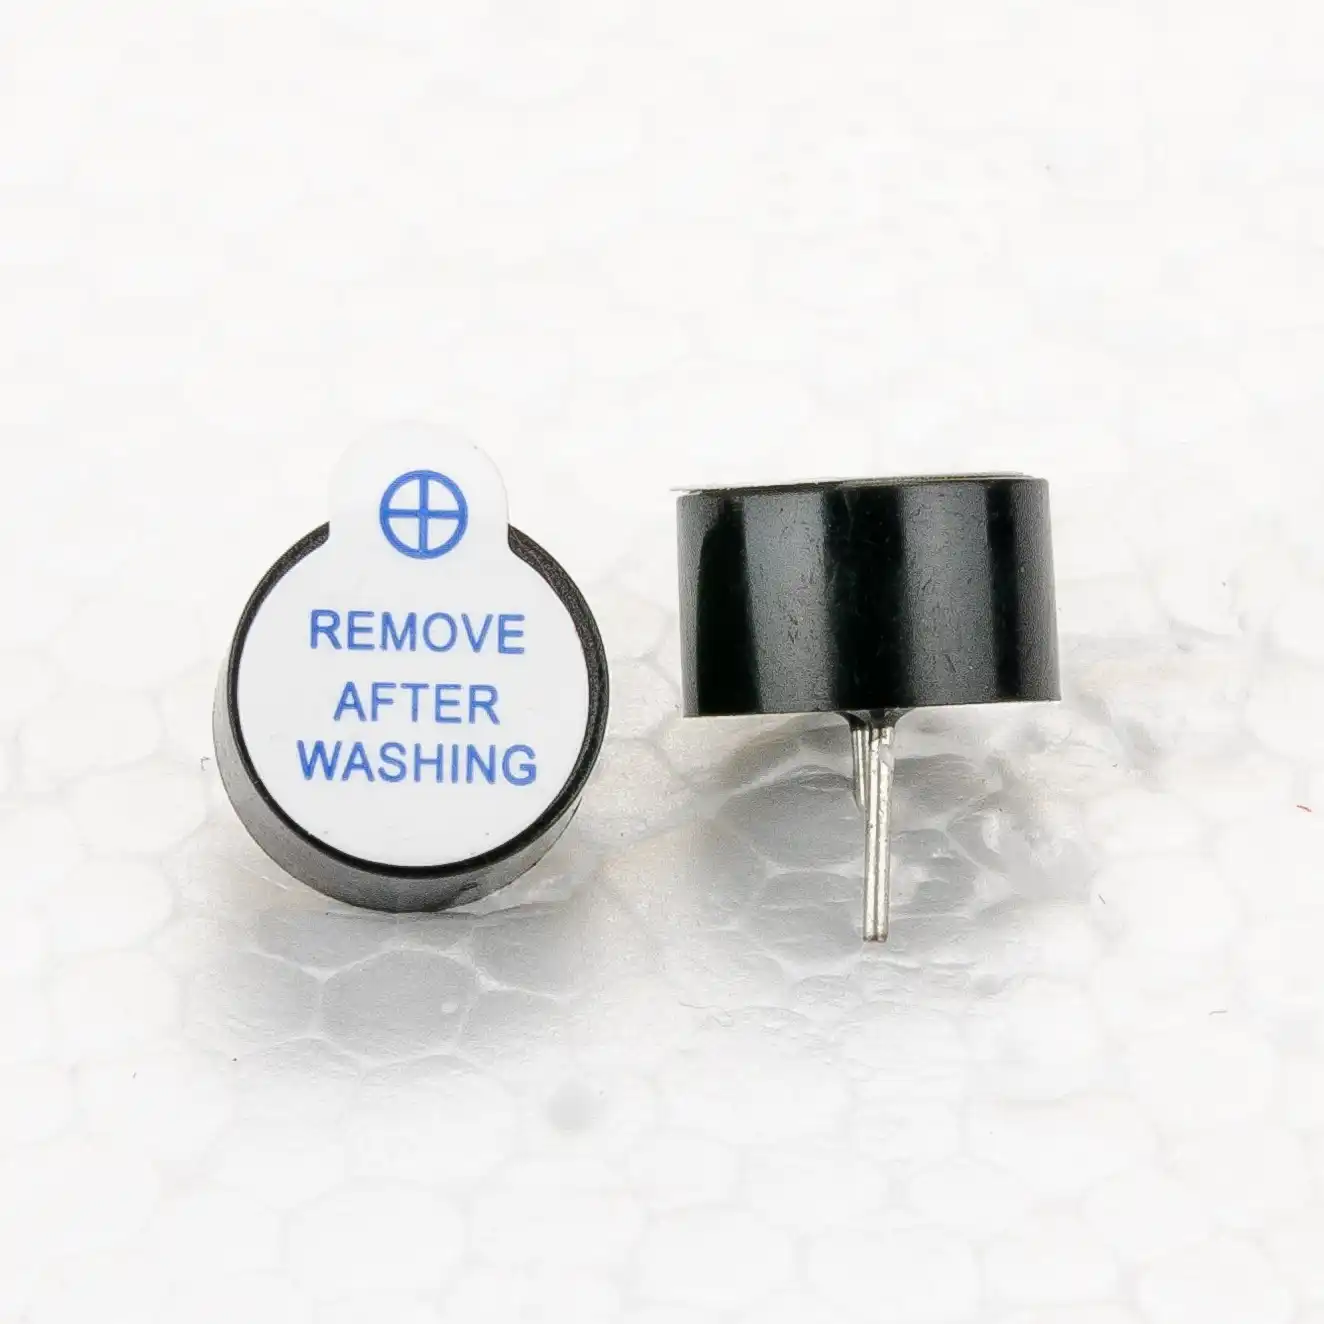
Electronic buzzers are DC-powered and equipped with an integrated circuit. They are widely used in computers, printers, photocopiers, alarms, electronic toys, automotive electronic devices, telephones, timers and other electronic products for voice devices. Buzzers can be categorized as active and passive ones. Turn the pins of two buzzers face up.The one with a green circuit board is a passive buzzer, while the other enclosed with a black tape is an active one.
The difference between the two is that an active buzzer has a built-in oscillating source, so it will generate a sound when electrified. A passive buzzer does not have such a source so it will not tweet if DC signals are used; instead, you need to use square waves whose frequency is between 2K and 5K to drive it. The active buzzer is often more expensive than the passive one because of multiple built-in oscillating circuits.

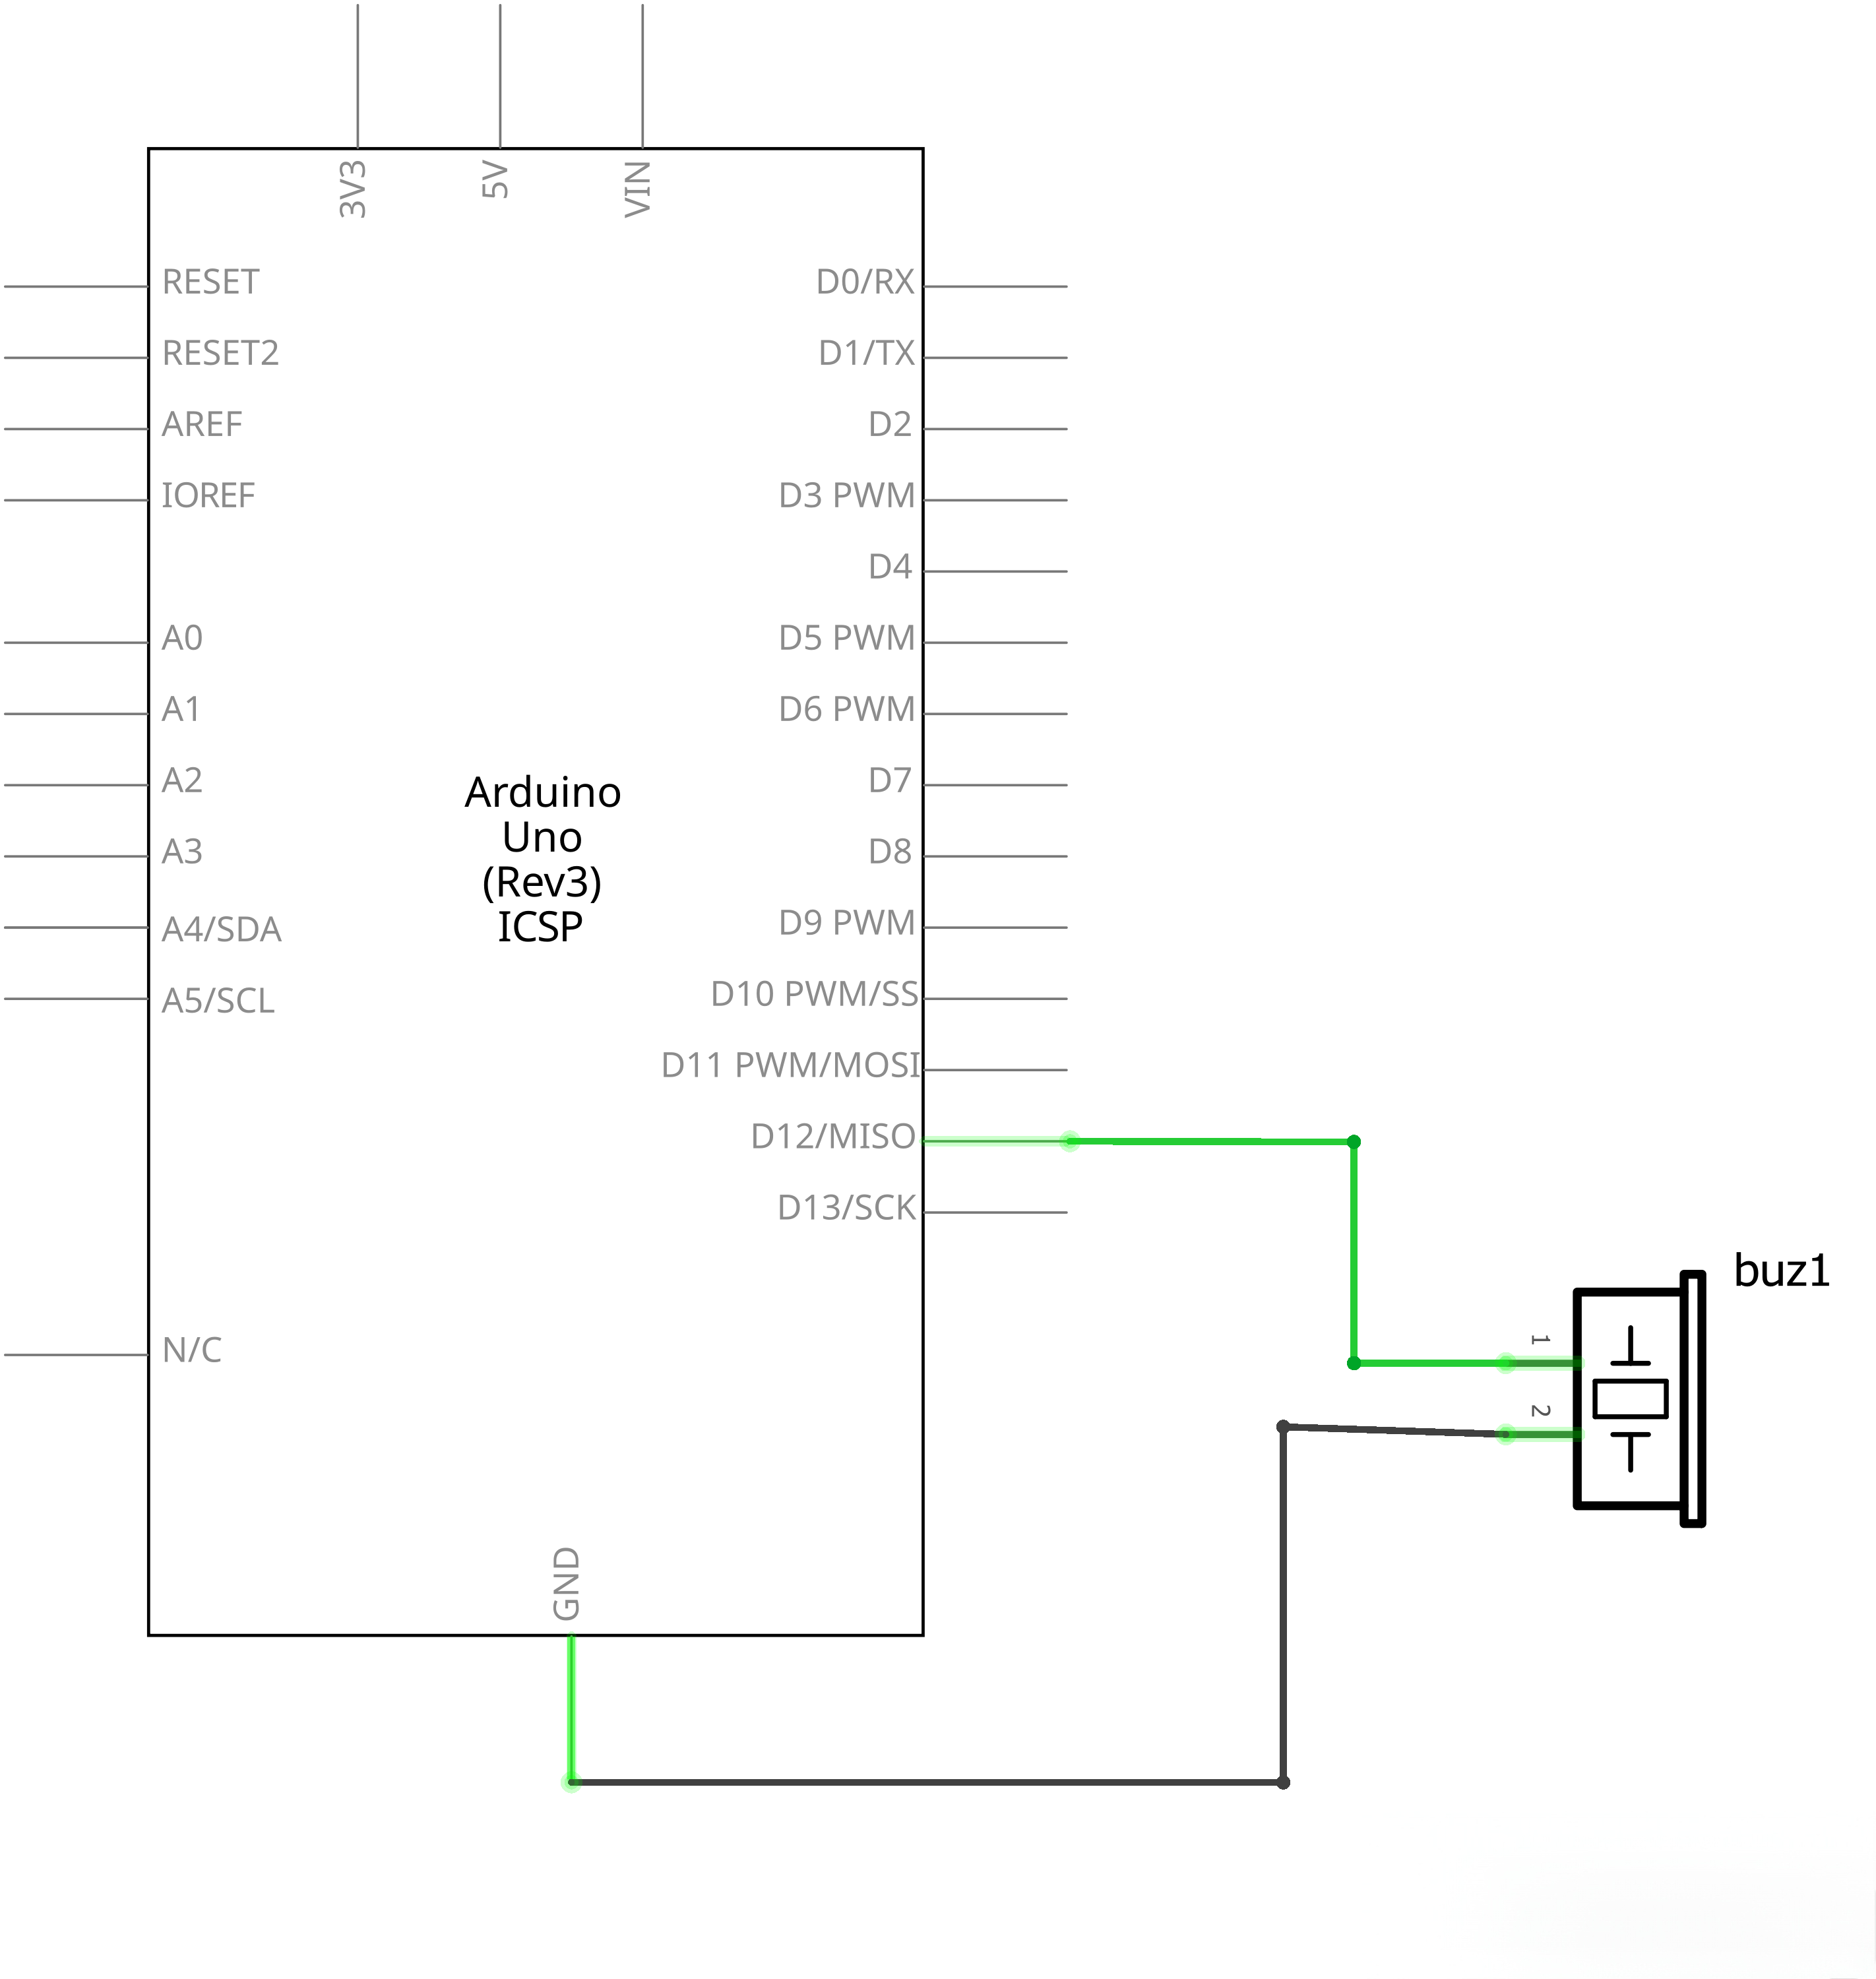
¶ Connection Schematic
¶ Wiring diagram
¶ Code
You can click the blue text link to download the program file to your local device, and double-click the file to open it after the download is complete. Please note: Before opening the file, ensure that you have installed the Arduino IDE development environment and completed the installation of relevant components such as the board support package and driver corresponding to the UNO development board. If you have any questions about this operation process, you can refer to the "part 1" chapter of the document for detailed guidance..
int buzzer = 12;//the pin of the active buzzer
void setup()
{
pinMode(buzzer,OUTPUT);//initialize the buzzer pin as an output
}
void loop()
{
unsigned char i;
while(1)
{
//output an frequency
for(i=0;i<80;i++)
{
digitalWrite(buzzer,HIGH);
delay(1);//wait for 1ms
digitalWrite(buzzer,LOW);
delay(1);//wait for 1ms
}
//output another frequency
for(i=0;i<100;i++)
{
digitalWrite(buzzer,HIGH);
delay(2);//wait for 2ms
digitalWrite(buzzer,LOW);
delay(2);//wait for 2ms
}
}
}
while(condition)
[Control Structure]
Description
A while loop will loop continuously, and infinitely, until the expression inside the parenthesis, () becomes false. Something must change the tested variable, or the while loop will never exit. This could be in your code, such as an incremented variable, or an external condition, such as testing a sensor.
Syntax
while(condition){
//statements
}
Parameters
condition: a boolean expression that evaluates to true or false.
if you need the program to enter an infinite loop execution state, you can directly set the conditional expression in the while() loop to true (boolean true value) or 1 (numeric true value); at the same time, you need to preset an exit trigger condition inside the loop body. When this condition is met, use the break statement to forcibly terminate the loop, thereby implementing the logic of "entering an infinite loop first and exiting when the condition is satisfied".
while(1){
if(x==1)
{
break;
}//.........
}