¶ Camera module FAQ
The following are the troubleshooting steps for mobile phones unable to see the ELEGOO-XXX WiFi signal.
- Some of the phone models may not be compatible with the camera module.Please use another phone or a laptop to check this problem first. After you connected to the WiFi signal, you can directly input "http://192.168.4.1/Test" on the browser to see the video stream.

- After you power on the robot car, please check if the red indicator LED on the camera module is on. If it's flashing, it means that there is a podor connection. Please reconnect the 4p cable. In the meanwhile, when the green indicator LED flashes, it means that the camera module is not connected. If it is constantly on, it means that it's connected.
- Please uninstall the camera module from the car andd connect the module to your computer via an USB type C cable. Please check if you can search for the WIFI signal.
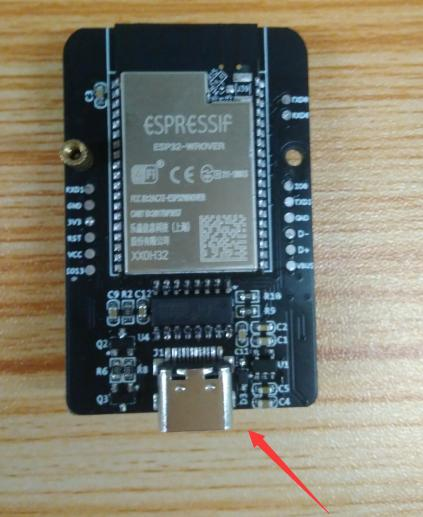
-
Please install Arduino IDE first. You could refer tothe attached tutorial to operate:https://wiki.elegoo.com/oshw-getting-started-kits/IDE
-
After you connect the camera module, please open the devicemanager and you are supposed to see a CH340 device. (The com number in diffferent computers is different.)
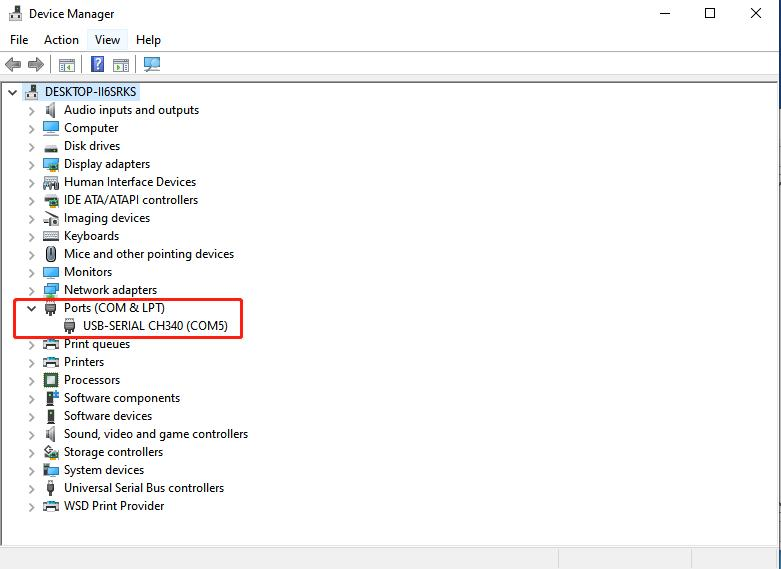
- If not, please install the CH340 driver software from this link:
https://wiki.elegoo.com/oshw-getting-started-kits/ch340 - Please select the correct com port and open serial monitor
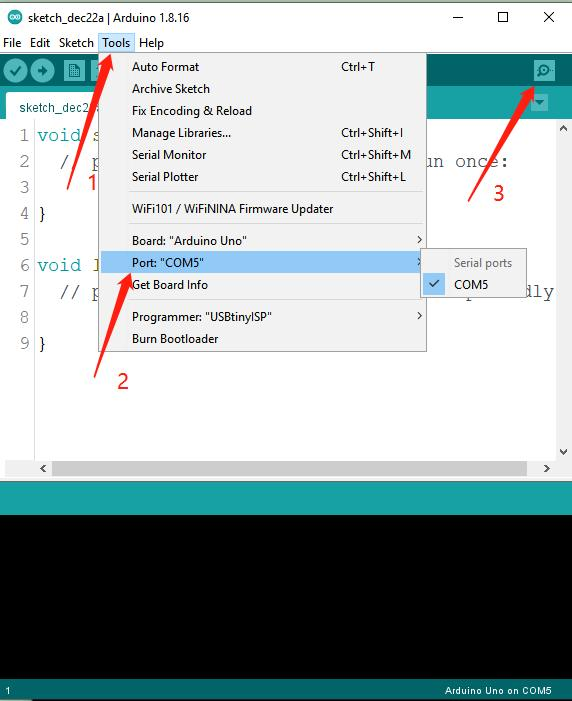
- Press the reset button on the camera module.
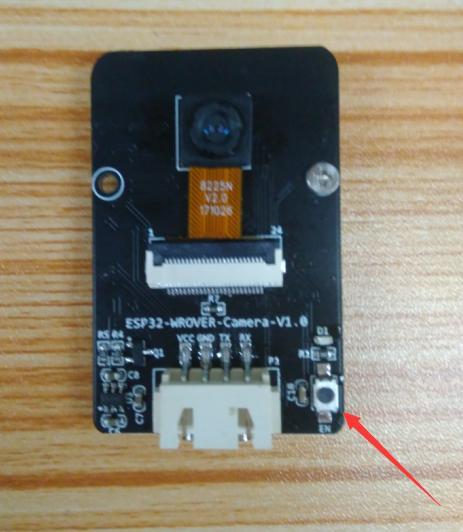
- If the camera module returns the attached message. It means that the camera module is OK.If not,maybe it's defective.
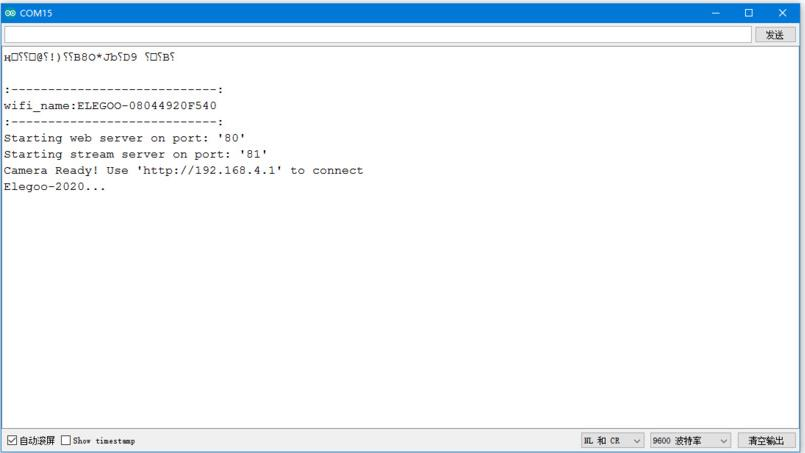
- If you can see the WiFi signal on another phone or on a llaptop, the camera module is working properly.Maybe the signal channel is busy. Please try to manually changethe signal channelof the camera module.
- (1) Connect the module to your computer via an USB typeC cable.
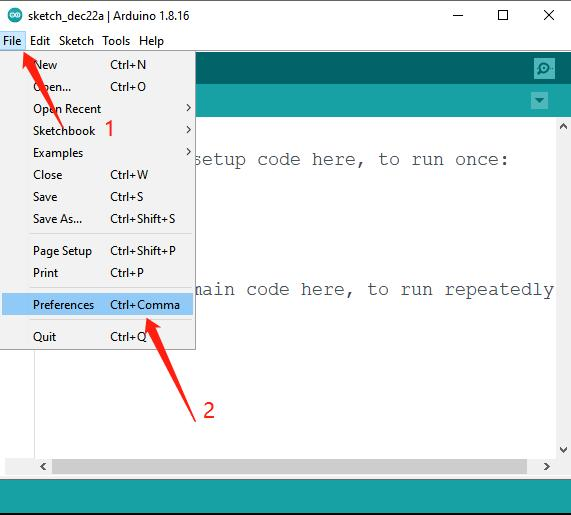
- (2) Please run Arduino IDE software and open the "Preferenceswindow.
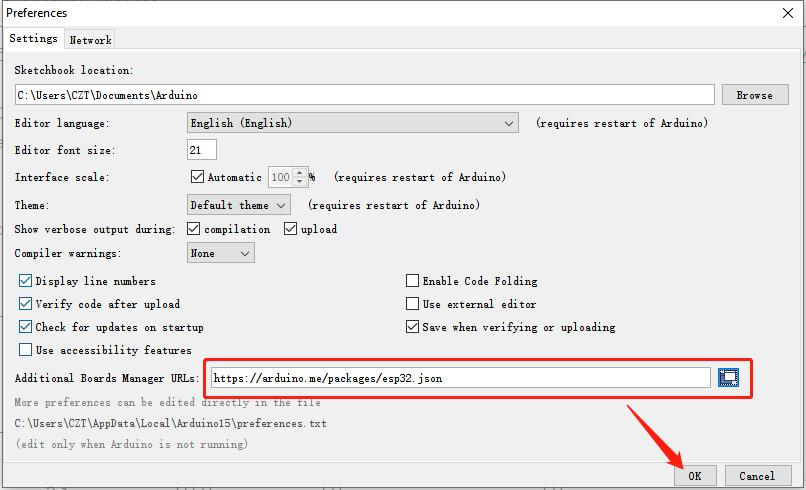
- (3) Copy and paste https://arduino.me/packages/esp32.json to the"Additional Boards Manager URLs" bar, then click "OK".
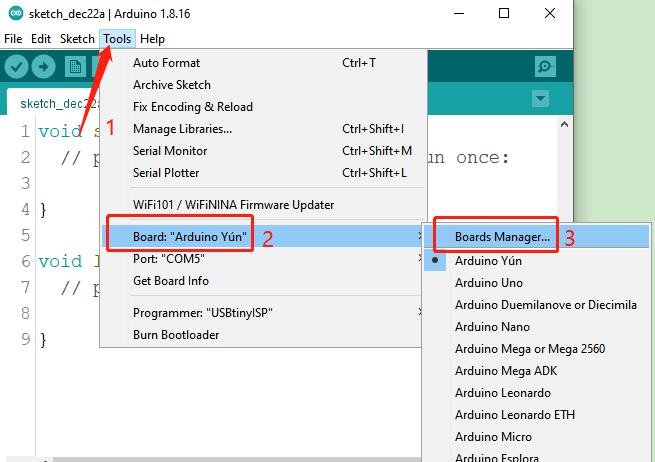
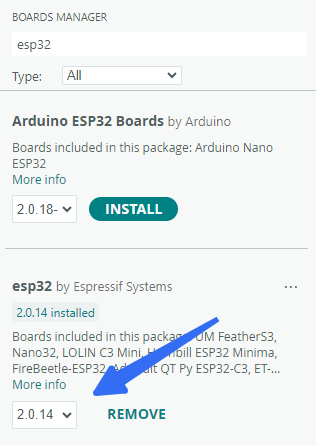
- (4) Click “Tools” button and select “Boards Manager...”.
-
- Input “esp32” in the search bar and install version 2.0.14 . Then close the Arduino IDEsoftware.
- (5) Please download the program for the camera module from the attached link.
- (6)Please open the device manager and remember the com number of the CH340 device.
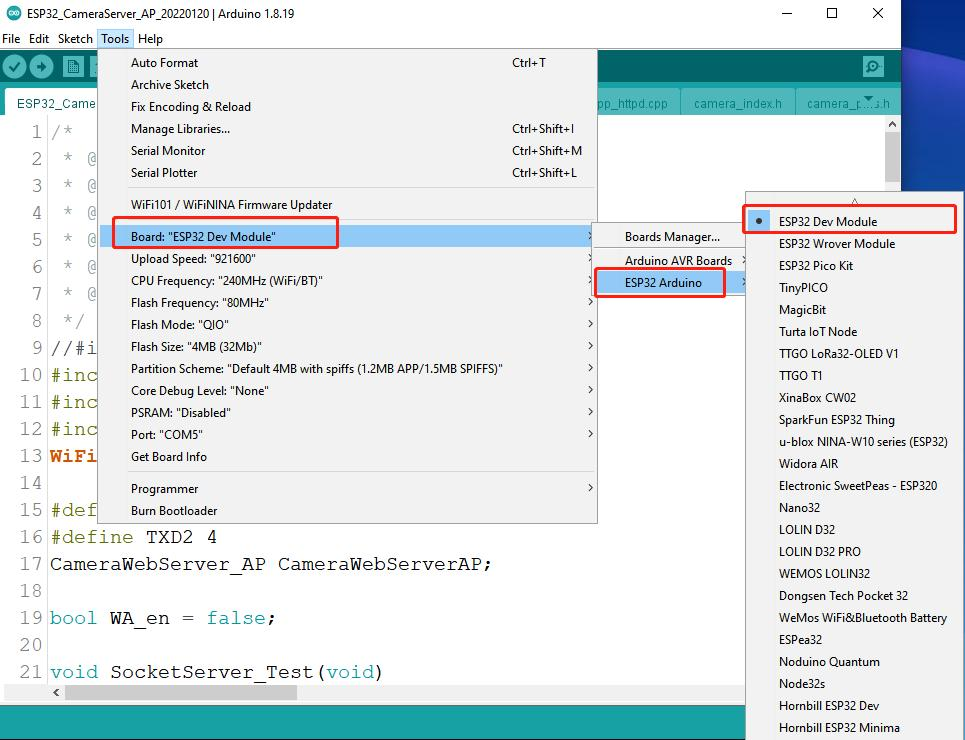
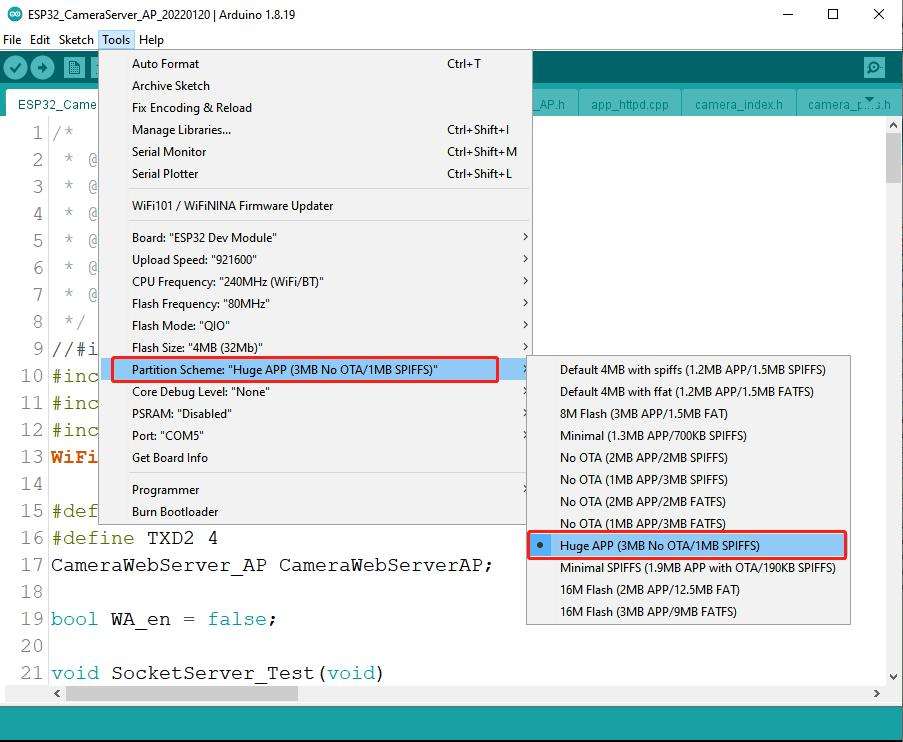
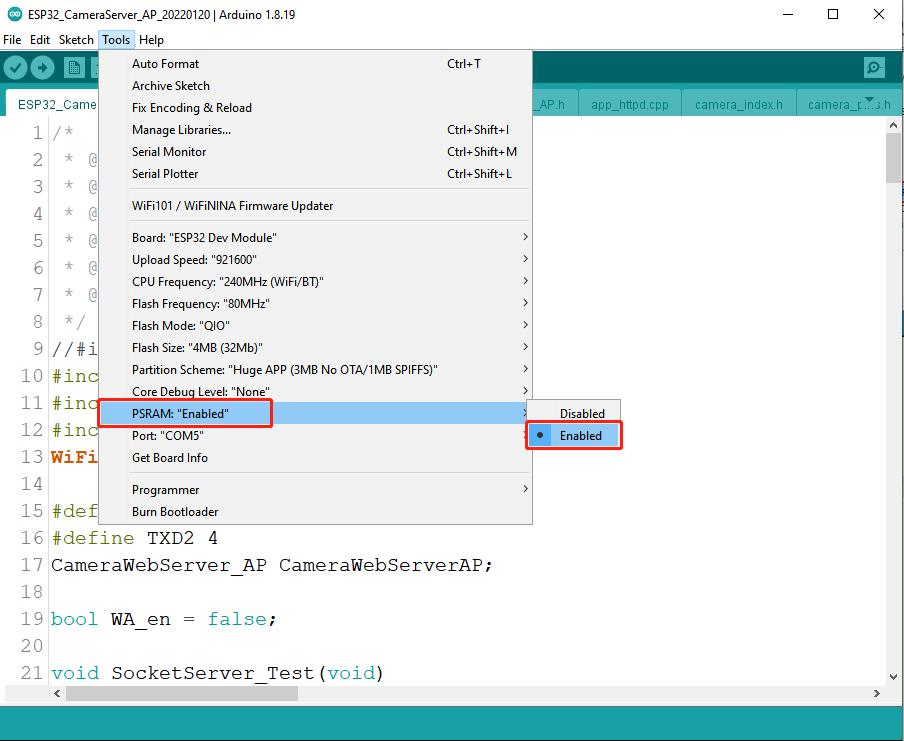
- (7) If you have the ESP32-WROVER module, please select “ESP32 Dev Module” on the board option and refer to the attached pictures to select the correct setting. Except for the settings in the attached pictures, the other settings are kept as default.
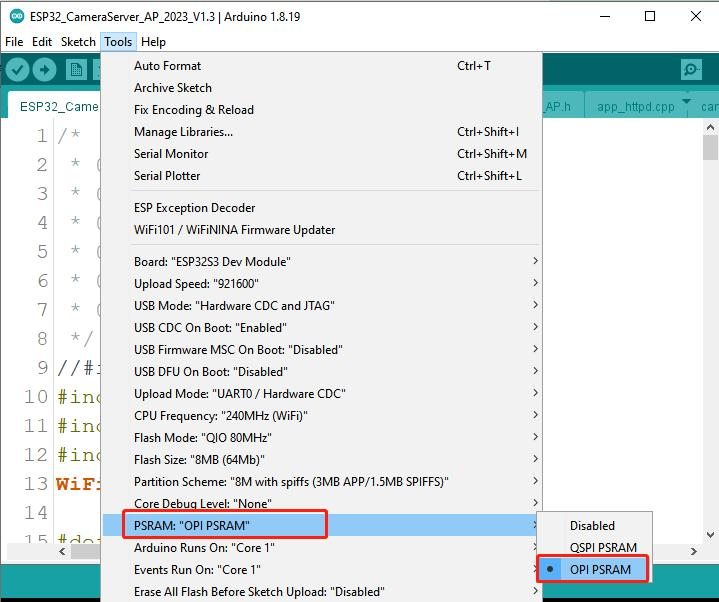
- (8) If you have the ESP32-S3-WROOM-1 module, please select “ESP32S3 Dev Module” on the board option and refer to the attached pictures to select the correct setting. Except for the settings in the attached pictures, the other settings are kept as default.
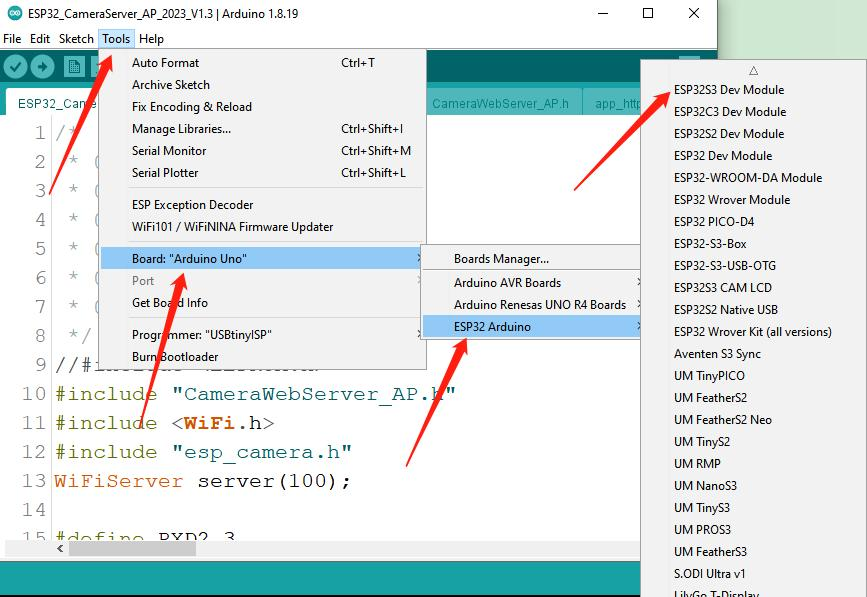
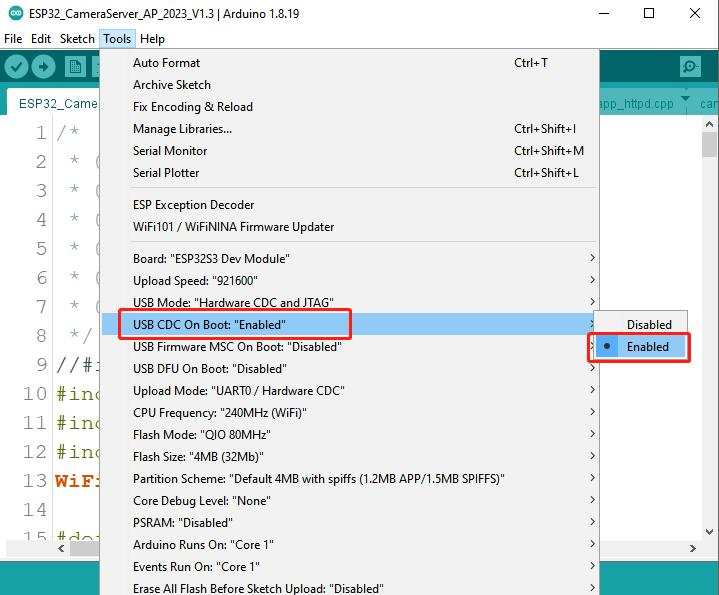
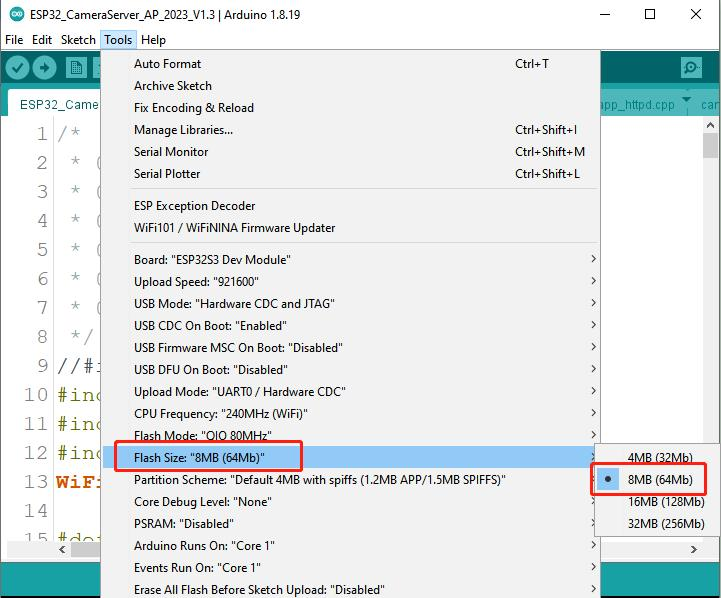
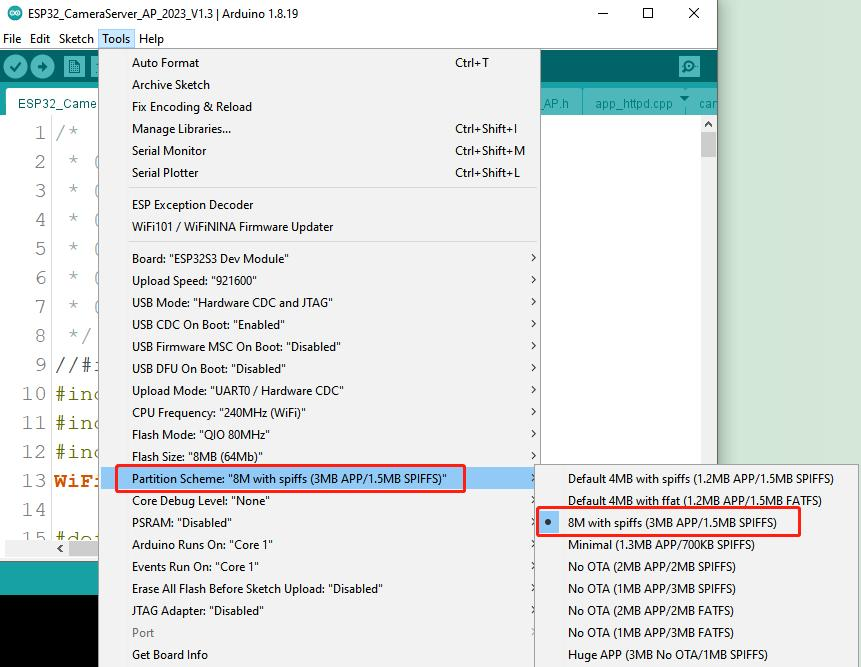
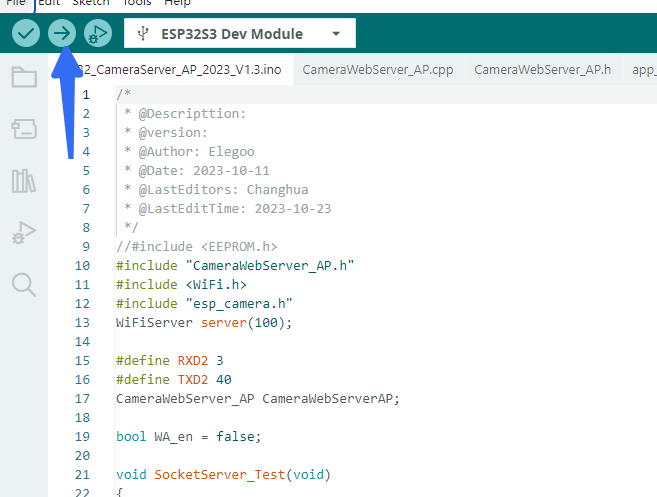
- (9)At last, please upload the code file to the camera module.
- If you still cannot see the ELEGOO-XXX signal, please upload the code file with another channel signal to the module. Or you could upload the code file with a password to the module. Adding a password to the module can also reduce interference by other WiFi signals.
- The below steps will teach you how to change the signal channel manually. You can Ignore them.
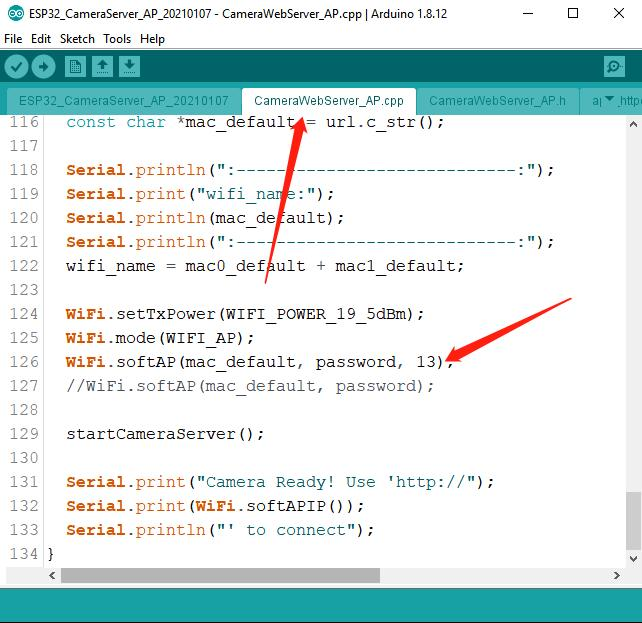
- Select CameraWebServer_AP.cpp file and move to the bottom of the code. Please change the signal channel by referring to the attached code. The range is 1~13.
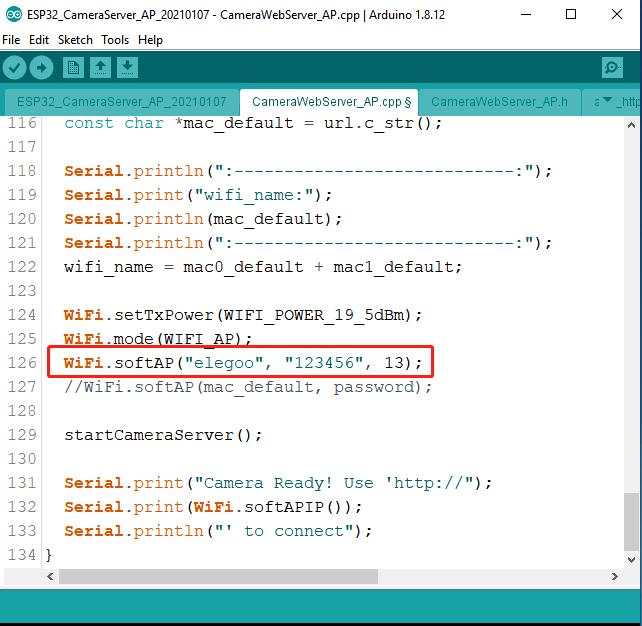
- You can also change the WiFi ssid and adding a password. The first value is the WiFi ssid, and the second value is the password.
You could also try to change the signal power. The optional value is 19_5dBm, 19dBm, 18_5dBm, 17dBm, 15dBm, 13dBm, 11dBm, 8_5dBm, 7dBm, 5dBm, and 2dBm.
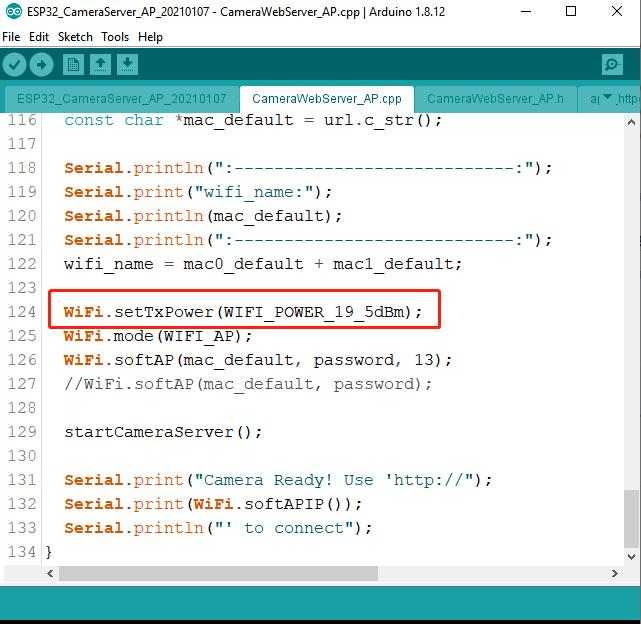
After you change the code, please upload the code to the camera module.