¶ Downloading and Installing the Arduino IDE 2
In this tutorial, we will show how to download and install the Arduino IDE 2 on your Windows, Mac, or Linux computer.
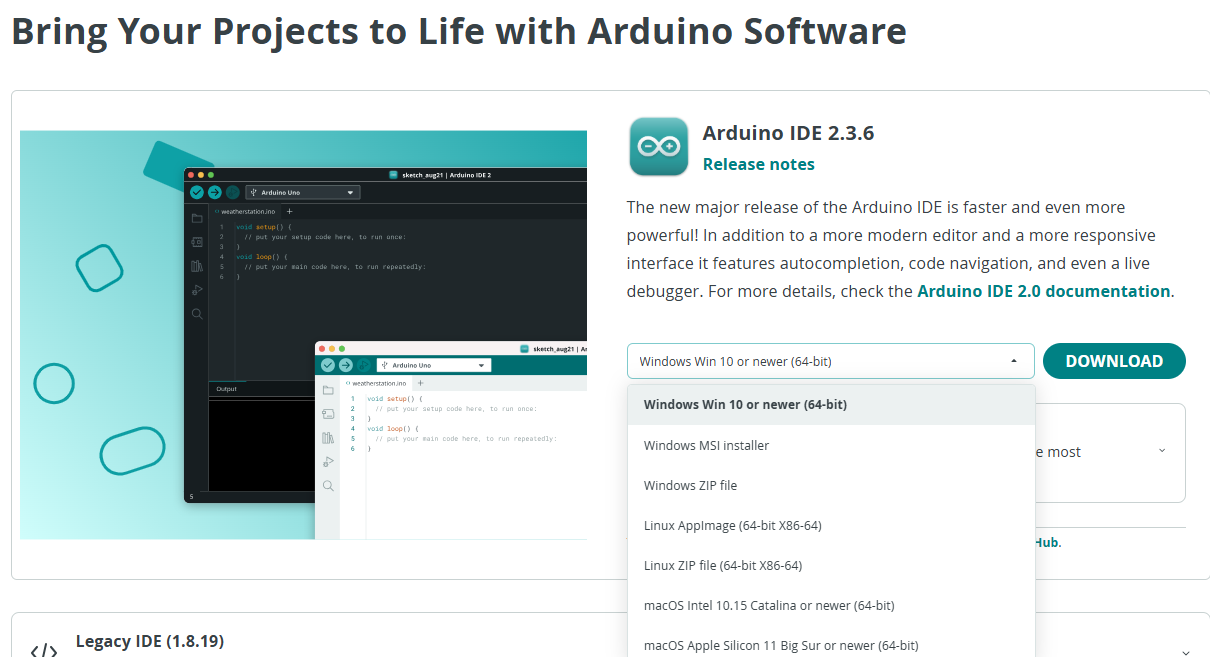
You can easily download the editor from the Arduino Software page.-https://www.arduino.cc/en/software/
¶ The Arduino IDE 2
The Arduino IDE 2 is an open-source project. It is a big step from its sturdy predecessor, Arduino IDE 1.x, and comes with revamped UI, improved board & library manager, debugger, autocomplete feature and much more.
¶ Download the Editor
Downloading the Arduino IDE 2 is done through the Arduino Software page. Here you will also find information on the other editors available to use.
¶ Installation
¶ Windows
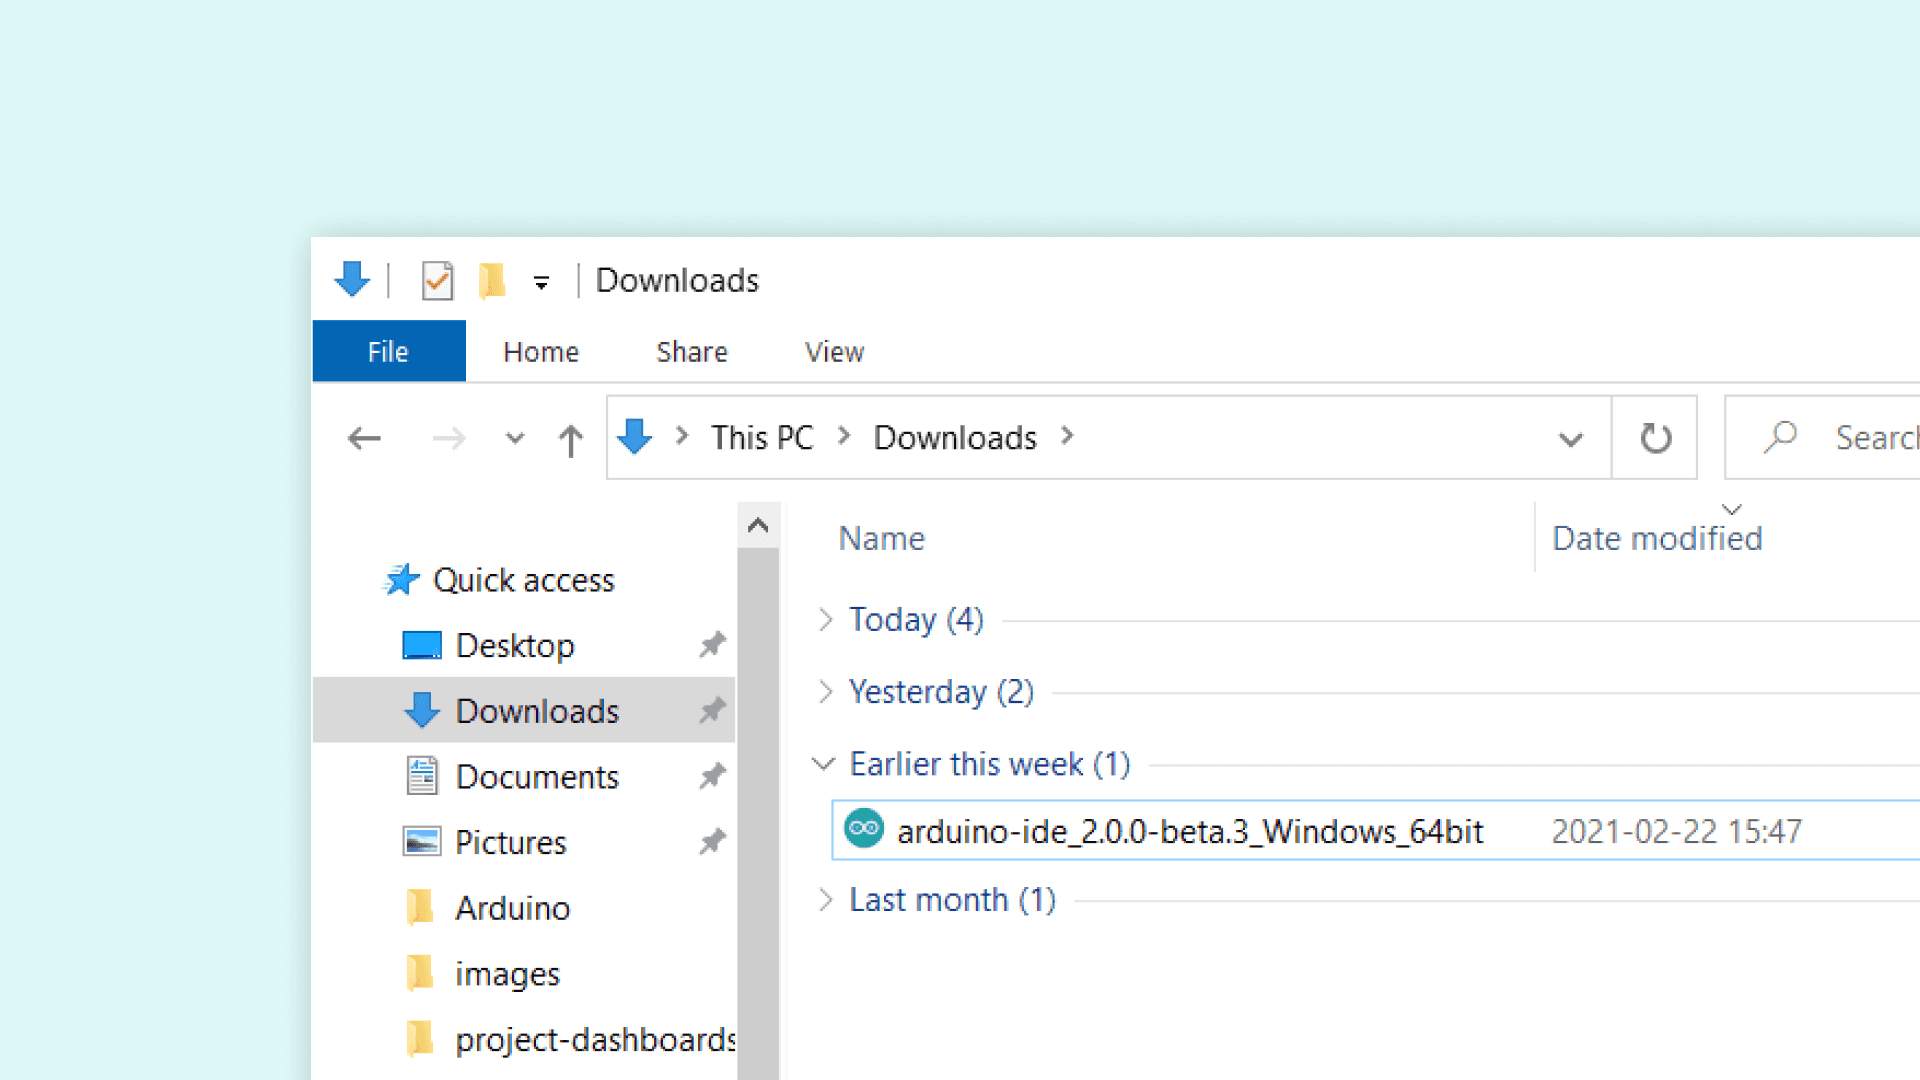
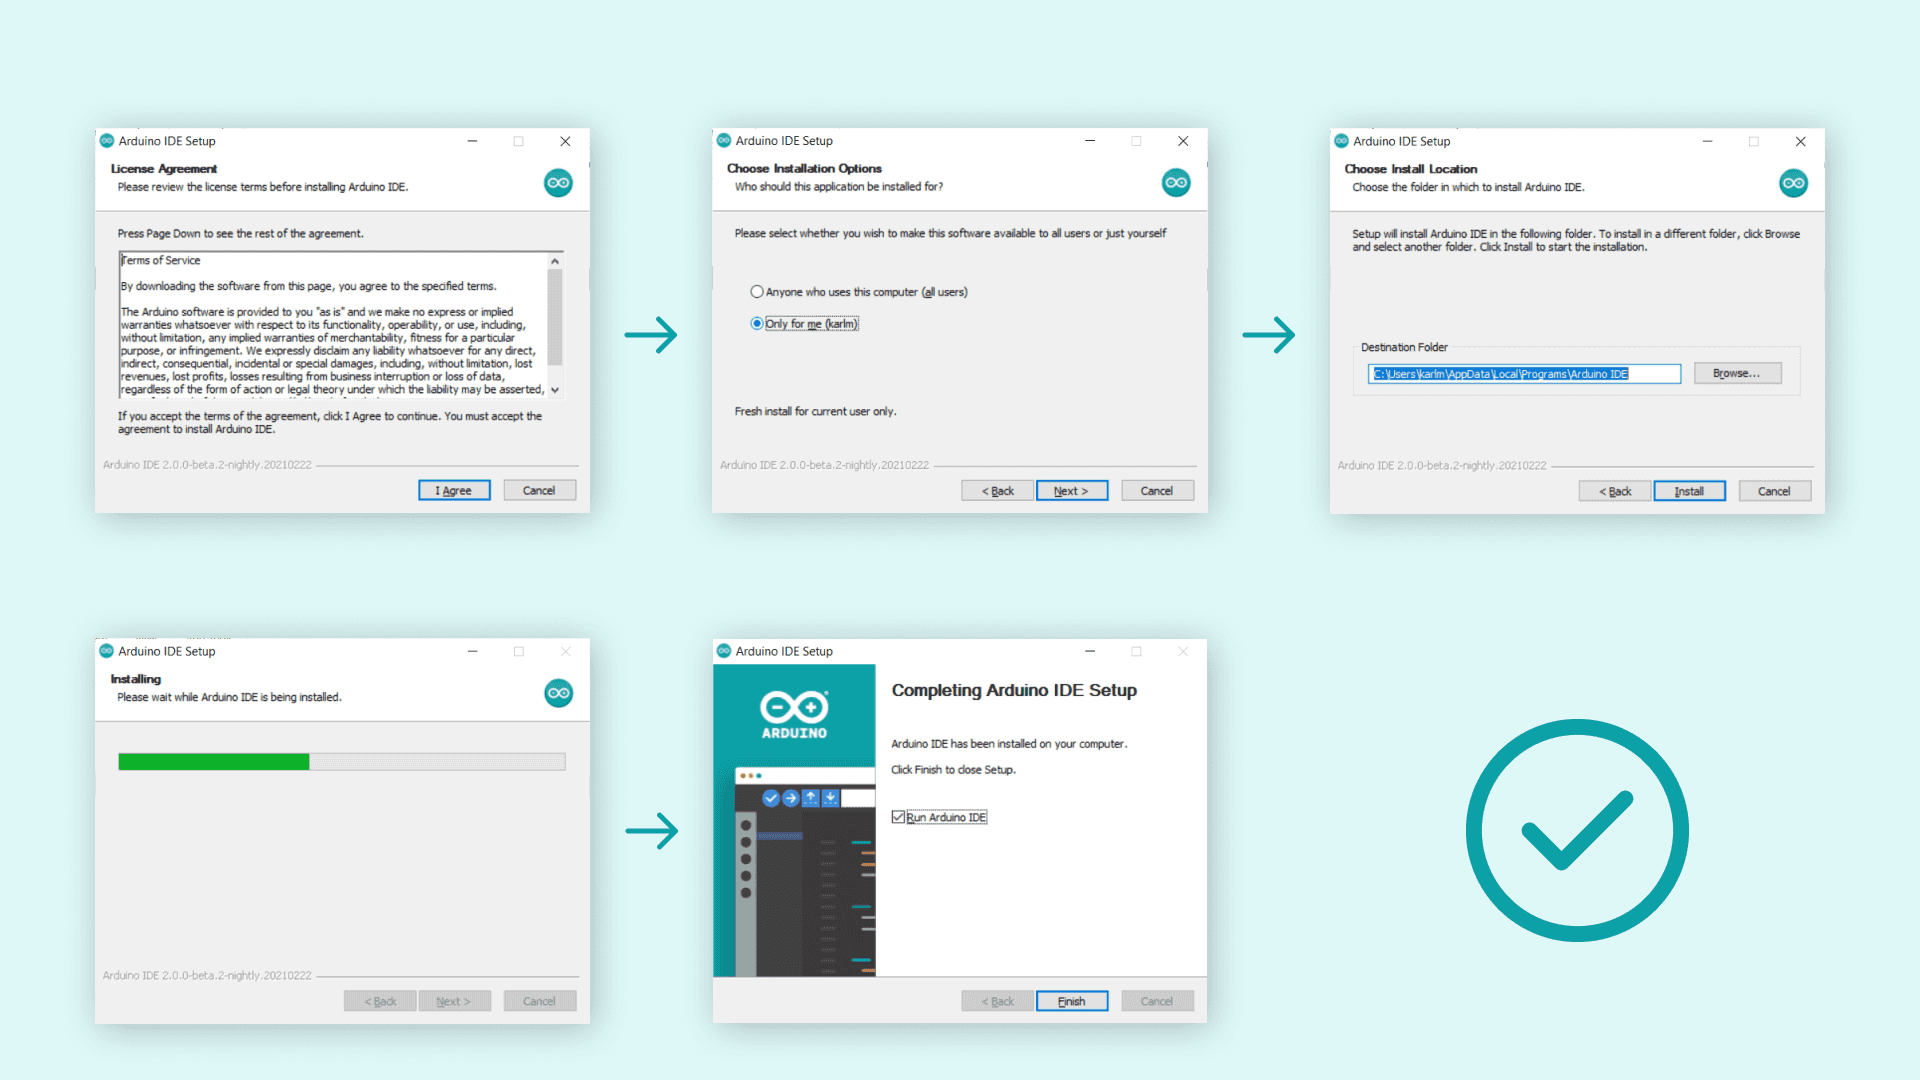
To install the Arduino IDE 2 on a Windows computer, simply run the file downloaded from the software page.
Follow the instructions in the installation guide. The installation may take several minutes.
¶ macOS
To install the Arduino IDE 2 on a macOS computer, simply copy the downloaded file into your application folder.

¶ Other Lower-Configuration Versions
Official Minimum System Requirements for Arduino IDE 1.8.9
The Arduino IDE 1.8.x series has extremely low hardware requirements and can run smoothly on older devices. Below are the official minimum configuration specifications:
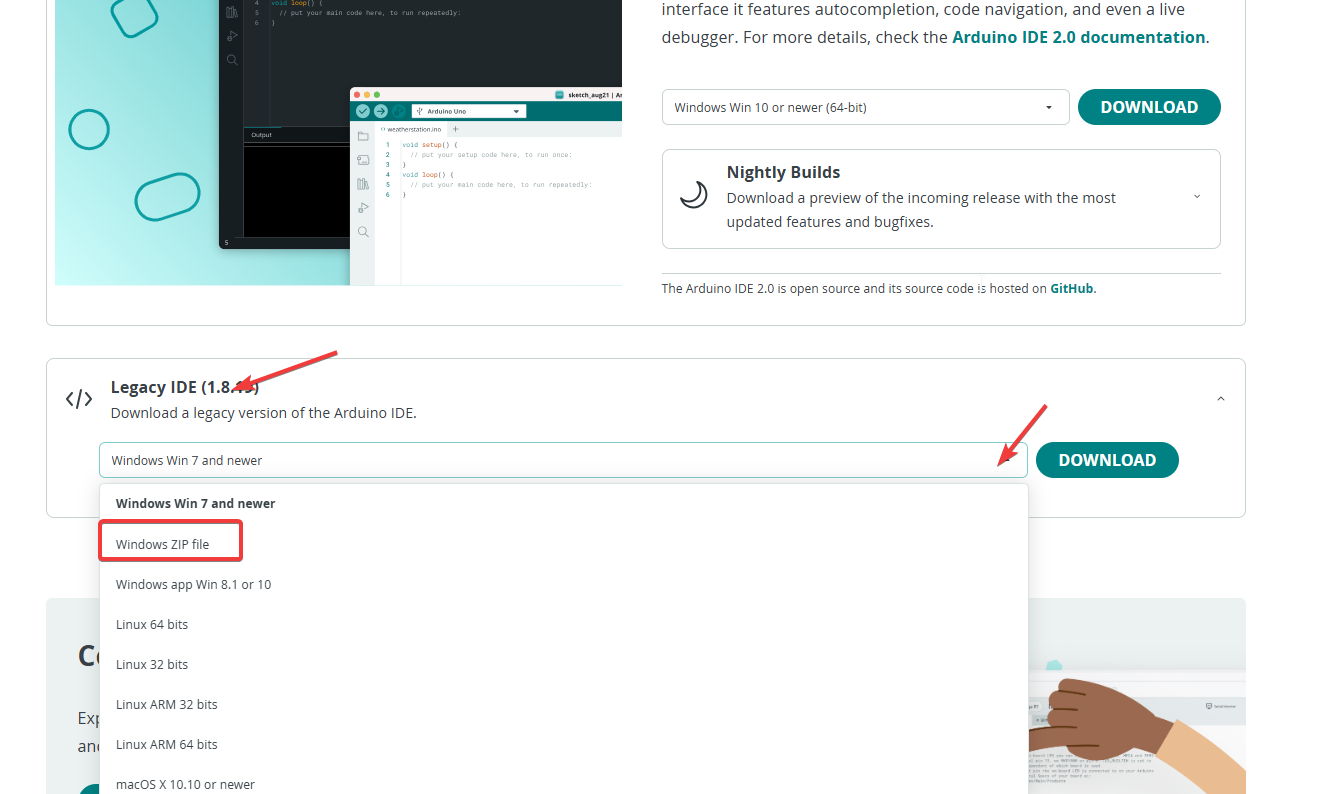
Navigate to the IDE download page, locate the Legacy IDE (1.8.19) section, click on it and select the version compatible with your operating system. After selecting the appropriate version, click the DOWNLOAD button to save the installation package to your local device, then follow the installation steps for the IDE 2.0 version mentioned above to complete the installation.
If you use the old version of Arduino IDE 1.8.x, there will be some differences in the software interface layout, but the operation paths of all functions are exactly the same. The old version interface only lacks the left-side shortcut toolbar, and you only need to follow the standard menu operation path and click step by step to complete the same configuration and operations.
¶ How to install ESP32/Other motherboards
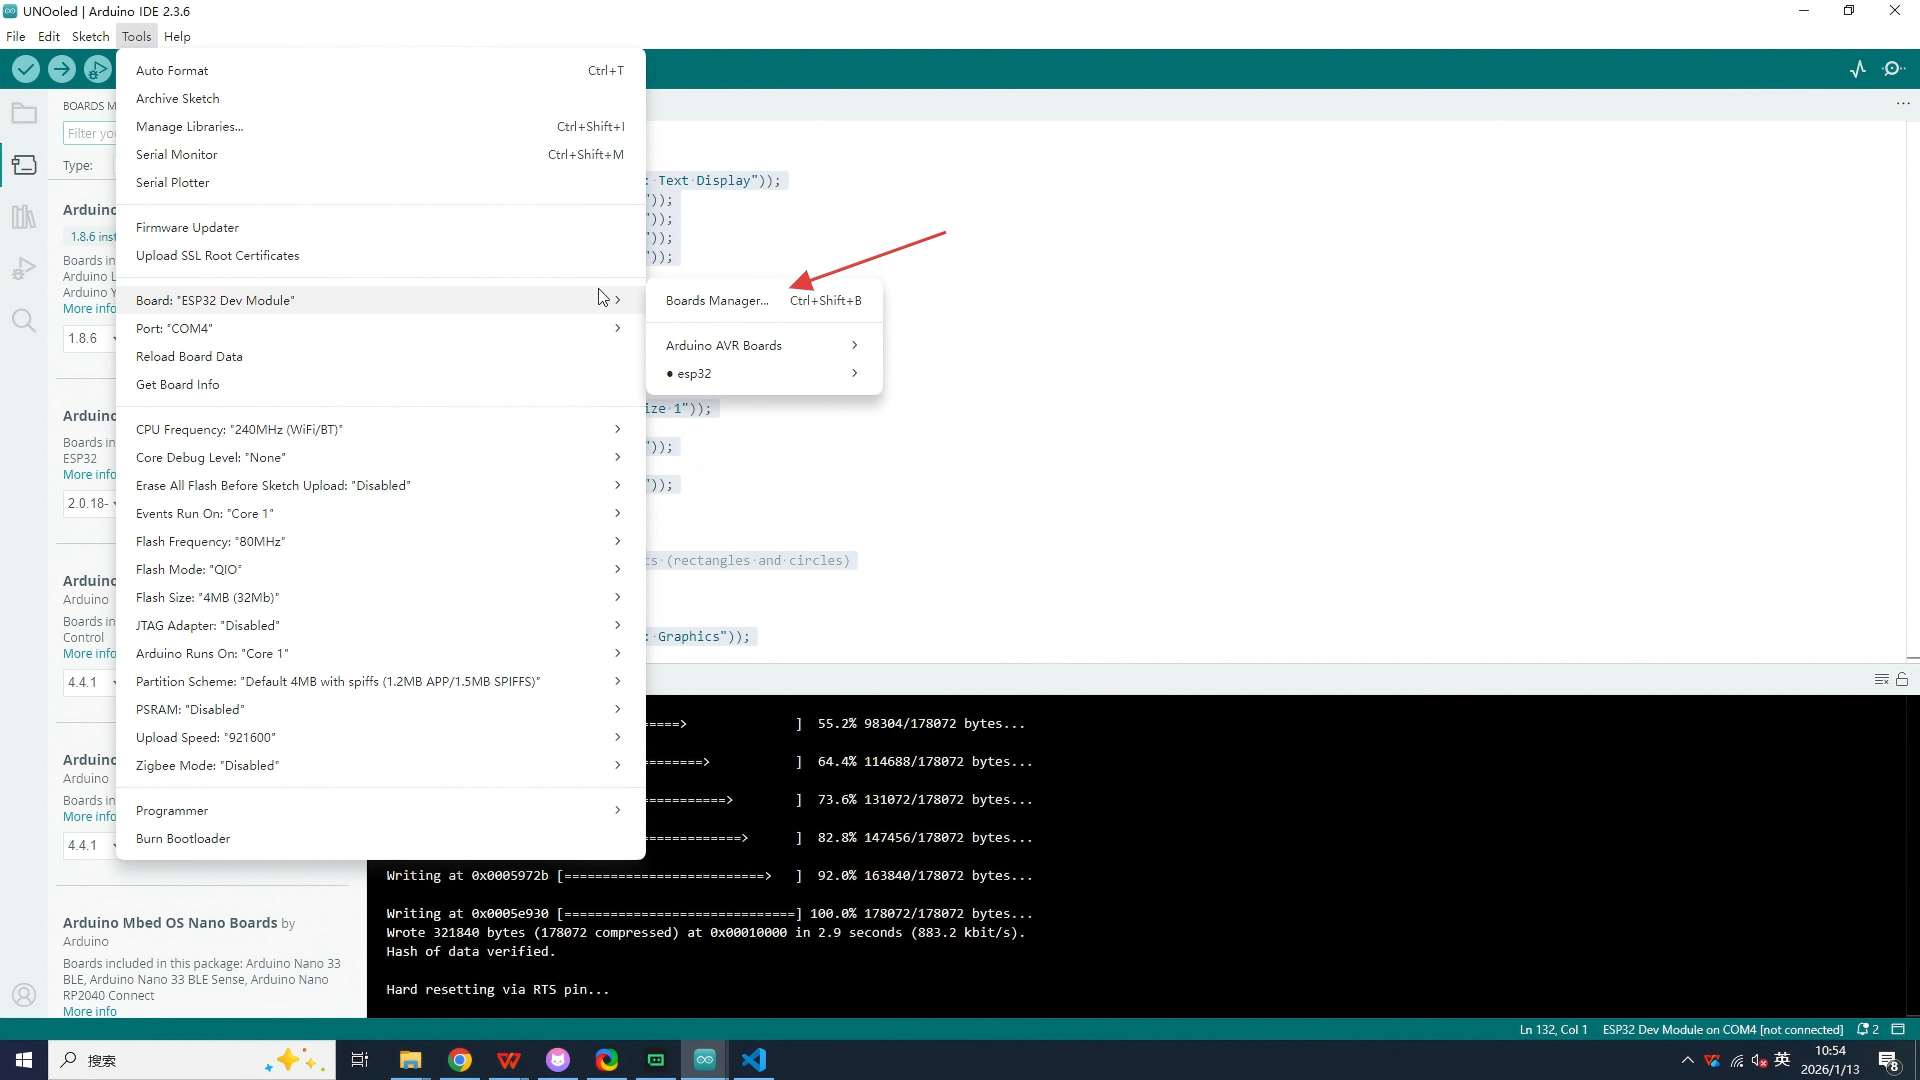
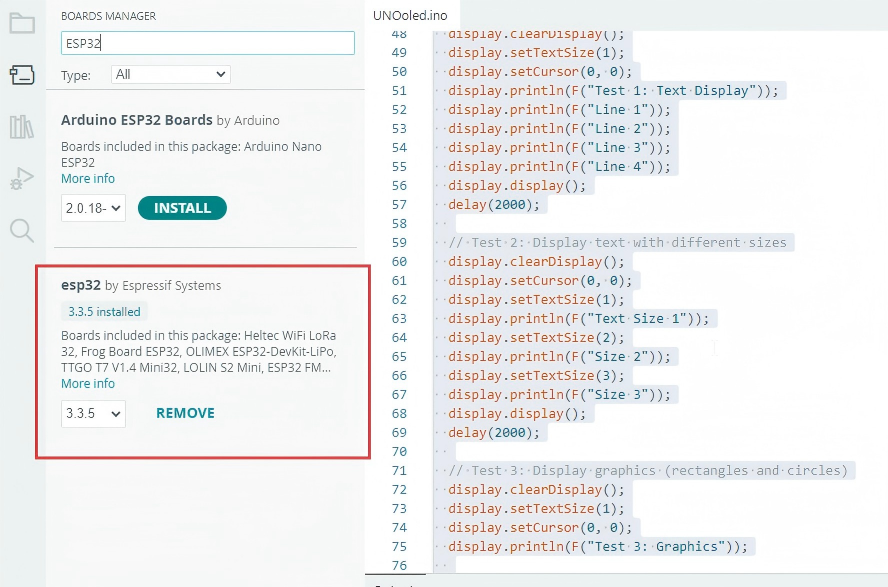
Please open the following path: Tools → Board → Board Manager. In the pop-up Board Manager window, locate the search bar at the top and enter "ESP32". After the search results are loaded, select the option displayed in the list as "ESP32 by Espressif Systems" (the official ESP32 board support package provided by Espressif Systems).
After opening the library management tool, enter the name of the library file you want to load in the search bar. The IDE will return various associated library files. Users only need to select the actual library file they need and click the download button. When you no longer need a certain library, you can click the remove button to remove it.
¶ How to upload a sketch with the Arduino IDE 2
In the Arduino environment, we write sketches that can be uploaded to Arduino boards. In this tutorial, we will go through how to select a board connected to your computer, and how to upload a sketch to that board, using the Arduino IDE 2.
¶ Verify VS Upload
There are two main tools when uploading a sketch to a board: verify and upload. The verify tool simply goes through your sketch, checks for errors and compiles it. The upload tool does the same, but when it finishes compiling the code, it also uploads it to the board.
A good practice is to use the verifying tool before attempting to upload anything. This is a quick way of spotting any errors in your code, so you can fix them before actually uploading the code.
¶ Uploading a Sketch
Uploading a sketch is quick and easy, but let's take a look at what we need to do.
- Open the Arduino IDE 2.
- With the editor open, let's take a look at the toolbar at the top. At the very left, there is a checkmark and an arrow pointing right. The checkmark is used to verify, and the arrow is used to upload.

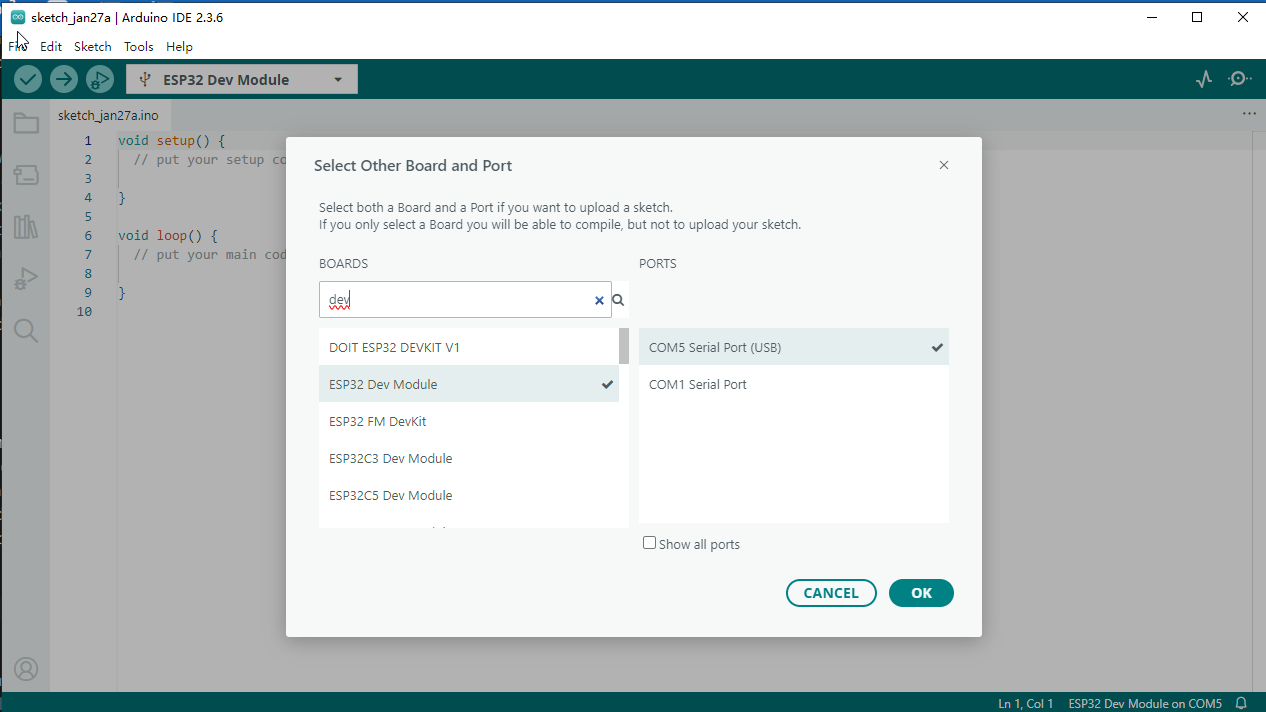
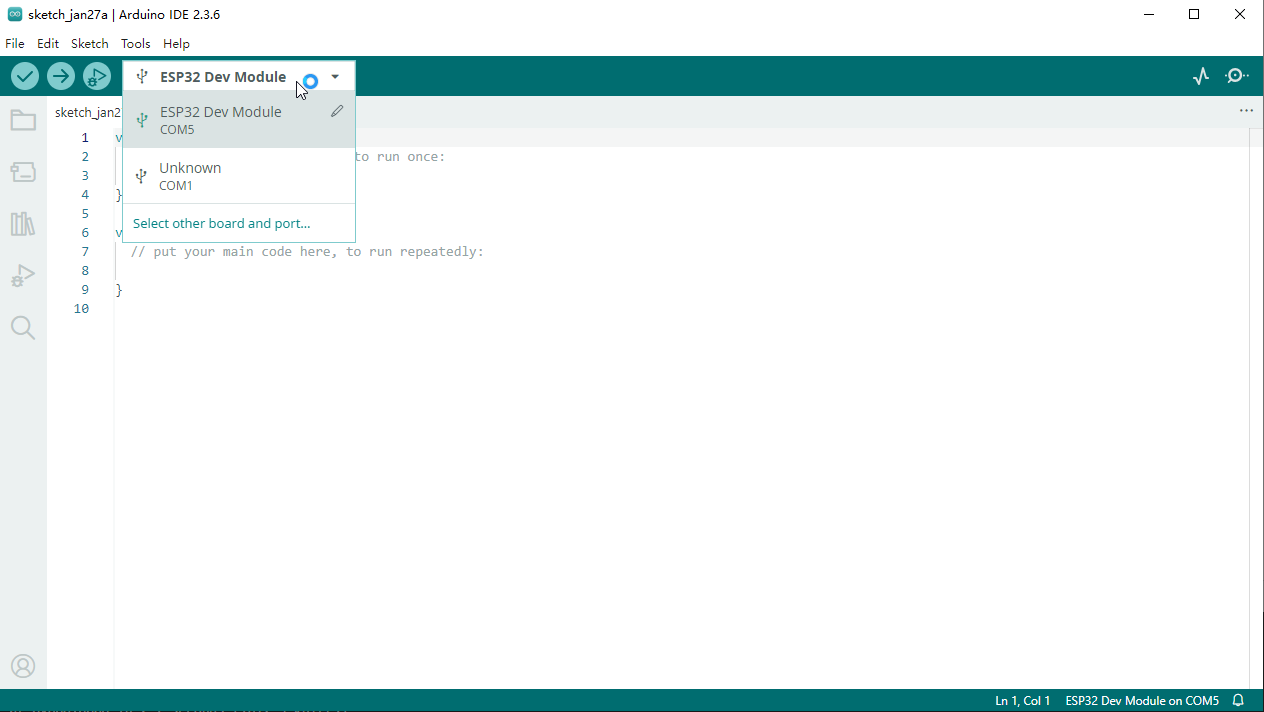
- But before doing any of that, we should choose what board we are uploading to. Beside the verify and upload button you should see a a drop down menu, this will, in most cases, display Arduino /ESP32 boards that are connected to your computer. If your board is not automatically detected, you can either press "Select other board and port..." in the drop-down and follow the instructions, or go to Tools > Board and Tools > Port in the toolbar menu to select the board and port manually.
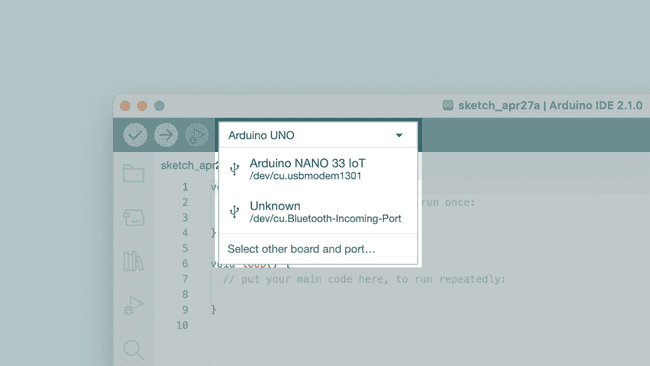
So connect your board to the computer and select it from the drop down menu. You'll know that there is a connection to the board when the board name appears in bold.
- Click on the verify tool (checkmark). Since we are verifying an empty sketch, we can be sure it is going to compile. After a few seconds, we can see the result of the action in the console (black box in the bottom).
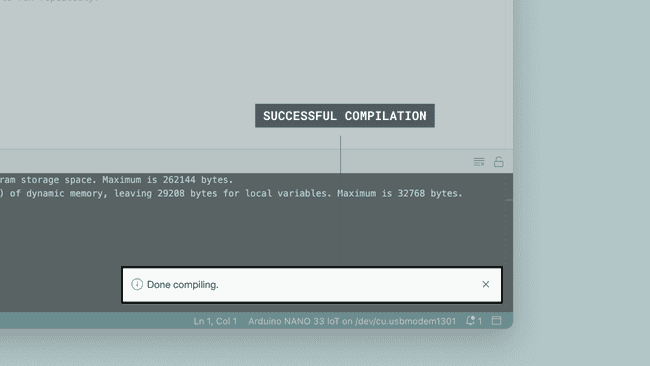
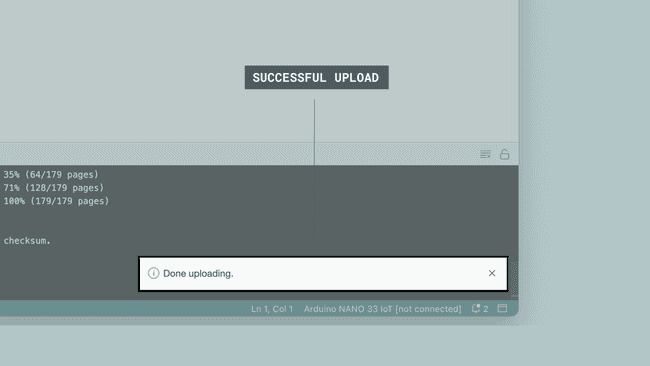
- When it is finished, a notification pops up in the bottom right of your IDE window. Of course, sometimes there are some complications when uploading, and these errors will be listed here as well.
¶ Installing libraries
A large part of the Arduino programming experience is the use of libraries. There are thousands of libraries that can be found online, and the best documented ones can be found and installed directly through the editor.
In this tutorial, we will go through how to install a library using the library manager in the Arduino IDE 2. We will also show how to access examples from a library that you have installed.
¶ Why Use Libraries?
Libraries are incredibly useful when creating a project of any type. They make our development experience much smoother, and there almost an infinite amount out there. They are used to interface with many different sensors, RTCs, Wi-Fi modules, RGB matrices and of course with other components on your board.
Arduino has many official libraries, but the real heroes are the Arduino community, who develop, maintain and improve their libraries on a regular basis.
¶ Installing a Library
-
- Open the Arduino IDE 2.
-
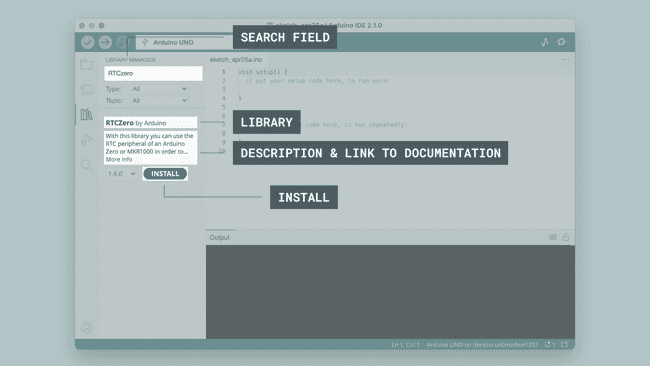
- With the editor open, let's take a look at the left column. Here, we can see a couple of icons. Let's click the on the "library" icon.

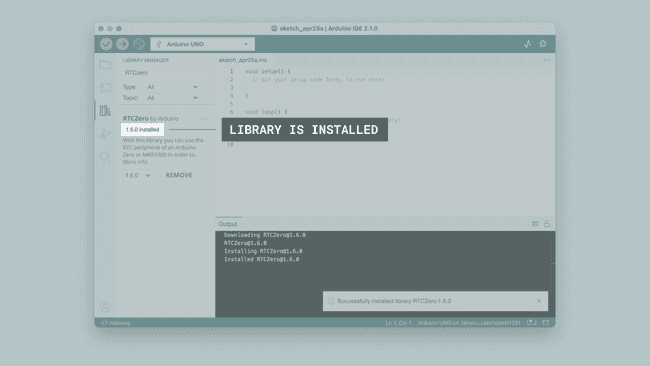
- 3.A list will now appear of all available libraries, where we can also search for the library we want to use. In this example, we are going to install the RTCZero library. Click on the "INSTALL" button to install the library.
- 4.This process should not take too long, but allow up to a minute to install it.
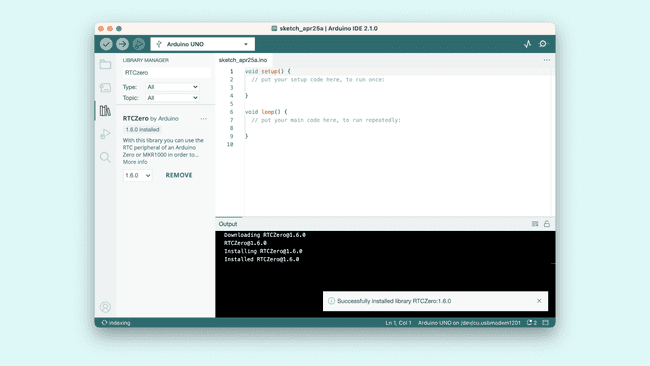
- 5.When it is finished, we can take a look at the library in the library manager column, where it should say "INSTALLED".