¶ Fault Phenomenon
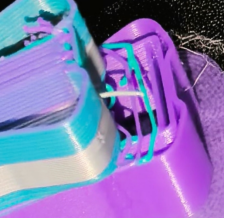
During printing, a certain layer suddenly shifts (layer shifting).
¶ Cause of the Issue
- Hotend assembly deformation
- Loose installation of the 3010 fan
- Filament cutter assembly unable to cut filament properly or abnormal return/rebound
- Nozzle wiper kit swing arm movement is not smooth or gets stuck
- Interference between the nozzle and the waste chute during wiping process
- Excessively tightened screws on the bottom cover causing slight deformation of the structure
¶ Required Tools
- 2.0 mm hex key
- 2.5 mm hex key
- Phillips screwdriver
- Tweezers
¶ Troubleshooting Steps
¶ 1. Check Whether the Hotend Assembly Is Deformed
¶ Steps
- Turn off the printer power switch, unplug the power supply cable, and wait until the hotend assembly cools down completely.
- Remove the tool head front cover.
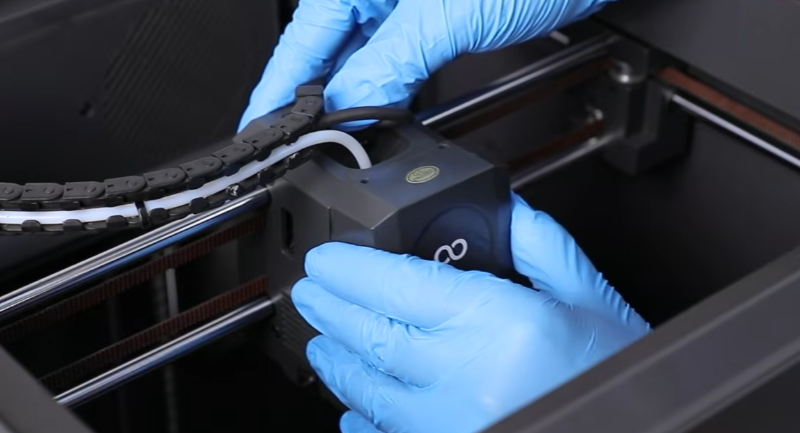
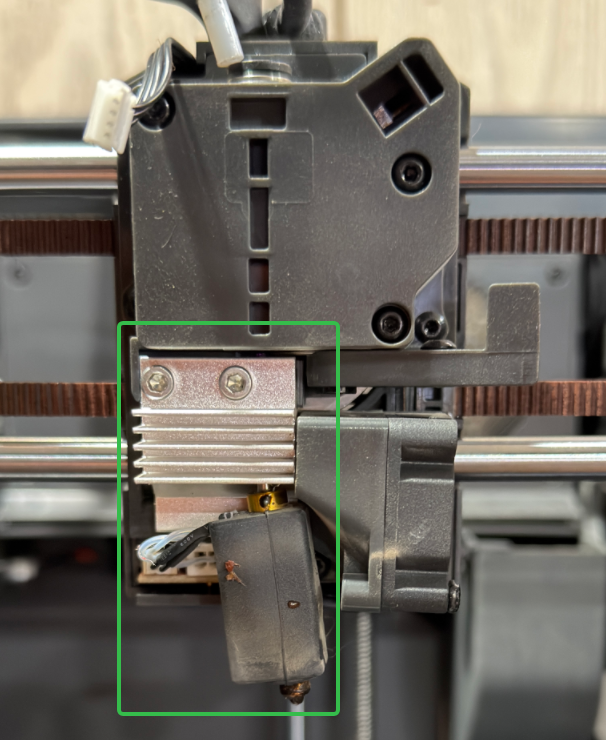
- Check whether the hotend assembly shows obvious deformation, tilt, or abnormal installation.
¶ Result
- If the heat break is deformed, replace the hotend assembly.
- If no deformation is found, continue with the following steps.
¶ 2. Check Whether the 3010 Fan Is Loose
¶ Steps
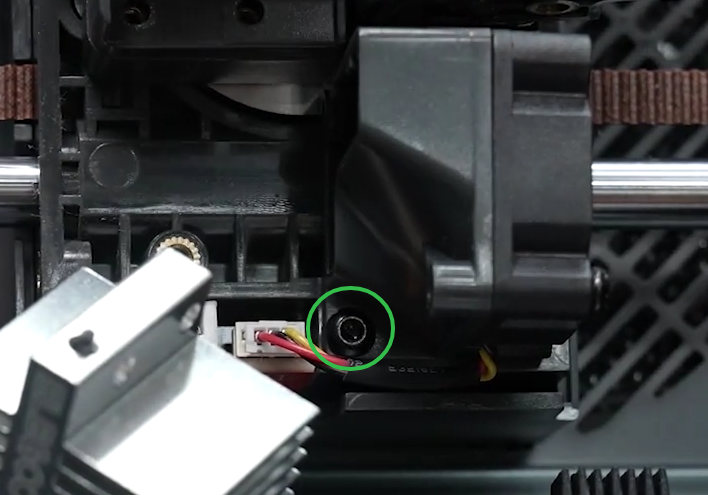
- Gently shake the 3010 fan by hand to check for looseness.
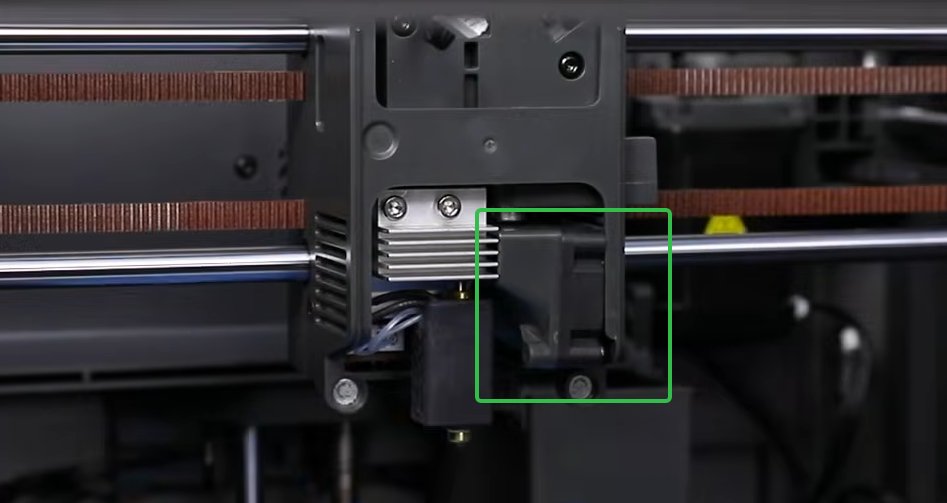
- Check whether the screws are correctly installed and tightened.
If slight wobbling is detected, tighten the screws.
Note:
The screw specification is M3×6. Using incorrect screws may prevent the fan assembly from being securely fixed.
¶ 3. Check Whether the Filament Cutter Assembly Works Properly
¶ Steps
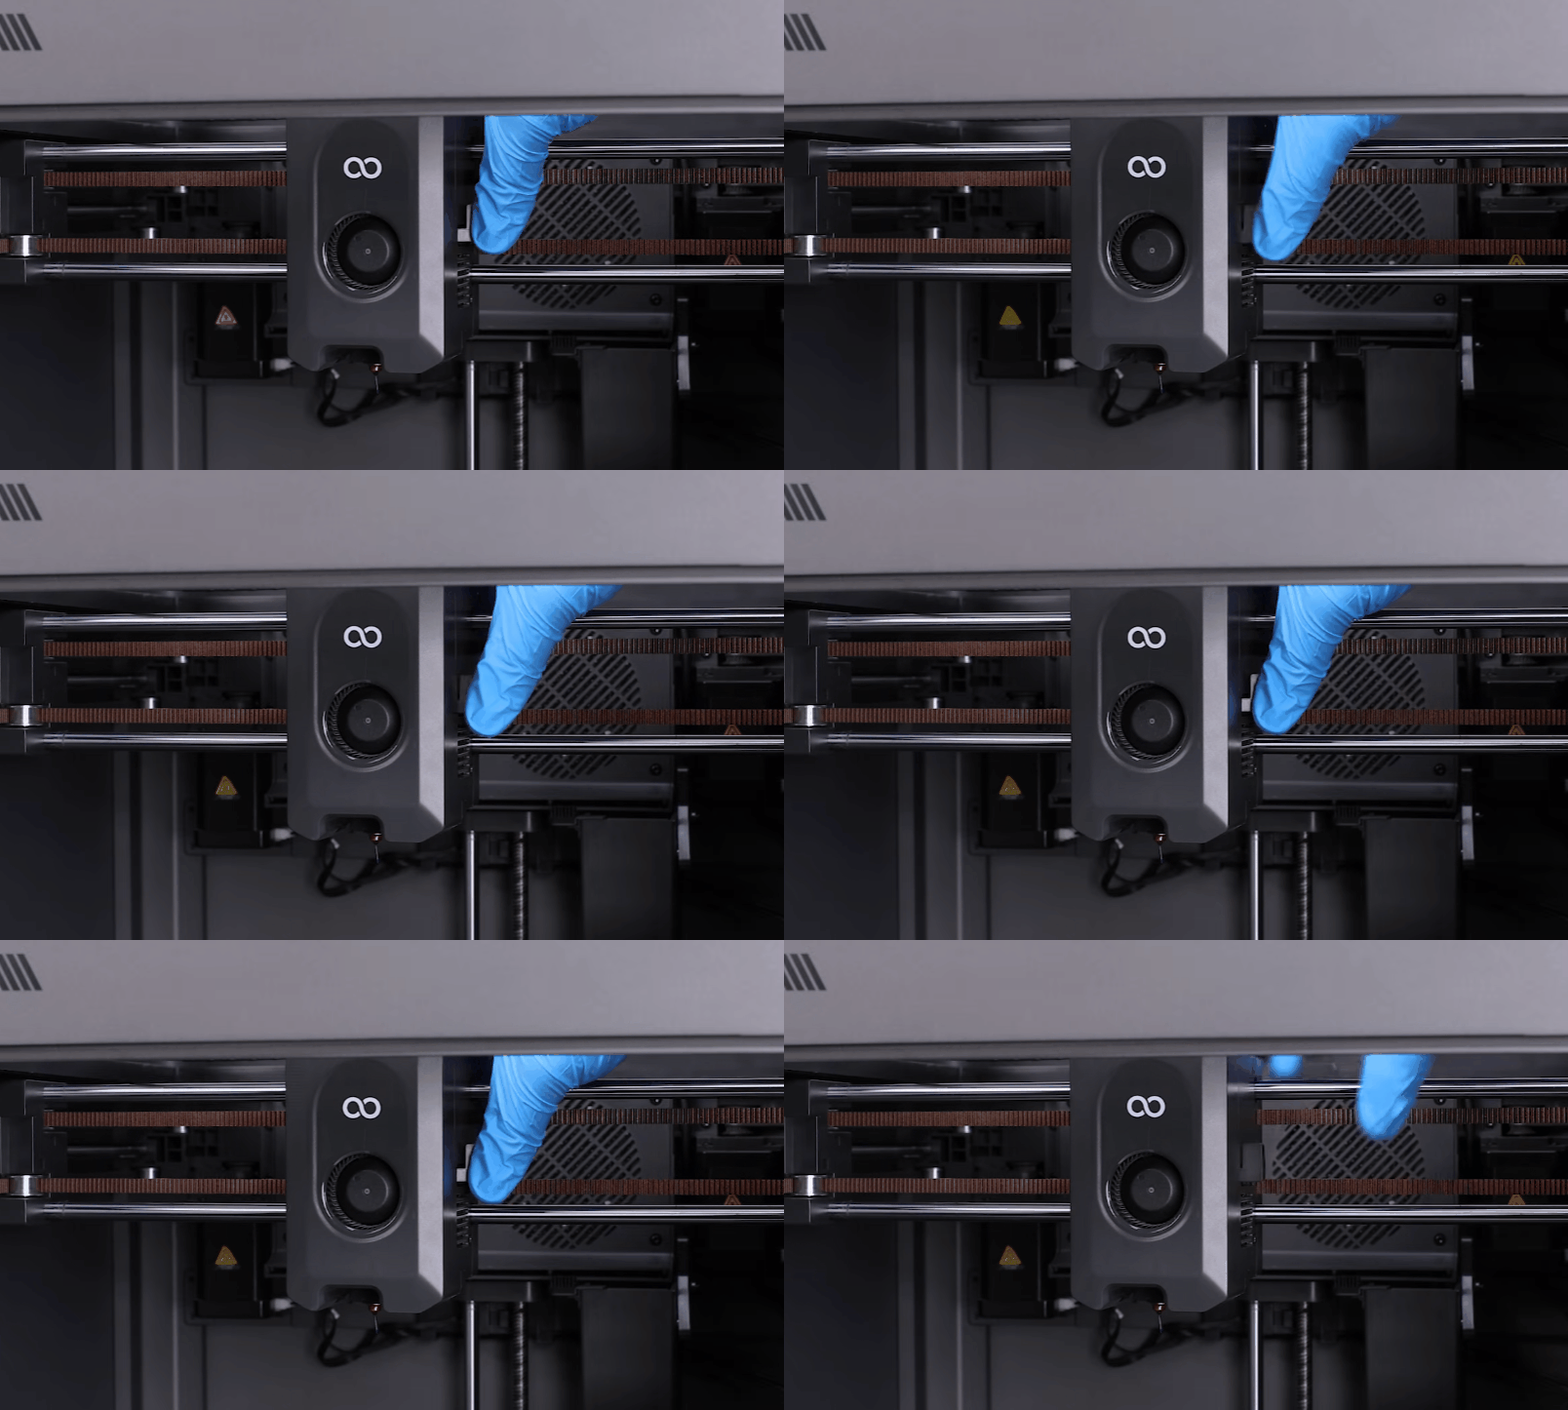
Manually press the Filament cutter assembly:
- Verify whether the cutter can complete the cutting action normally.
- After releasing, check whether it returns smoothly.
(The figure below shows normal operation)
¶ Result
If the cutter is stuck, unable to cut, or cannot return properly, please refer to the following link to reinstall the Filament cutter assembly:
¶ 4. Check Whether the Nozzle Wiper Kit Swing Arm Moves Normally
¶ Steps
- Gently move the nozzle wiper kit swing arm by hand to confirm whether it can move freely.
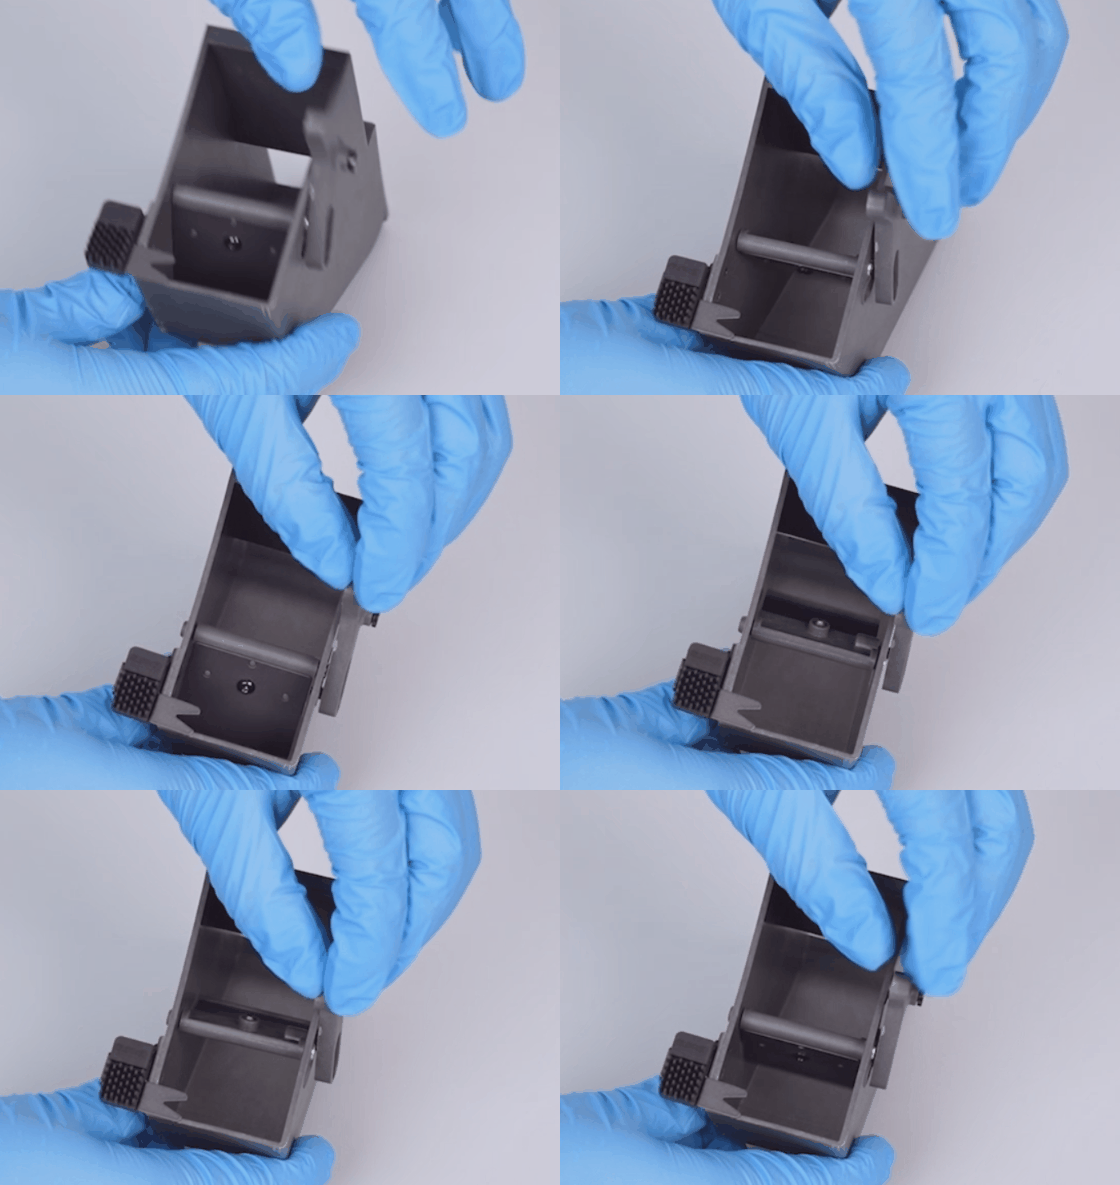
- If the swing arm is stuck or does not move smoothly, check whether there is any foreign object interfering around the nozzle wiper kit.
¶ 5. Check Whether There Is Interference Between the Nozzle and the Waste Chute
¶ Steps
- Reassemble the hotend assembly, tool head front cover, and nozzle wiper kit.
- Start any print job and observe the nozzle movement during the wiping process. Check whether the nozzle tip collides with the upper part of the waste chute.
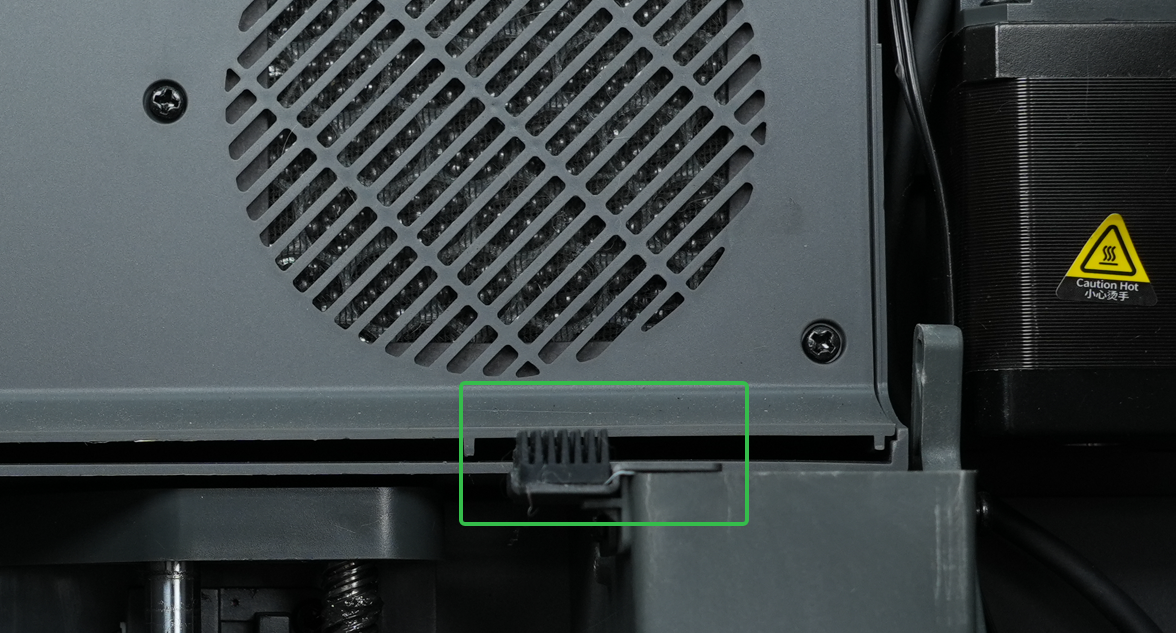
- If interference occurs, slightly loosen the four screws on the back cover and reinstall. Avoid over-tightening the screws during reassembly.
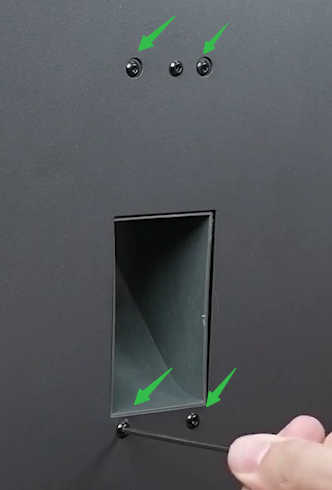
- After reinstalling the nozzle wiper kit, run the wiping action again to confirm whether collision still occurs.
How to Reinstall the Nozzle Wiper Kit
Please refer to the following link:
How to Replace the Filament Wiping Assembly(B0C0J1)
¶ If the Issue Is Still Not Resolved
Please contact technical support via email:
Provide the following information:
- G-code file
- Photos of the hotend assembly after removing the part cooling fan
- Video recording of the nozzle wiping process
- Current printer firmware version
- SN code
¶ Help us improve
If you have any ideas about the wiki pages, please let us know via ELEGOO official feedback channel.