¶ Thermometer
¶ Overview
In this tutorial, you will use an LCD1602 display to show the temperature.
¶ Component Required:
(1) x Elegoo Uno R3
(1) x LCD1602 Module
(1) x 10k ohm resistor
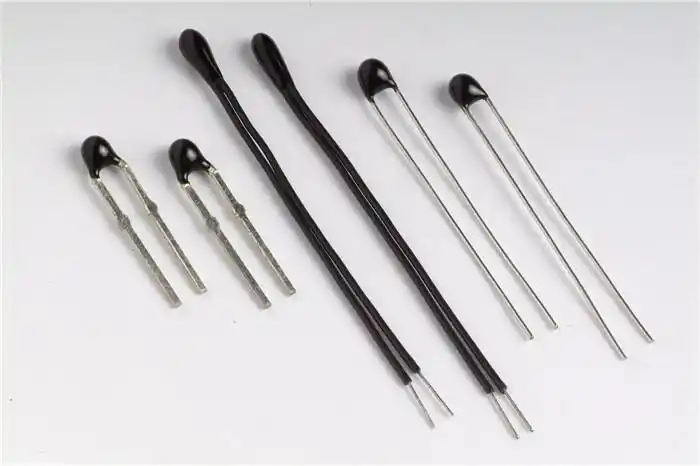
(1) x Thermistor
(1) x Potentiometer
(1) x 830 tie-points Breadboard
(18) x M-M wires (Male to Male jumper wires)
¶ Component Introduction
Thermistor
A thermistor is a thermal resistor - a resistor that changes its resistance with temperature. Technically, all resistors are thermistors - their resistance changes slightly with temperature - but the change is usually very small and difficult to measure. Thermistors are made so that the resistance changes drastically with temperature. It can be 100 Ohms or more, per degree of change.
There are two kinds of thermistors, NTC (negative temperature coefficient) and PTC (positive temperature coefficient). In general, you will see NTC sensors used for temperature measurement. PTC's are often used as resettable fuses - an increase in temperature increases the resistance which means that as more current passes through them, they heat up and 'choke back' the current, quite handy for protecting circuits!
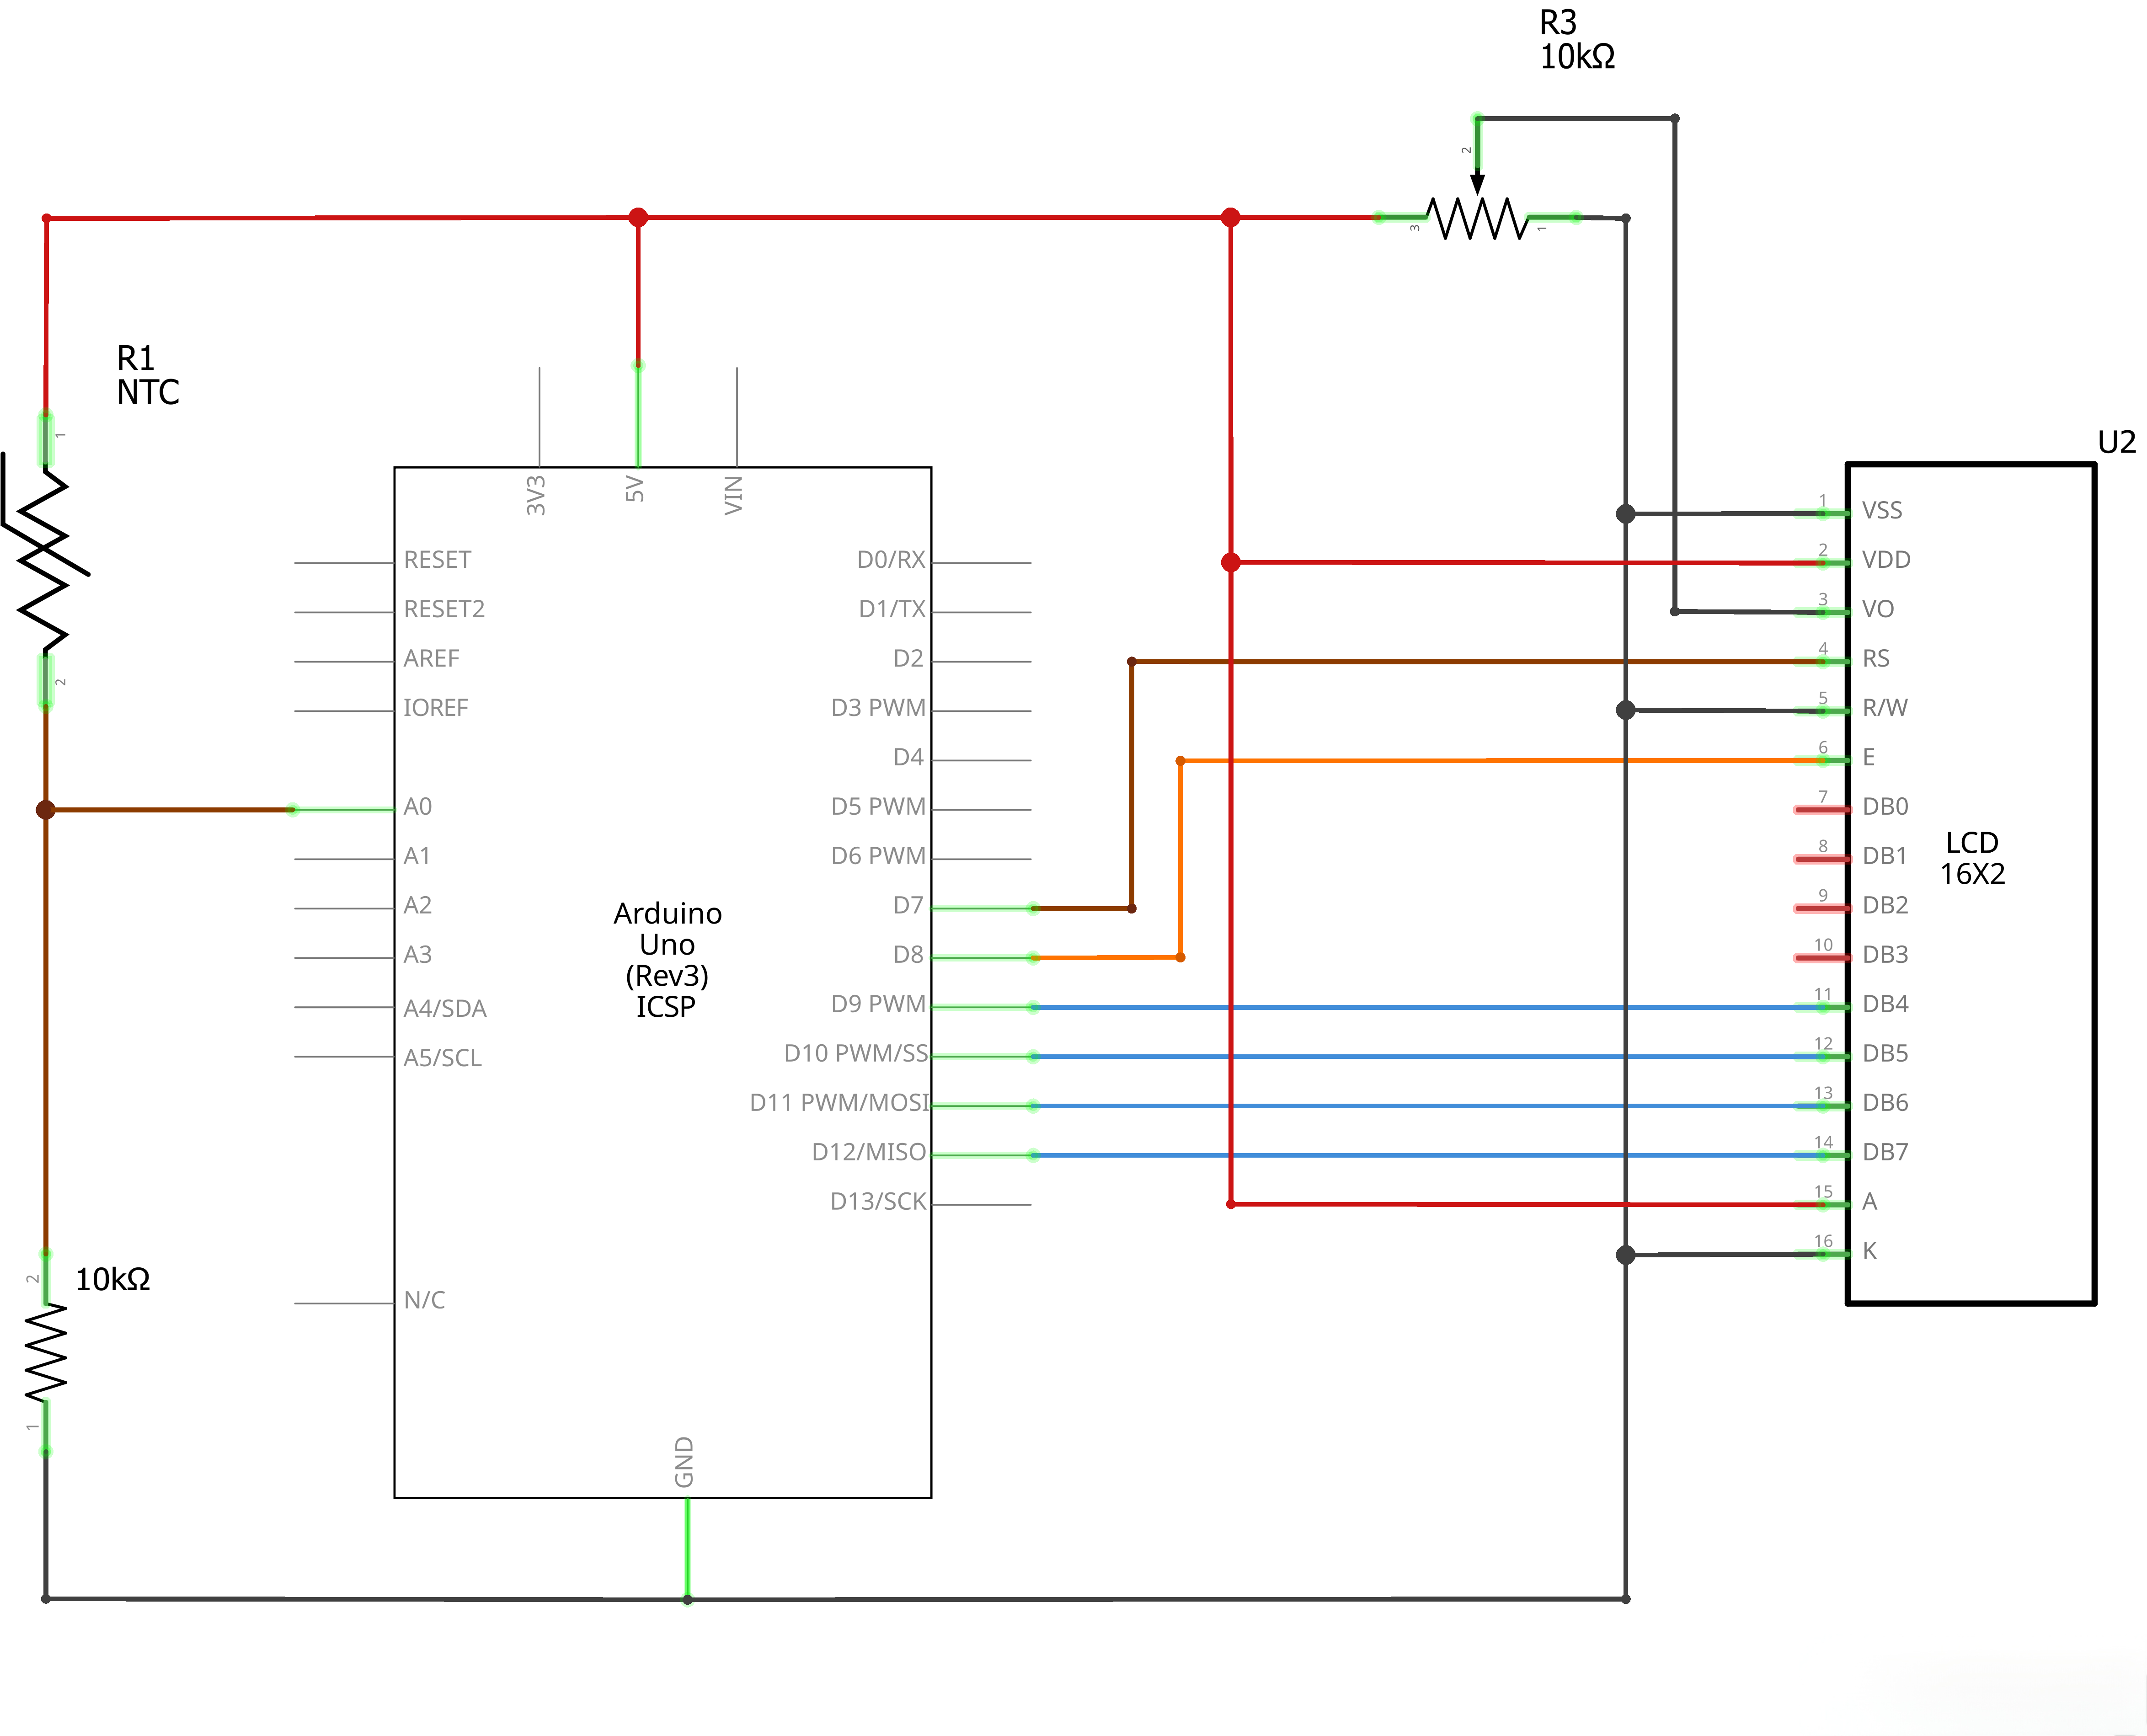
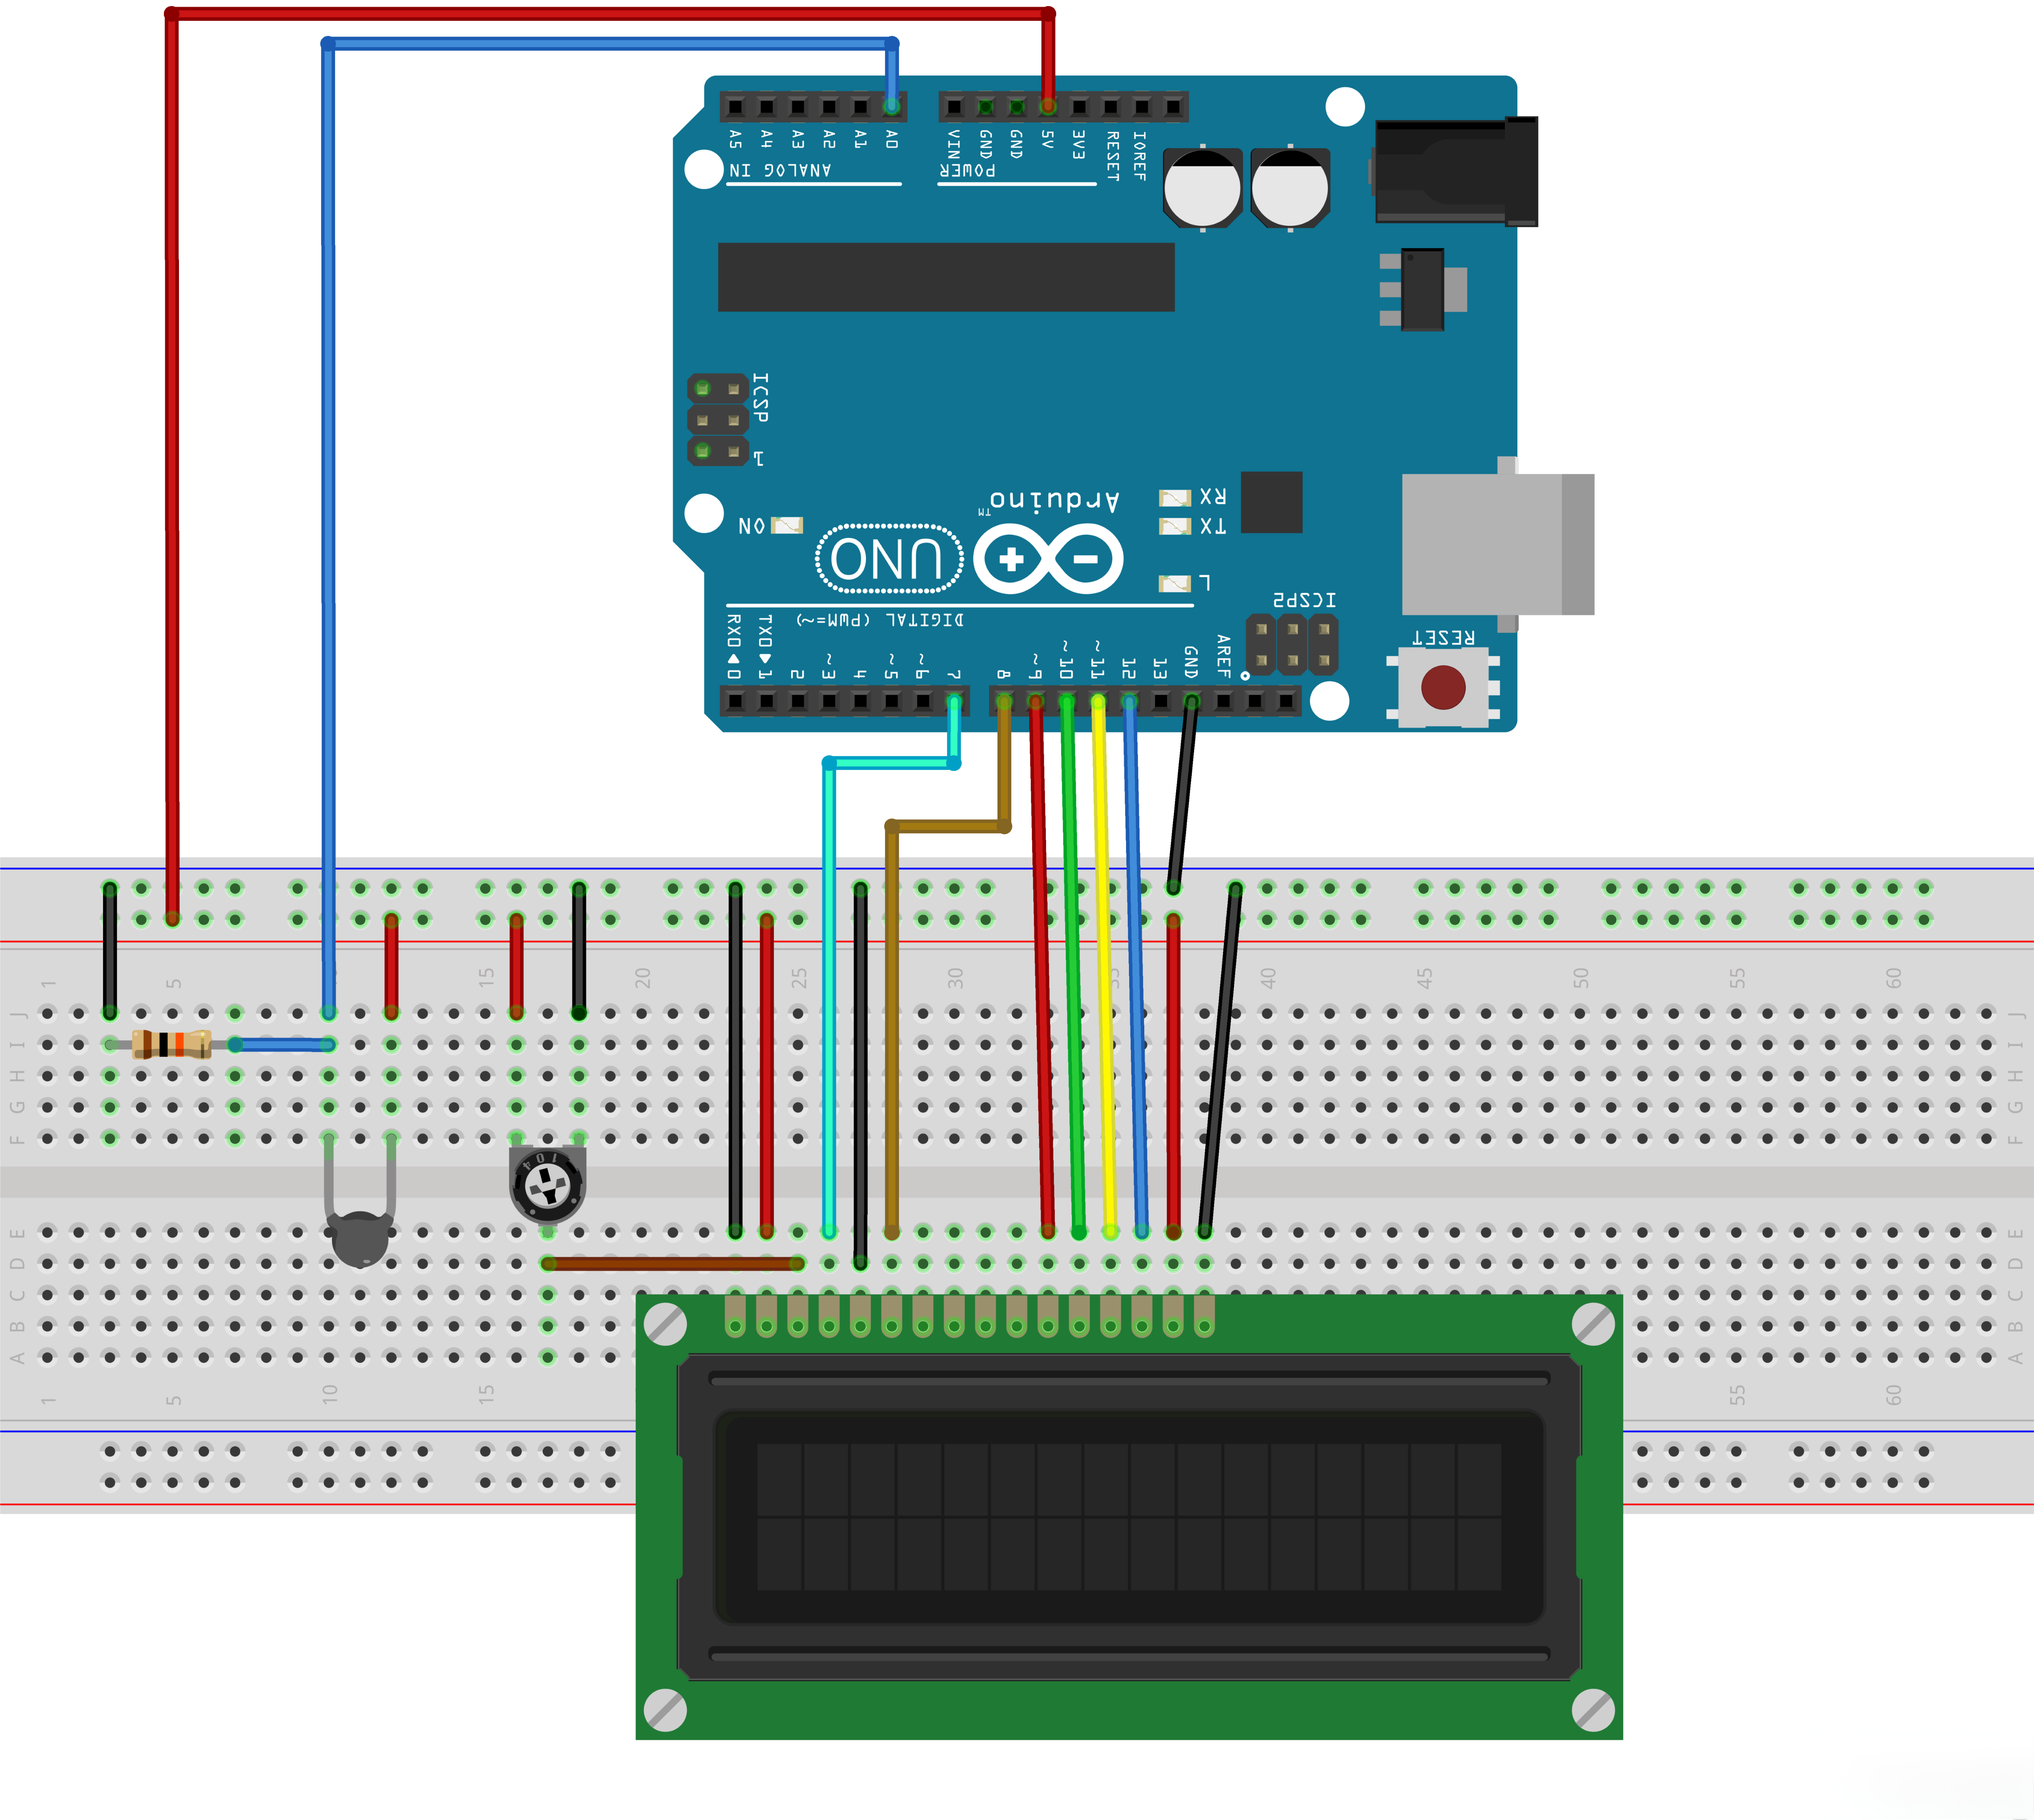
¶ Connection Schematic
¶ Wiring diagram
¶ Code
You can click the blue text link to download the program file to your local device, and double-click the file to open it after the download is complete. Please note: Before opening the file, ensure that you have installed the Arduino IDE development environment and completed the installation of relevant components such as the board support package and driver corresponding to the UNO R3. If you have any questions about this operation process, you can refer to the "part 1" chapter of the document for detailed guidance.
With this code, the UNO reads temperature from an NTC thermistor, calculates temperature using the Steinhart-Hart equation, and displays it on a 16x2 LCD screen. The temperature is updated every 500 milliseconds.
Click the Serial Monitor button to turn on the serial monitor. The basics about the serial monitor are introduced in details in tutorial 4 in part 2.
#include <LiquidCrystal.h>
int tempPin = 0;
// BS E D4 D5 D6 D7
LiquidCrystal lcd(7, 8, 9, 10, 11, 12);
Library Includes and LCD Initialization:
#include <LiquidCrystal.h>:Arduino built-in library for controlling LCD displays.int tempPin = 0;:Defines the analog input pin for the NTC thermistor (A0).LiquidCrystal lcd(7, 8, 9, 10, 11, 12);:Creates a LiquidCrystal object with the specified pin connections: RS=7, EN=8, D4=9, D5=10, D6=11, D7=12.
void setup()
{
/*lcd.begin(cols, rows)
lcd: a variable of type LiquidCrystal
cols: the number of columns that the display has
rows: the number of rows that the display has
*/
lcd.begin(16, 2);
}
Setup Function:
lcd.begin(16, 2);:Initializes the LCD display with 16 columns and 2 rows.
void loop()
{
int tempReading = analogRead(tempPin);
// This is OK
double tempK = log(10000.0 * ((1024.0 / tempReading - 1)));
tempK = 1 / (0.001129148 + (0.000234125 + (0.0000000876741 * tempK * tempK )) * tempK ); // Temp Kelvin
float tempC = tempK - 273.15; // Convert Kelvin to Celcius
float tempF = (tempC * 9.0)/ 5.0 + 32.0; // Convert Celcius to Fahrenheit
Temperature Reading and Calculation:
int tempReading = analogRead(tempPin);:Reads the analog value from the thermistor connected to pin A0.double tempK = log(10000.0 * ((1024.0 / tempReading - 1)));:Calculates the natural logarithm of the resistance ratio for the thermistor.tempK = 1 / (0.001129148 + (0.000234125 + (0.0000000876741 * tempK * tempK )) * tempK );:Calculates temperature in Kelvin using the Steinhart-Hart equation with specific coefficients.float tempC = tempK - 273.15;:Converts Kelvin temperature to Celsius.float tempF = (tempC * 9.0)/ 5.0 + 32.0;:Converts Celsius temperature to Fahrenheit.
/* replaced
float tempVolts = tempReading * 5.0 / 1024.0;
float tempC = (tempVolts - 0.5) * 10.0;
float tempF = tempC * 9.0 / 5.0 + 32.0;
*/
// Display Temperature in C
lcd.setCursor(0, 0);
lcd.print("Temp C ");
// Display Temperature in F
//lcd.print("Temp F ");
lcd.setCursor(6, 0);
// Display Temperature in C
lcd.print(tempC);
// Display Temperature in F
//lcd.print(tempF);
delay(500);
}
LCD Display and Delay:
/* replaced ... */:Commented-out alternative temperature calculation method using voltage-based approach.lcd.setCursor(0, 0);:Sets the cursor position to the beginning of the first row (column 0, row 0).lcd.print("Temp C ");:Prints the temperature label with Celsius unit on the LCD.//lcd.print("Temp F ");:Commented-out code for displaying Fahrenheit unit instead.lcd.setCursor(6, 0);:Sets the cursor position to column 6 of the first row for the temperature value.lcd.print(tempC);:Prints the calculated temperature in Celsius on the LCD.//lcd.print(tempF);:Commented-out code for printing Fahrenheit temperature value.delay(500);:Delays 500 milliseconds before repeating the loop for the next temperature reading.
¶ Troubleshooting
- LCD Not Displaying:Check LCD connections and ensure the LiquidCrystal library is installed
- Temperature Reading Error:Verify thermistor and resistor connections
- Incorrect Temperature:Ensure you're using the correct Steinhart-Hart coefficients for your NTC thermistor
- LCD Display Issues:Check that the LCD is properly initialized with the correct pin connections
- Temperature Unit:To display Fahrenheit instead of Celsius, uncomment the Fahrenheit lines and comment out the Celsius lines