¶ Switch modules
In this lesson, we will learn how to use switch modules. Including Shock switch and Tap switch module. the Tilt switc tutorial can visit the link https://wiki.elegoo.com/oshw-getting-started-&-kits/tiltball.
¶ Introduction
- Shock switch module
A built-in 10 K ohm resistor is connected between the center pin and the ‘S’ pin and can be used as a
pull-up or pull-down resistor. The switch contacts connect to the two outer pins.
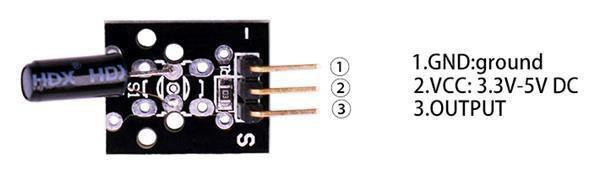
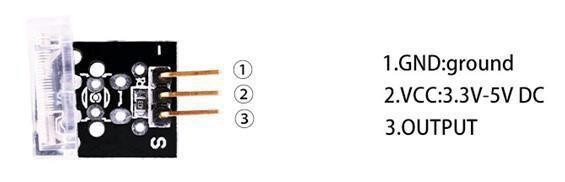
- Tap switch module
Also called the vibration sensor module. The momentary switch contacts are
connected between the two outer pins.
¶ Sensor Output and Verification Description
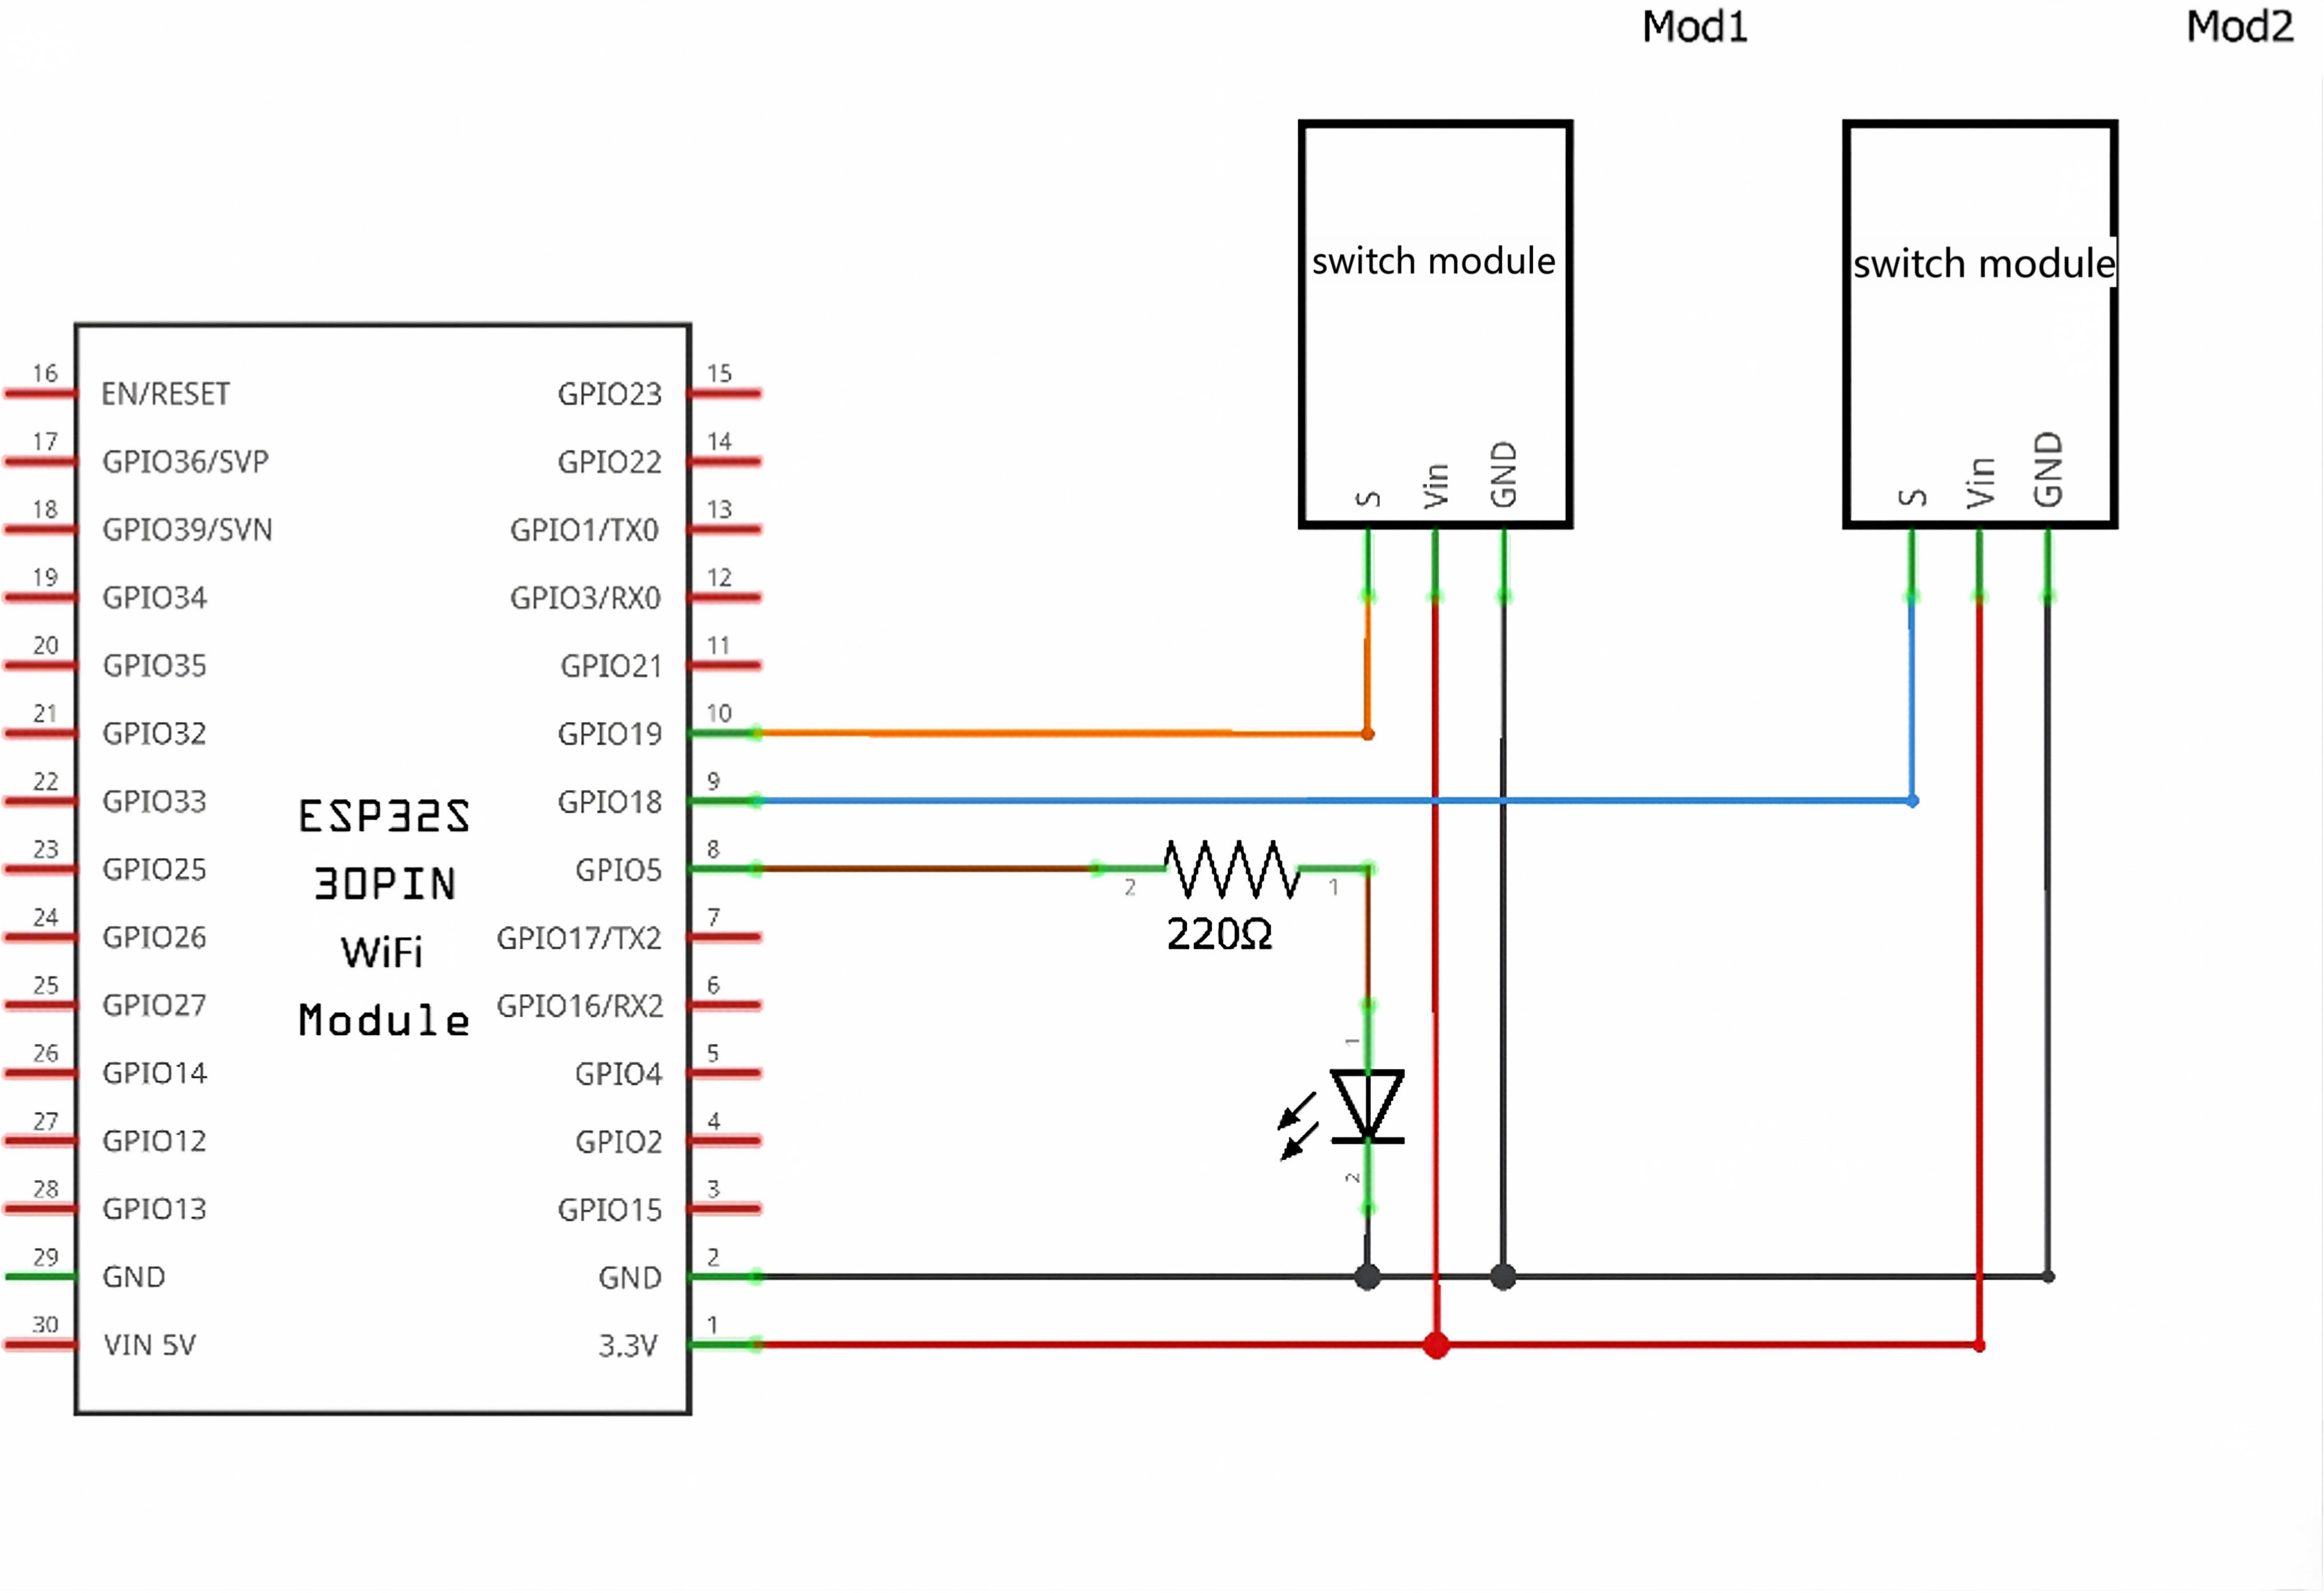
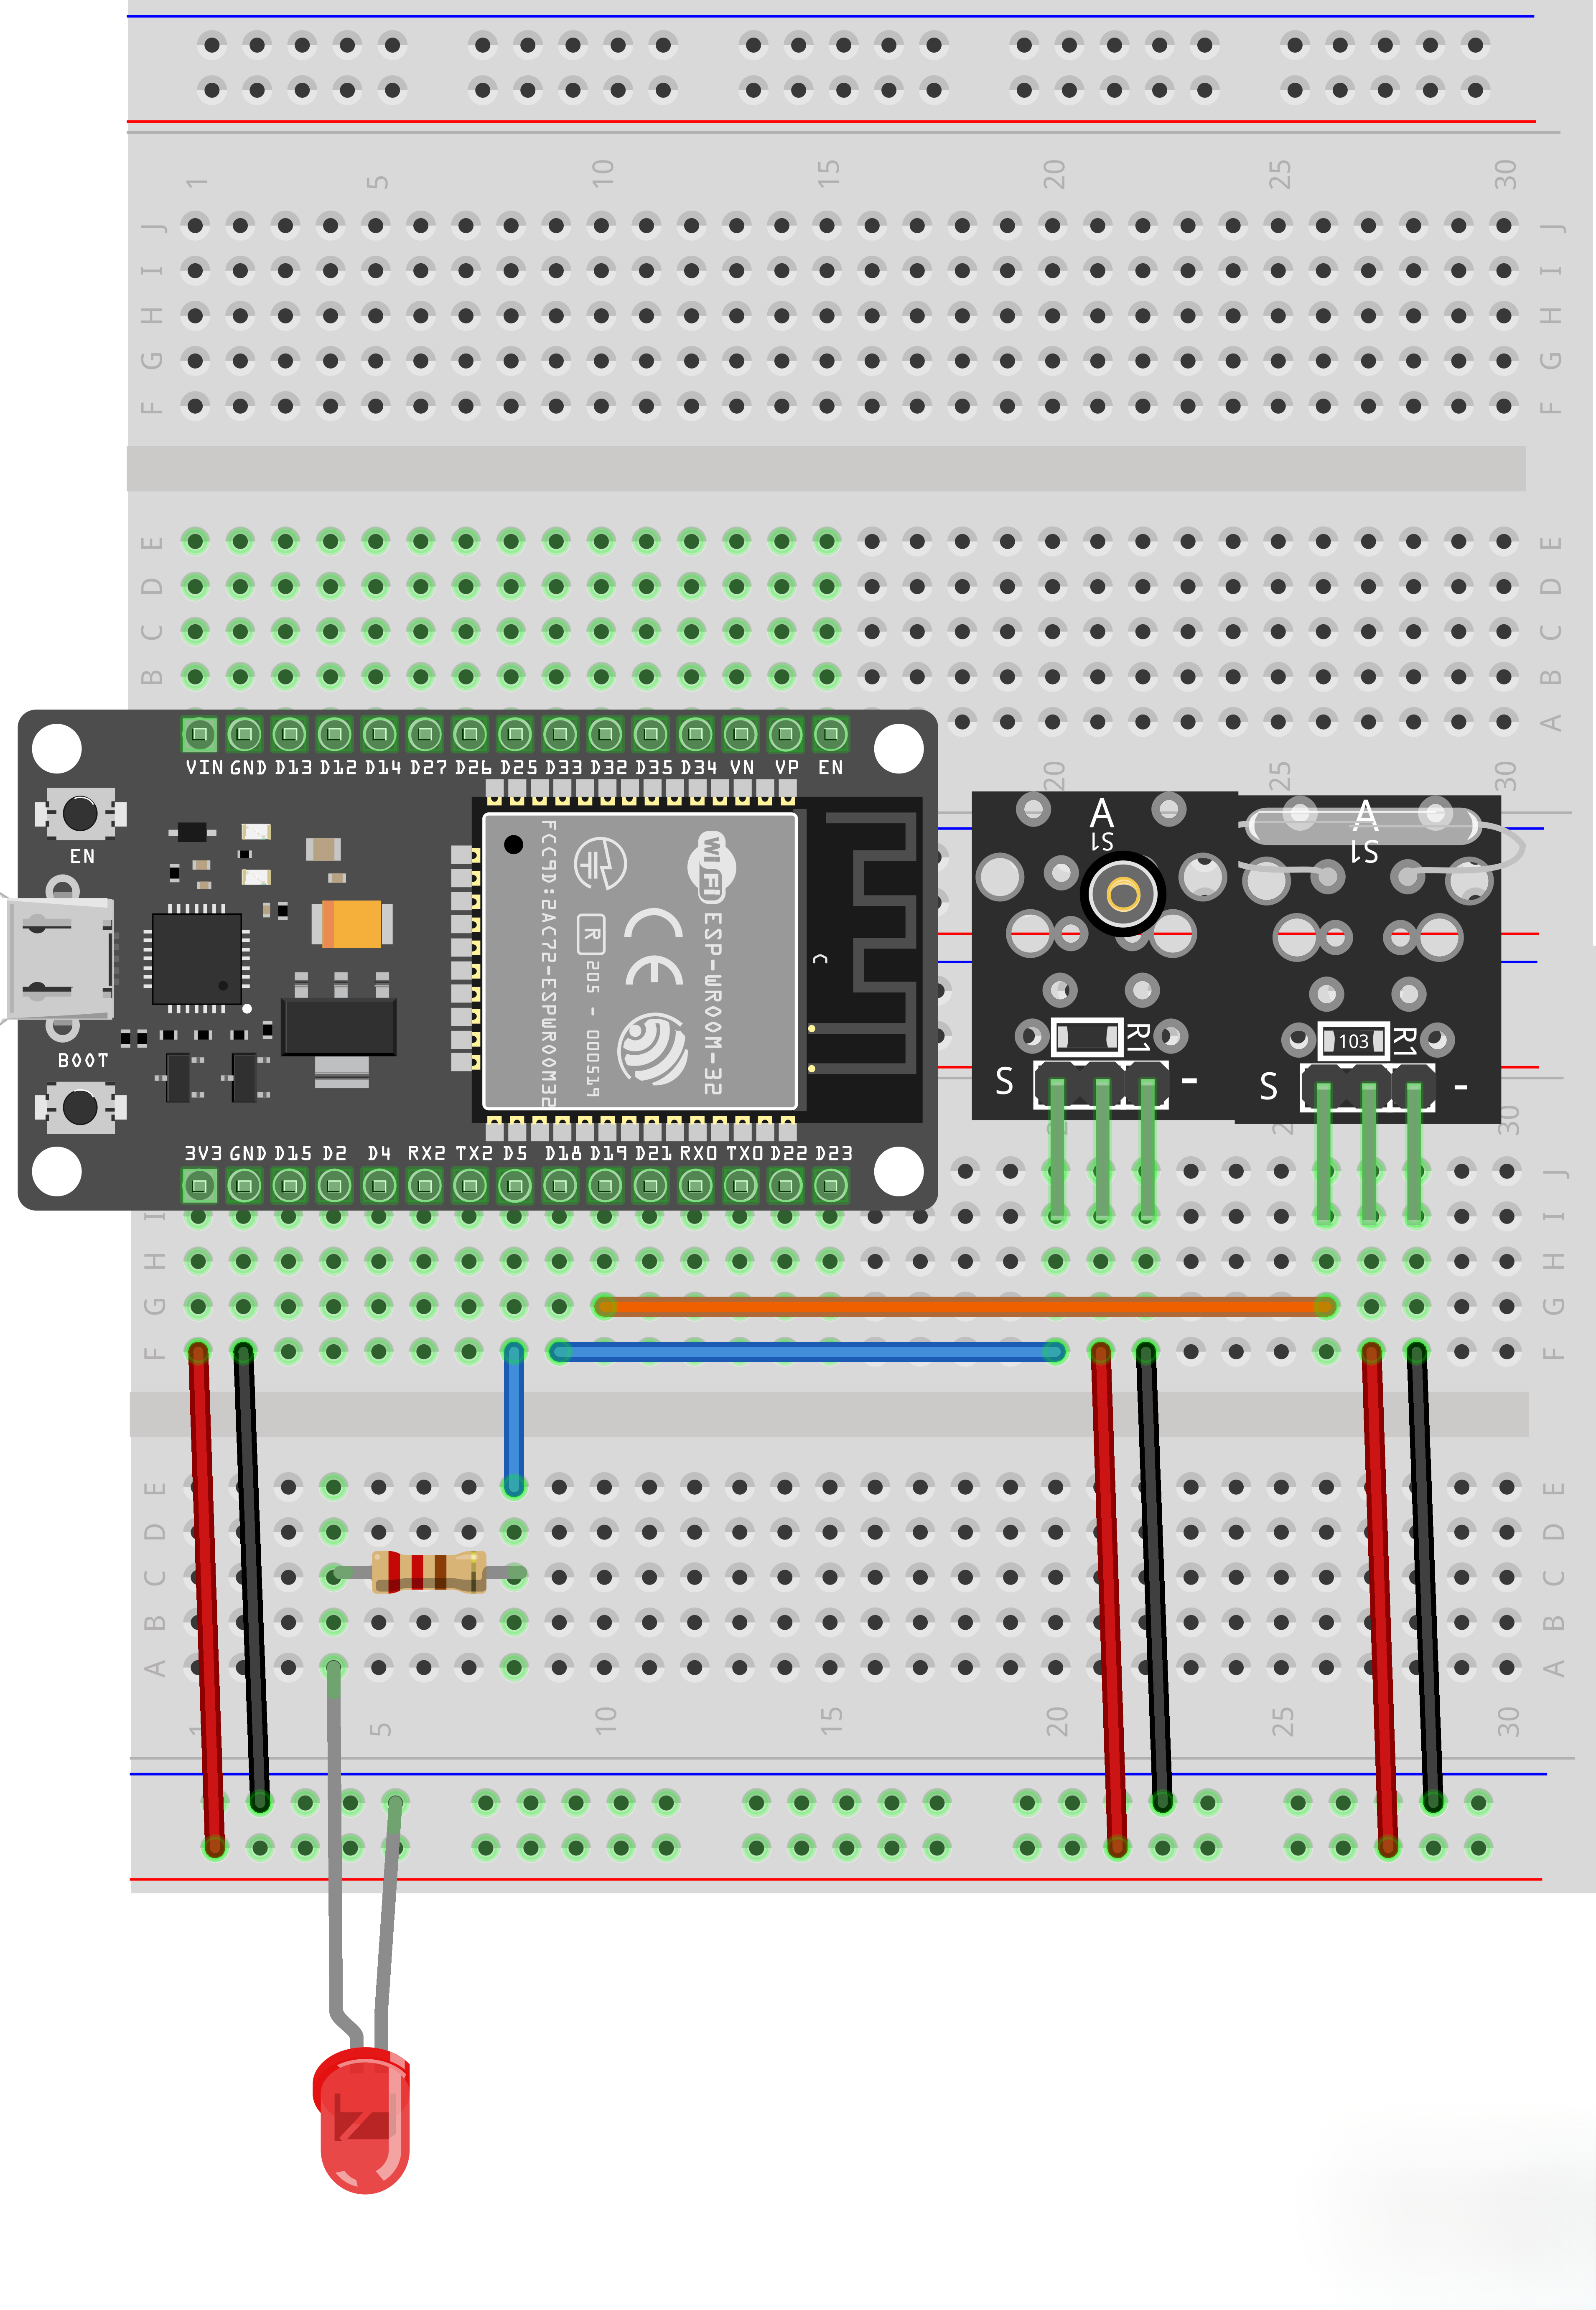
Both of the above two switch modules output digital signals, which only have high and low levels. The default output level is high, and it will switch to low level when the sensor is triggered. According to this principle, just connect the S pin of the two modules to the corresponding digital pins of the main controller.
For ESP32, optional pins include 5, 18, 19 and so on;
For UNO series such as UNO R3, any pin from D2 to D13 is available.
To intuitively check whether the sensor is triggered, an indicator light can be added. The light turns on when the sensor is triggered and turns off when it is not triggered.
¶ Connection Schematic
¶ Wiring Diagram
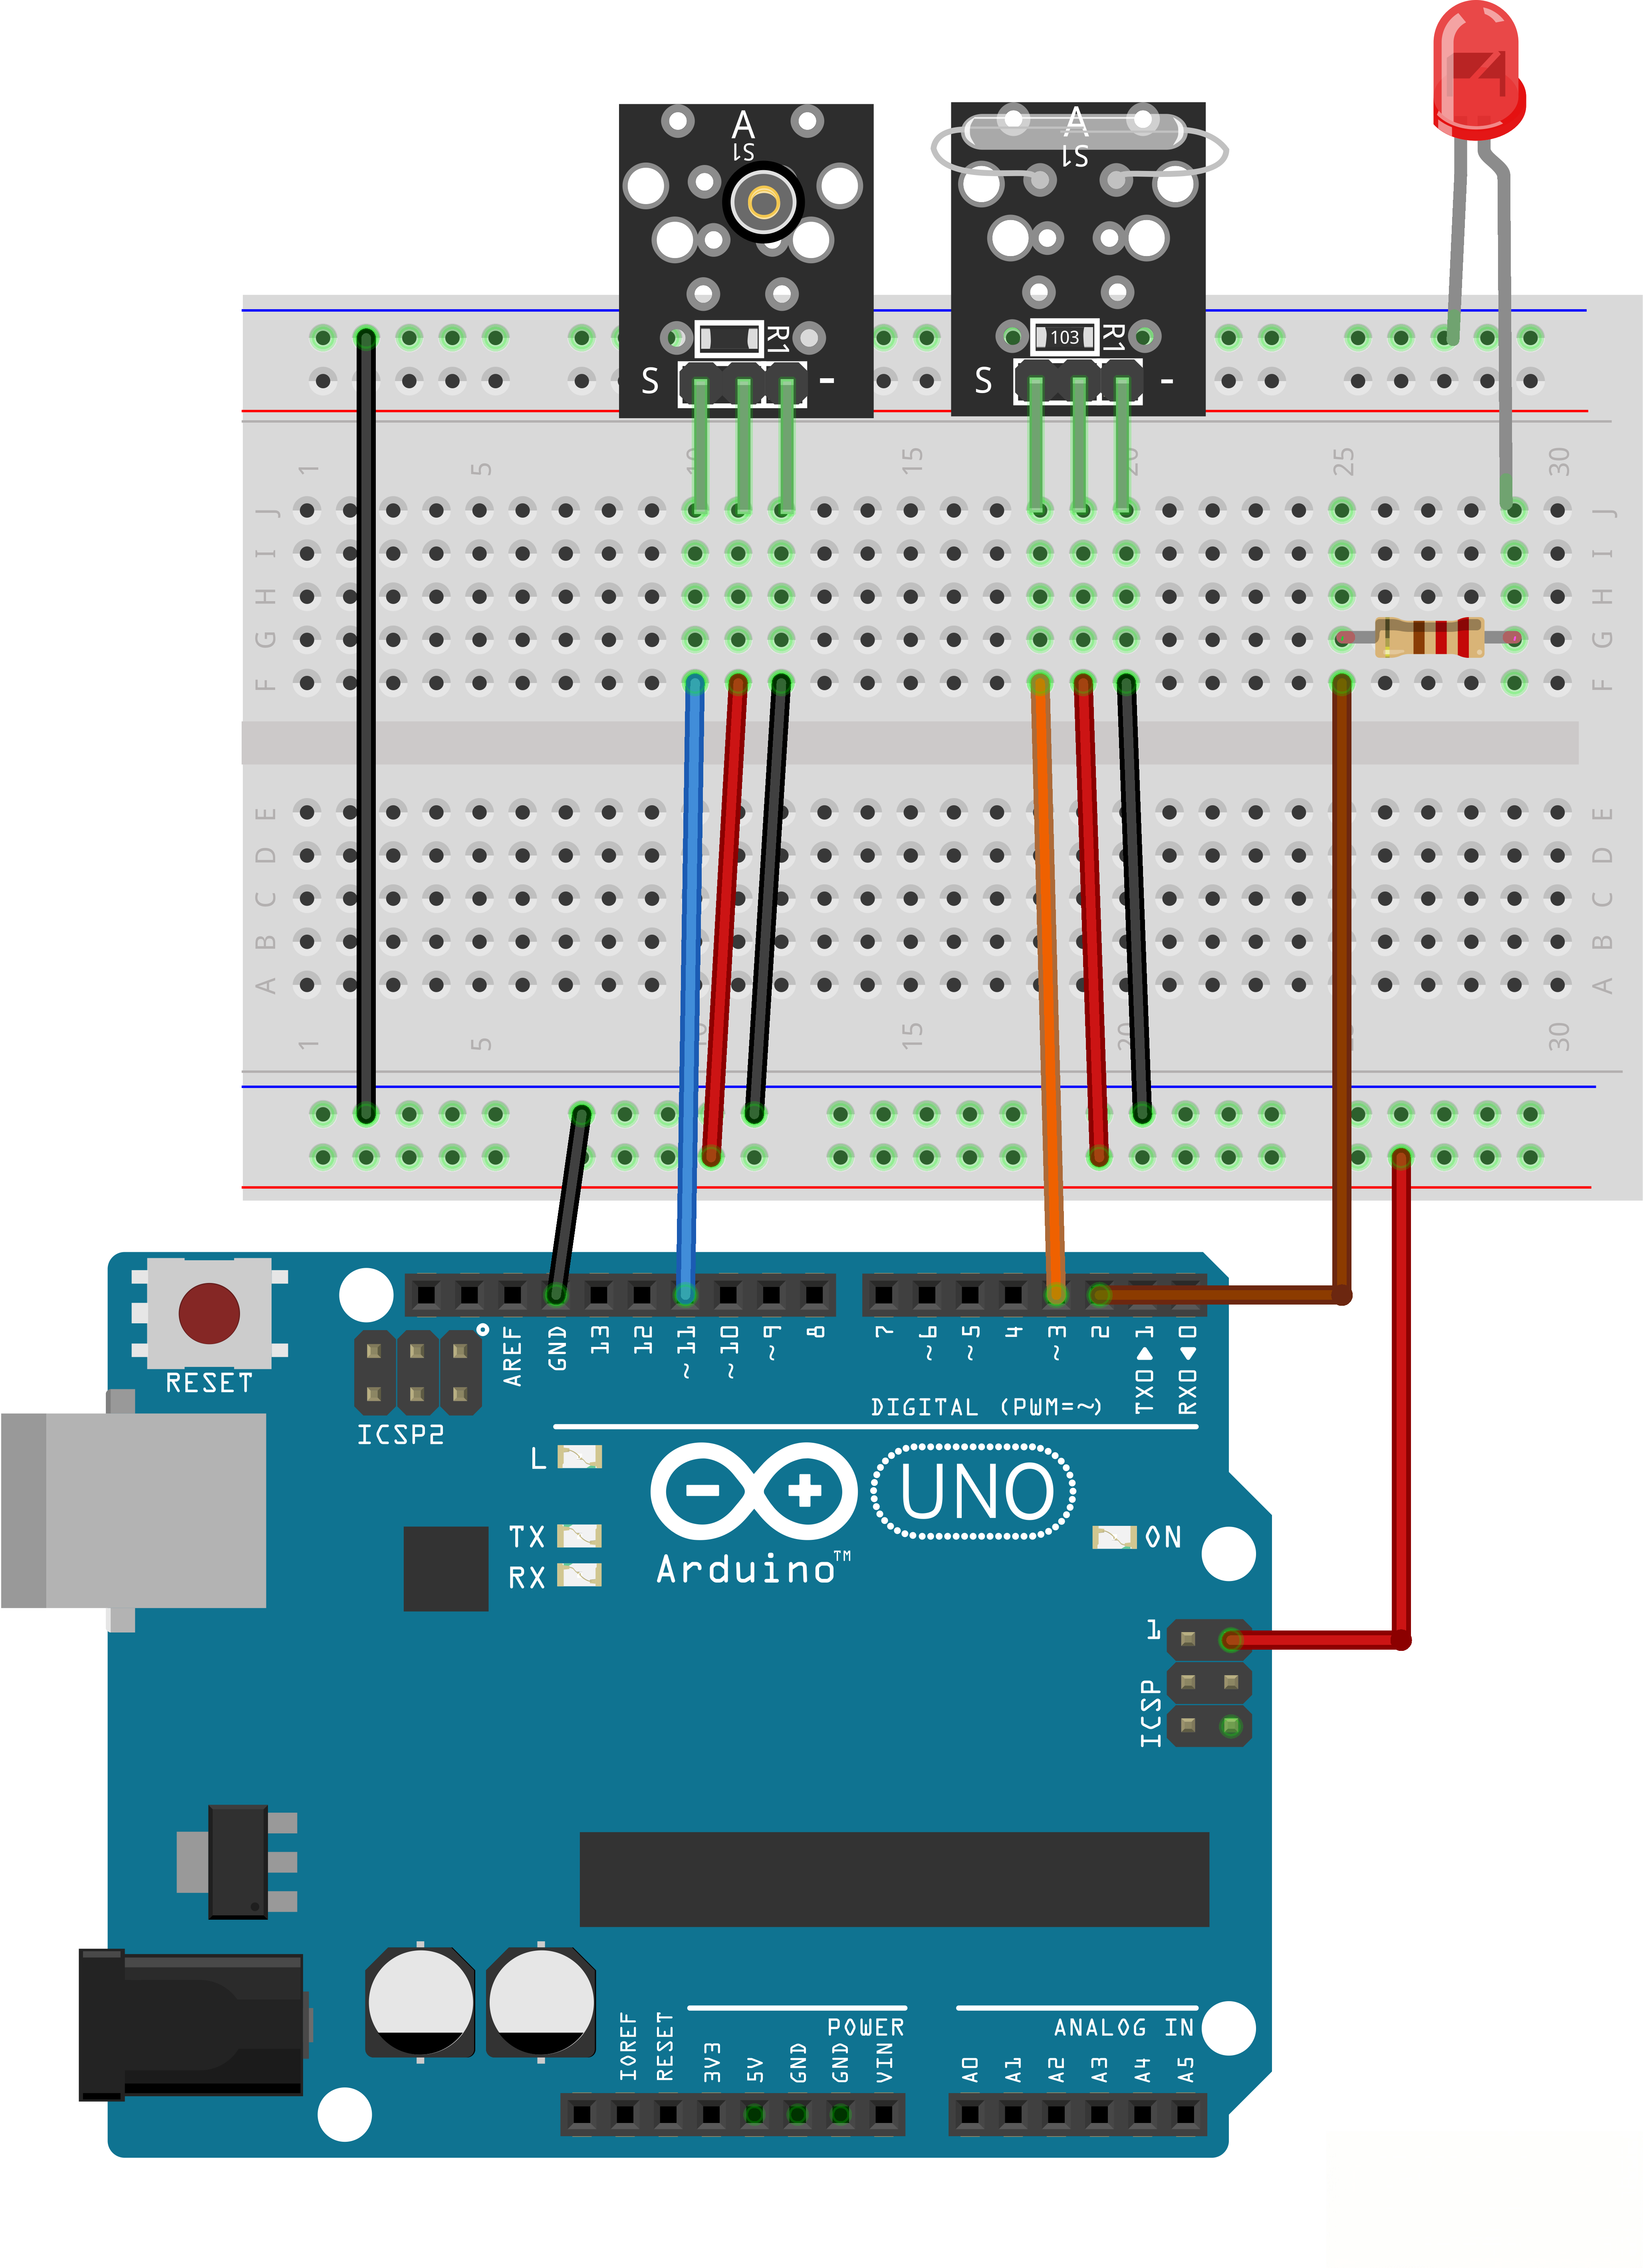
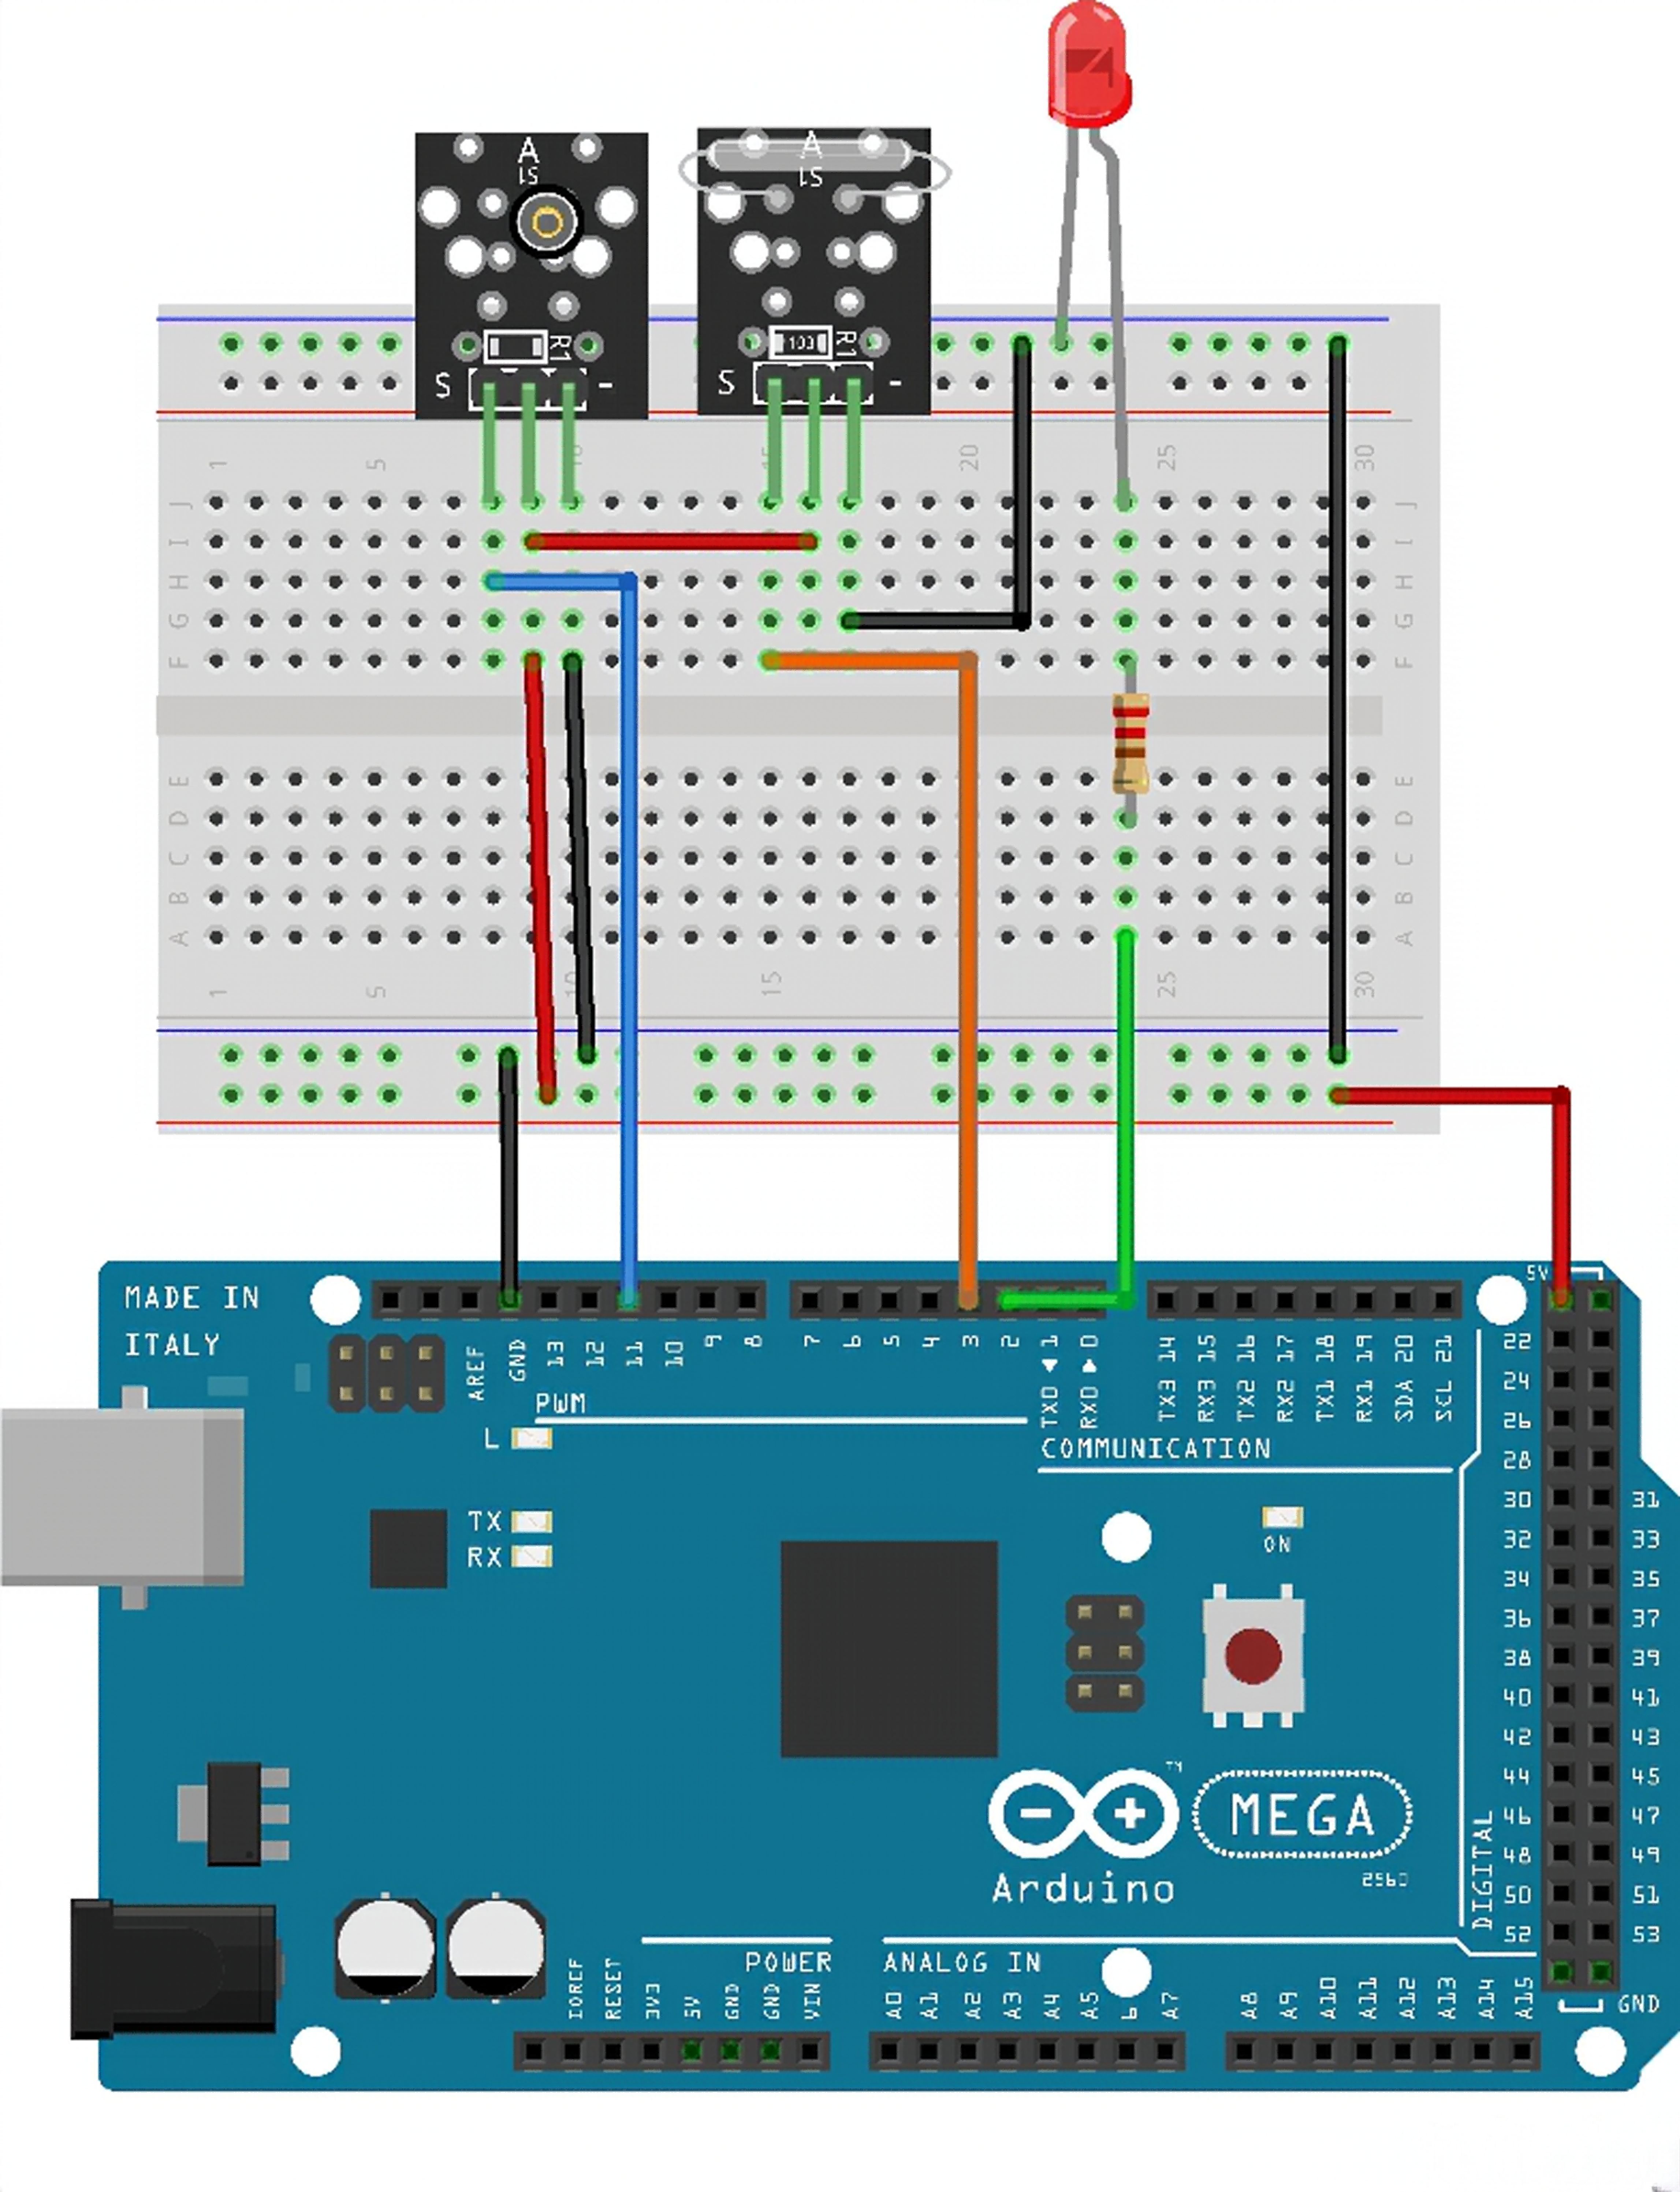
¶ Code
You can click the blue text link to download the program file to your local device, and double-click the file to open it after the download is complete. Please note: Before opening the file, ensure that you have installed the Arduino IDE development environment and completed the installation of relevant components such as the board support package and driver corresponding to the board.
int Led = 5; //define LED port
int tap=18;
int Shock = 19;
int val_shock;//define digital variable val_shock
int val_tap;//define digital variable val_tap
We define the sensor pin and LED pin and declare corresponding variables. You can select appropriate pins reasonably according to different main control boards. This example takes ESP32 as the hardware platform. If you use the UNO R3 series board, you can change the pins to any digital pin from D2 to D13.
void setup()
{pinMode(Led, OUTPUT); //define LED as a output port
pinMode(Shock, INPUT); //define shock sensor as a output port
pinMode(tap, INPUT); //define tap sensor as a output port
}
The pin modes of the sensor and LED are configured here. The LED pin is set to output mode, while the sensor pin is set to input mode.
void loop()
{ val_shock = digitalRead(Shock); //read the value of the digital interface 3 assigned to val
val_tap= digitalRead(tap);
if (val_shock== LOW||val_tap==LOW) //when the shock sensor have signal, LED blink
{
digitalWrite(Led, HIGH);
}
else
{
digitalWrite(Led, LOW);
}
}
The digitalRead(pin) function is used here to read the status of the corresponding sensor pin, which is applied to digital sensors. For analog sensors, the analogRead(pin) function should be adopted to get the collected values. Unlike digital sensors that only output two fixed states 0 and 1, analog sensors output continuous values ranging from 0 to …….
The sensor outputs a high level by default and outputs a low level when triggered. The if statement is used to judge the level state of the sensor pin: the indicator light will be turned on when a low level is detected; otherwise, the light will be turned off.