¶ Button Switch Module
¶ Overview
In this lesson, you will learn to use push buttons with digital inputs to turn an LED on and off. Pressing the button will turn the LED on; pressing the other button will turn the LED off.
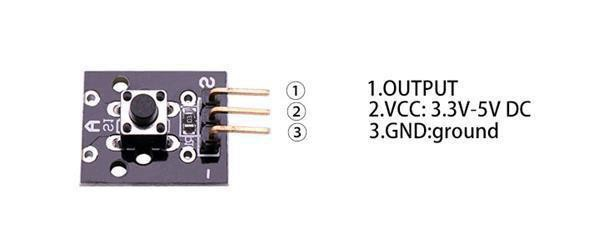
¶ Component Introduction
¶ PUSH SWITCHES:
Switches are really simple components. When you press a button or flip a lever, they connect two contacts together so that electricity can flow through them.The little tactile switches that are used in this lesson have four connections, which can be a little confusing.
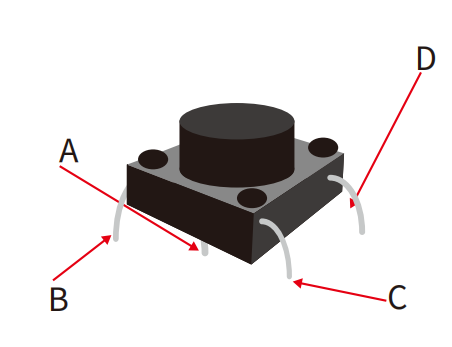
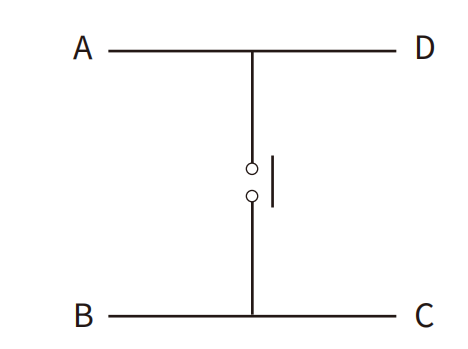
Actually, there are only really two electrical connections. Inside the switch package, pins B and C are connected together, as are A and D.
¶ Connection Schematic
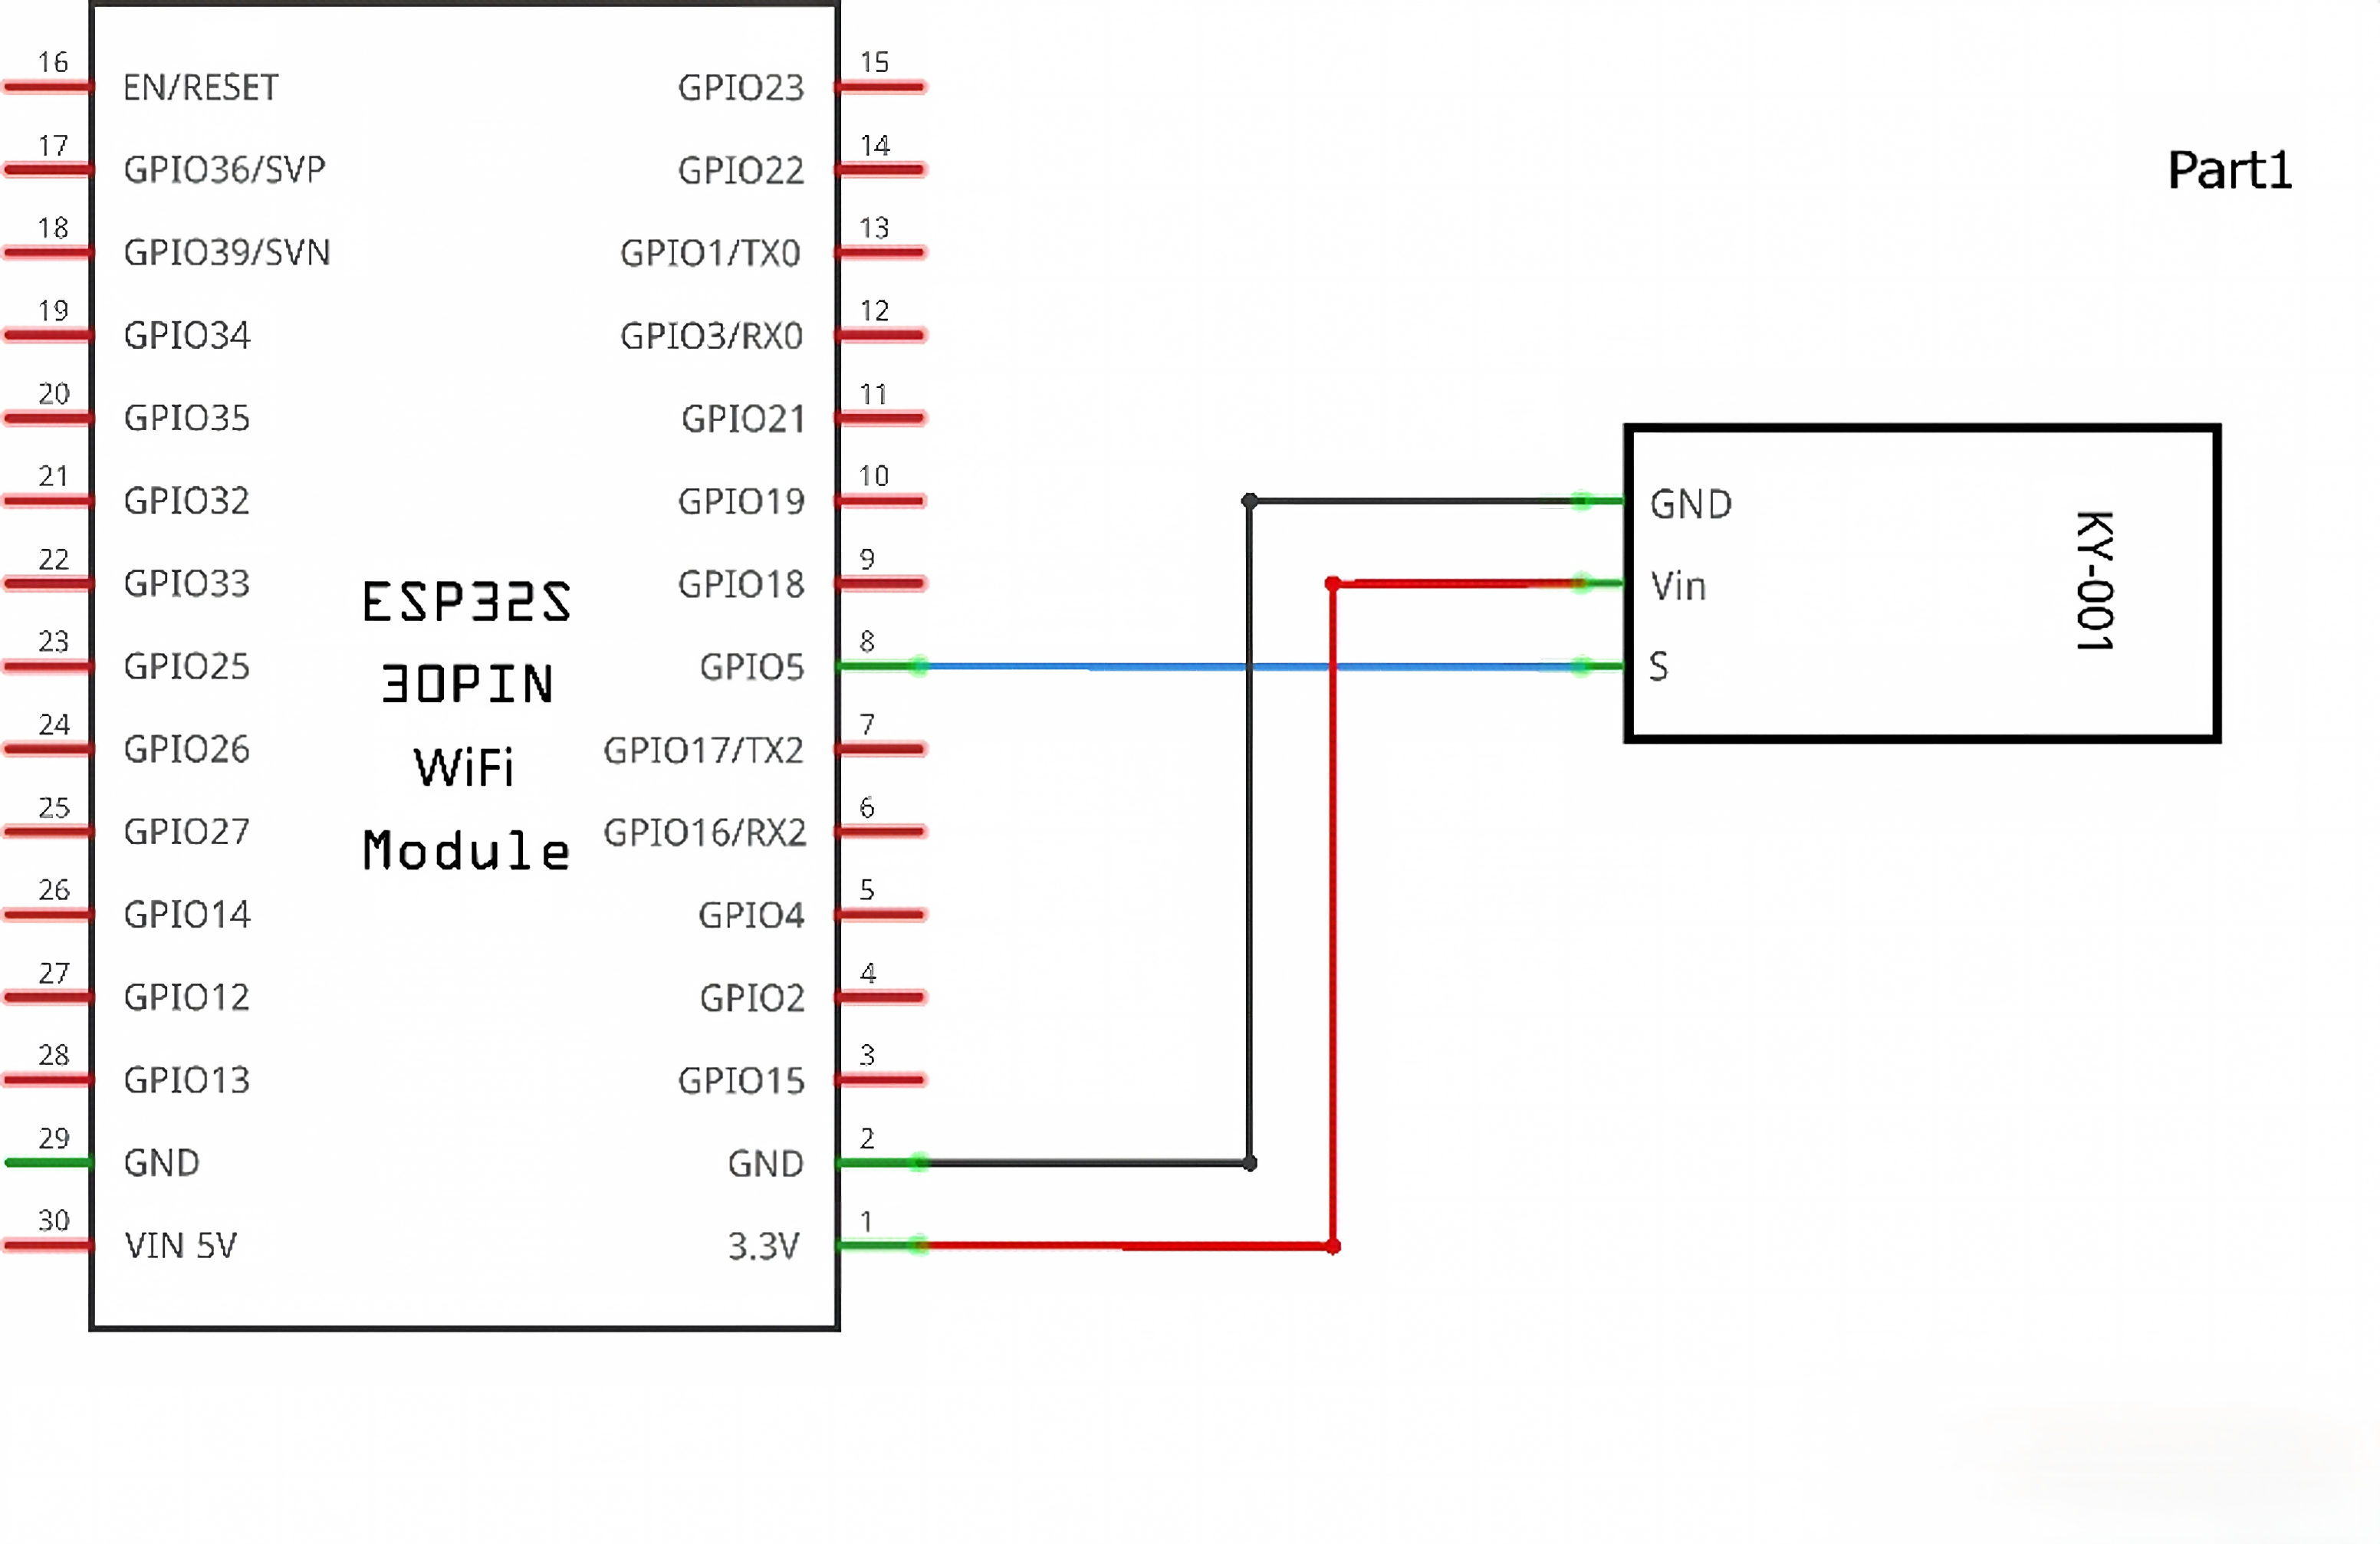
¶ Wiring diagram
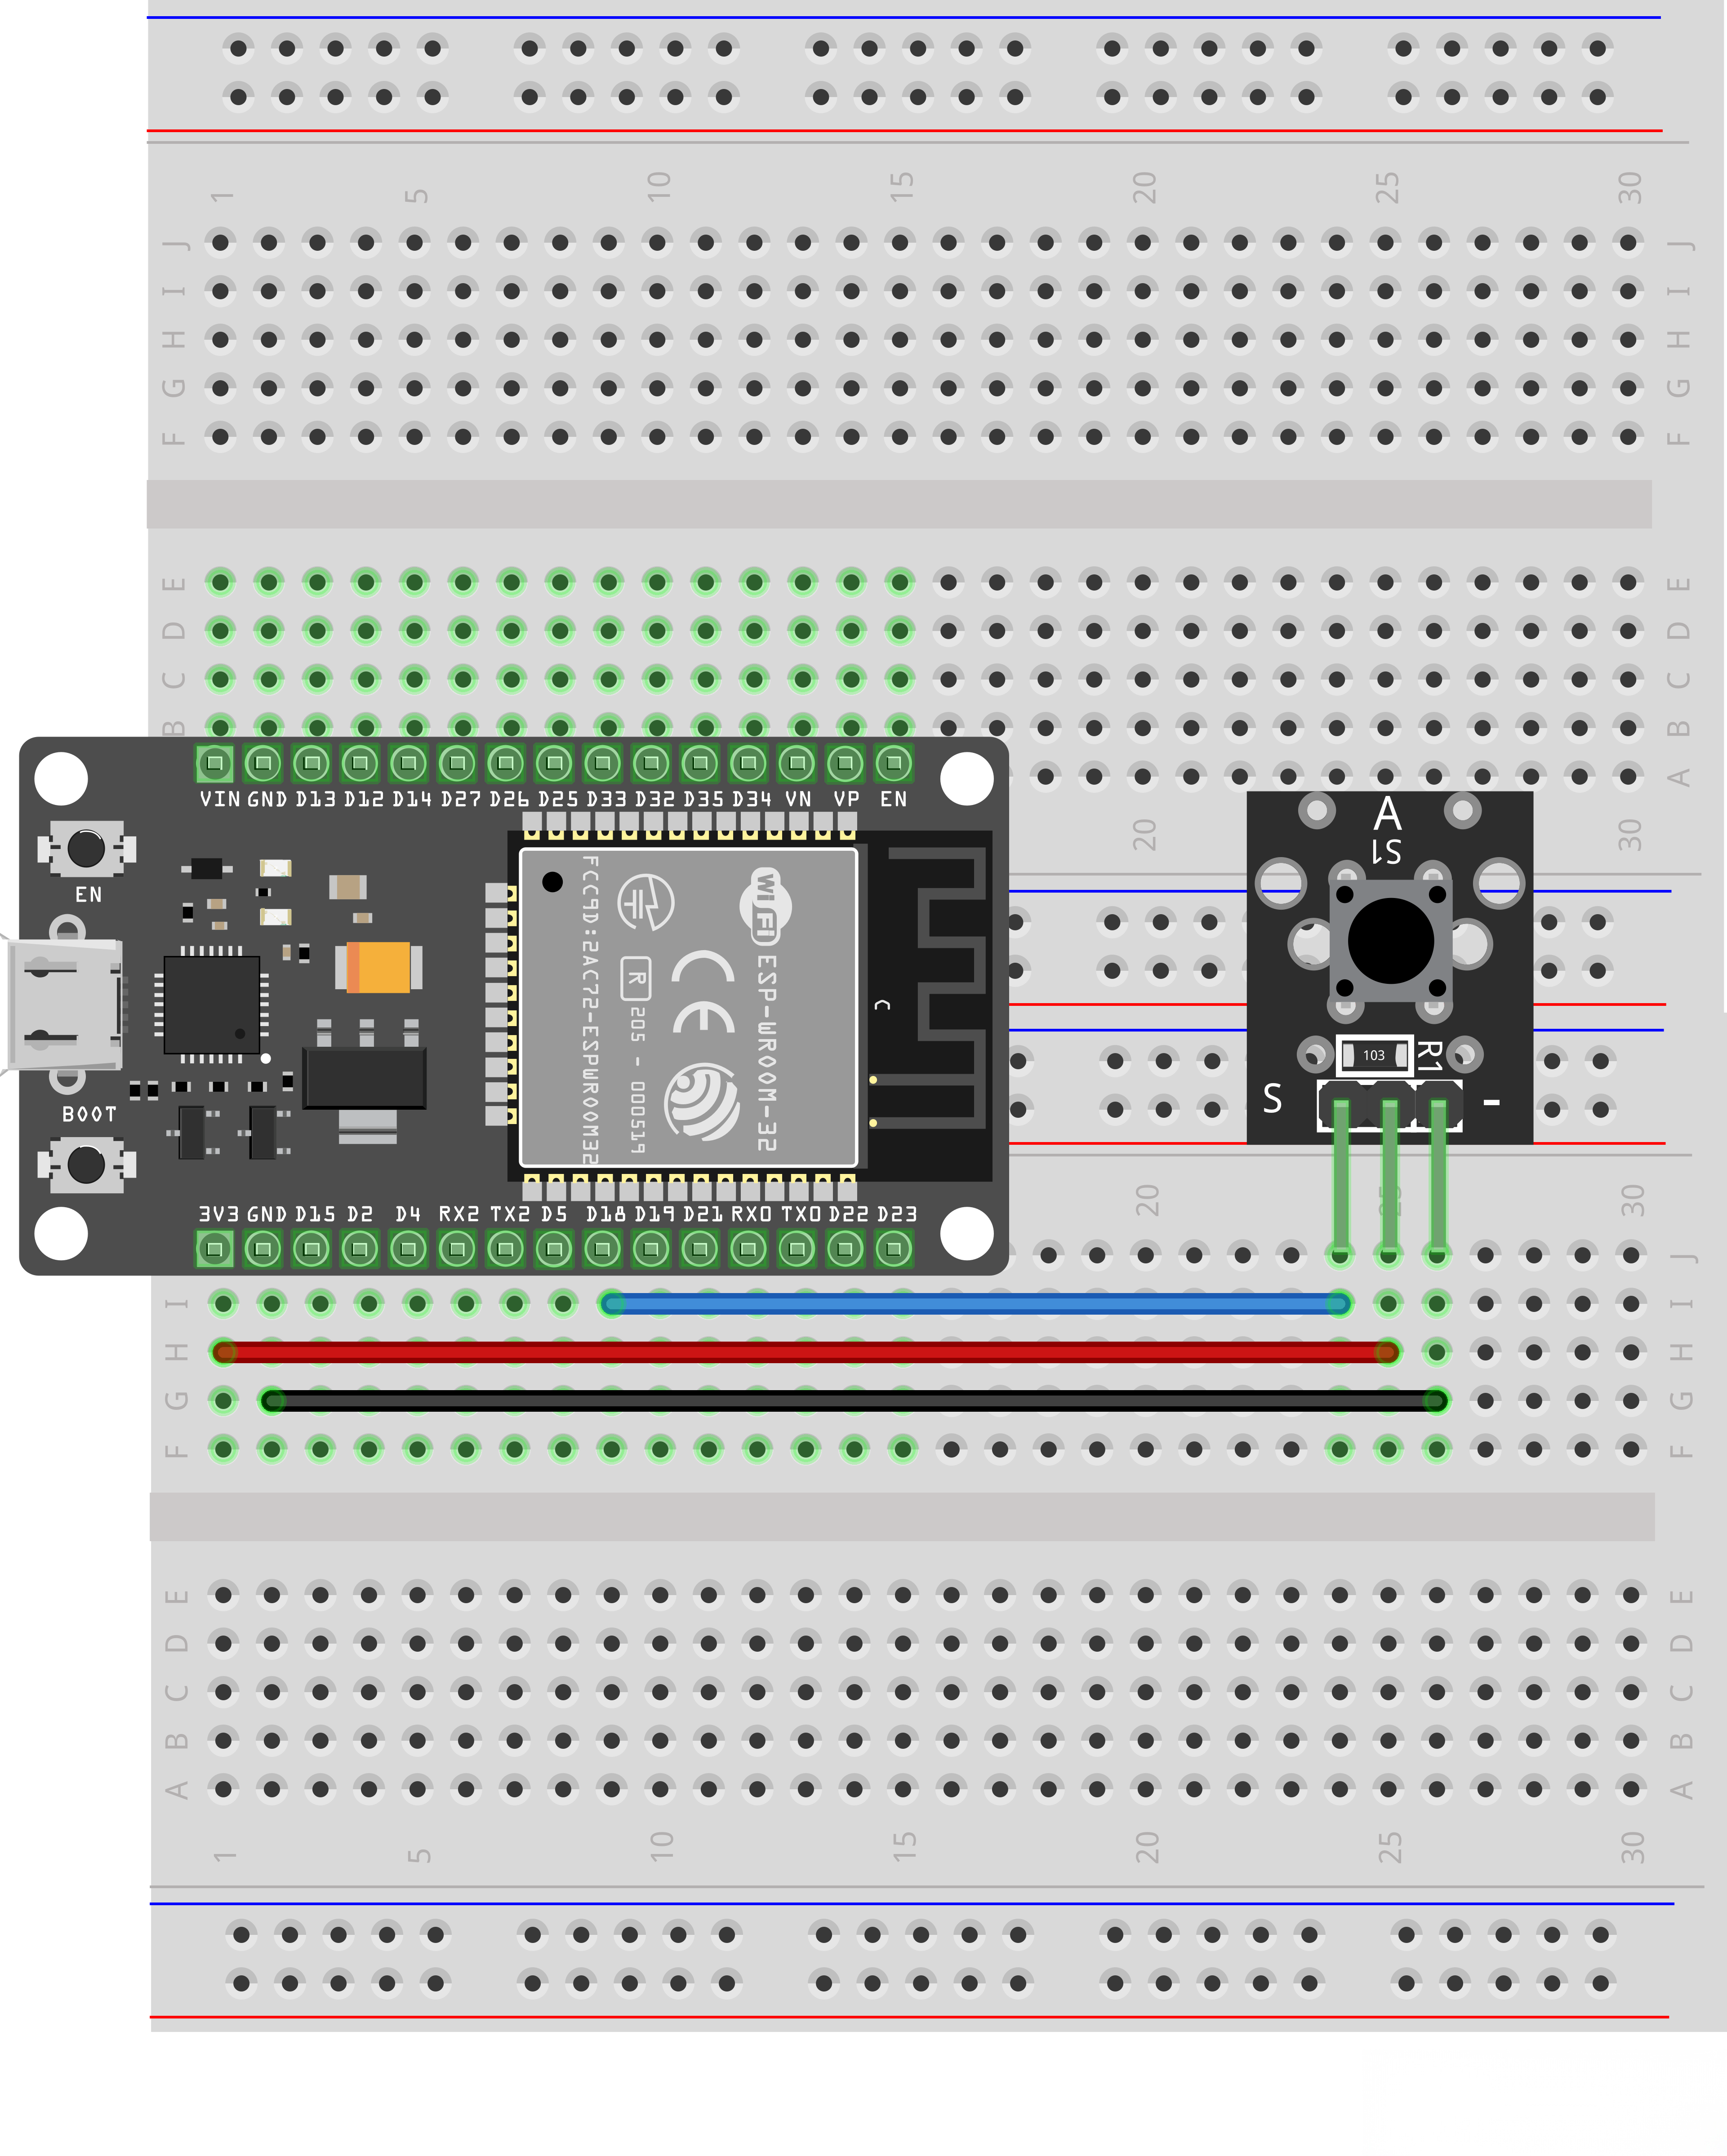
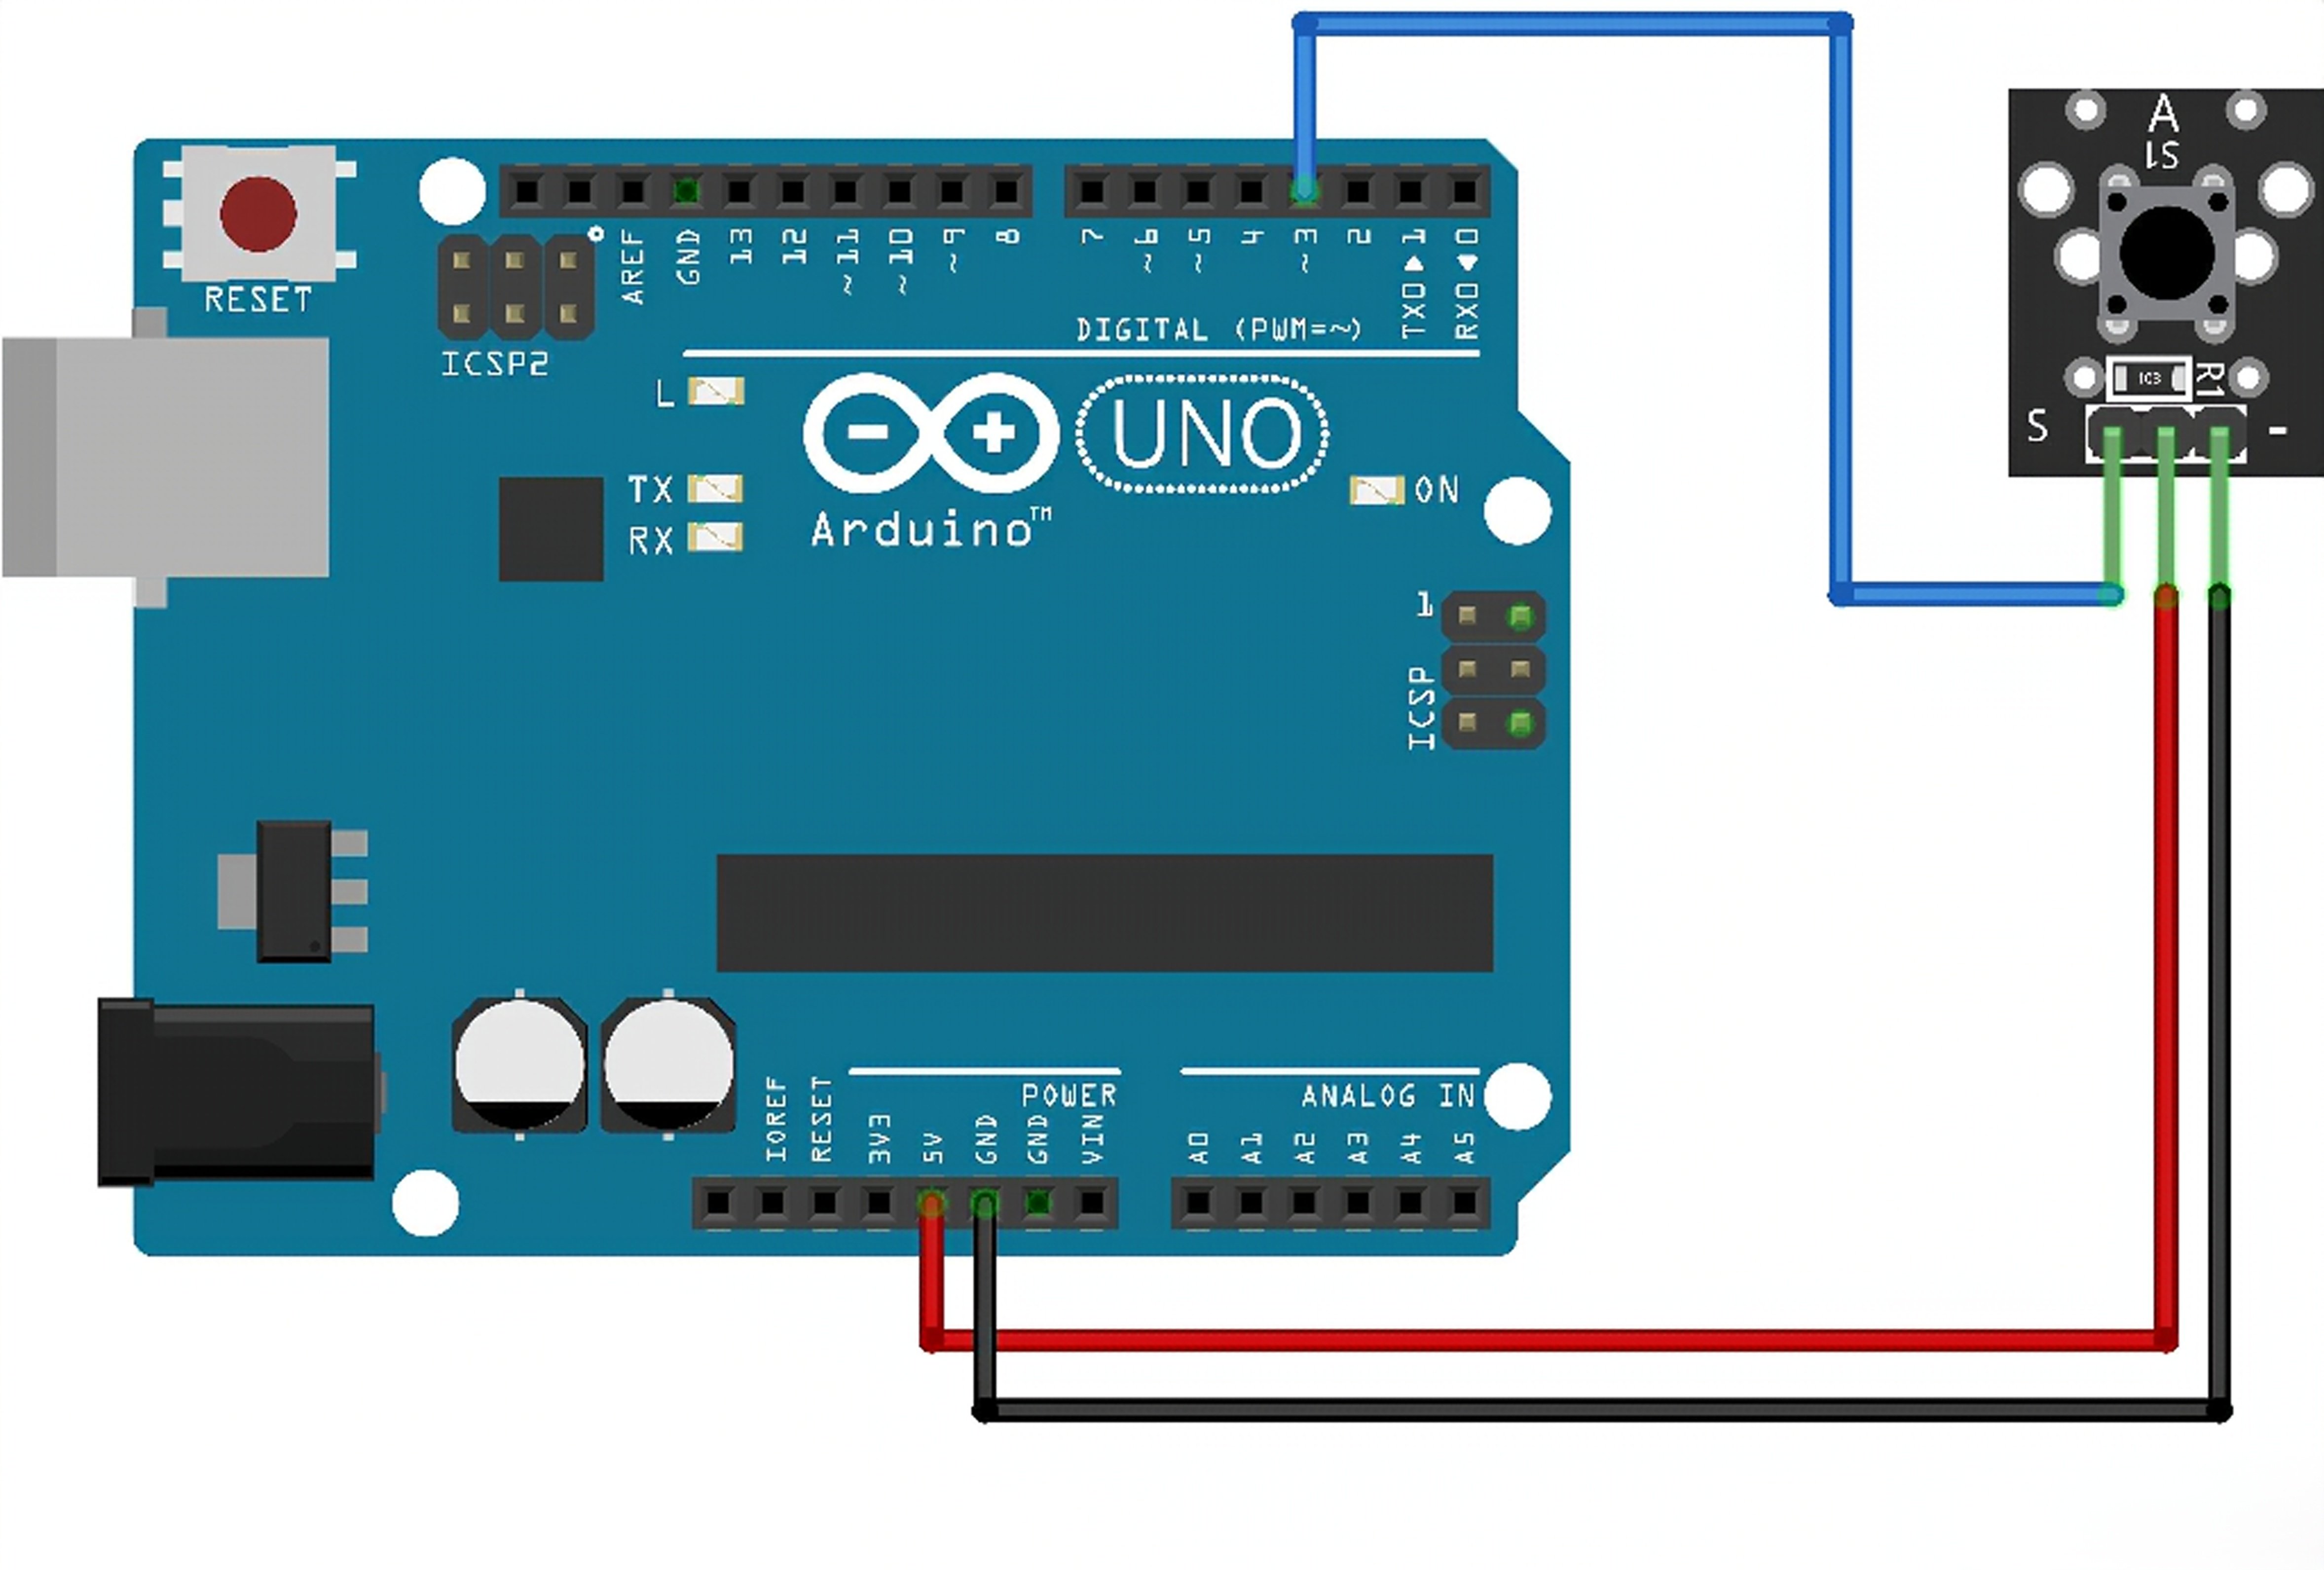
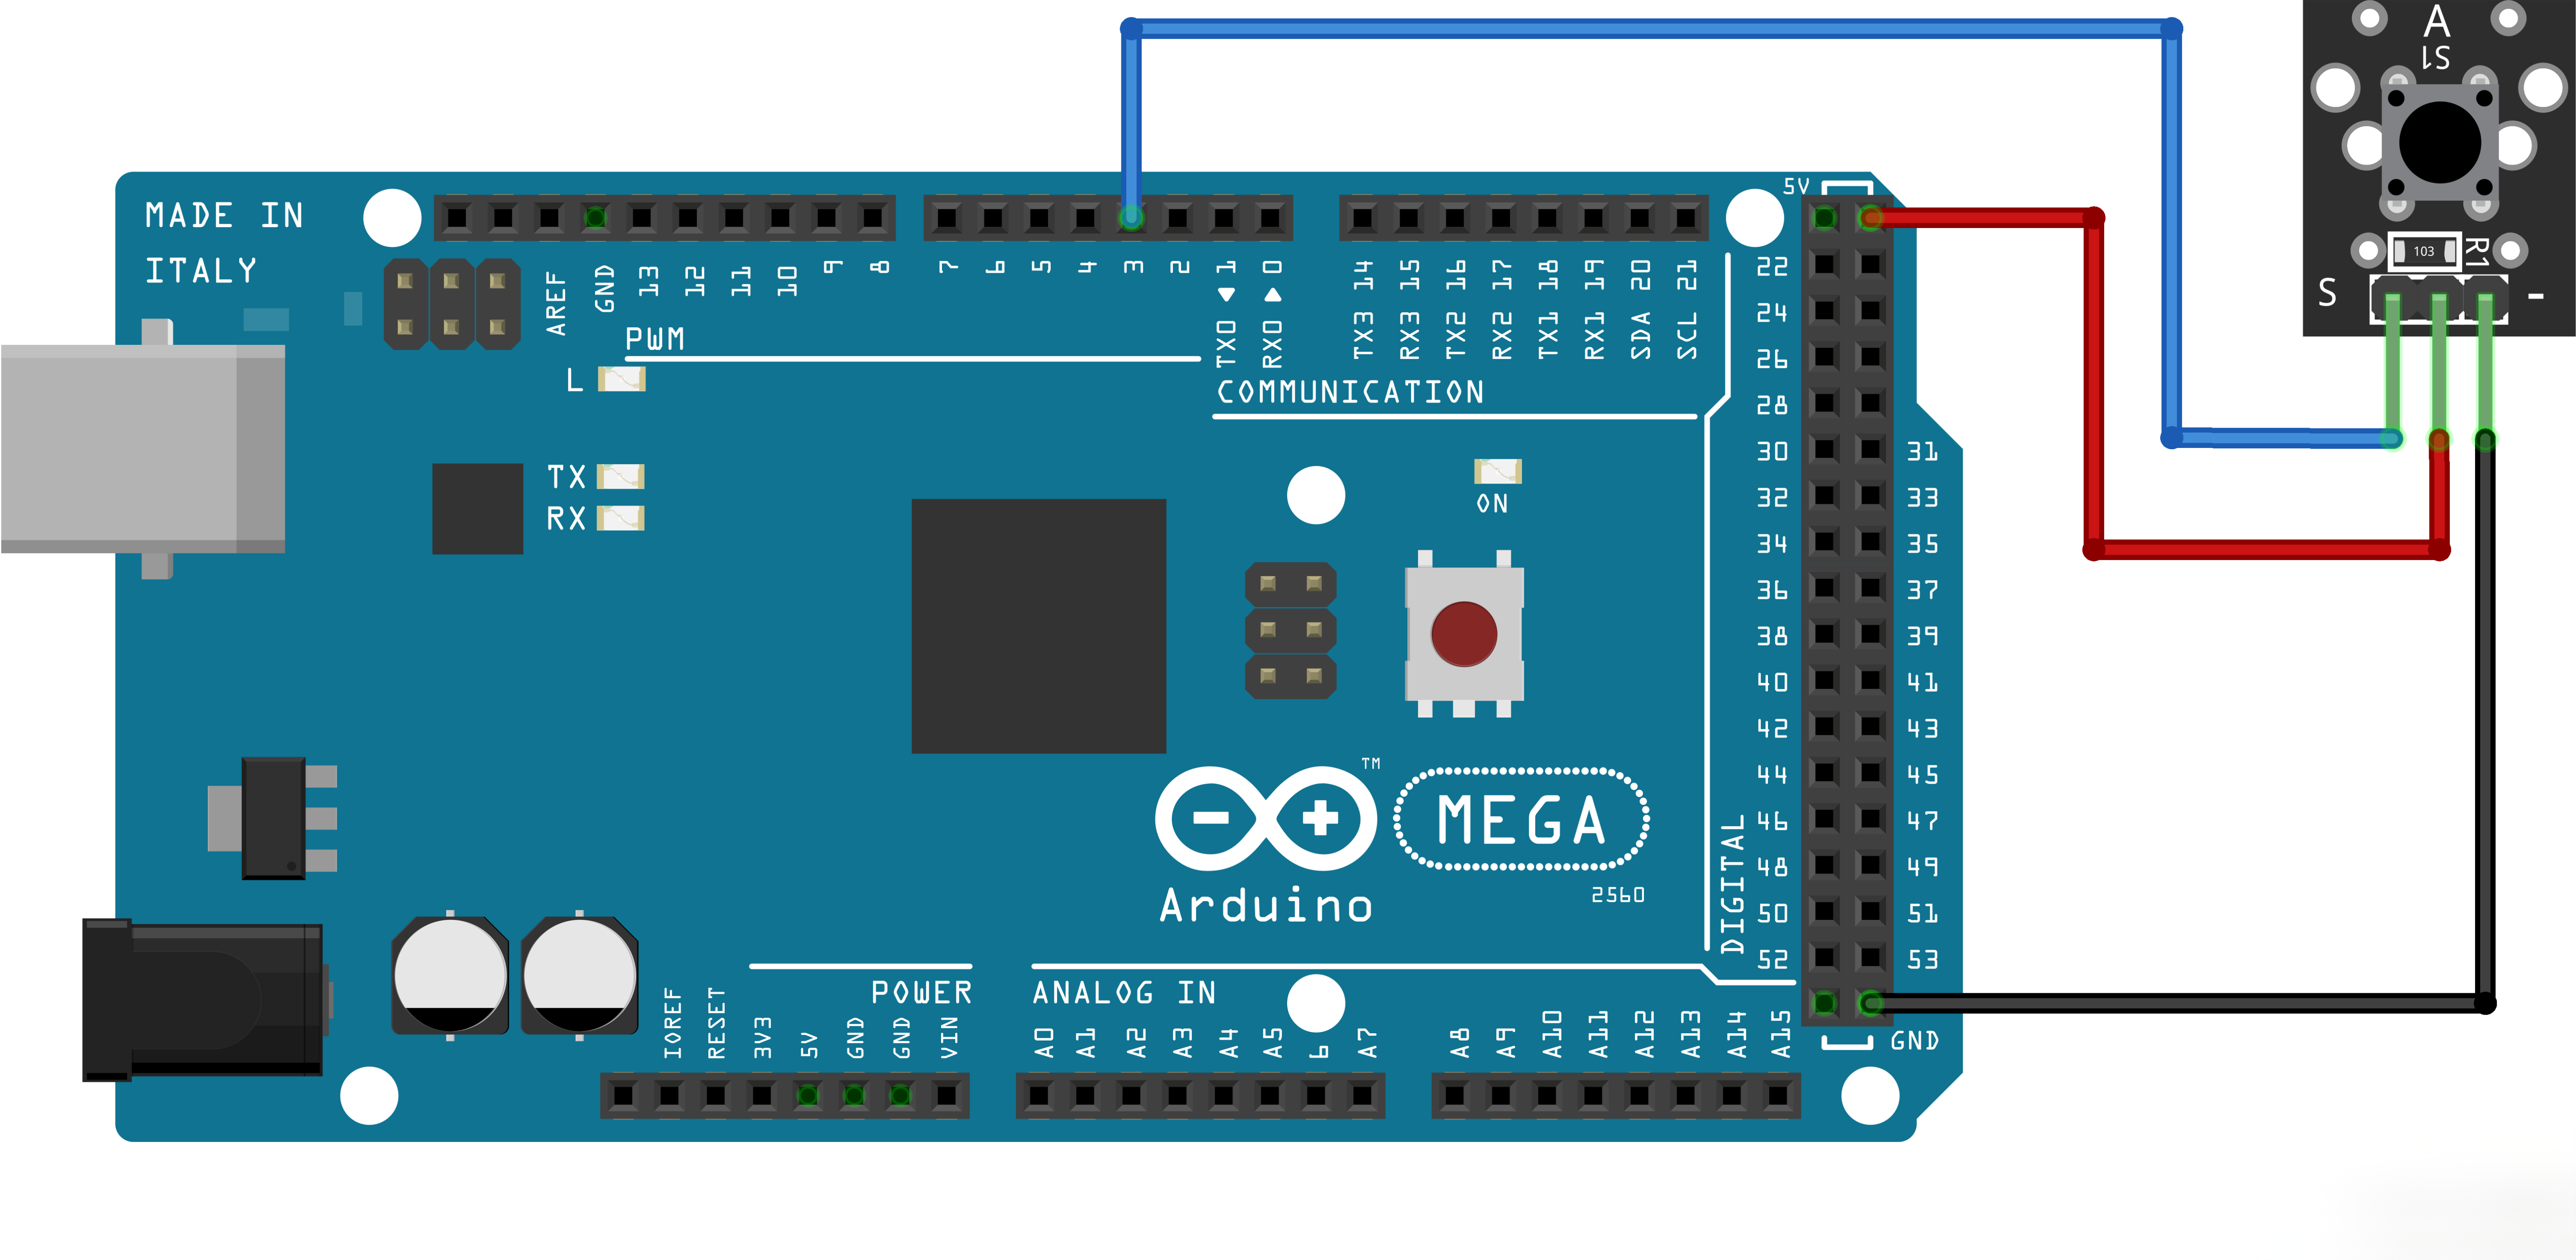
¶ Code
You can click the blue text link to download the program file to your local device, and double-click the file to open it after the download is complete. Please note: Before opening the file, ensure that you have installed the Arduino IDE development environment and completed the installation of relevant components such as the board support package and driver corresponding to the ESP32 development board. If you have any questions about this operation process, you can refer to the "part 1" chapter of the document for detailed guidance.
int Led = 2; //define LED port
int Shock = 18; //define shock port
int val;//define digital variable val
void setup()
{
pinMode(Led, OUTPUT); //define LED as a output port
pinMode(Shock, INPUT); //define shock sensor as a output port
}
void loop()
{ val = digitalRead(Shock); //read the value of the digital interface 3 assigned to val
if (val == HIGH) //when the shock sensor have signal, LED blink
{
digitalWrite(Led, LOW);
}
else
{
digitalWrite(Led, HIGH);
}
}
int Led = 2; //define LED port
int Shock = 18; //define shock port
The corresponding pin is defined here. The default pin of ESP32 is GPIO2, and you can directly use the built-in LED to realize the experimental effect.
pinMode(Led, OUTPUT); //define LED as a output port
pinMode(Shock, INPUT); //define shock sensor as a output port
The pin modes are defined here: the sensor is set to input mode and the LED is set to output mode.
val = digitalRead(Shock);
The sensor status is read via functions. Digital sensors use digitalRead(), while analog sensors adopt analogRead(). A digital sensor only has two states: high level and low level.
if (val == HIGH) //when the shock sensor have signal, LED blink
{
digitalWrite(Led, LOW);
}
else
{
digitalWrite(Led, HIGH);
}
The program judges the sensor's current state: the LED will be turned off when the sensor outputs a high level; otherwise, the LED will be switched on.