¶ Definition of Layer Shifting
Layer shifting occurs when one or more layers suddenly move in the X-axis or Y-axis direction during printing, causing a noticeable offset or "stair-step" appearance in the finished model.
¶ Possible Causes
X-axis is not parallel to the Heated Bed
Belt tension is too high
Faulty X or Y stepper motor
Mainboard failure
Input Shaping calibration has not been performed
Improper slicer settings
¶ Troubleshooting Steps
¶ Check the Gantry
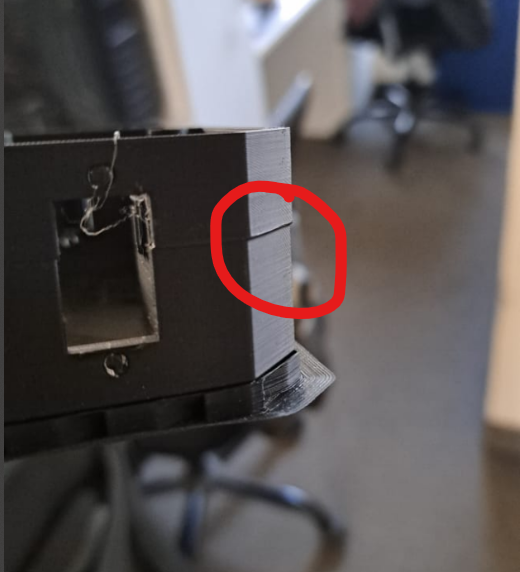
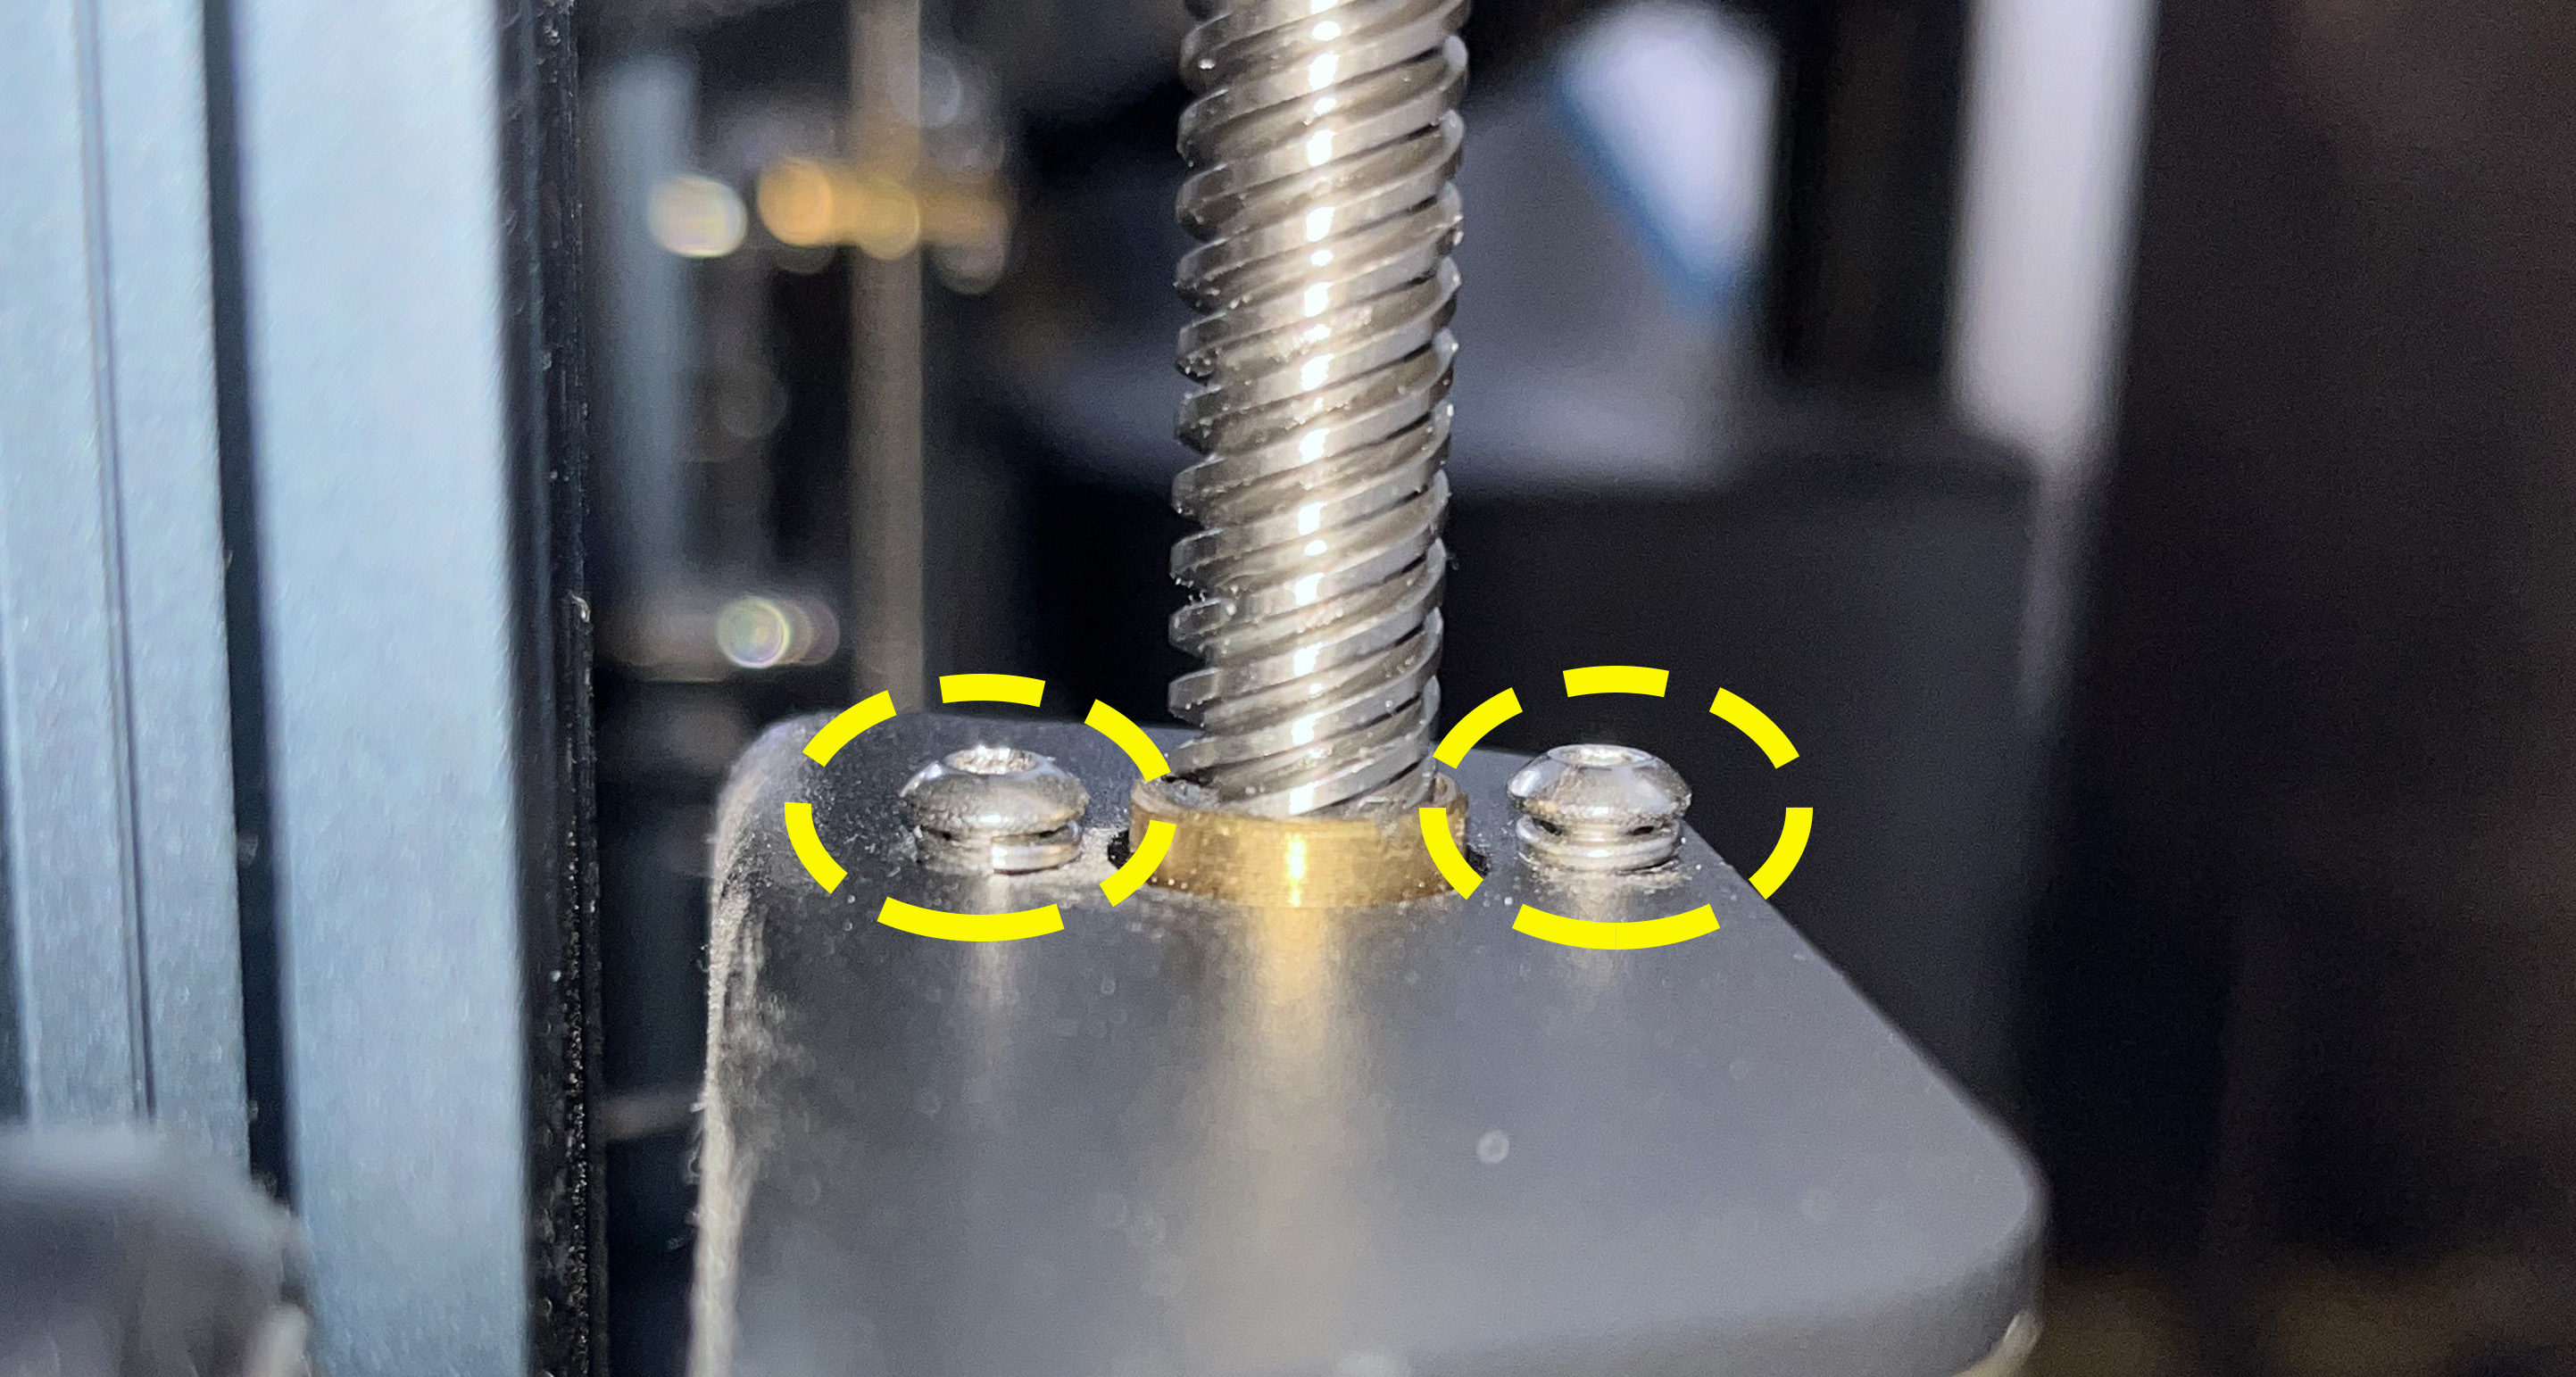
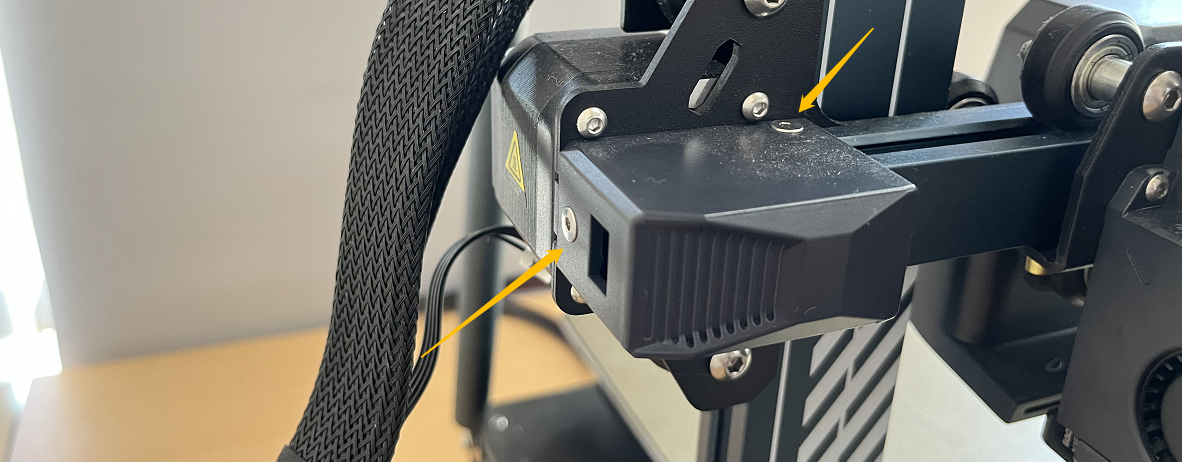
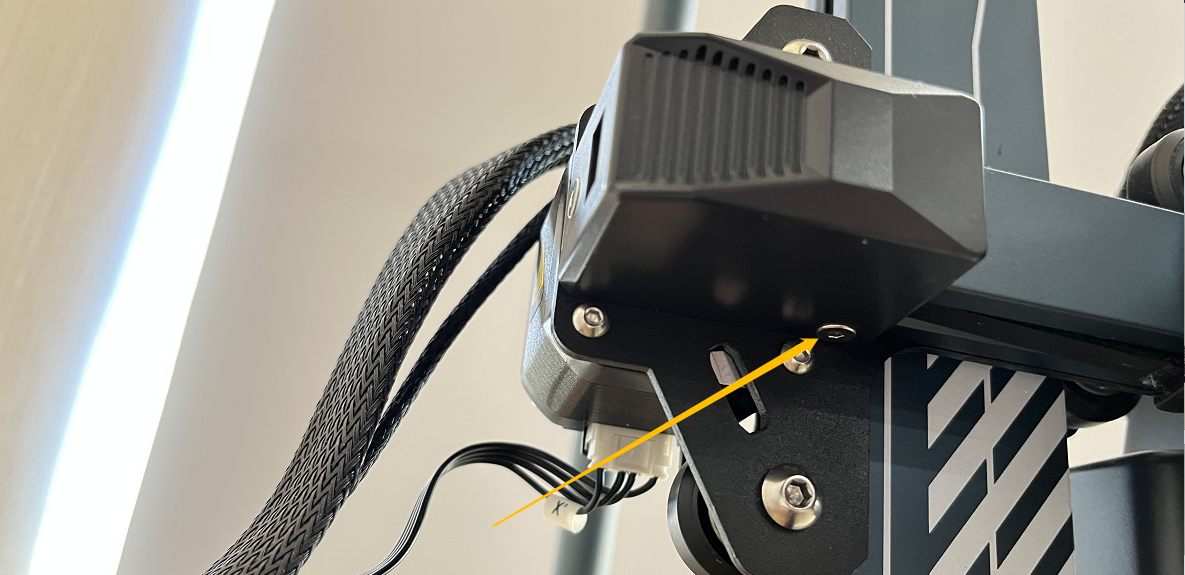
1. Check the Brass Nut Mounting Screws
The mounting screws for both Z-axis Brass Nuts must remain slightly loose.
If these screws are tightened, the Z-axis may bind during upward movement, increasing the likelihood of the Nozzle scraping the model surface and causing layer shifting.
The image below shows the correct condition.
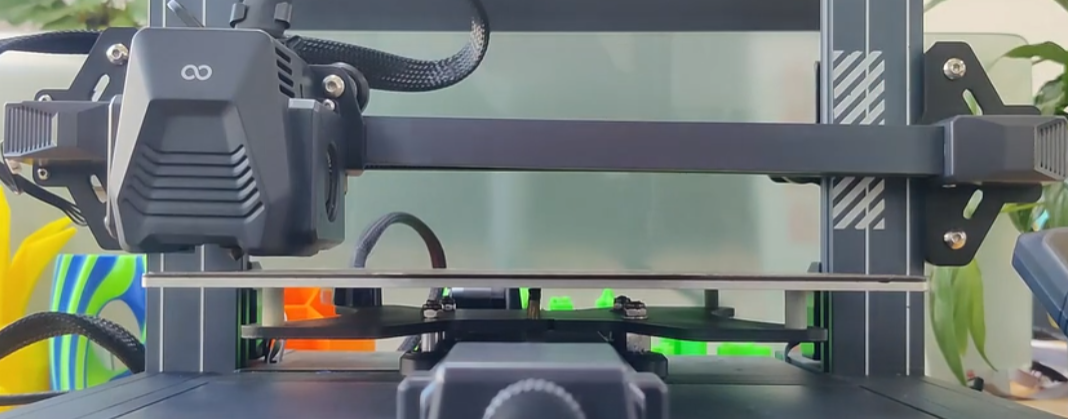
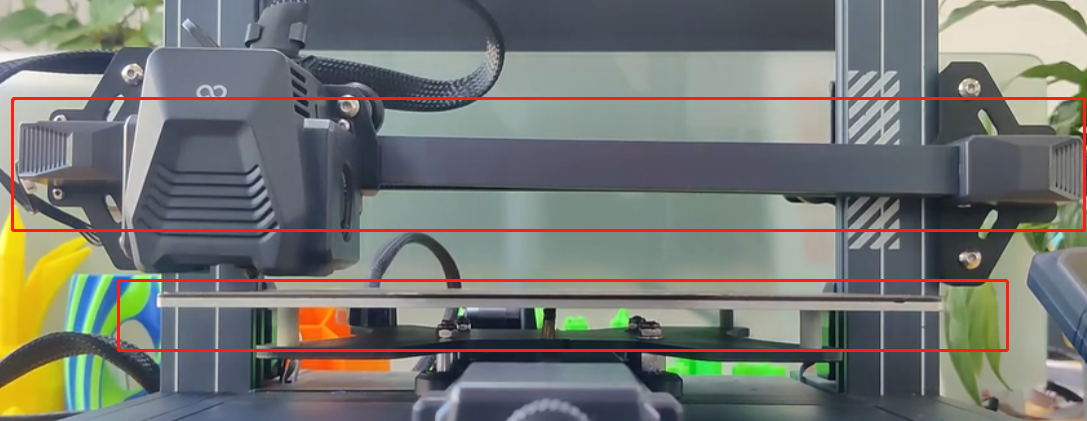
2. Check Whether the Heated Bed and X-axis Are Parallel
a. Verify Alignment
Visually inspect whether the X-axis is parallel to the Heated Bed.
If visual inspection is difficult, use a ruler to measure the distance between each end of the X-axis and the Heated Bed and compare the measurements.
b. Adjust the X-axis
If the X-axis is not parallel to the Heated Bed, adjust it according to the link below.
https://www.youtube.com/watch?v=lbeevQxRwlI
The adjustment procedure is the same for all Neptune series printers.
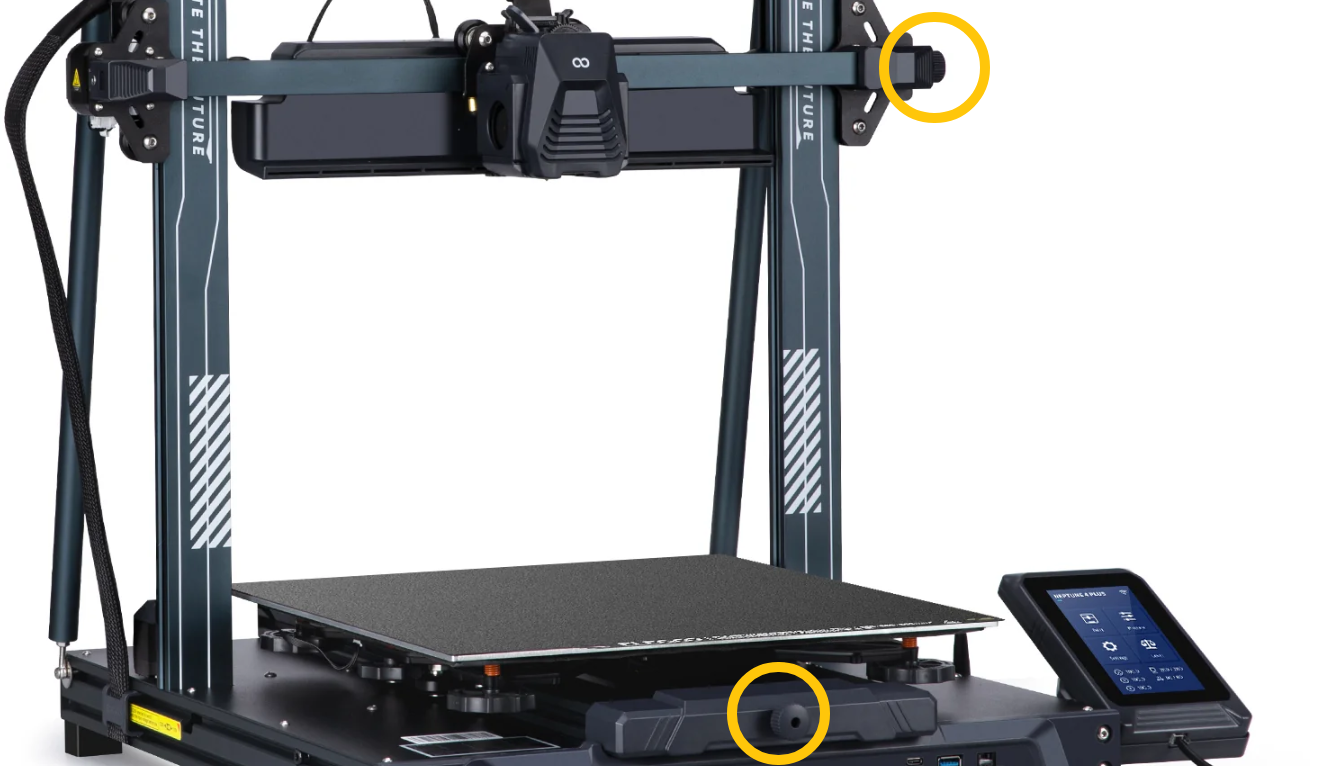
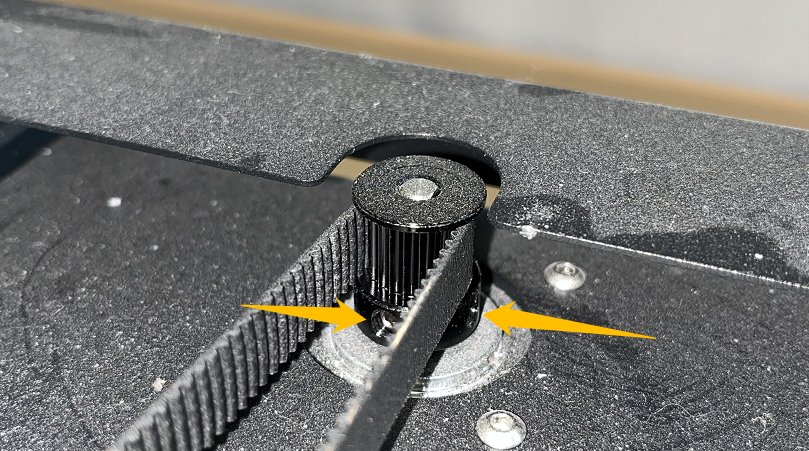
c. Loosen the Belts
The X and Y Belts are located in the positions shown below.
Turn the tensioner knob counterclockwise to reduce Belt tension.
After adjustment, manually move the print head and Heated Bed along the X and Y axes to ensure:
- The Belts are not excessively loose
- The X/Y timing pulleys do not slip
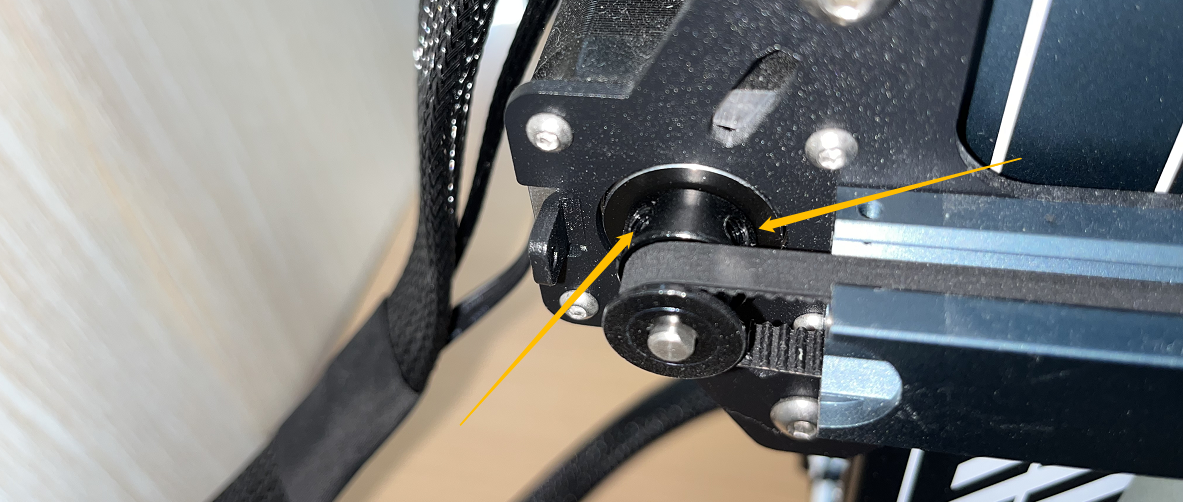
¶ Check the X/Y Timing Pulleys
Loose set screws on the X/Y timing pulleys can cause rough movement and missed steps in the stepper motors.
If any set screws are loose, tighten them using a 2.0 mm hex key.
¶ Check Slicer Settings
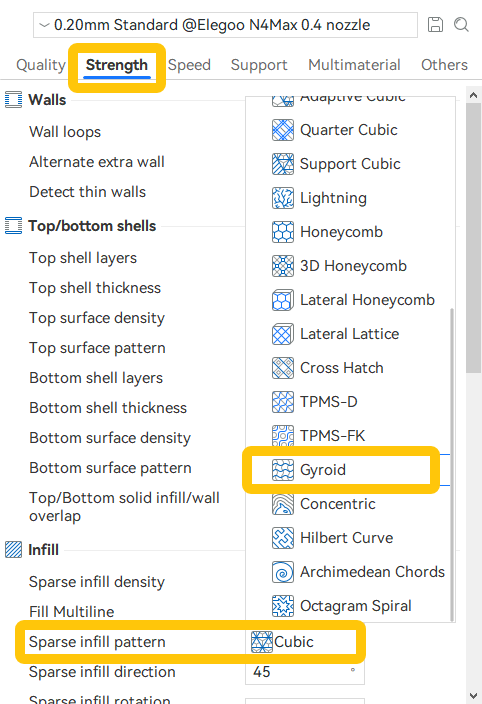
1. Set Infill Pattern to Gyroid
Using a Gyroid infill pattern helps reduce frequent collisions between the Nozzle and printed infill structures.
During infill printing, the Nozzle moves rapidly across the model. When crossing previously cooled infill intersections (especially with patterns such as Grid), the Nozzle may strike slightly raised or hardened extrusion lines.
This sudden resistance can be significantly greater than normal printing friction, applying an abrupt force to the print head (X-axis) or Heated Bed (Y-axis), potentially causing layer shifting.
2. Disable Acceleration Control or Reduce Print Speed
At higher print speeds, the stepper motors must rotate faster and therefore produce less torque.
Even minor resistance caused by friction, inertia, or Nozzle contact with the print can cause the motor to miss steps, resulting in layer shifting.
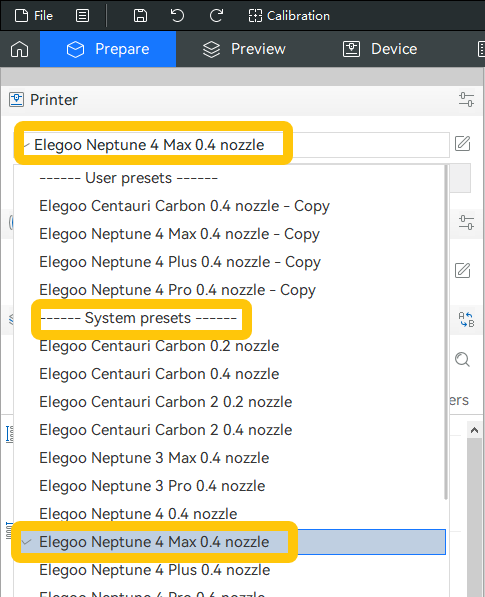
3. Restore Default Slicer Settings
If you are unsure which settings have been modified, it is recommended to restore the default profile in Elegoo Slicer.
Navigate to:
Prepare → Current Printer → System Presets
Select your printer model to switch back to the default profile.
The default profile provides a balanced combination of print speed and print quality and is suitable for most models.
Elegoo Slicer User Guide:
https://www.youtube.com/watch?v=INjgjcJmU54
Elegoo Slicer Download:
https://github.com/ELEGOO-3D/ElegooSlicer/releases
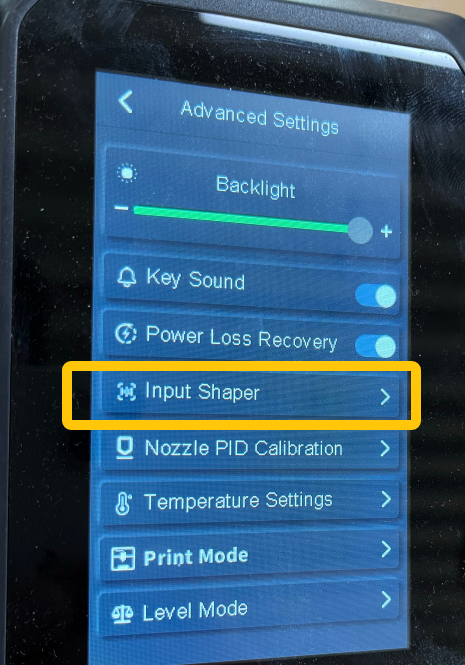
4. Perform Input Shaping Calibration
Neptune 4 series printers operate at relatively high printing speeds.
Input Shaping allows smoother motion at the same speed and acceleration, helping reduce missed steps and vibration transmission.
If Input Shaping has not been performed, or if any mechanical components have been disassembled or adjusted, it is recommended to recalibrate X-axis and Y-axis Input Shaping.
¶ Check the X/Y Motors and Mainboard
If layer shifting still occurs after completing all of the above troubleshooting steps, one of the following components may be faulty:
- X motor
- Y motor
- Motor connection cable
- Mainboard
Swap the X and Y motors and print a test model.
Test Results
- If the layer shift remains on the same axis:
The Mainboard is likely faulty and should be replaced. - The Motherboard Replacement
- If the layer shift moves to the other axis:
The stepper motor is likely faulty and should be replaced.