¶ Required Tools
2.0 mm Hex Key
Phillips Screwdriver
Flathead Screwdriver
Tweezers
¶ Disassembly
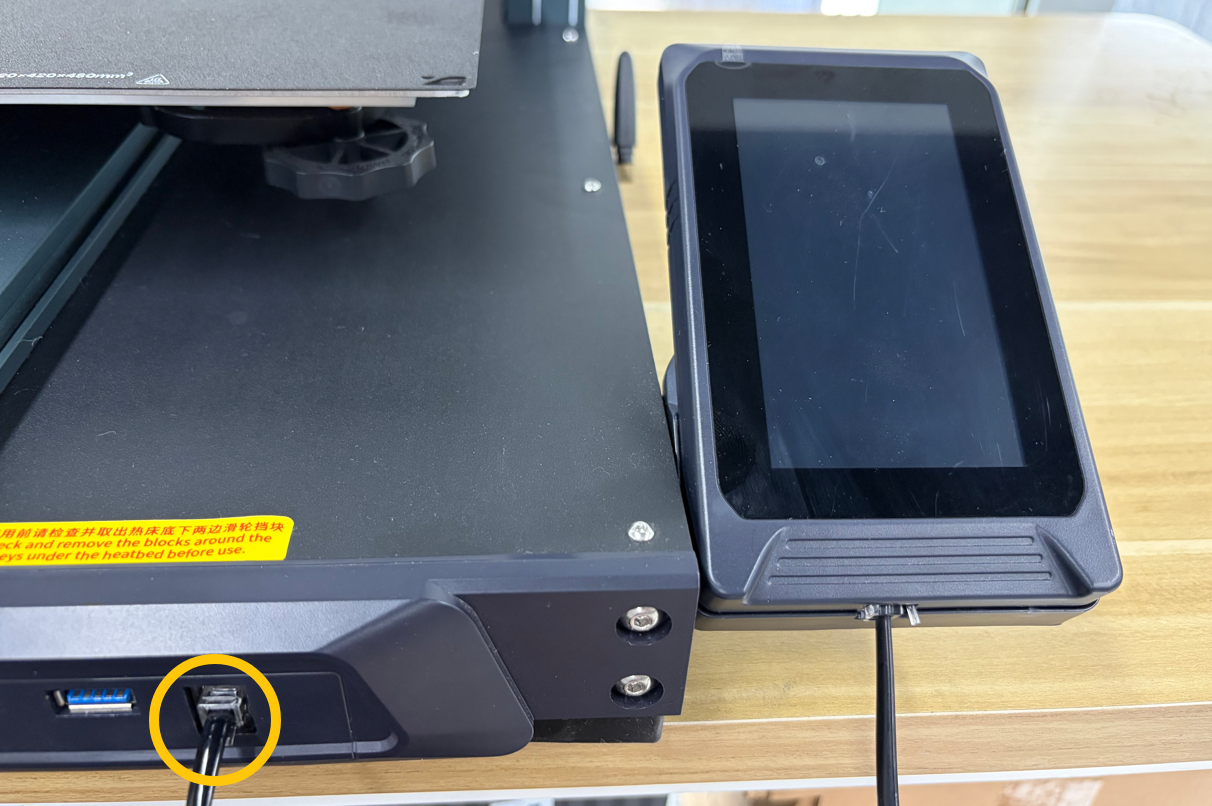
¶ Remove the touch screen
1. Turn off the printer and unplug the power supply cable.
2. Disconnect the touch screen cable and remove the touch screen.
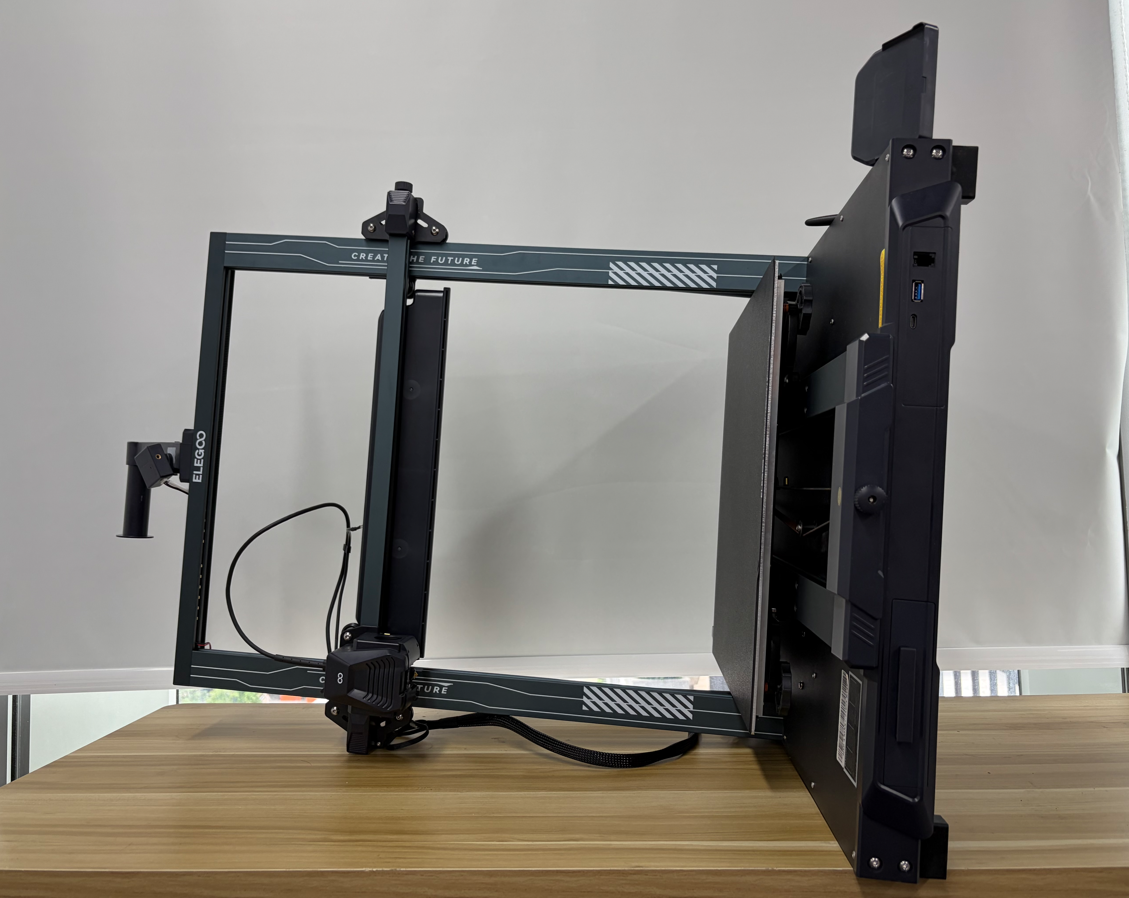
¶ Place the printer on its side
Carefully place the printer on its side with the touch screen side facing upward.
¶ Remove the mainboard cover plate
1. Use a 2.0 mm hex key to remove the five screws securing the Mainboard cover.
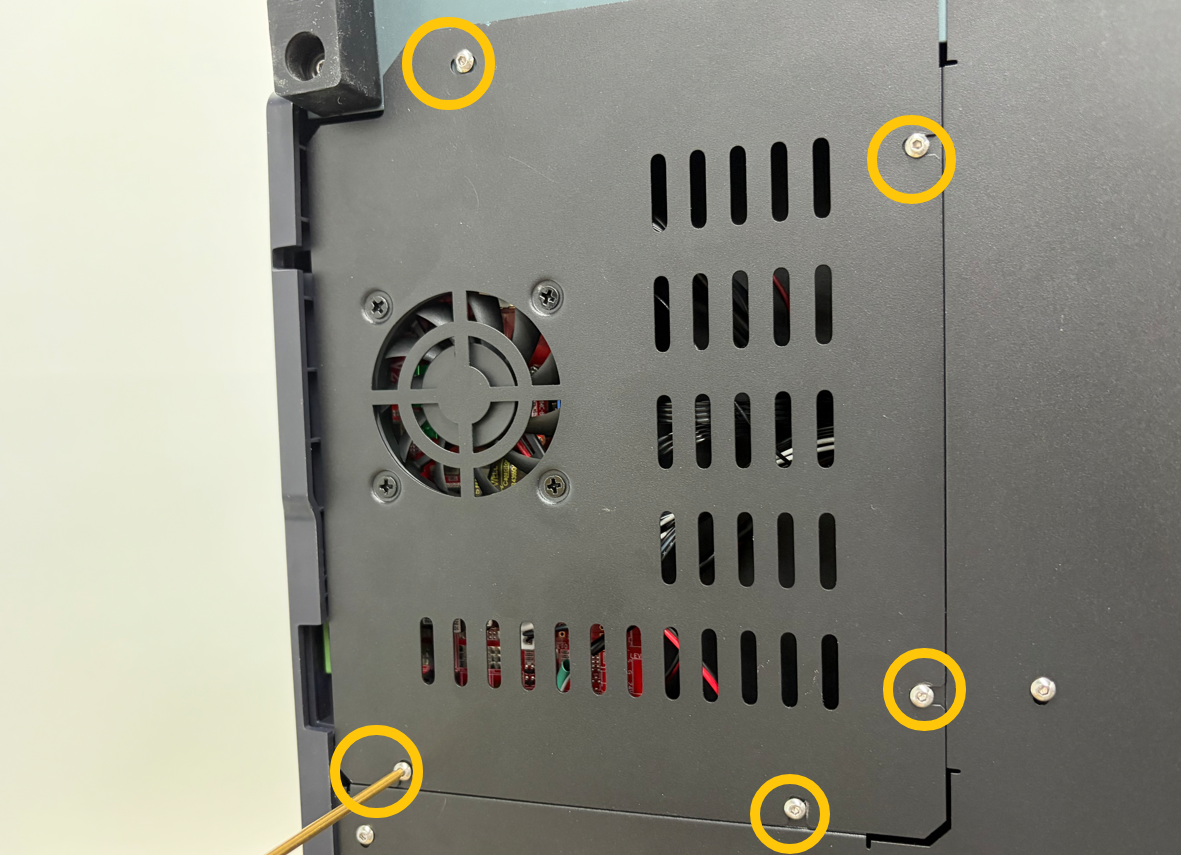
2. Slowly open the Mainboard cover, disconnect the Mainboard Cooling Fan connector, and remove the cover.
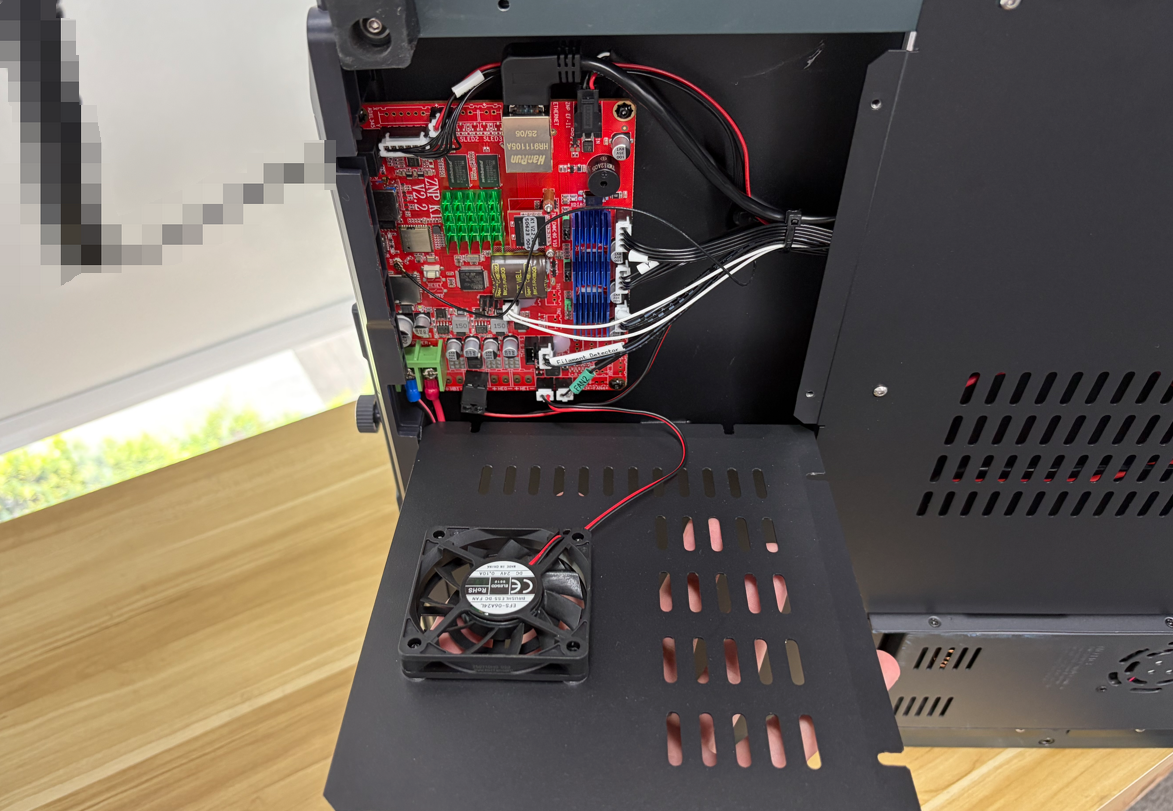
¶ Remove the mainboard
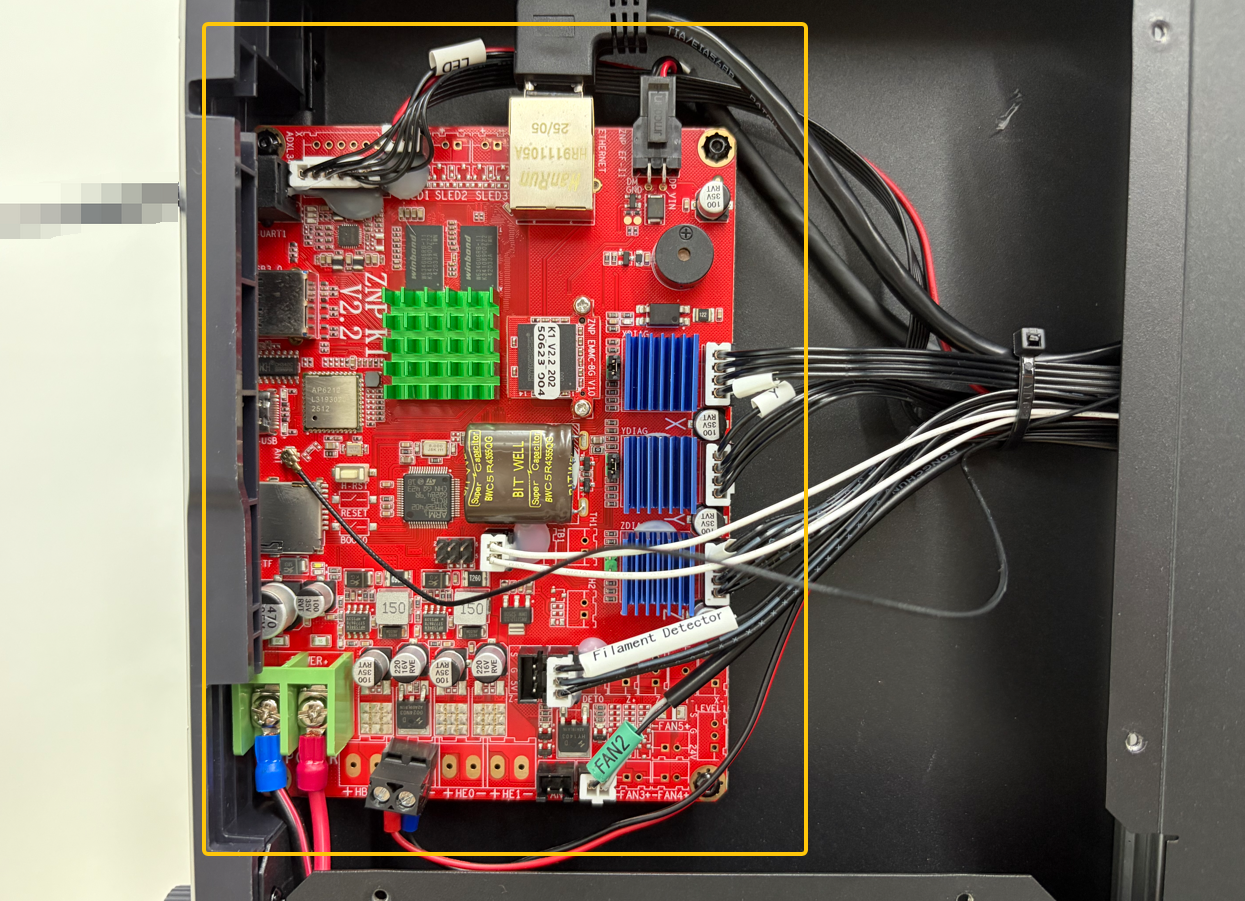
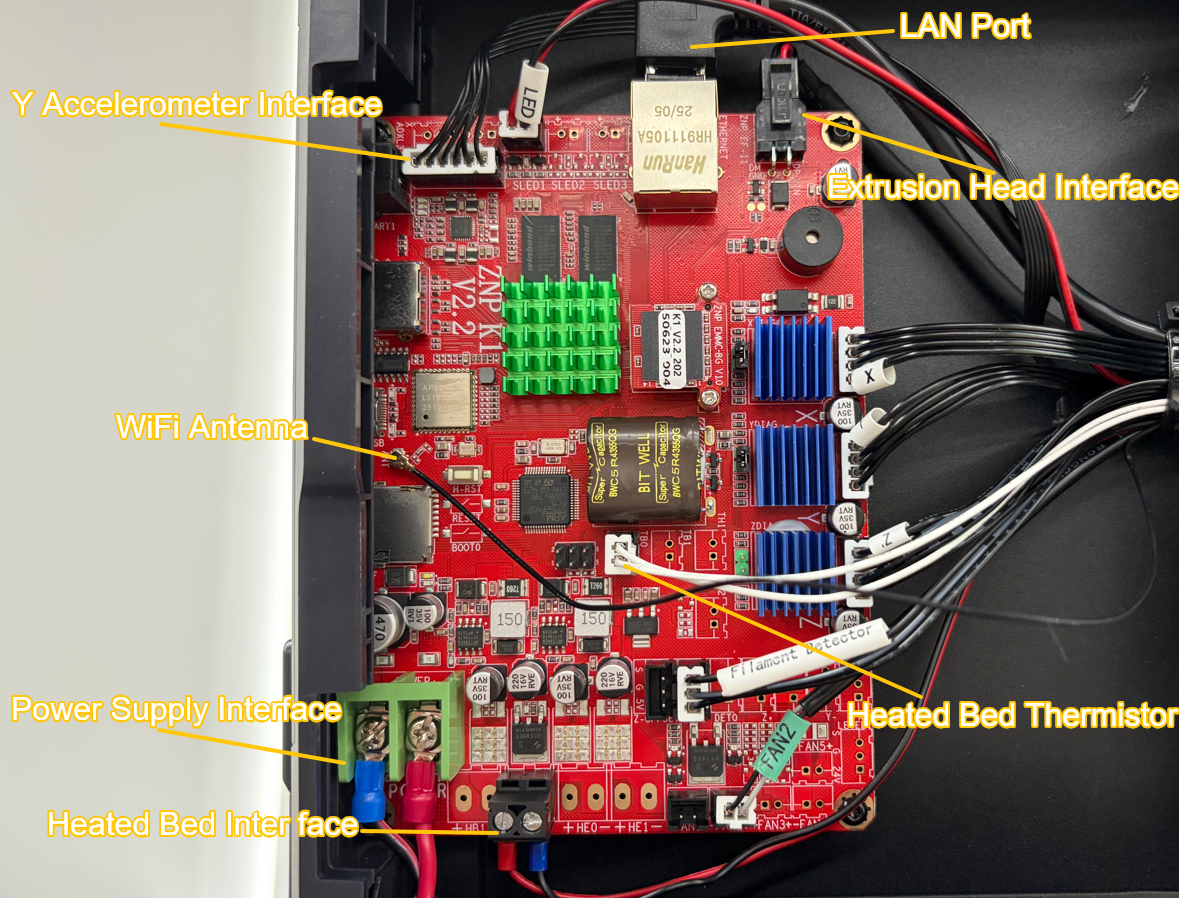
1. Disconnect all connectors from the Mainboard.
Note: Some connectors must be loosened with a flathead or Phillips screwdriver before removal.
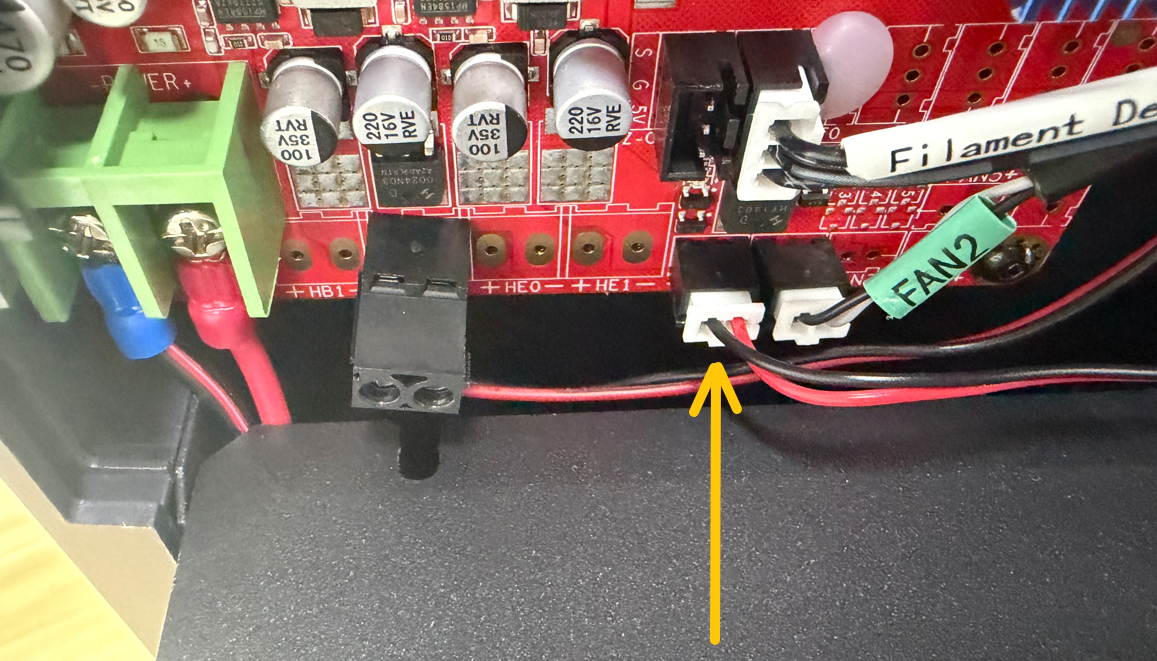
2. The hot glue applied to the Mainboard connectors (four locations in total) is removable. It is recommended to use cutting pliers to remove it. If the hot glue is difficult to remove, apply a small amount of alcohol to the glue and wait 2–3 minutes before removing it.

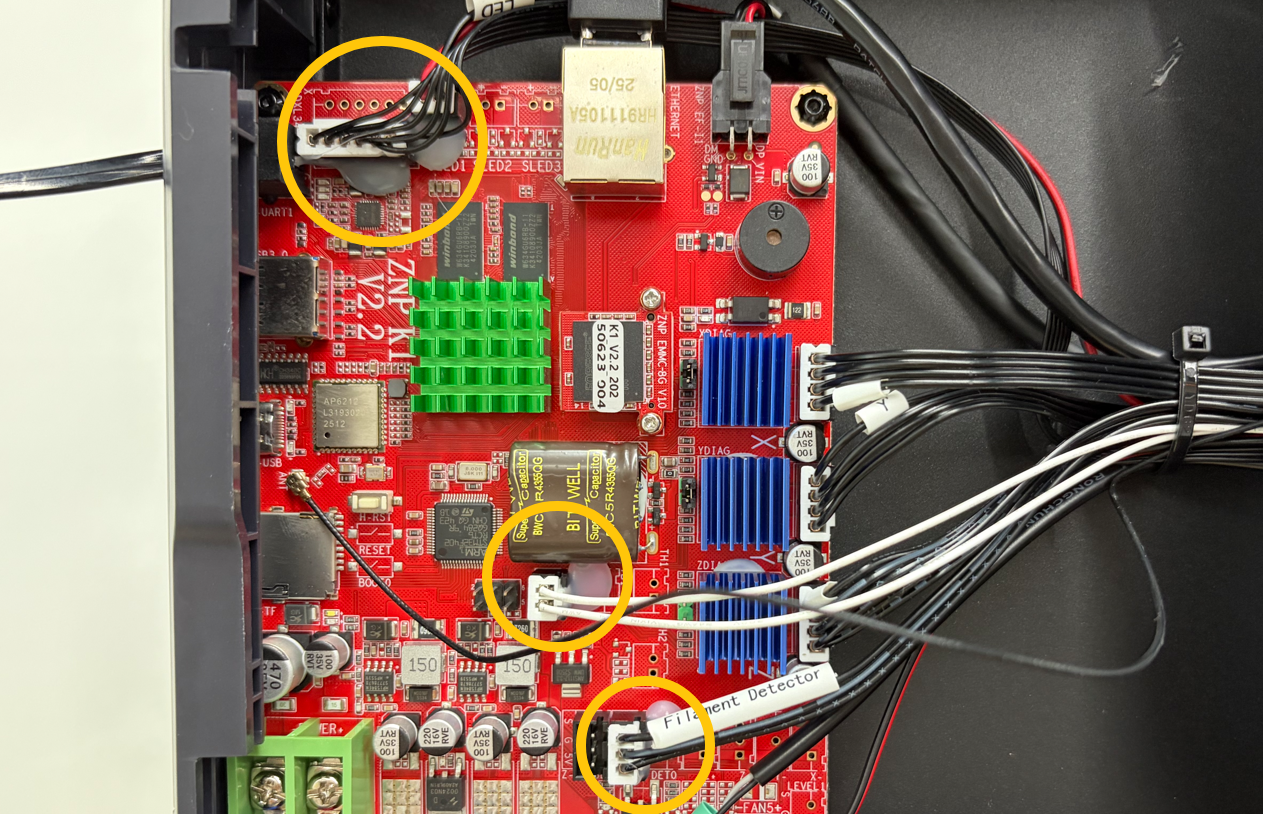
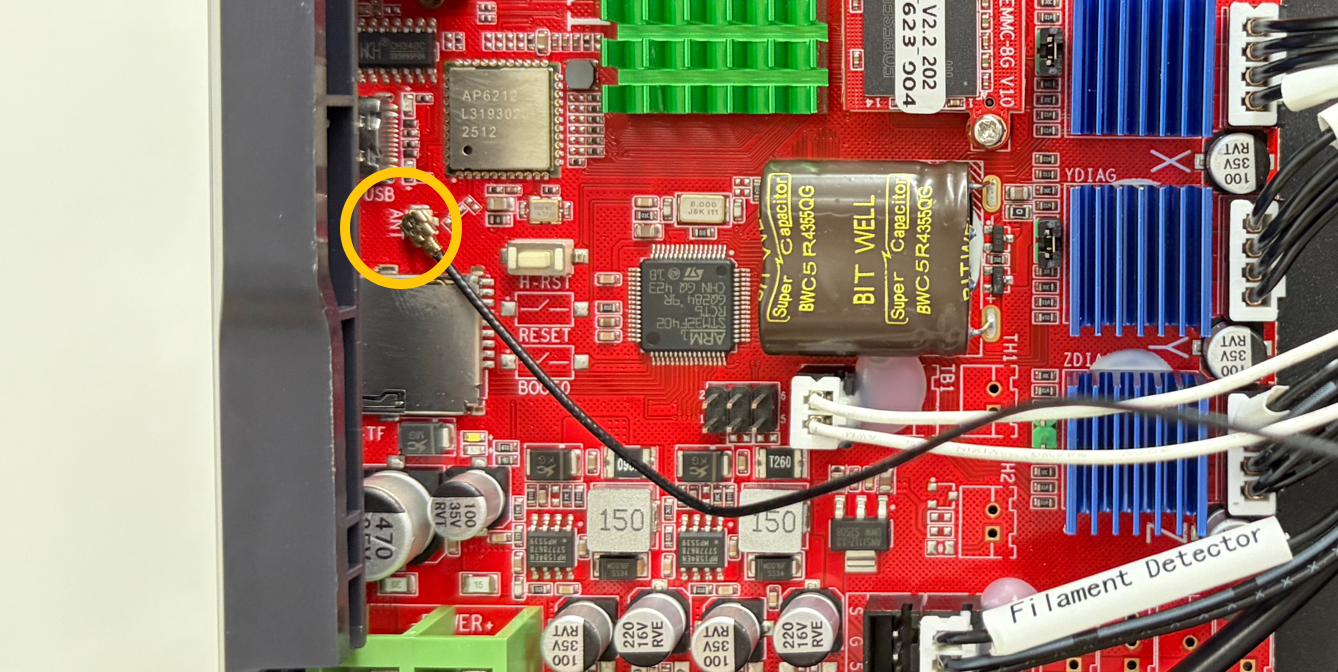
Note: It is recommended to use tweezers to disconnect the Wi-Fi antenna connector.
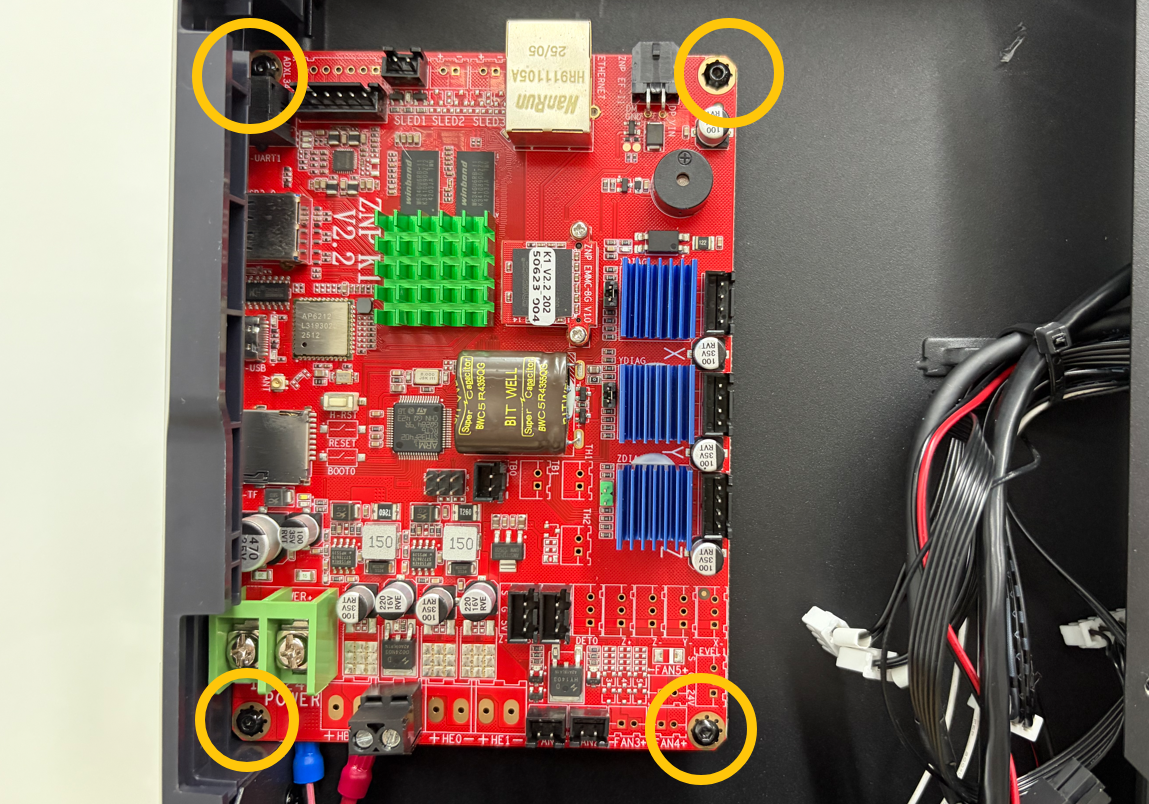
3. Use a 2.0 mm hex key to remove the four screws securing the Mainboard, then remove the old Mainboard.
¶ Installation
¶ Install the mainboard
1. Place the new Mainboard in the correct position and tighten the four mounting screws.
2. Reconnect all connectors to the corresponding Mainboard ports according to the labels on the connectors.
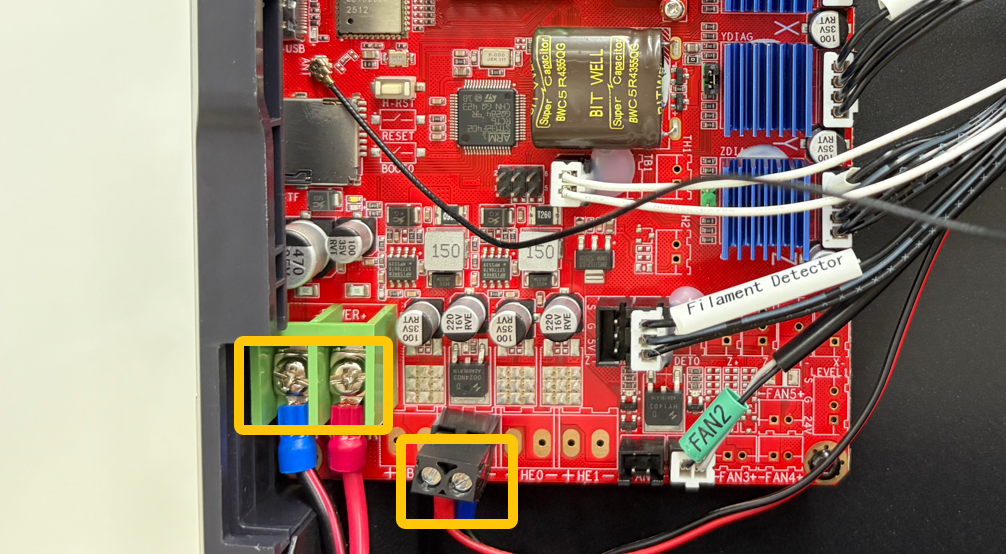
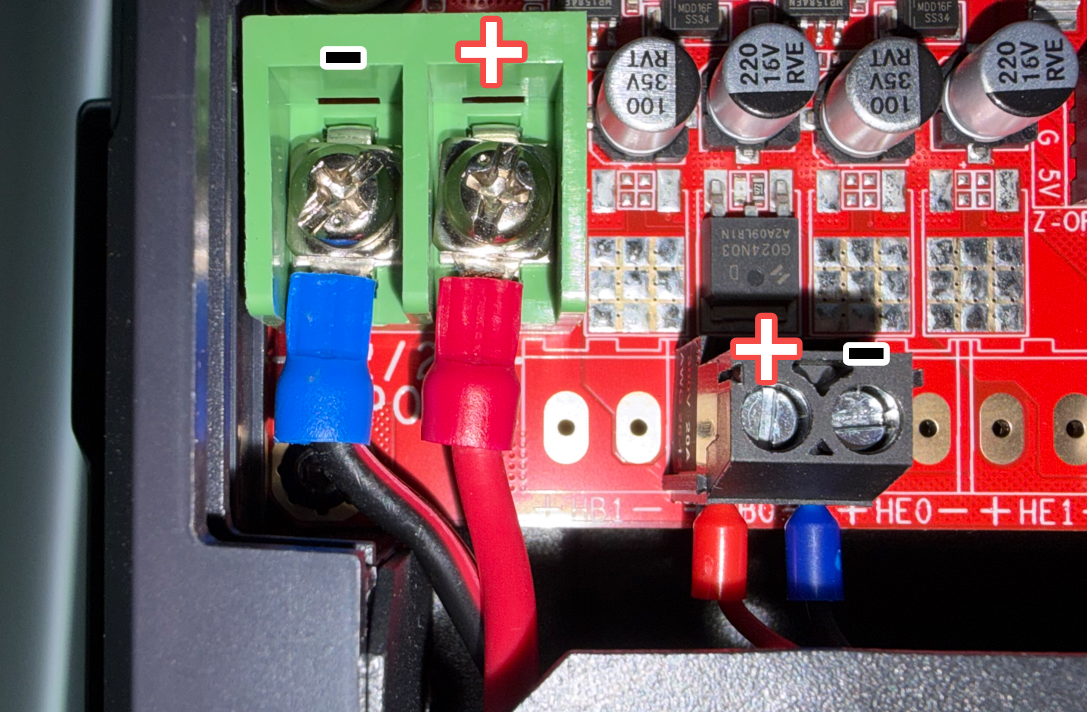
Important: Pay close attention to the polarity of the Power Supply and Heated Bed connectors. Incorrect installation may damage the Mainboard.
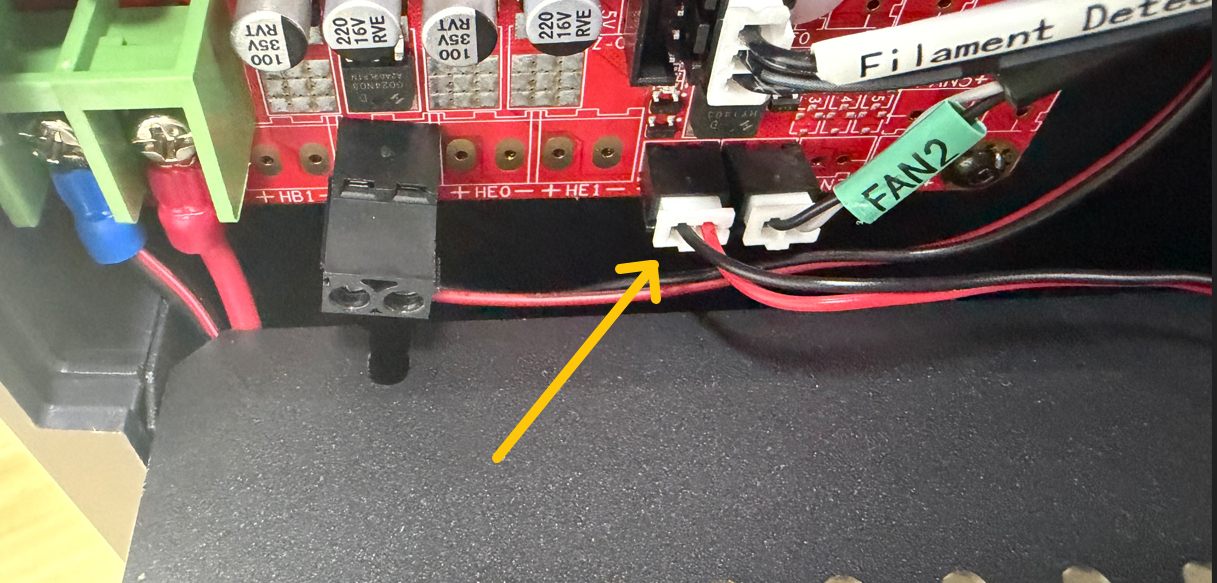
3. Connect the Mainboard Cooling Fan connector to the FAN1 port.
¶ Install the mainboard cover plate
Reinstall the Mainboard cover and tighten the cover screws.
Note:
The upper-left screw is an M3 × 16 screw.
The other four screws are M3 × 4 screws.
¶ Place the printer upright
Return the printer to its upright position.
¶ Install the touch screen
Reconnect the touch screen cable.
¶ Functional Verification
- Connect the power supply cable and turn on the printer.
- Verify that the touch screen powers on normally.
- Perform the following steps:
- Auto Leveling Calibration
- Input Shaping Calibration