¶ Software Interface Overview
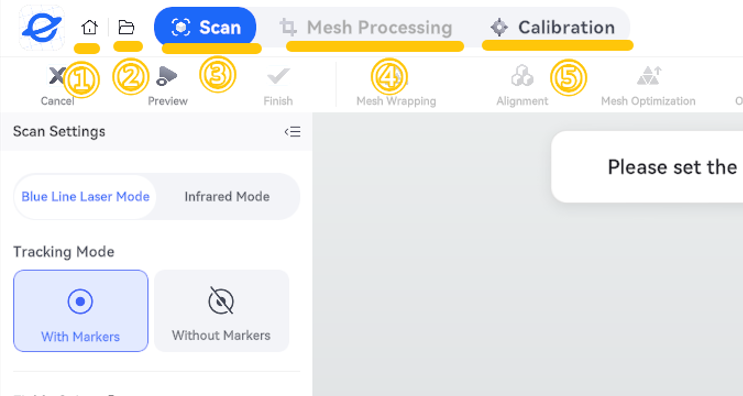
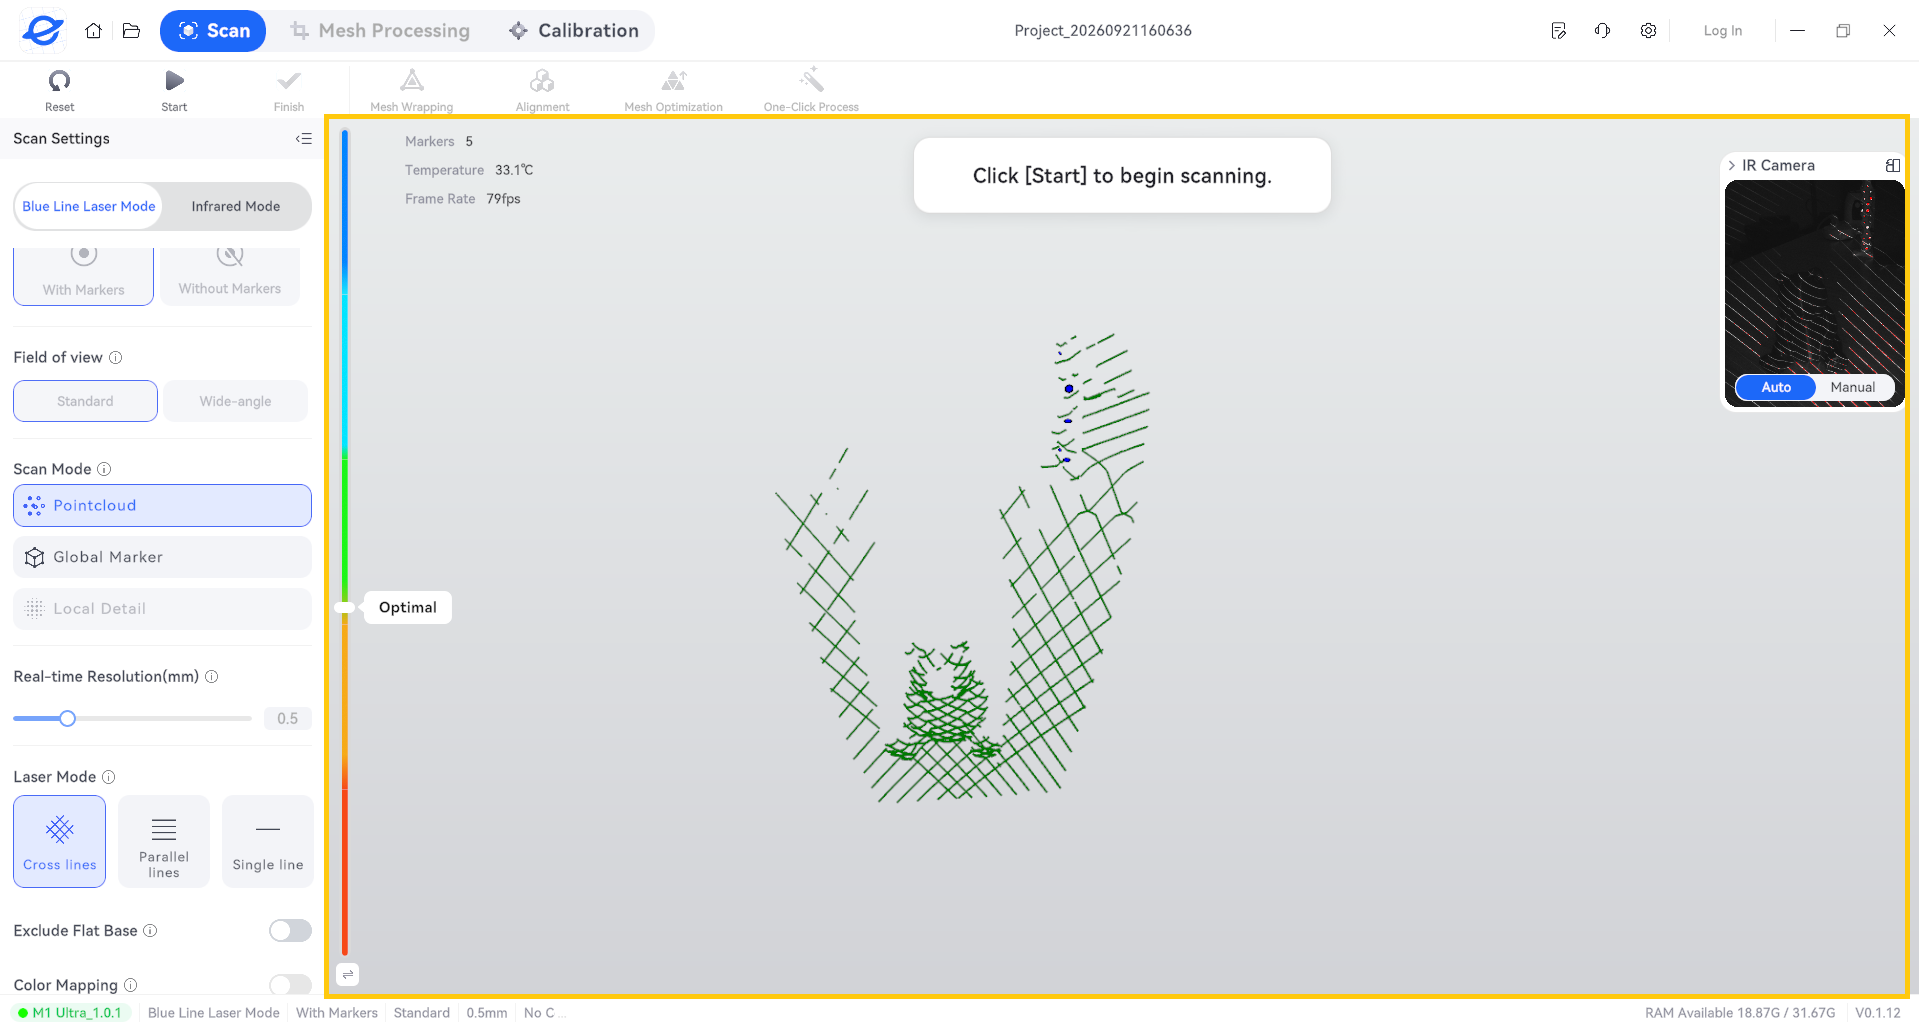
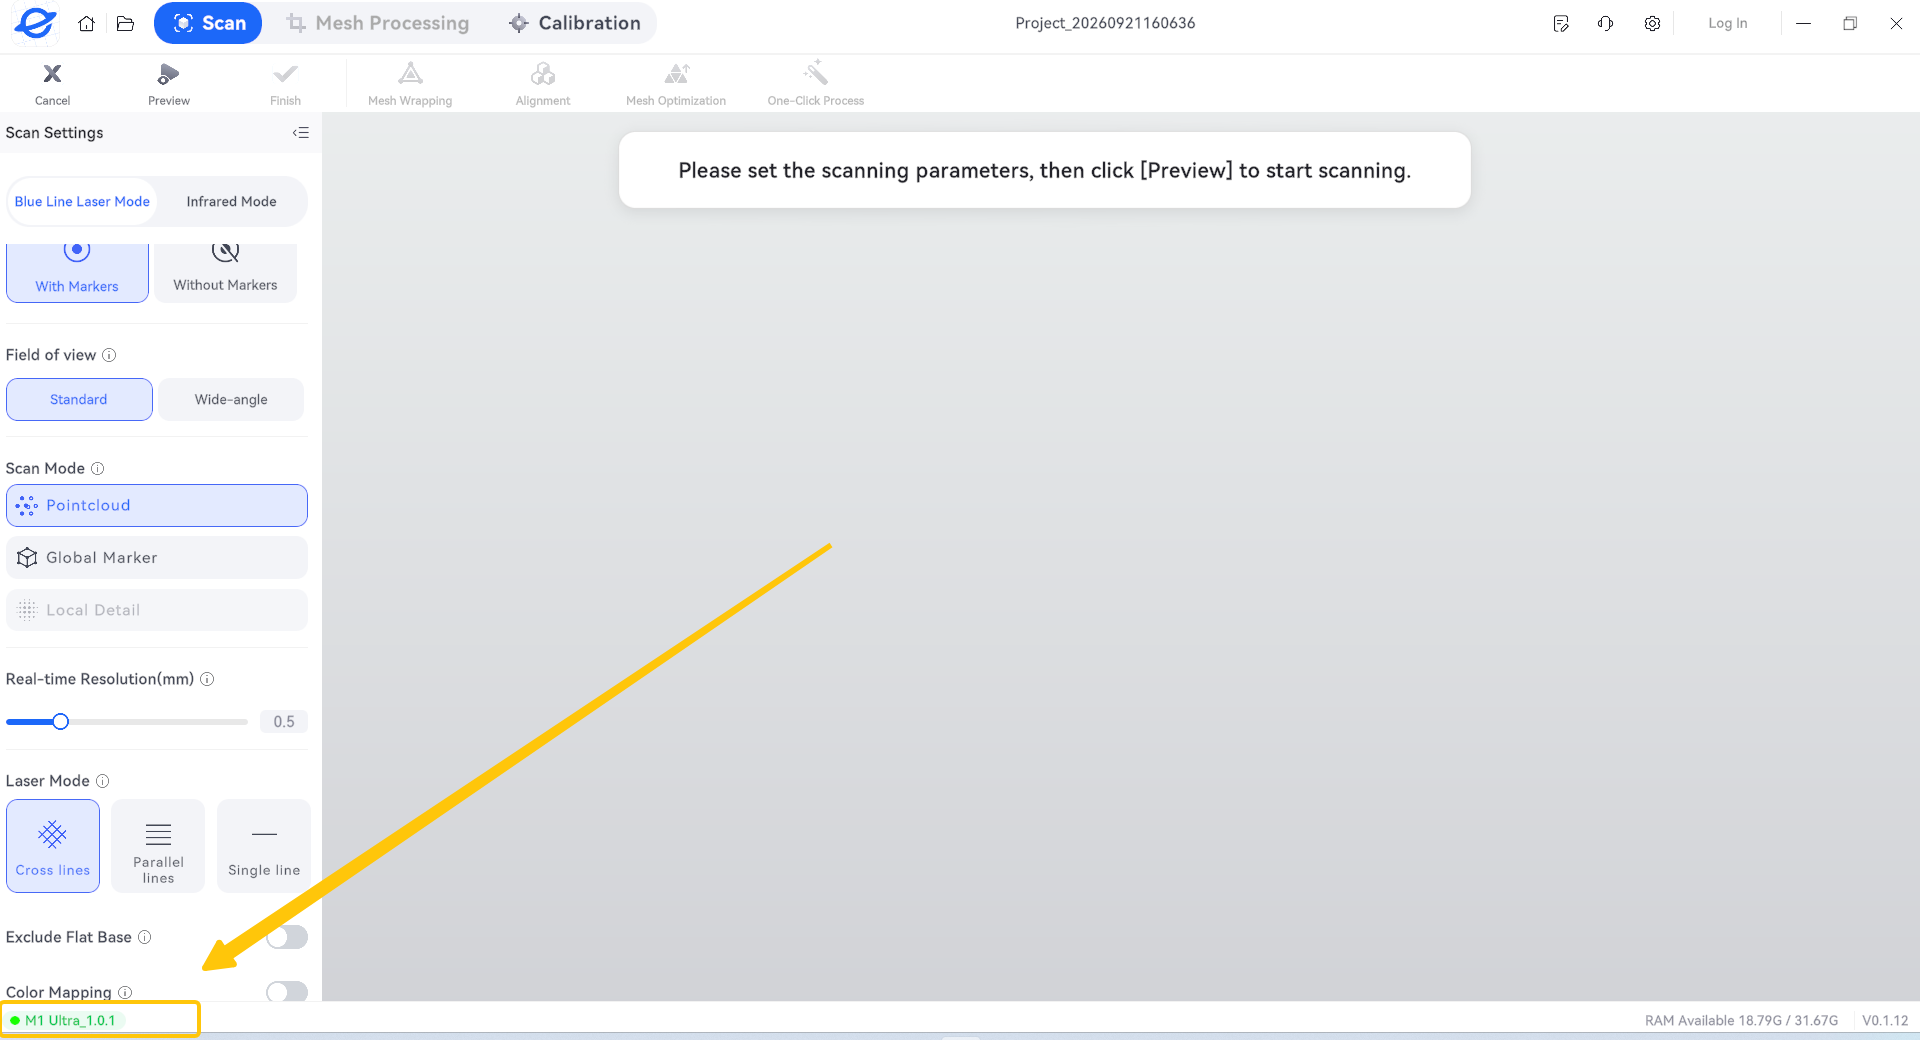
After entering a scan project, the software interface mainly consists of the top navigation bar, operation toolbar, Scan Settings panel, model display area, and bottom status bar.
¶ 1. Top Navigation Bar
| No. | Function | Description |
|---|---|---|
| ① | Home icon | Returns to the home page or starts the new project workflow. |
| ② | Folder icon | Opens the project file list. |
| ③ | Scan | Opens the scanning workspace. |
| ④ | Mesh Processing | Opens the mesh processing module. |
| ⑤ | Calibration | Opens the device calibration module. |
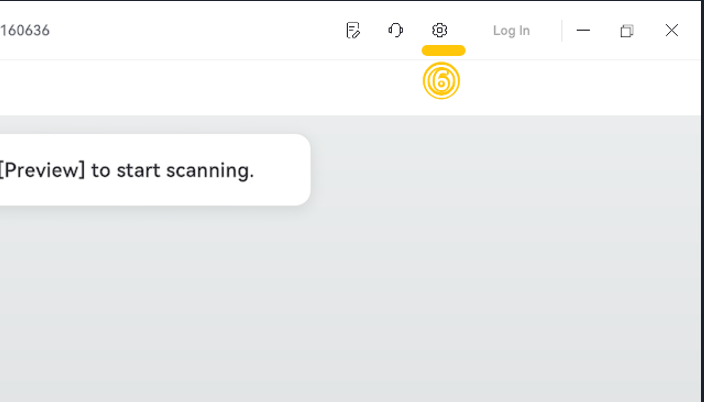
| ⑥ | Settings icon | Opens the settings page. |
¶ 2. Operation Toolbar
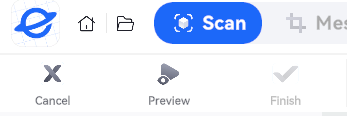
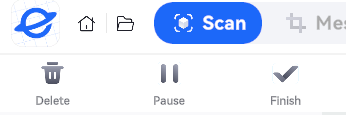
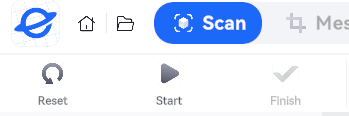
The operation toolbar is located at the top of the interface and displays the functions available at the current stage of operation.
Note: The available buttons may vary depending on the current operation stage. A grayed-out button indicates that the function is not available at the current stage.
| Button | Description |
|---|---|
| Cancel / Delete / Reset | Cancels the current operation / Deletes the current scan / Resets the current scan stage. |
| Preview / Start | Enters preview mode / Starts scanning. |
| Finish | Finishes scanning. |
¶ 3. Scan Settings Panel
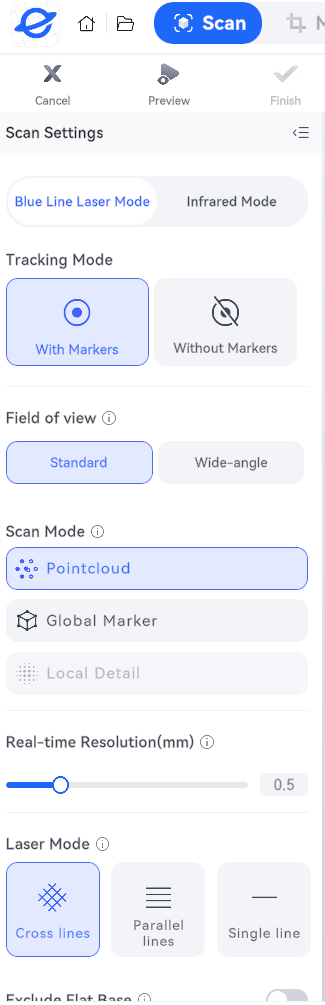
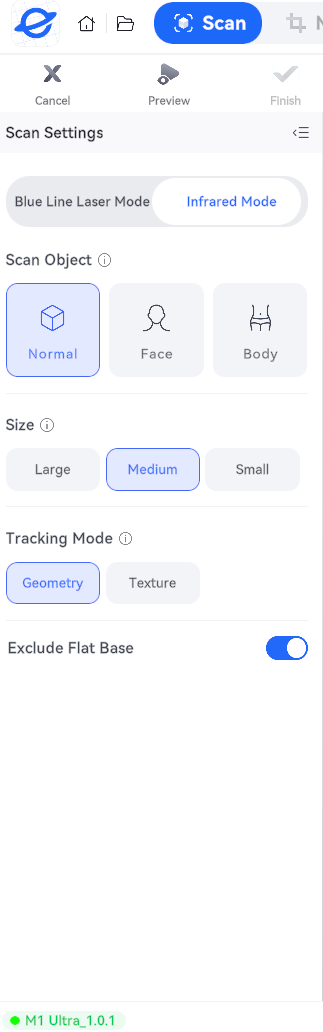
The Scan Settings panel is located on the left side of the interface. It allows you to select a scan mode and adjust the corresponding parameters. The available settings vary depending on the selected scan mode.
¶ 4. Model Display Area
The large area in the center of the interface displays the scan preview and model data. Configure the scanning parameters first, then click Preview to start the scan preview.
Before the scan preview starts, the software displays operation prompts, such as:
Please set the scanning parameters, then click Preview to start scanning.
¶ 5. Bottom Status Bar
The bottom status bar displays information such as device connection status, current scan configuration, available memory, and software version. Before scanning, make sure the scanner is properly connected.
¶ Scanning Parameter Settings
¶ 1. Select Scan Mode
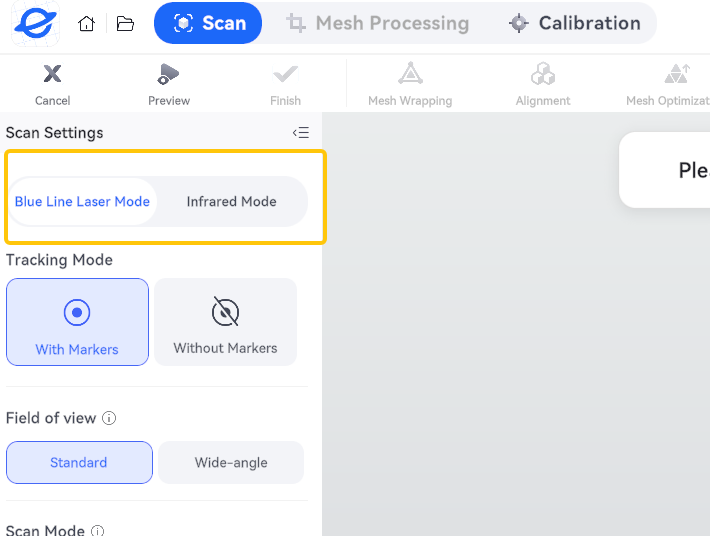
In the Scan Settings panel on the left, you can choose between the following two scan modes.
| Scan Mode | Description |
|---|---|
| Blue Line Laser Mode | Suitable for scanning tasks that require capturing detailed object geometry. |
| Infrared Mode | Allows you to select a scanning configuration for normal objects, faces, or bodies. |
For information on when to use each scan mode, see How to Choose a Scan Mode.
¶ 2. Blue Line Laser Mode
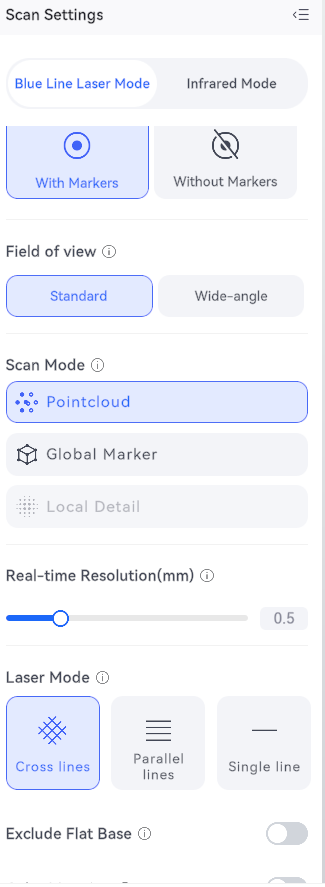
After selecting Blue Line Laser Mode, you can configure the following parameters.
| Setting | Options and Description |
|---|---|
| Tracking Mode | With Markers or Without Markers. |
| Field of View | Standard or Wide-angle. Available in the With Markers mode demonstrated in the video. |
| Scan Mode | Options include Pointcloud and Global Marker. Available options vary depending on the current settings. |
| Real-time Resolution | Adjusts the real-time scanning resolution. |
| Laser Mode | Cross lines or Parallel lines. Some configurations also support Single line. |
| Exclude Flat Base | Enables or disables flat base exclusion. |
¶ Field of View Recommendations
- Standard: Suitable for capturing finer scanning details.
- Wide-angle: Covers a larger scanning area and is suitable for larger objects or scenes.
¶ Global Marker Function
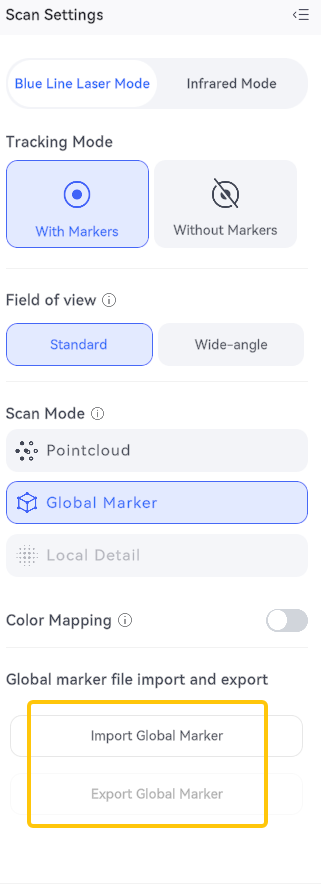
When Global Marker is selected, the interface also displays Color Mapping and the options to import or export global marker files.
Import Global Marker allows you to select an existing global marker file.
¶ 3. Infrared Mode
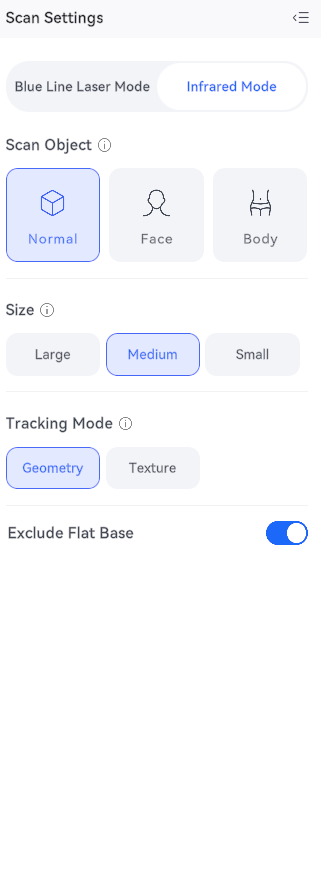
After selecting Infrared Mode, configure the settings based on the object being scanned and your requirements.
| Setting | Options and Description |
|---|---|
| Scan Object | Normal, Face, or Body. |
| Size | Depending on the selected scan object, options may include Large, Medium, and Small. |
| Tracking Mode | Geometry or Texture. |
| Exclude Flat Base | Enables or disables flat base exclusion. |
The available parameters may vary depending on the scan object. Refer to the options displayed in the current interface.
¶ Basic Operations
¶ Step 1. Check the Device Connection
After entering a scan project, check the device status in the lower-left corner of the interface. Make sure the software has detected the scanner and that the device is properly connected.
¶ Step 2. Select Scan Mode
Select Blue Line Laser Mode or Infrared Mode according to the object you want to scan. Then select the corresponding parameters in the left-hand settings panel.
¶ Step 3. Enter Scan Preview
After configuring the parameters, click Preview on the top toolbar. The software enters preview mode, and the toolbar displays the Start button.
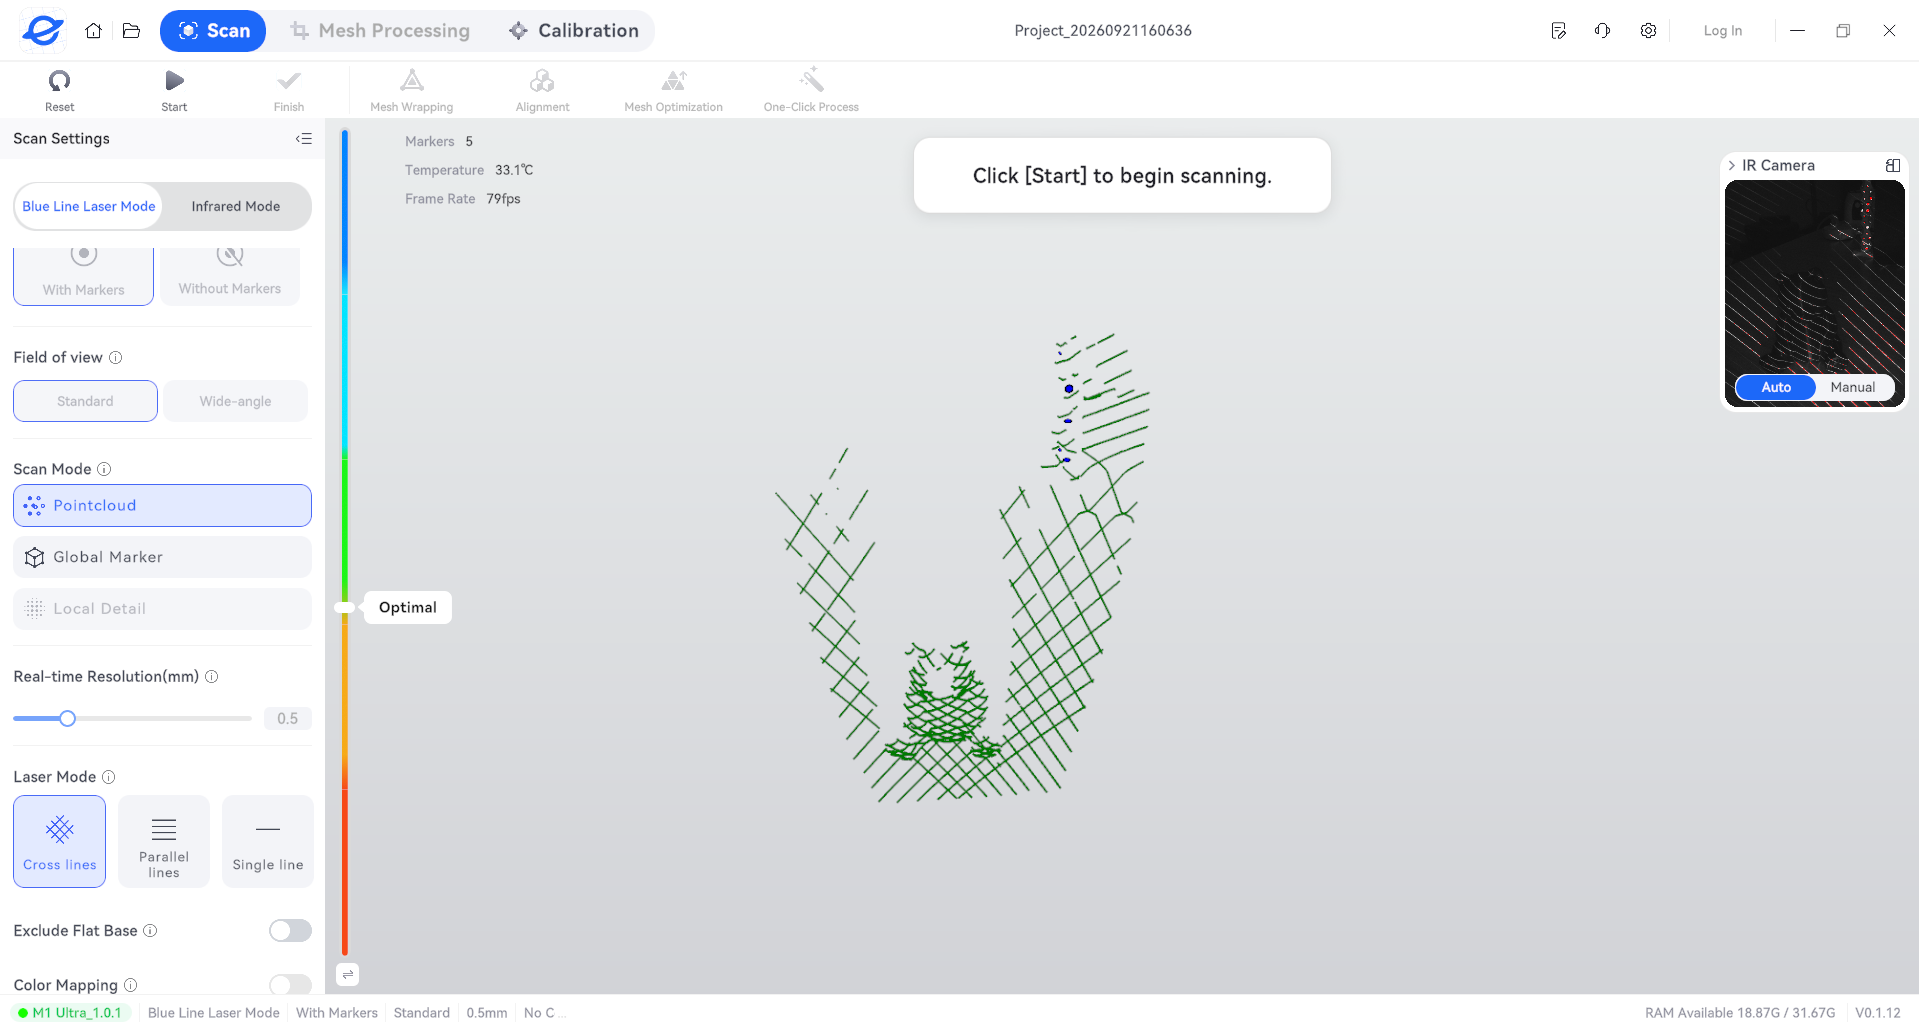
Check that the preview image and scan settings are satisfactory, then click Start to begin scanning. Move the scanner according to the operating requirements of the selected mode to gradually capture the object's surface data.
For details about scanning distance, movement speed, and scanning posture, see Scanning Distance and Movement Techniques.
¶ Step 4. Finish Scanning
After scanning is complete, follow the on-screen instructions to finish the scan. You can then proceed to the model-processing workflow.
¶ Notes
- The available parameters vary between scan modes. Review the relevant settings whenever you switch modes.
- A grayed-out button indicates that the corresponding function is currently unavailable.
- During operation, hover over the ⓘ icon next to a parameter to view the software's description of that function.
- When creating a new project, if the software prompts you to exit the current scan, make sure the current task is complete and save any data you want to keep before deciding whether to proceed.
¶ Help us improve
If you have any ideas about the wiki pages, please let us know via ELEGOO official feedback channel