¶ Operation Steps for Each Model
The steps below apply to all models.
| Model | Action | Steps to Skip |
|---|---|---|
| Centauri Carbon 2 Combo | Follow all steps | None |
| Centauri Carbon 2 | Follow all steps | None |
| Centauri 2 Combo | Follow all steps | None |
| Centauri 2 | Follow all steps | None |
¶ Required Tools
- 2.0 mm Allen key
- 3.0 mm Allen key
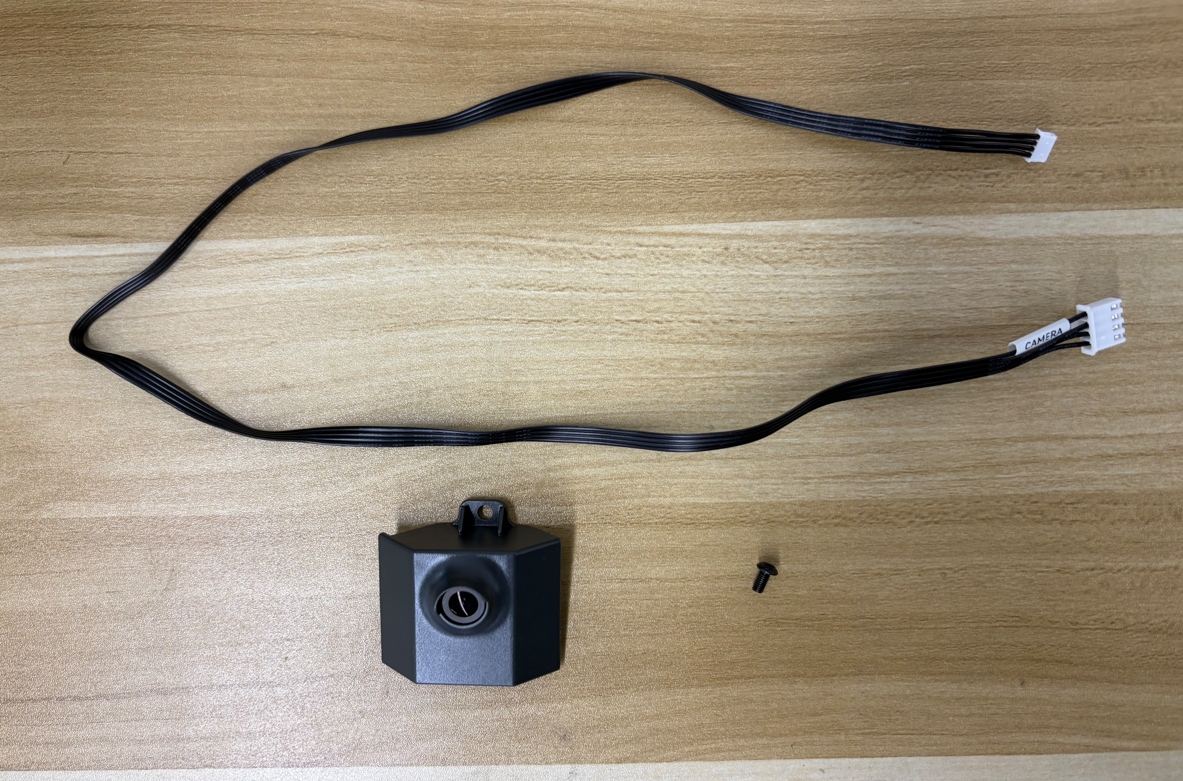
¶ Required Parts
- Camera cable ×1
- Camera ×1
- M3×6 screws ×1
¶ Preparation
Turn off the printer power switch and unplug the power supply cable.
¶ Disassembly
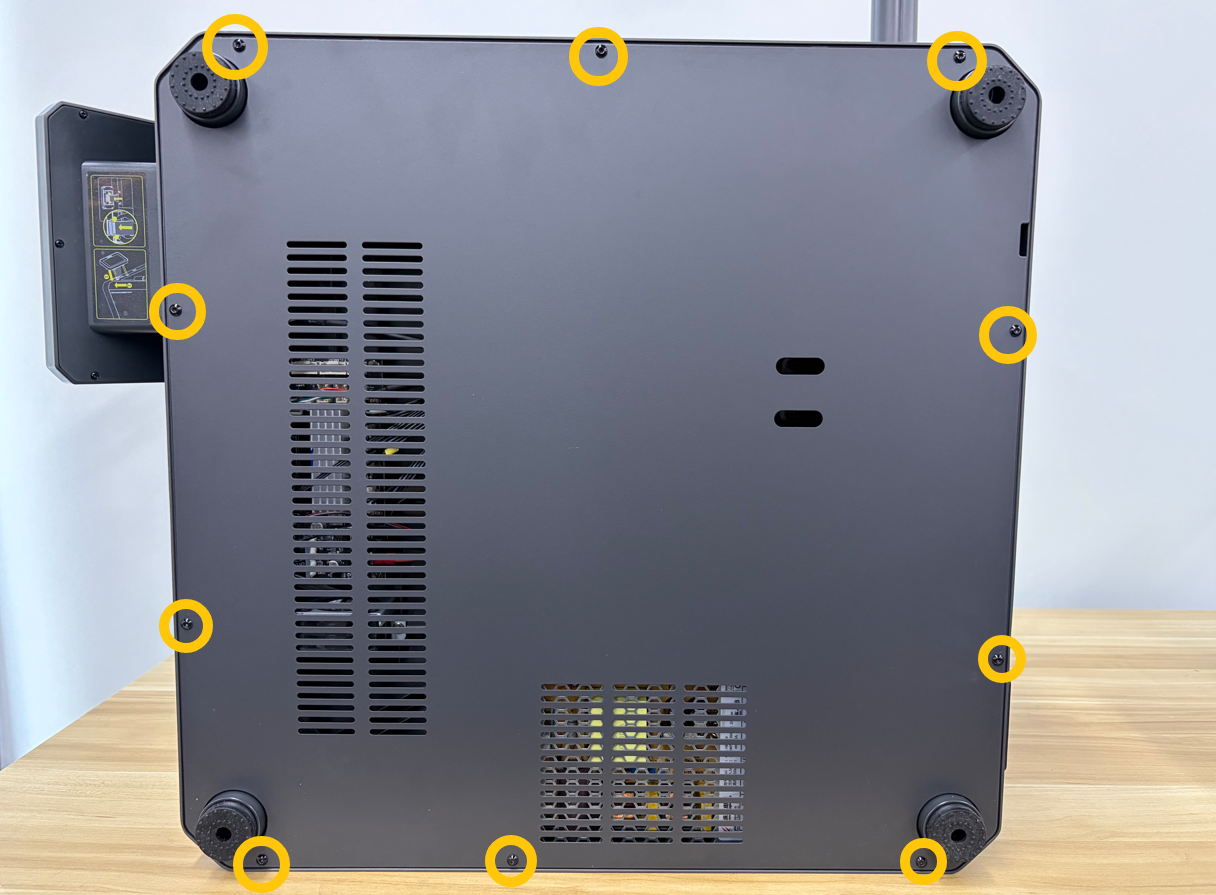
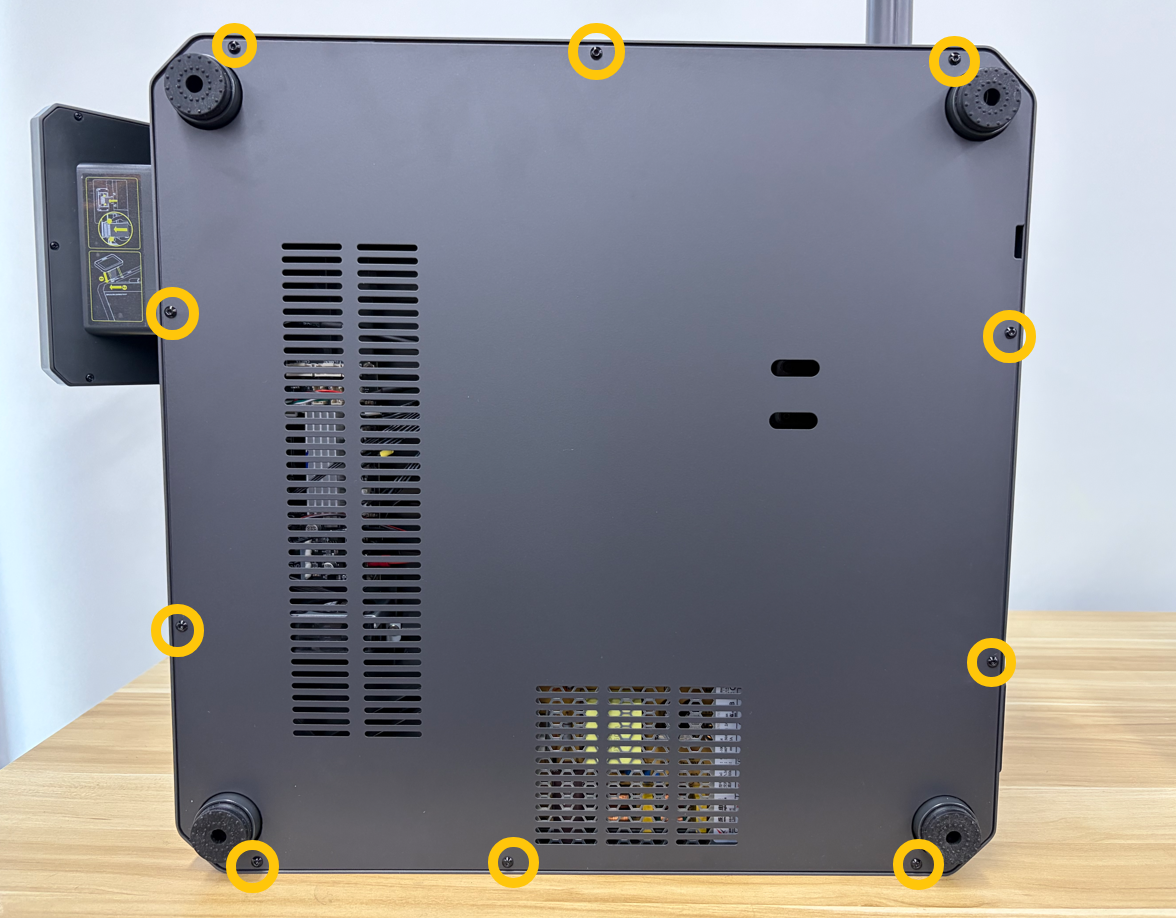
¶ Remove the bottom cover
Use a 2.0 mm Allen key to remove the ten screws securing the bottom cover, then remove the bottom cover.
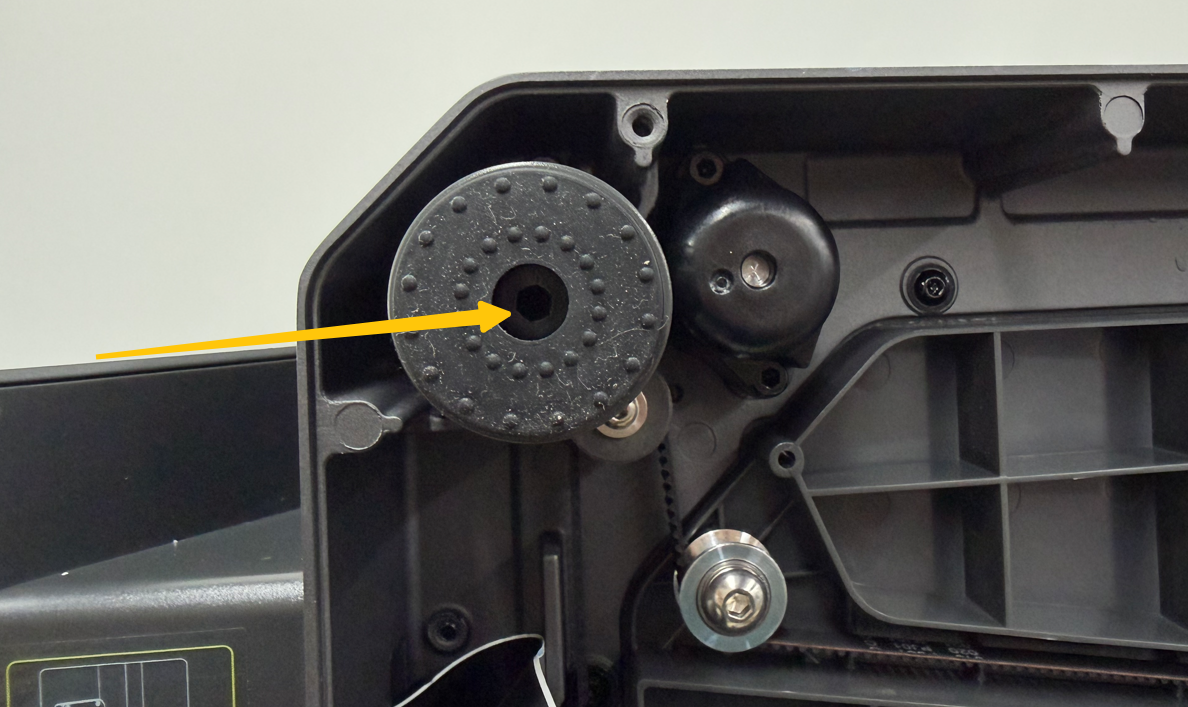
¶ Remove the foot pads
Use a 3.0 mm Allen key to remove the screws securing the foot pads (near the touch screen), then remove the foot pads.
¶ Installation
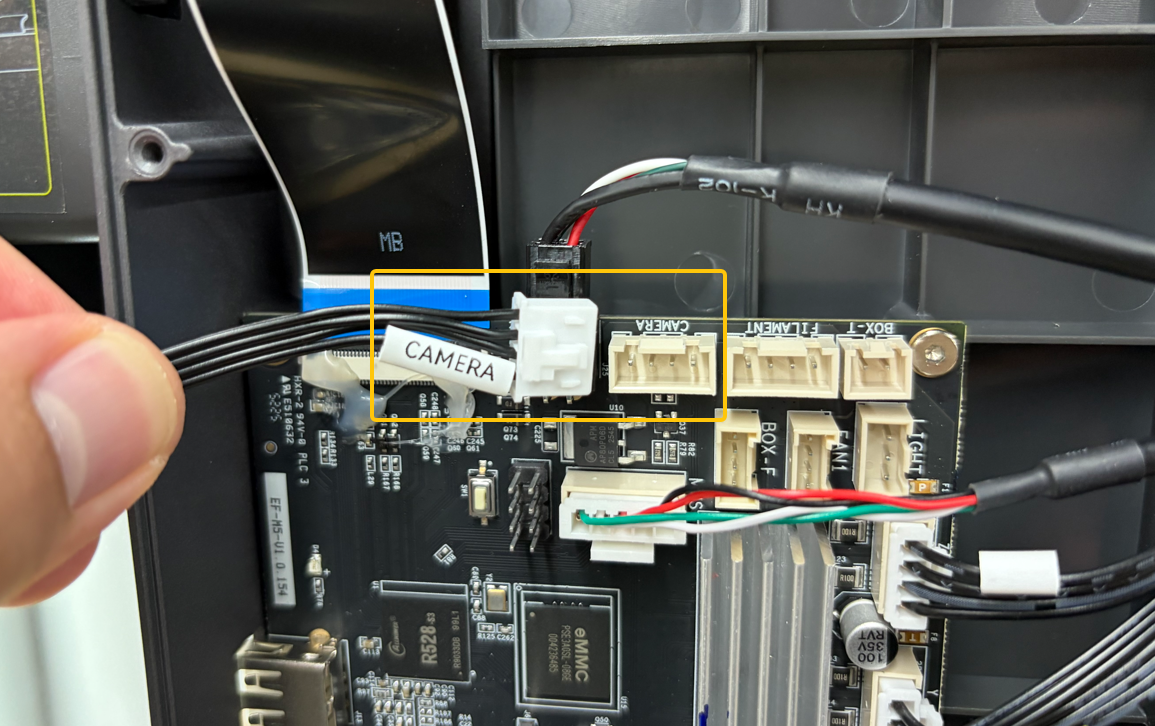
¶ Connect the plug
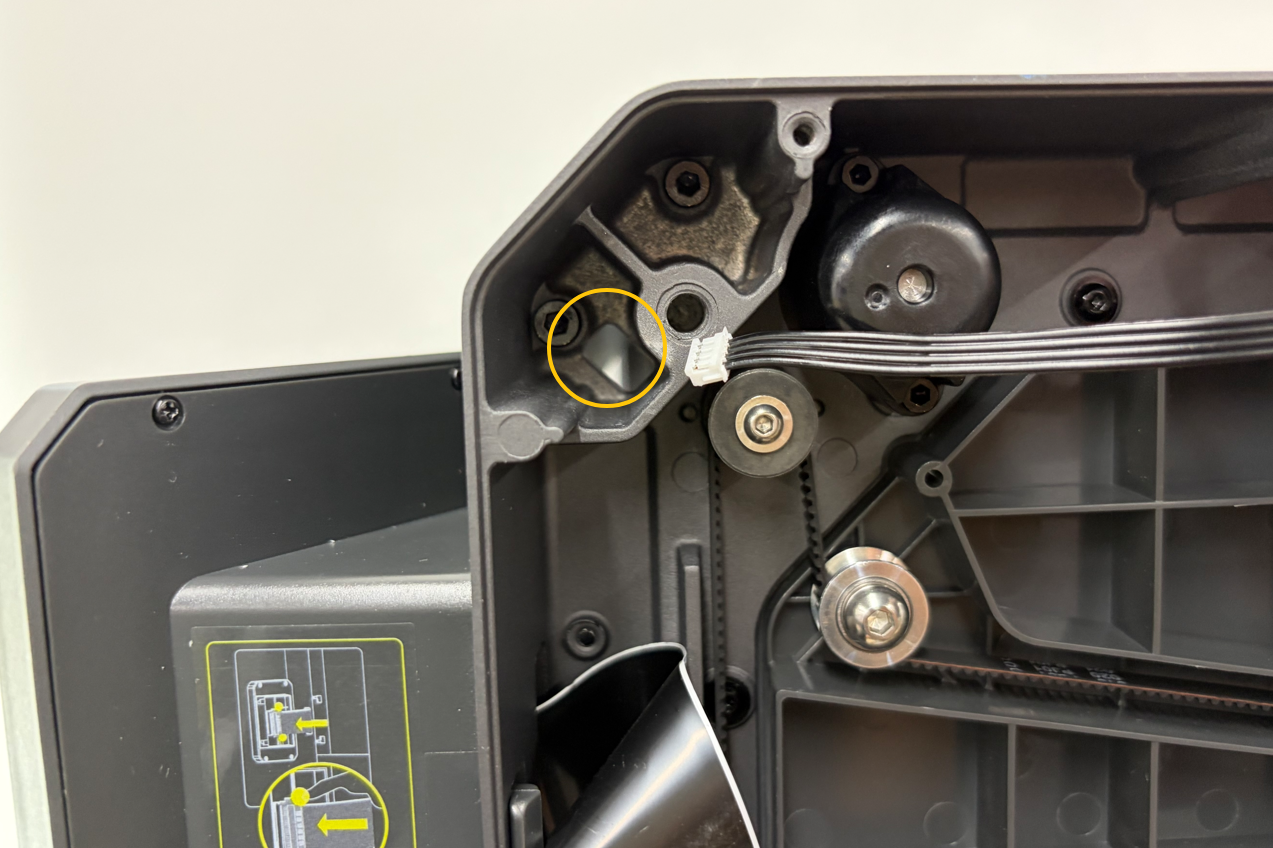
Insert the camera cable connector into the mainboard port (CAMERA).
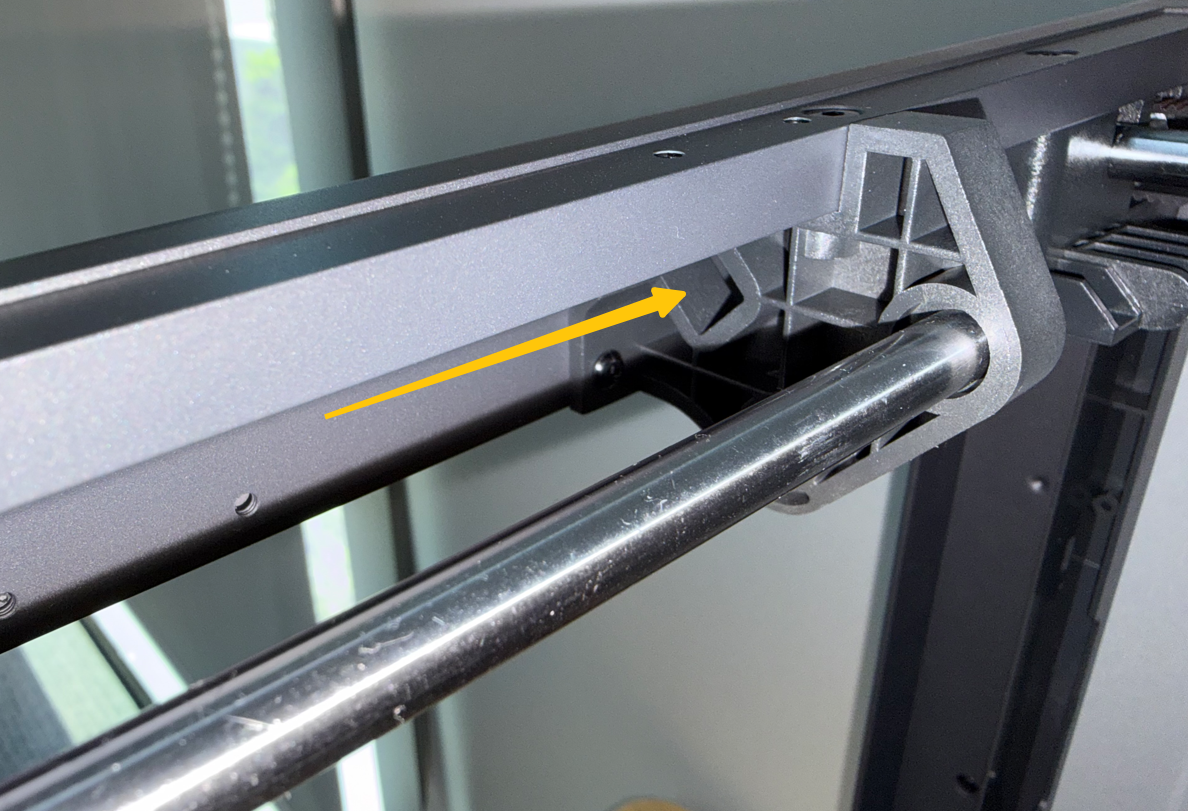
Route the camera cable through the cable slot.
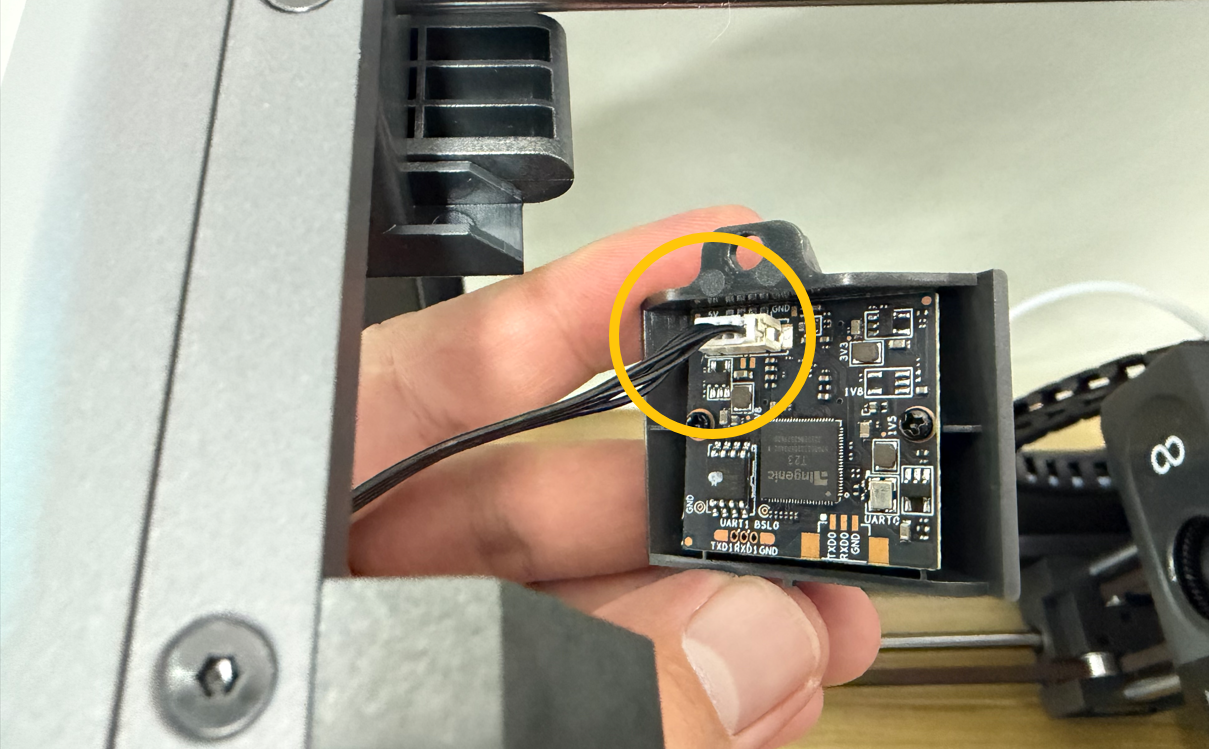
Insert the other end of the cable into the port on the back of the camera.
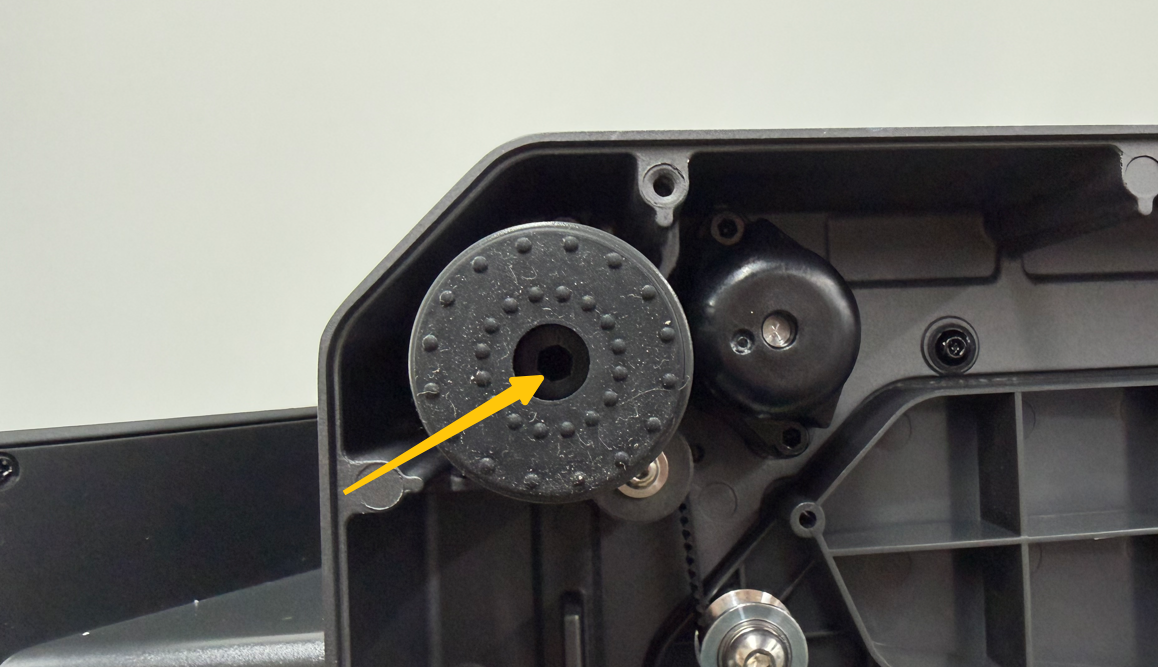
¶ Install the camera
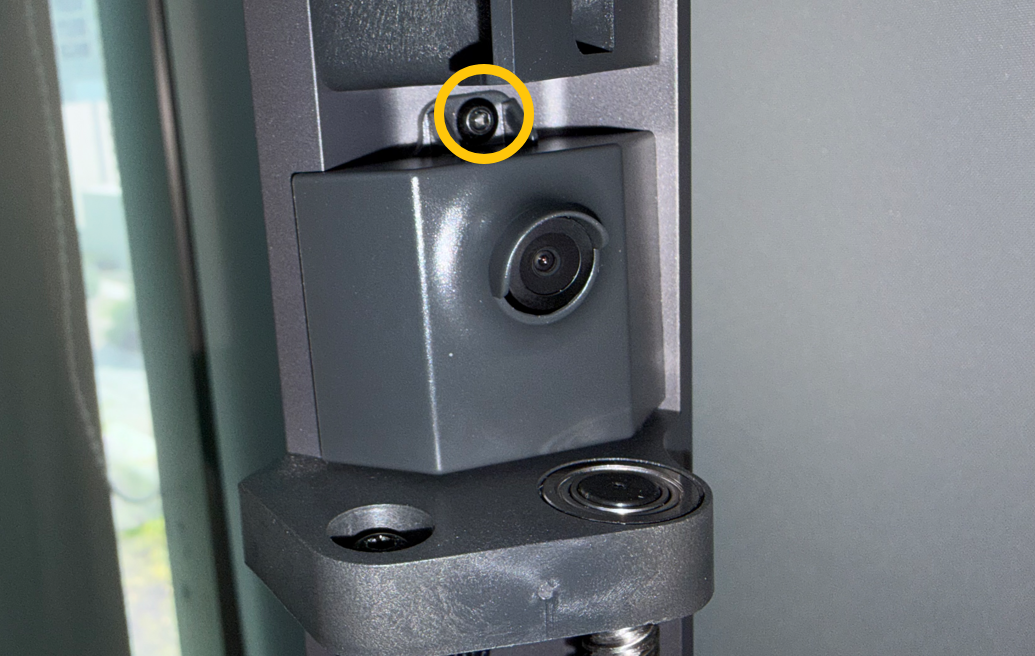
Place the camera in the corresponding position and use a 2.0 mm Allen key to tighten the screws securing the camera.
¶ Install the foot pads
Reinstall the foot pads to their original position and tighten the screws.
¶ Install the bottom cover
Reinstall the bottom cover and tighten the ten screws.
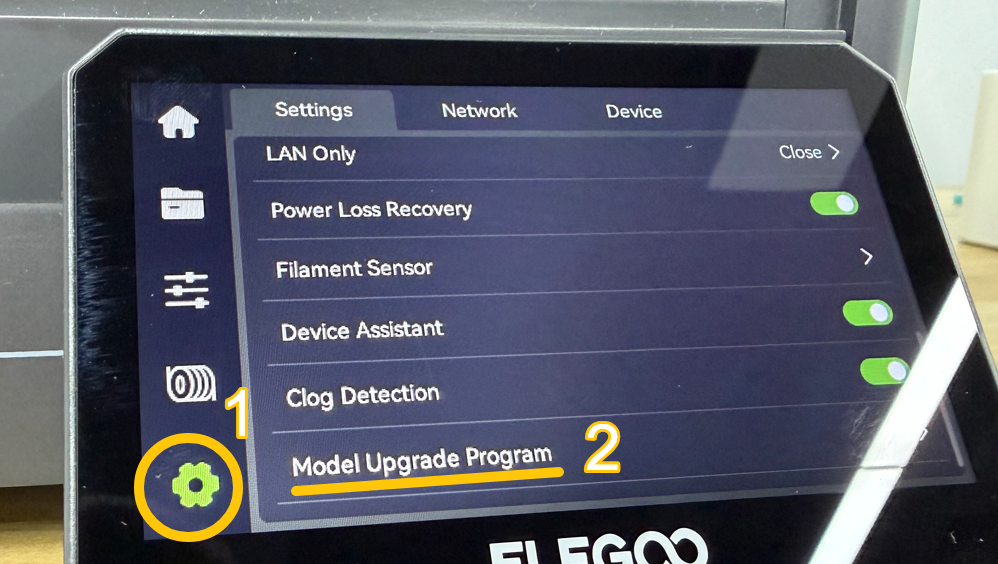
¶ Touch Screen Settings
Plug in the power cable and turn on the printer power switch.
On the touch screen, tap:
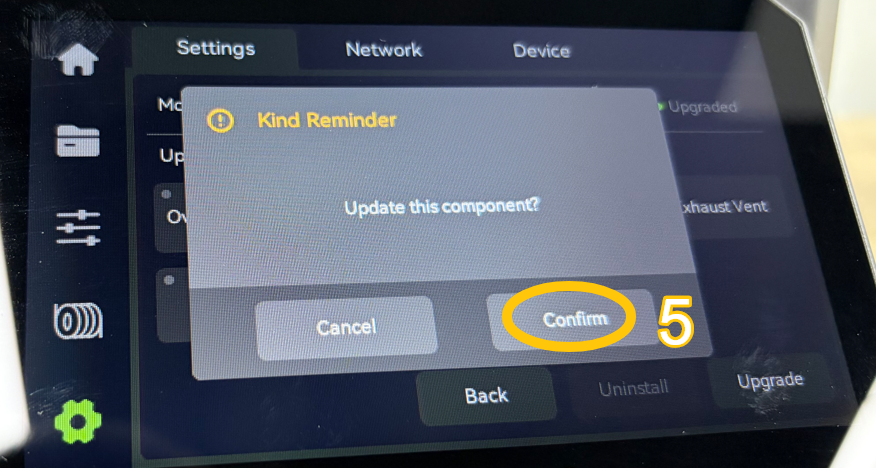
Settings → Upgrade (Model Upgrade Program)
Select:
Camera → Upgrade
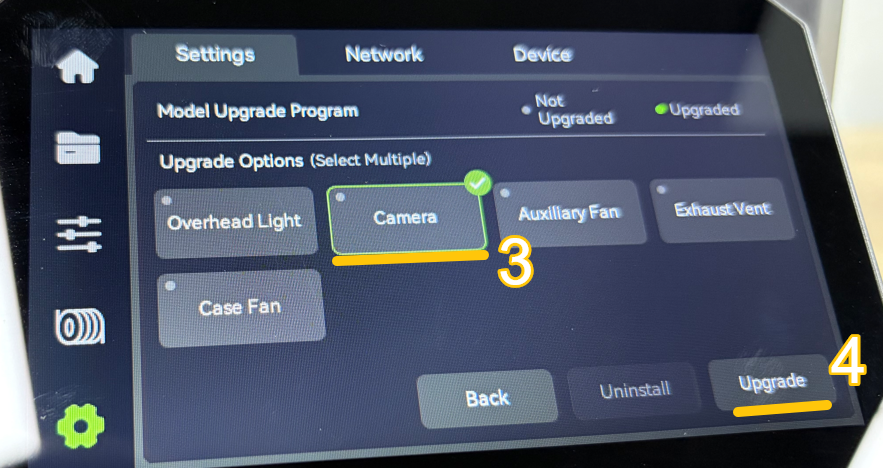
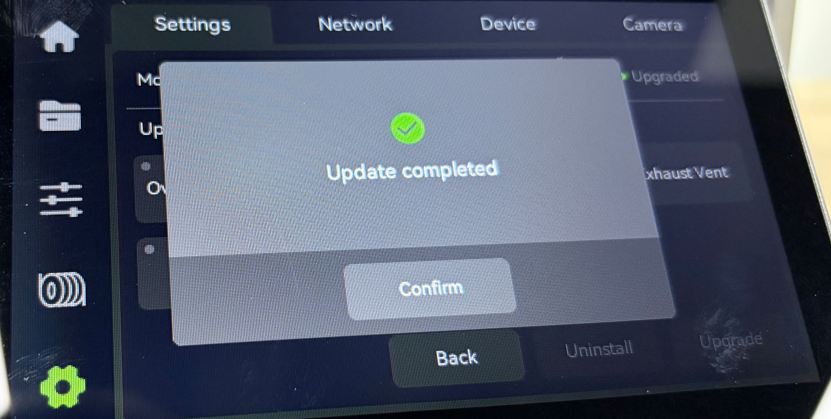
Tap Confirm
¶ Verification
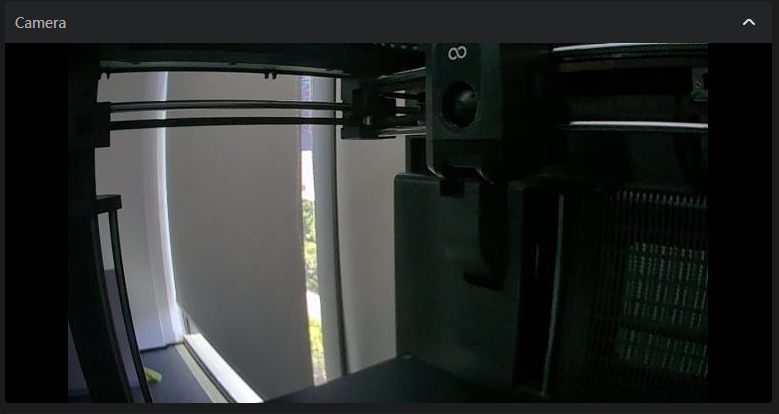
Connect the printer using Elegoo Slicer.
How to connect using Elegoo Slicer:
How to Connect the Printer Using Elegoo Slicer and Elegoo Matrix App
Check the camera feed in Elegoo Slicer to confirm the image is displayed correctly. Camera installation is complete.
¶ Related Links
¶ Help us improve
If you have any ideas about the wiki pages, please let us know via ELEGOO official feedback channel