¶ Tools Required
- Heat-resistant gloves
- Cleaning needle
- Pliers
- 1.5 mm Allen key
- 2.0 mm Allen key
- 2.5 mm Allen key
- A piece of PLA filament
¶ Troubleshooting Procedure
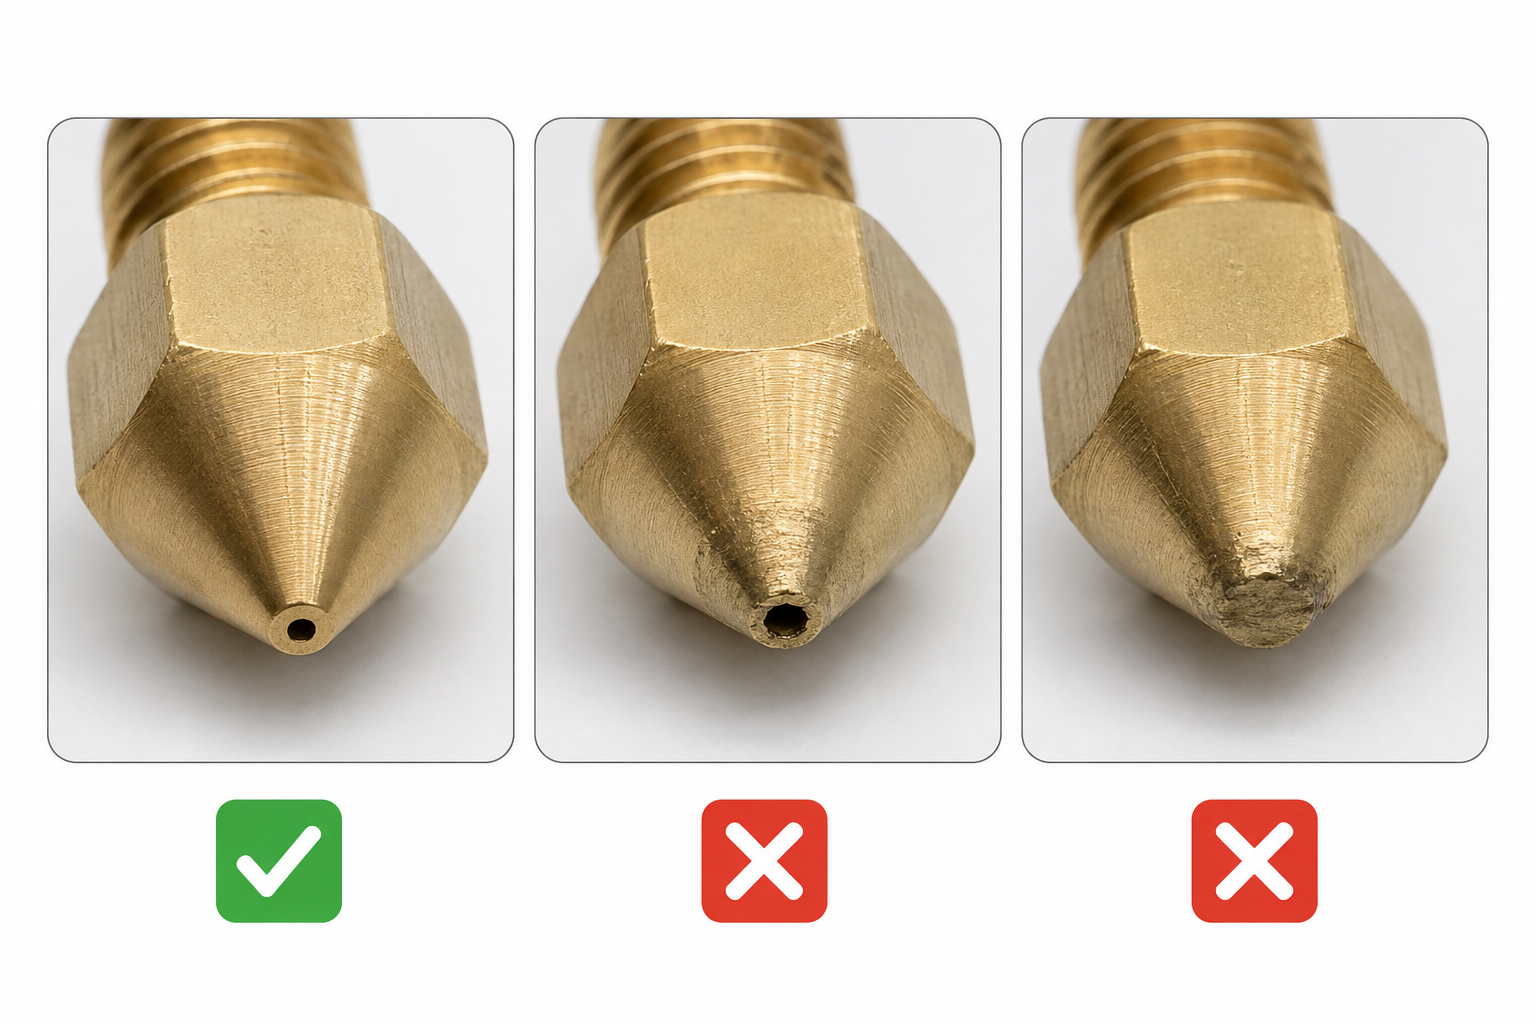
Note: Before proceeding with further troubleshooting, first check whether the nozzle tip is worn. If the nozzle tip is worn, it is recommended to directly replace the nozzle. There is no need to proceed with the following troubleshooting steps.
¶ Increase the Nozzle Temperature and Test Extrusion
- Turn off the printer and unplug the power supply cable.
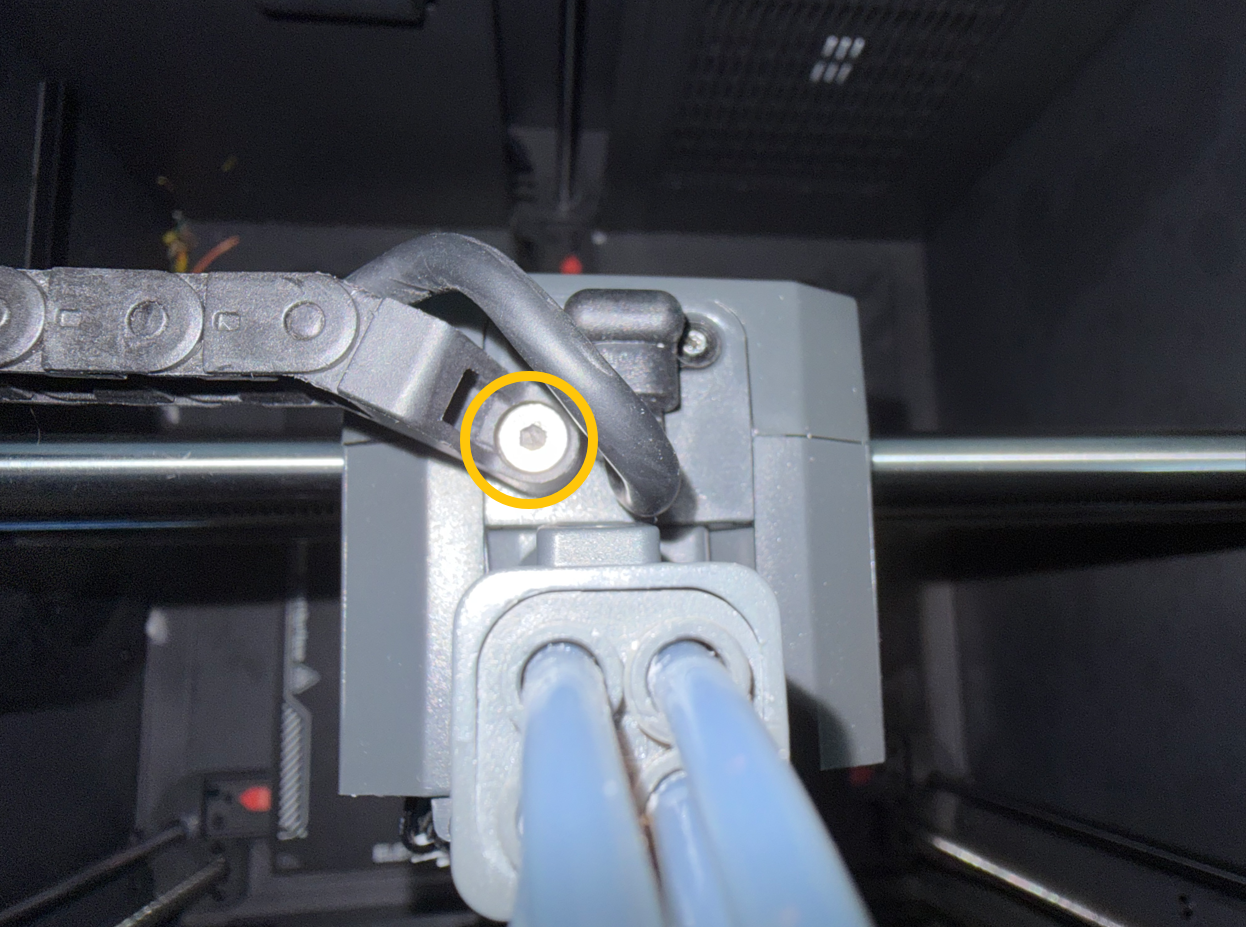
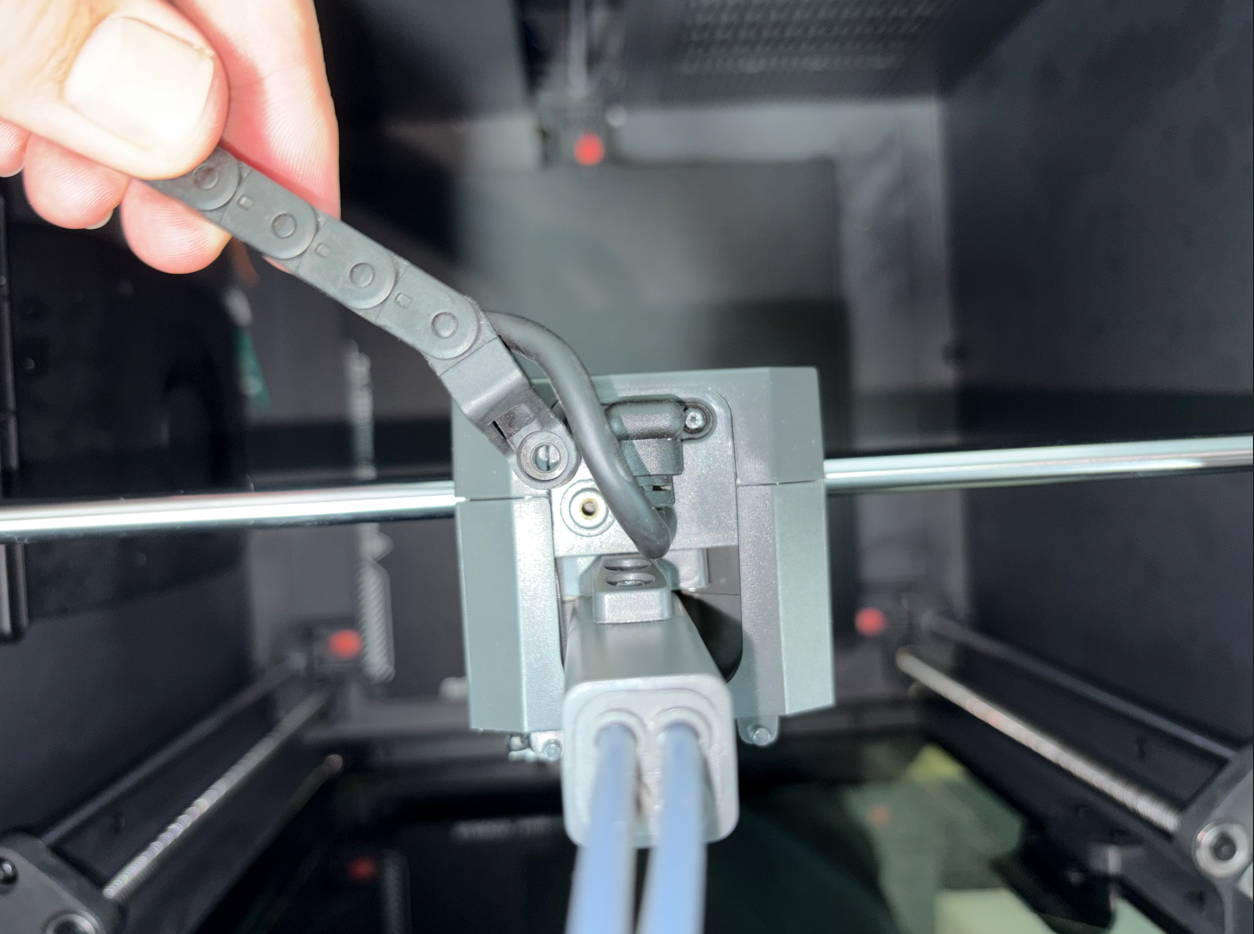
- Use a 2.5 mm Allen key to remove the screws securing the tank chain, and then remove the tank chain.
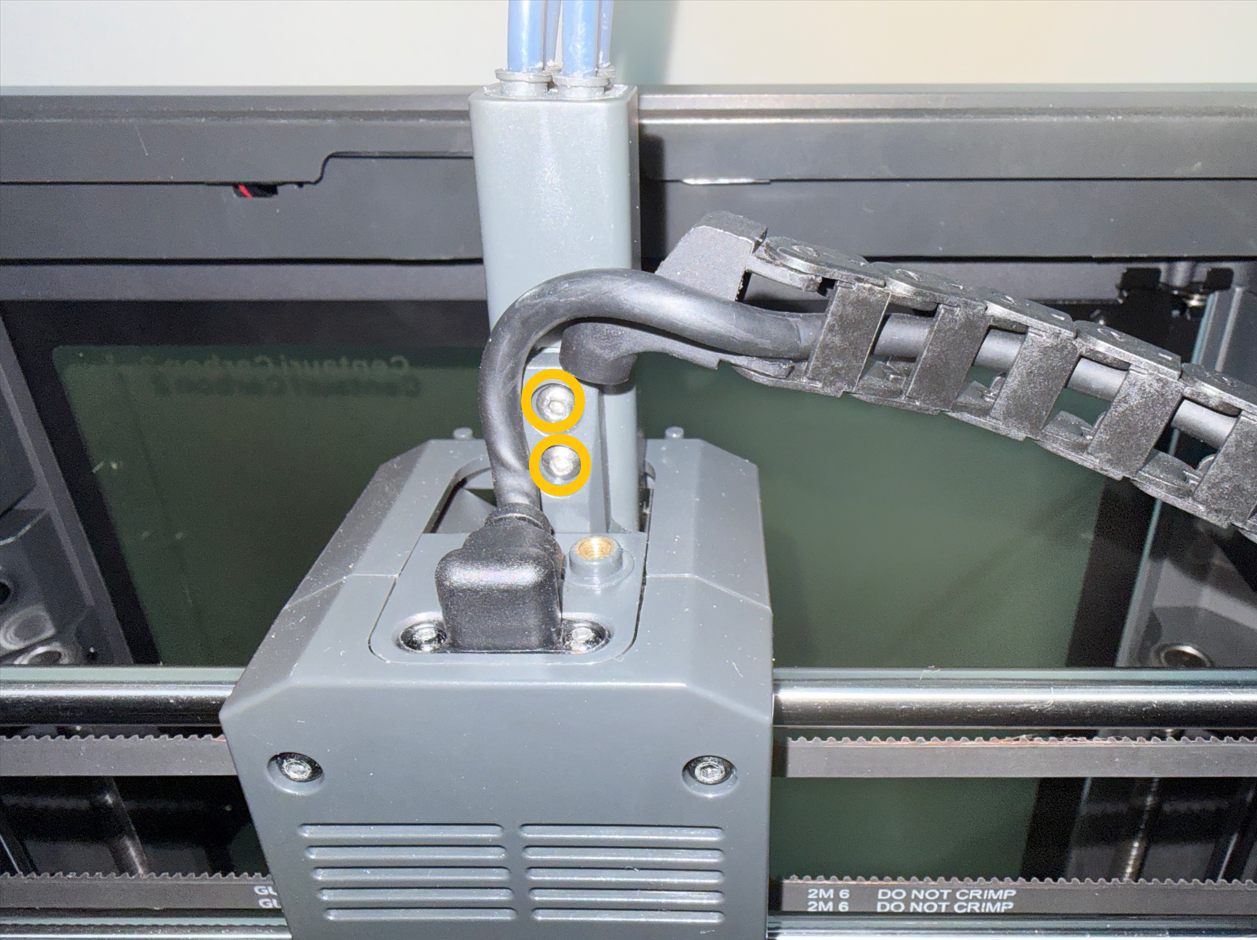
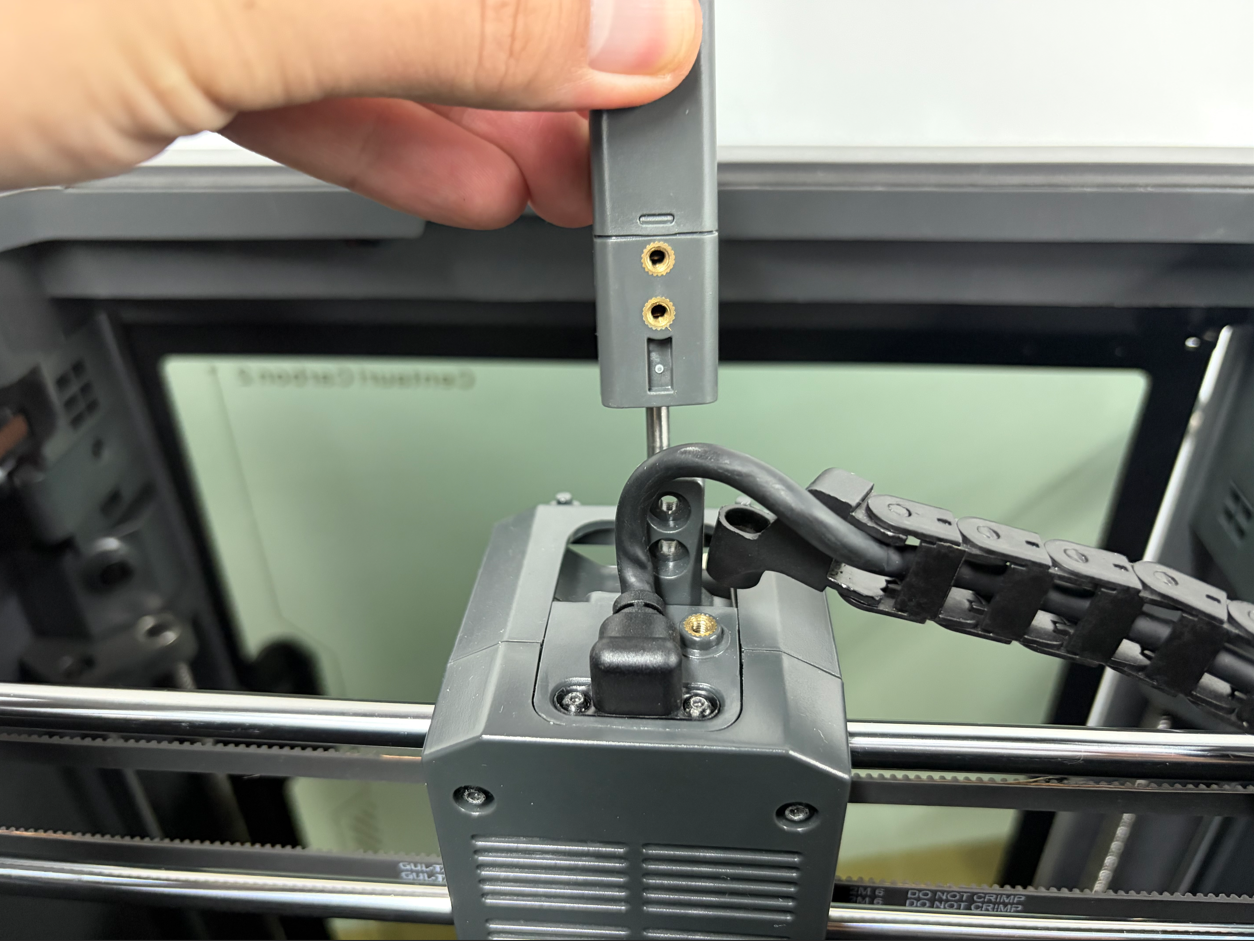
- Use a 2.0 mm Allen key to remove the screws securing the 4-in-1 hub, and then remove the 4-in-1 hub.
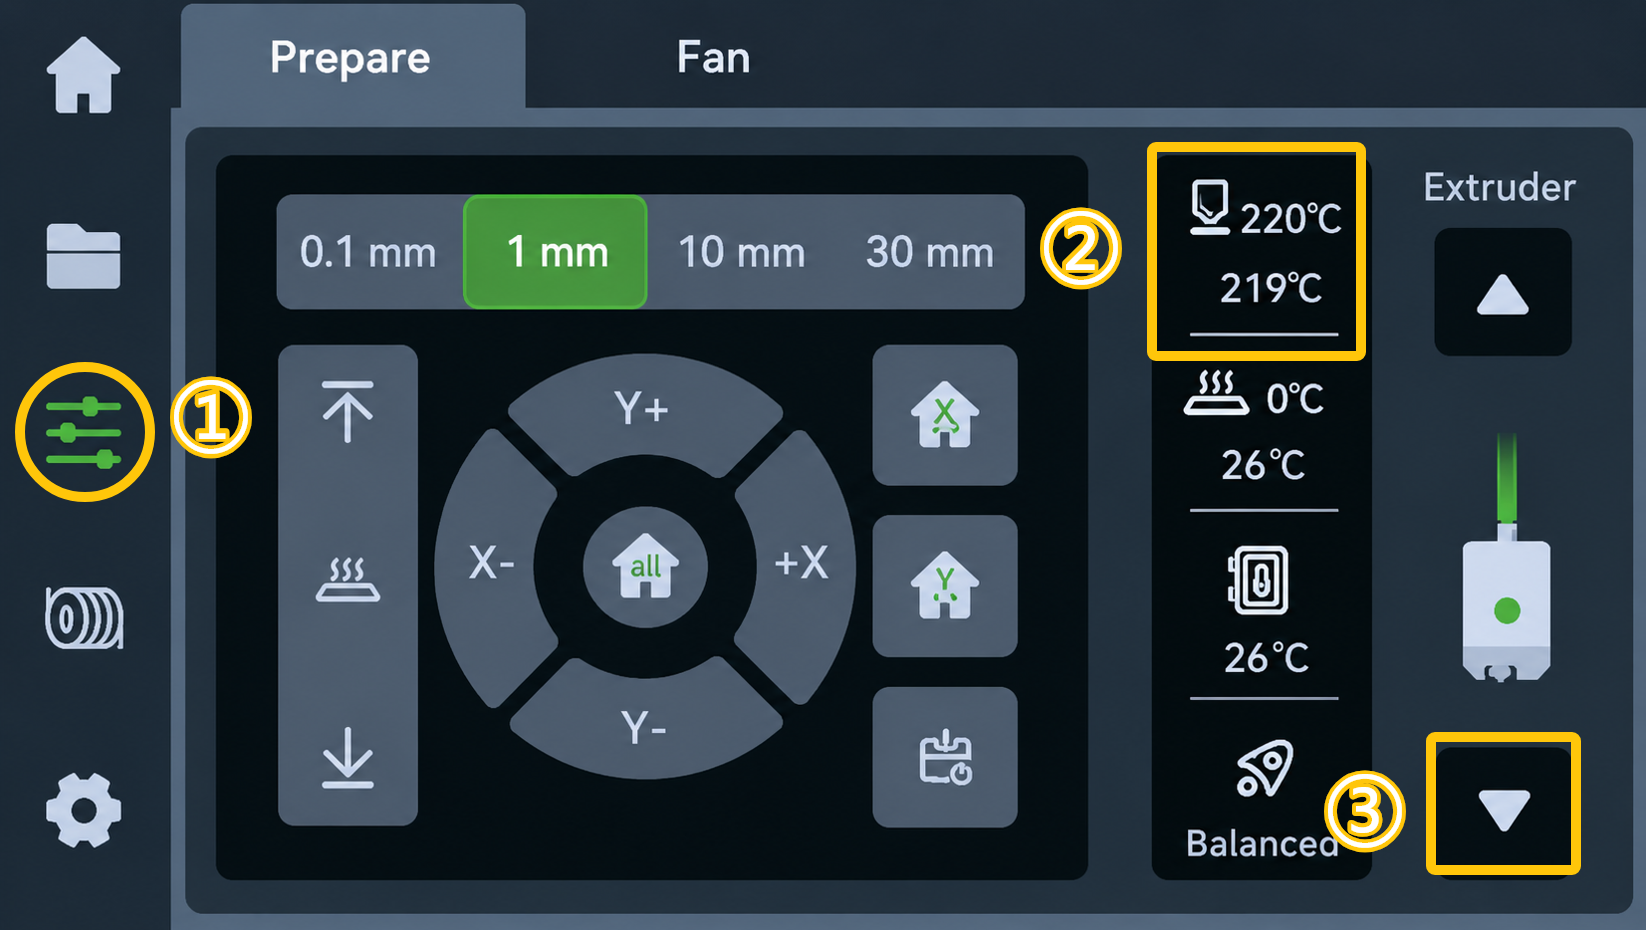
- Use the touch screen to heat the nozzle. Set the temperature slightly higher than the recommended printing temperature for the filament. For example, if the recommended temperature for PLA is 210°C, set the nozzle temperature to 220–230°C.
Note: During the heating and extrusion process, a clogged nozzle may suddenly eject hot molten filament. To prevent burns, close the glass door. Do not put your head inside the enclosure.
- Wait for the nozzle to reach the set temperature, then tap the ▽ button to extrude the filament.
- Check whether filament can be extruded from the nozzle.
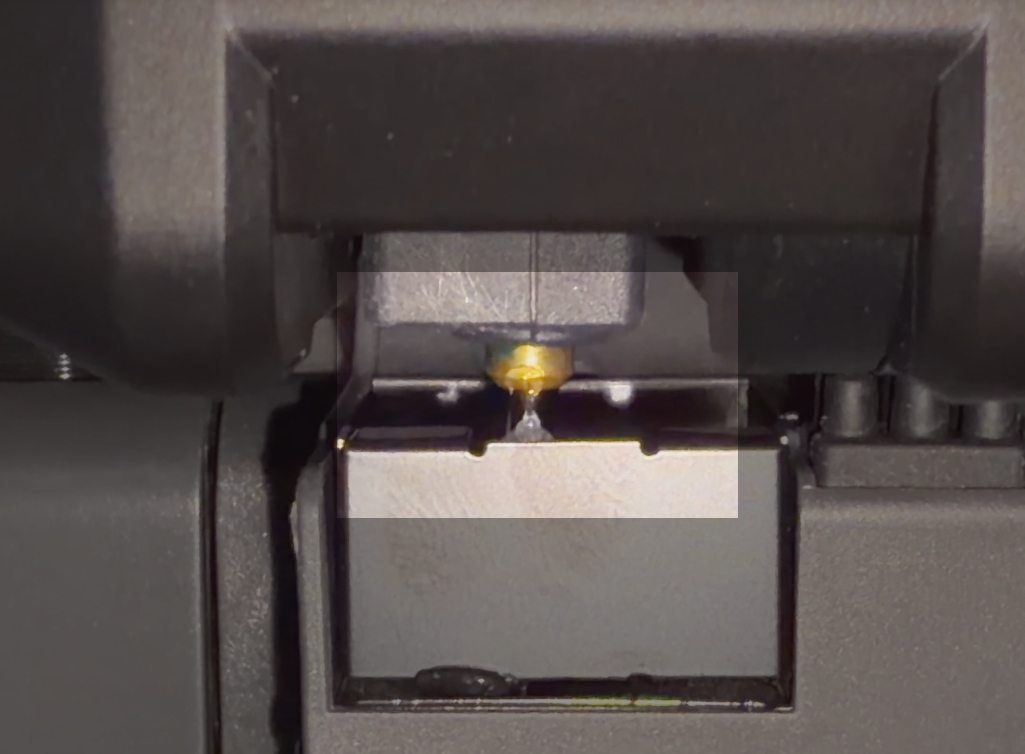
- If filament can be extruded after increasing the nozzle temperature, proceed to Part 3, "Cold Pull Cleaning for the Throat Tube and Nozzle."
- If filament still cannot be extruded after increasing the nozzle temperature, proceed with the following troubleshooting steps.
¶ Clean the Nozzle with a Cleaning Needle
Note: A small amount of molten filament may be ejected when cleaning the nozzle with a cleaning needle. Always wear heat-resistant gloves to prevent burns.
- Heat the nozzle and ensure that the temperature is slightly higher than the recommended printing temperature for the filament.
- Slowly insert the cleaning needle into the nozzle orifice from the bottom of the nozzle, and move it up and down several times to clear the blockage.
Note: Do not force the cleaning needle into the nozzle or move it sideways, as this may cause the cleaning needle to break or damage the nozzle orifice.

- After cleaning, tap the ▽ button to try extruding the filament.
- If the filament can be extruded normally, continue with Part 3, "Cold Pull Cleaning for the Throat Tube and Nozzle," to further remove residue from inside the nozzle and throat tube.
- If the filament still cannot be extruded, or the cleaning needle cannot be inserted properly into the nozzle, replace the nozzle according to Replace the Nozzle.
¶ Cold Pull Cleaning for the Throat Tube and Nozzle
Note: Cold pulling is suitable for partially clogged nozzles where filament can still be extruded from the nozzle. If filament cannot be extruded at all, stop the cold pull operation and inspect or replace the nozzle.
- Reinstall the components removed previously, then plug in and power on the printer.
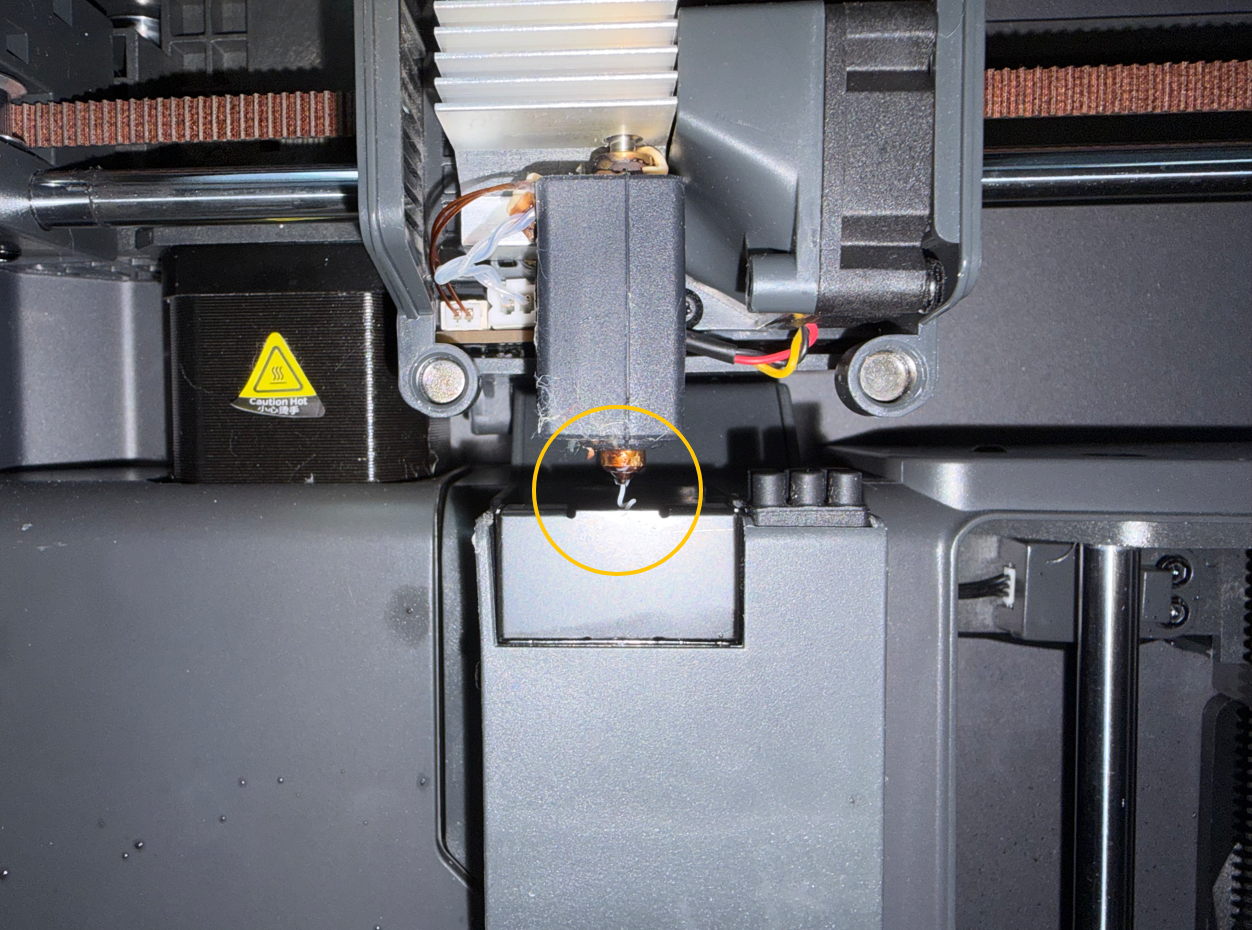
- Heat the nozzle to the recommended printing temperature for PLA, then tap the ▽ button to extrude a small amount of filament.
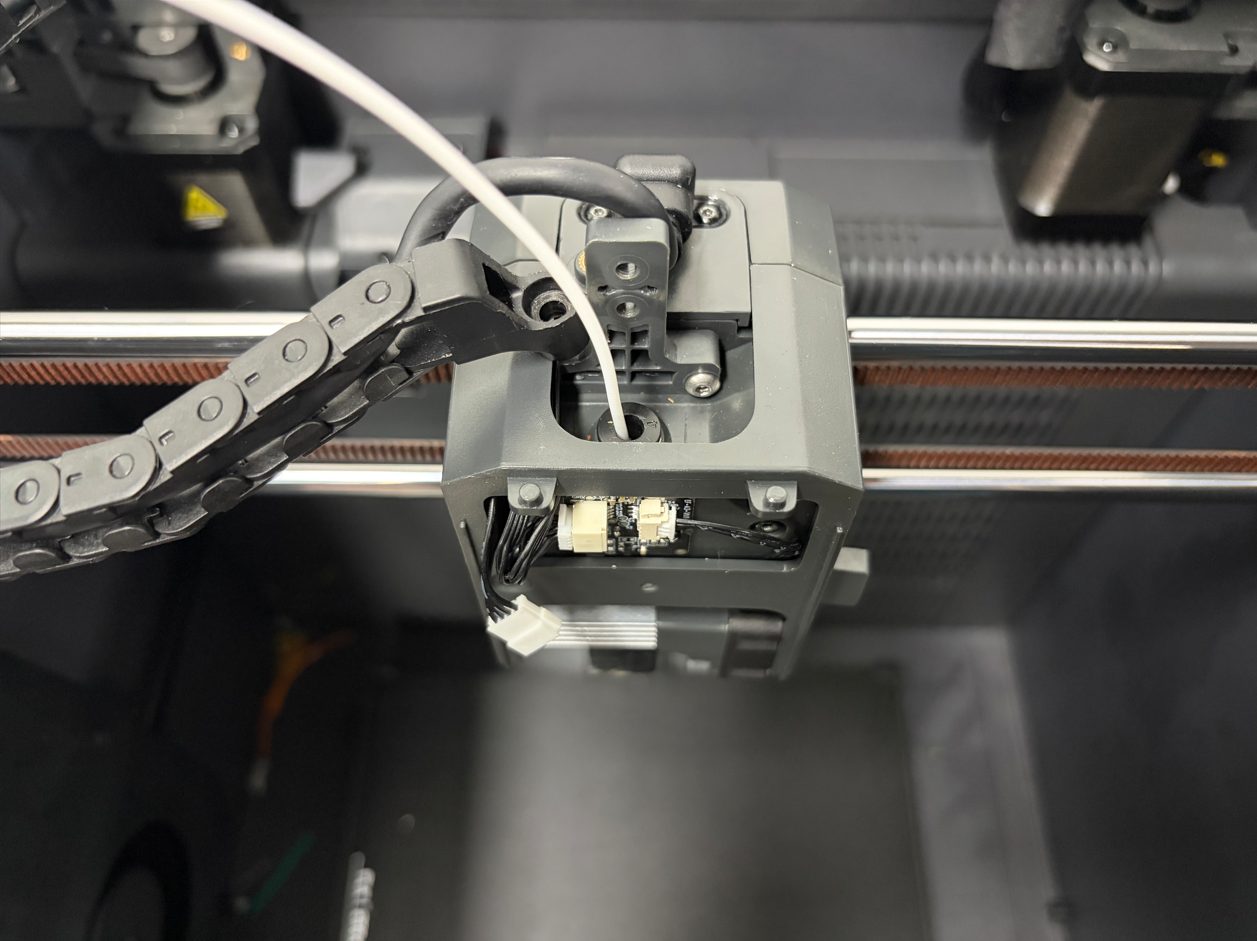
- Check the filament extrusion from the nozzle.
- If filament can be extruded from the nozzle, continue with the cold pull operation.
- If filament still cannot be extruded at all, stop the operation and replace the nozzle.
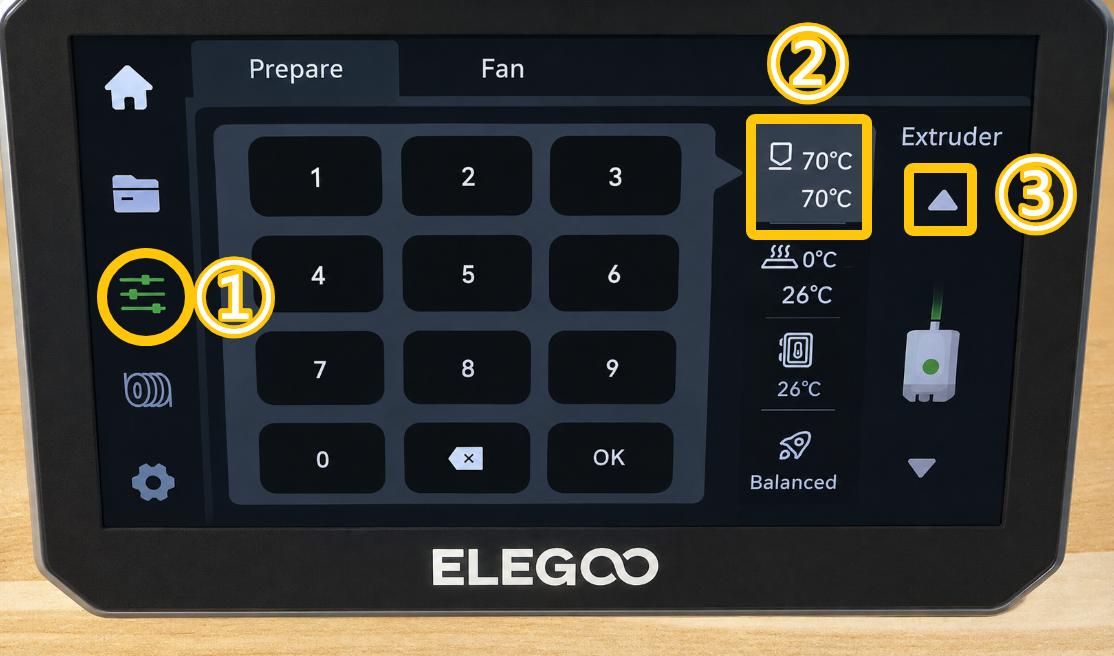
- Wait until the nozzle temperature drops to 70°C. In the control menu, tap the △ button to retract the filament.
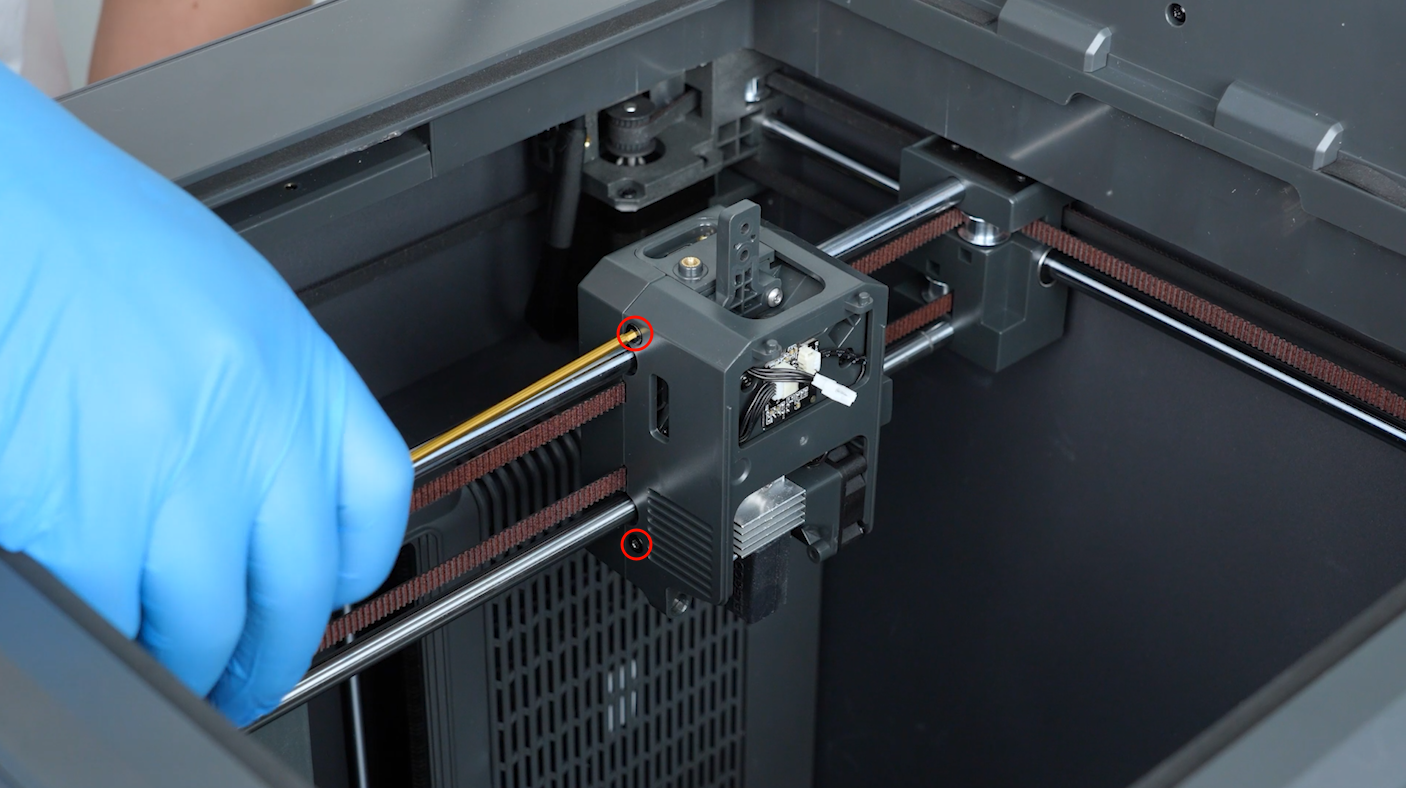
- If the filament is difficult to retract, remove the tool head housing, release extruder gear tension, and use pliers to manually pull out the filament.
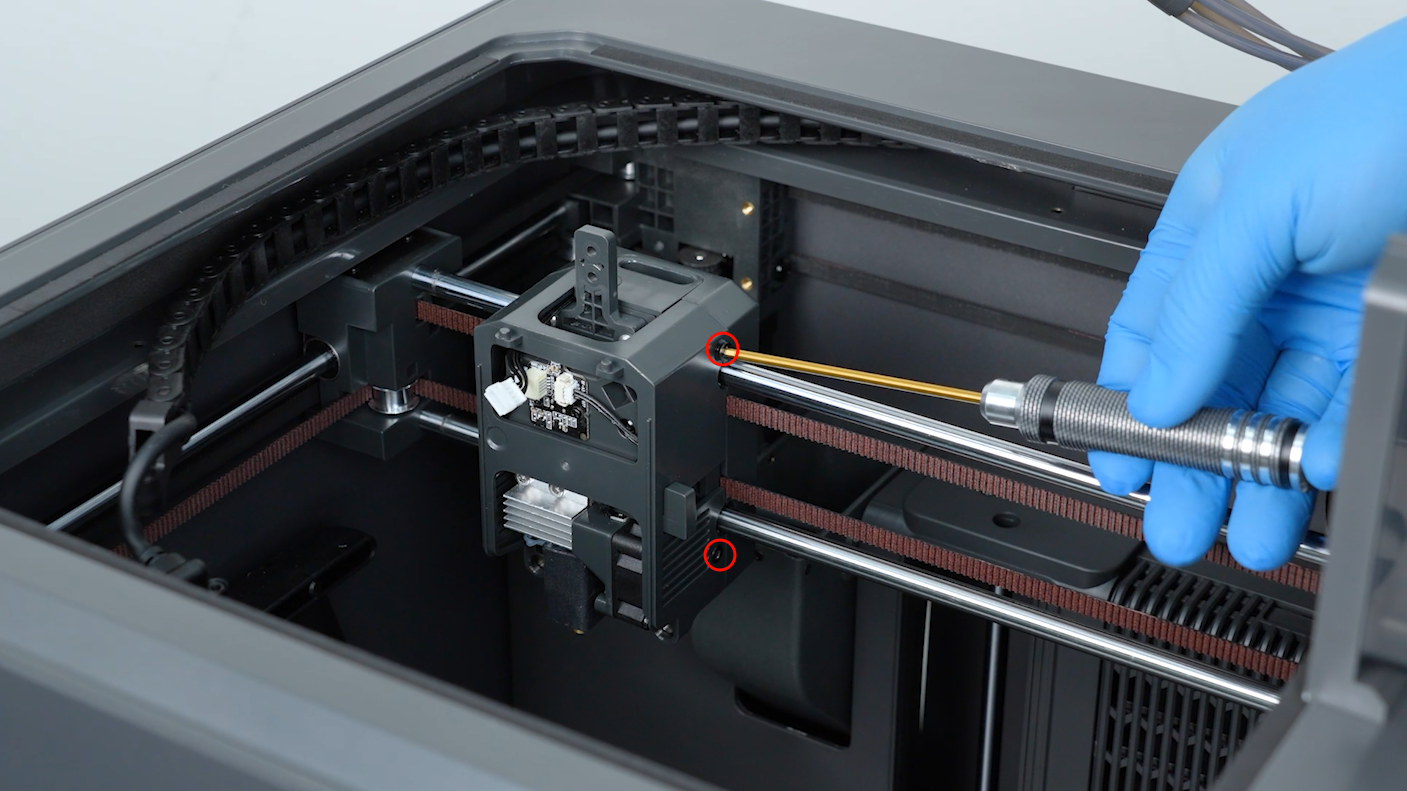
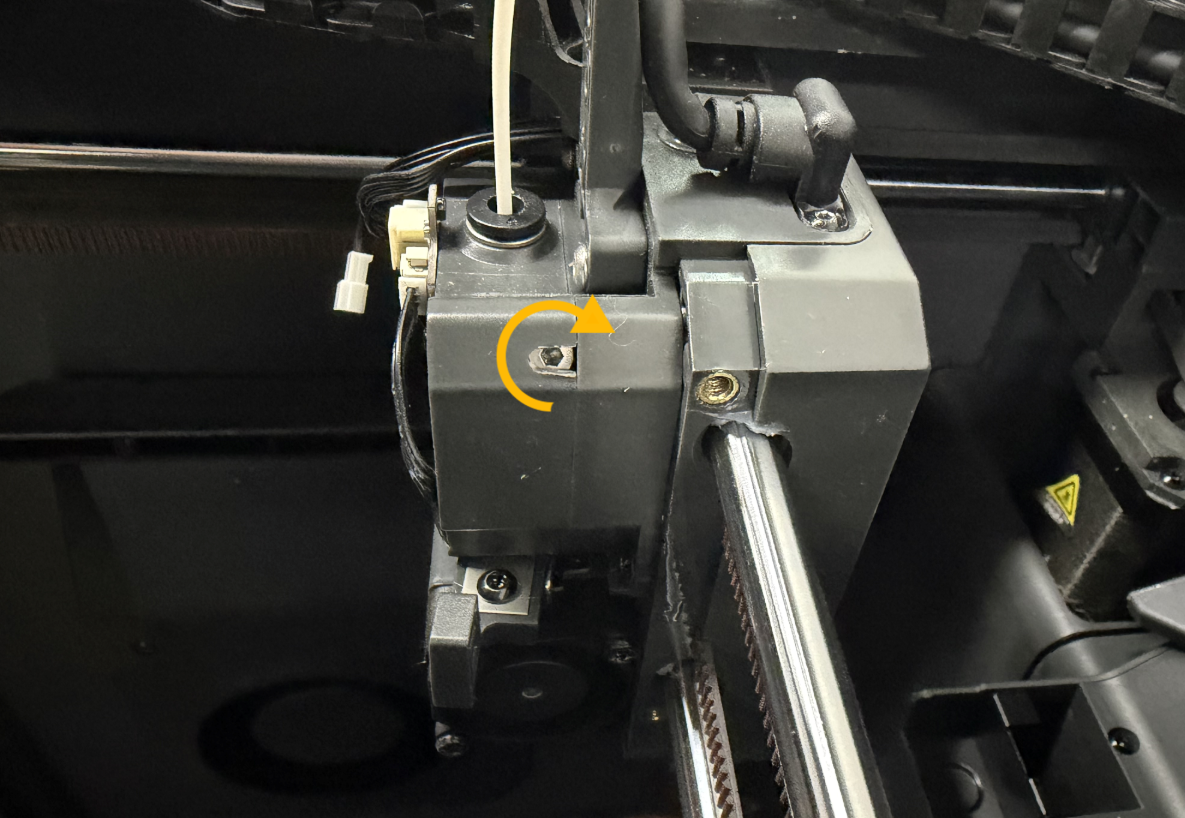
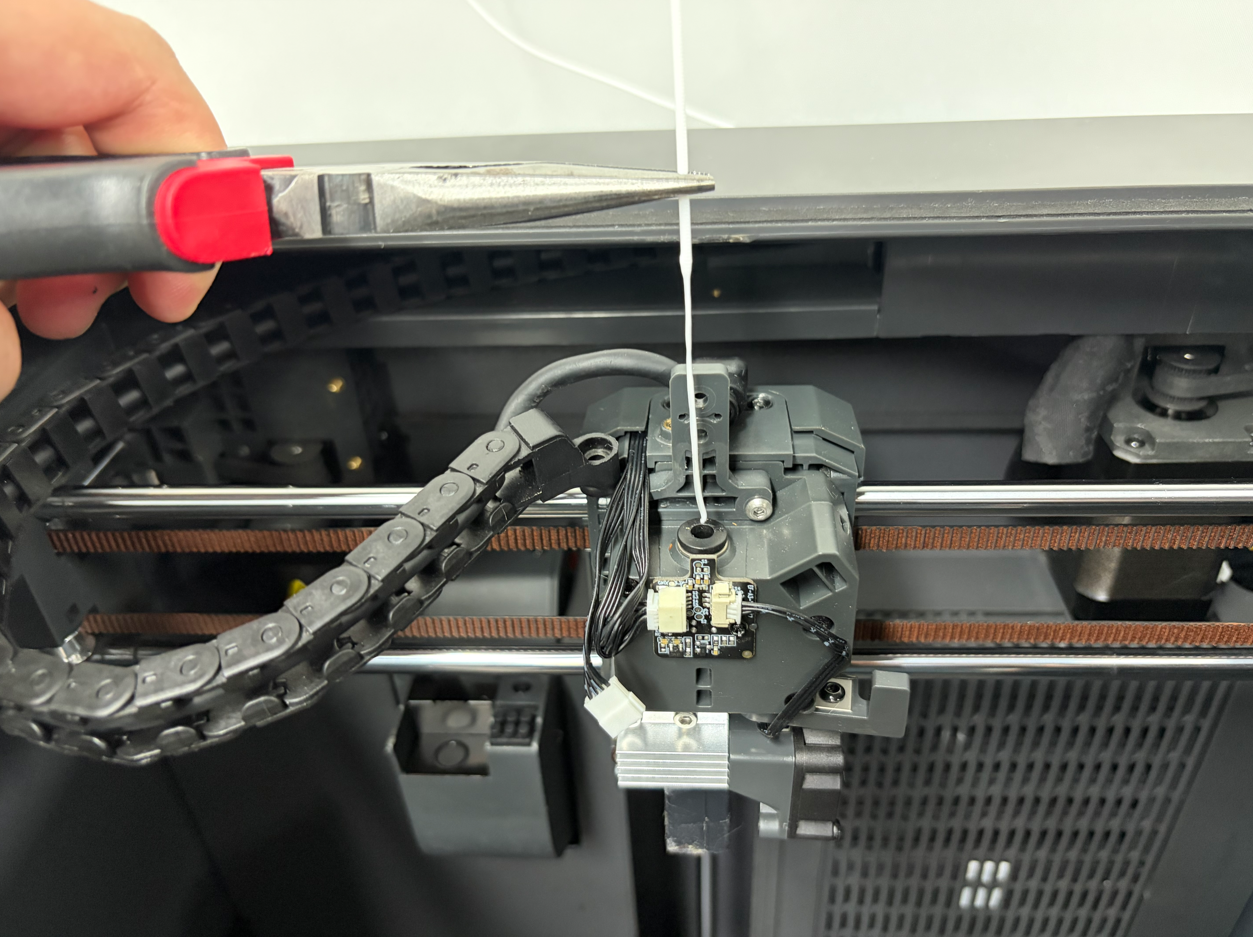
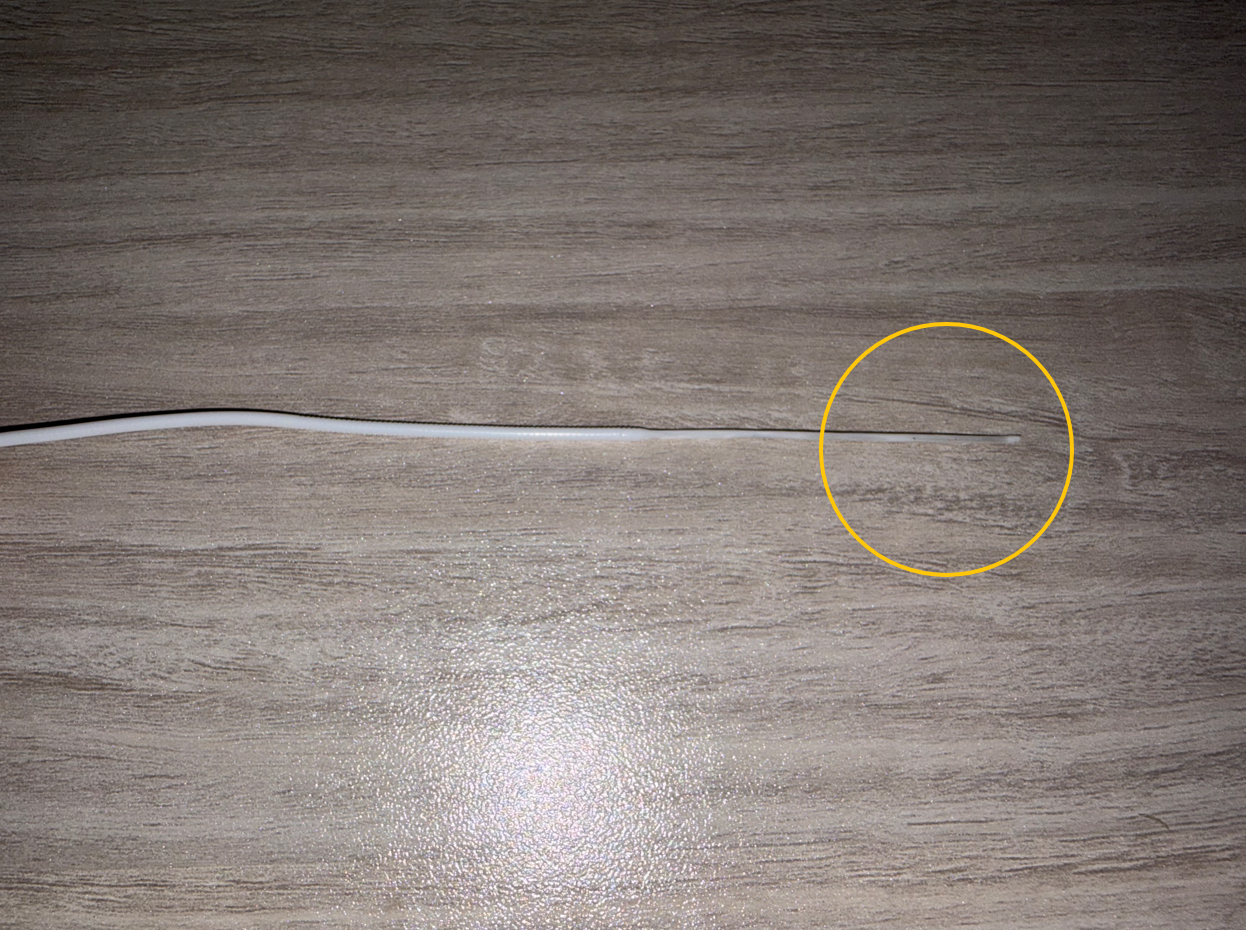
- Check the end of the removed filament. If noticeable filament residue, impurities, or burnt particles are still attached to the end, repeat the cold pull procedure above until the removed filament end is free of noticeable residue.
¶ Reinstall the Tool Head and Perform a Test
- Refer to How to replace the gearbox(B0C1L1) to reinstall the tool head.
- Power on the printer.
- Heat the nozzle to the recommended printing temperature for the filament using the touch screen, then tap the ▽ button to confirm that the filament can be extruded normally.
- Tap Settings > Calibration > Auto Leveling and wait for the printer to complete the auto leveling process. The printer can then be used normally.
¶ Contact Technical Support
If the issue persists after completing the troubleshooting steps above, provide the following information and contact technical support:
- A video showing the extruder failing to extrude filament normally
- A photo of the filament label on the side of the spool, including the filament specifications and recommended temperature information
- The G-code file of the model being printed
- The printer's SN, which can be found on the white label near the power switch. The format is usually CC.XXXX.XXX
- The printer firmware version (Touch Screen > Settings > Check for Updates)
¶ Help Us Improve
If you have any ideas for improving the wiki pages, please let us know through the ELEGOO official feedback channel.