Saturn3 Ultra - Cooling Fan Replacement
Tools and materials needed
l3.0mm Allen wrench
l2.5mm Allen wrench
lLint-free cloth
Reference video
No video yet
Operation steps
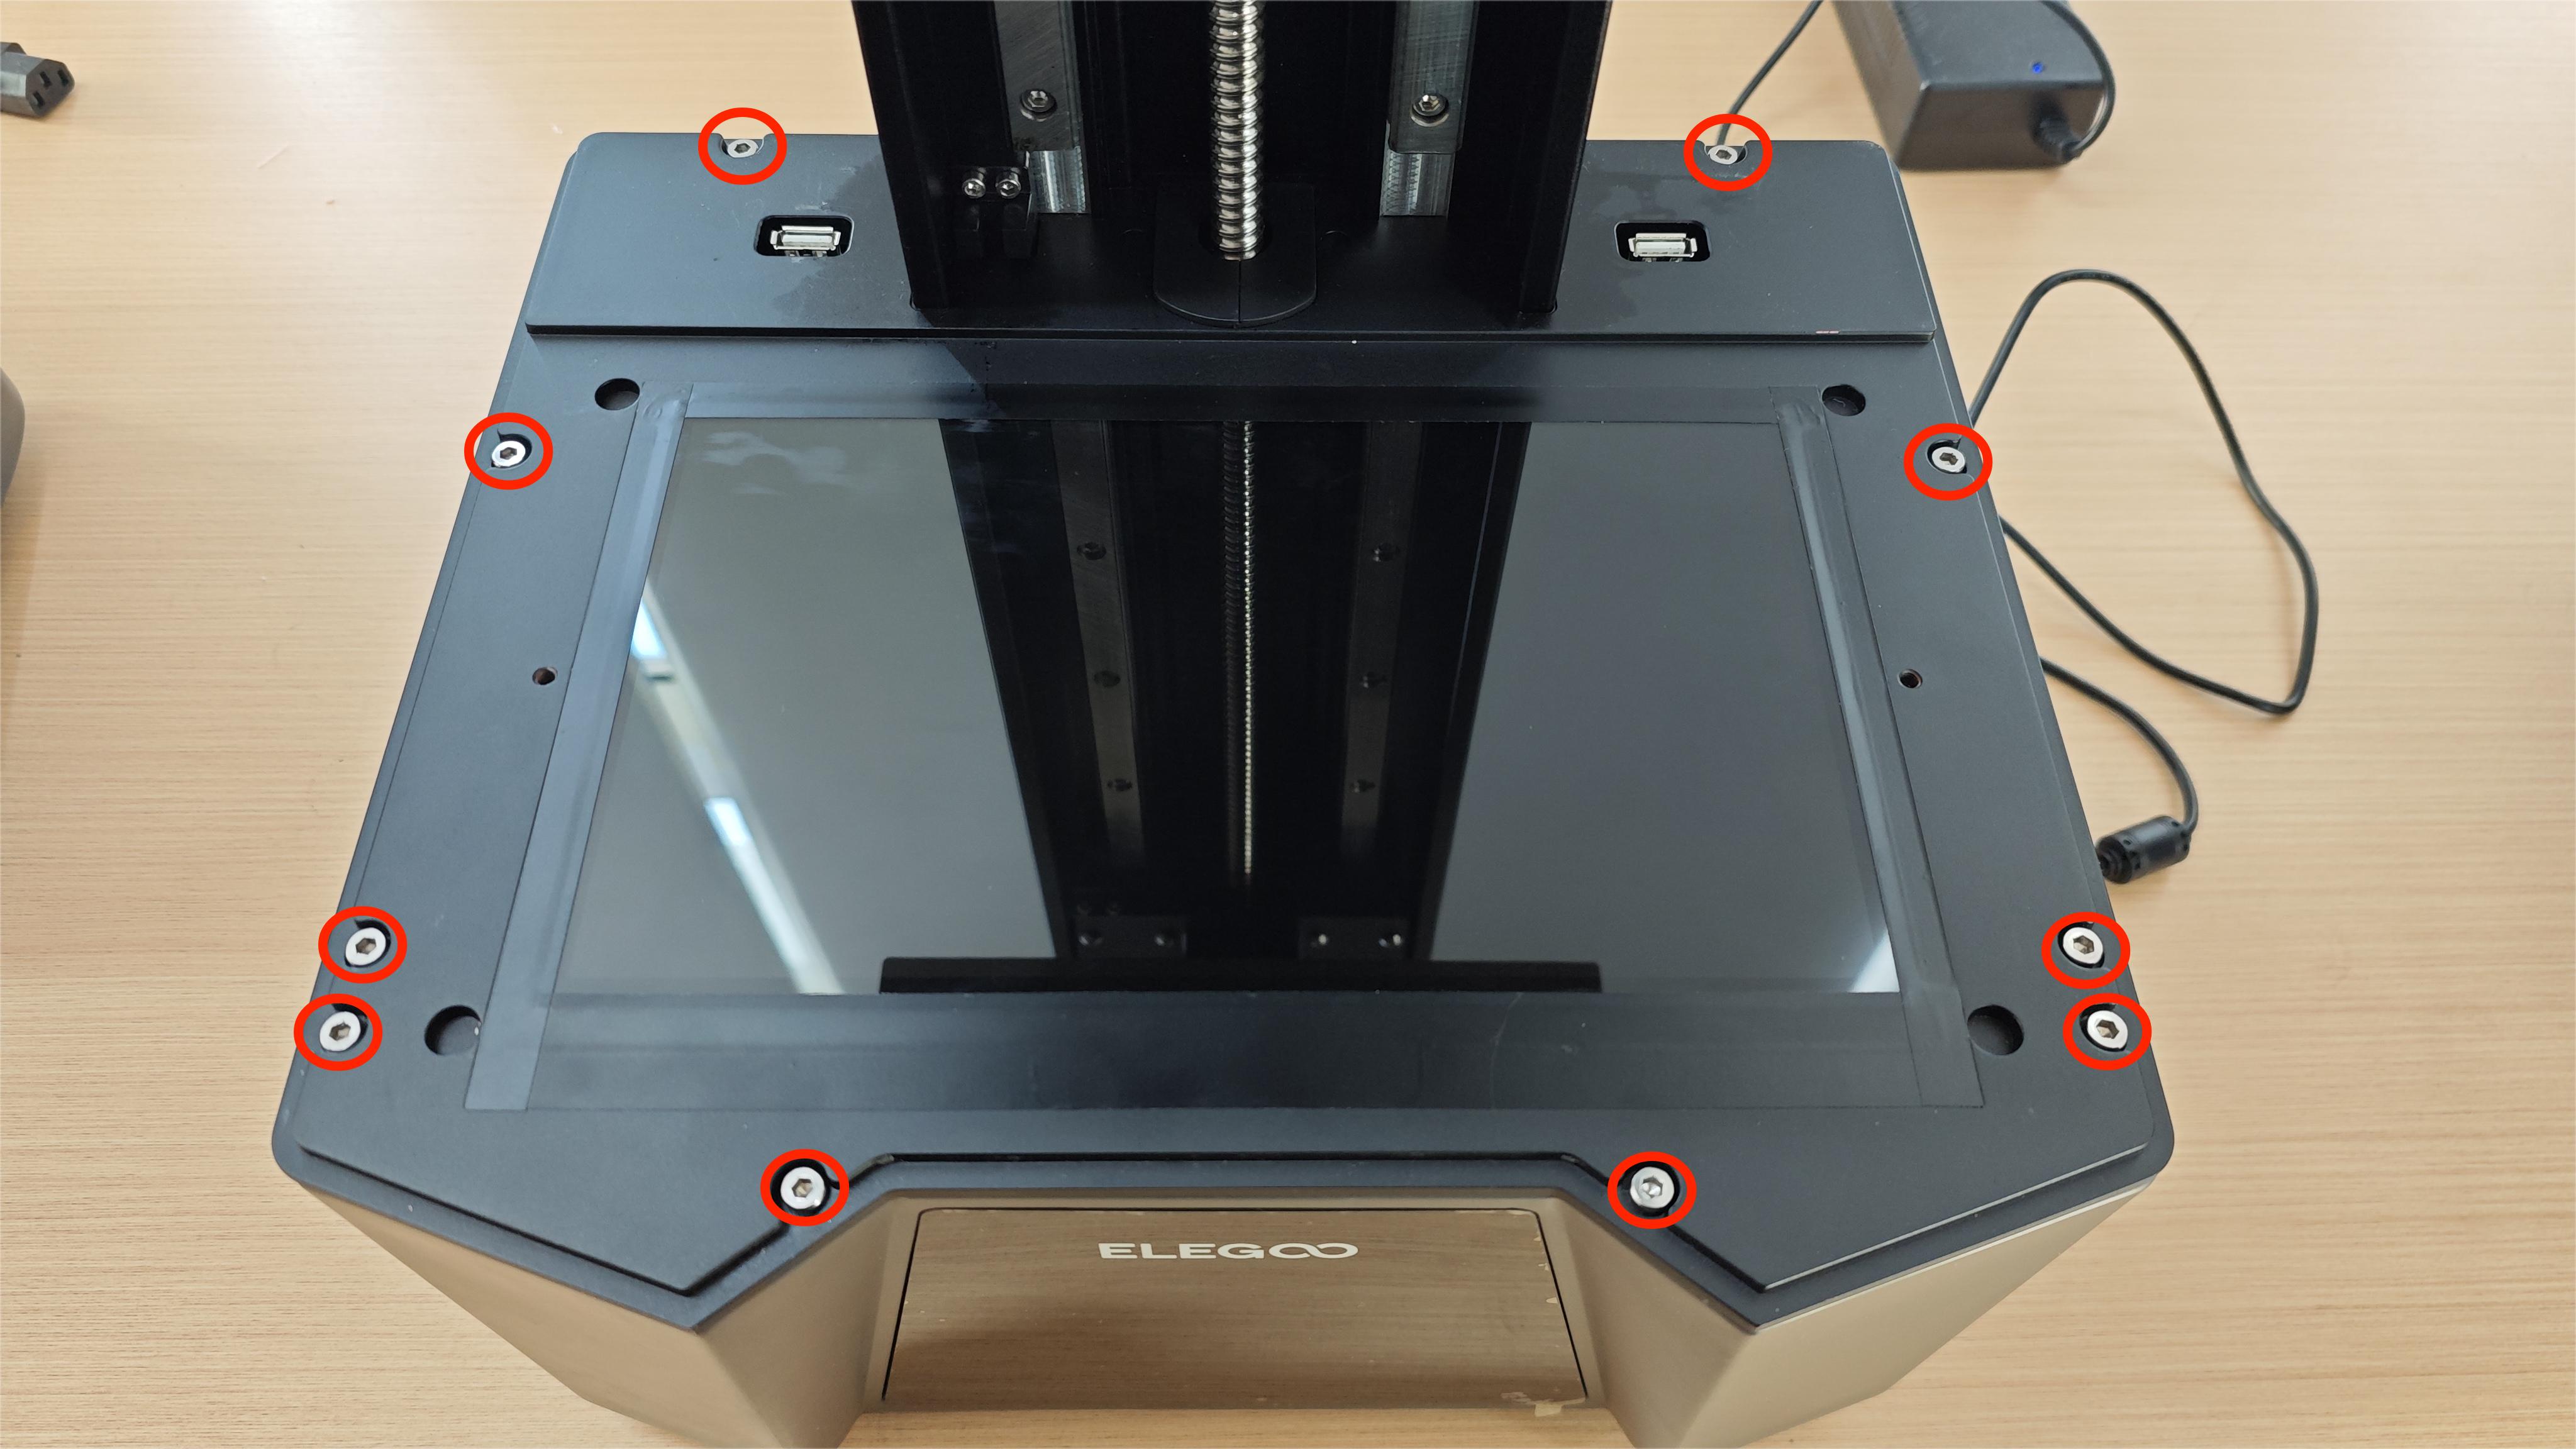
- Use a 3.0mm Allen wrench to loosen all 11 screws on the surface of the middle plate (there is one fixed screw at the back of the Z-axis).
|
- Use a 2.5mm Allen wrench to loosen the four fixed screws that secure the front plate to the bottom plate. After removing them, place the front plate flat on the table (be careful not to damage the touchscreen ribbon cable).
|
- Mark the cable connectors on the mainboard (you can take photos for reference) for easier installation later and to prevent incorrect connections. Then, remove the limit switch cables, two USB interface cables, two fan connector cables, and motor cables one by one.
|
- Remove the entire middle plate.
(Note: When removing the middle plate, please be careful not to damage the various cables underneath.)
|
- Take out the new cooling fan and use a 2.5mm Allen wrench to tighten the two fixed screws that connect the cooling fan to its connector. Then, use the same wrench to tighten the two fixed screws that hold the cooling fan assembly in place on the middle plate.
(Note: Take note of the fan’s orientation when securing the fan and its connector.)
|
- Install the middle plate (be careful not to press down on the cables). Use a 2.5mm Allen wrench to tighten the seven fixed screws on the middle plate, including one at the back of the Z-axis.
|


