¶ Fault Symptoms
The Z Axis does not respond, moves unevenly, or gets stuck after starting a print.
¶ Possible Causes
- The spring cable is caught or obstructed.
- The screws securing the Z motor are loose.
- The Z Axis lead screw and guide rail are insufficiently lubricated.
- The anti-backlash nut is damaged.
- The Z motor connector is loose.
¶ Required Tools
- 2.0 mm Allen key
- 2.5 mm Allen key
- Cable ties
- White lithium grease
- Lint-free cloth
- Nitrile gloves
- Diagonal cutters
Safety Warning: Before disassembling the printer, adjusting cables, or accessing internal components, turn off the printer and unplug the adapter. Turn on the printer only when necessary to test Z Axis movement using the touch screen. During testing, keep your hands, tools, and other objects away from the Z Axis moving area.
¶ Troubleshooting Steps
Note: Before troubleshooting, open the UV cover and remove the build plate and resin tank to facilitate subsequent inspections.
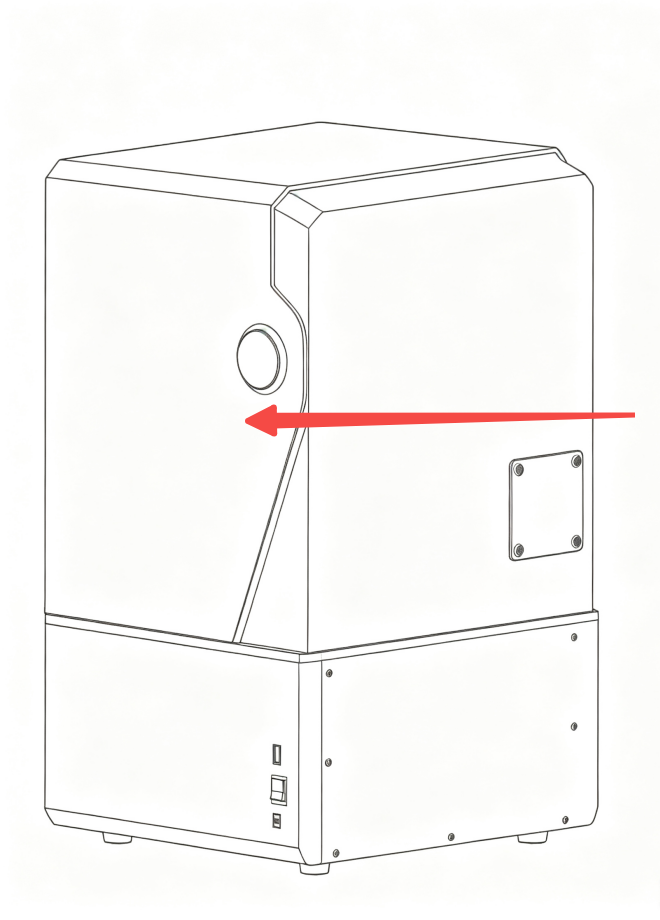
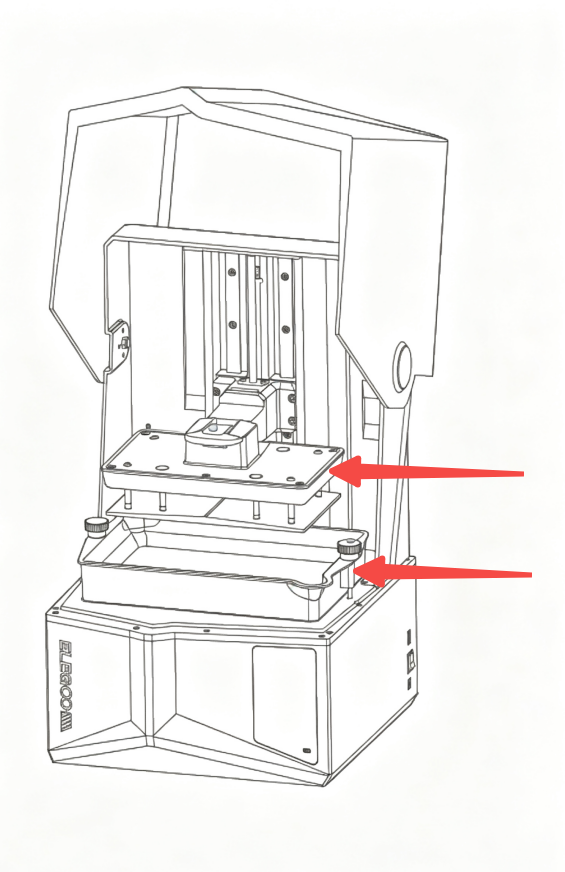
¶ 1. Check Whether the Spring Cable Is Caught or Interfering
- Turn off the power switch and unplug the adapter.
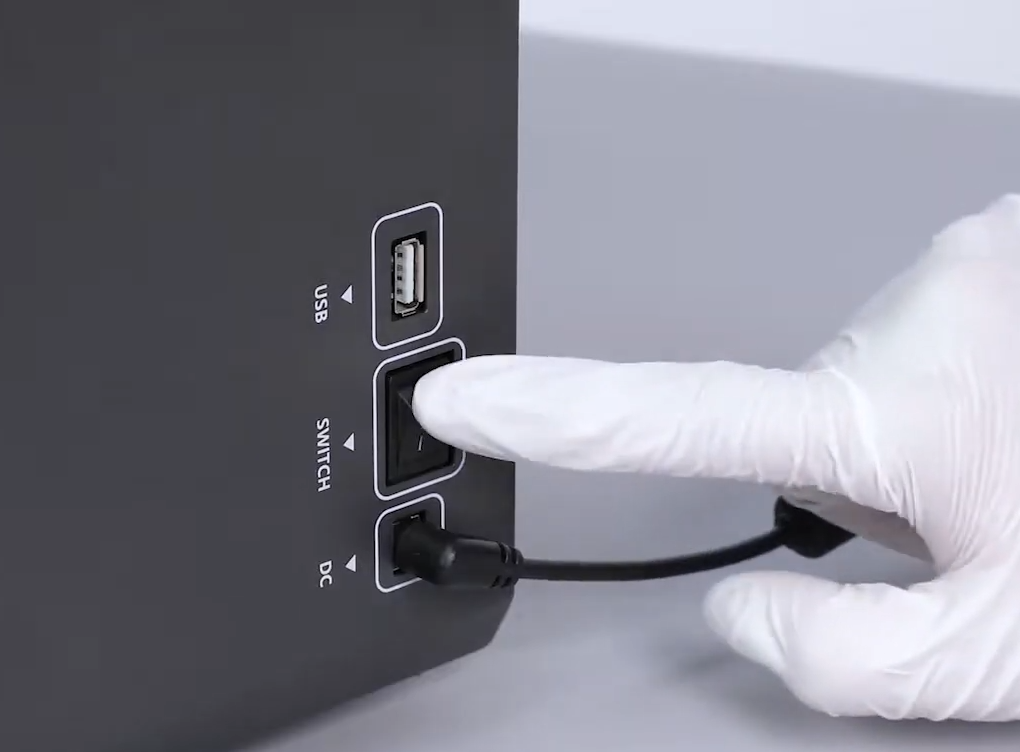
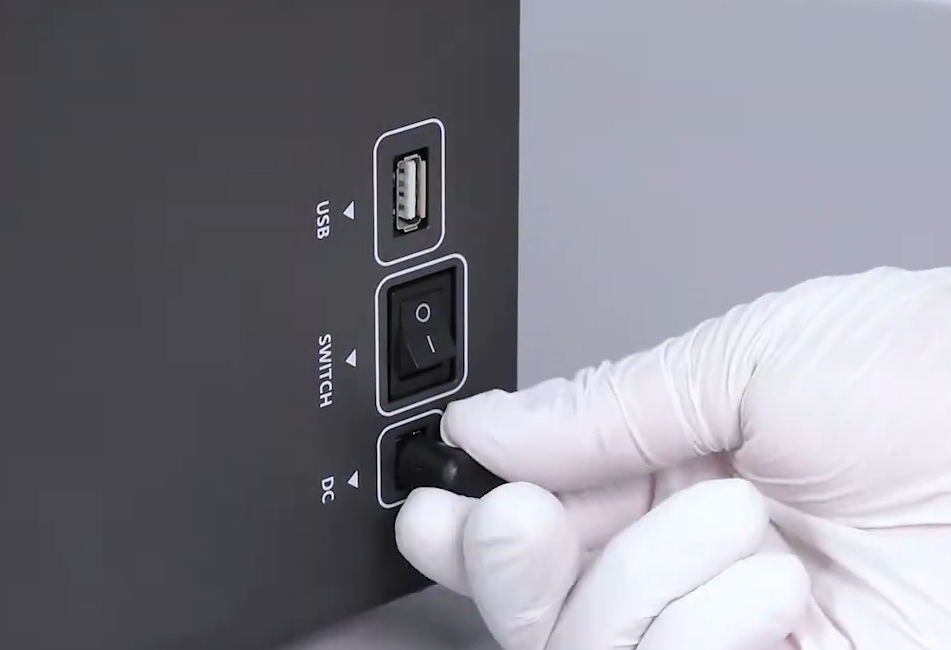
- Check whether the spring cable is stacked, bent, or interfering with other components.
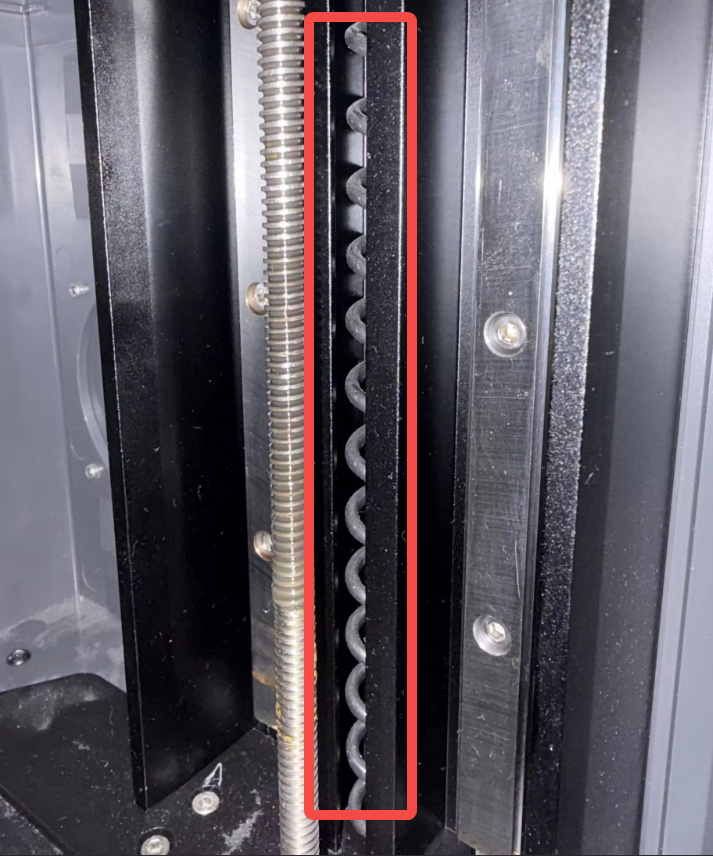
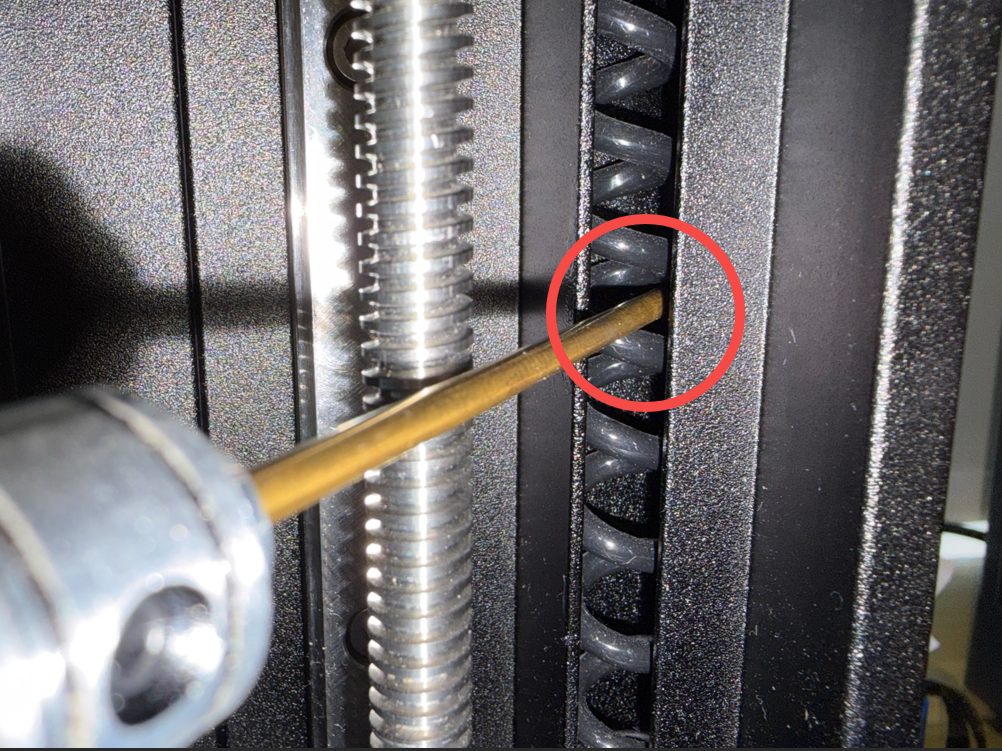
- If the spring cable is stacked, bent, or interfering with other components, use a screwdriver or another suitable tool to gently adjust the spring cable downward to restore it to its proper position. Make sure it does not interfere with any other components.
Note: When adjusting the spring cable, do not squeeze, puncture, or otherwise damage it.
- Remove all tools from the printer and reconnect the power.
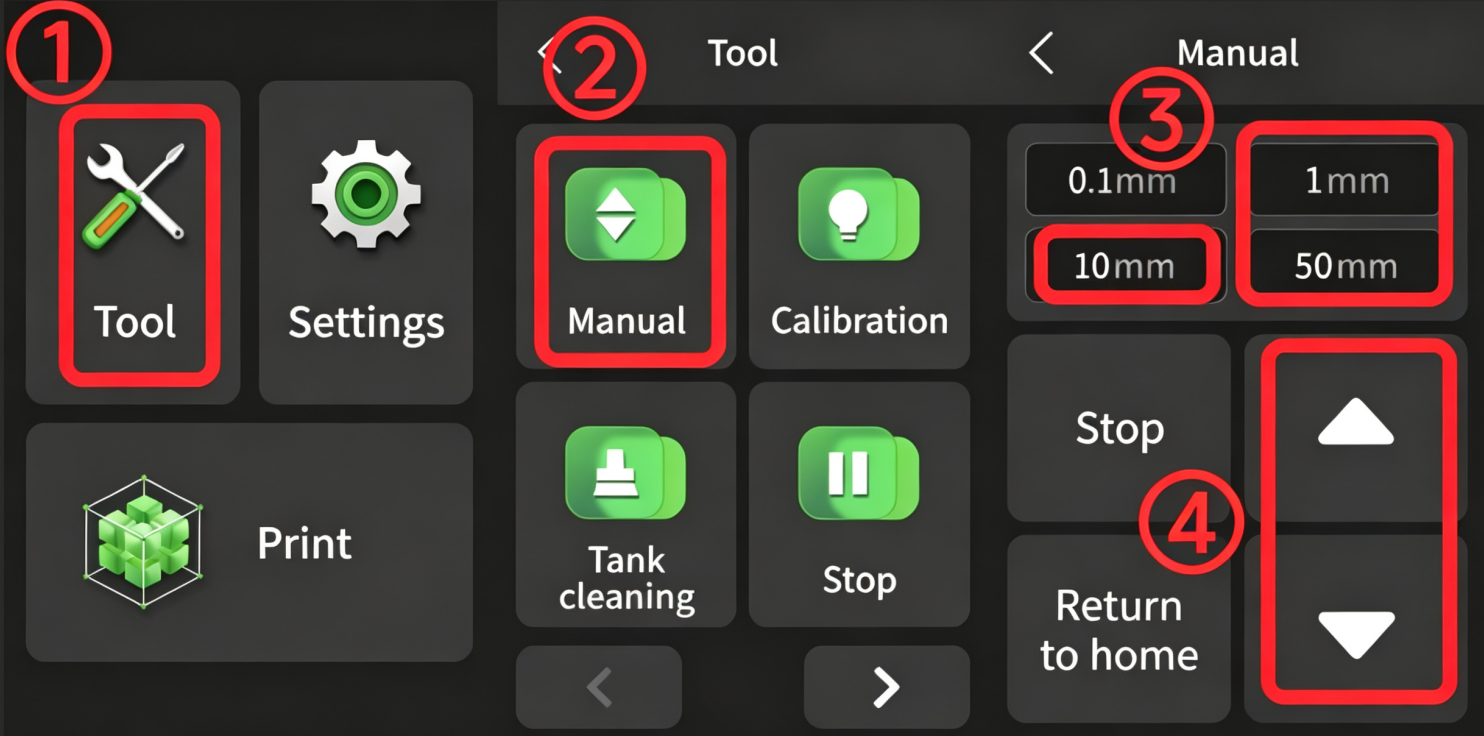
- Use the touch screen to move the Z Axis up and down. Go to Tool > Manual > Distance adjustment > △/▽ and check whether the Z Axis moves smoothly.
¶ 2. Check Whether the Z Motor Mounting Screws Are Loose
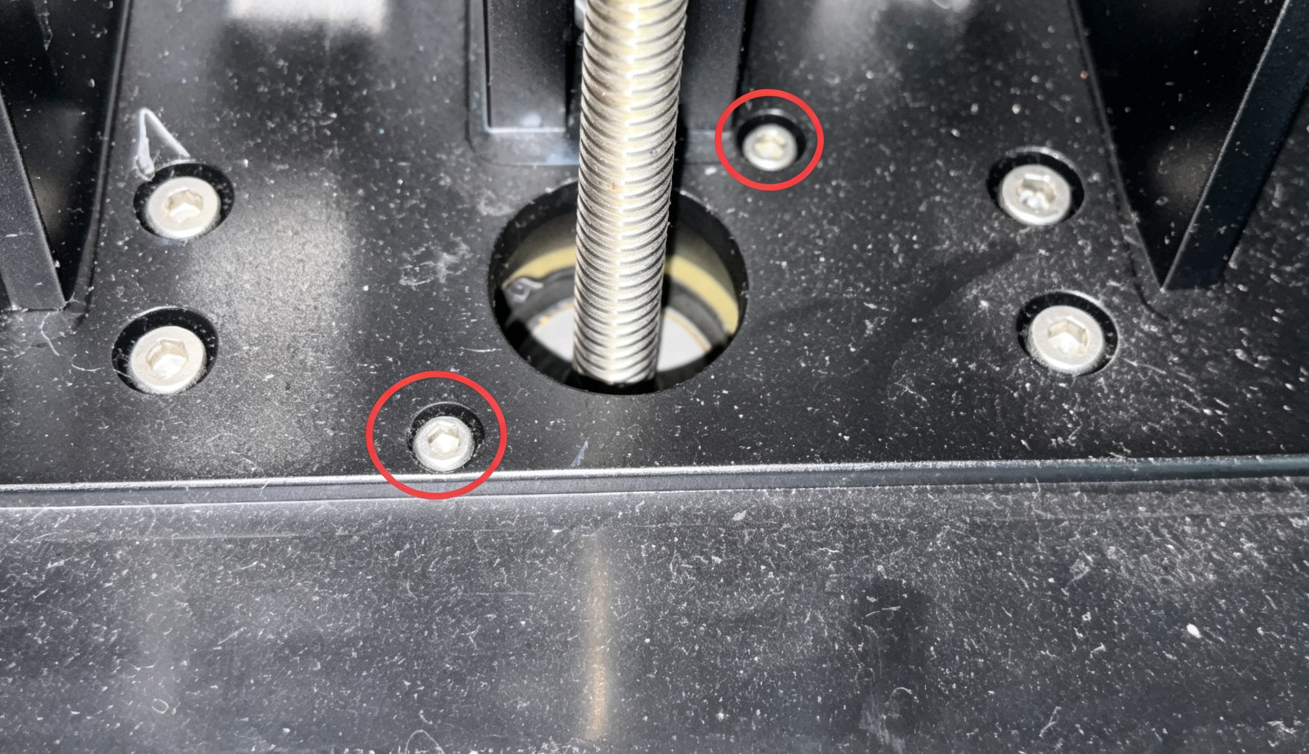
Check whether the Z motor mounting screws are loose. If they are loose, use a 2.5 mm Allen key to tighten the two screws.
Note: If you find that resin has leaked into the stepper motor, stop troubleshooting immediately. Do not use the printer. Turn off the power switch and take photos to contact Technical Support.
- If the Z motor mounting screws are secure, continue with the following troubleshooting steps.
¶ 3. Lubricate the Z Axis Lead Screw and Guide Rail
- Turn off the printer and unplug the adapter.
- Use a lint-free cloth to wipe off dirt and residual grease from the surfaces of the Z Axis lead screw and guide rail.
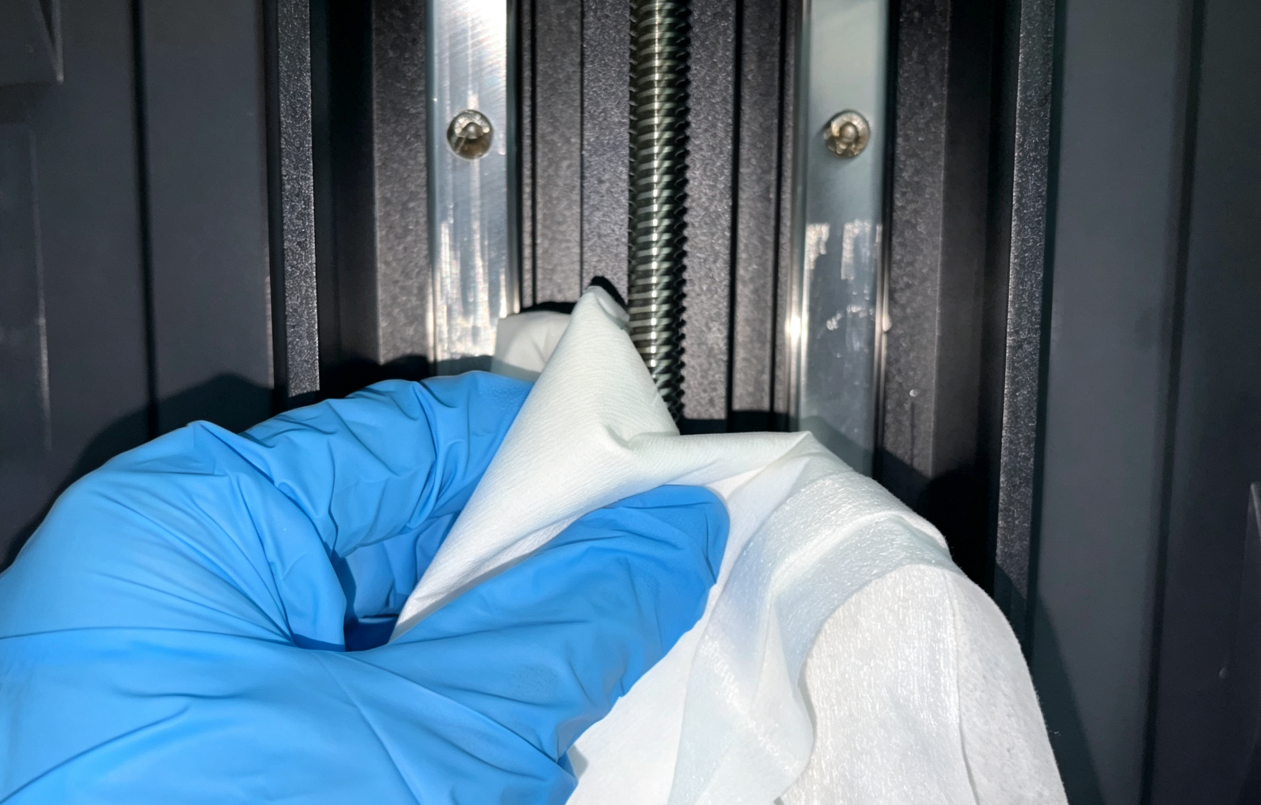
- Apply an even layer of grease to the surfaces of the Z Axis lead screw and guide rail. White lithium grease is recommended. Make sure the surfaces are evenly lubricated.
Caution: Do not apply excessive grease, as accumulated grease may attract dust.
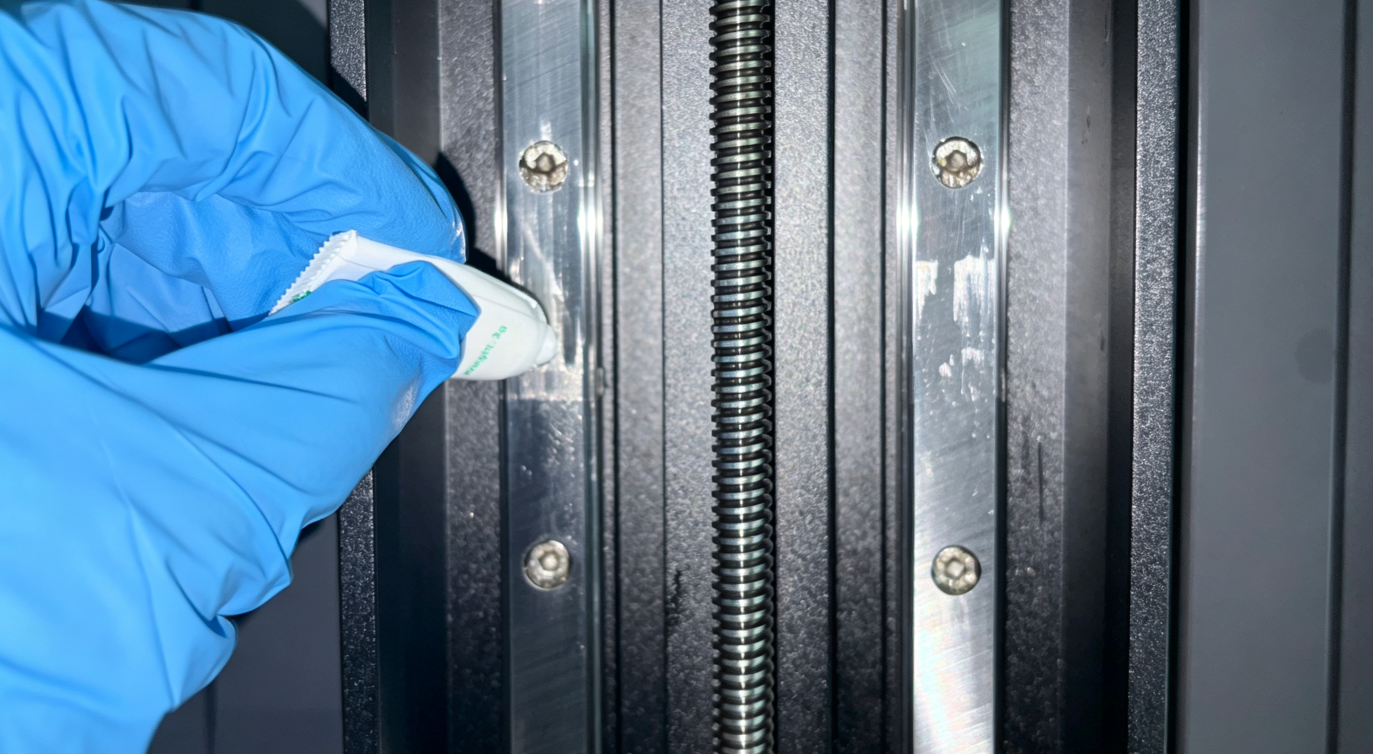
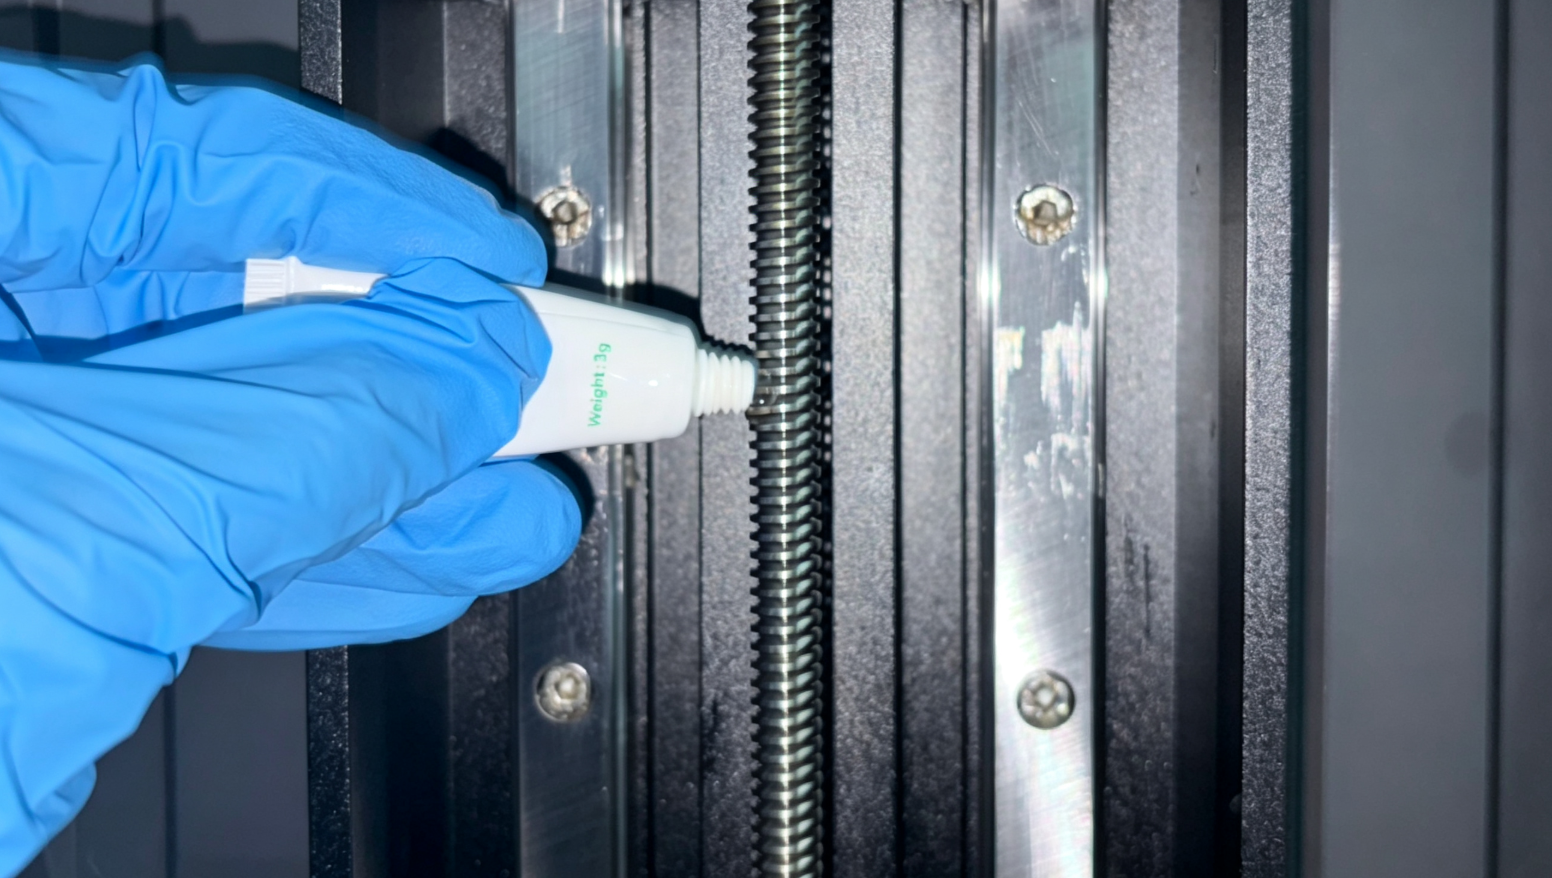
- Reconnect the power and use the touch screen to move the Z Axis up and down. Check whether the Z Axis moves smoothly.
- If the Z Axis moves smoothly, troubleshooting is complete.
- If the Z Axis still does not move normally, continue with the following troubleshooting steps.
¶ 4. Check the Z Axis Anti-Backlash Nut
- Turn off the printer and unplug the adapter.
- Locate the screws securing the Z Axis anti-backlash nut.
- Use a 2.5 mm Allen key to slightly loosen the mounting screws. Do not remove the screws completely.
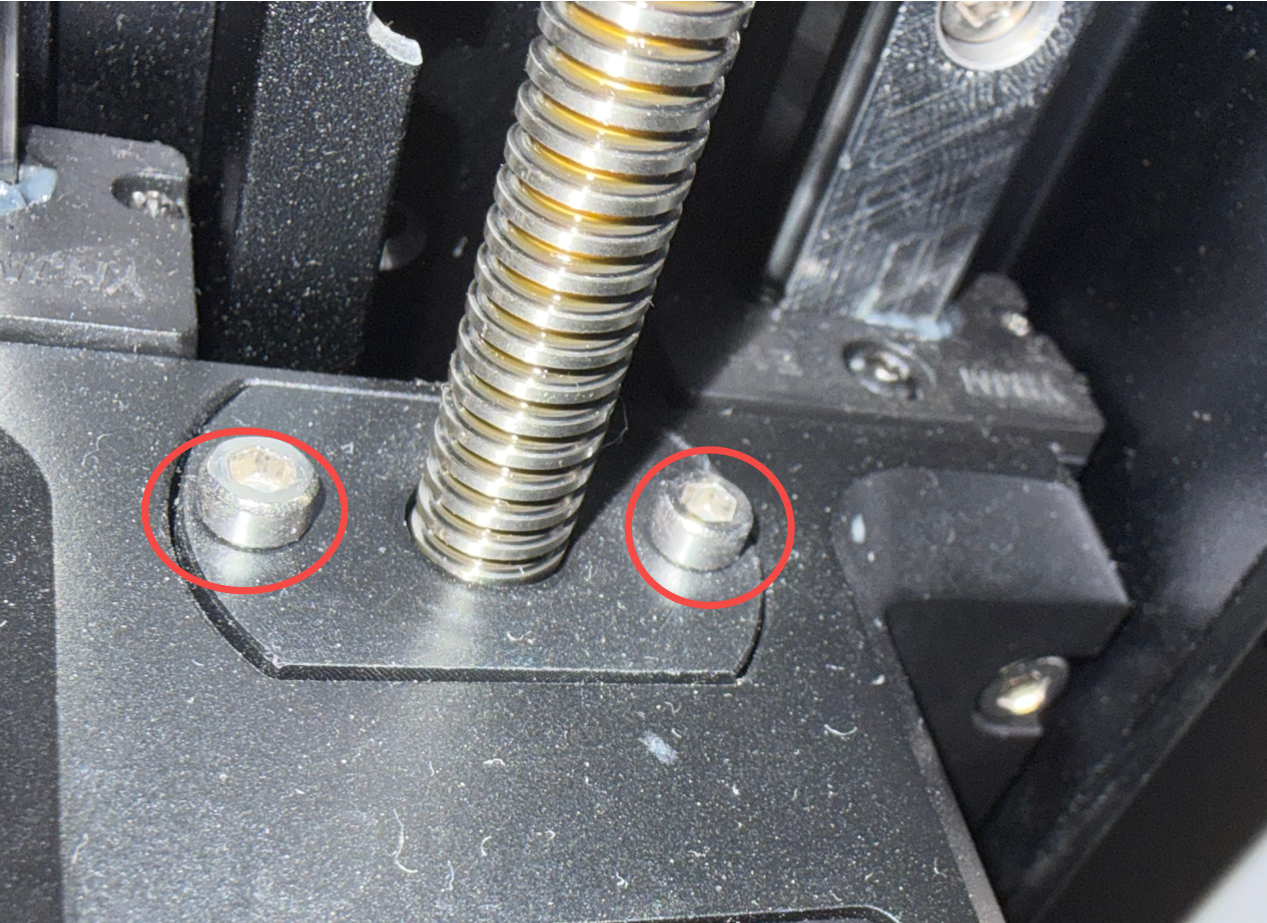
- Make sure all tools have been removed and keep your hands and other objects away from the Z Axis moving area.
- Reconnect the power and use the touch screen to move the Z Axis up and down. Check whether the Z Axis operates normally.
- If the Z Axis operates normally after loosening the anti-backlash nut mounting screws, the anti-backlash nut may be defective. Replace the anti-backlash nut and test the printer again.
- If the Z Axis still does not operate normally after loosening the mounting screws, continue with the following troubleshooting steps.
Note: Before proceeding to the next troubleshooting step, retighten the anti-backlash nut mounting screws.
¶ 5. Adjust the Spring Cable Length
- Turn off the power switch and unplug the adapter.
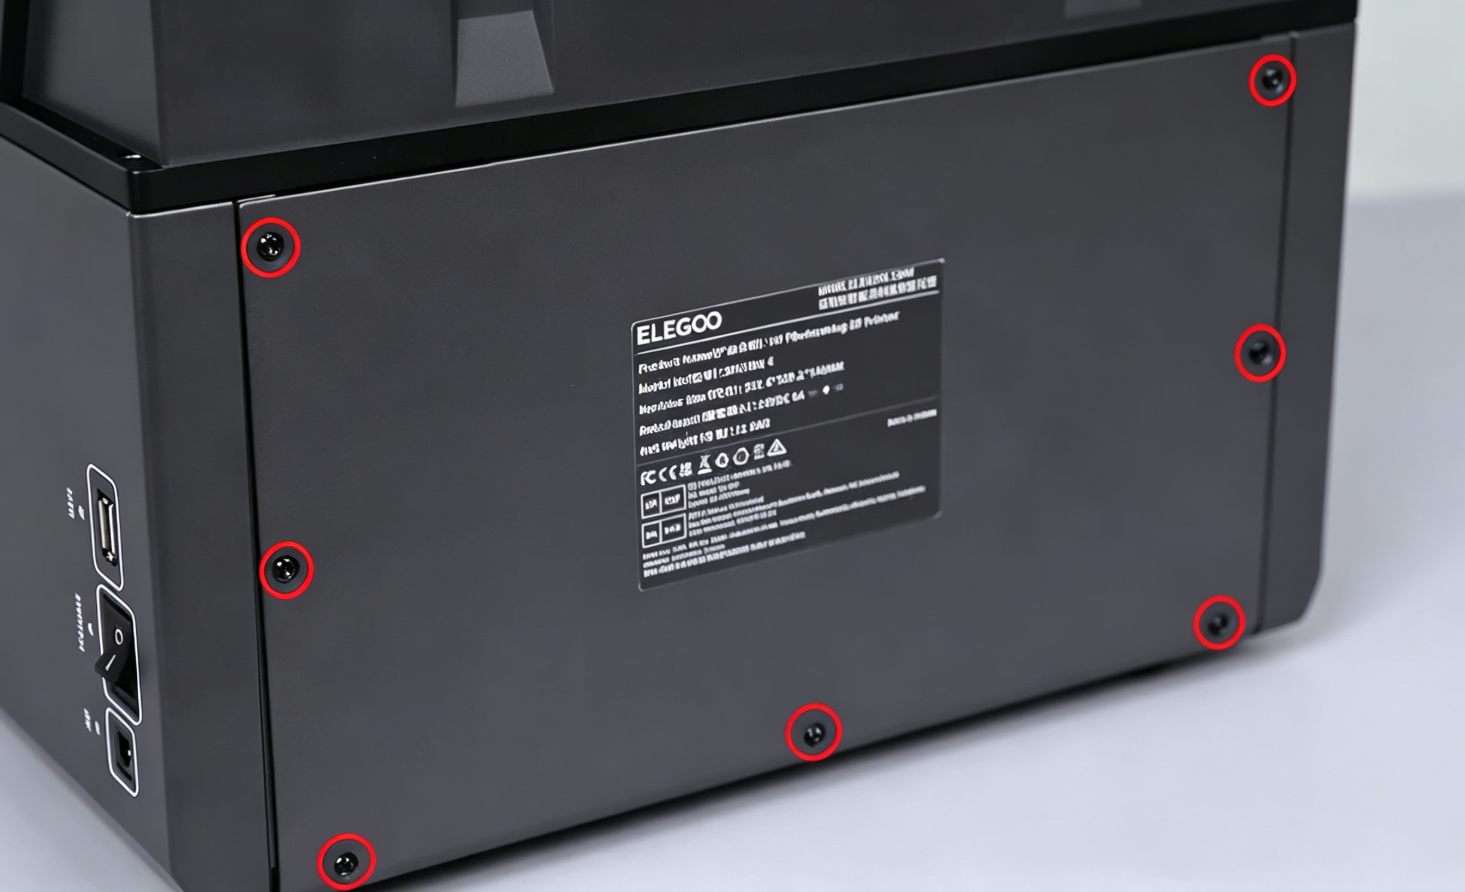
- Use a 2.0 mm Allen key to remove the seven screws securing the rear cover, and then remove the rear cover.
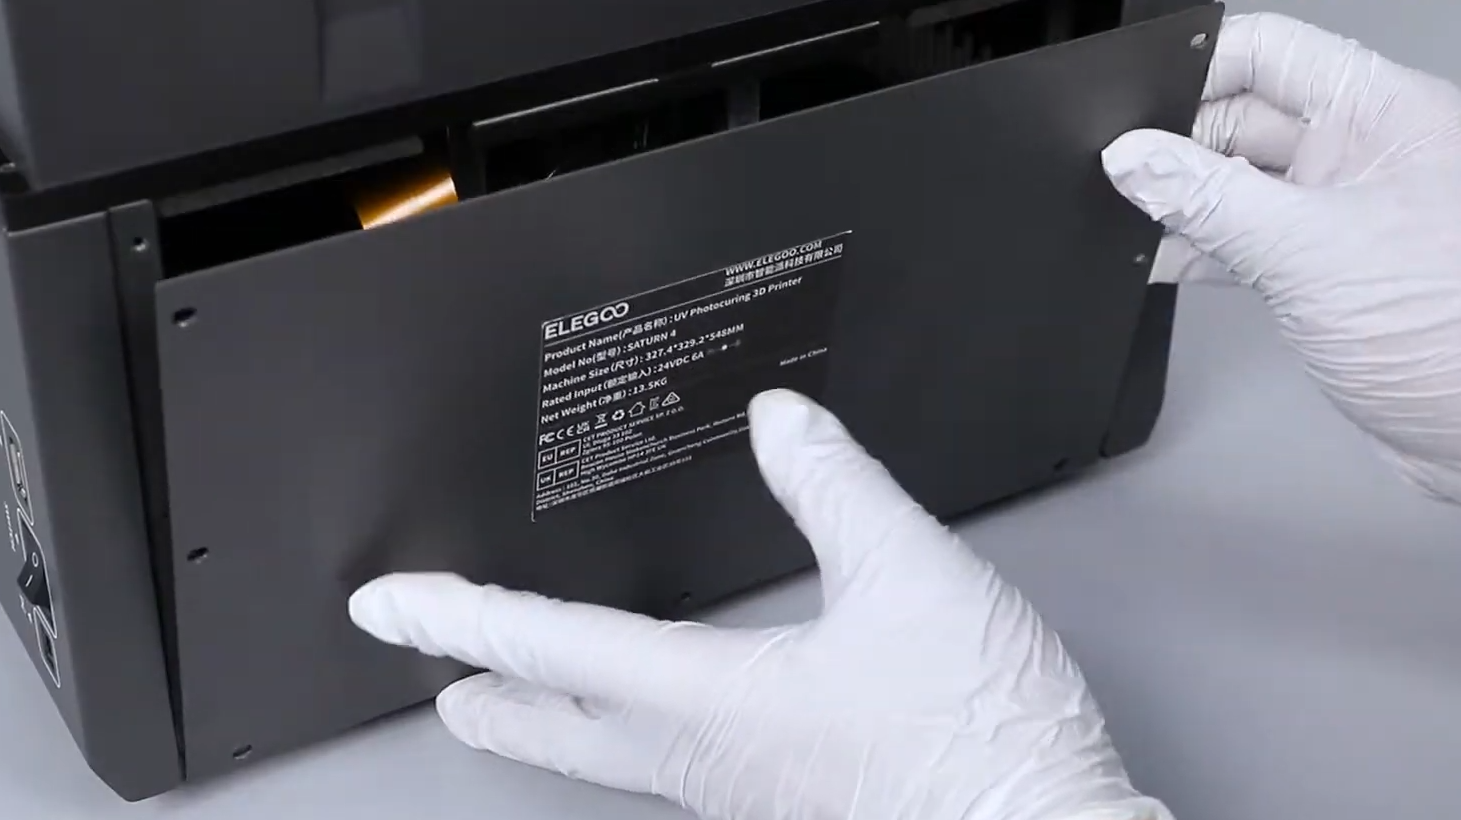
- Locate the cable tie securing the spring cable and use diagonal cutters to cut the cable tie.
Note: When cutting the cable tie, be careful not to cut the spring cable.
The spring cable is located at the marked position. If the spring cable is already tangled, refer to the following video to reinstall it.
Spring Cable Reinstallation Video
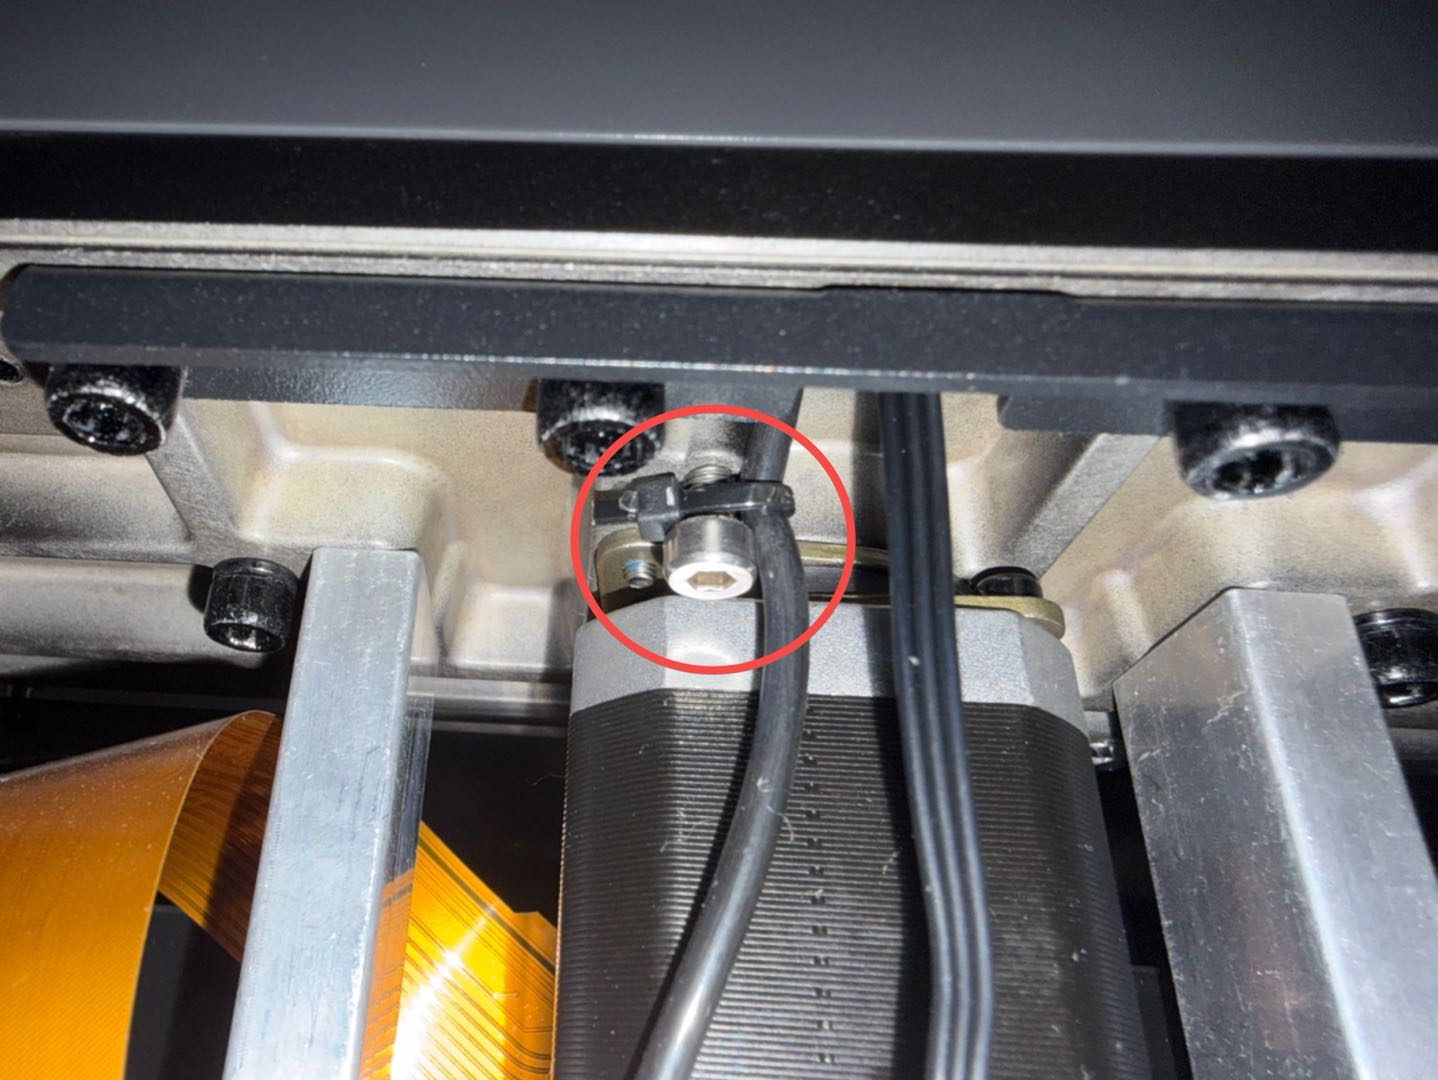
Caution: Make sure the adjusted spring cable does not interfere with the Z Axis moving components, lead screw, or any other internal structures.
- Pull the spring cable downward until it extends approximately 2 turns, then secure it with a new cable tie.
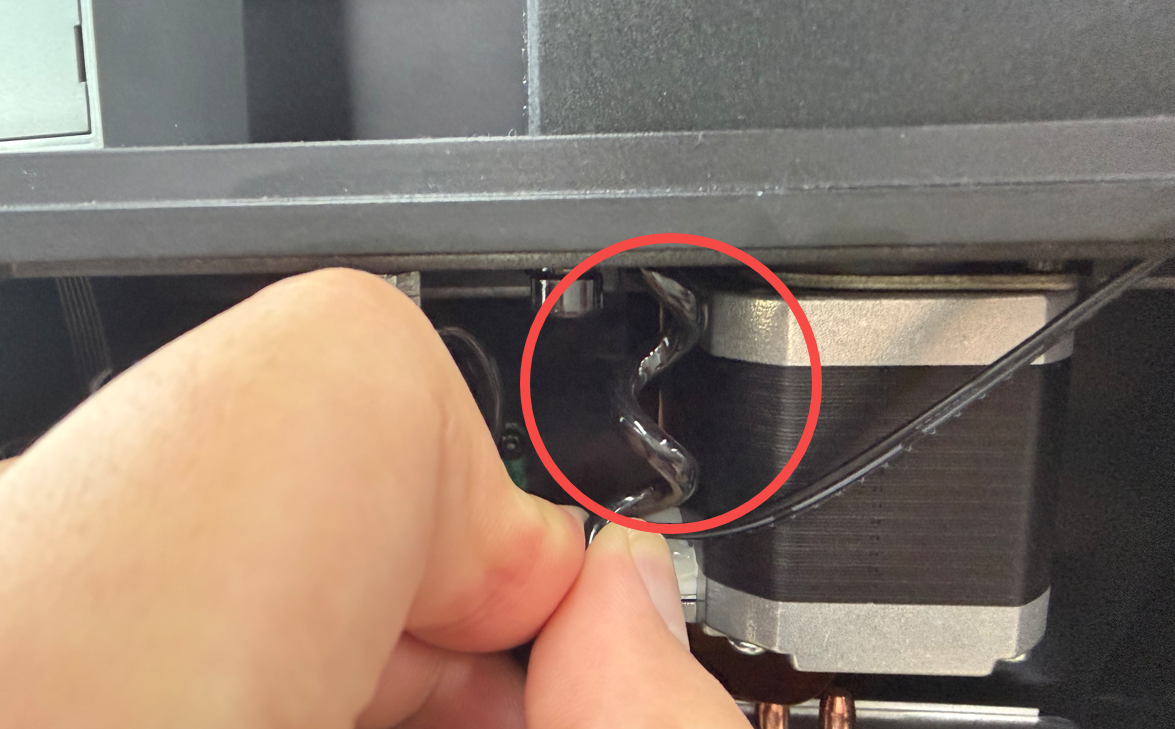
- Reconnect the power and use the touch screen to move the Z Axis up and down. Check whether the Z Axis moves smoothly.
- If the Z Axis moves smoothly, troubleshooting is complete.
- If the Z Axis does not move or still moves intermittently, continue with the following troubleshooting steps.
¶ 6. Check the Z Motor Connector
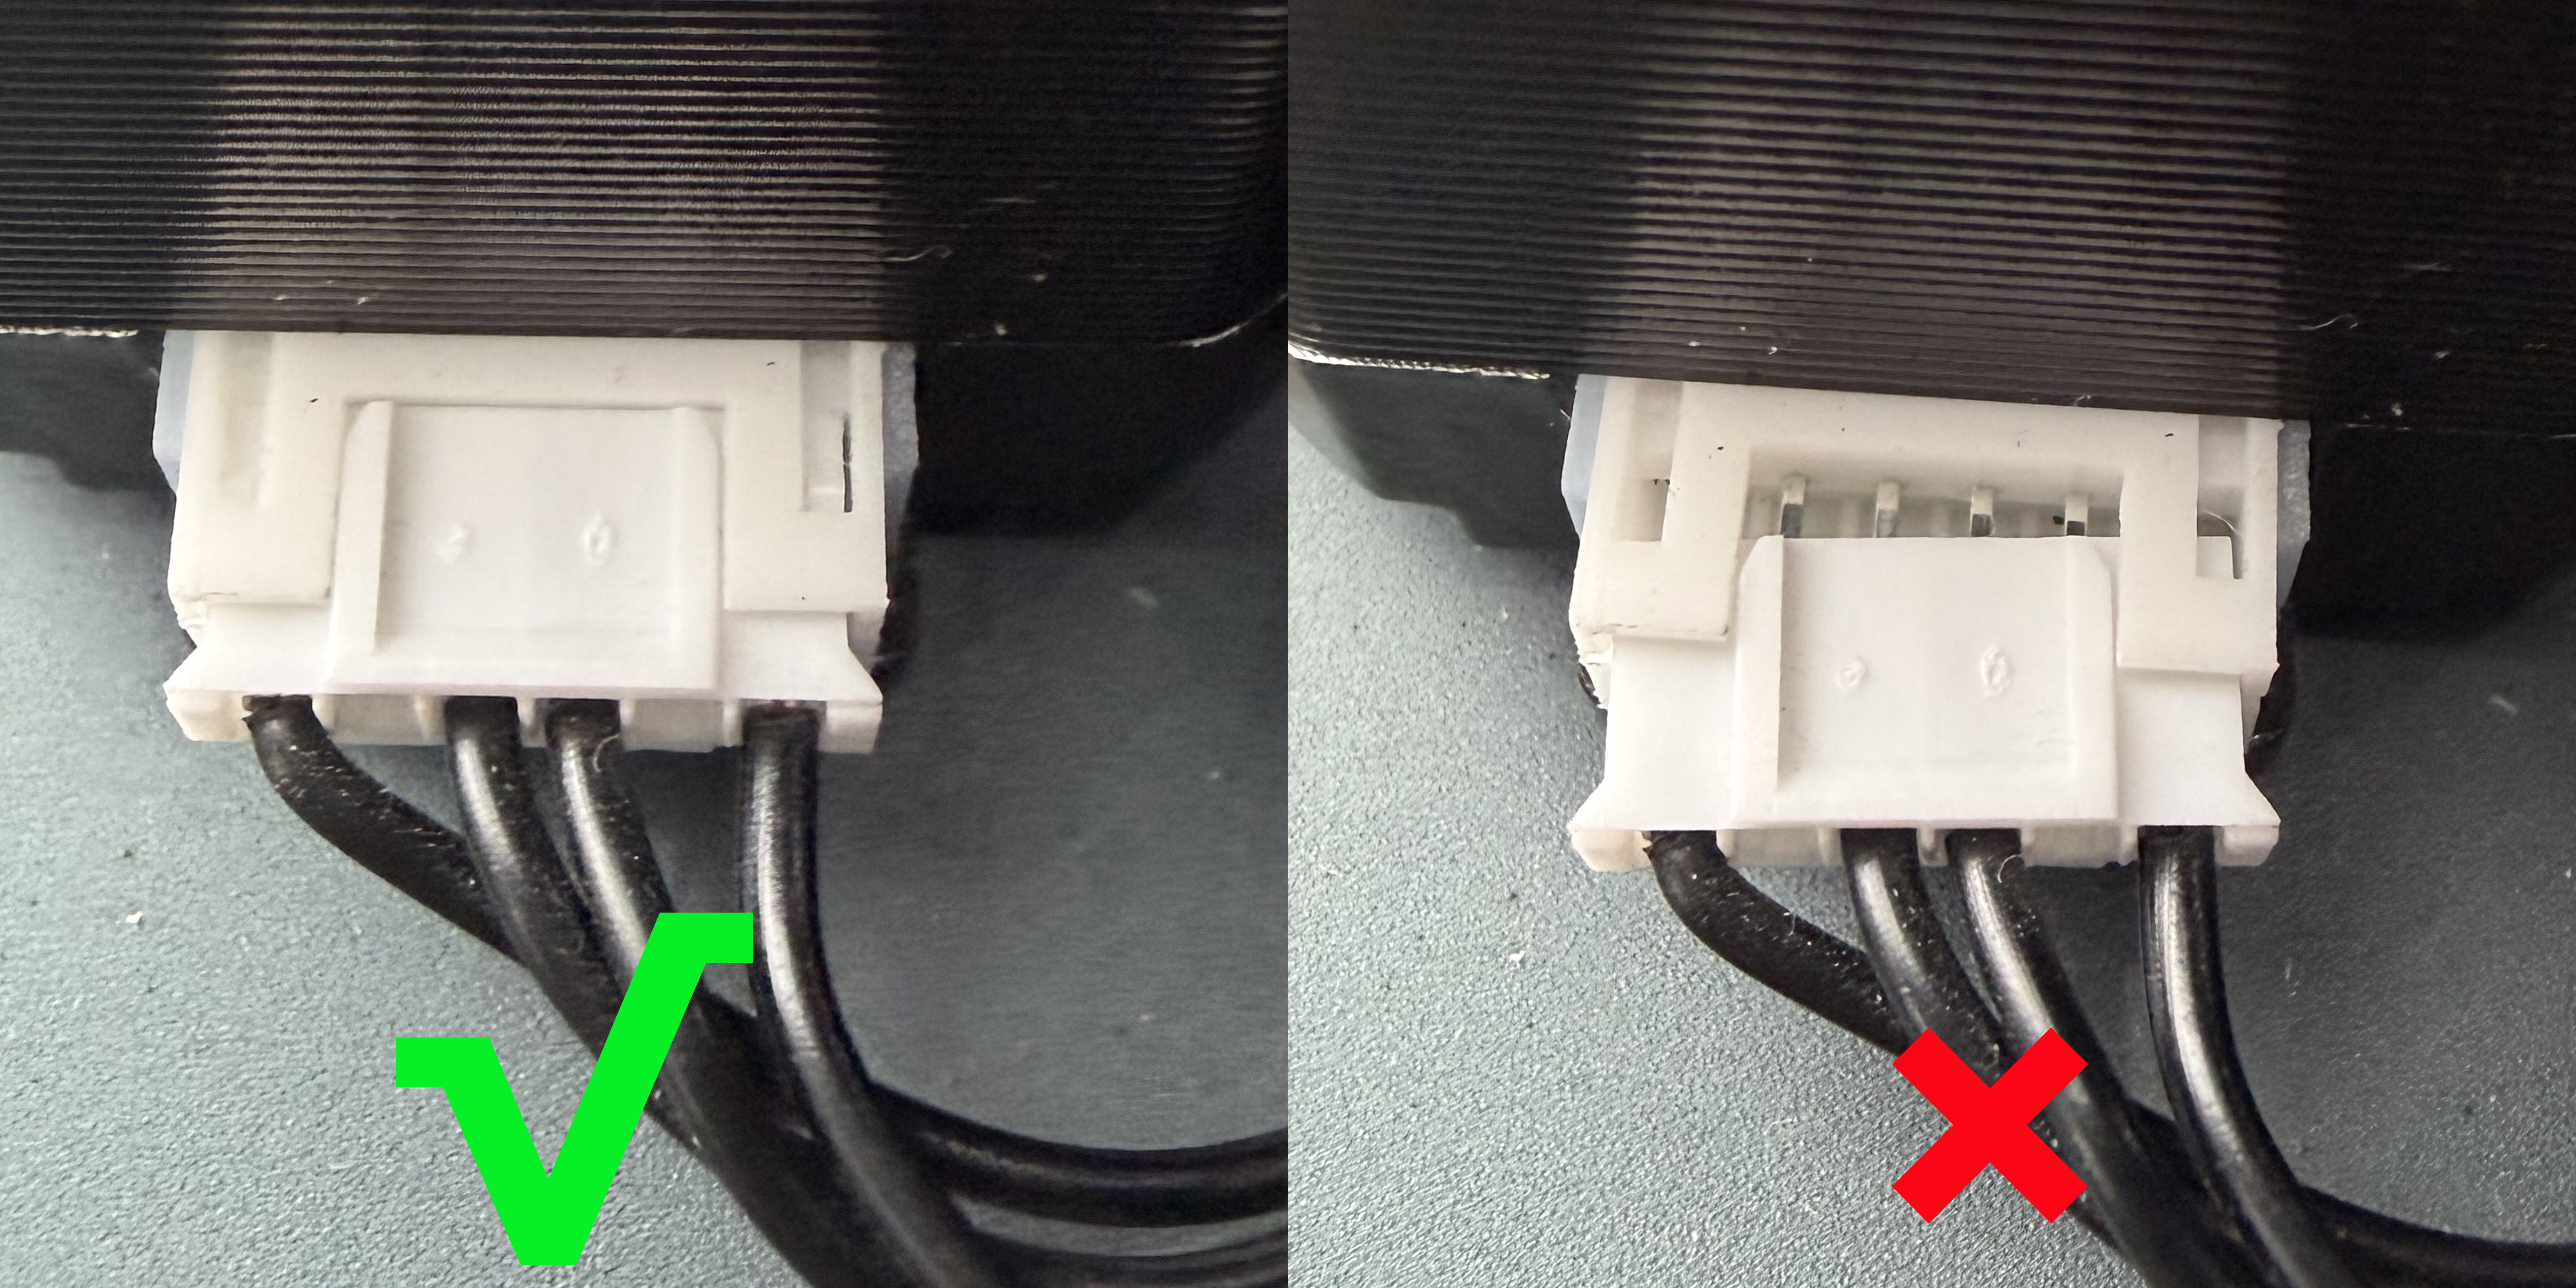
- Check whether the Z motor connector is loose and whether the connector shows any signs of burning, melting, or discoloration. Reconnect the Z motor connector.
Note: The connector is secured with hot-melt glue at the factory to prevent it from becoming loose. If the connector is firmly connected, skip the reconnection step.
Note: If the connector shows signs of burning, melting, or discoloration, take photos and contact Technical Support. Do not use the printer until the issue has been resolved.
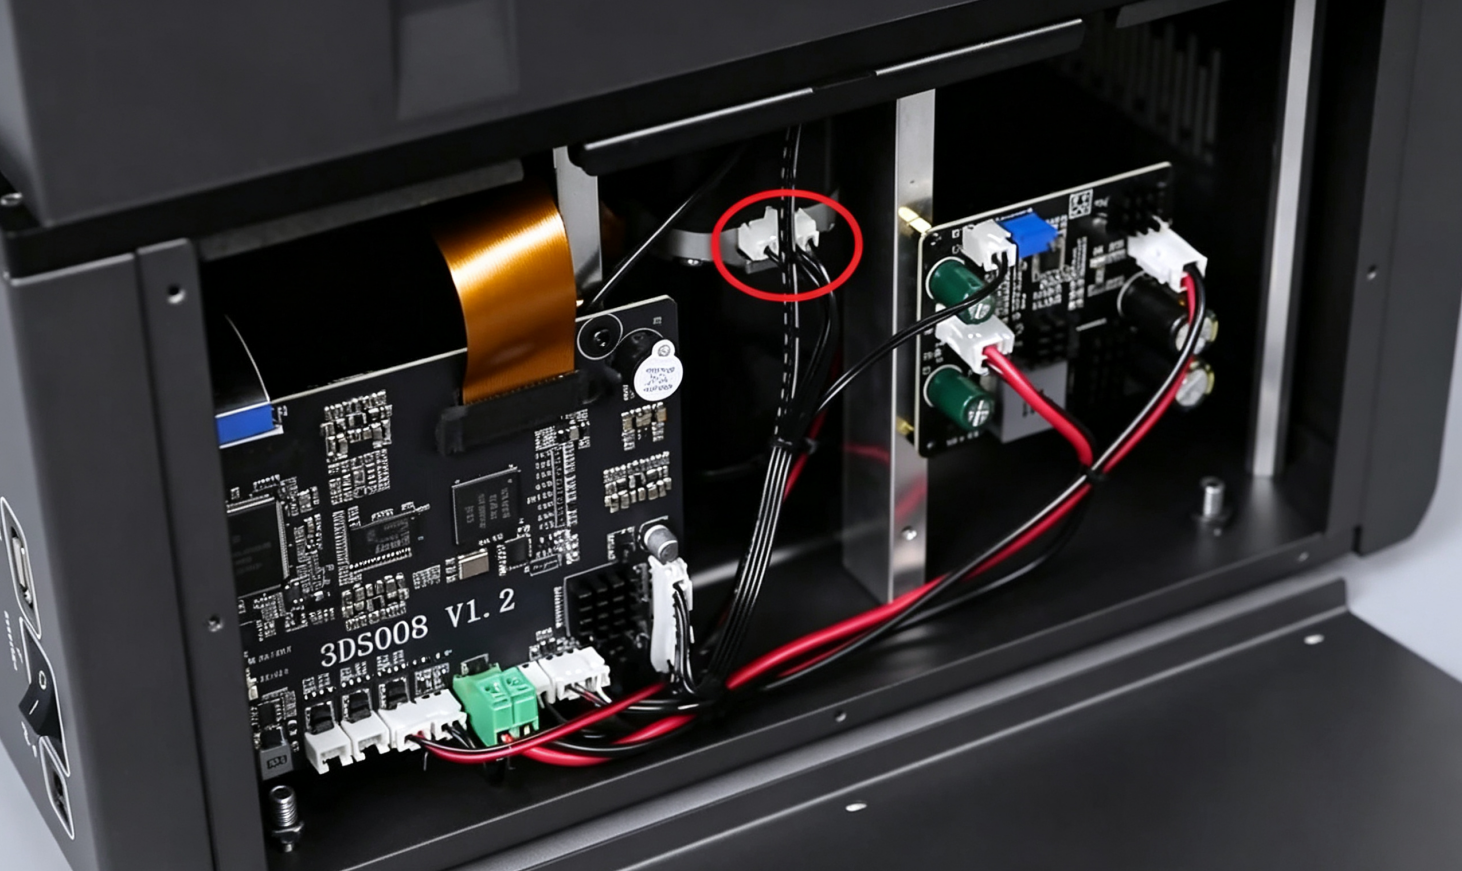
- The following image shows the normal and loose connection states of the Z motor connector.
¶ 7. Verification
- Use the touch screen to move the Z Axis up and down several times. Confirm that the Z Axis moves smoothly without abnormal noise, intermittent movement, or stopping.
- Start a print job and confirm that the Z Axis moves normally during printing.
¶ Contact Technical Support
If the issue persists after completing all the troubleshooting steps above, provide the following information when contacting Technical Support at 3dp@elegoo.com:
Video: Record a video showing the abnormal Z motor operation.
Photo: Take a photo of the area above the Z motor.
Photo: Take a photo showing the overall condition of the spring cable.
Photo: Take photos showing the connection status of the connectors on both sides of the Z motor.
Test Result: Indicate whether the Z motor operates normally after loosening the anti-backlash nut mounting screws.
¶ Help us improve
If you have any ideas about the wiki pages, please let us know via ELEGOO official feedback channel