- 2.0 mm Allen wrench
- 2.5 mm Allen wrench
- Pliers
- Wire cutters
- Diagonal pliers
https://youtu.be/hkWbXRwmnto
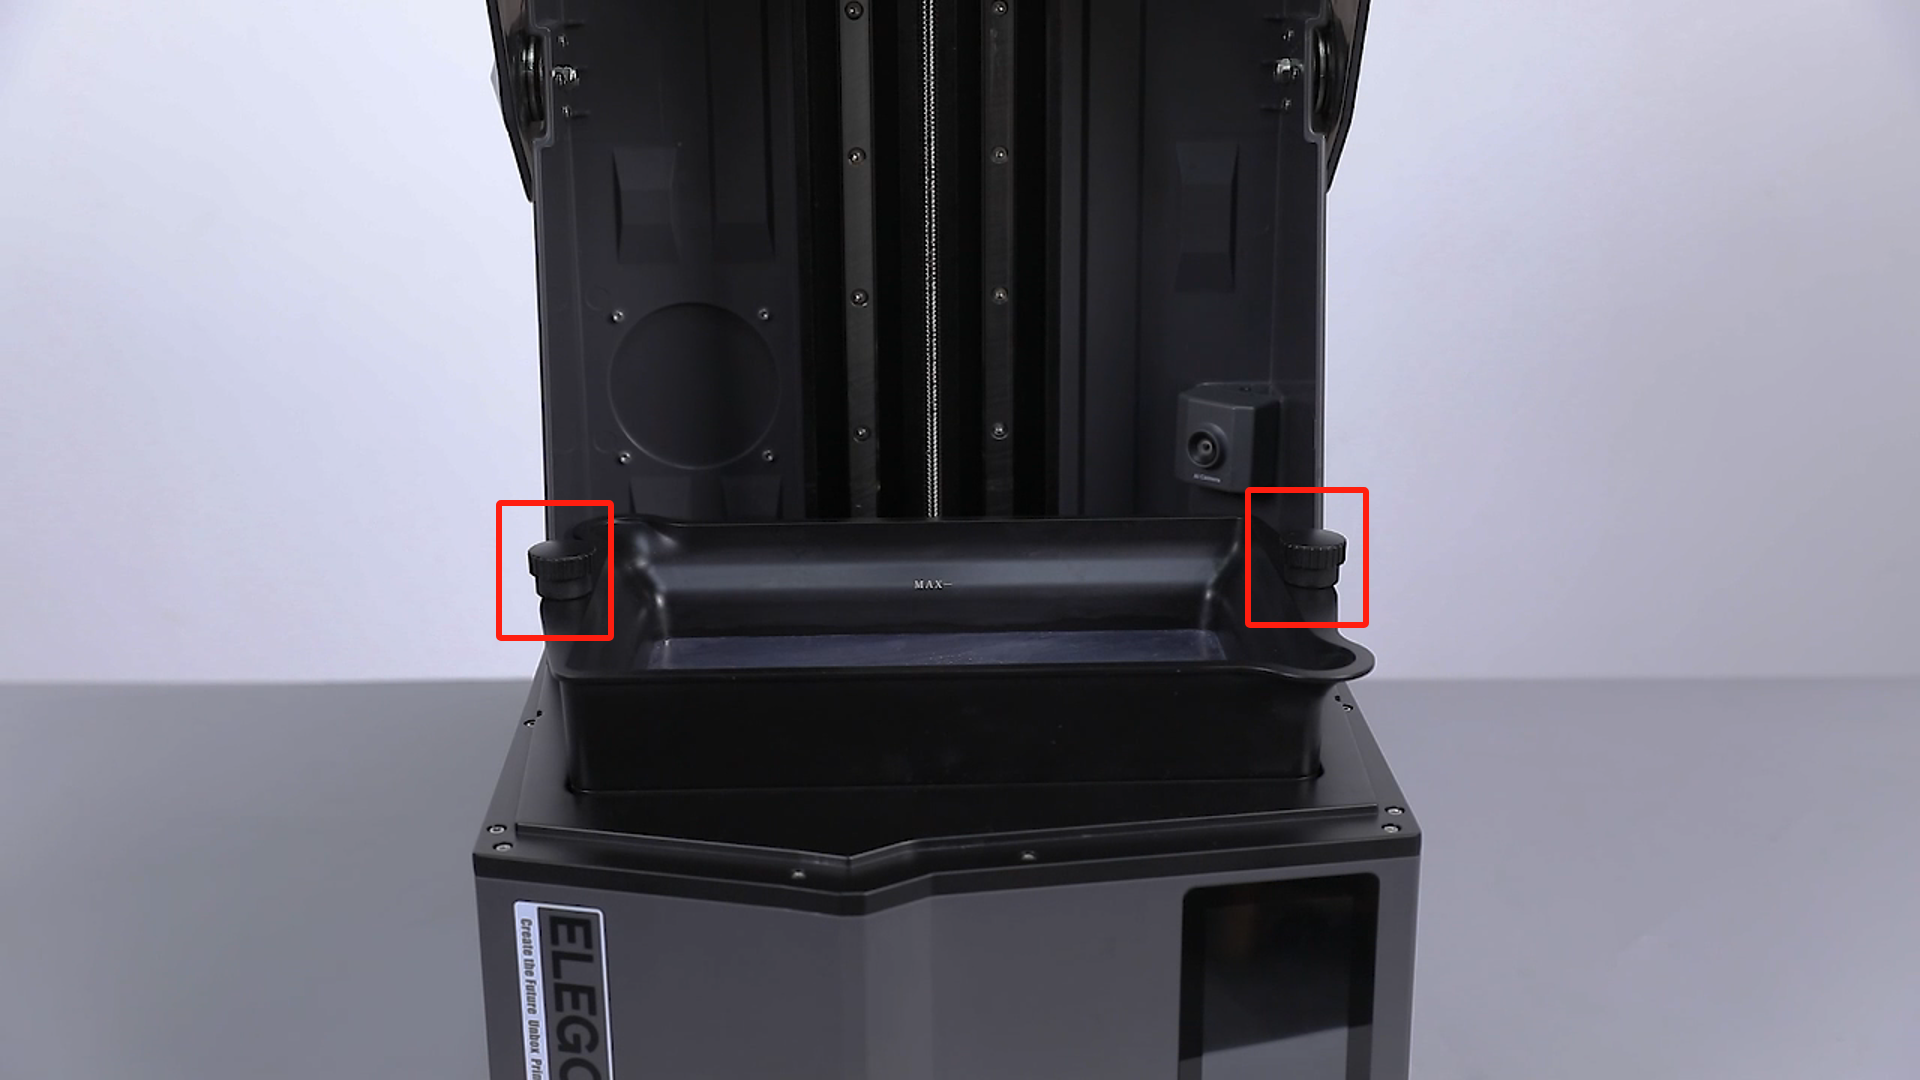
- Resin has entered the threaded hole of the straight knob that secures the resin vat, causing it to jam and making it impossible to loosen.
- Turn off the 3D printer power and unplug the power cord.
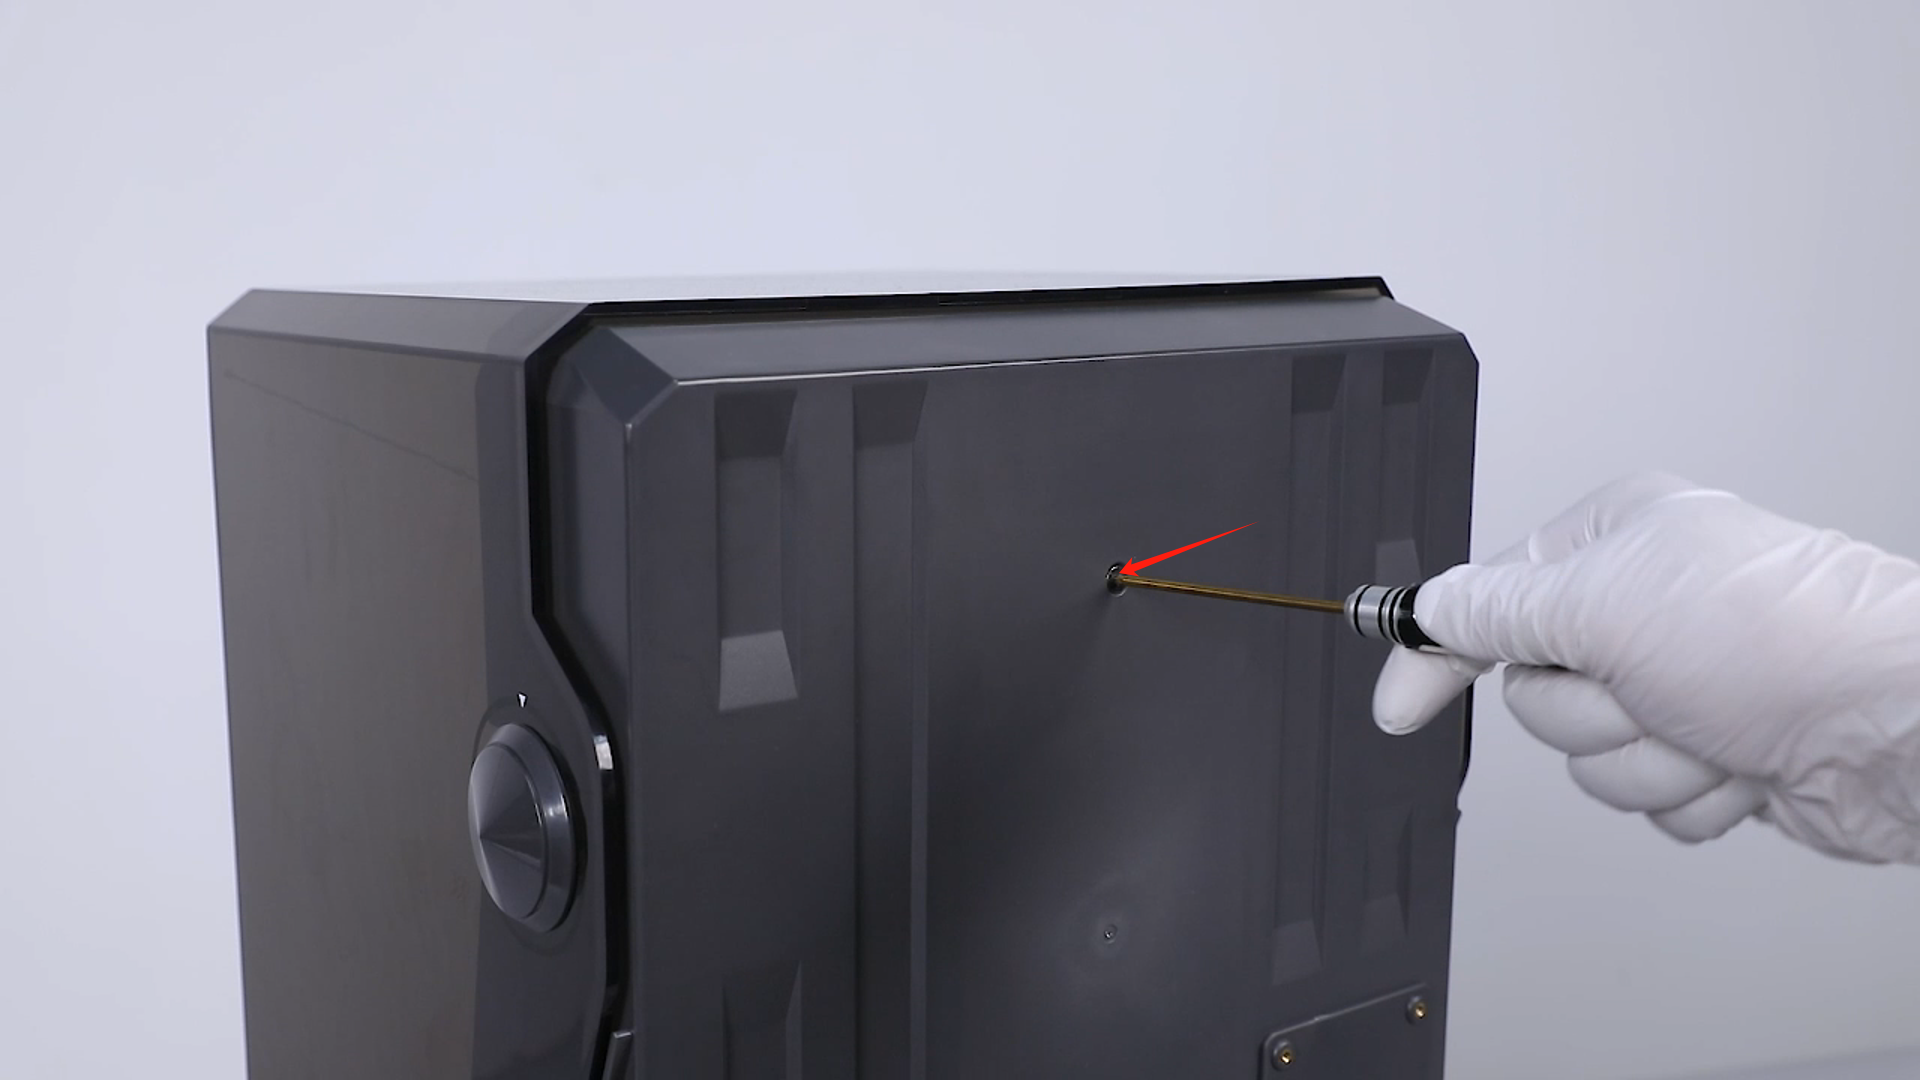
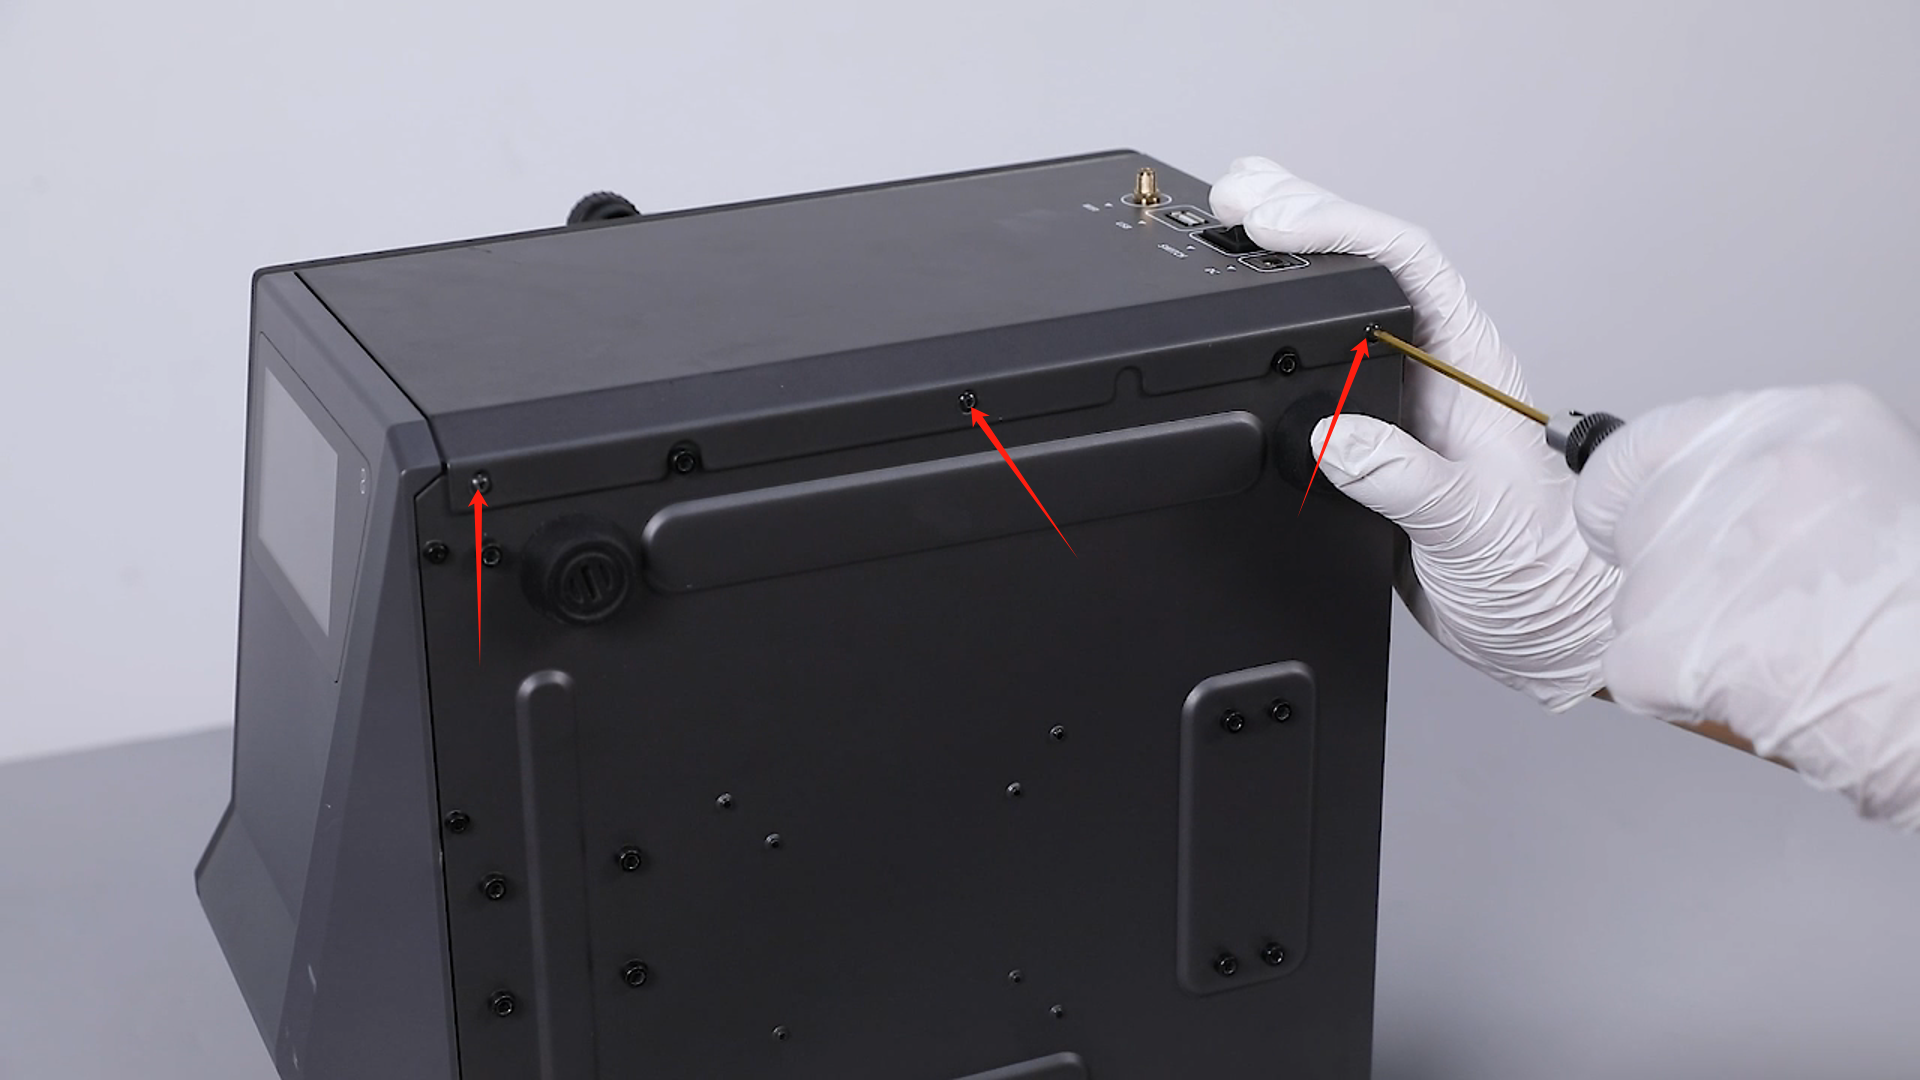
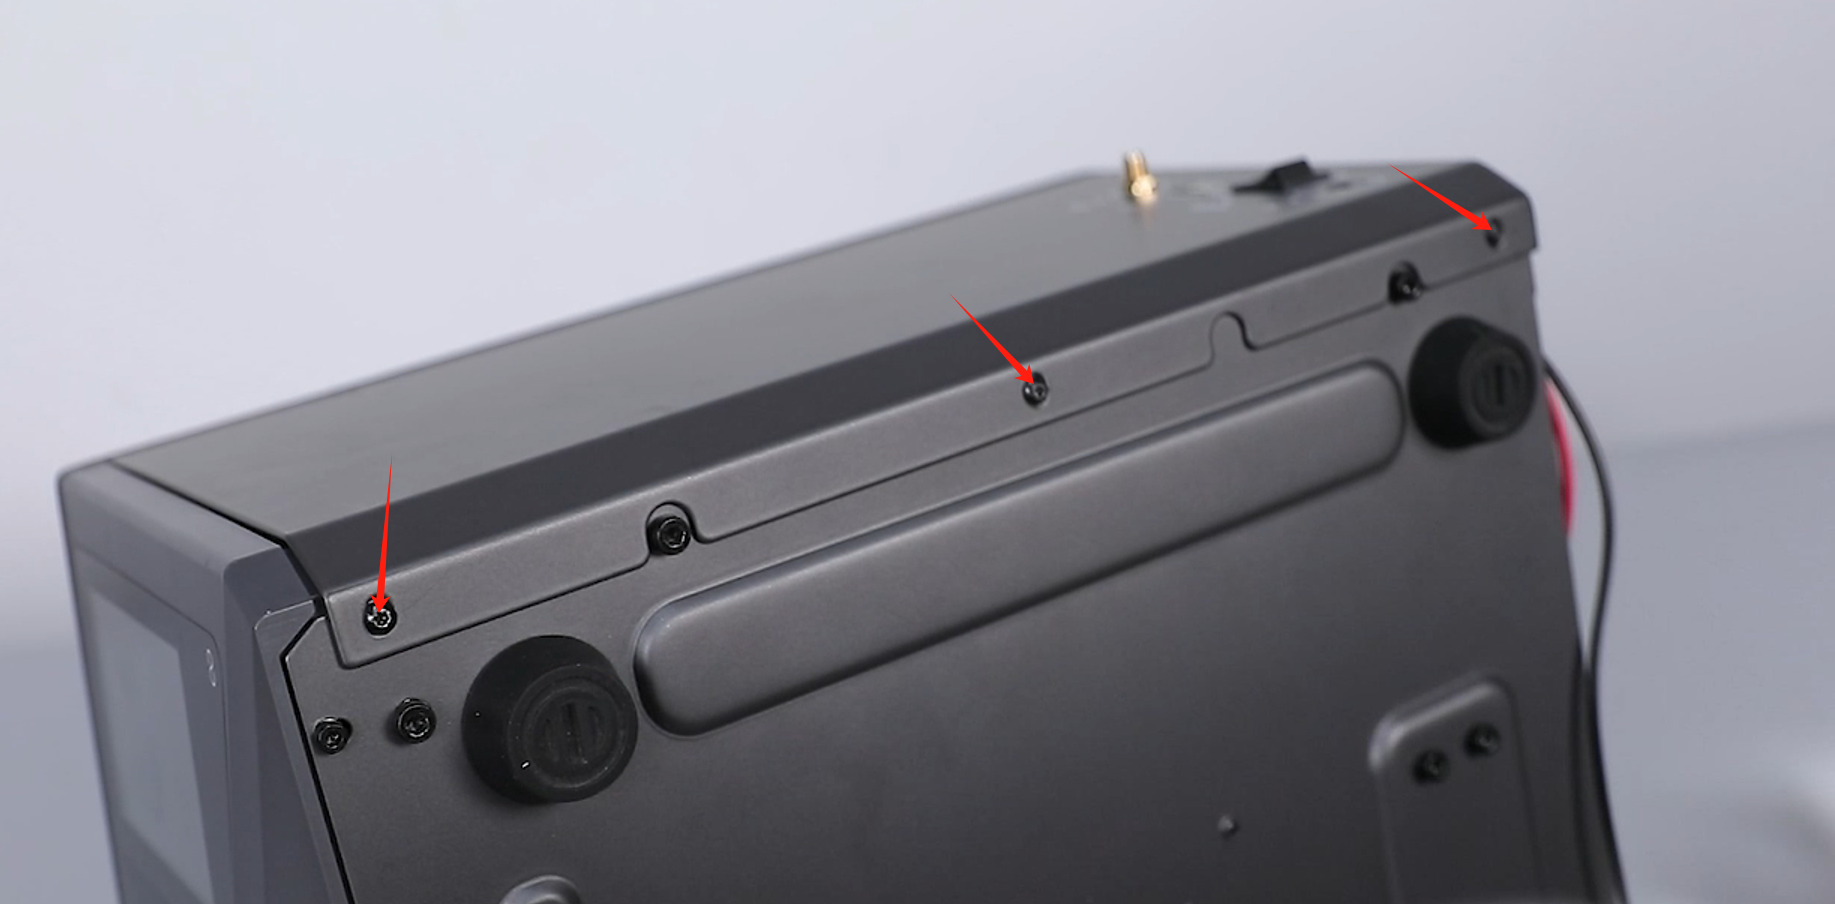
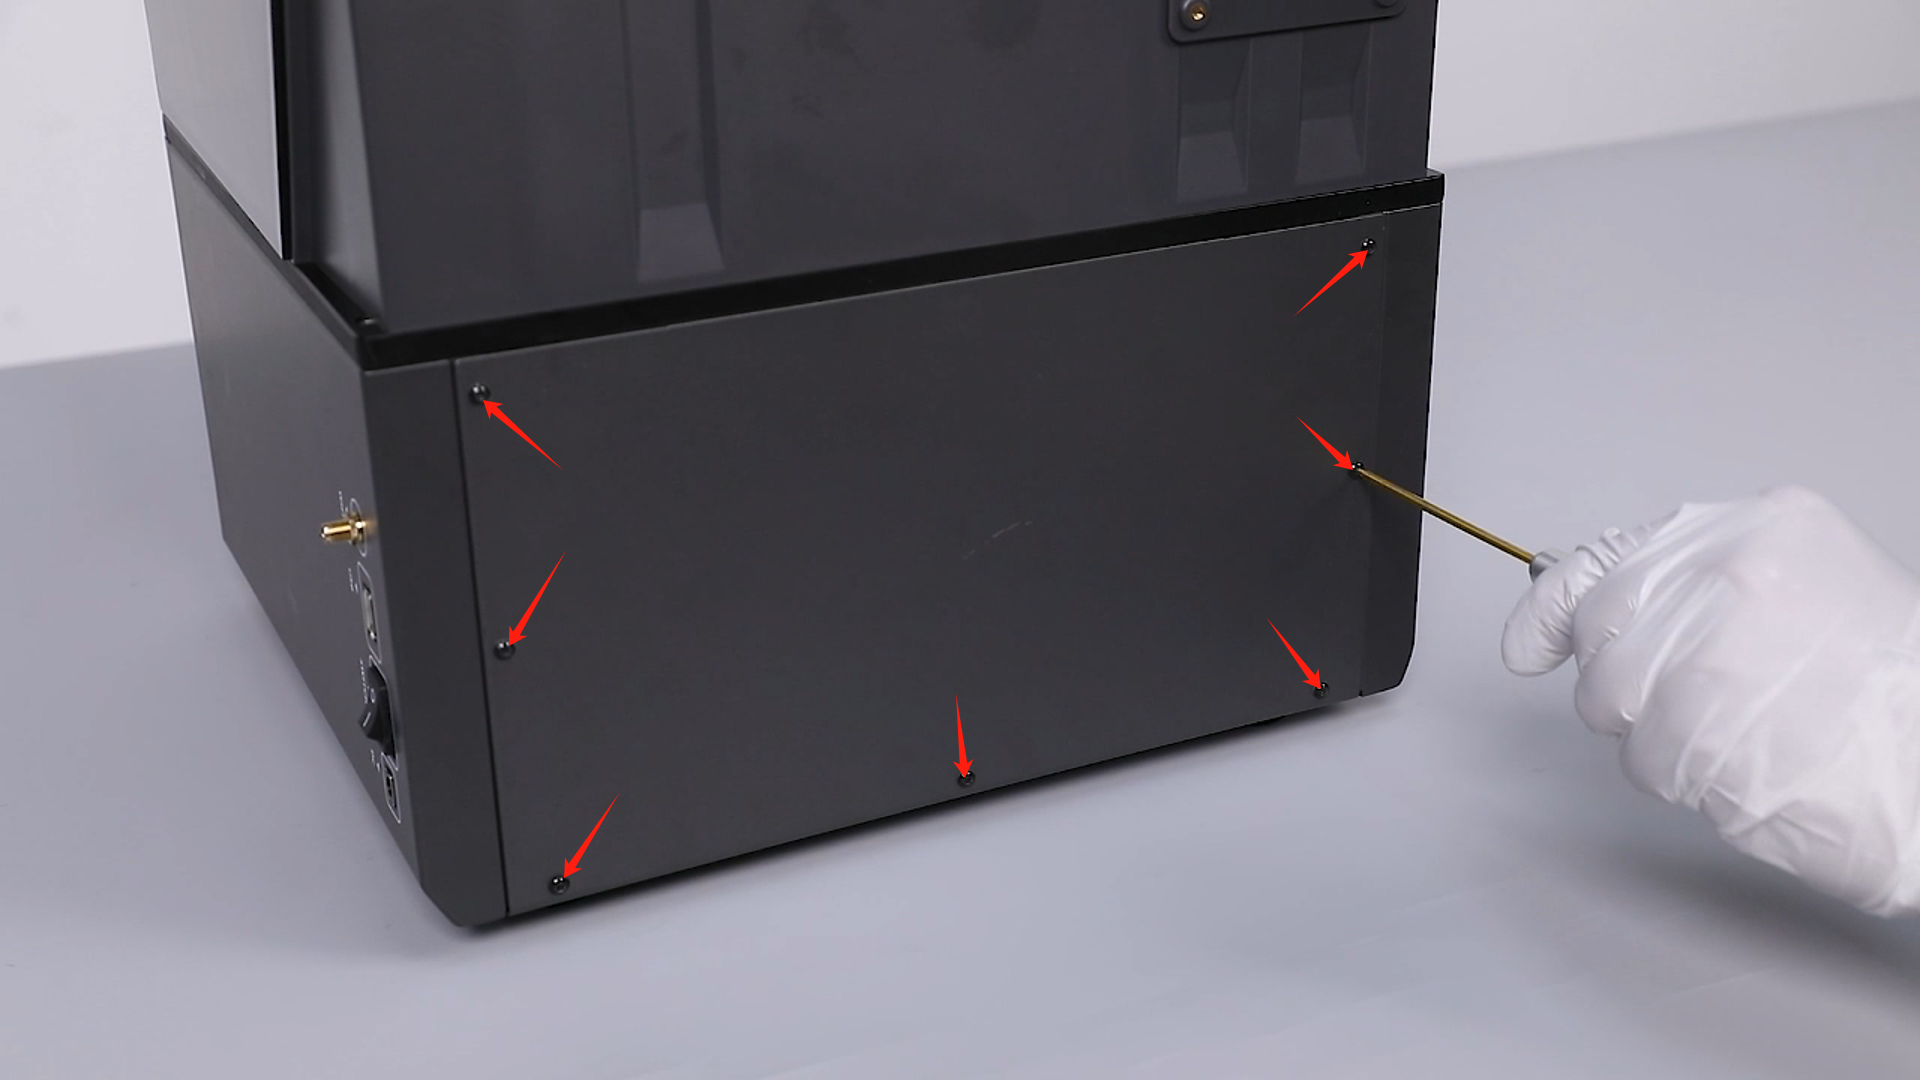
- Loosen the seven screws that secure the rear cover of the printer, using a 2.0 mm Allen wrench, then retrieve the printer's rear cover.

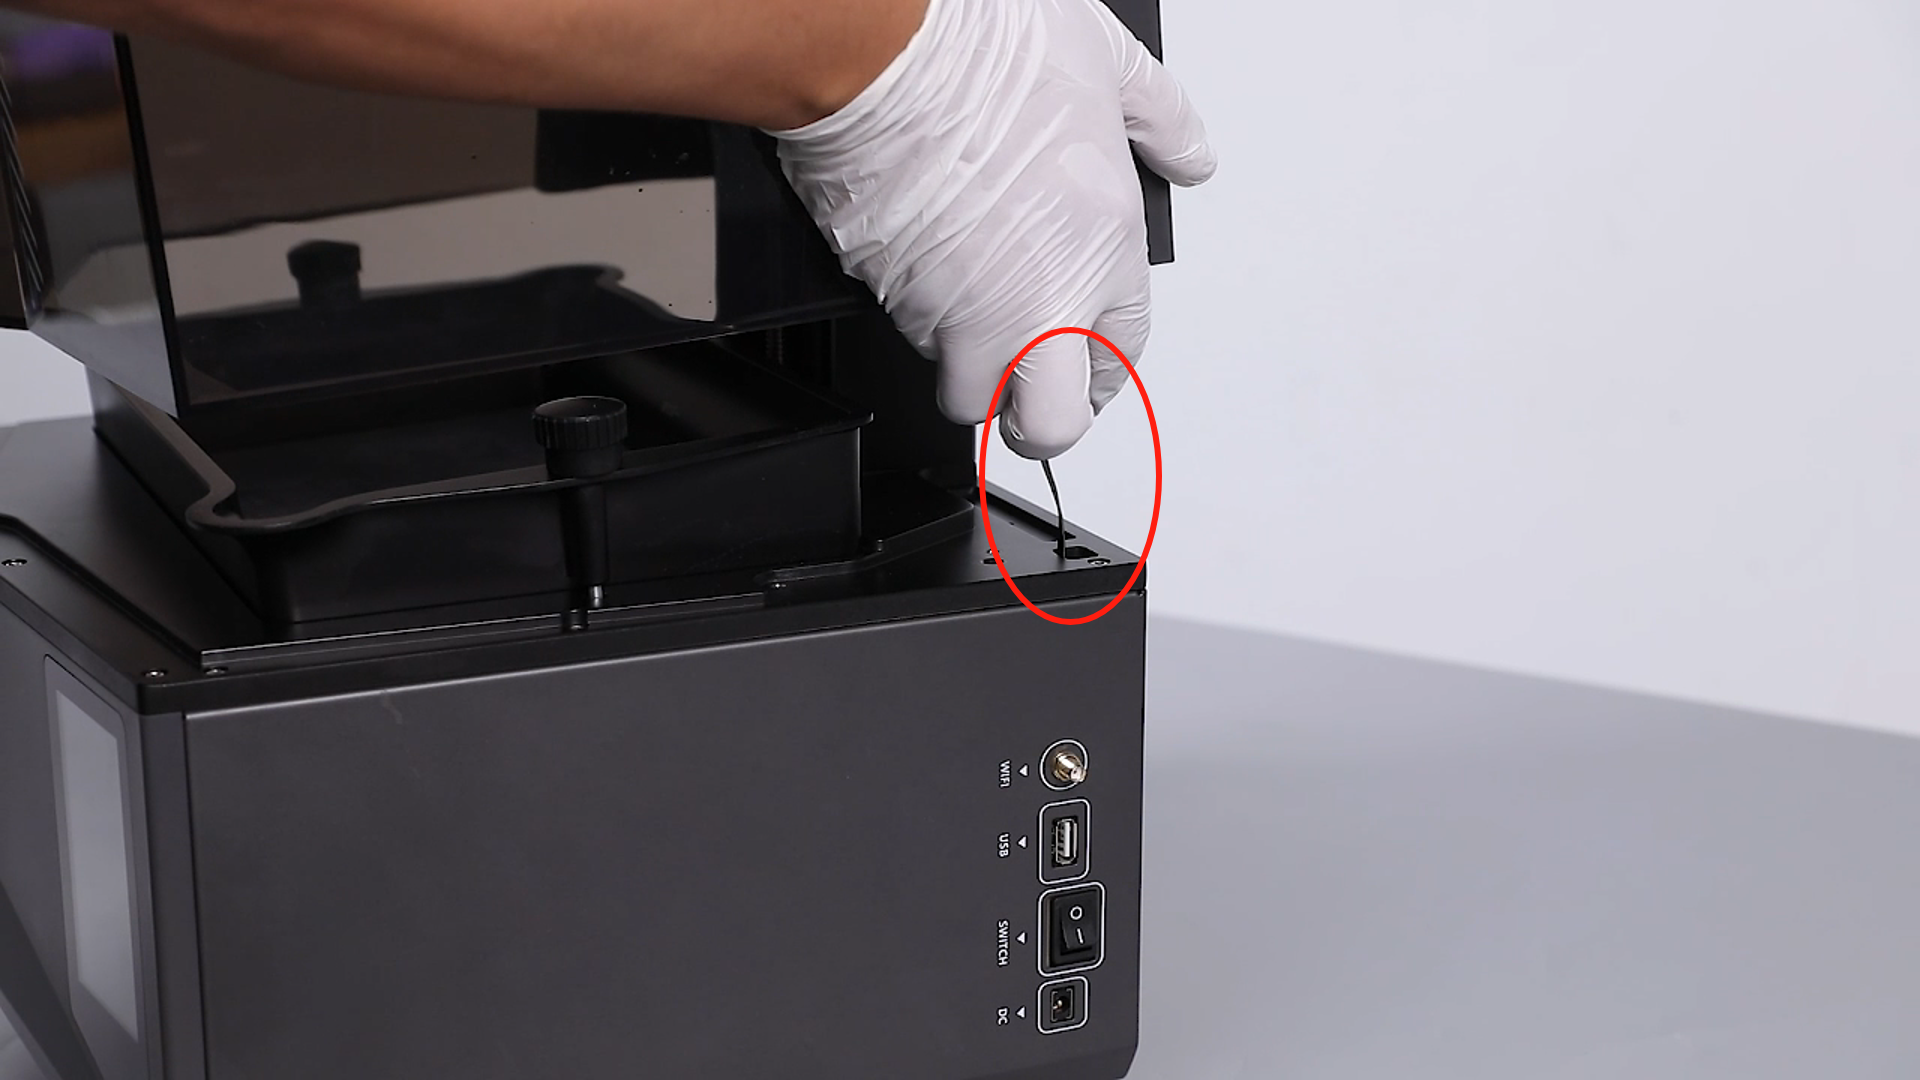
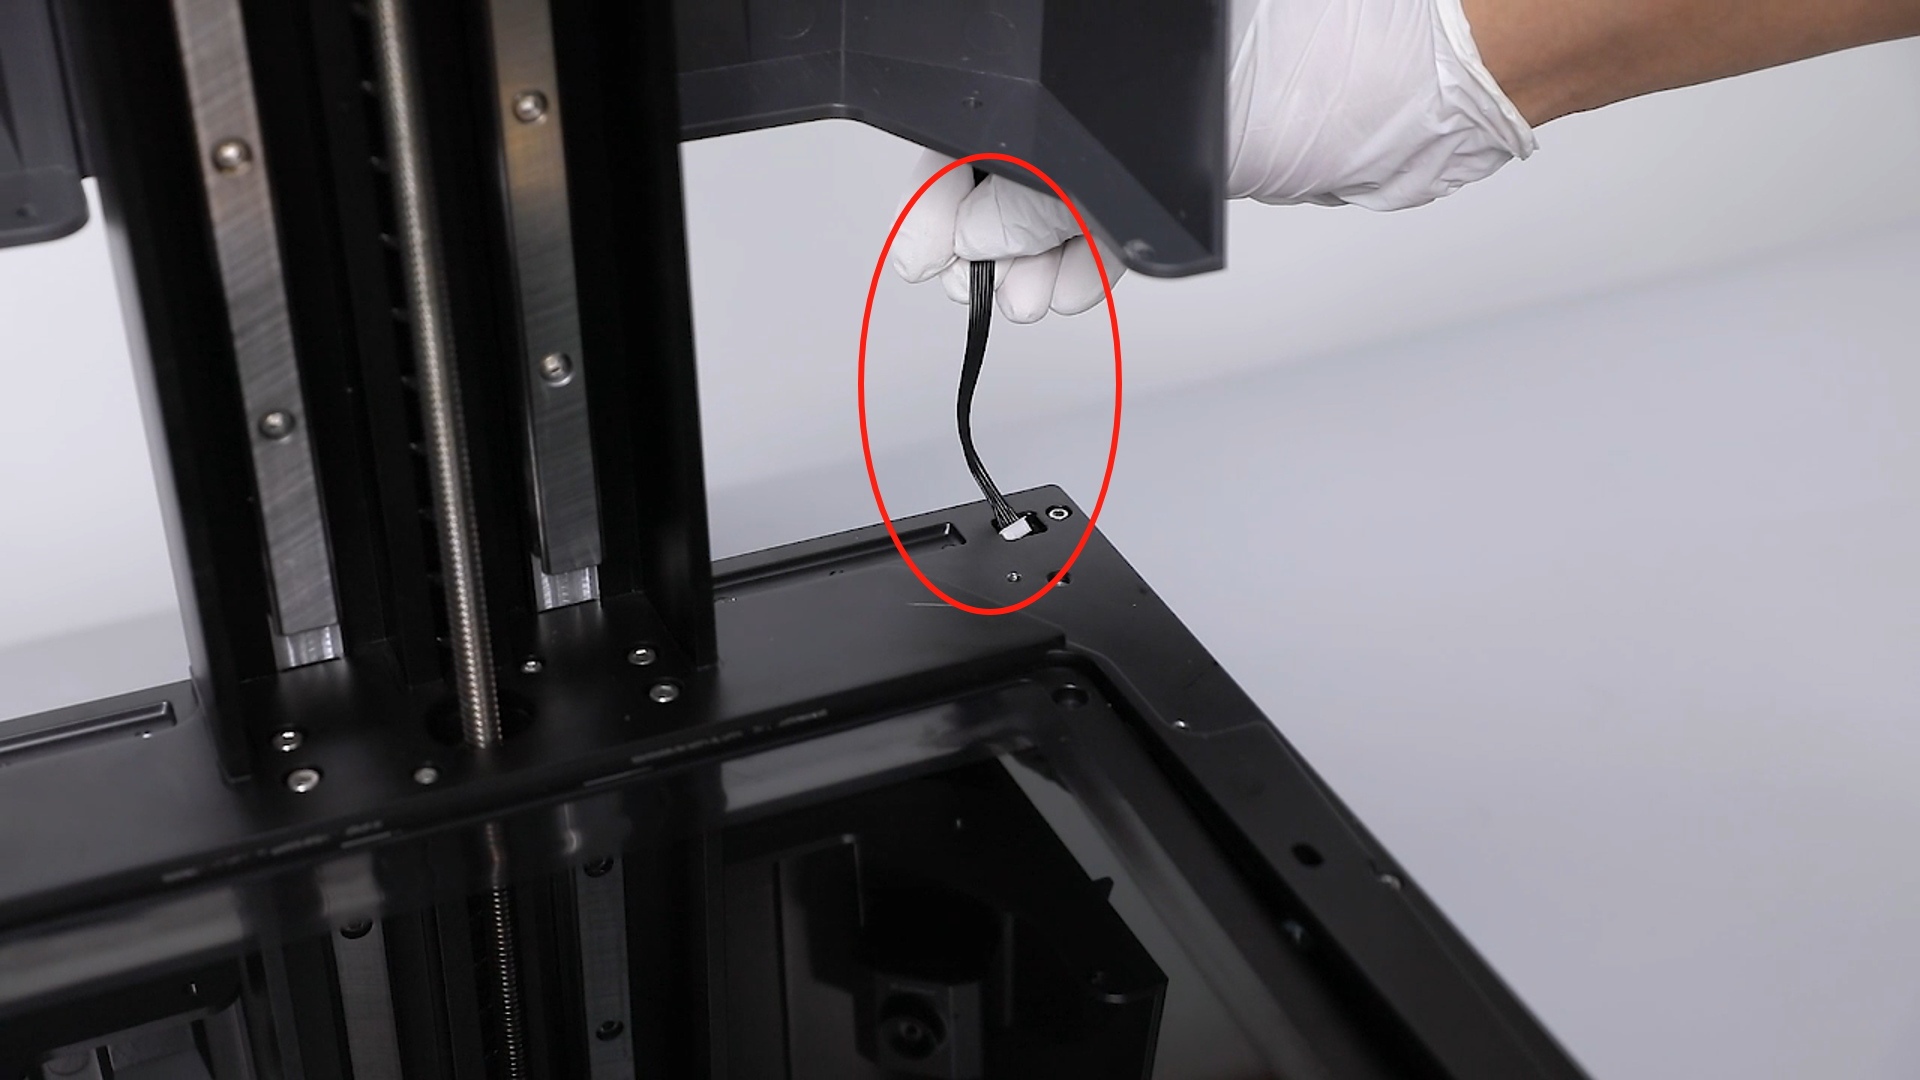
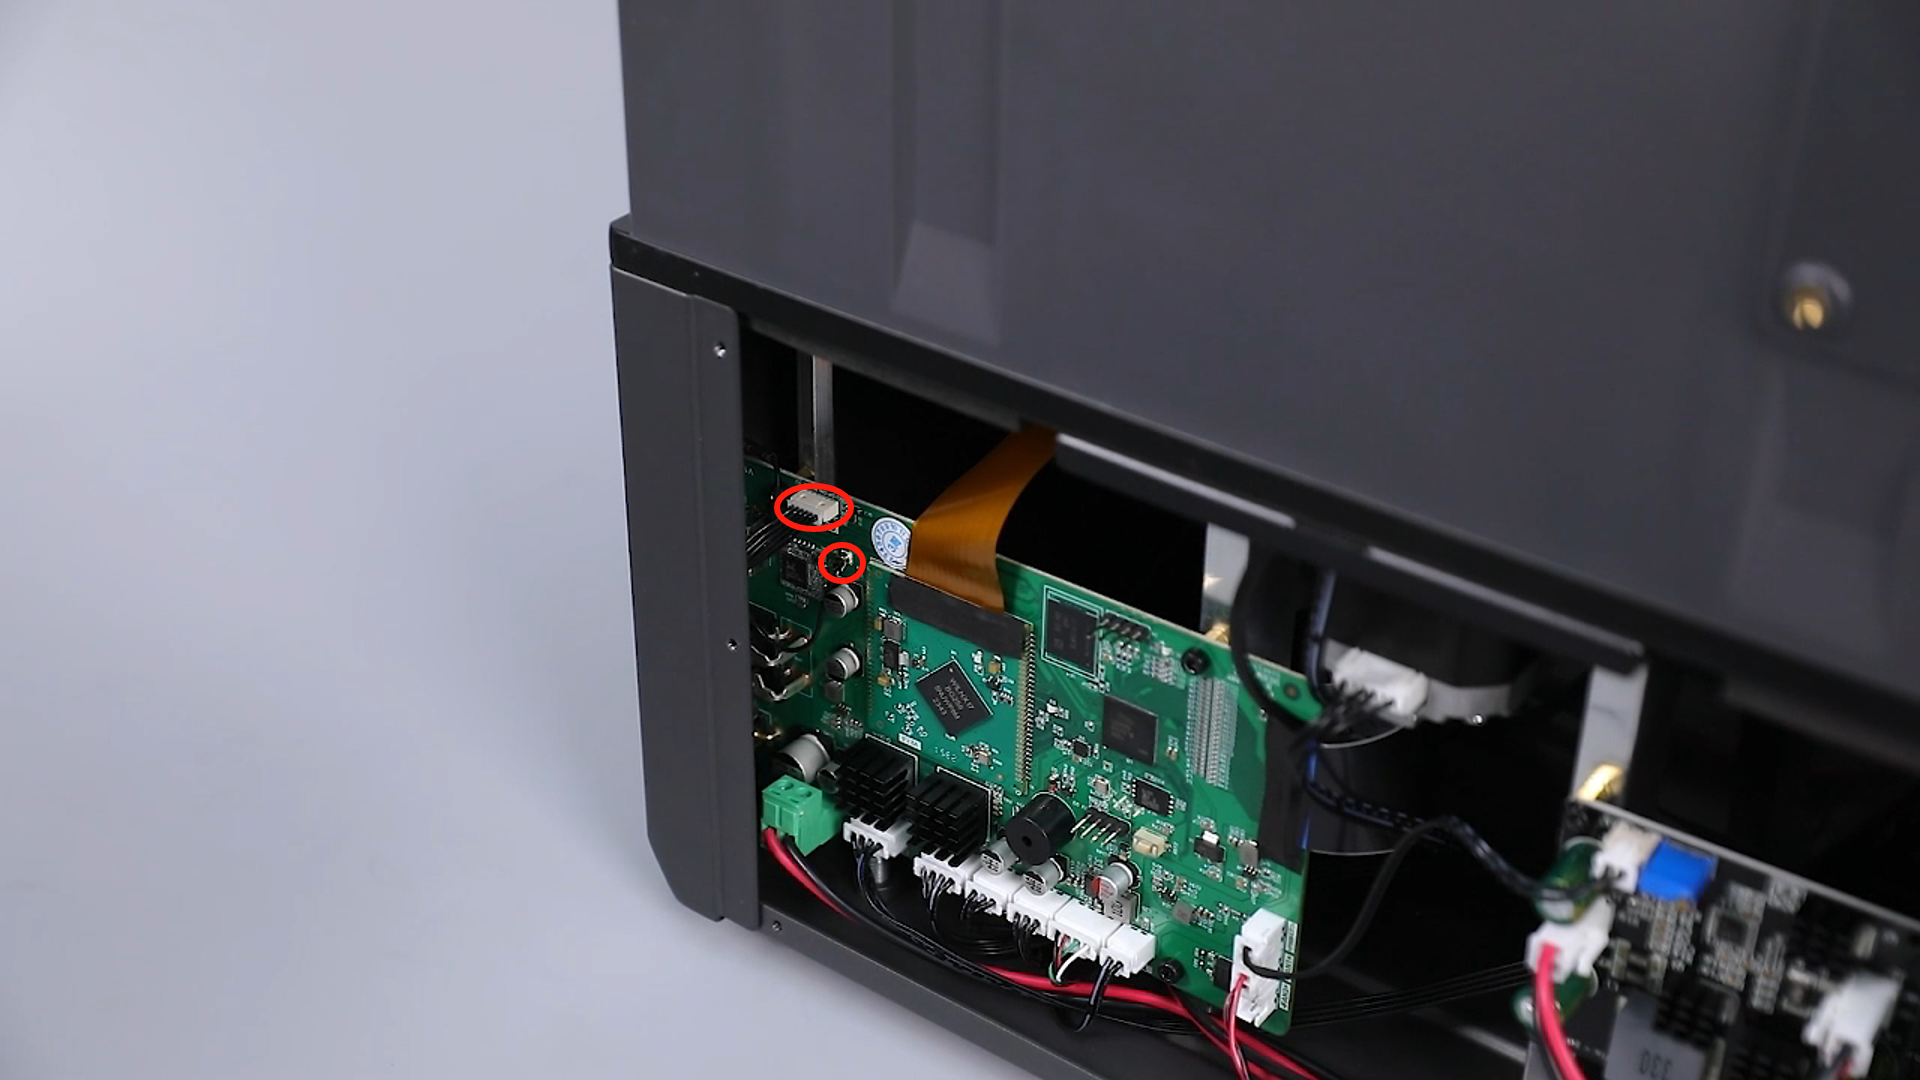
- Unplug the camera ribbon cables and Wifi ribbon cables from the motherboard.

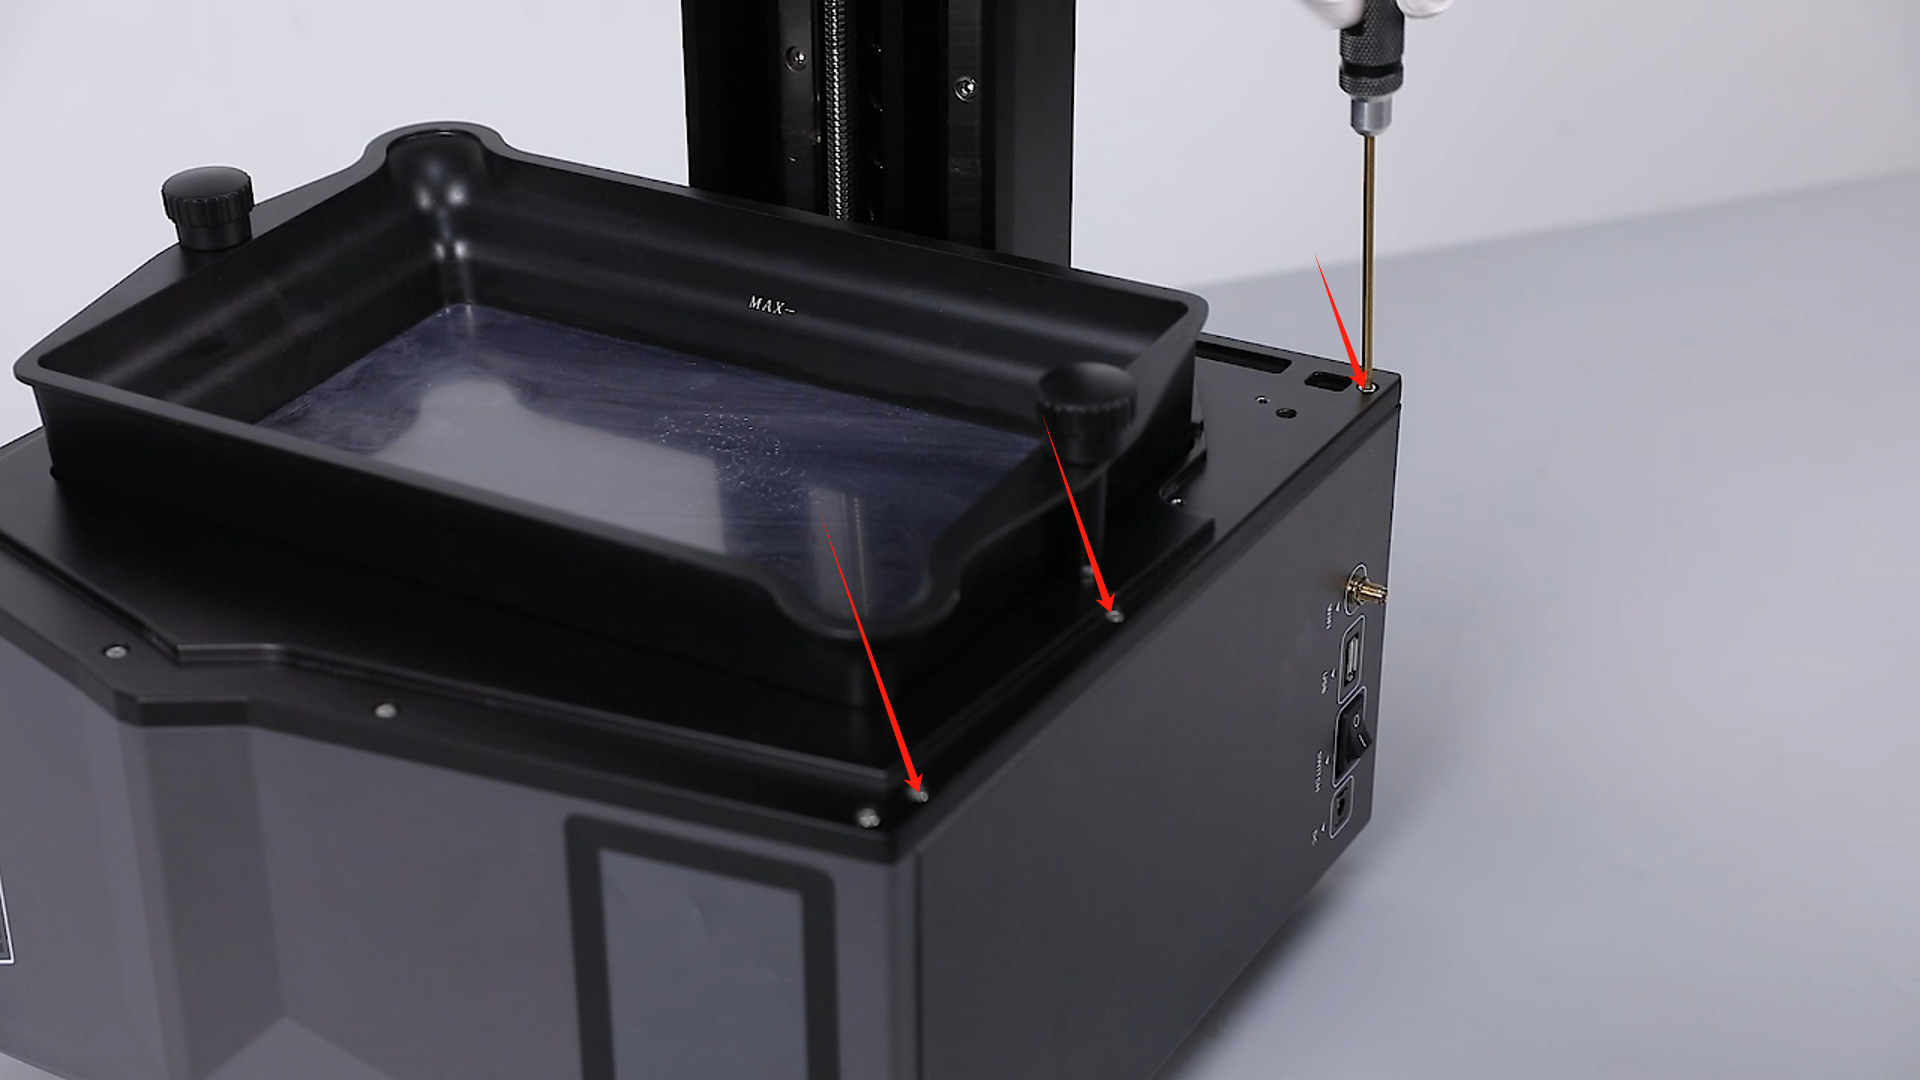
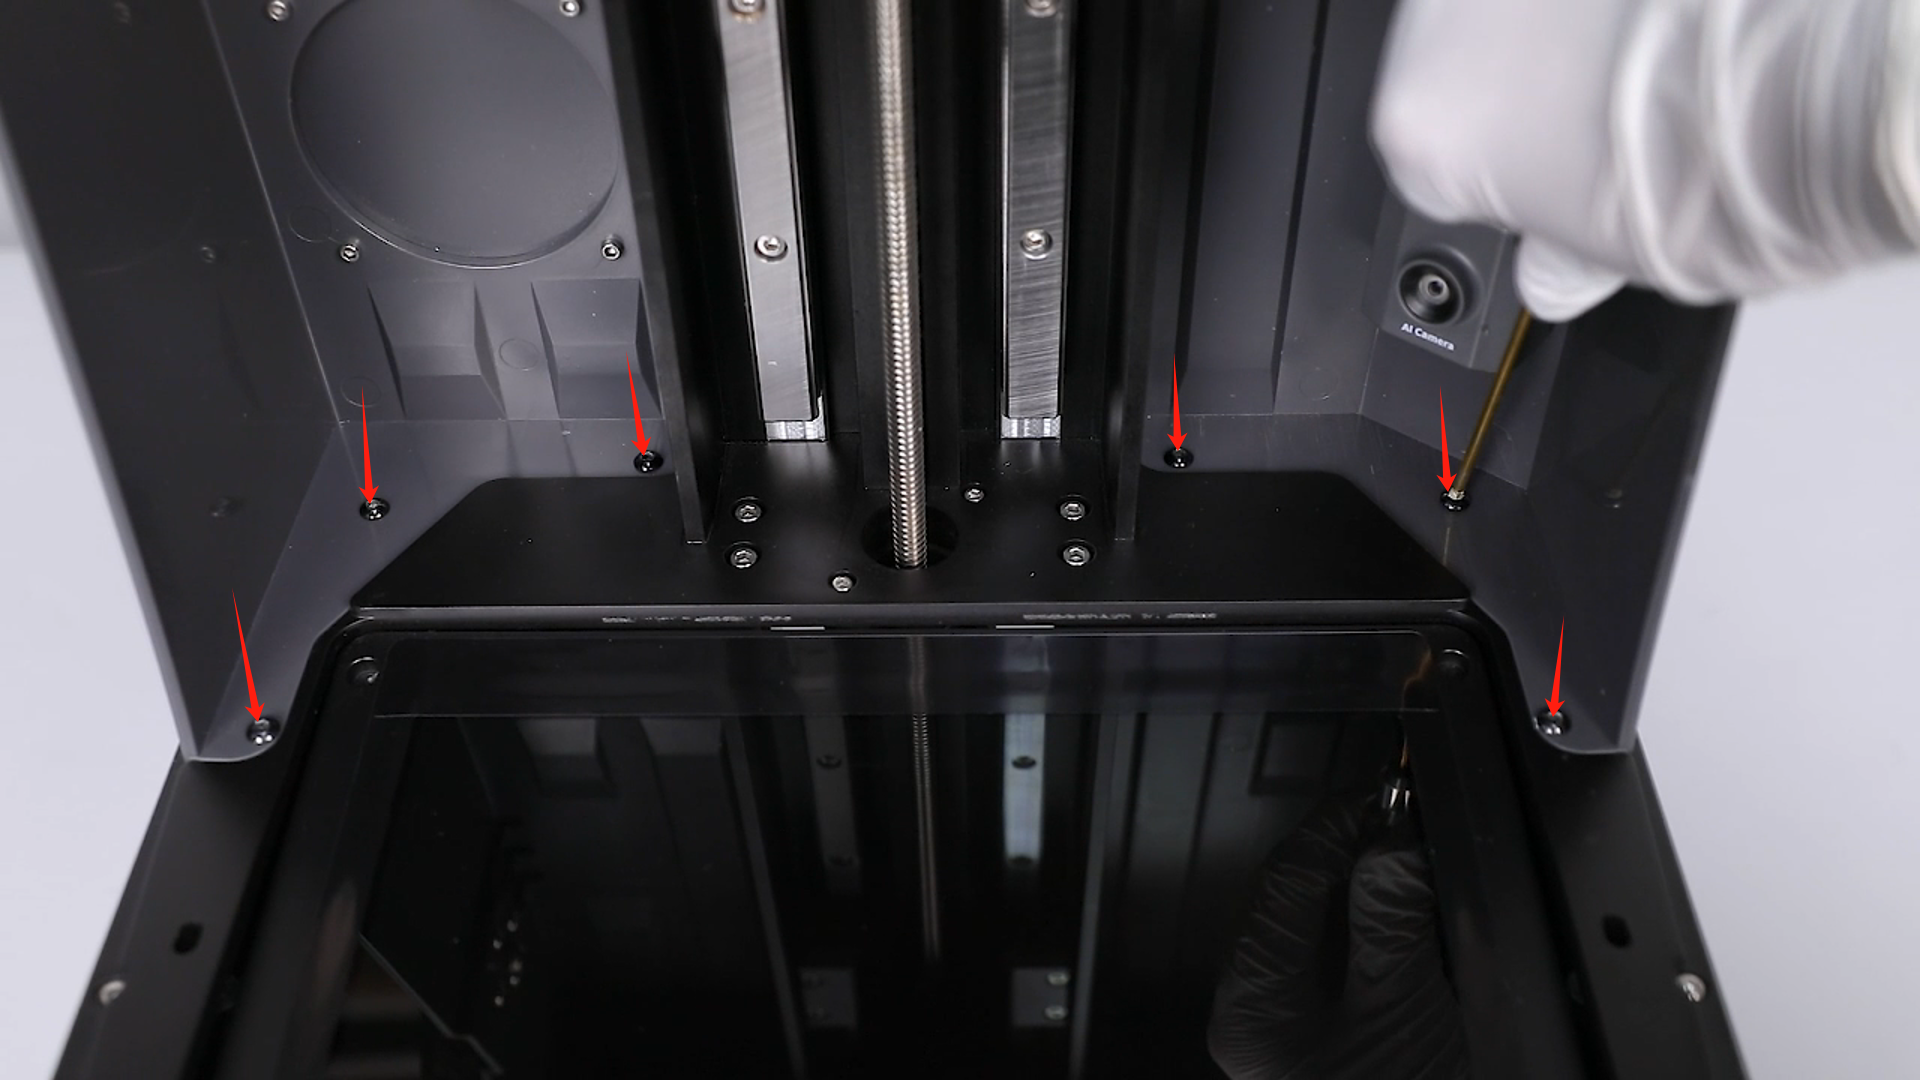
- Lift the top cover and loosen the six screws below it that are secured with a 2.5 mm Allen wrench.
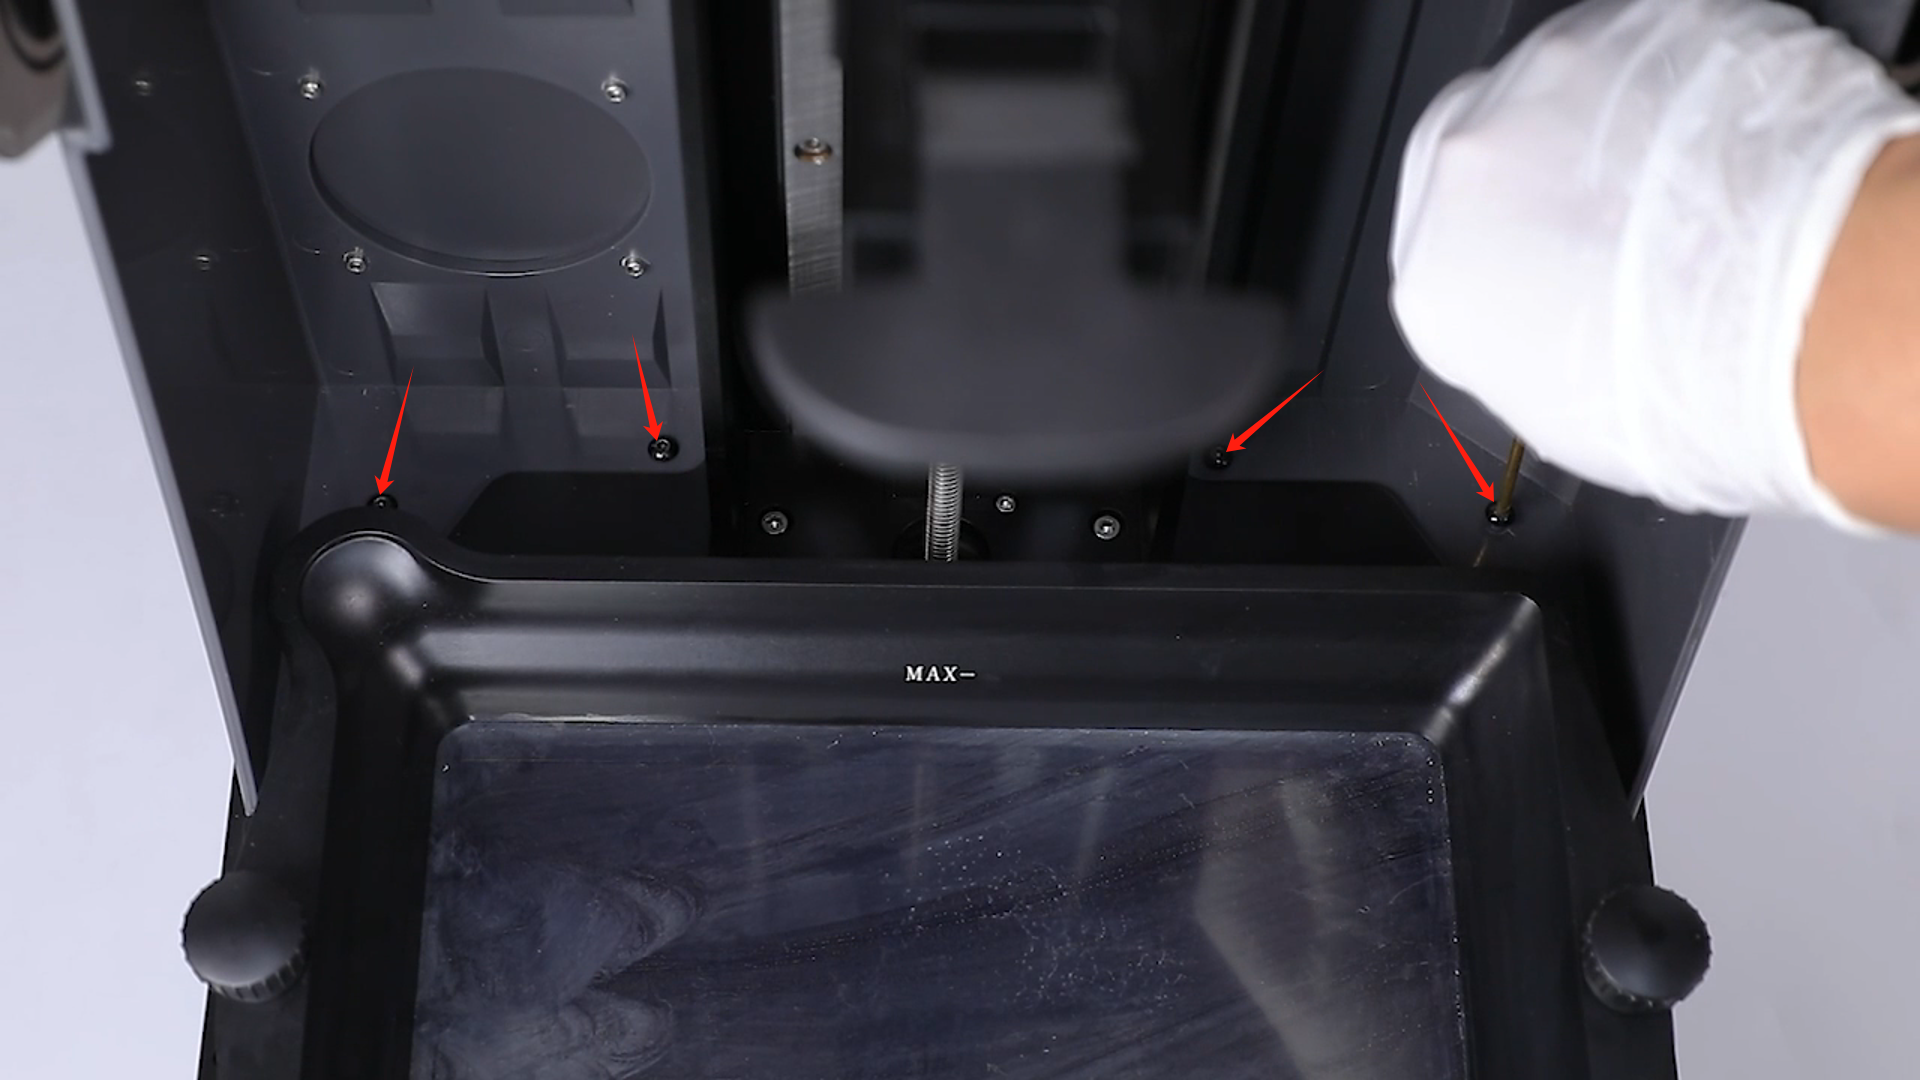

- Cover the top again and loosen the one screw at the back securing the top cover, using a 2.5 mm Allen wrench.
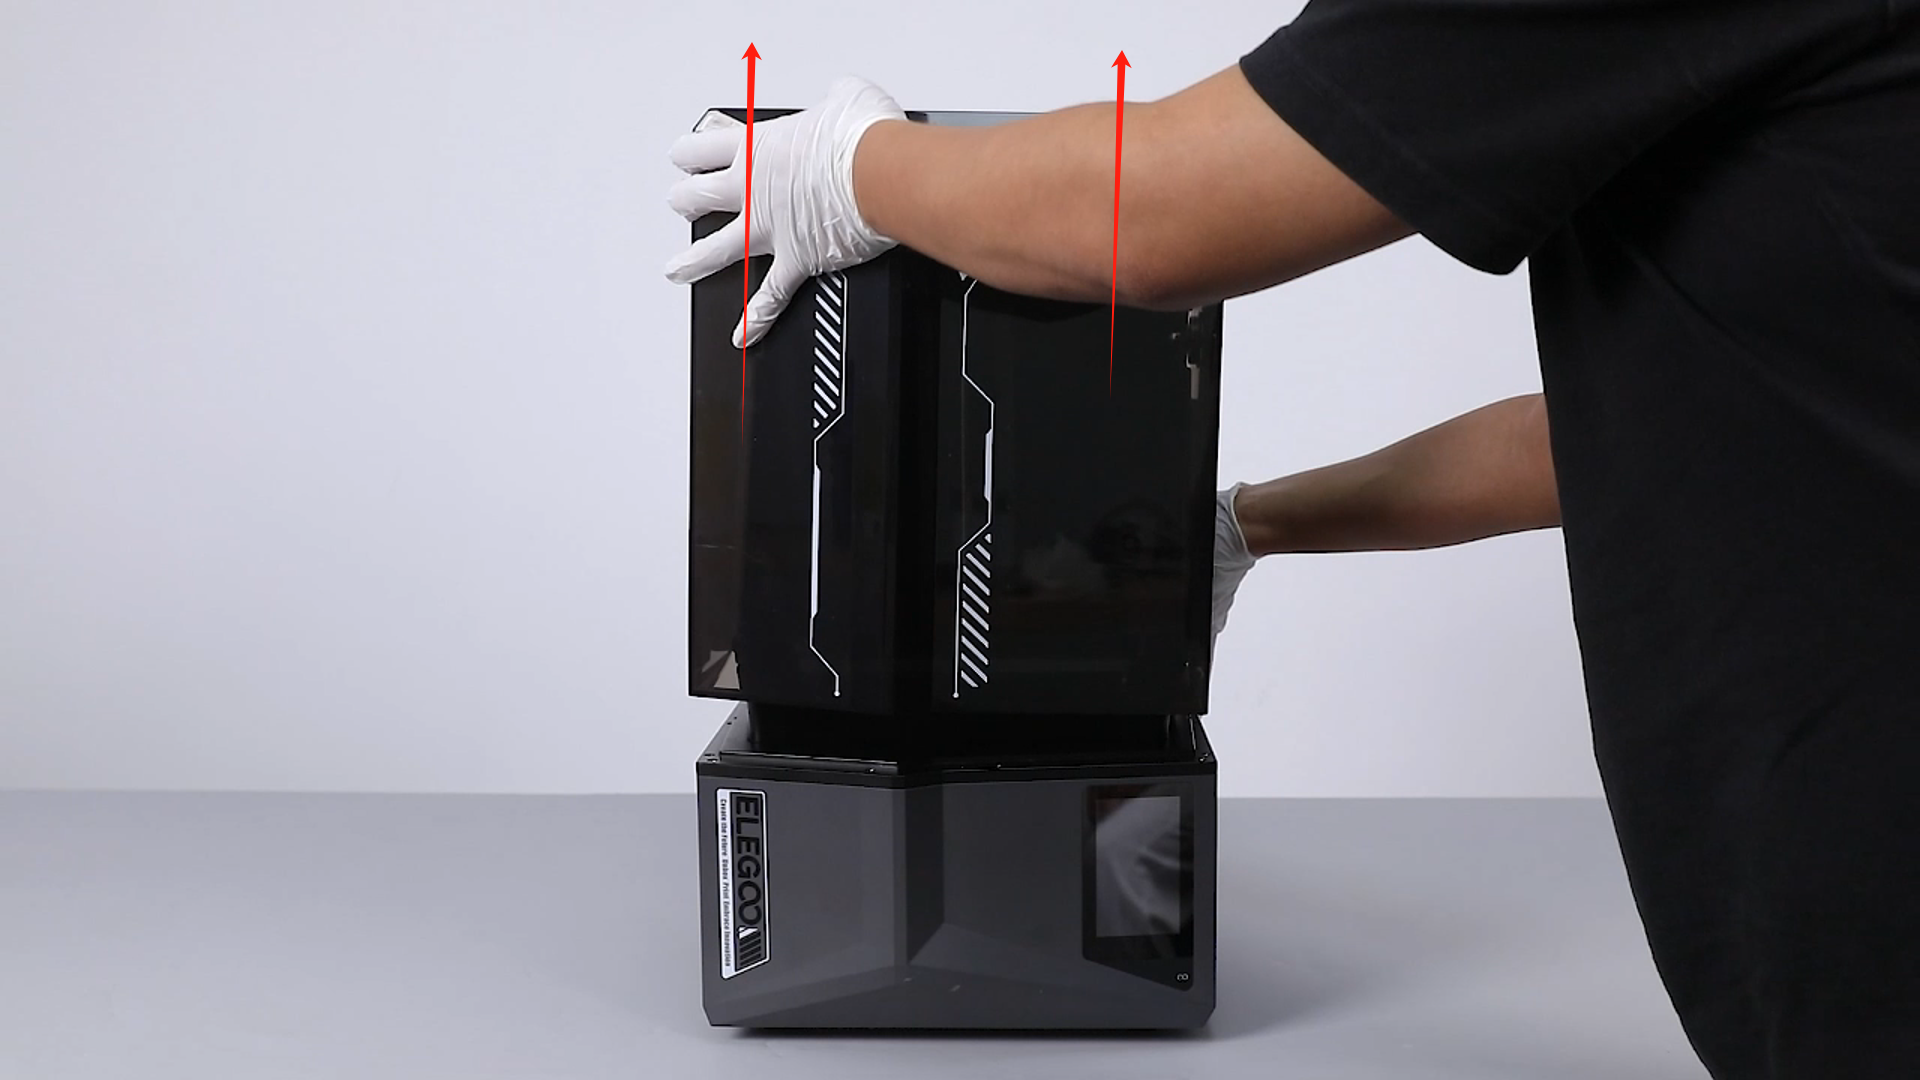
- Retrieve the printer's top cover upward, paying attention to routing the camera ribbon cables through the reserved hole on the right side.
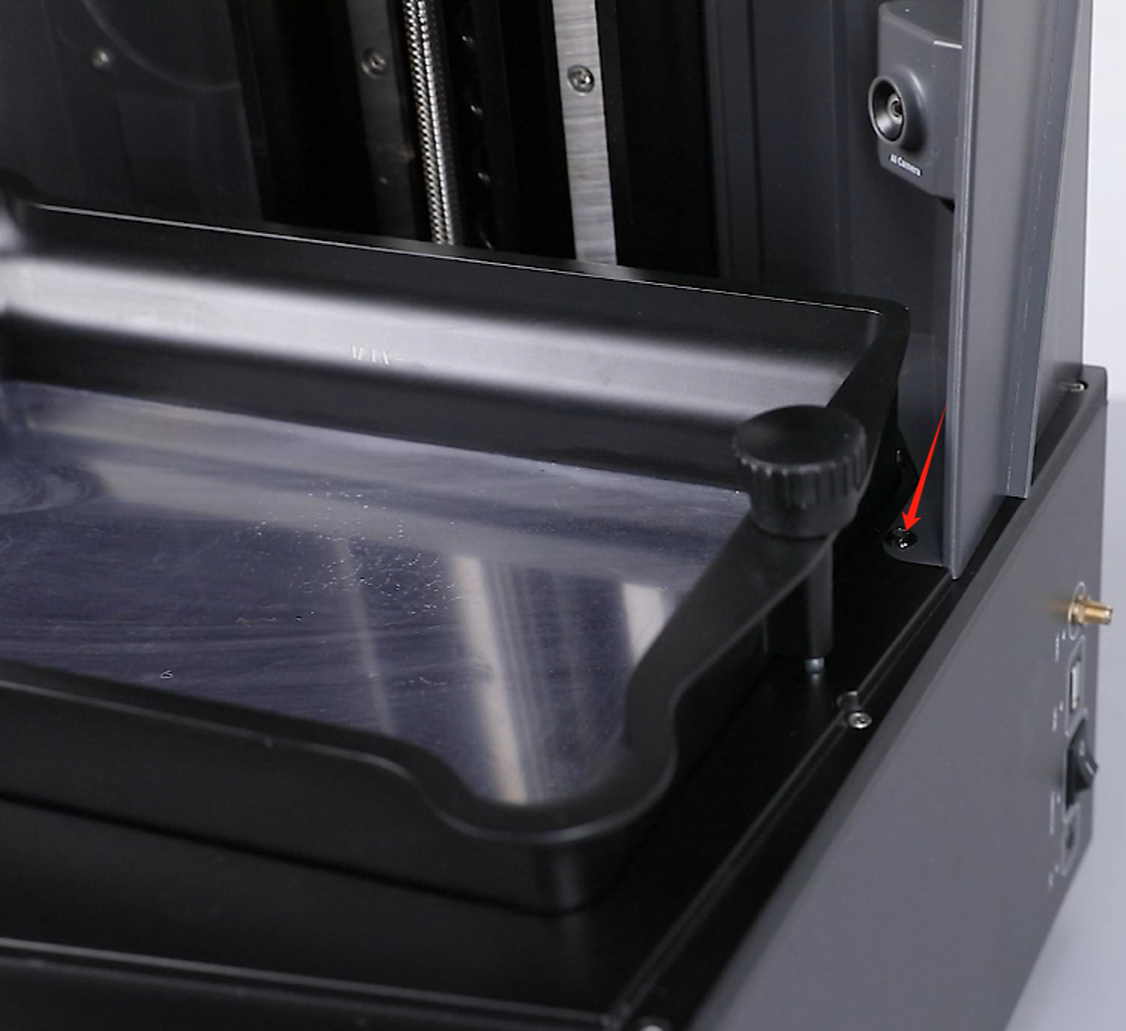
- Loosen the 3 screws securing the top of the printer's right cover, using a 2.5 mm Allen wrench.
- Loosen the 3 screws securing the bottom of the printer's right cover, using a 2.0 mm Allen wrench, then retrieve the right cover.
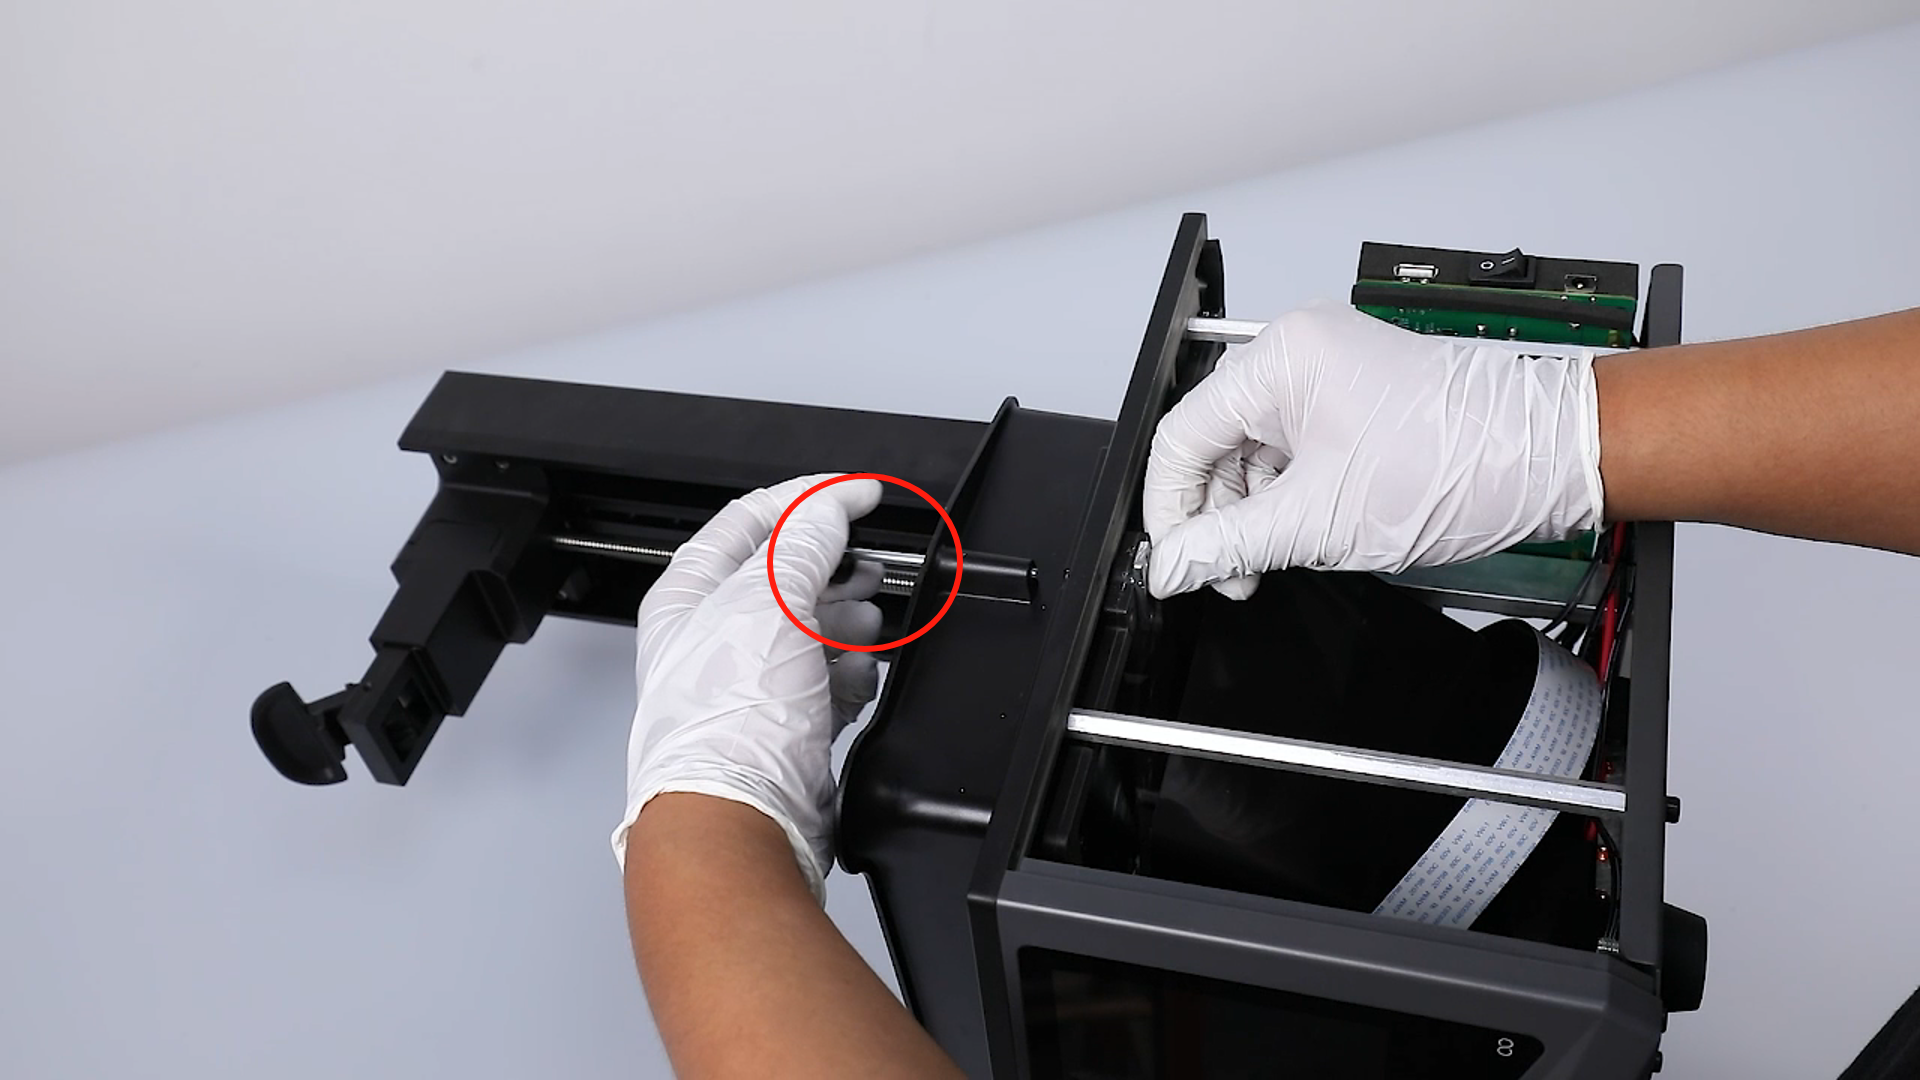
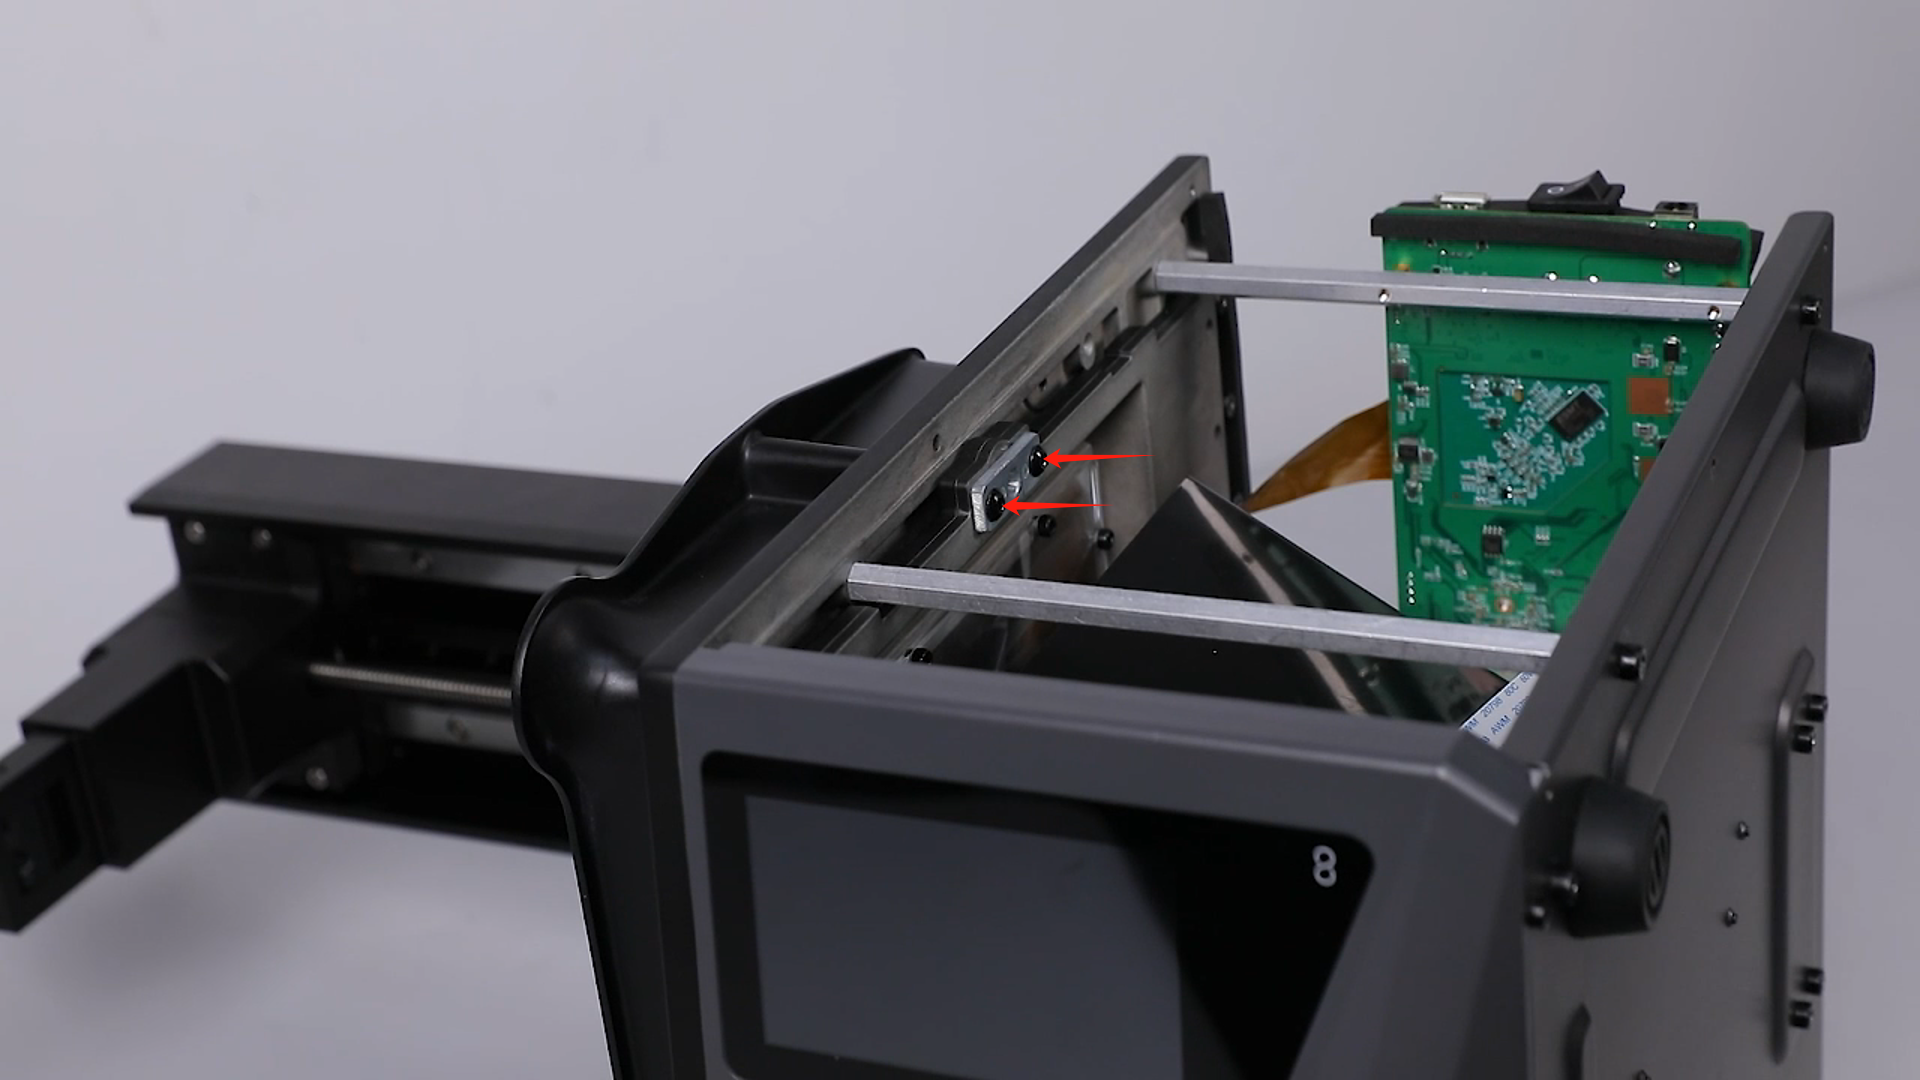
- Loosen the two screws securing the handle block with a 2.5 mm Allen wrench.

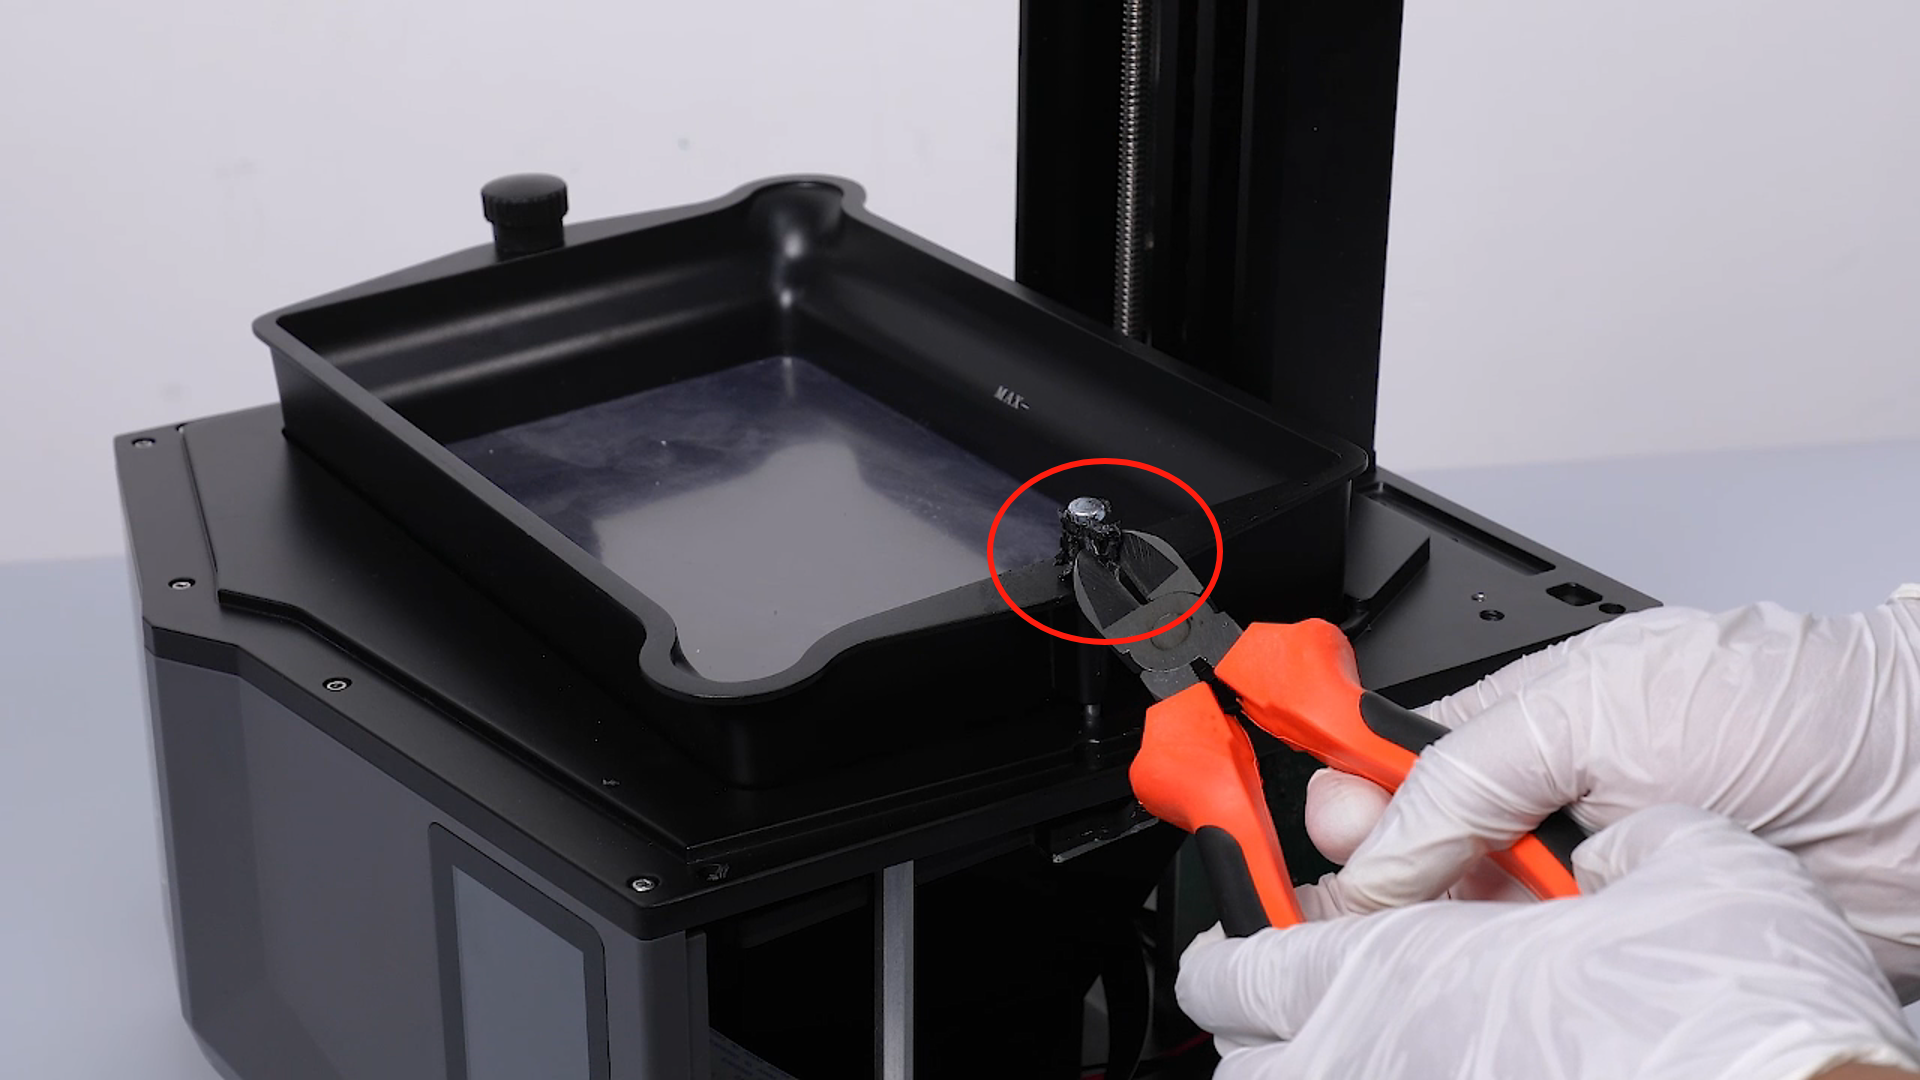
- Use pliers to grip the plastic handle securing the straight knob, rotate slightly, then use wire cutters to grip the handle block.
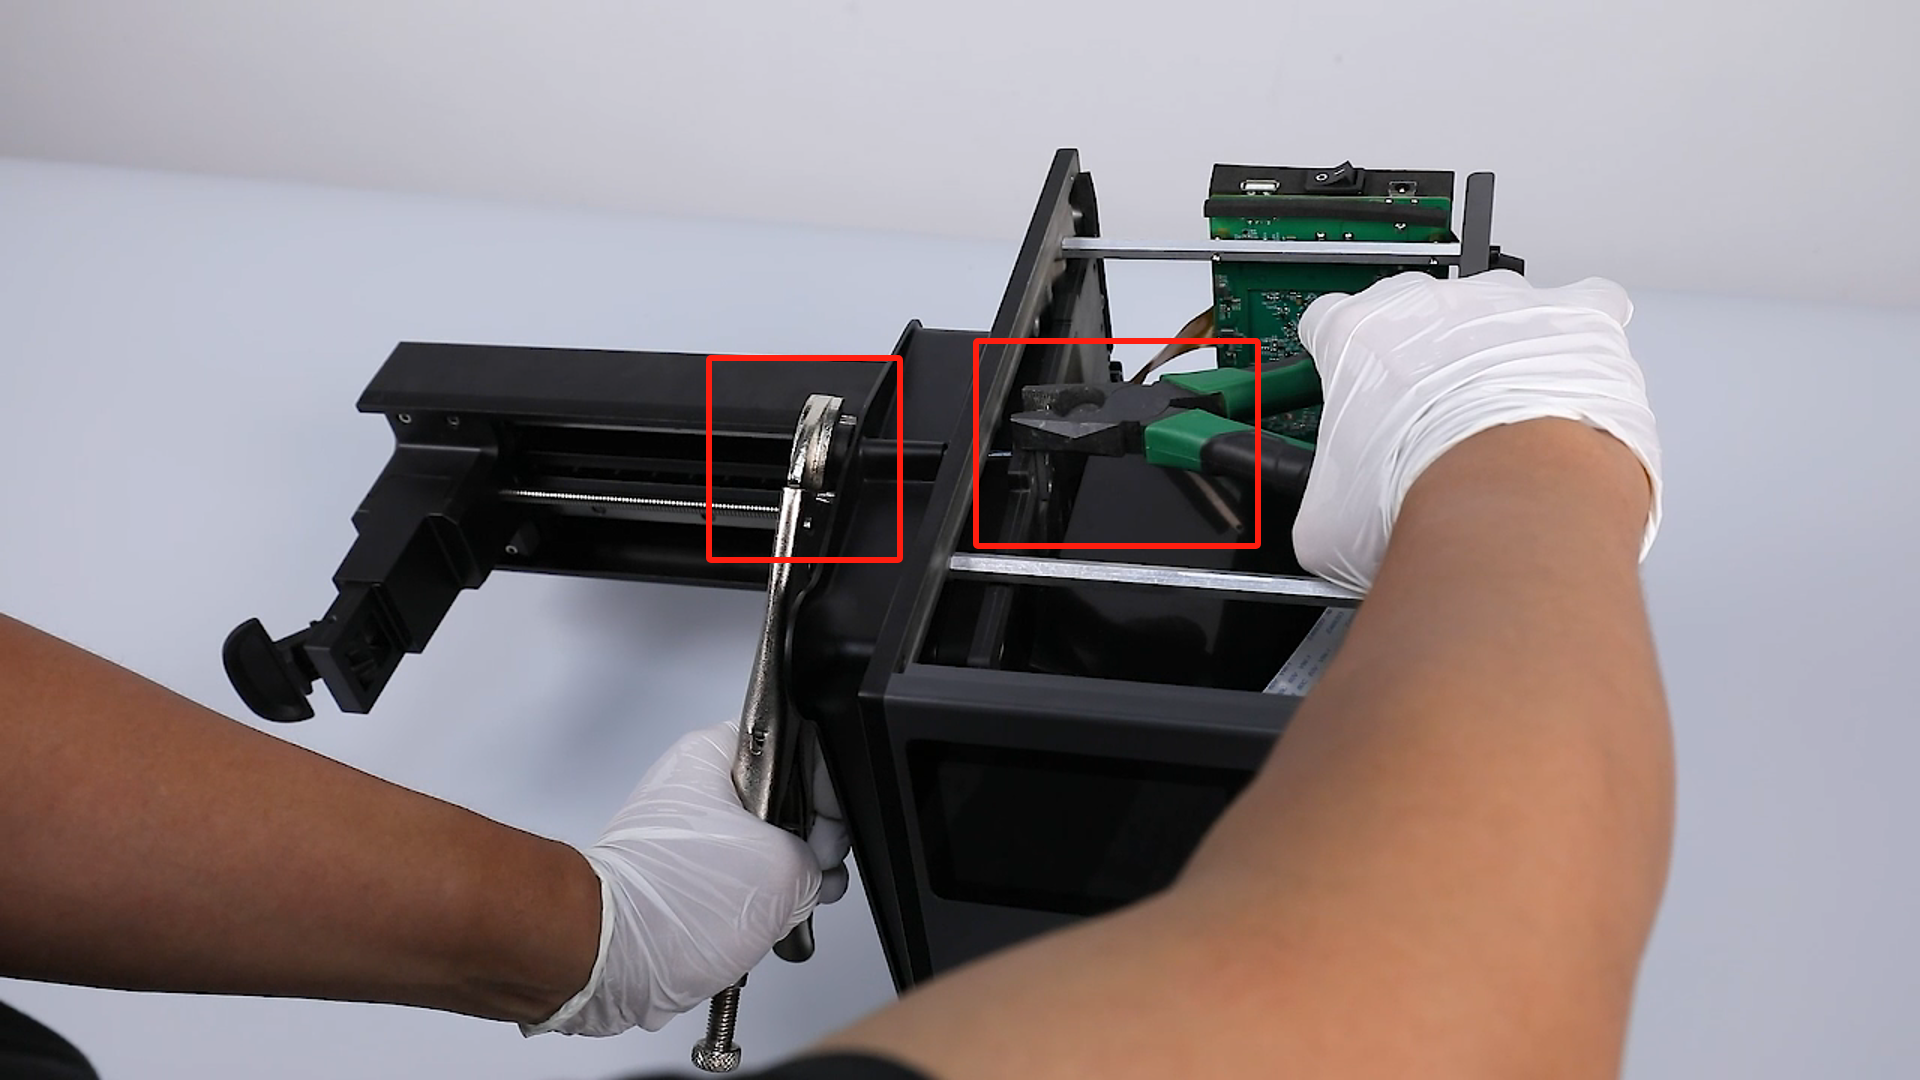
- Rotate counterclockwise with the pliers to loosen the straight knob while maintaining grip on the handle block with the wire cutters.
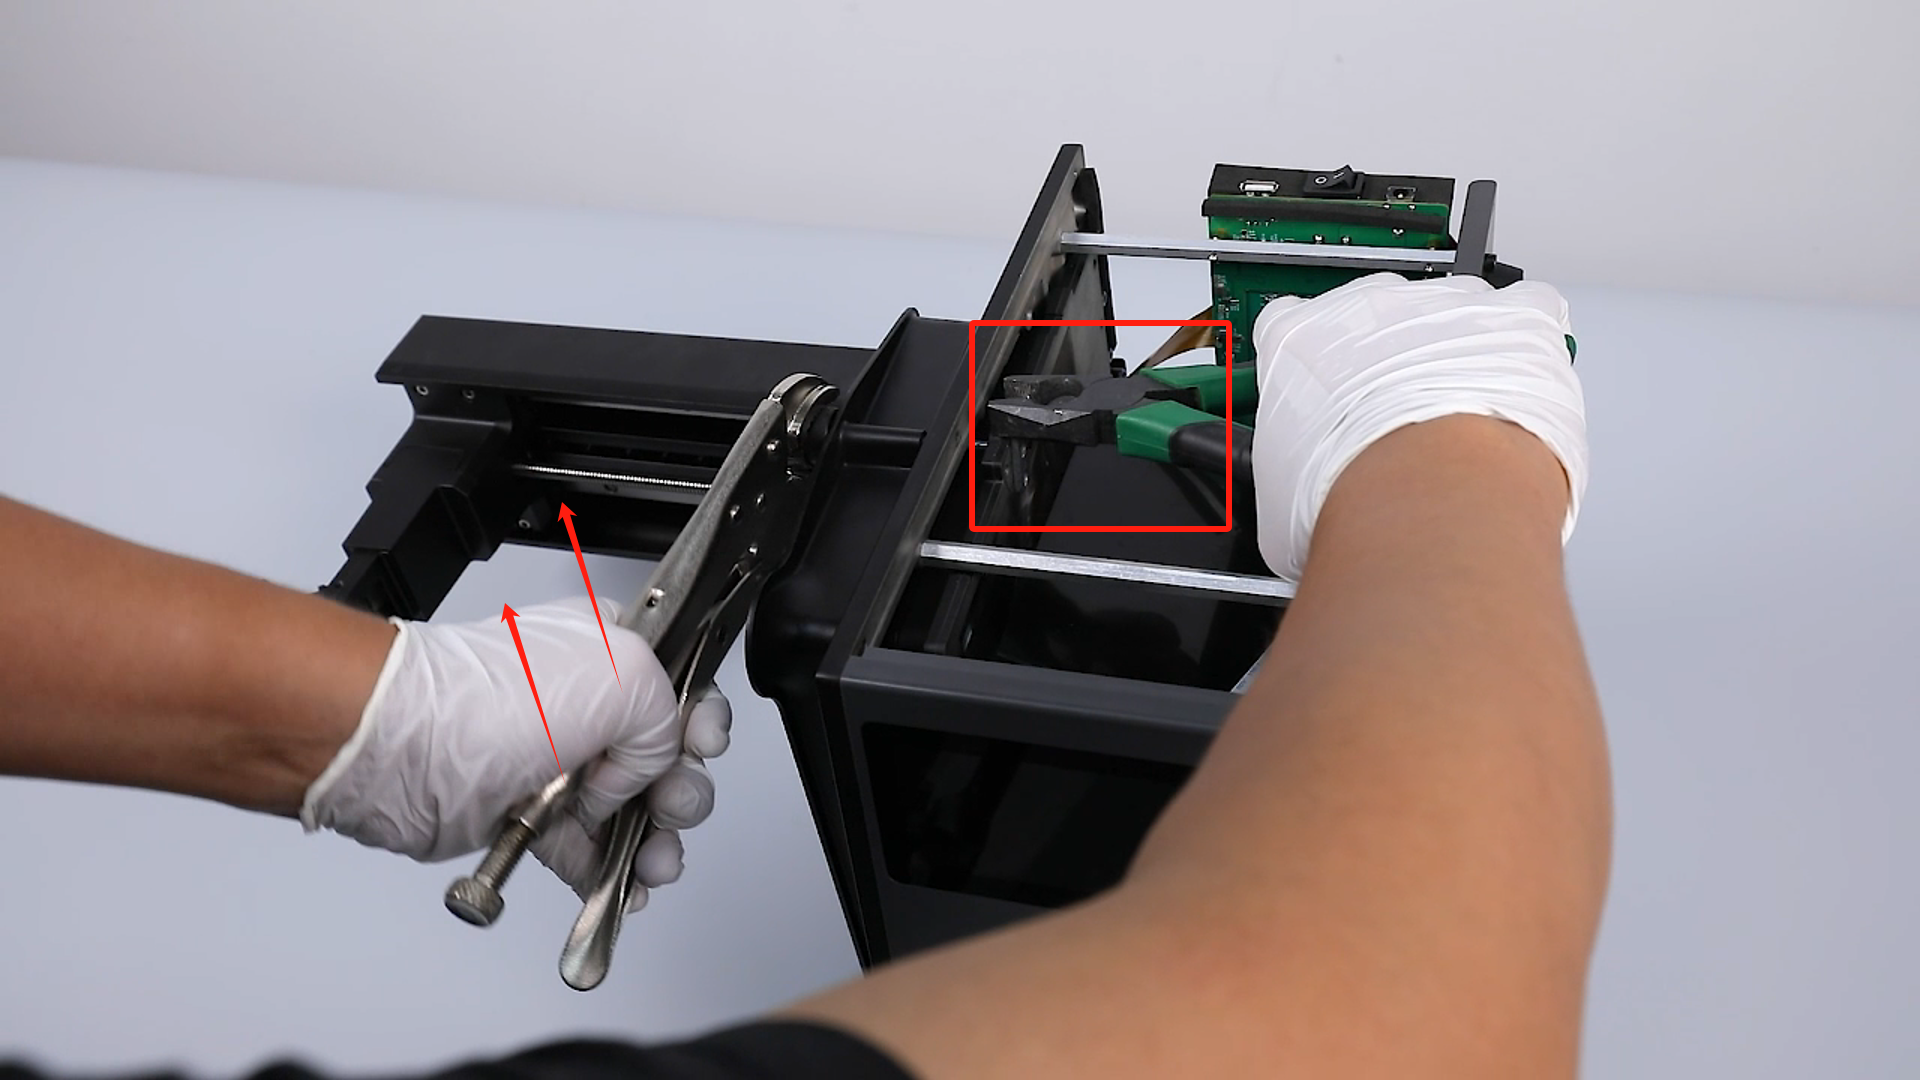
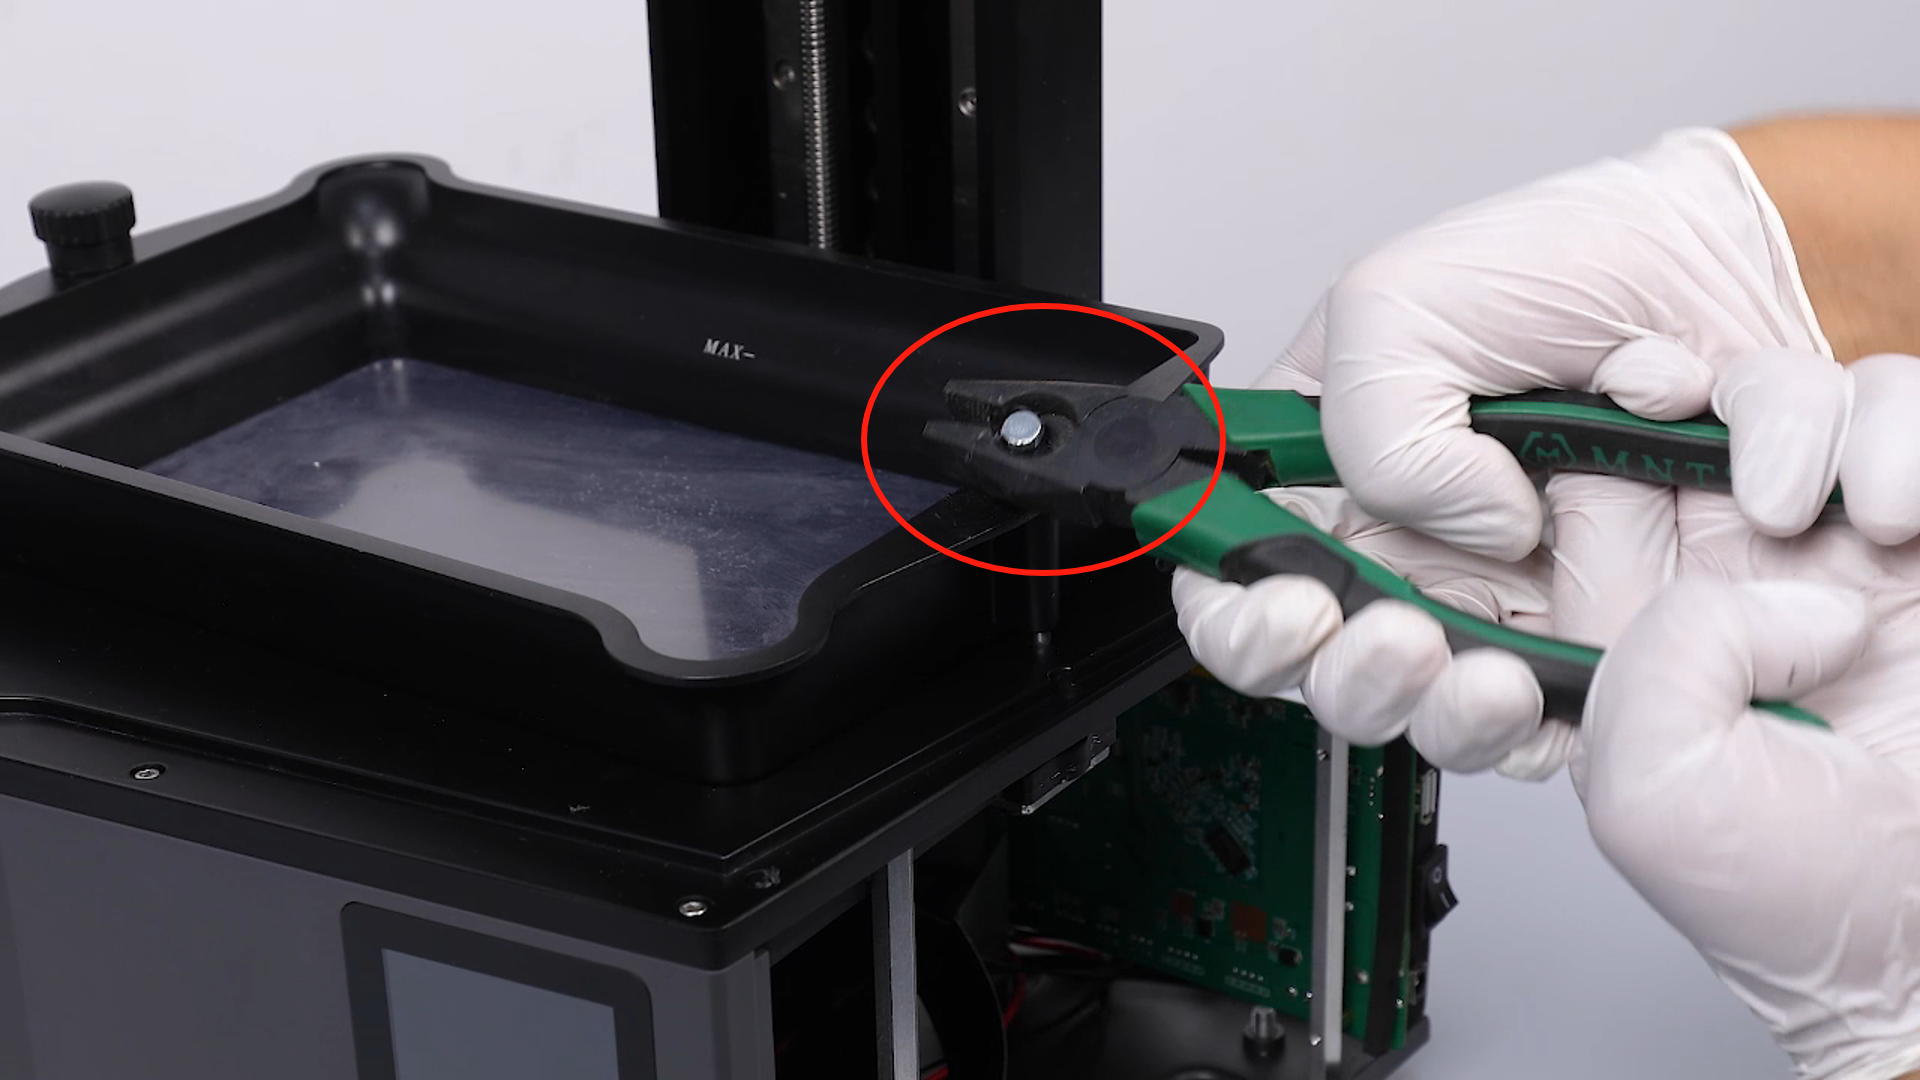
- Repeat the counterclockwise rotation with the pliers until the straight knob is fully loosened and remove the straight knob and handle block.
- If the above method still fails to remove the straight knob, follow these steps:
- Use diagonal pliers to cut away the upper part of the plastic handle of the straight knob in multiple sections.
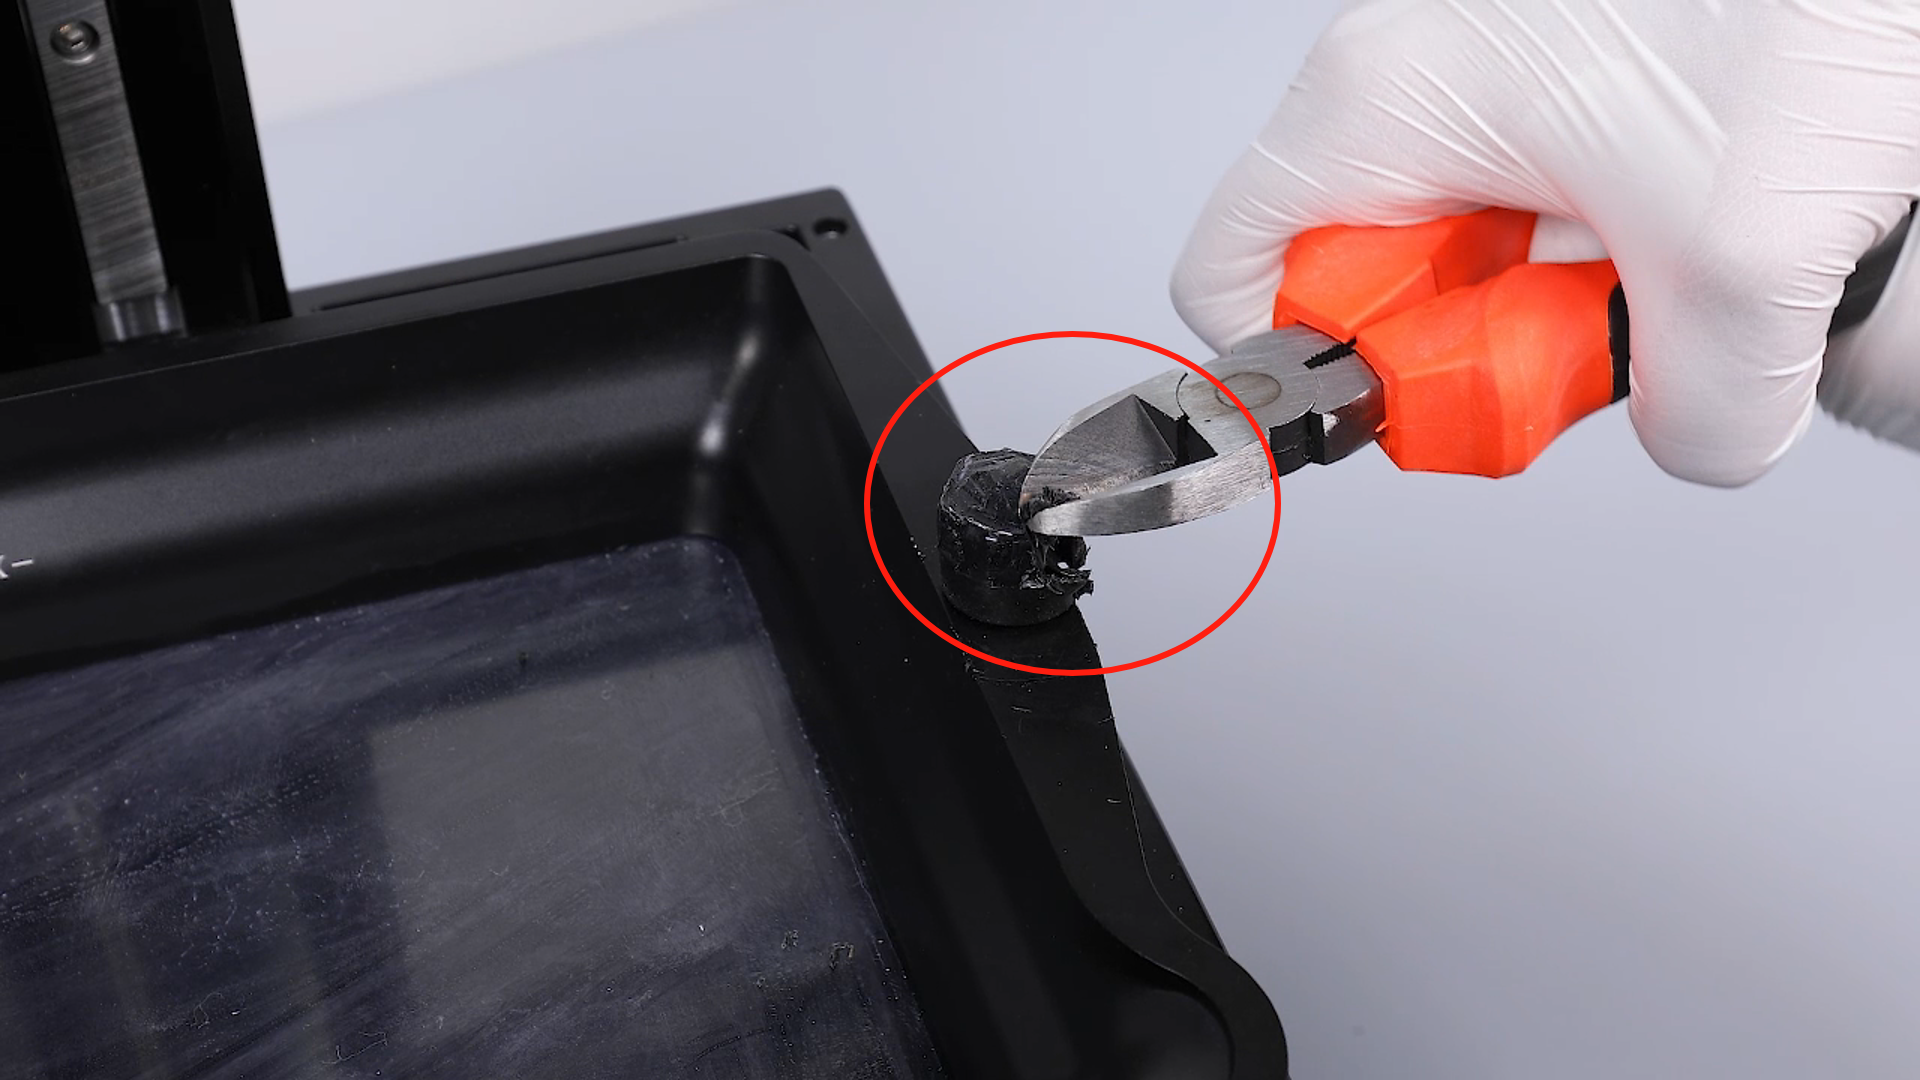
- Use wire cutters to grip the top end of the straight knob and wiggle it until it breaks off after nearly all the plastic handle has been cut away.
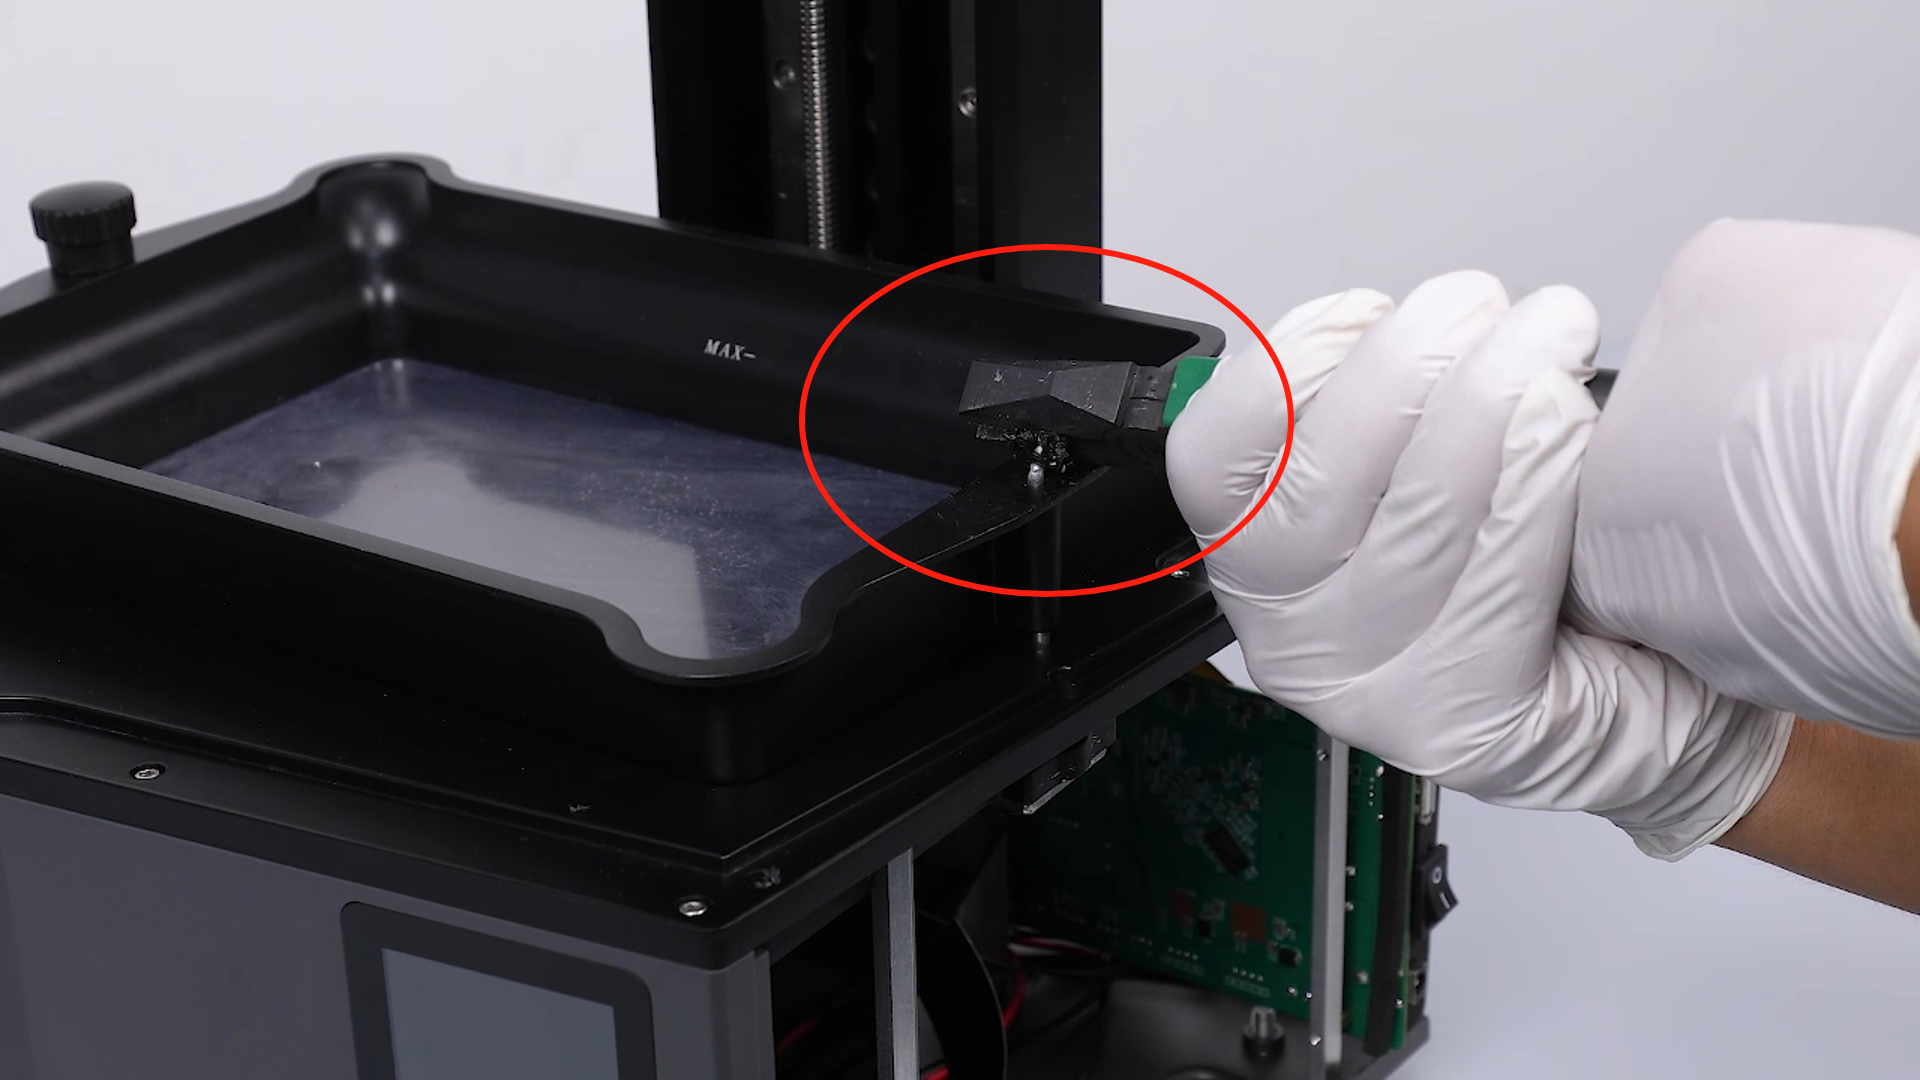
- Retrieve the lower half of the straight knob from underneath the machine.
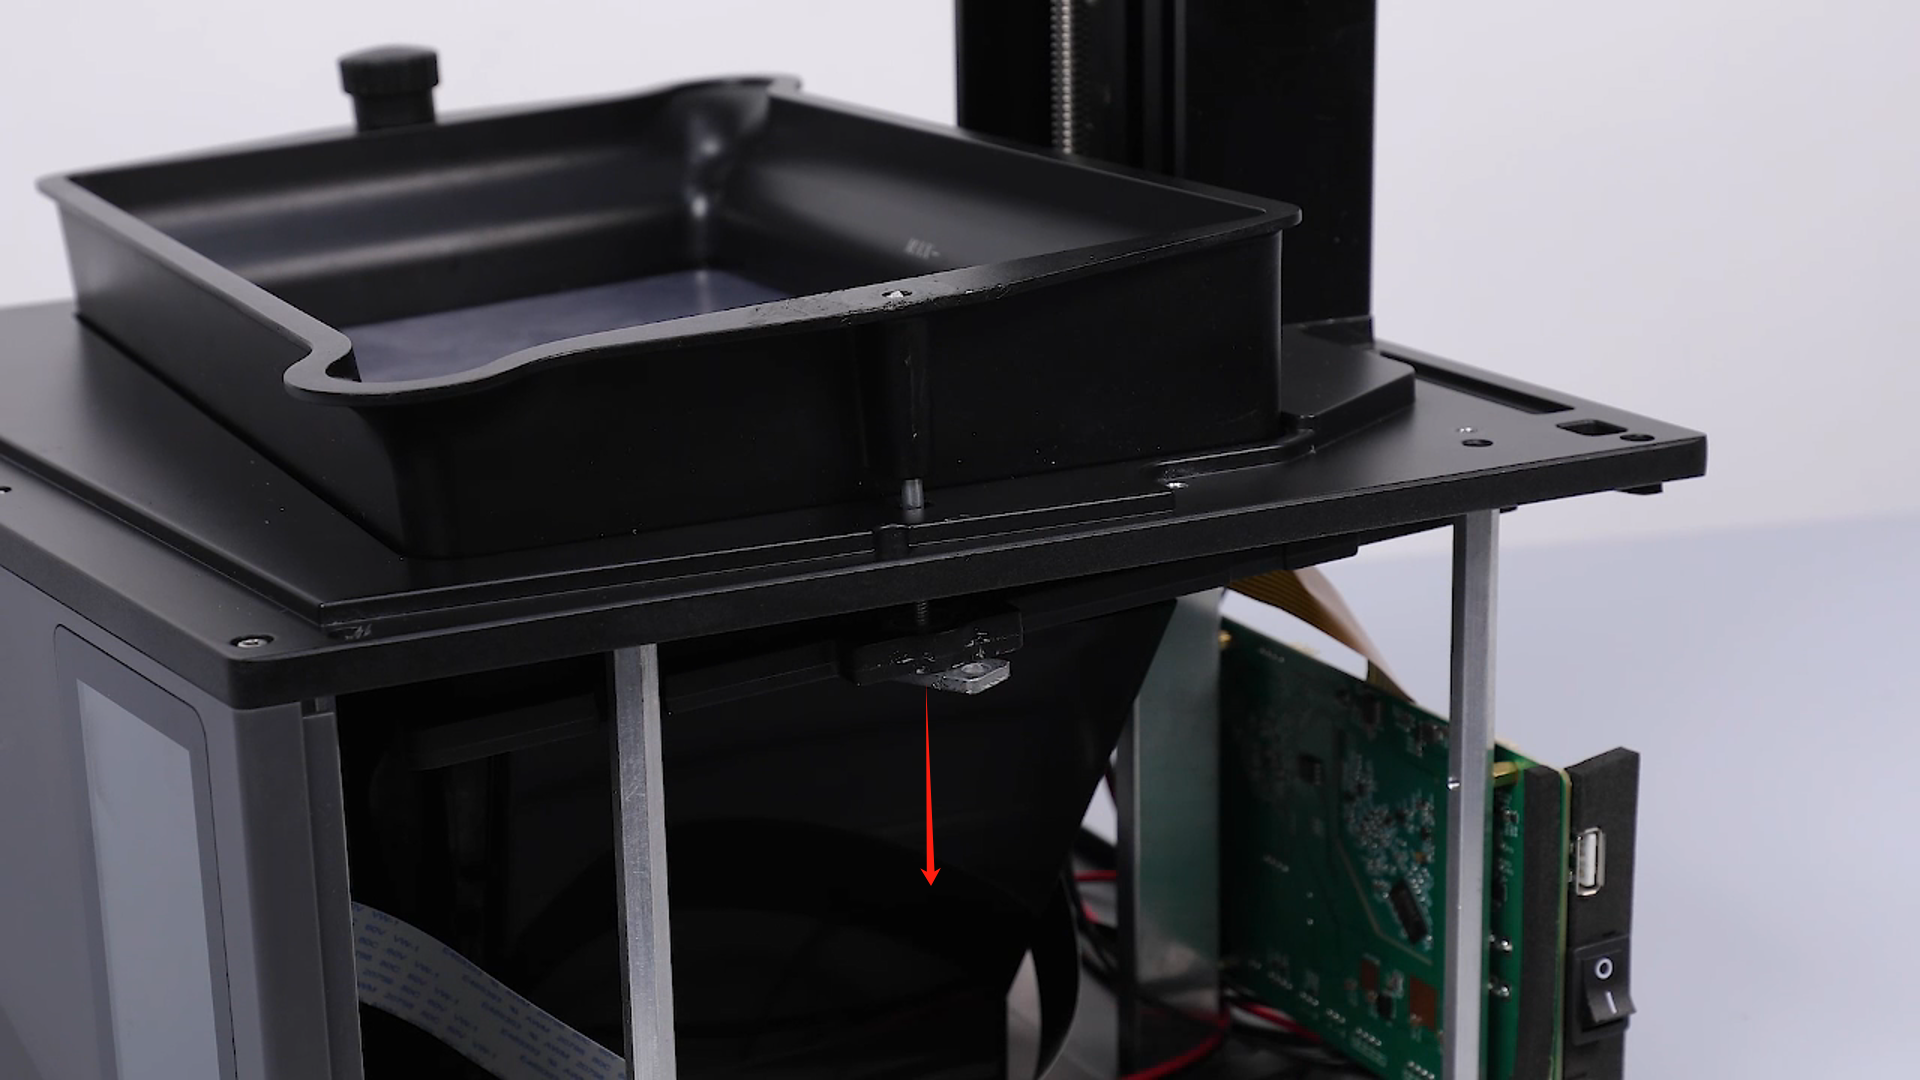
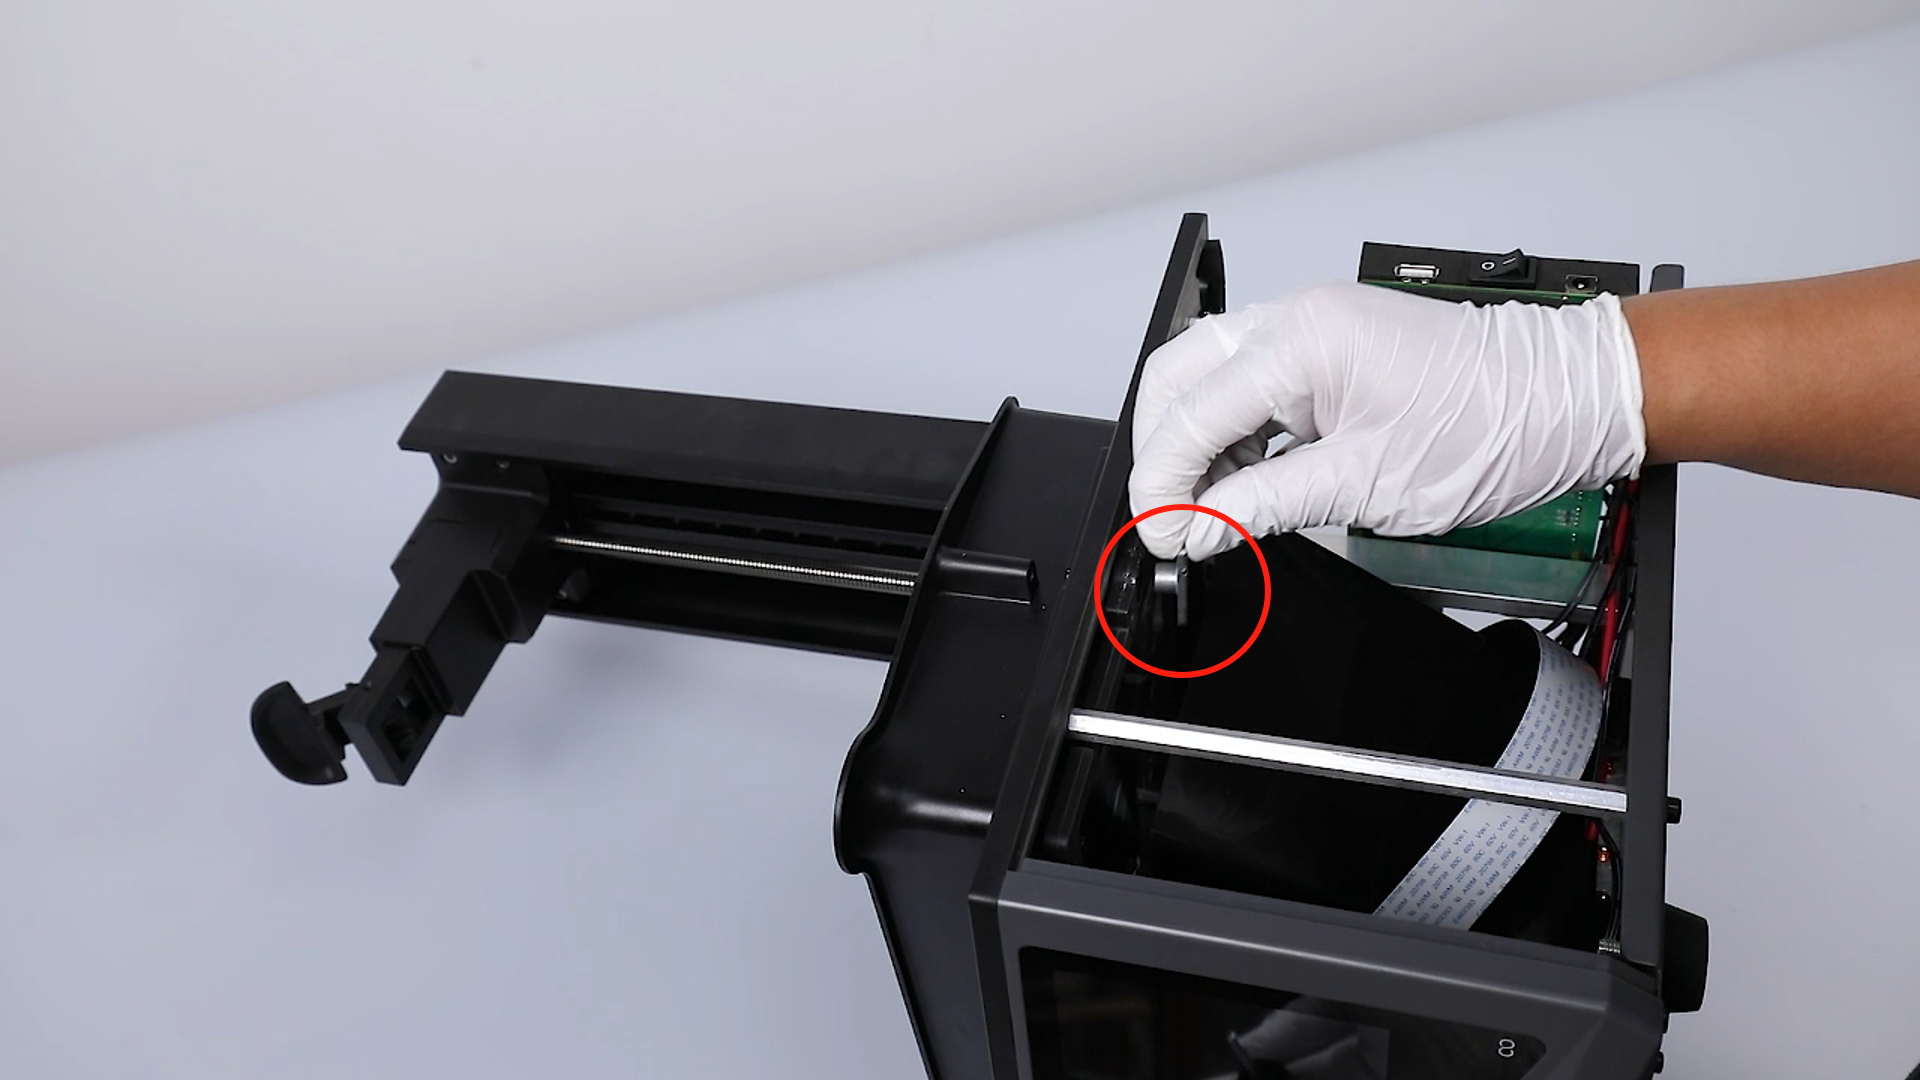
- Retrieve the new handle block, align it with the screw holes, place it in the installation position, and tighten the two securing screws with a 2.5 mm Allen wrench.
- Perform the same operations if the other side's straight knob is jammed and cannot be removed.
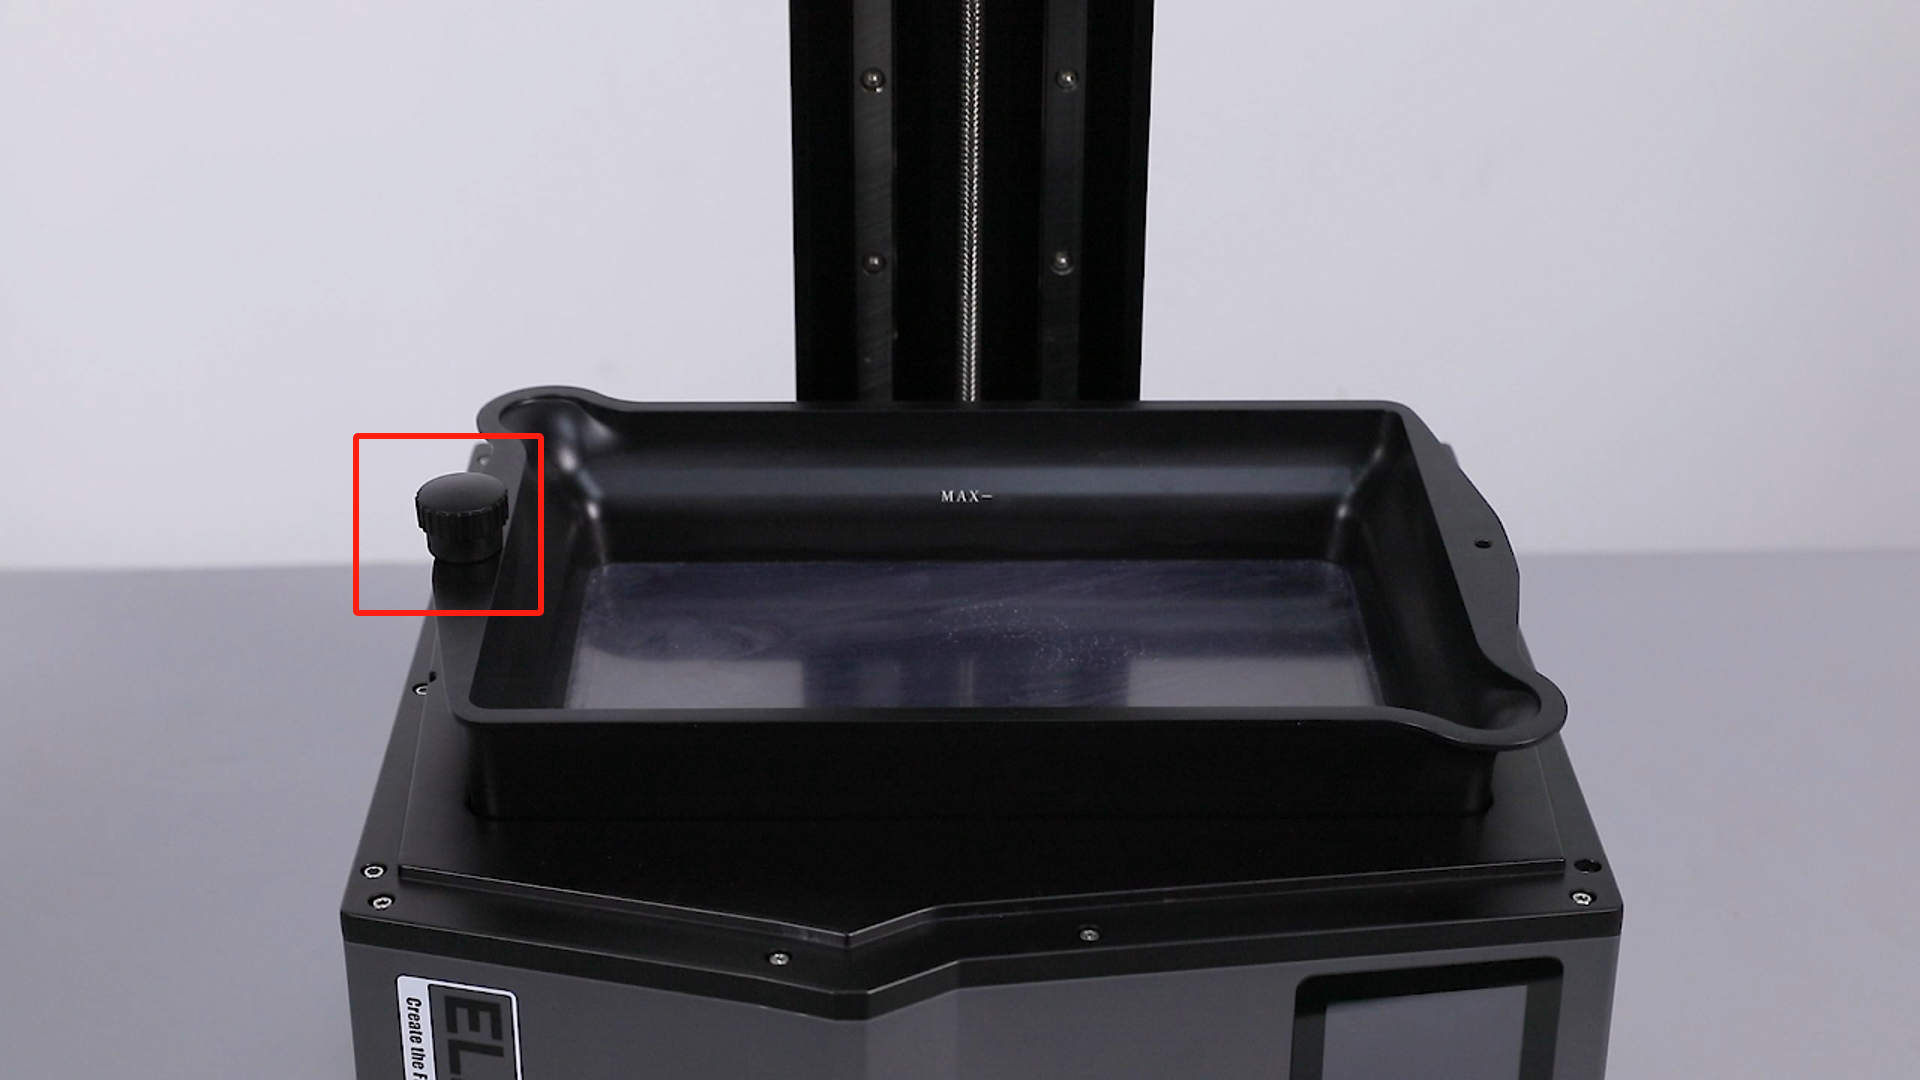
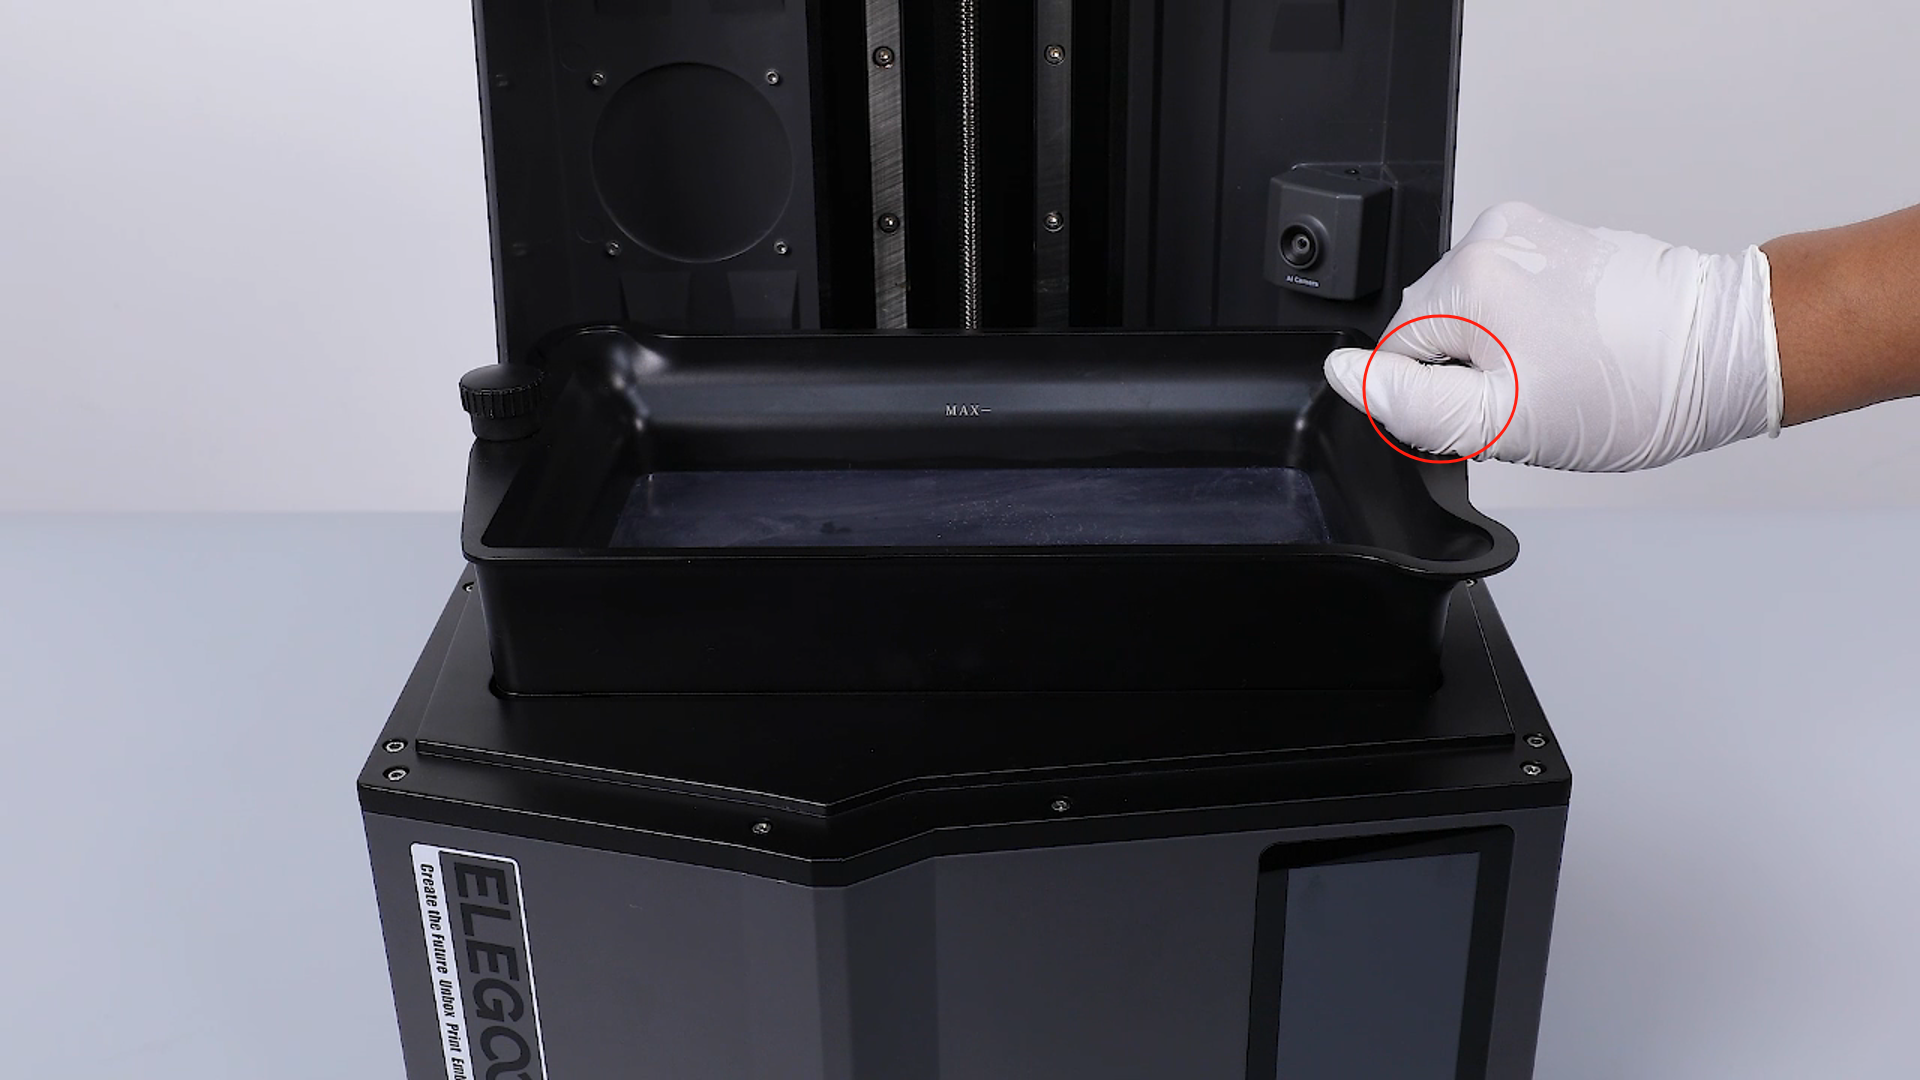
- Loosen the straight knob and remove the resin vat.

- Retrieve the right cover, route the Wifi ribbon cables properly, align the screw holes and button holes, place the right cover in the installation position, and tighten the 3 securing screws at the top with a 2.5 mm Allen wrench.
- Tighten the 3 screws securing the bottom of the printer's right cover with a 2.0 mm Allen wrench.
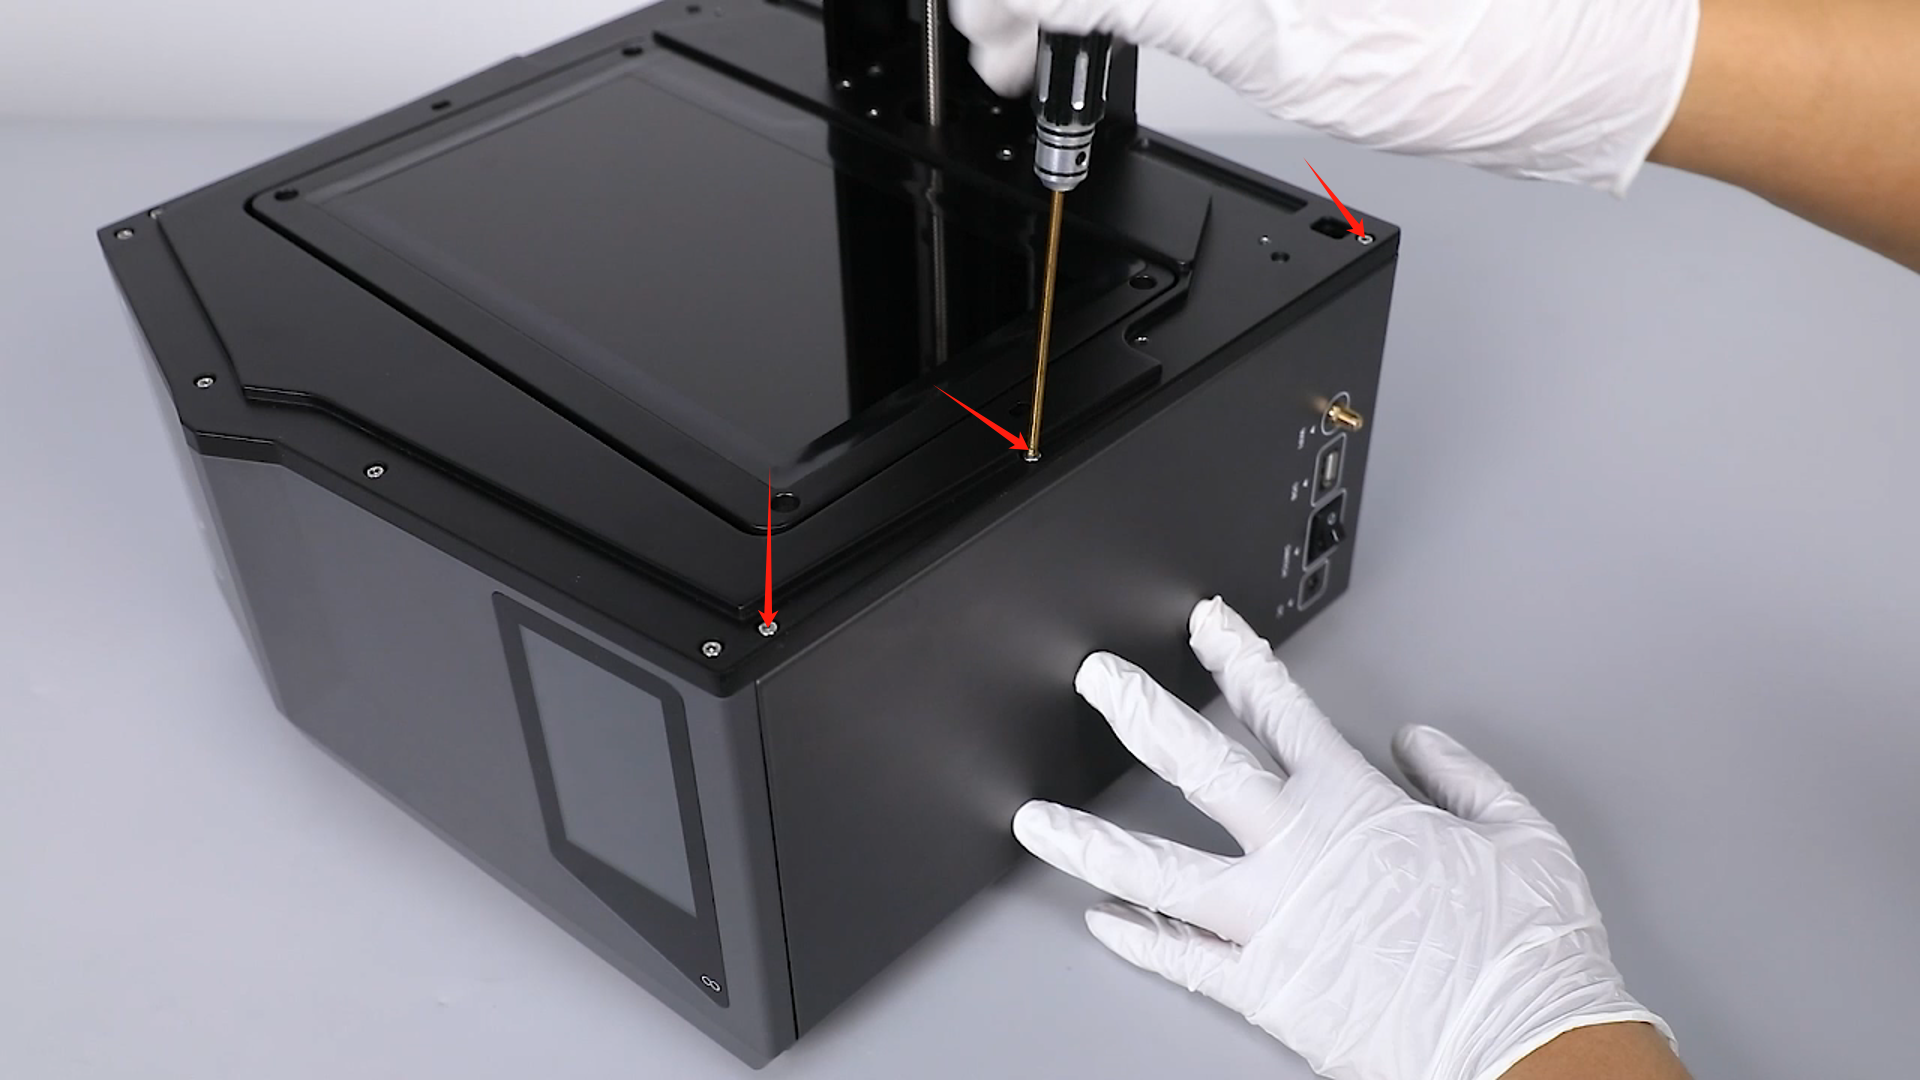
- Retrieve the printer's top cover, align the screw holes, place the top cover in the installation position, and tighten the six securing screws with a 2.5 mm Allen wrench. Note: Route the camera ribbon cables through the reserved hole on the right side.
- Tighten the one screw at the back securing the top cover with a 2.5 mm Allen wrench.

- Plug the Wifi ribbon cables and camera ribbon cables into the motherboard ports.
- Retrieve the printer's rear cover and tighten the 7 screws securing it with a 2.0 mm Allen wrench.
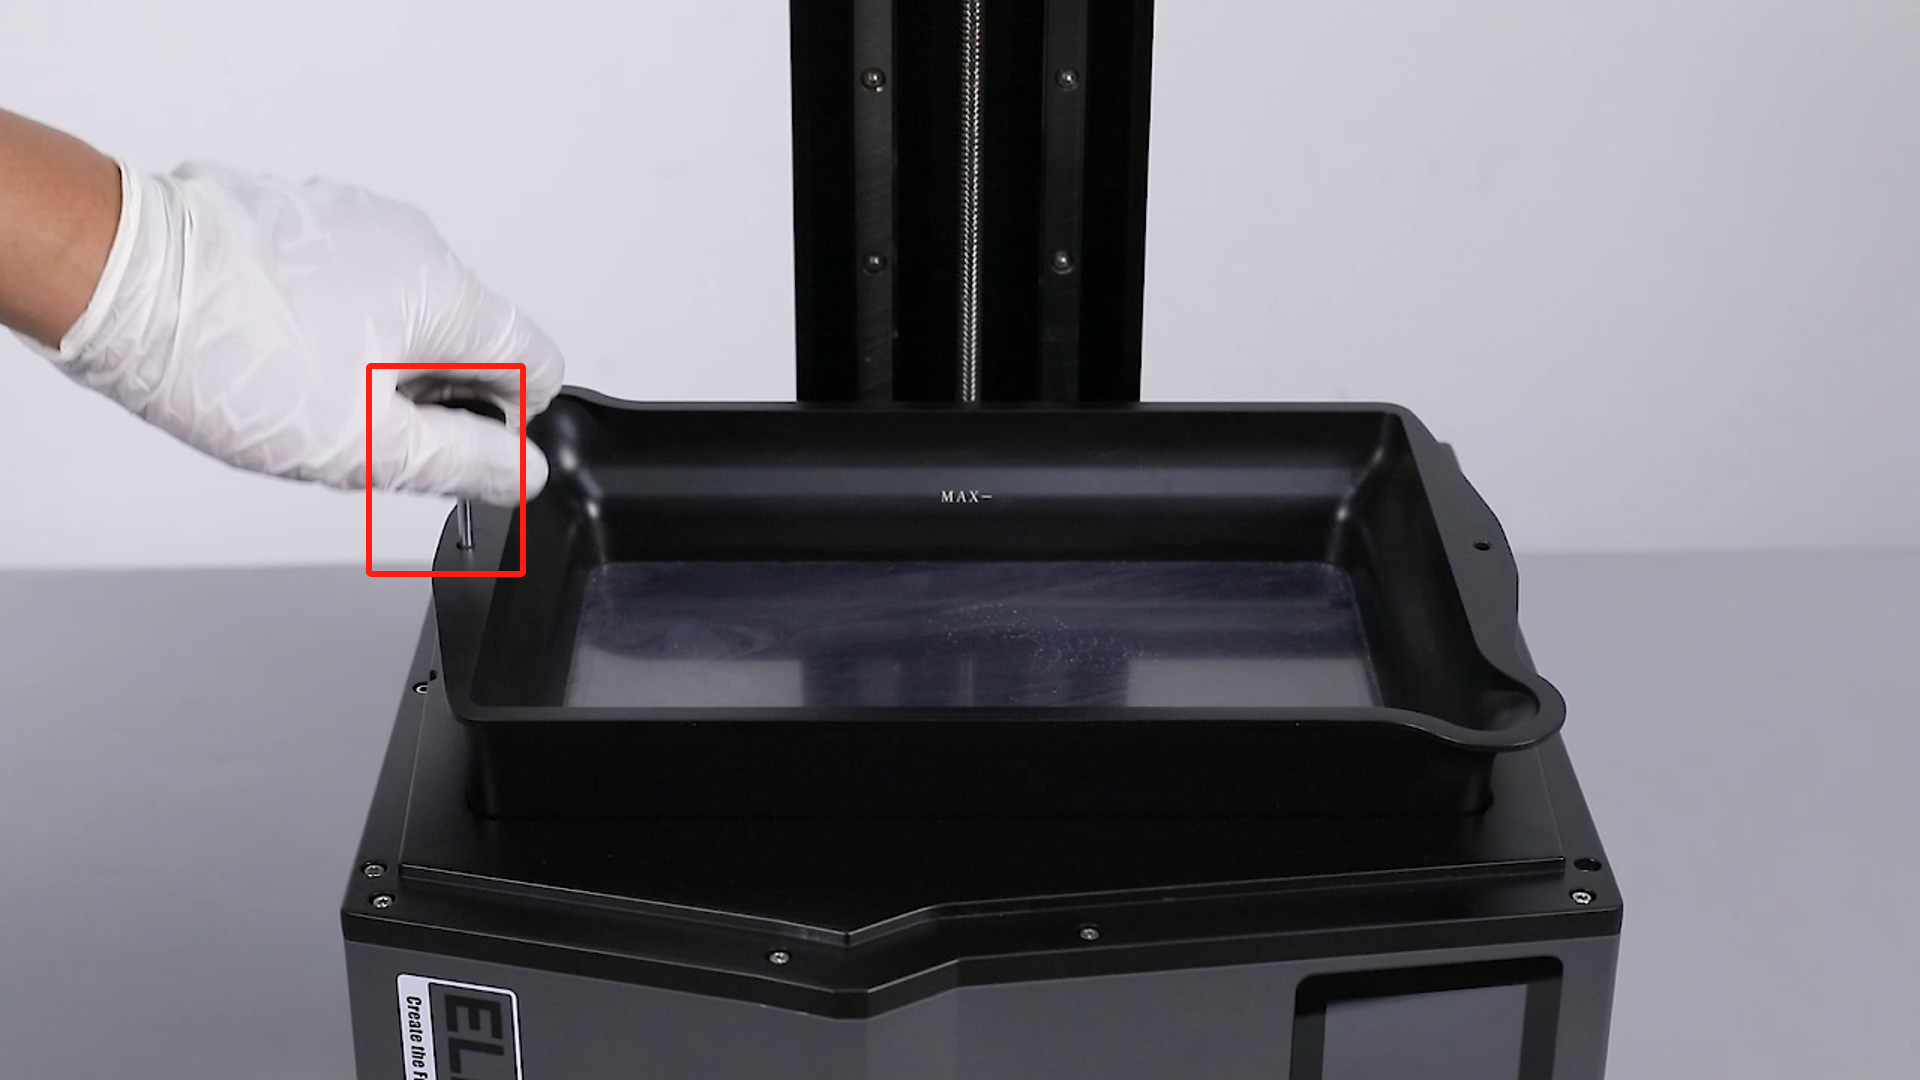
- Place the resin vat in its installation position and secure it tightly with the straight knob, then the 3D printer is ready for use.