¶ Fault Symptoms
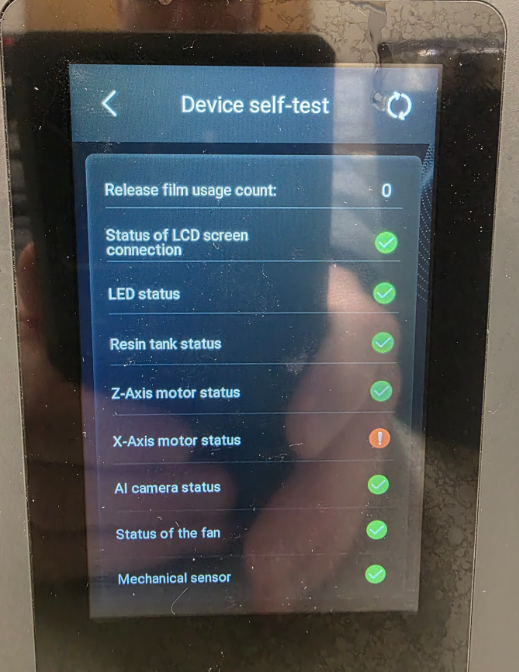
During the self-check process, the X-axis homing process is abnormal and accompanied by impact noise. At the same time, the motor drive is abnormal, causing the X-axis motor to malfunction.
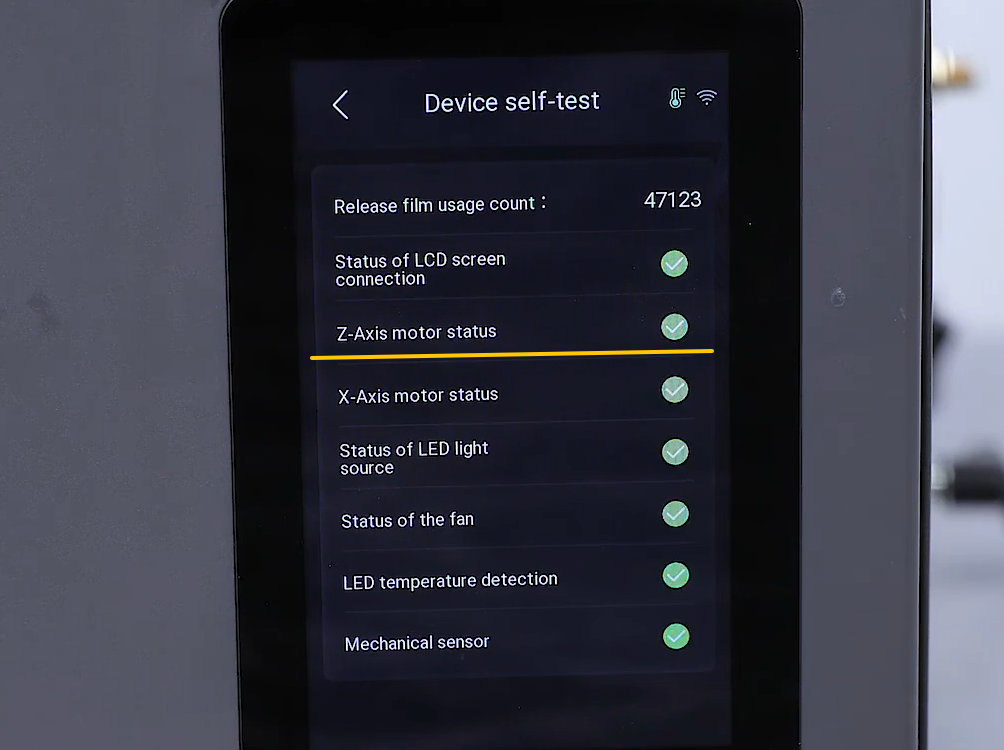
After the self-check is completed, the touch screen displays the error message “X-axis Motor Status”.
¶ Possible Causes
- Resin leakage
- Loose X-axis structure
- Incorrect firmware version installed
- X-axis limit switch abnormality
- X-axis motor abnormality
¶ Required Tools
- 2.0 mm Allen wrench
- 2.5 mm Allen wrench
- 3.0 mm Allen wrench
- Lint-free cloth
¶ Troubleshooting Steps
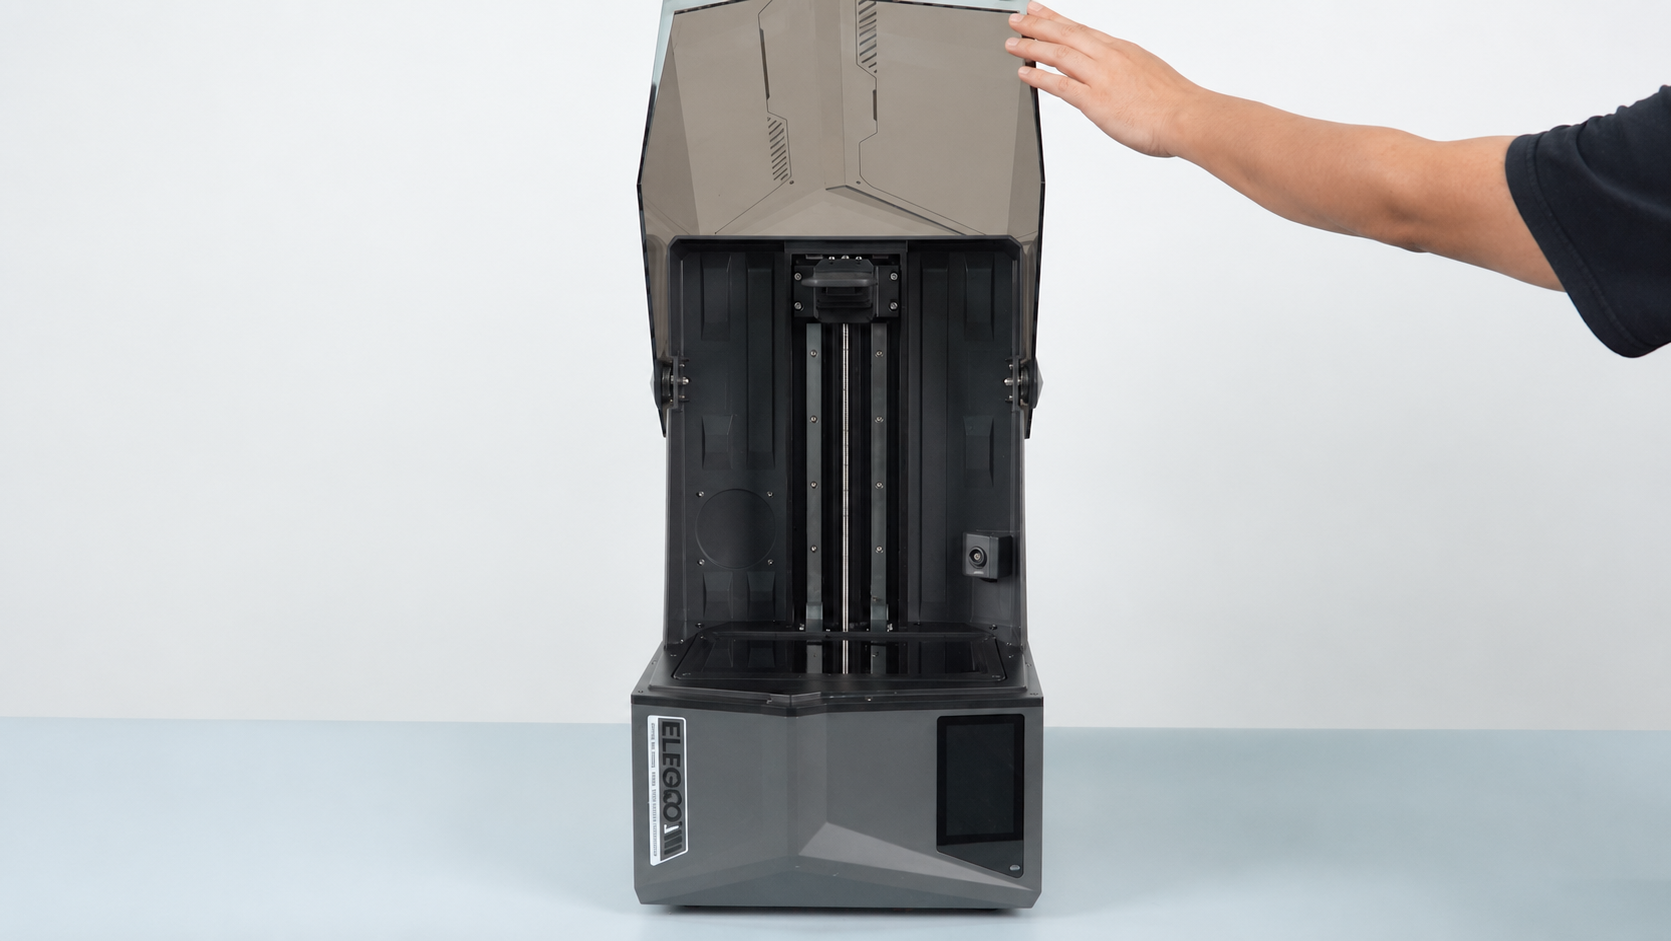
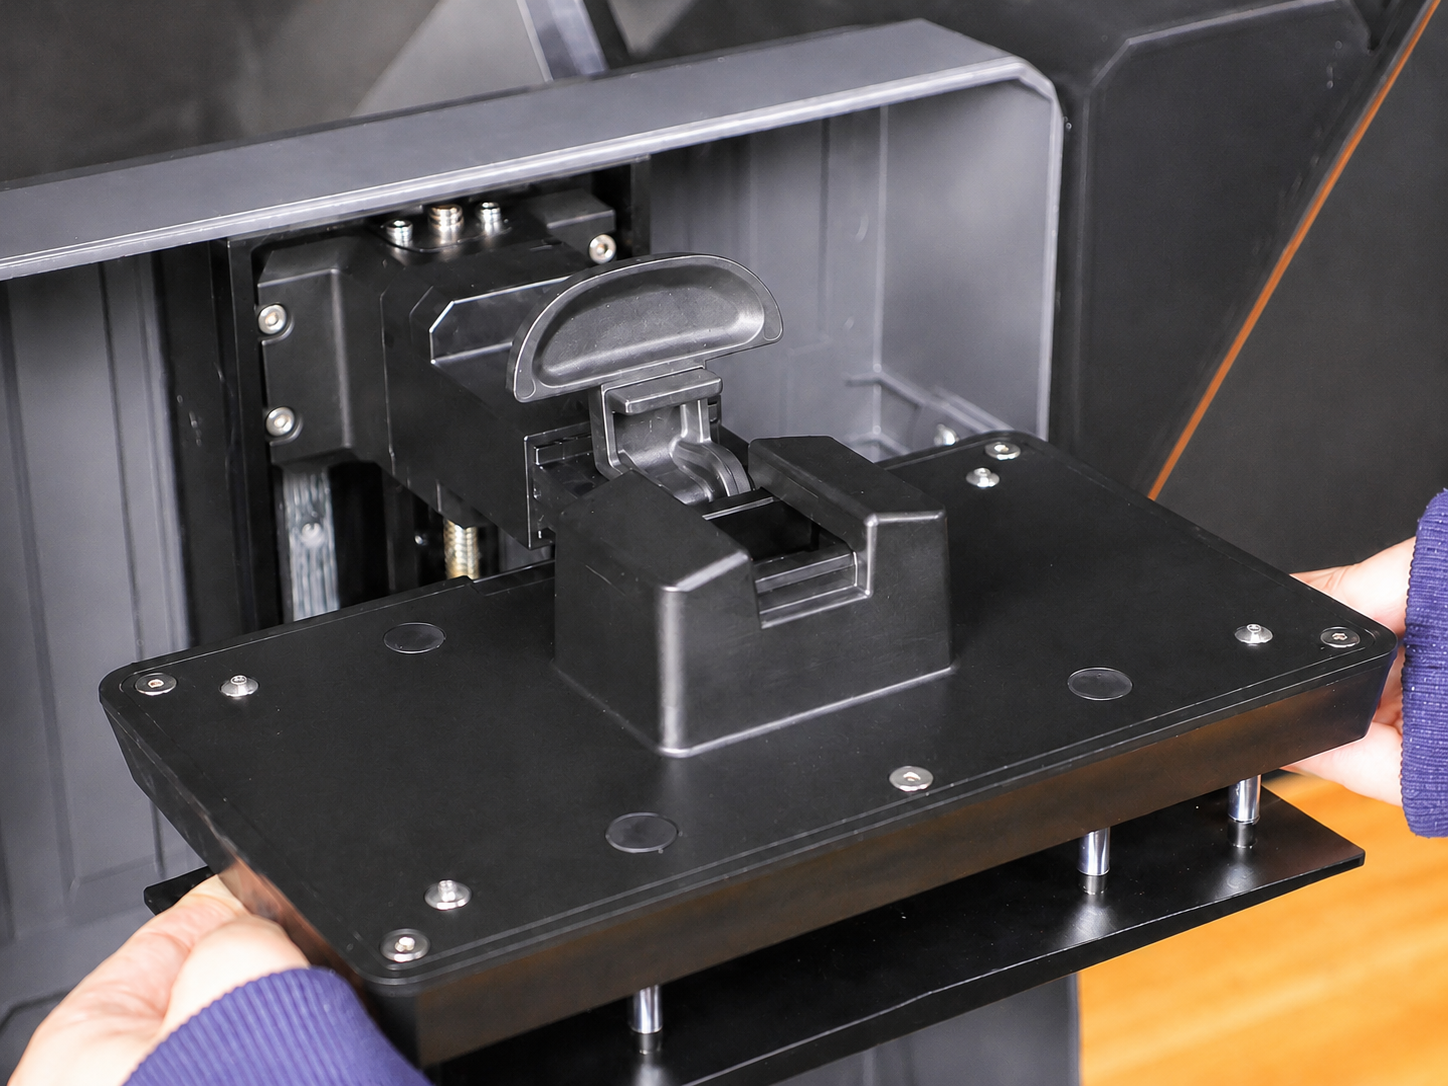
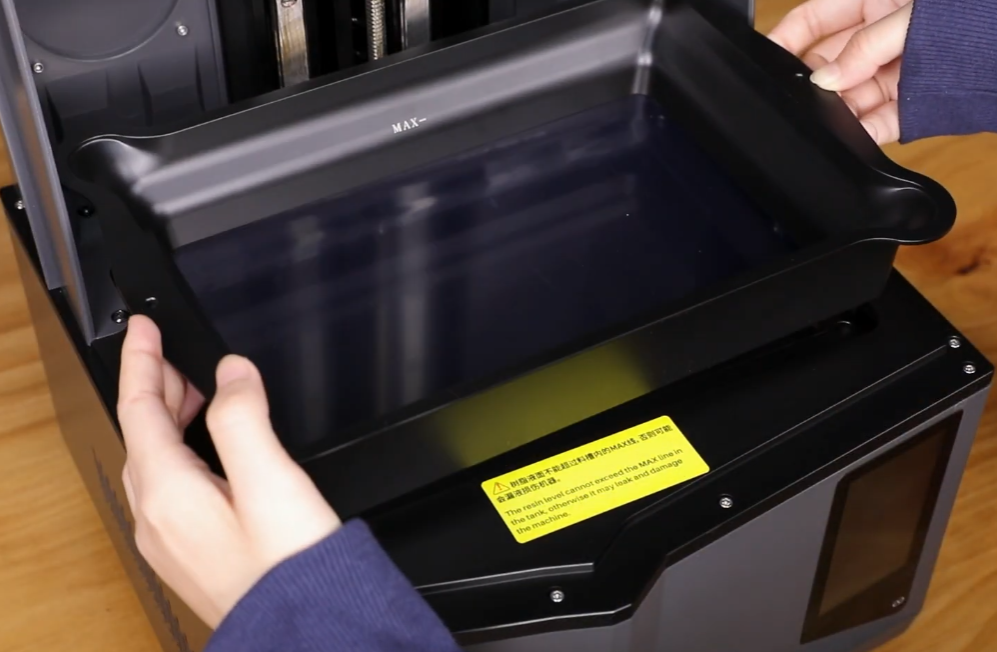
Note: To facilitate subsequent troubleshooting, please open the UV cover/remove the resin tank and build plate in advance.
¶ Check Whether the Firmware Matches
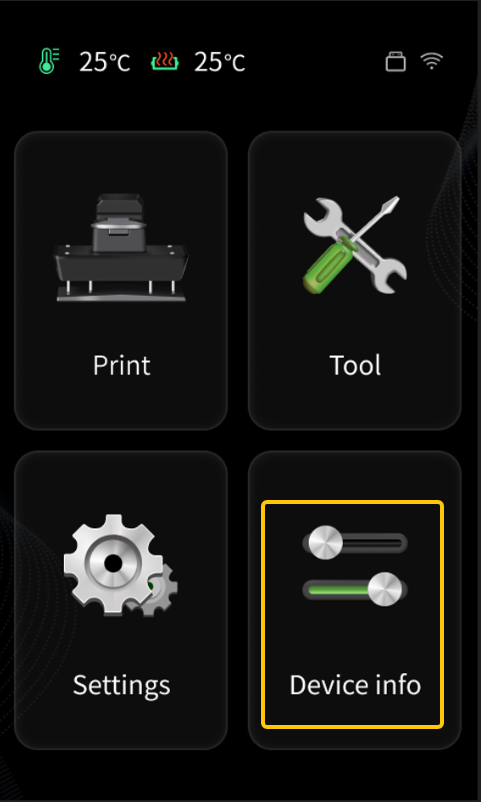
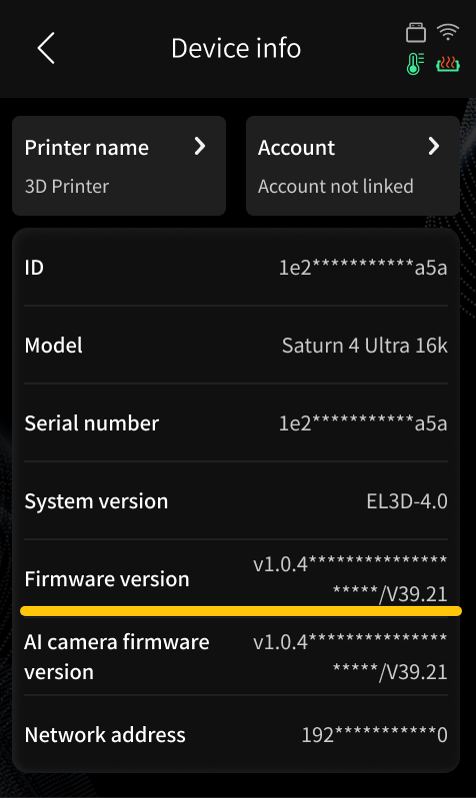
- Power on the printer. Then go to Touch Screen > Device Information and check whether the firmware version ends with the letter B.
- Turn off the printer using the power switch and unplug the adapter.
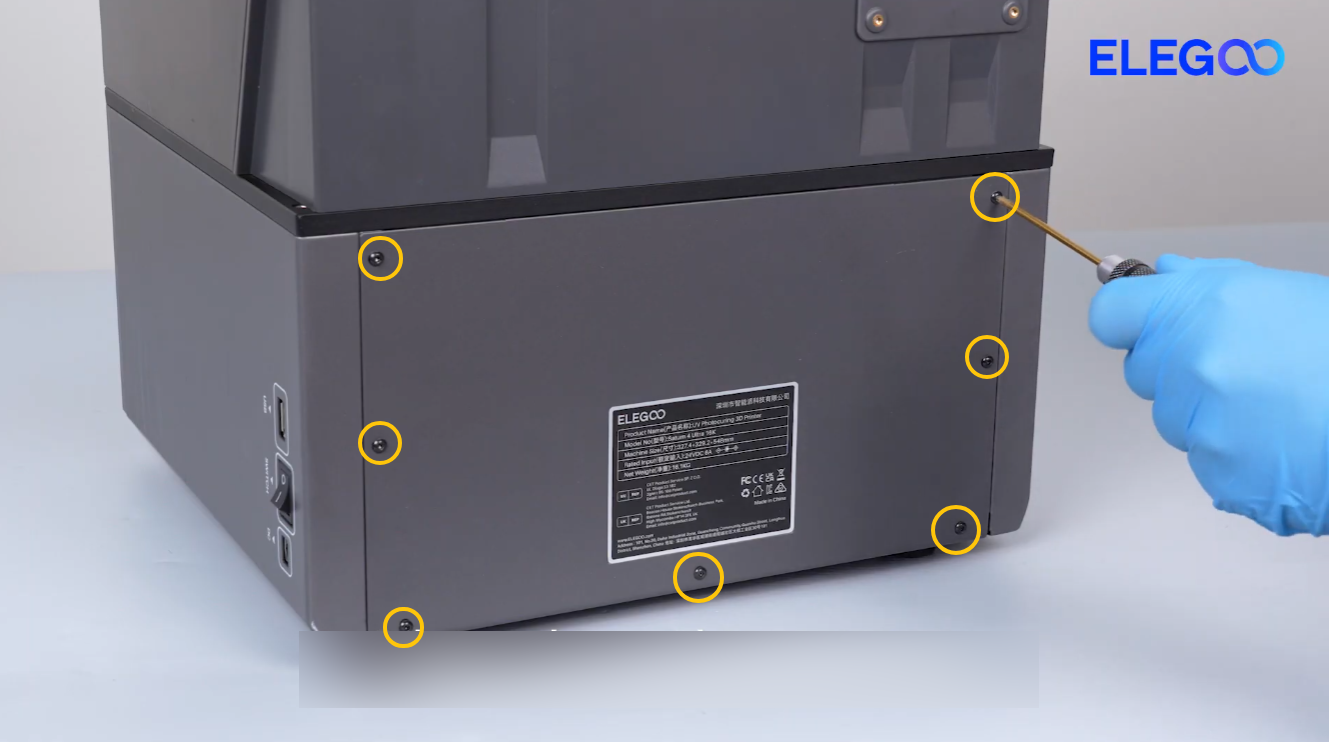
- Use a 2.0 mm Allen wrench to remove the seven screws securing the rear cover.
- Remove the rear cover.
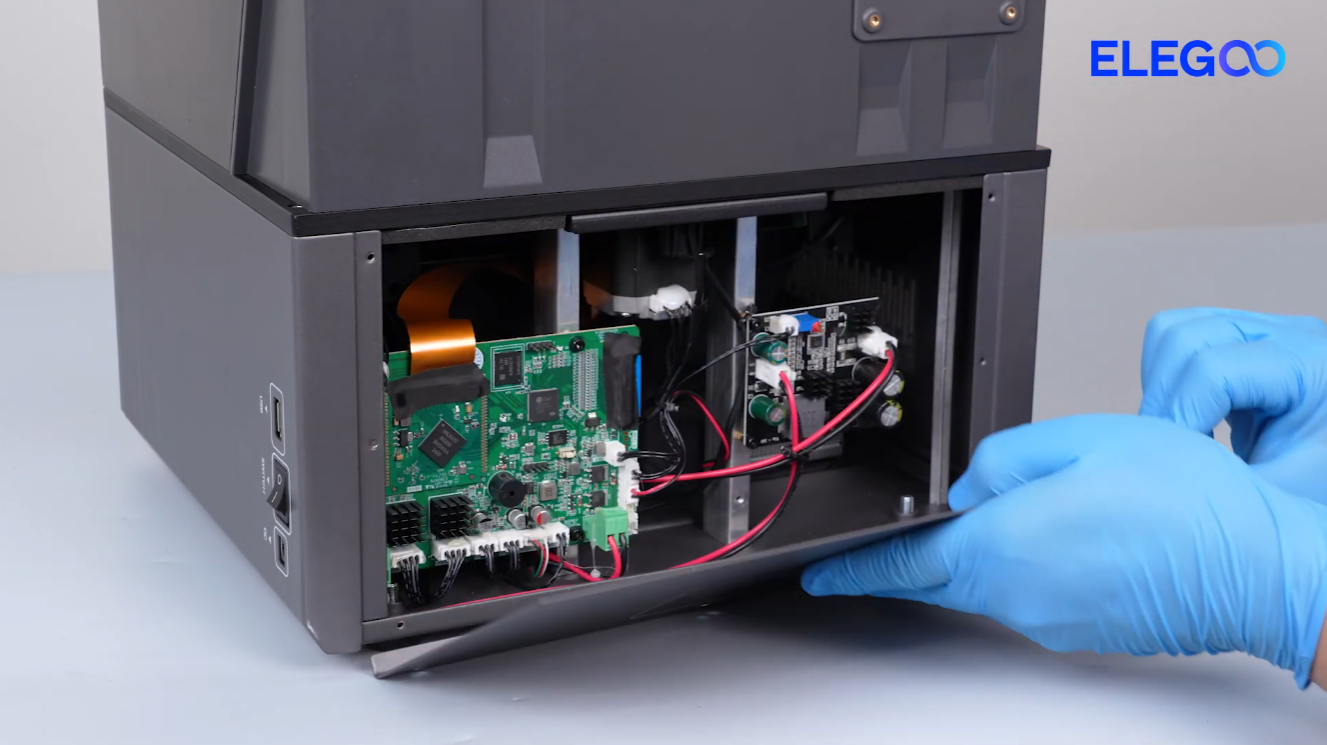
- Check whether a capacitor is installed on the mainboard.
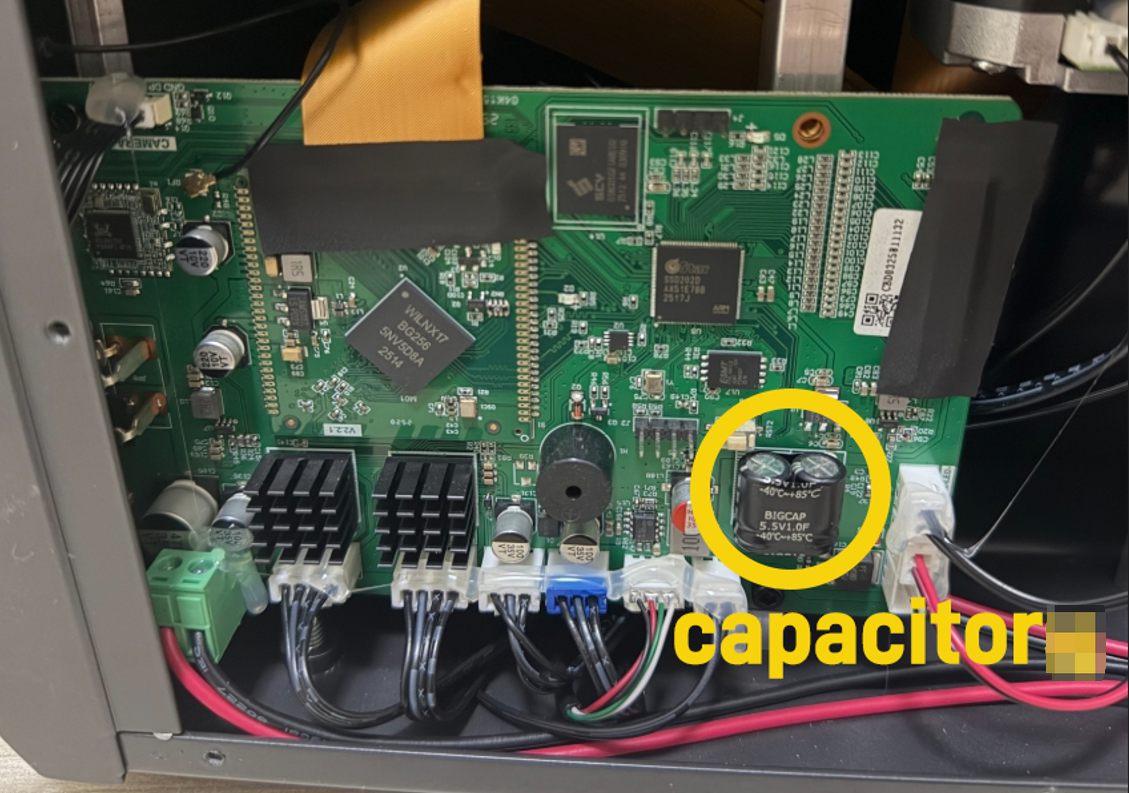
- If a capacitor is installed on the current mainboard, the printer must be updated to the B version firmware.
Saturn 4 Ultra 16K Firmware-V1.4.4B-20251023-V8
Saturn 4 Ultra Firmware-V1.4.5B-20251028-V4
- If there is no capacitor on the current mainboard, continue with the following troubleshooting steps.
¶ Check for Resin Leakage
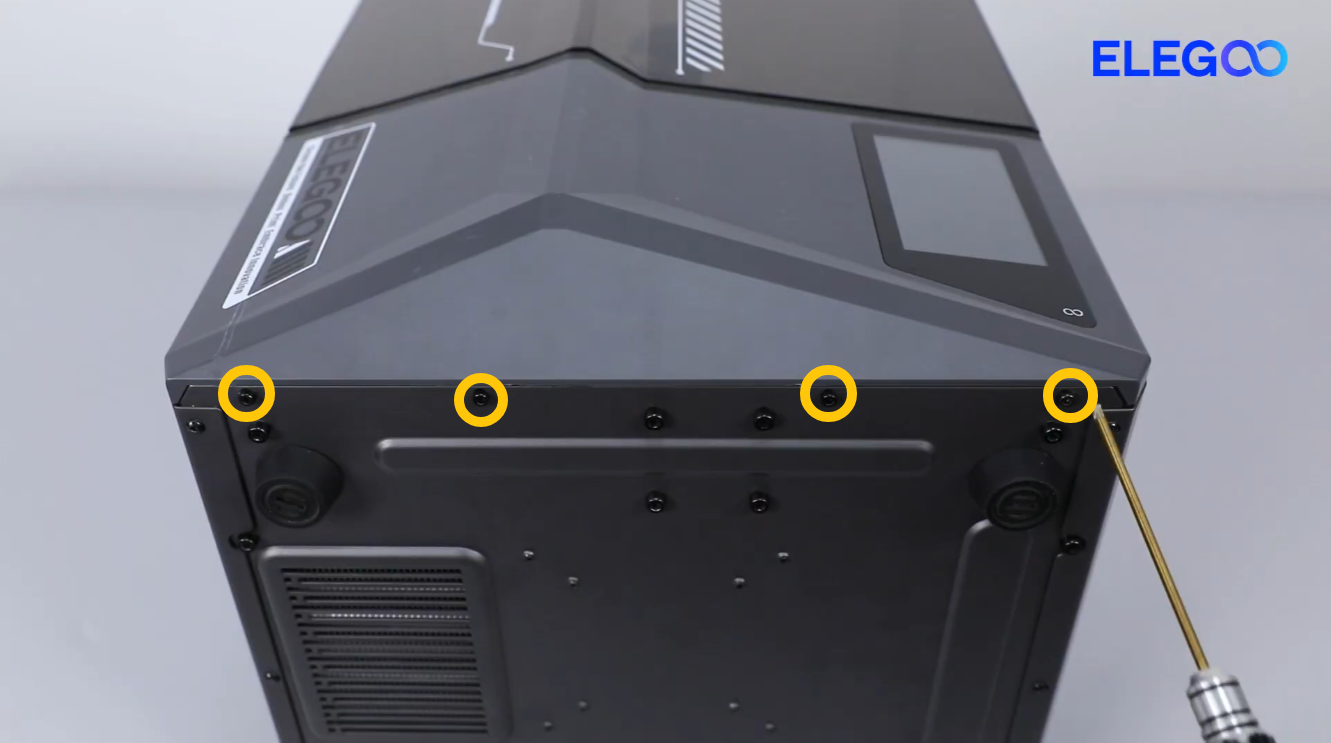
- Use a 2.5 mm Allen wrench to loosen the 4 screws securing the upper part of the front cover.
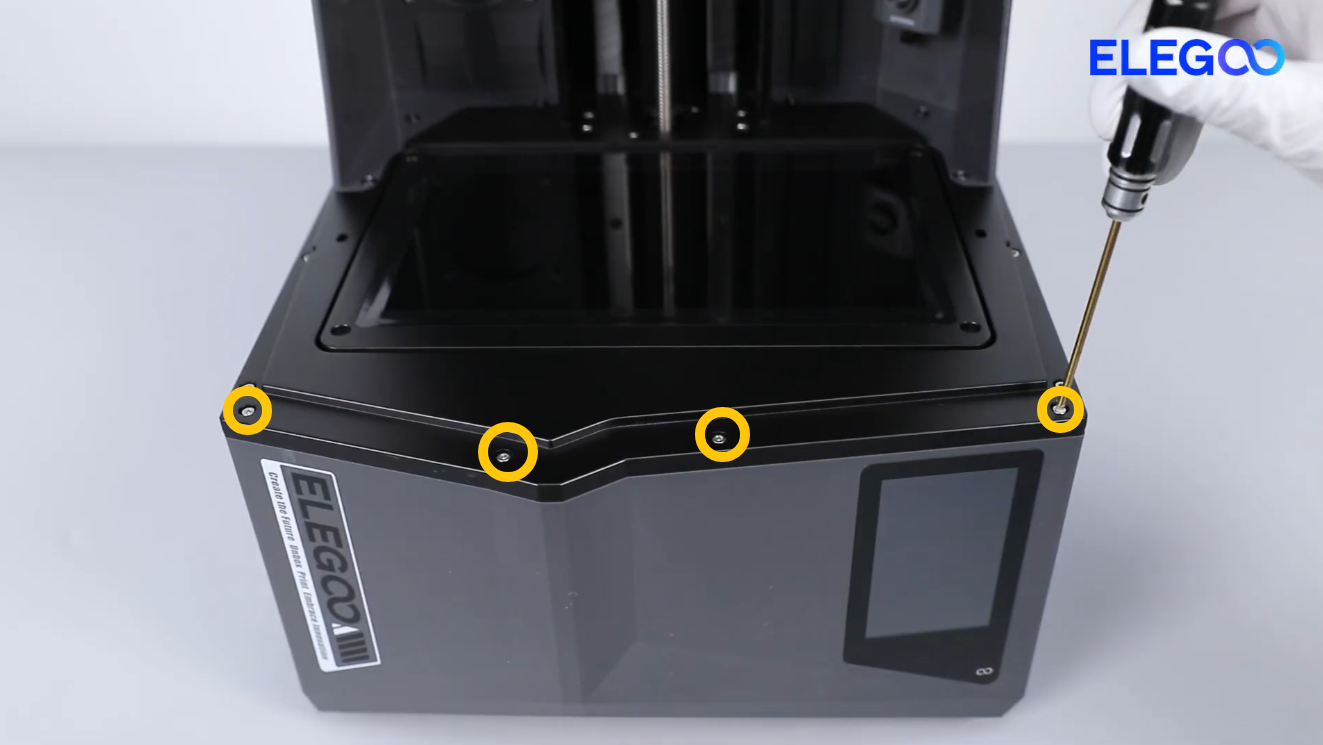
- Close the top cover and place the printer on its side.
Note: If there is obvious resin leakage on the surface of the LCD screen, do not place the printer on its side. Move the printer to the edge of the table, expose the screws securing the lower part of the front cover, and then remove the screws. Make sure the foot pads remain on the table surface at all times, and support the printer to prevent it from falling over.
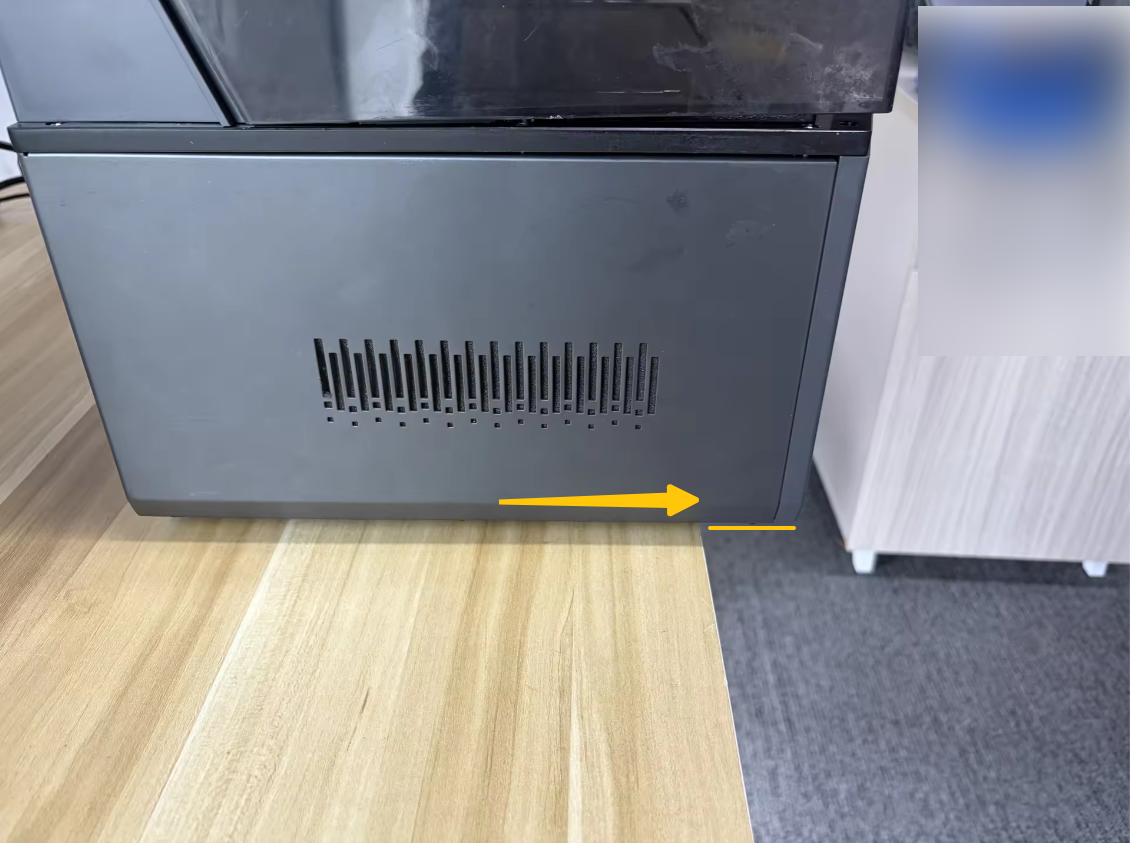
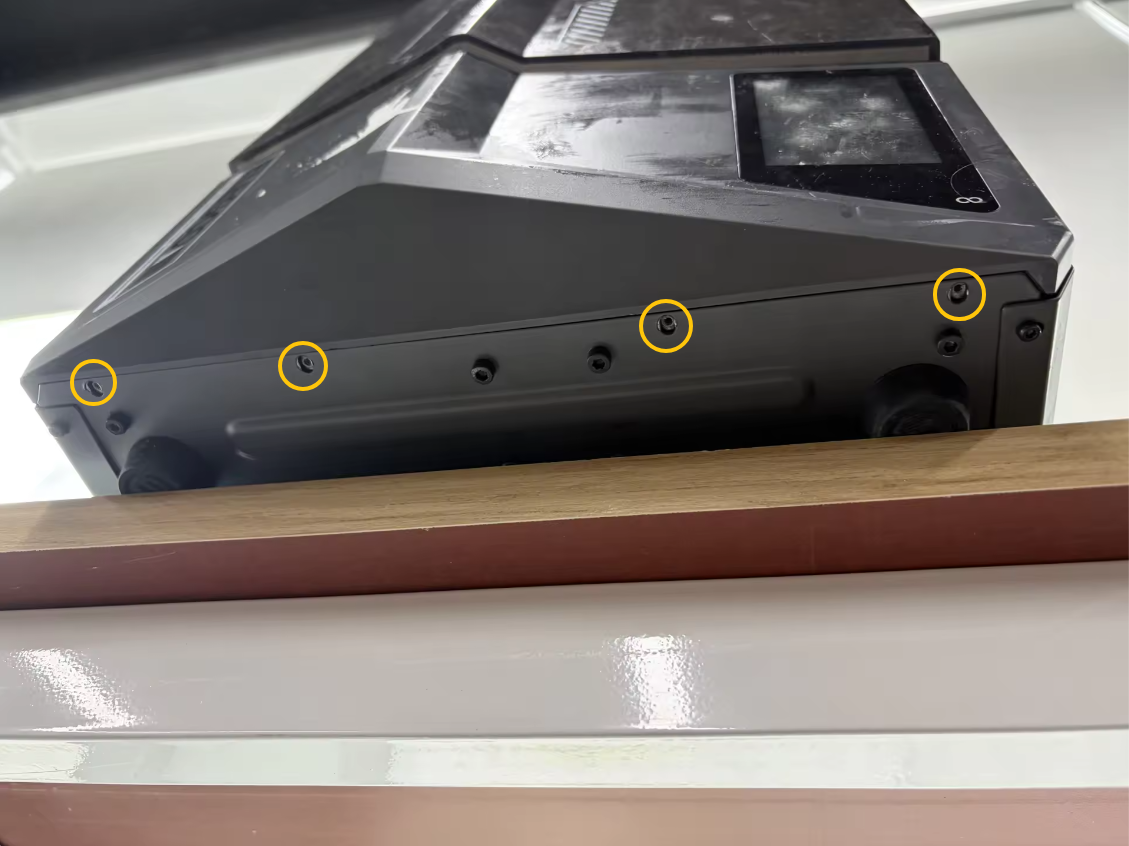
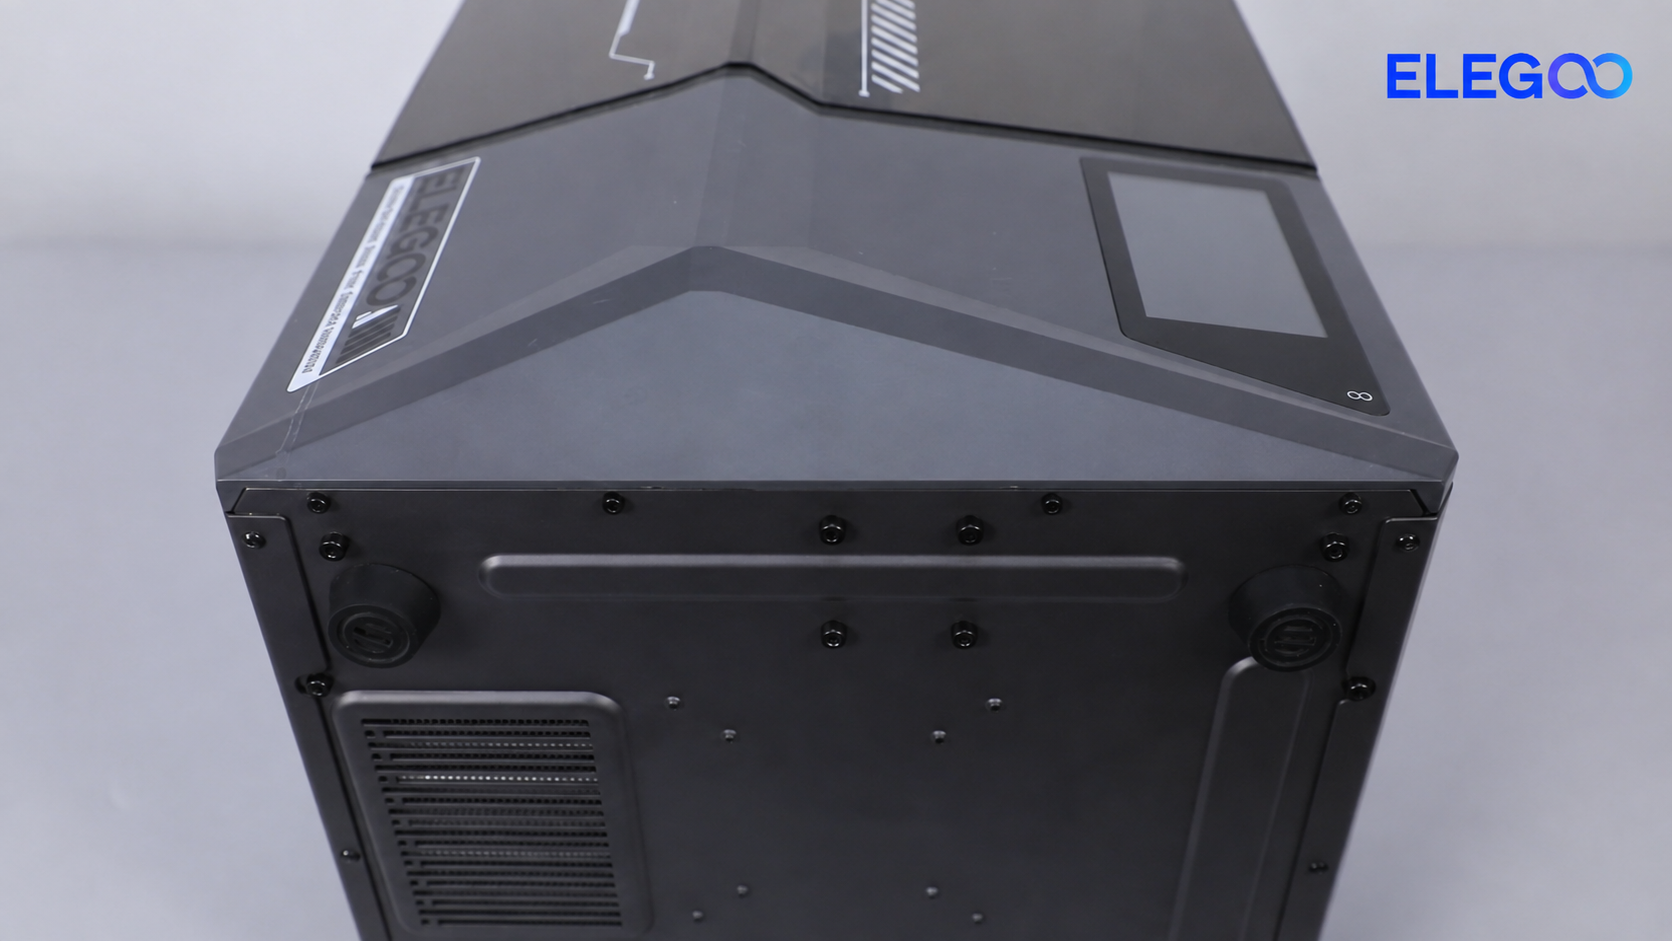
- Use a 2.5 mm Allen wrench to loosen the 4 screws securing the lower part of the front cover.
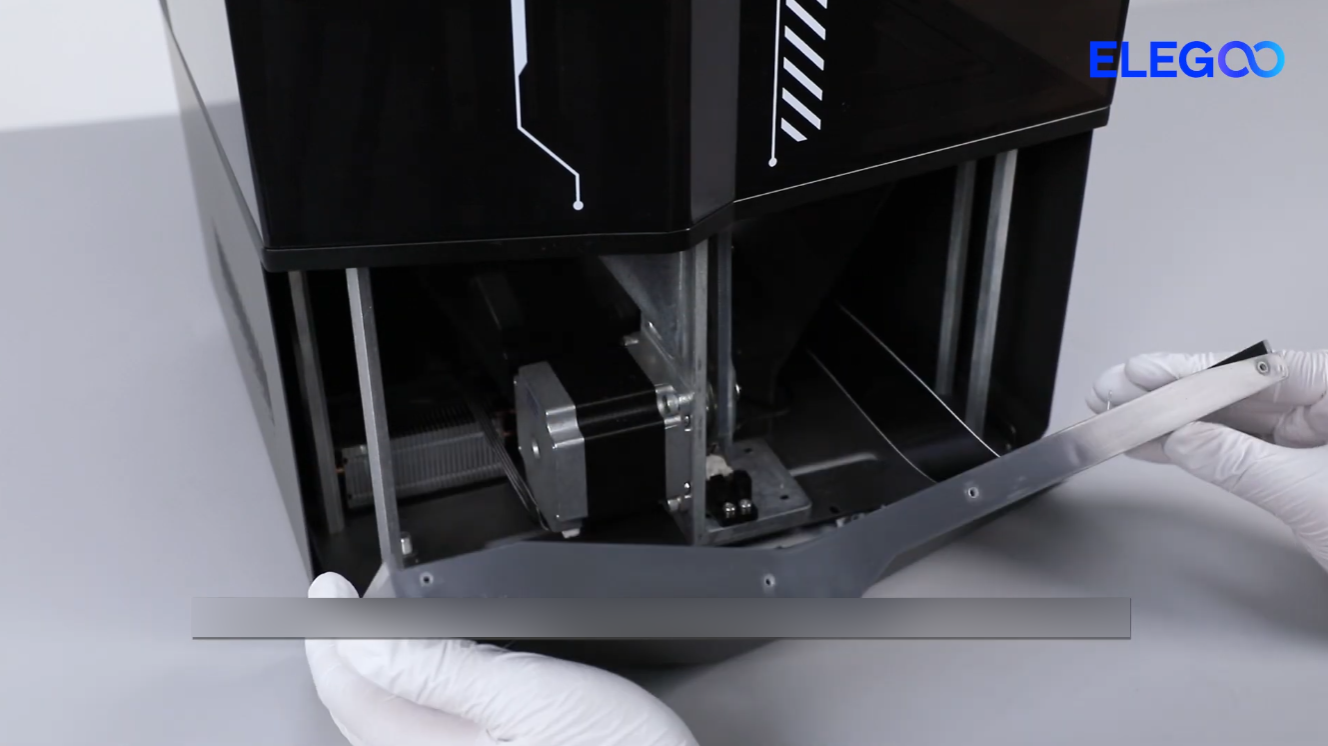
- Slowly open the front cover.
Note: The front cover is connected with cables. Be careful during removal to avoid pulling or damaging the cables.
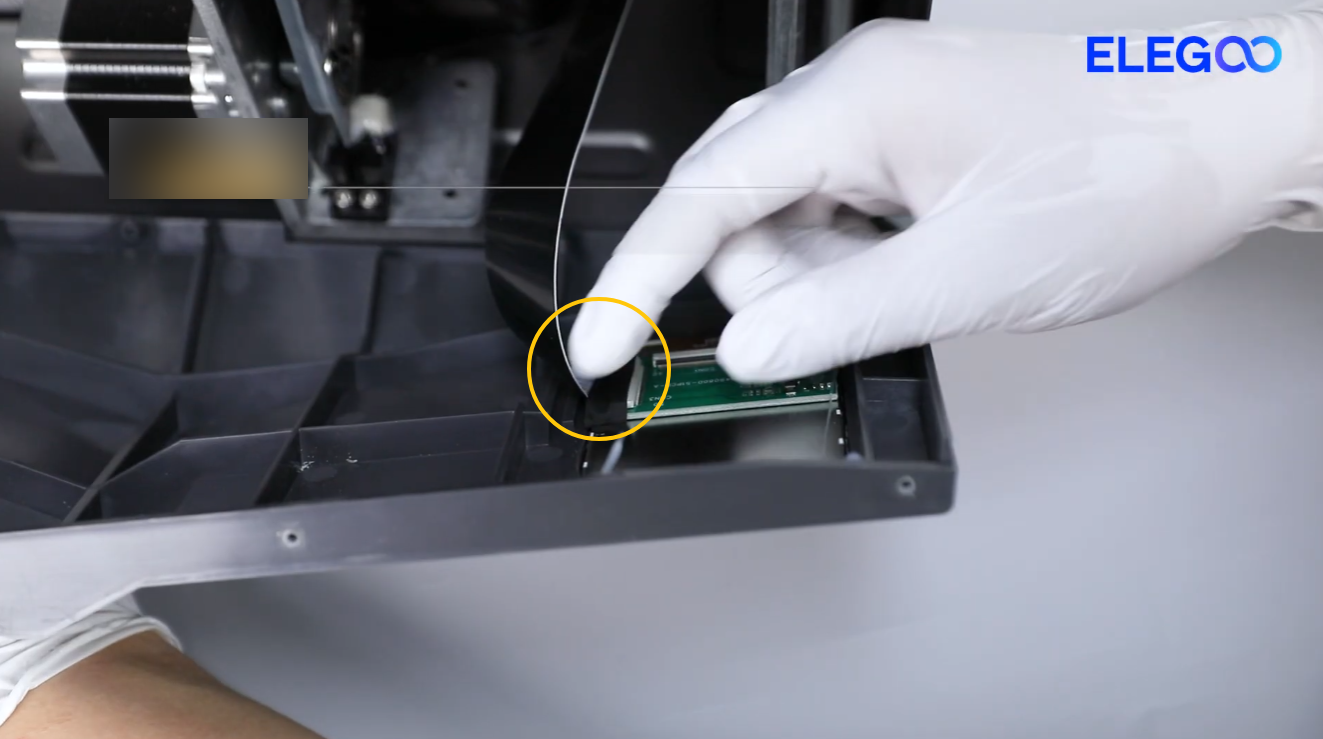
- Remove the tape securing the touchscreen cable, release the latch, and detach the front cover.
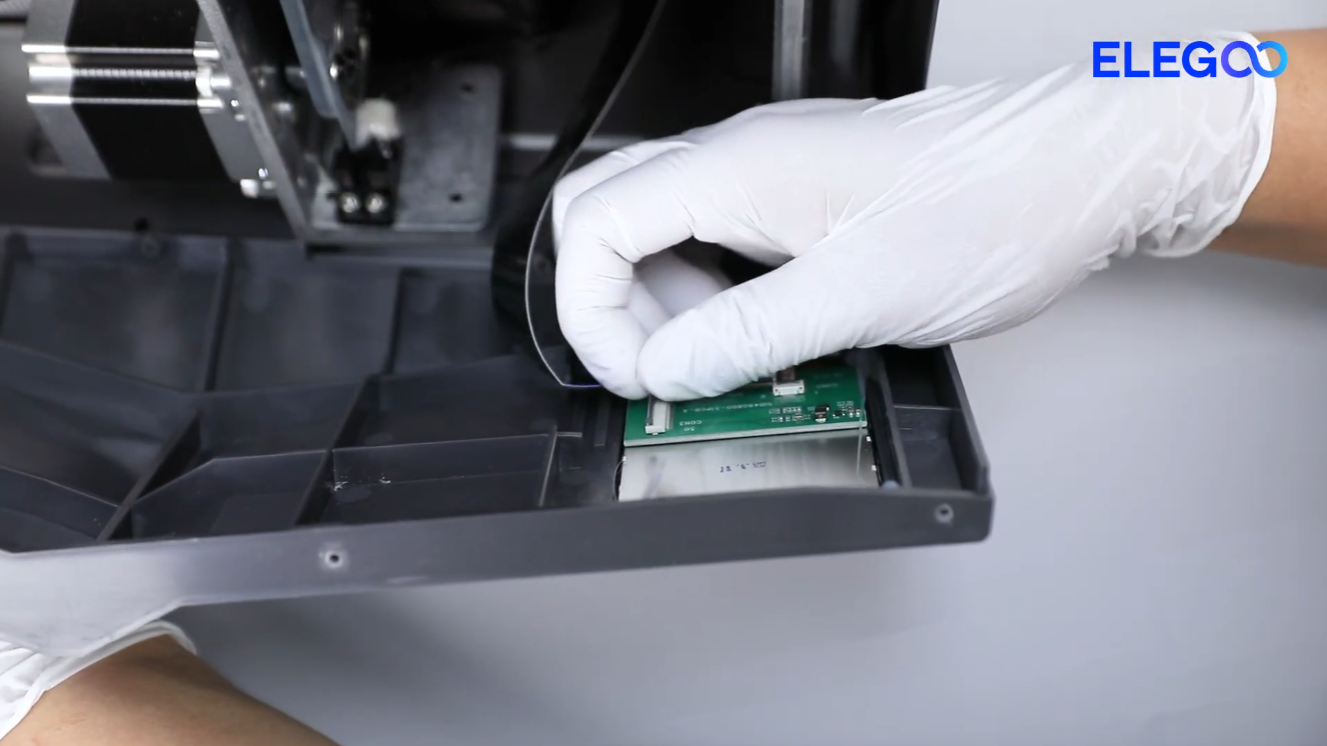
- Check whether there is resin leakage in the indicated area.
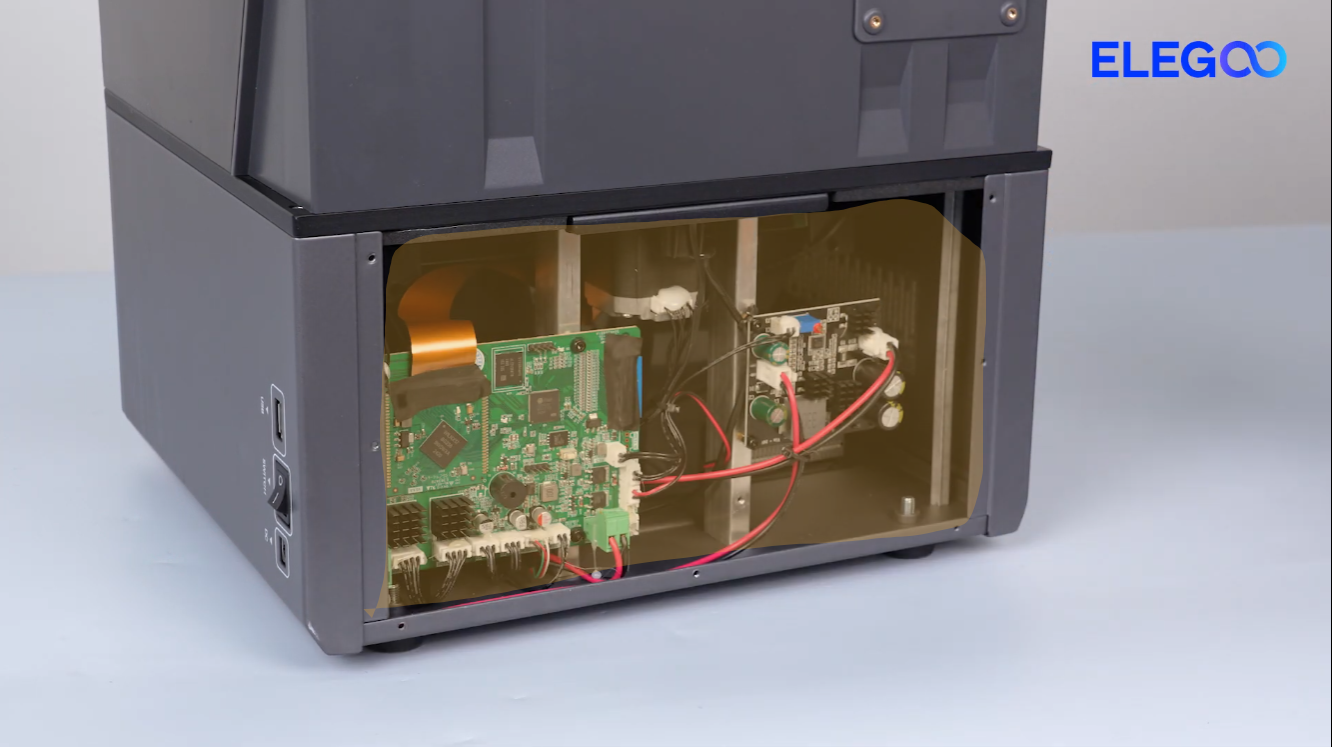
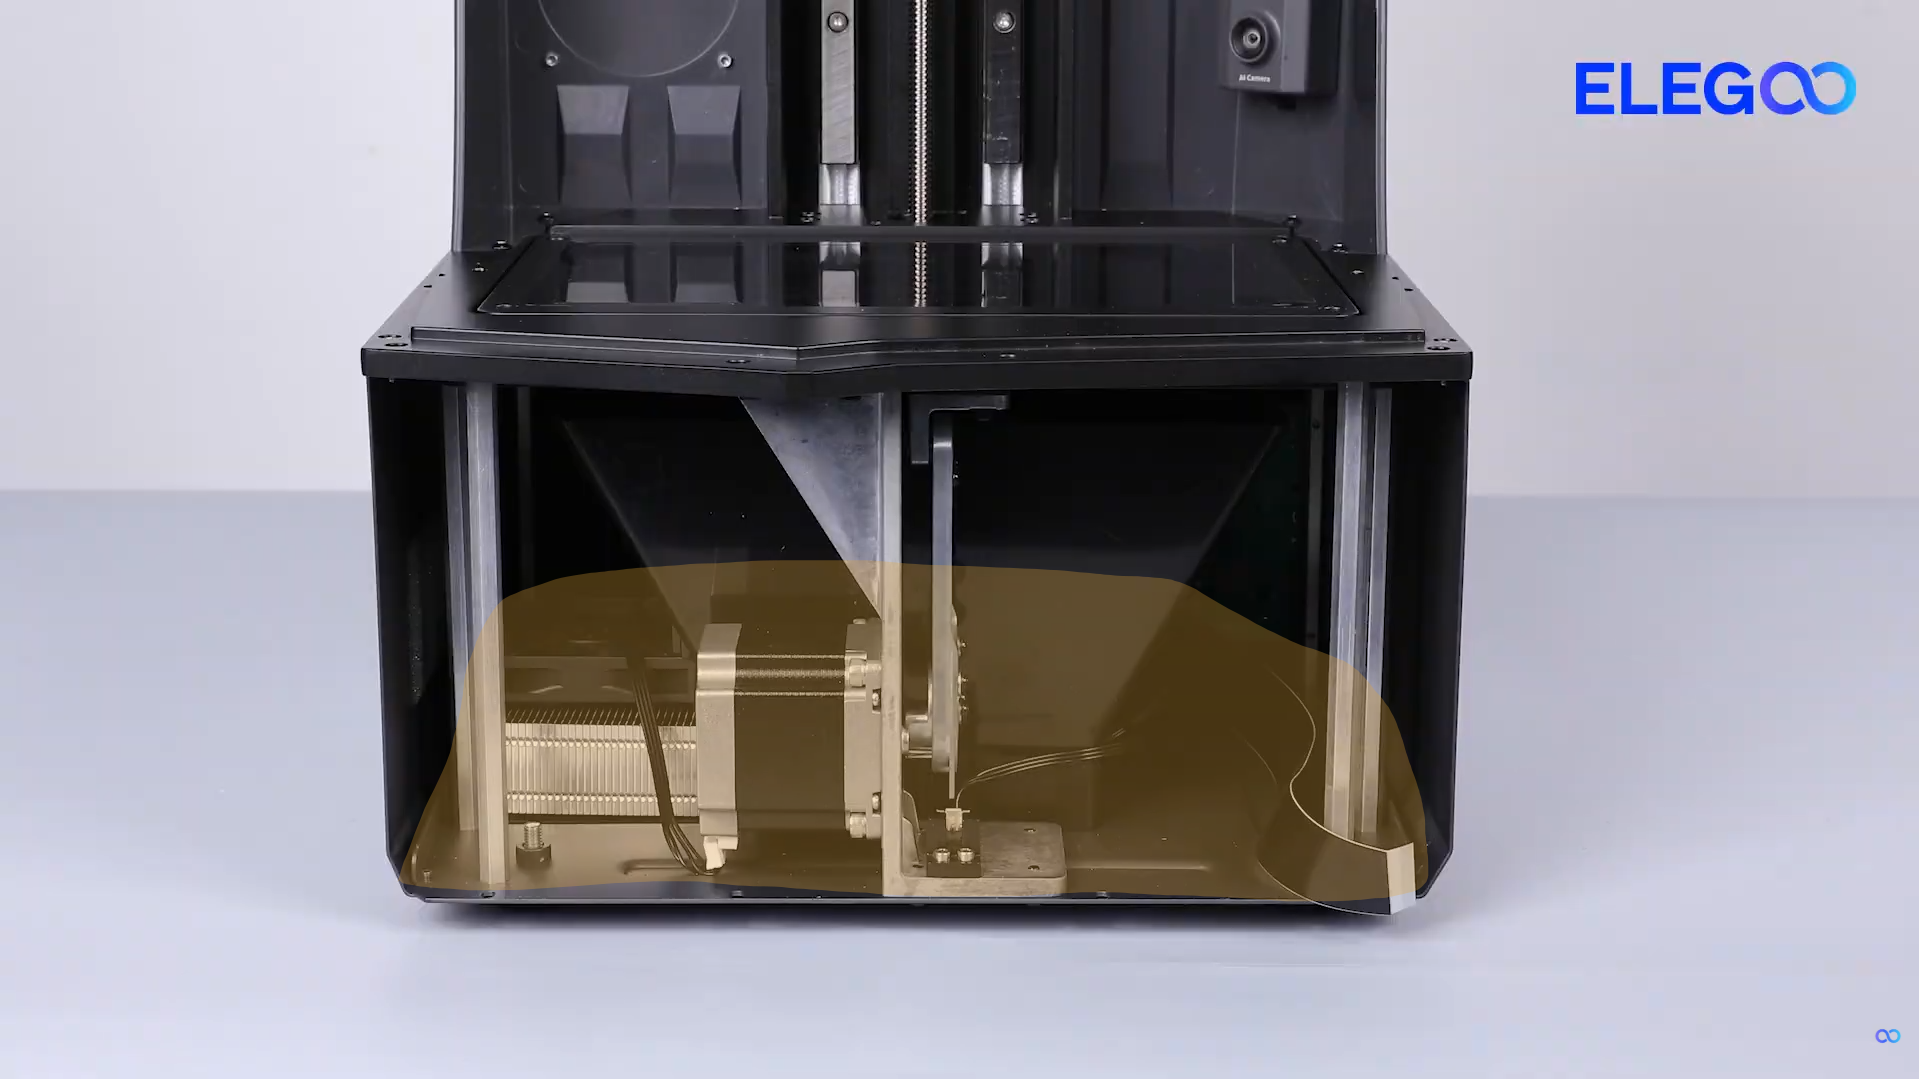
- If resin leakage is found, take clear photos of the leakage area and contact Technical Support for evaluation. Stop using the printer and keep the power turned off.
- If no resin leakage is found, continue with the following troubleshooting steps.
¶ Check the X-axis Motor Set Screw
- Do not install the front cover temporarily and do not power on the printer.
- Manually press the LCD screen downward until the set screw becomes visible.
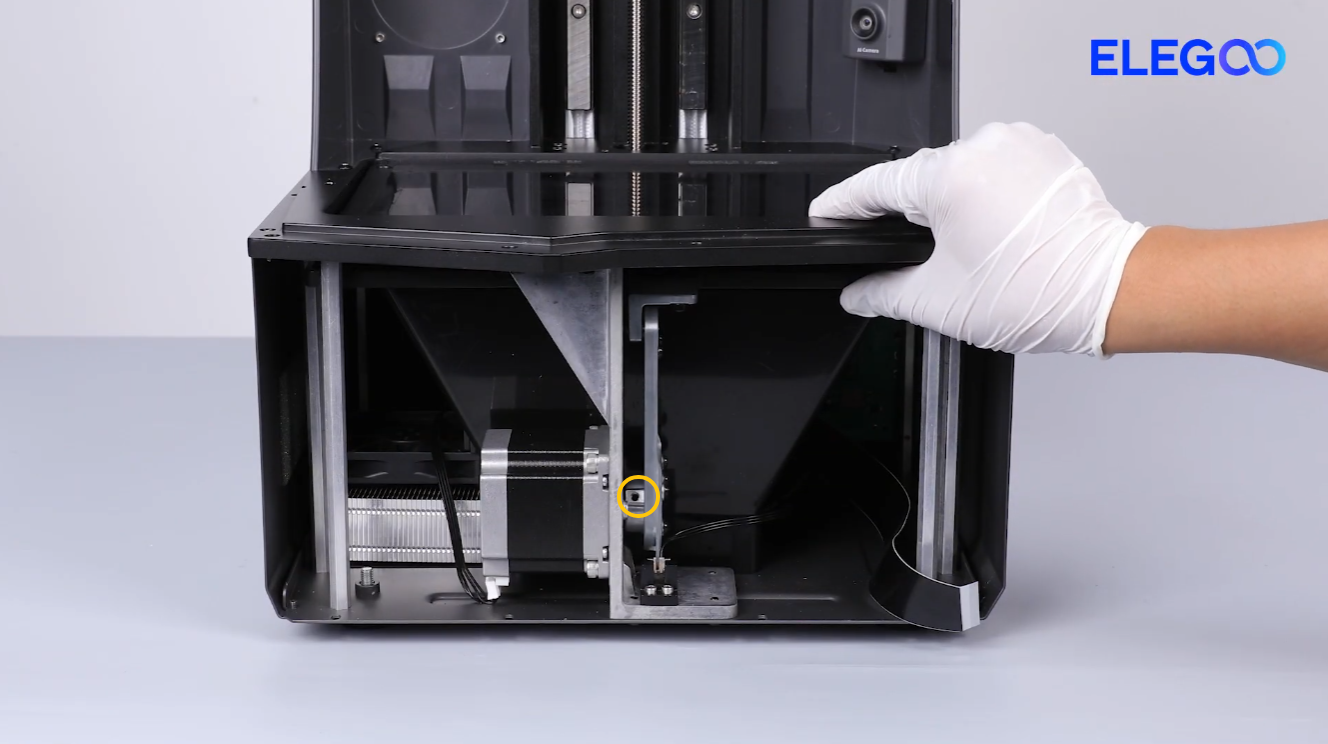
- Check whether the screw is loose and whether the set screw is aligned with the flat side of the stepper motor shaft.
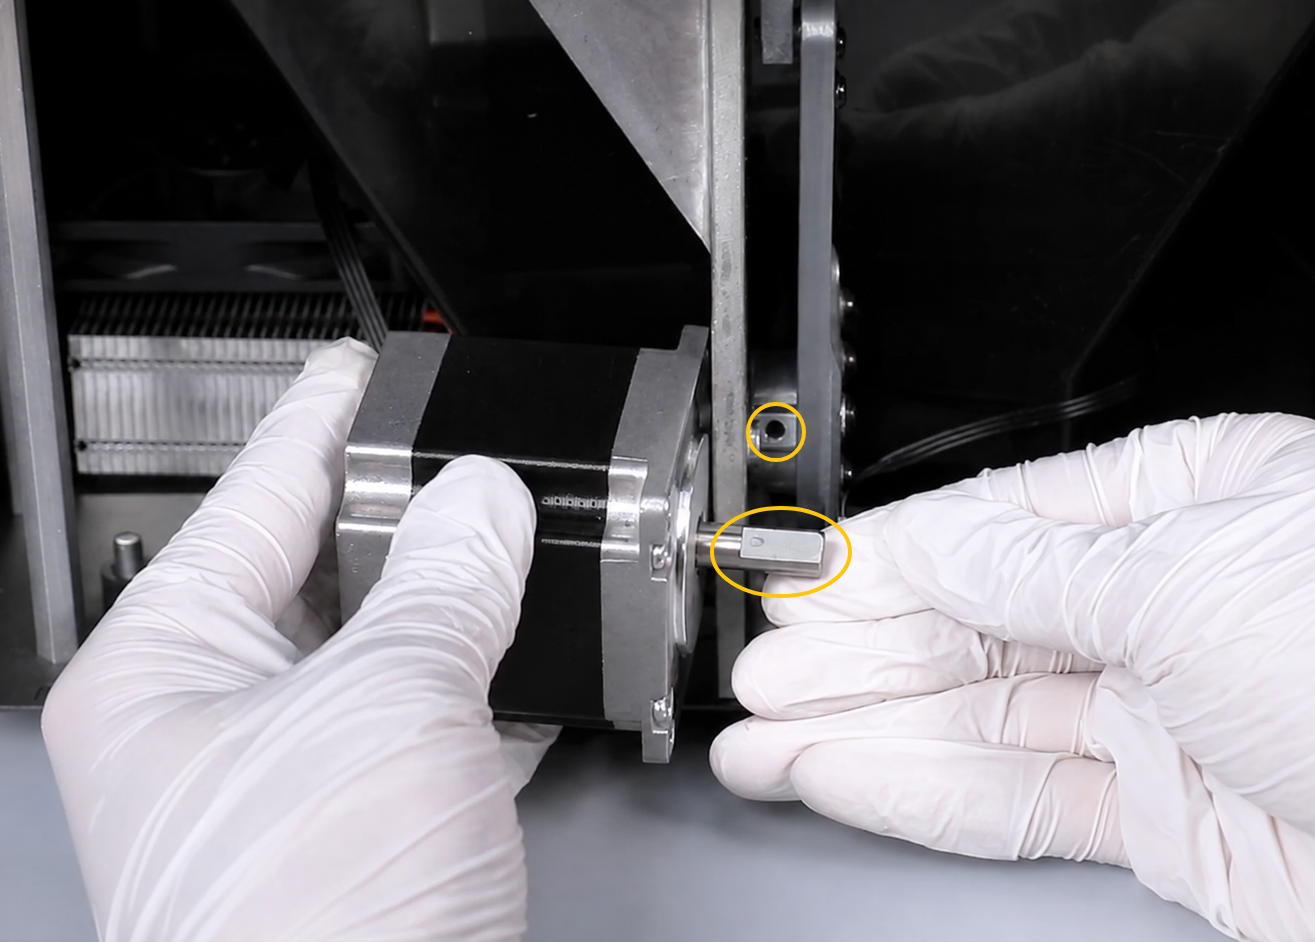
- If the set screw is loose or not aligned with the flat side of the stepper motor shaft, tighten the set screw or refer to this link to reinstall the X-axis stepper motor.
- If the set screw is not loose and is aligned with the flat side of the stepper motor shaft, continue with the following troubleshooting steps.
¶ Check the Crank and X-axis Motor Mounting Screws
- Check whether the screws securing the crank are loose. Refer to the image below.
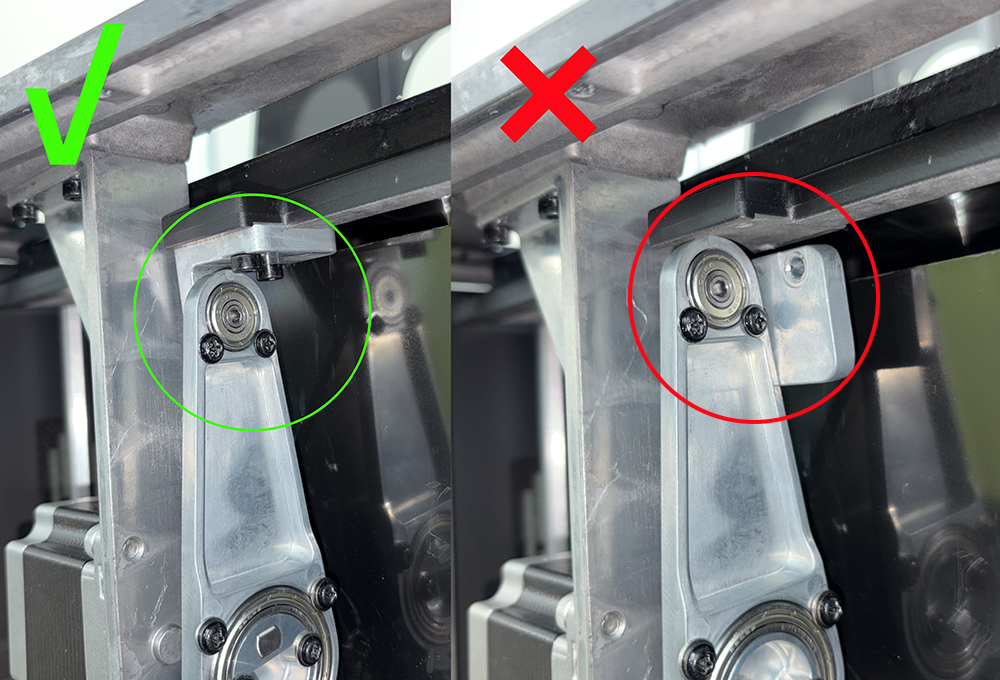
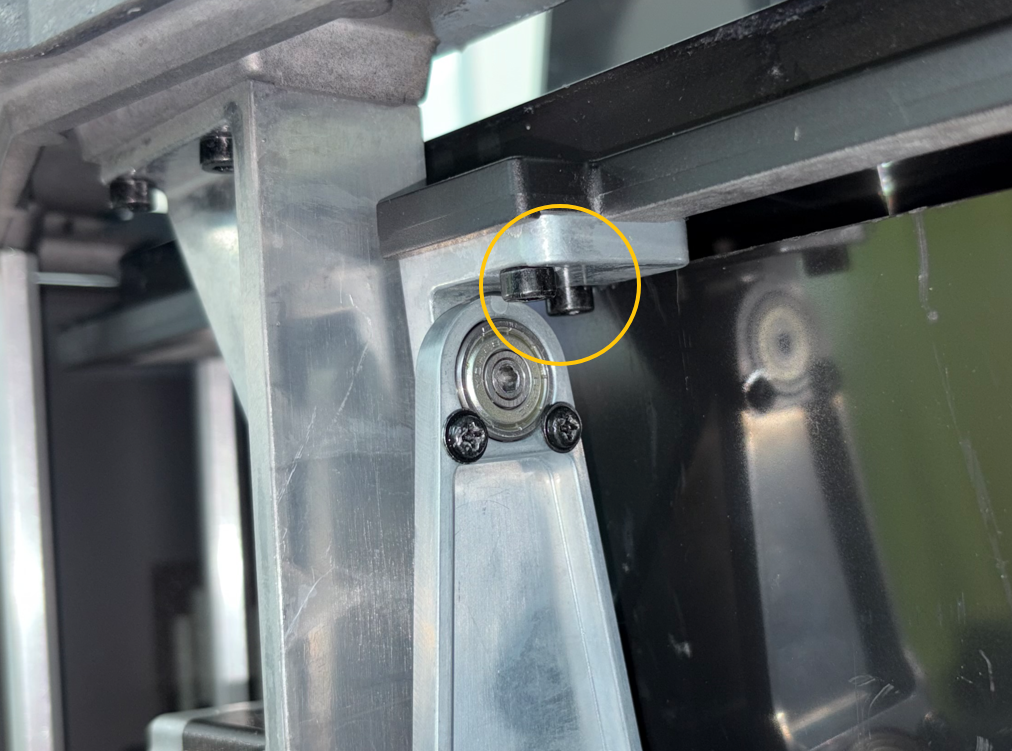
- If the crank fixing screws are loose, use a 3.0 mm Allen wrench to tighten them.
- Check whether the screws securing the X-axis motor are loose.
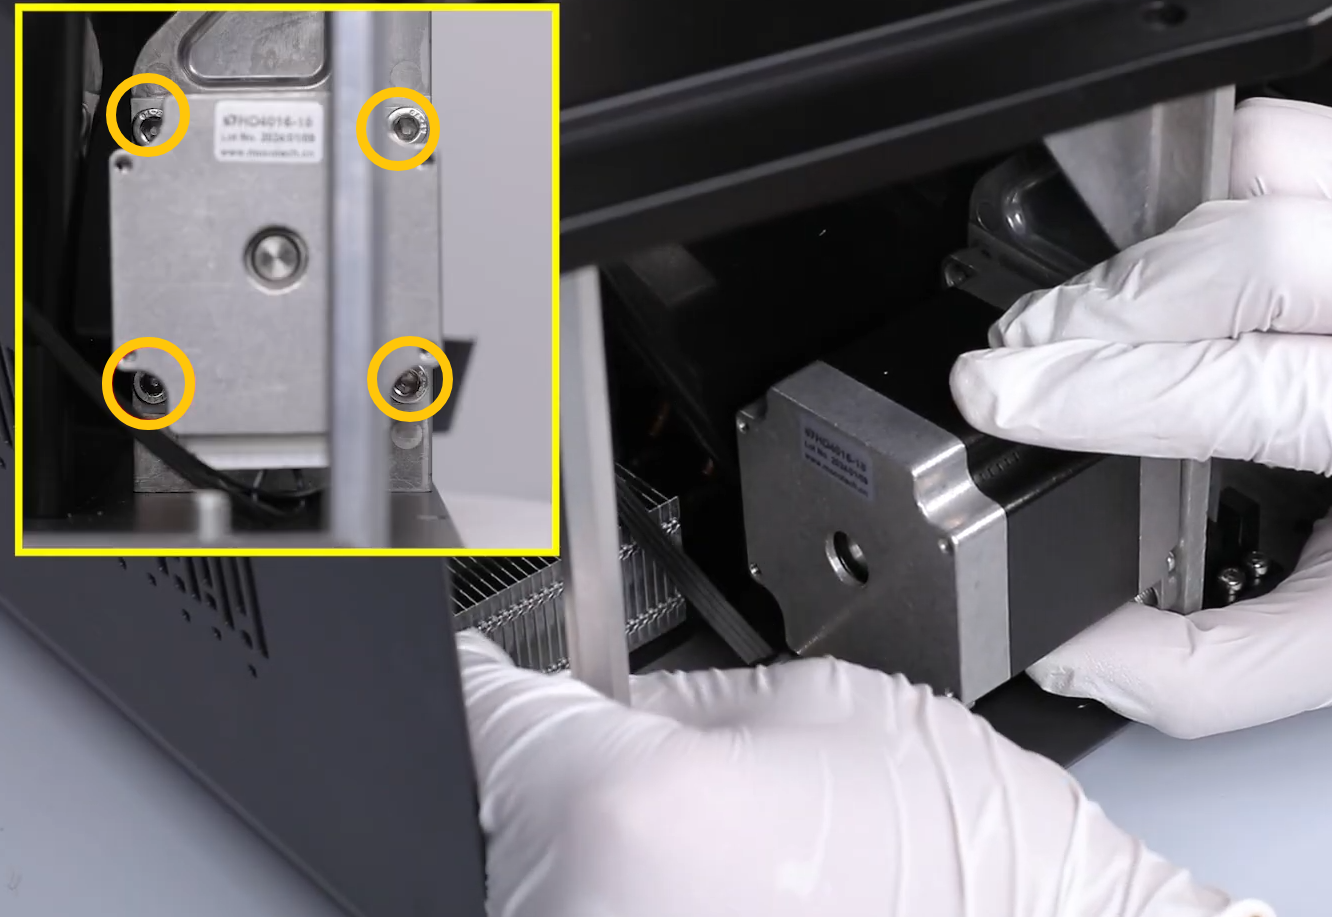
- If the X-axis motor fixing screws are loose, refer to the videos below to retighten the screws and reinstall the X-axis motor.
Mars 5 Ultra X-axis Motor Replacement
Saturn 4 Ultra / Saturn 4 Ultra 16K X-axis Motor Replacement
¶ Reinstall the Crank
- Hold the upper part of the X-axis crank.
Note: Be sure to hold the upper part of the crank when moving it to avoid finger pinching injuries.
- Manually move the crank and check whether it contacts the X-axis limit switch and whether the crank moves smoothly.

- If the crank contacts the X-axis limit switch or gets stuck during manual movement, refer to this link to adjust the crank.
- If the crank does not contact the X-axis limit switch during manual movement, continue with the following troubleshooting steps.
¶ Check the X-axis Cable, Motor, and Limit Switch
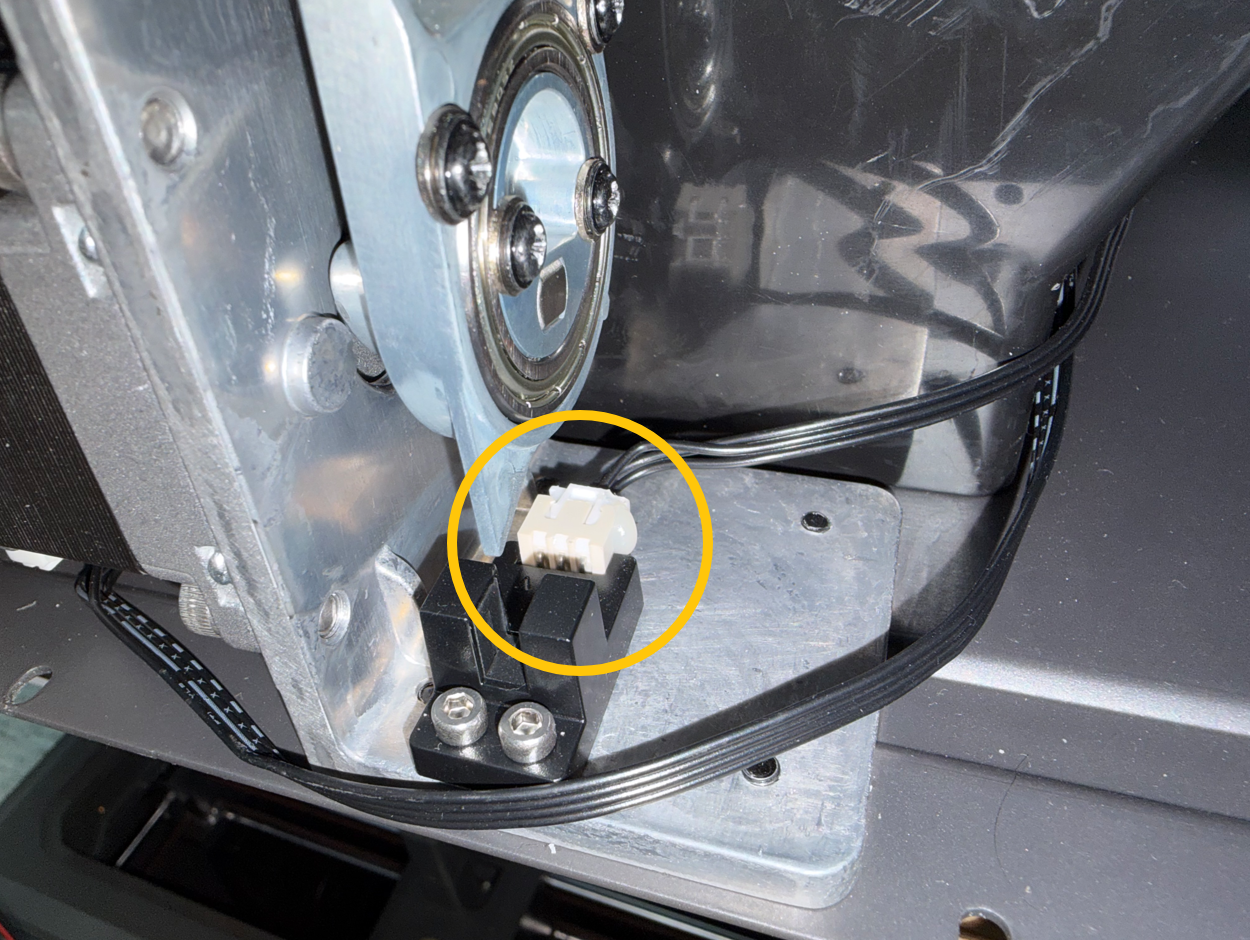
- Check whether there is dust or resin on the surface of the X-axis limit switch.
- If dust or resin is found, use a lint-free cloth to clean it.
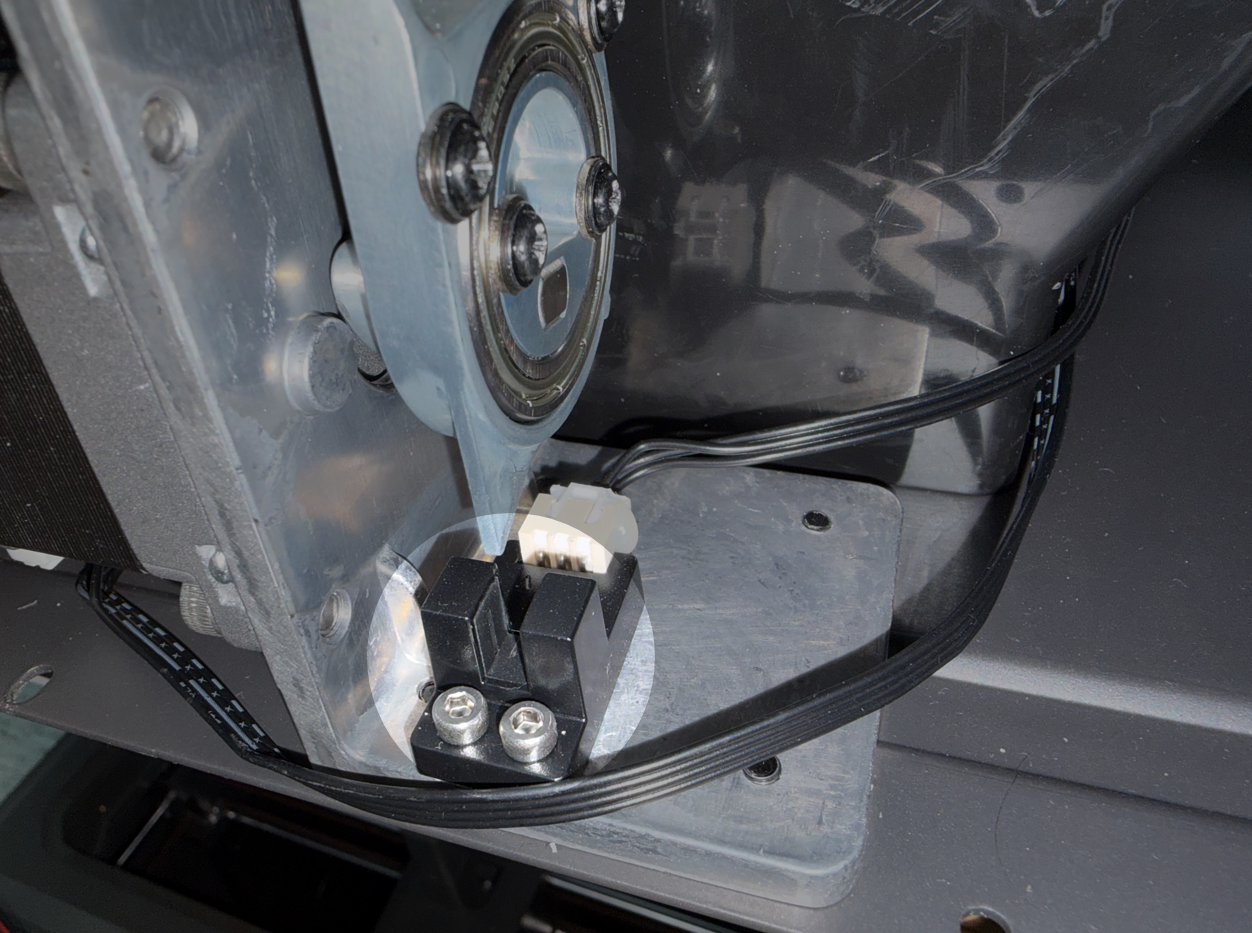
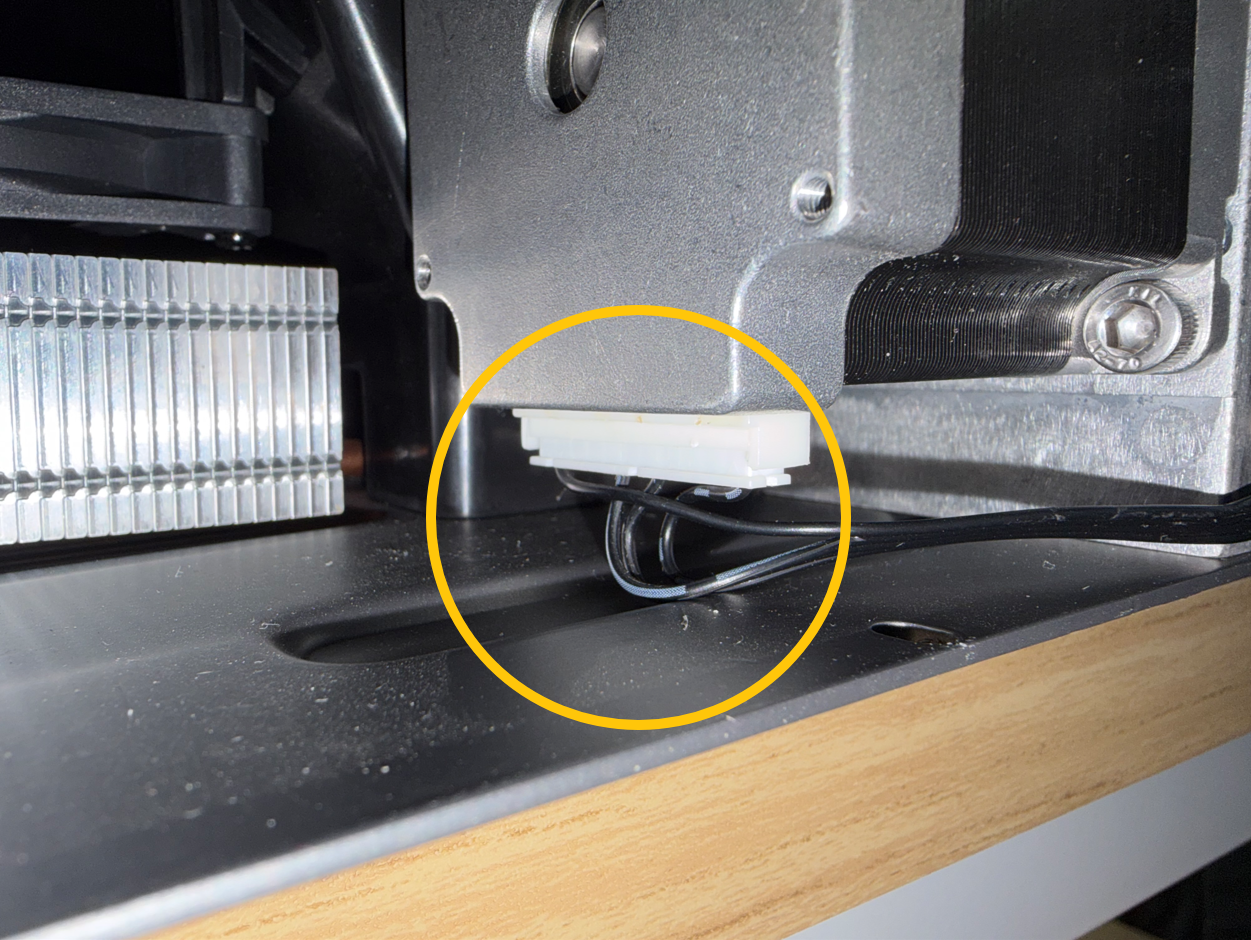
- Check whether there is resin contamination on the X-axis limit switch cable and X-axis motor cable, and check whether the cable insulation is damaged.
- If the cable insulation is damaged, replace the cable with a new one.
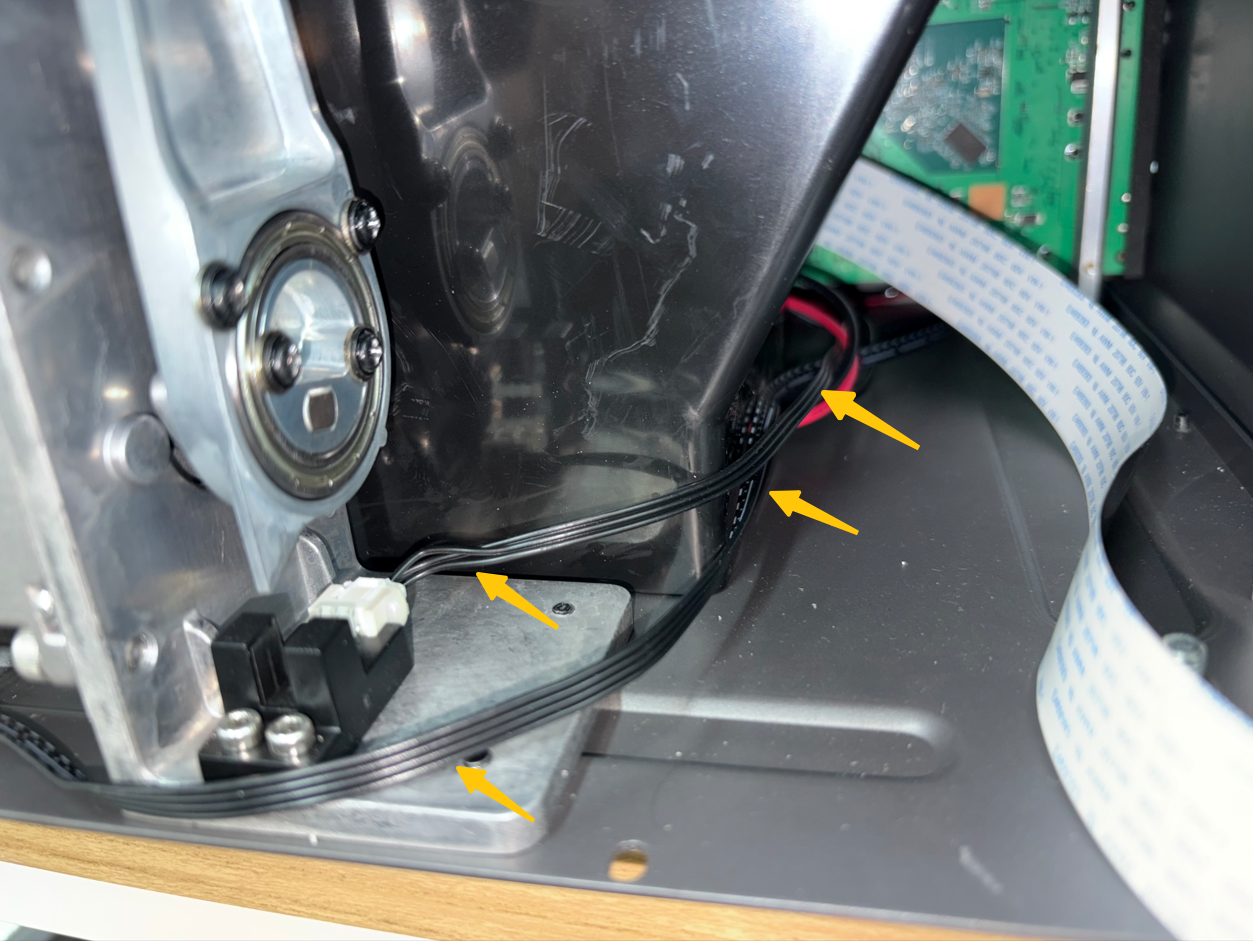
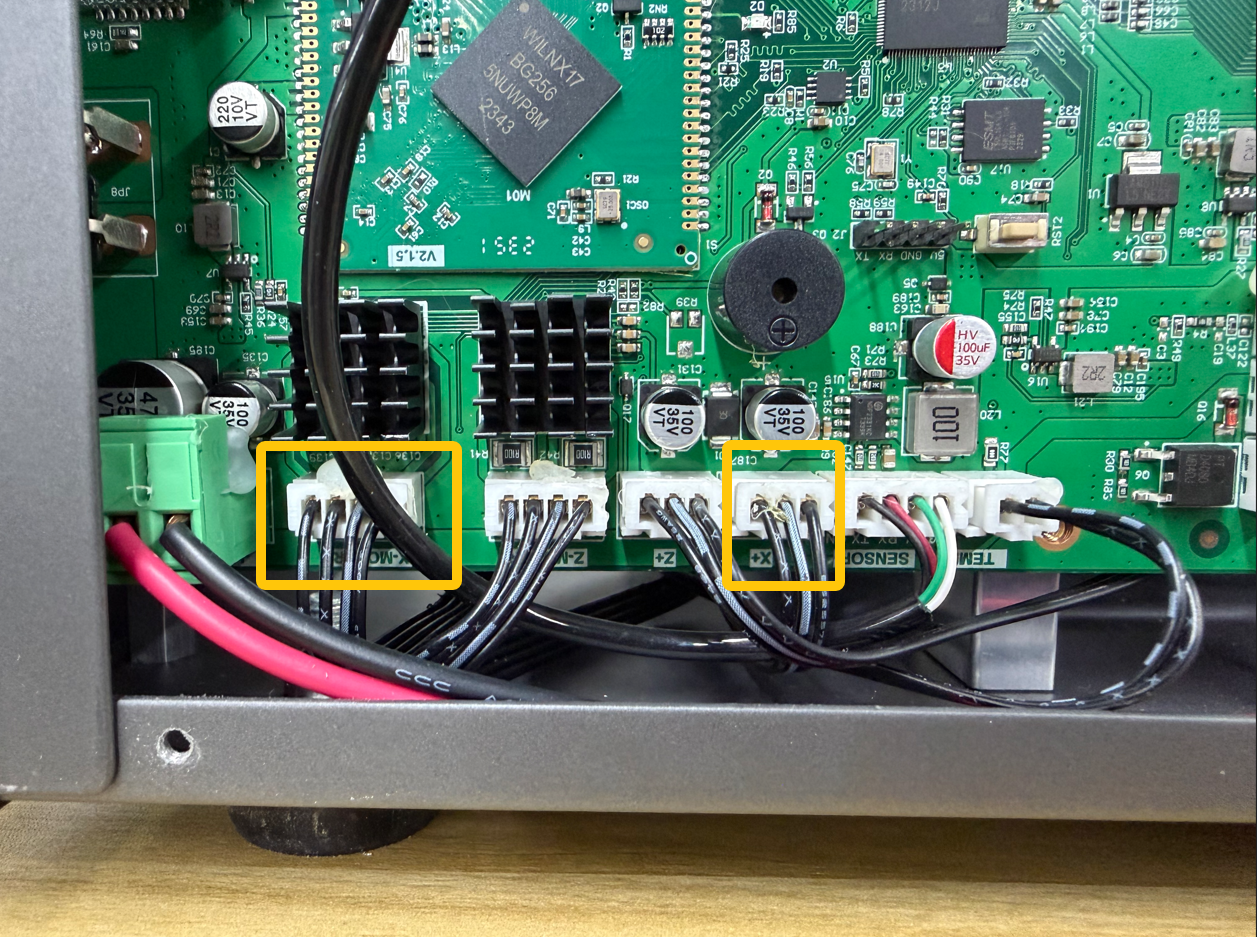
- Check whether the connectors at both ends of the X-axis motor cable and X-axis limit switch cable are loose, damaged, or burnt.
- If the connectors are loose, damaged, or burnt, replace the cable, X-axis limit switch, or X-axis motor.
¶ Swap the X/Z Limit Switches for Testing
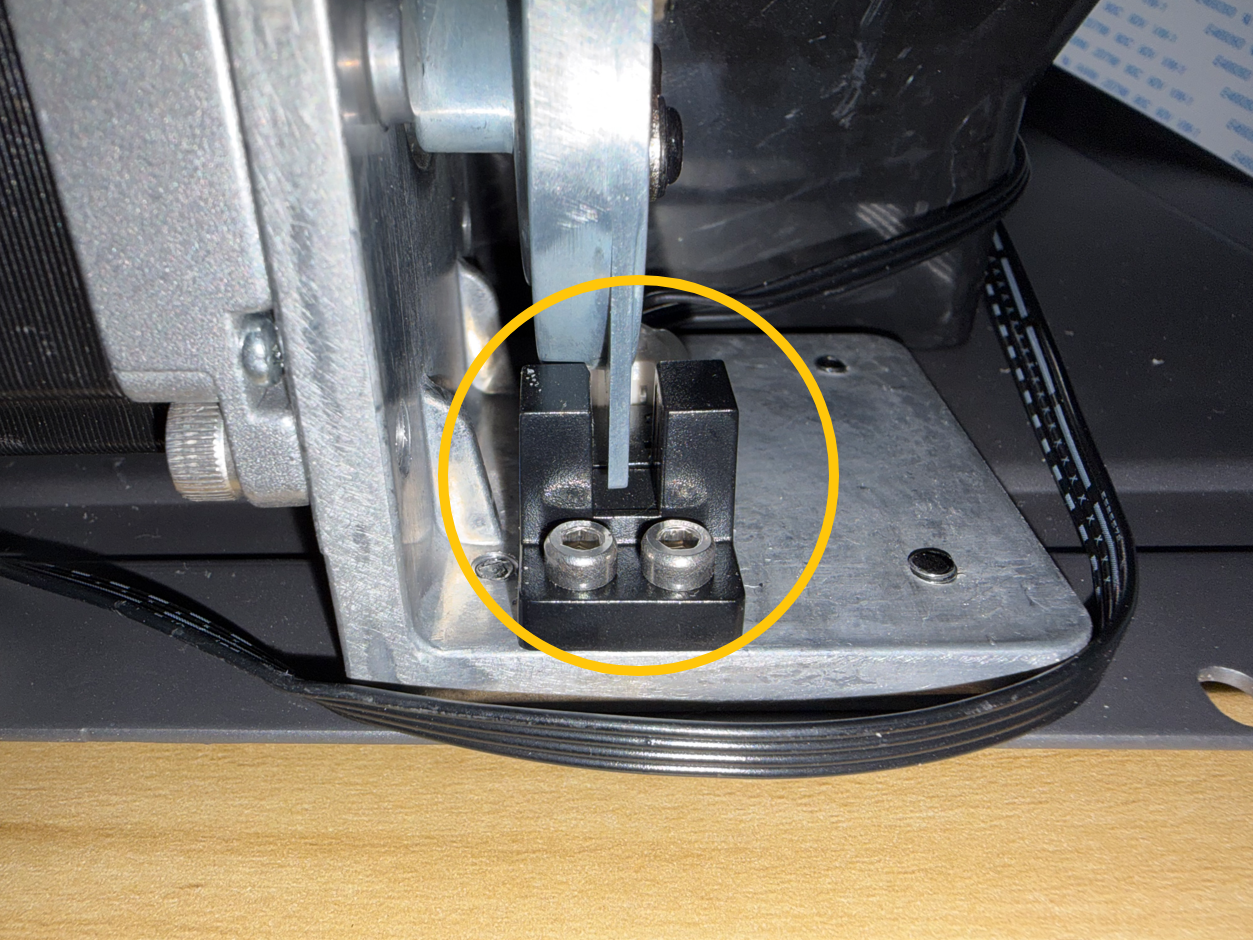
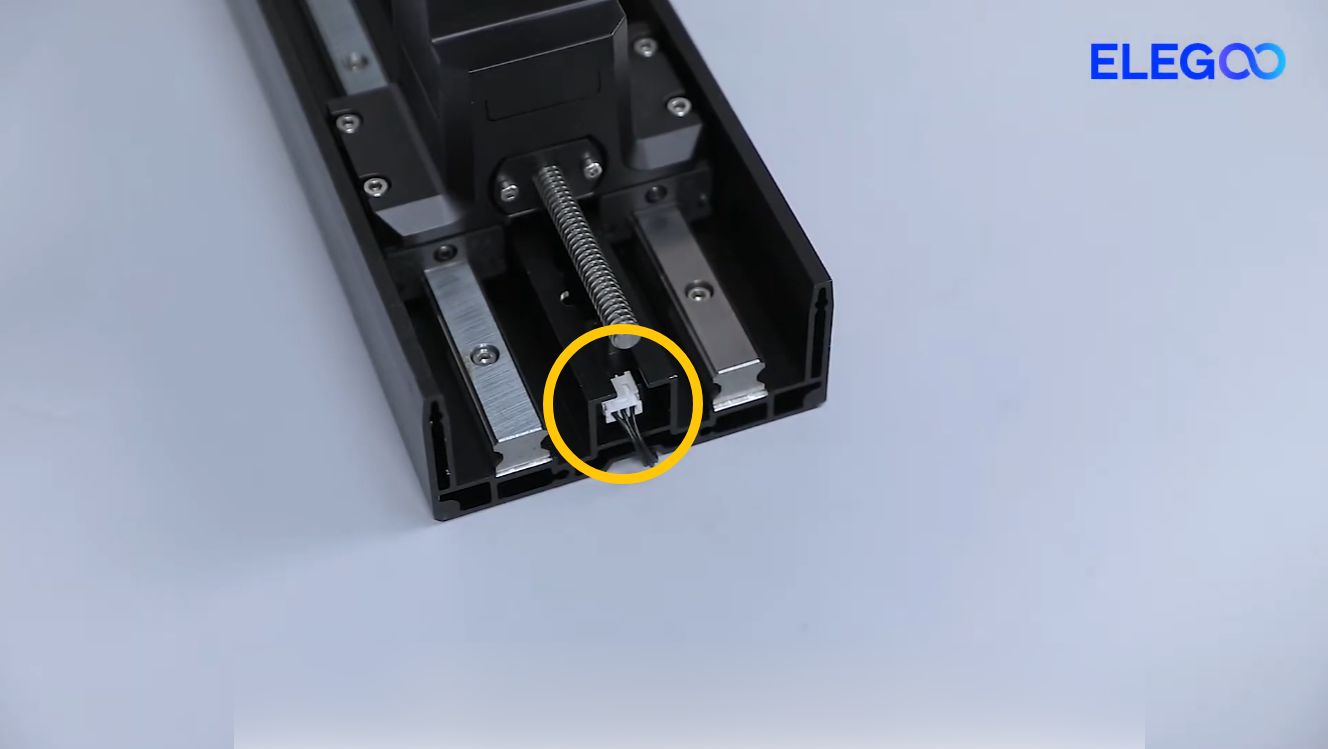
- Refer to the instructions below to remove the X/Z Axis limit switches. Swap the positions of the X-axis and Z Axis limit switches.
How to Replace the X-axis Limit Switch on Saturn 4 Ultra / Saturn 4 Ultra 16K
How to Replace the Z Axis Limit Switch on Saturn 4 Ultra / Saturn 4 Ultra 16K
- Reinstall all other components of the printer.
- Power on the printer again and wait for the printer to initialize. Observe the self-check process on the touch screen:
- If the Z-axis motor reports an error during the self-check process, the X-axis limit switch is faulty and needs to be replaced.
- If the X-axis motor still reports an error during the self-check process, the X-axis motor or mainboard may be faulty and needs to be replaced.
¶ Contact Technical Support
If the issue is still not resolved after completing troubleshooting steps 1–7, please provide the following information and contact Technical Support:
- Video showing the complete X-axis self-check failure process
- Photos of the X-axis limit switch/X-axis motor ports and cables
- Current firmware version/mainboard photos
- Test result — after swapping the X/Z limit switches, whether the Z Axis reports an error
¶ Help us improve
If you have any ideas or suggestions about the Wiki pages, please let us know through the ELEGOO official feedback channel.