¶ Tools and Materials
- 3.0mm Allen key x 1
- 2.5mm Allen key x 1
- 8 mm Open key
¶ Tutorial Video
¶ Instruction
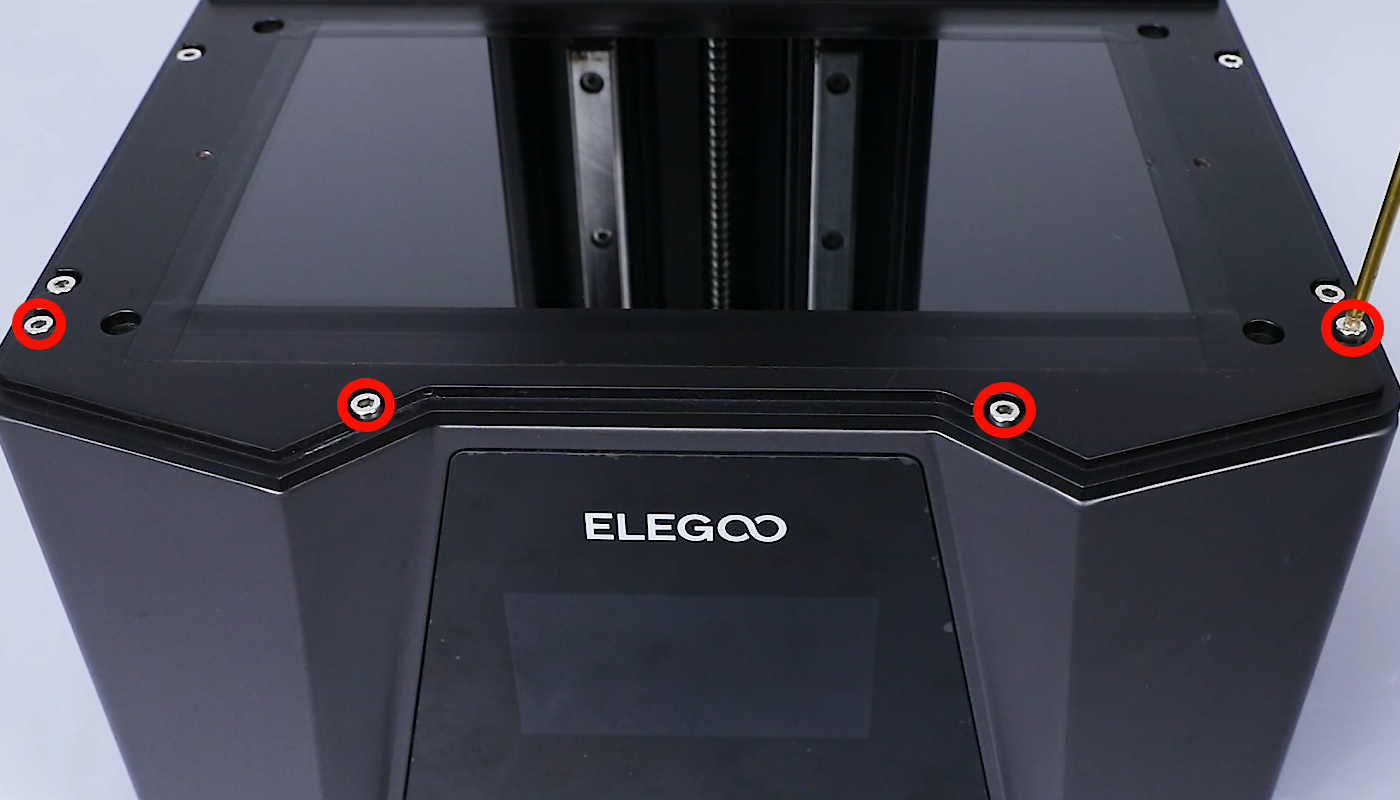
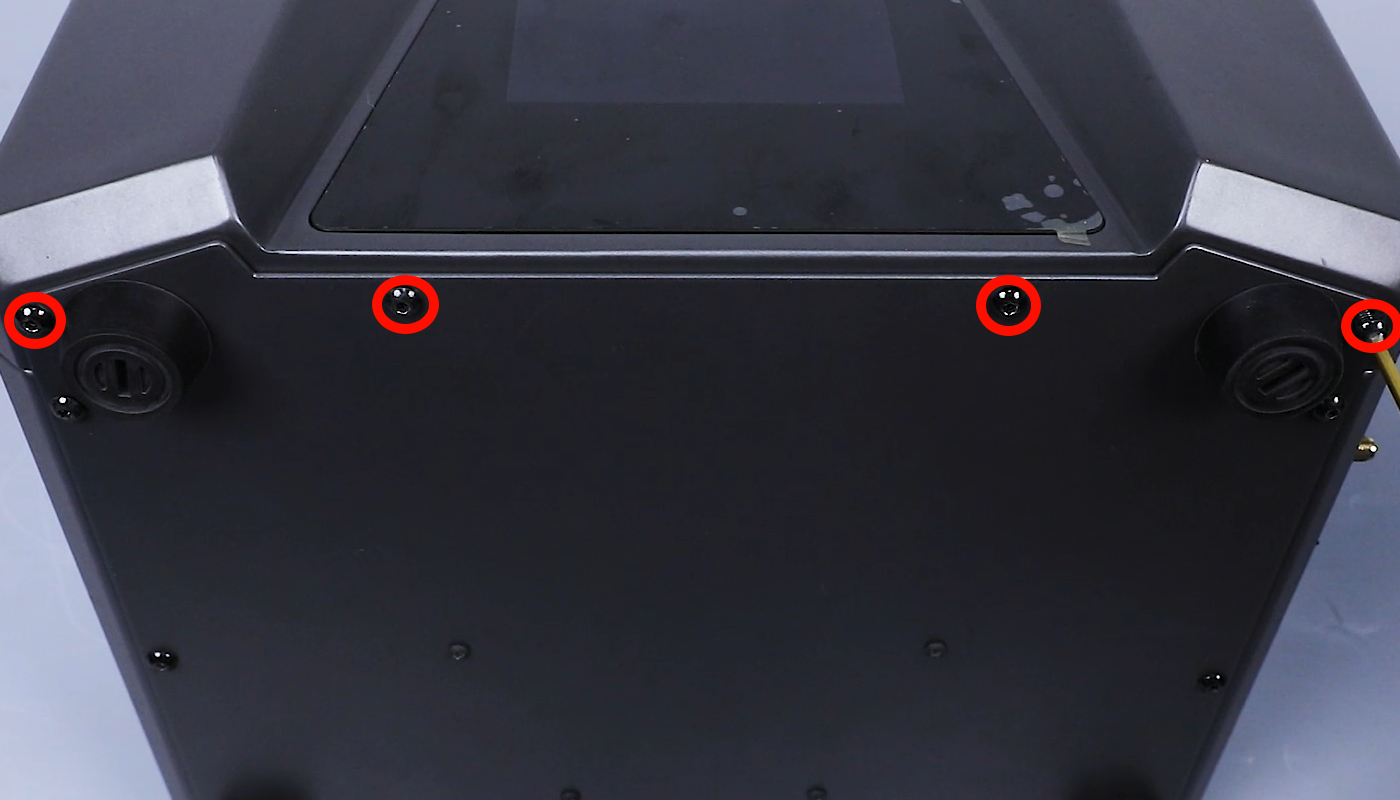
- Using a 3.0mm Allen key, loosen the four screws securing the front panel of the middle housing. Using a 2.5mm Allen key, loosen the four screws securing the front panel of the bottom cover. Remove the front coverand lay it flat on the table.


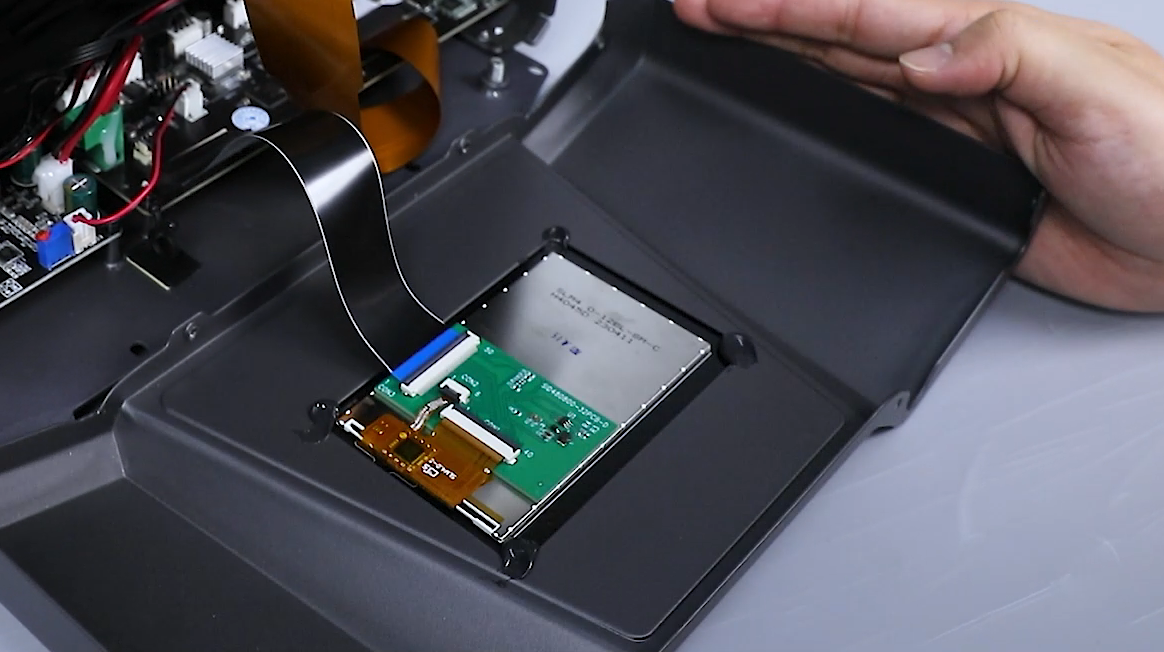
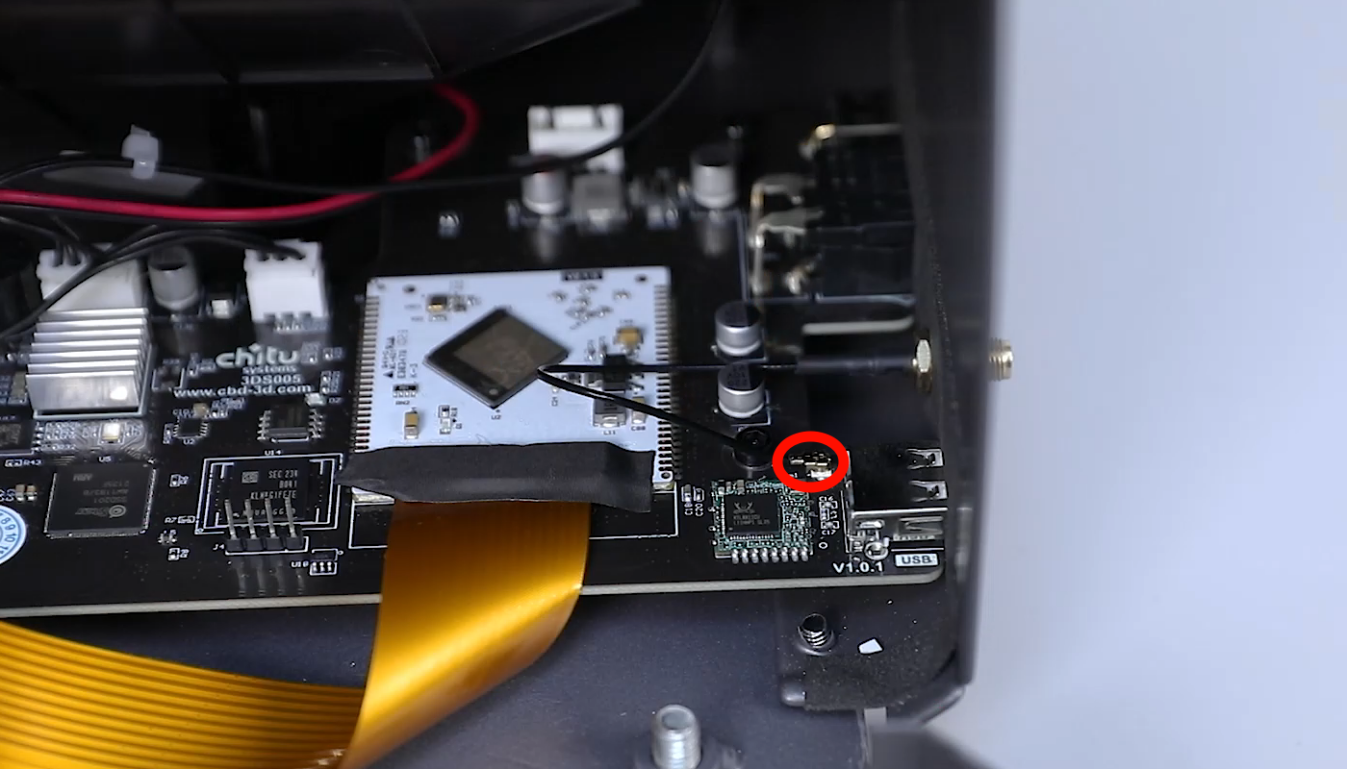
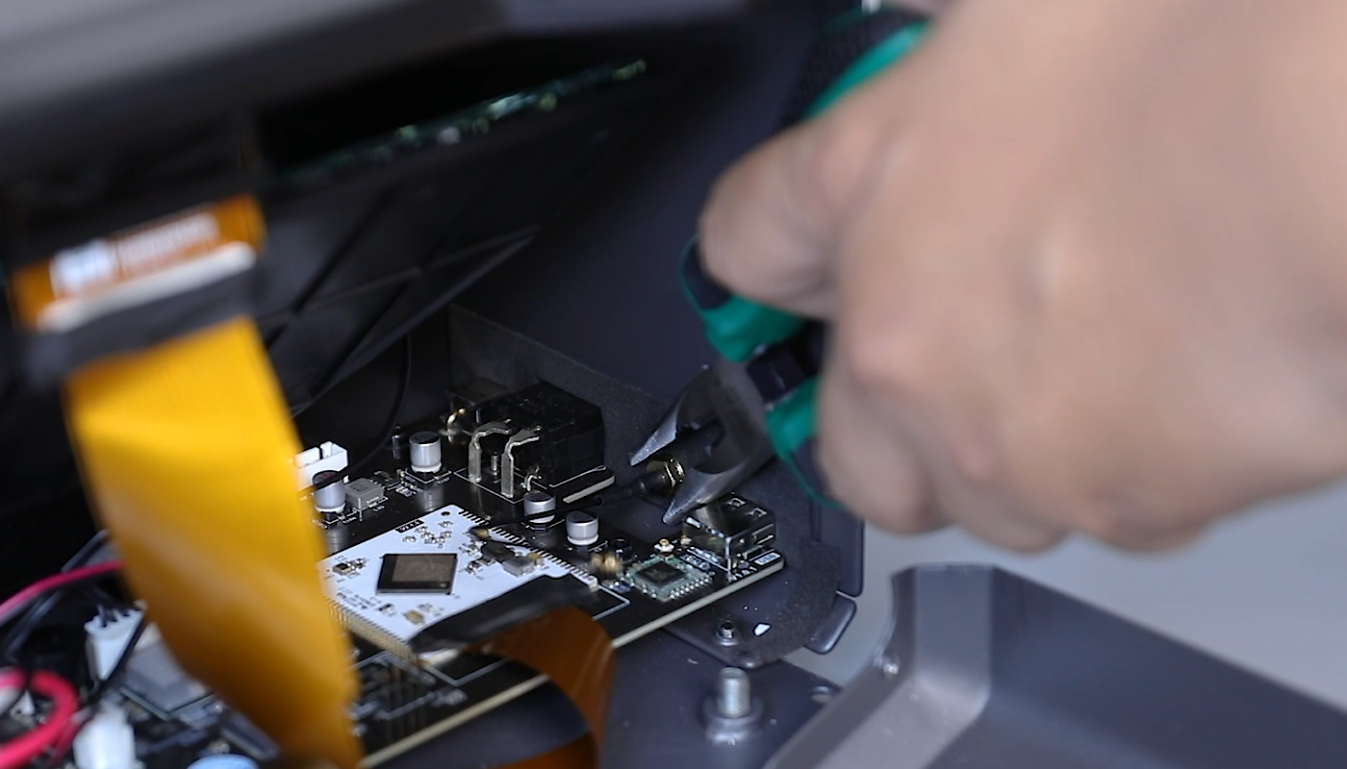
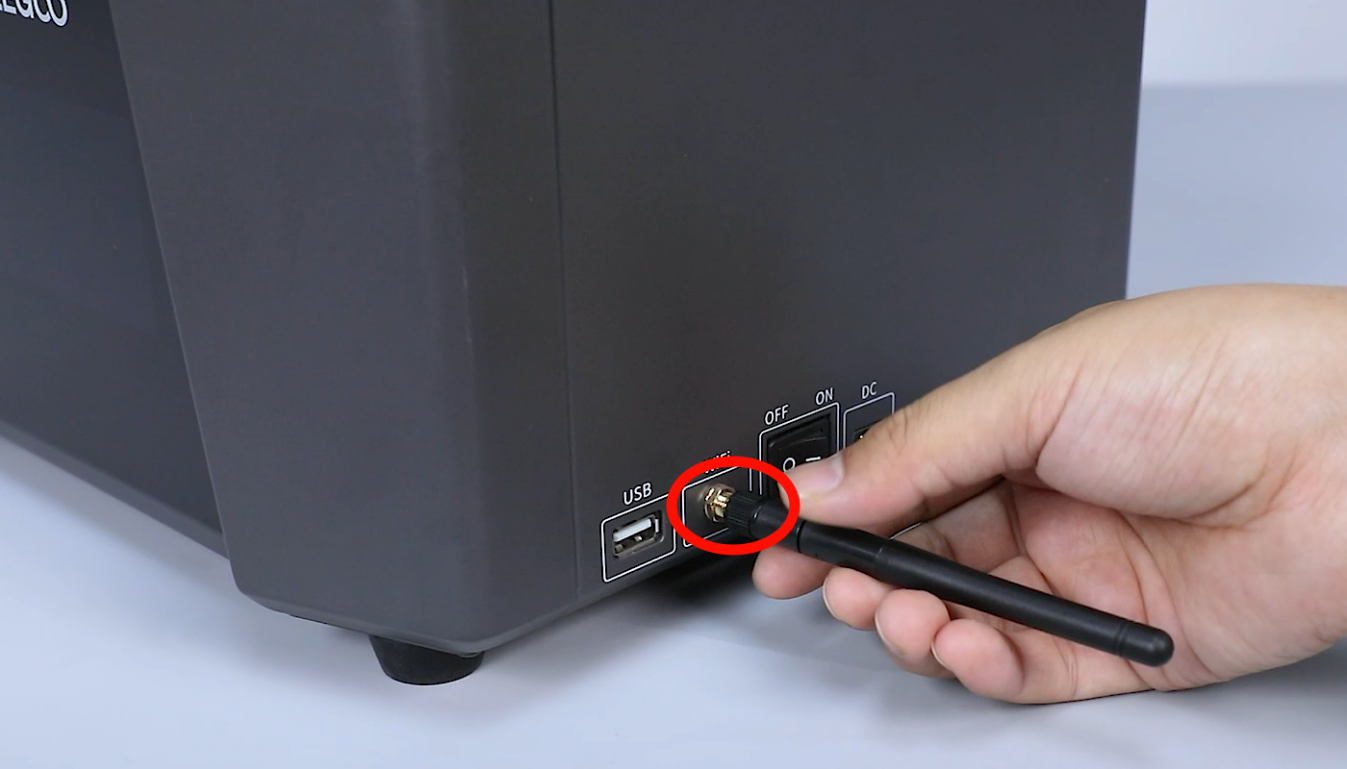
- Disconnect the Wi-Fi port cable from the motherboard. Using an 8mm open-end key, loosen the nut securing the antenna base. Remove the nut and nut washer.
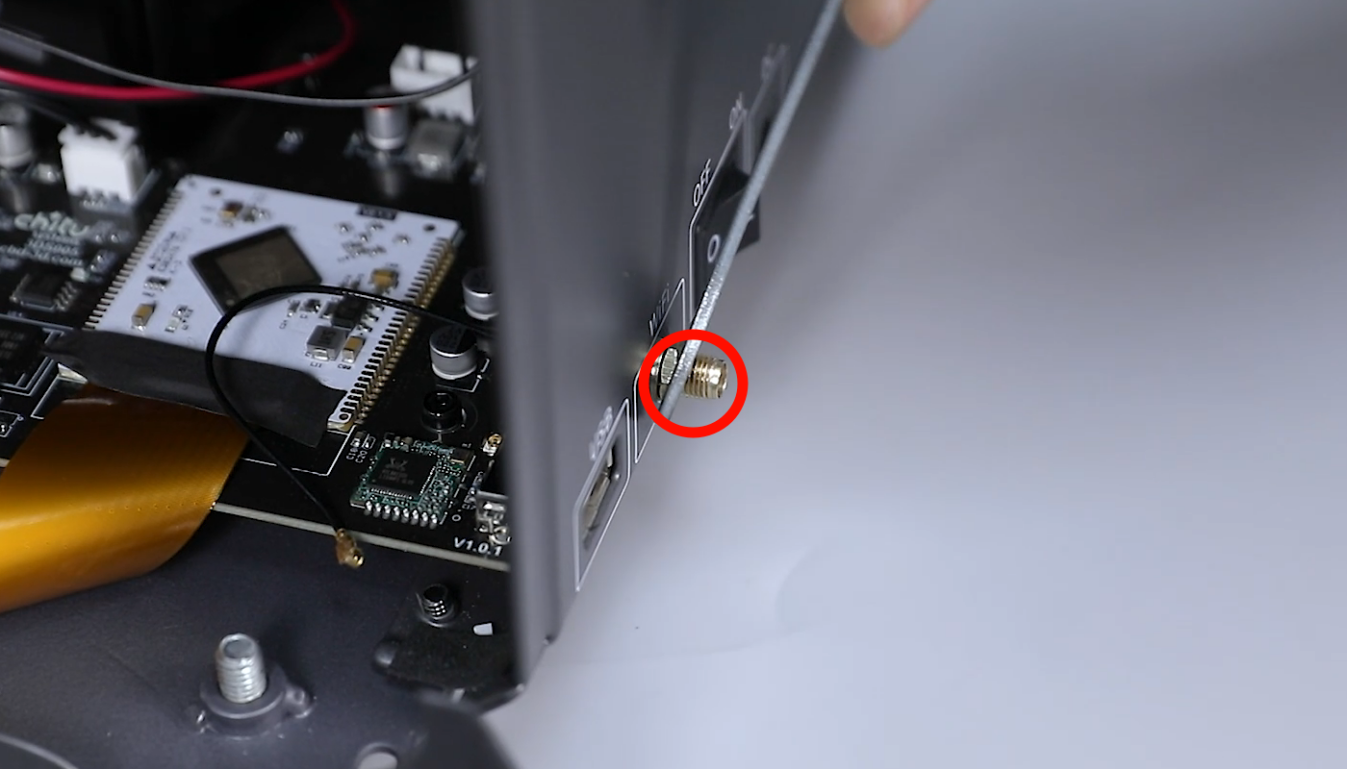

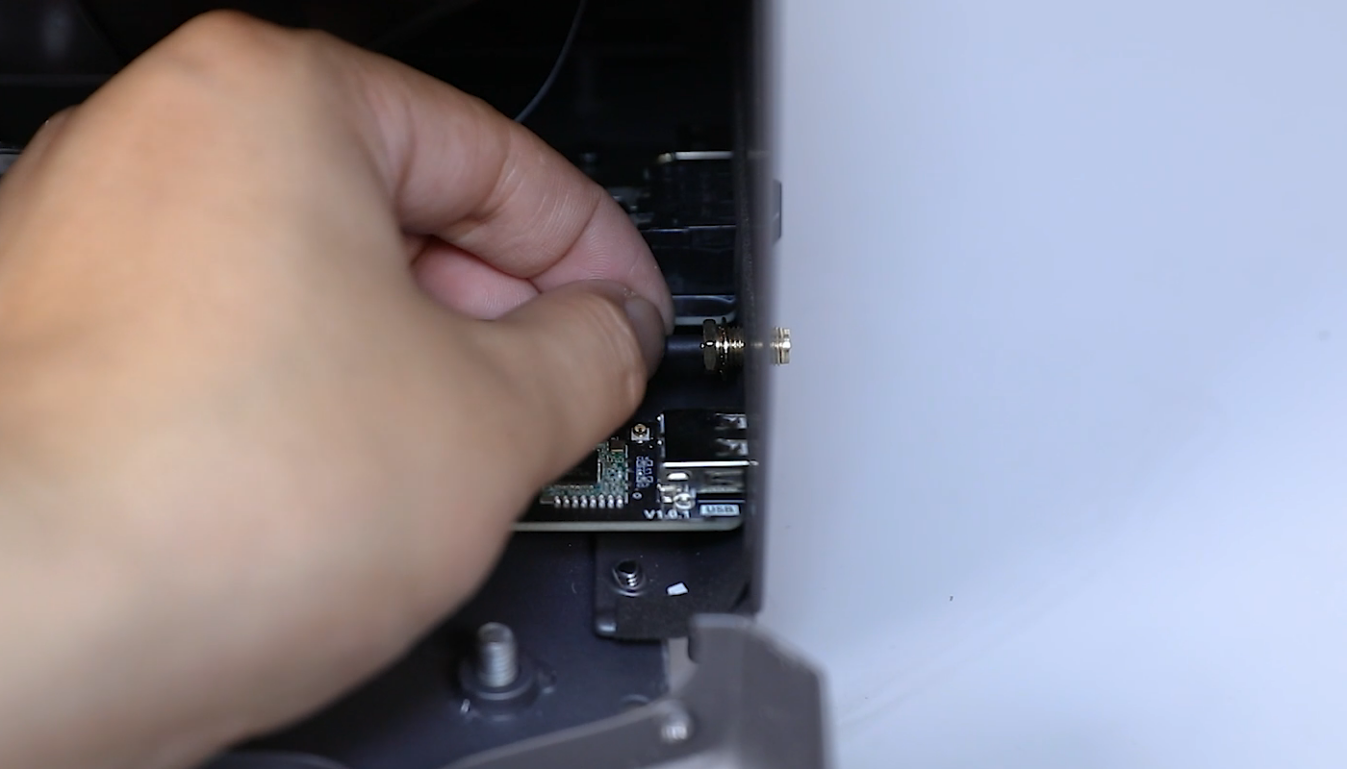
- Remove the antenna connector from inside the printer and remove the washer.
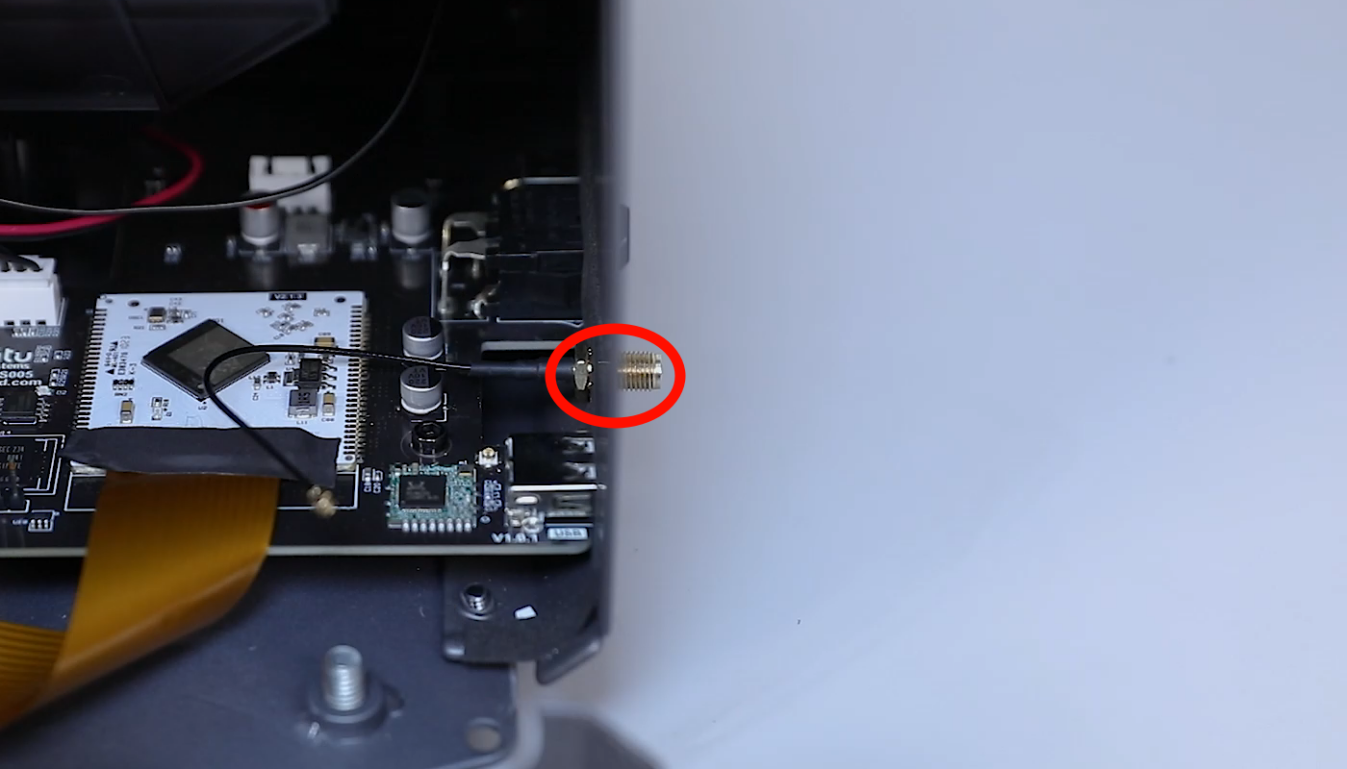

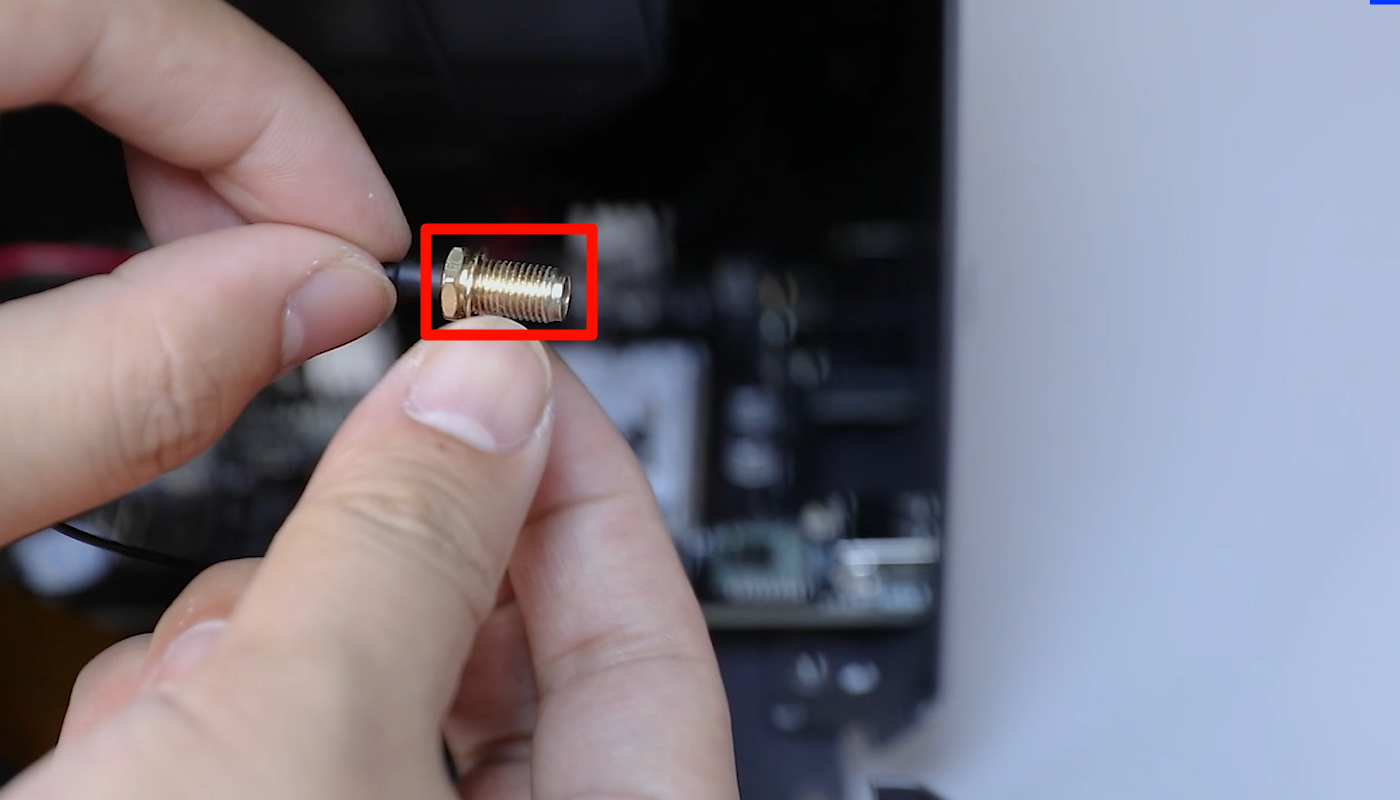
- Remove the new antenna connector and install the washer onto the connector.
- Align the antenna connector with the hole and put it in the installation positio. Install the washer under the nut onto the antenna connector. Put the nut back in position and tighten it slightly.
(
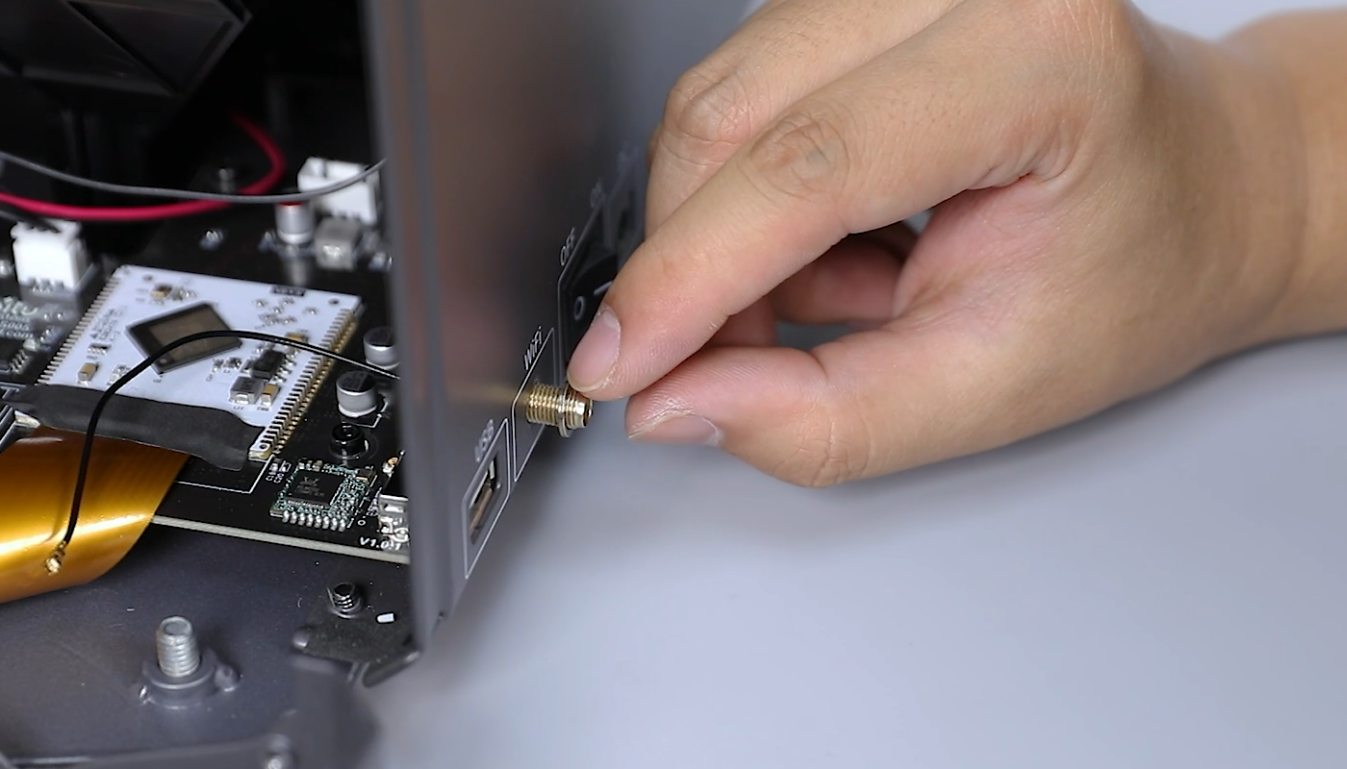
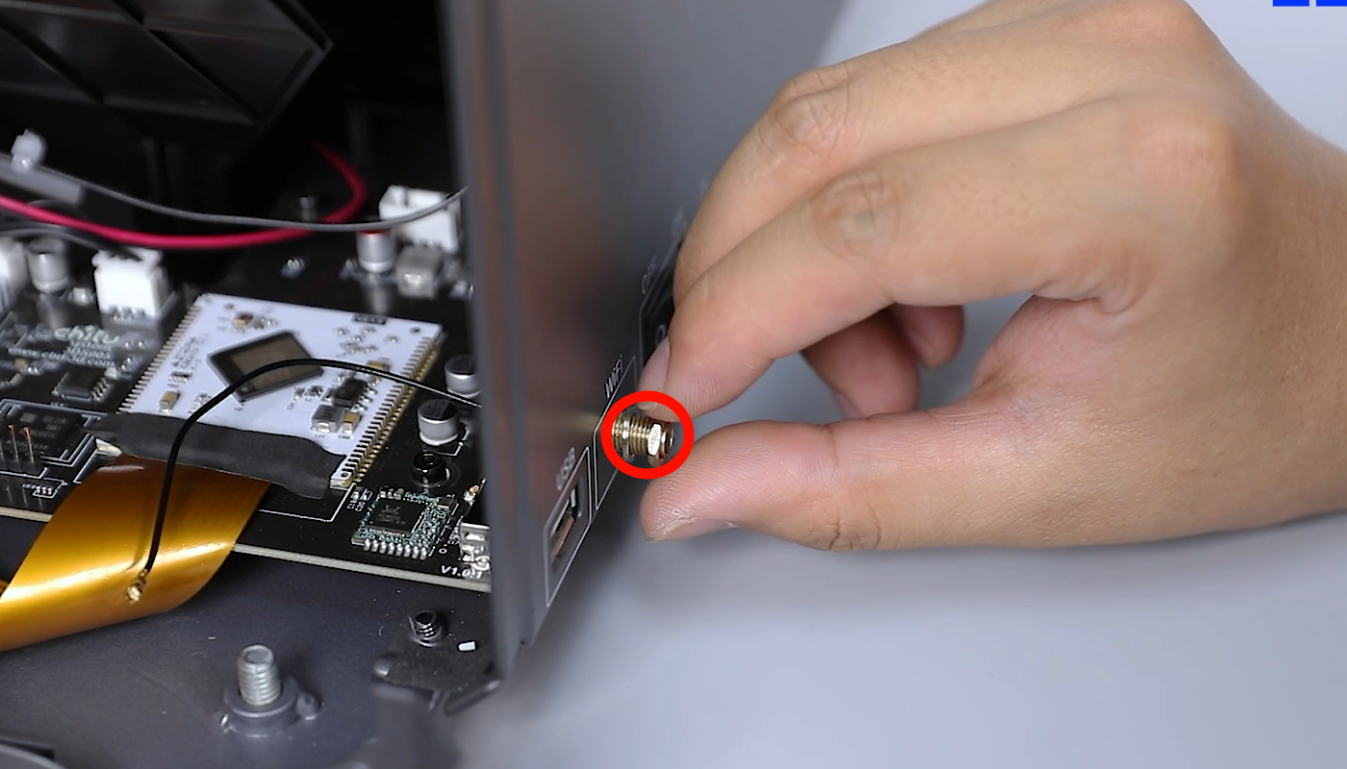
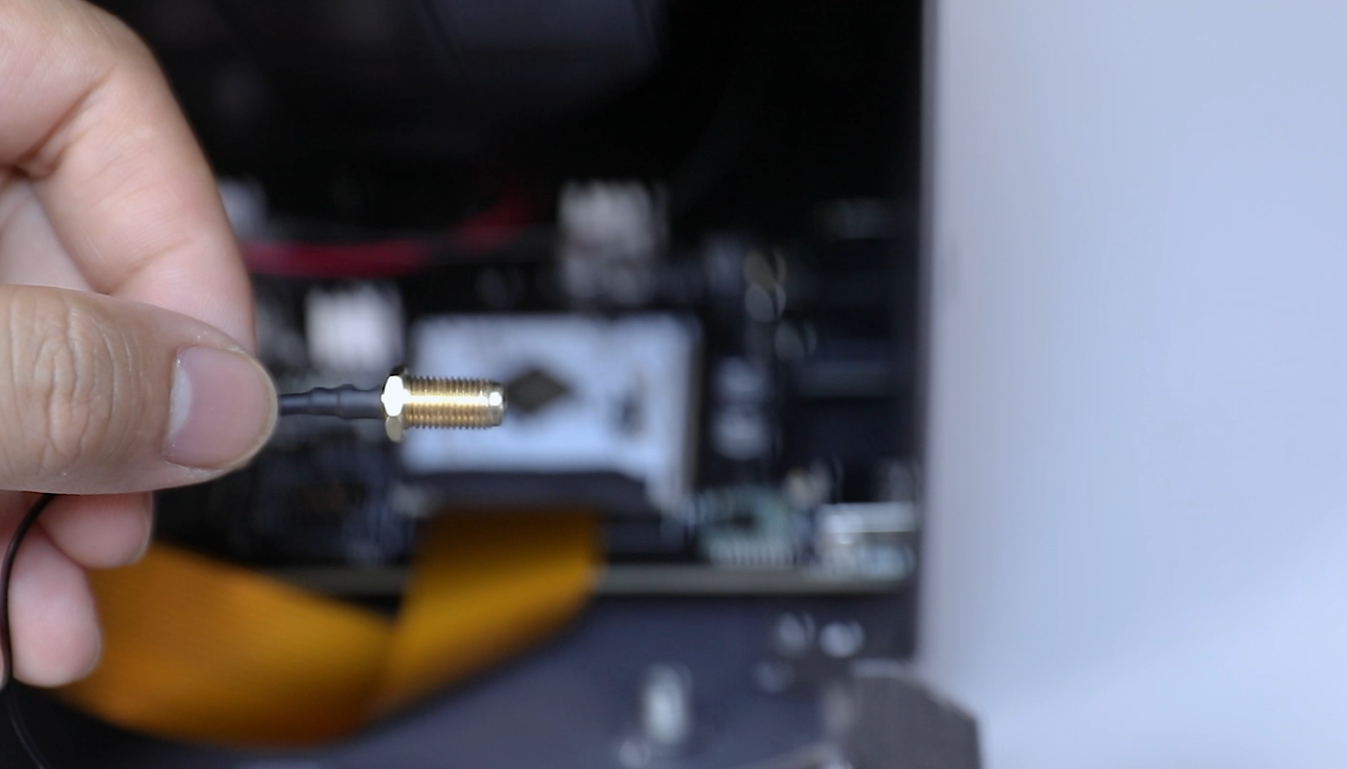
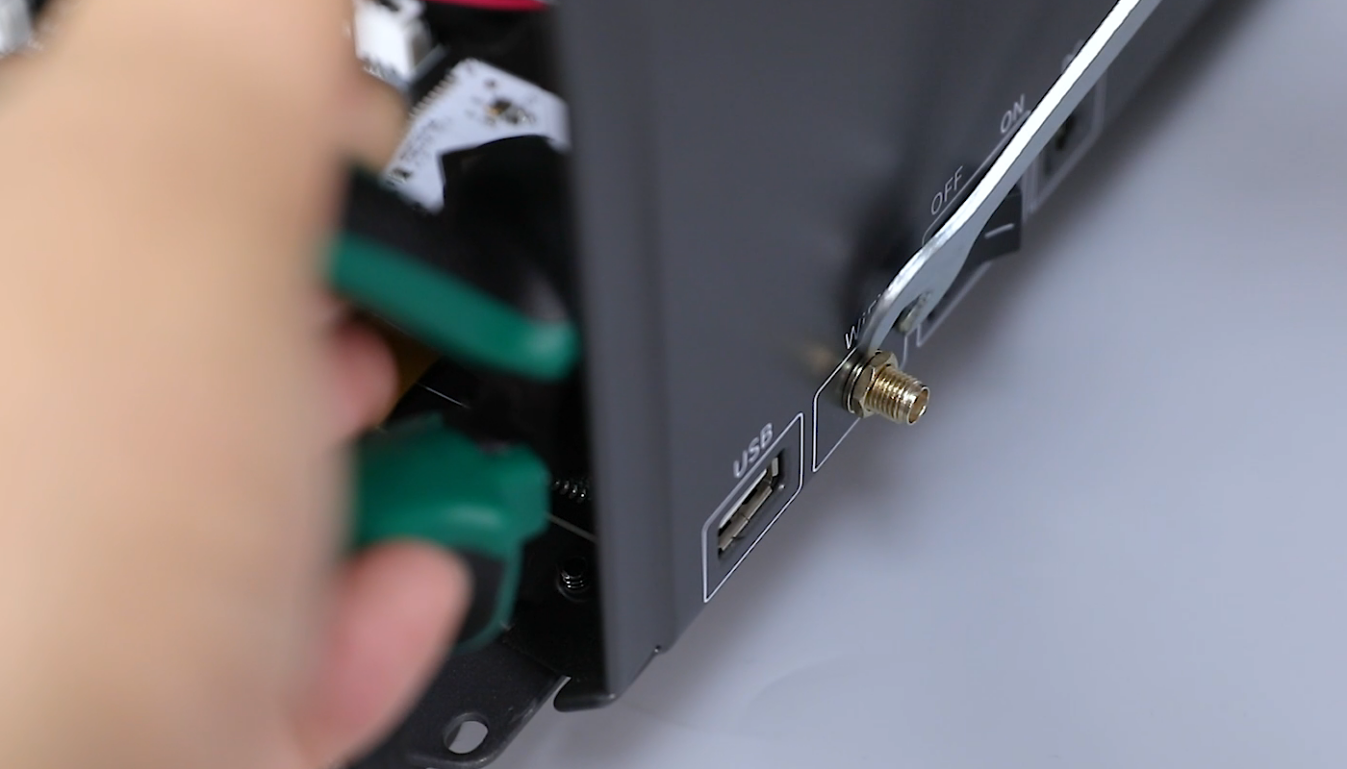
- Using a pair of needle-nose pliers, secure the antenna connector internally. Using an 8mm open-end key, tighten the nut securing the antenna connector.
- Align the back cover with the screw holes and put it in the installation position. Using a 2.5mm Allen key, tighten the four screws securing the back cover .

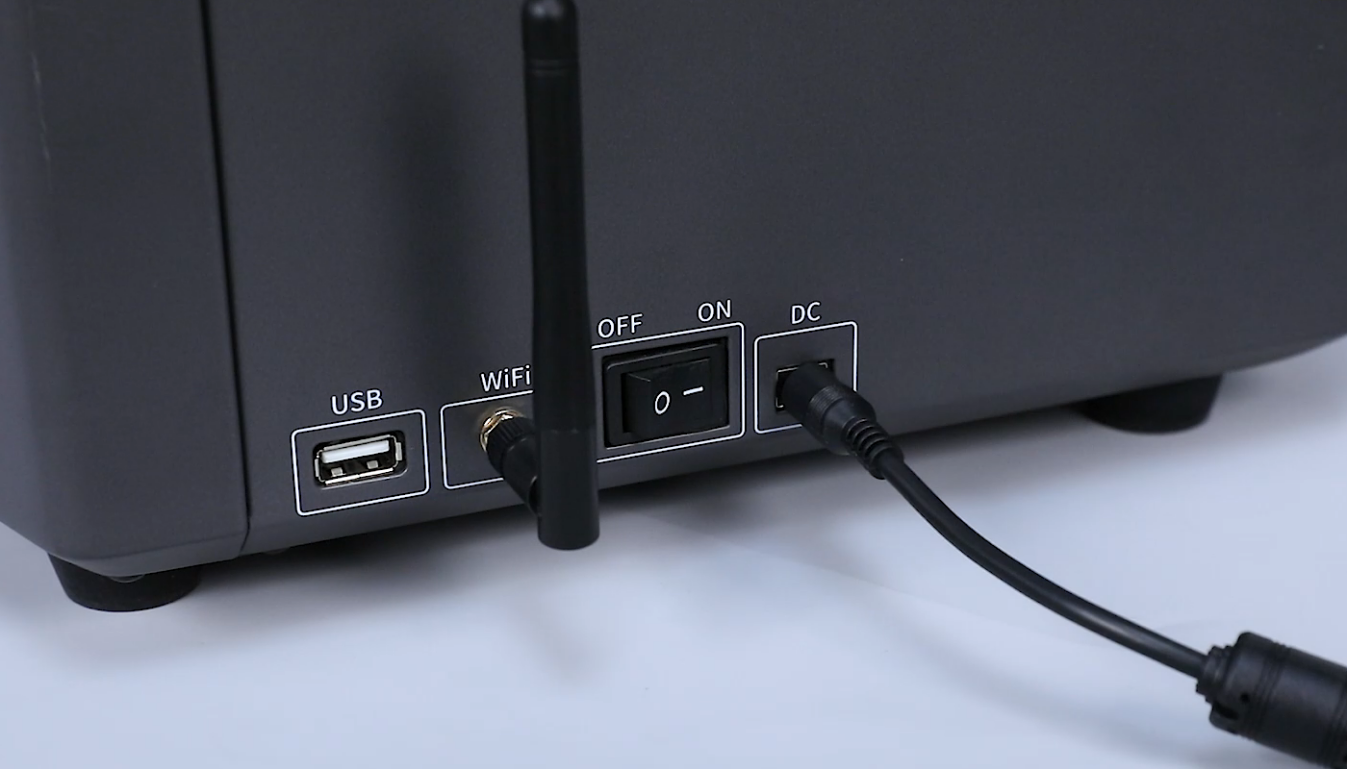
- Install the Wi-Fi antenna and power on the printer.
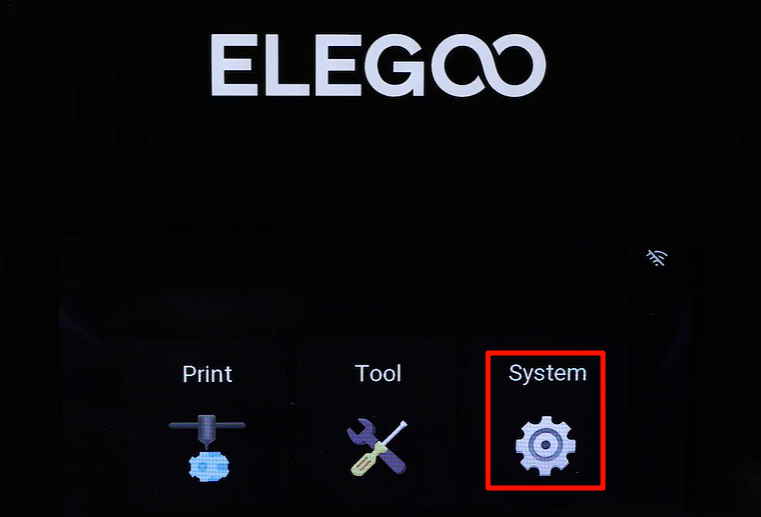
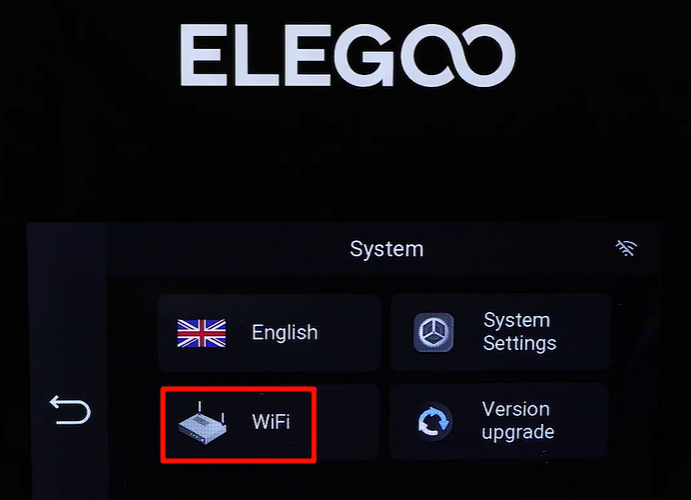
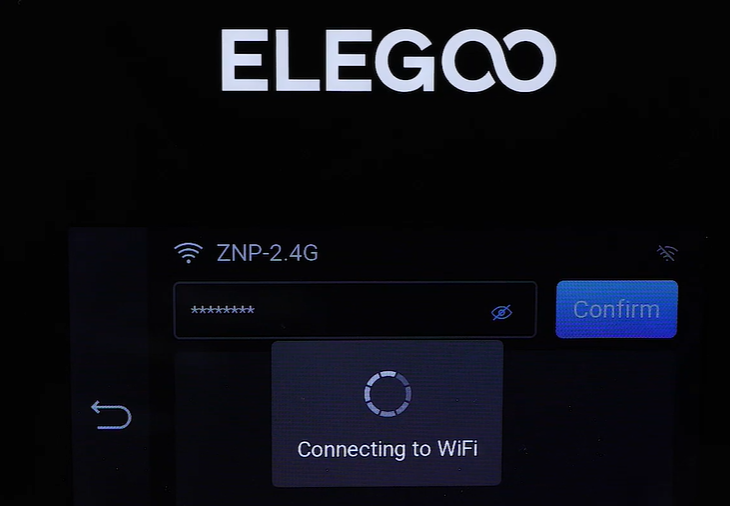
- On the touchscreen, select Setting - Wi-Fi. Enter the passwaord and click Confirm. The printer is ready for use after connecting to Wi-Fi.