¶ Fault Symptoms
After pressing the power switch, the printer touch screen does not turn on.
¶ Possible Causes
- Resin leakage inside the printer may cause a short circuit in the electronic circuits.
- The USB flash drive may be damaged or cause a short circuit, preventing the printer from powering on properly or reading files.
- The power adapter may be faulty or output abnormal voltage.
- The power switch does not receive 24V input voltage.
- The DC power socket is damaged.
- The DC power cable is damaged, has poor contact, or has soldering defects.
- The cable between the touch screen and the mainboard is loose or damaged.
- The mainboard or touch screen is faulty.
¶ Required Tools and Materials
- 2.0 mm Allen key
- Multimeter
- A working 12V or 24V adapter
- FAT32 formatted USB 2.0 flash drive with a capacity of no more than 16GB
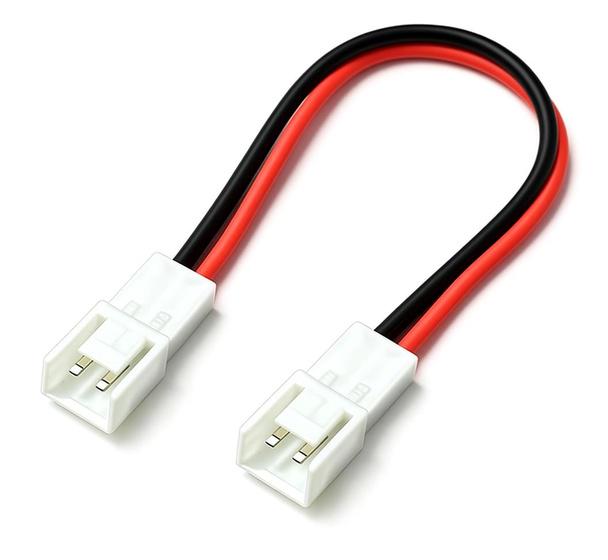
- 2-pin cable with VH3.96 connectors on both ends
¶ Troubleshooting Steps
Note: Before performing further troubleshooting, remove the Build Plate, Resin Tank, and UV Cover.
¶ 1. Check for Resin Leakage
- Turn off the power switch and disconnect the adapter.
- Check whether there is any resin leakage around the LCD screen.
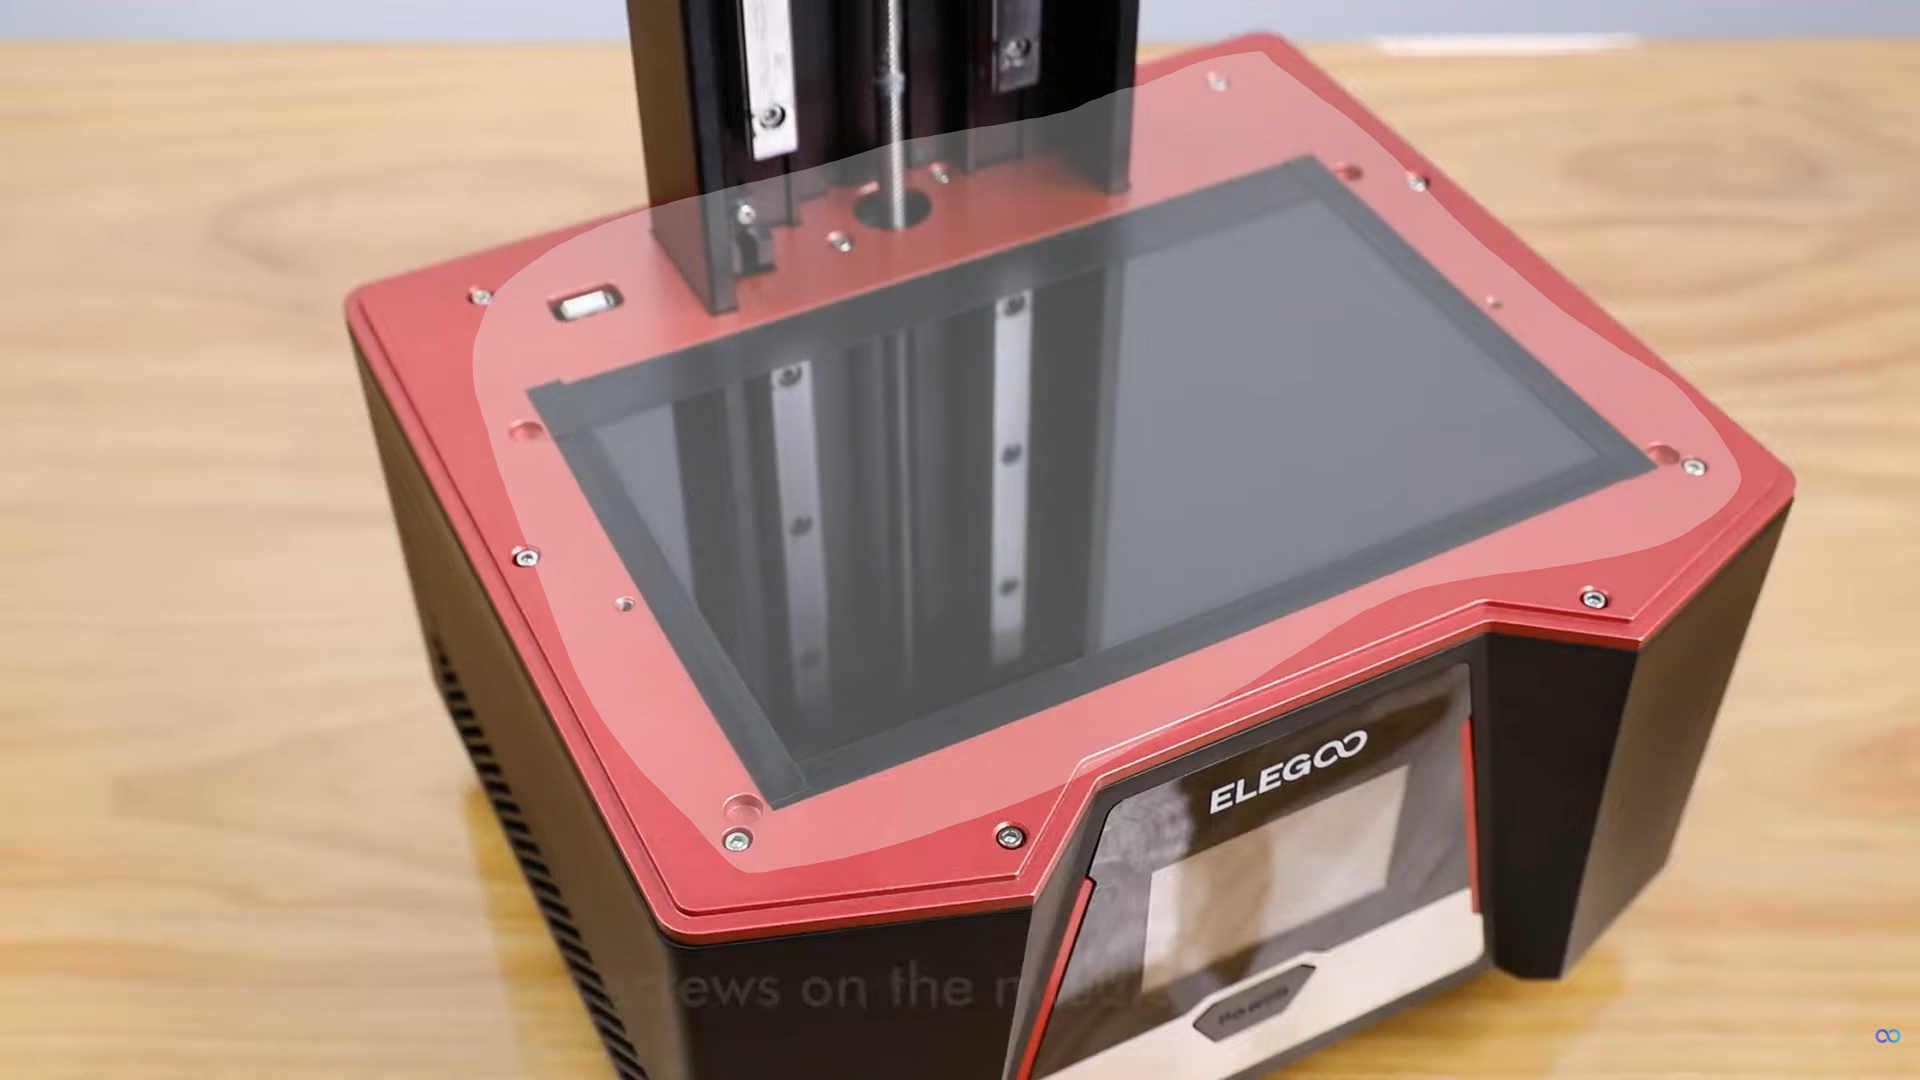
- If resin leakage is found, refer to the following video (00:00–02:43) to remove the printer housing:
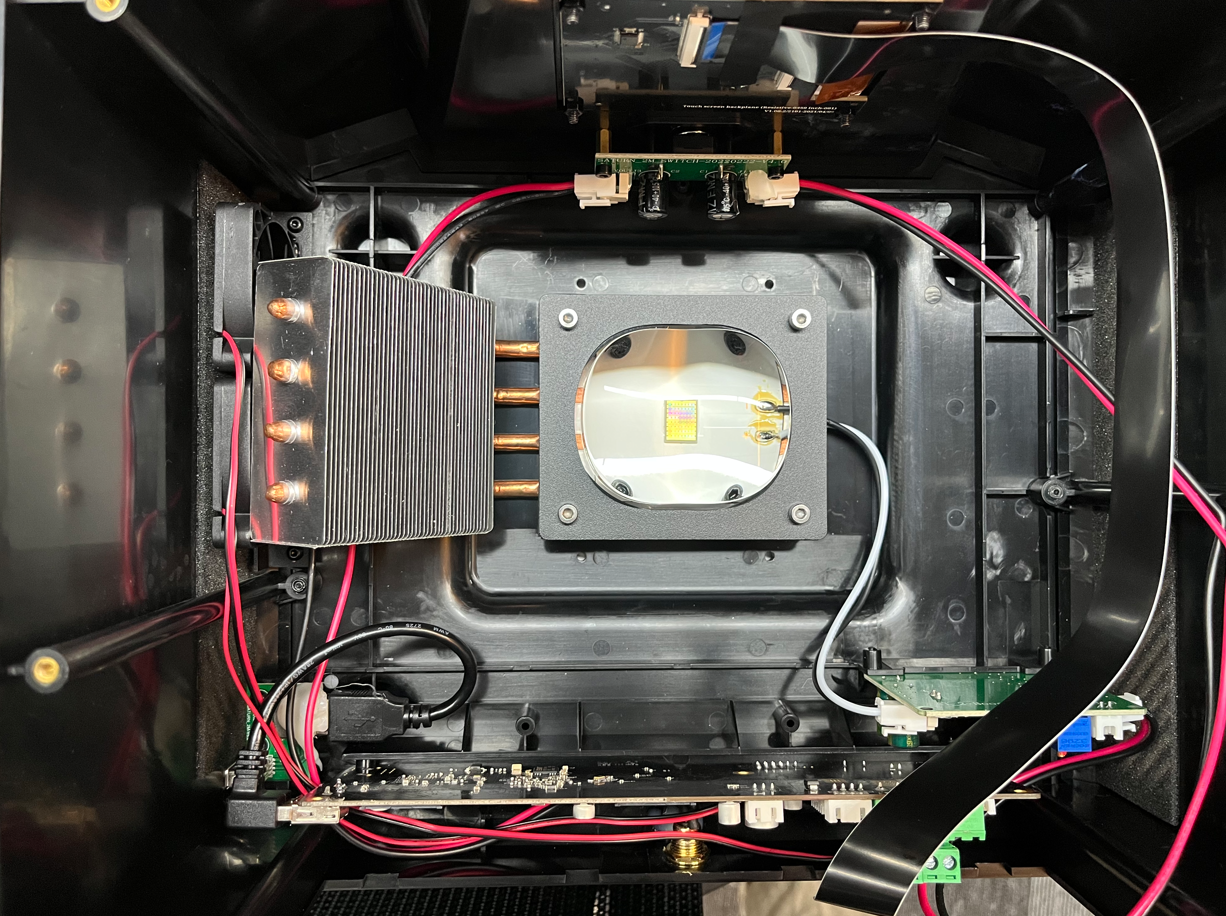
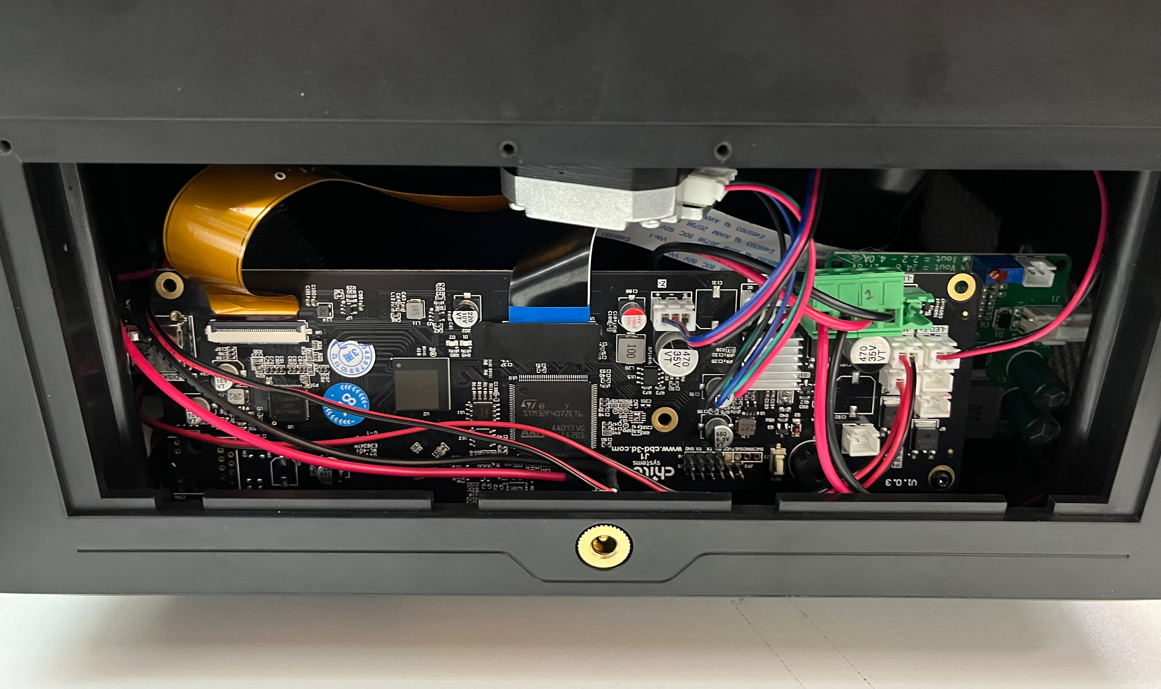
- Take photos of the following areas and contact technical support (Email: 3dp@elegoo.com). Do not use the printer until further inspection.
- Lens and base area
- Mainboard
- Touch screen
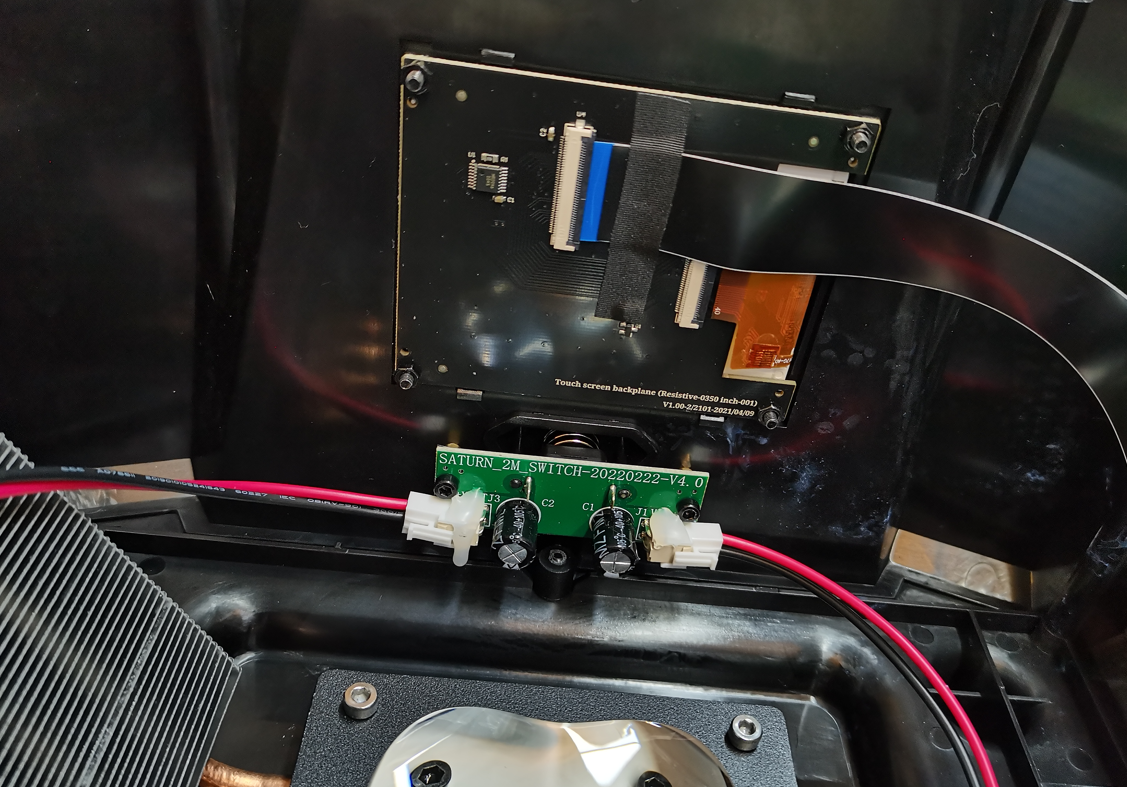
If no resin leakage is found, continue with the following troubleshooting steps.
¶ 2. Remove the USB Flash Drive for Testing
If a USB flash drive is inserted before powering on the printer, it may cause startup errors and prevent the touch screen from turning on.
- If a USB flash drive is inserted, remove it and restart the printer.
- If no USB flash drive is inserted, continue with the following troubleshooting steps.
¶ 3. Check the Mainboard Indicator Lights
Note: Before opening the cover, turn off the printer and disconnect the power supply. Do not touch the mainboard or other powered components during the power-on test.
- Use a 2.0 mm Allen key to remove the four screws securing the rear cover, then remove the rear cover.
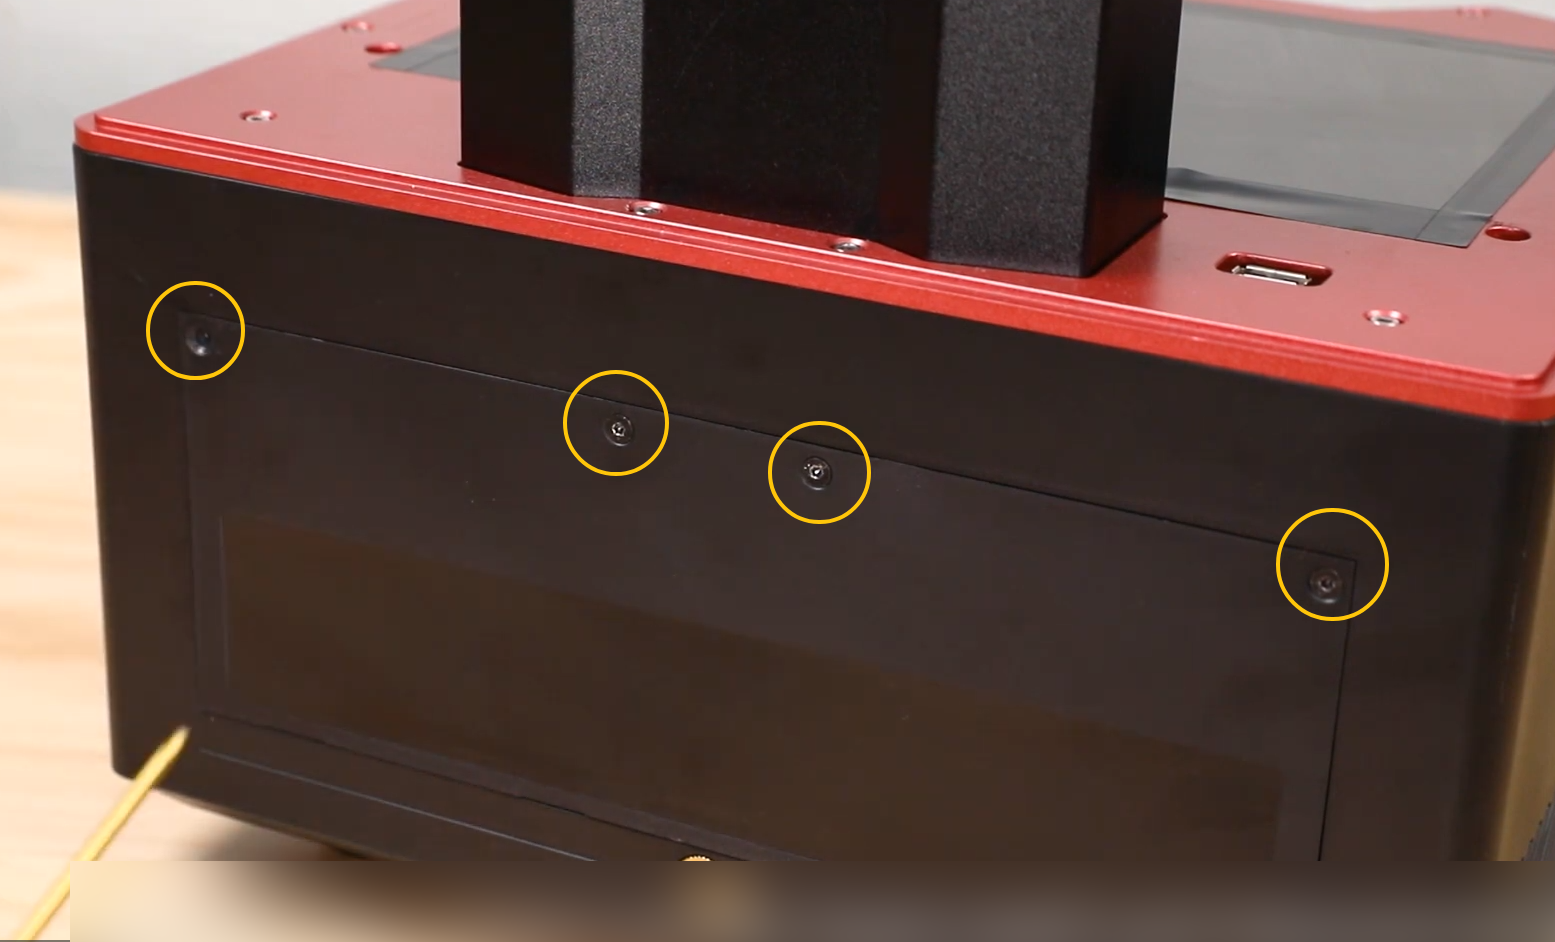
- Reconnect the power supply and turn on the printer.
- Check whether the two indicator LEDs on the mainboard are lit.
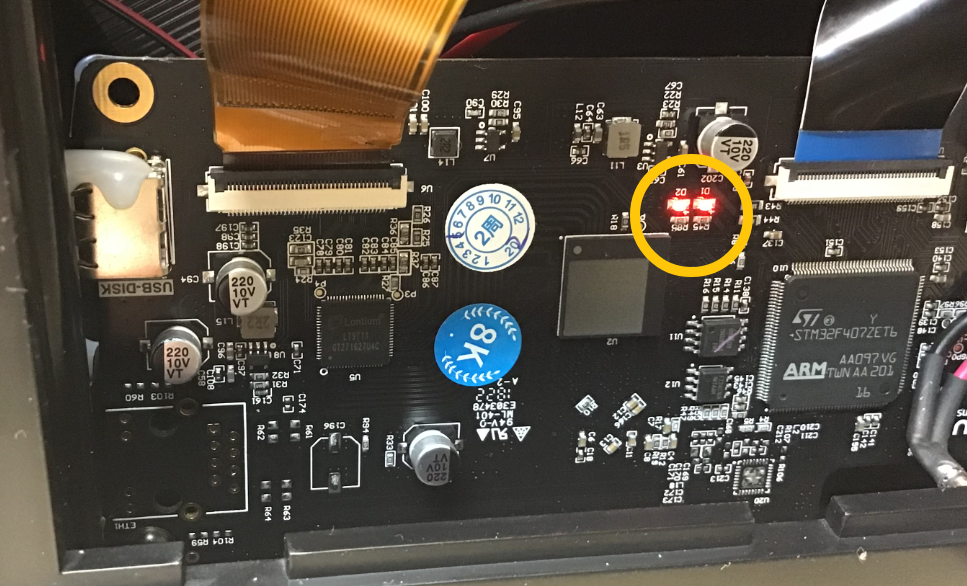
- If the indicator lights are not lit, the mainboard may be faulty.
- If the indicator lights are lit, continue with the following troubleshooting steps.
¶ 4. Check the Touch Screen Cable
If the mainboard indicator lights are normal but the touch screen still does not light up or displays abnormally:
- Turn off the power switch and disconnect the adapter.
- Refer to the following video (00:00–00:33) to remove the touch screen:
https://www.youtube.com/watch?v=y6uccuh61IE
- Check whether the touch screen cable on the back of the touch screen and the mainboard side are damaged, broken, or have poor contact.
The following images show the normal condition:
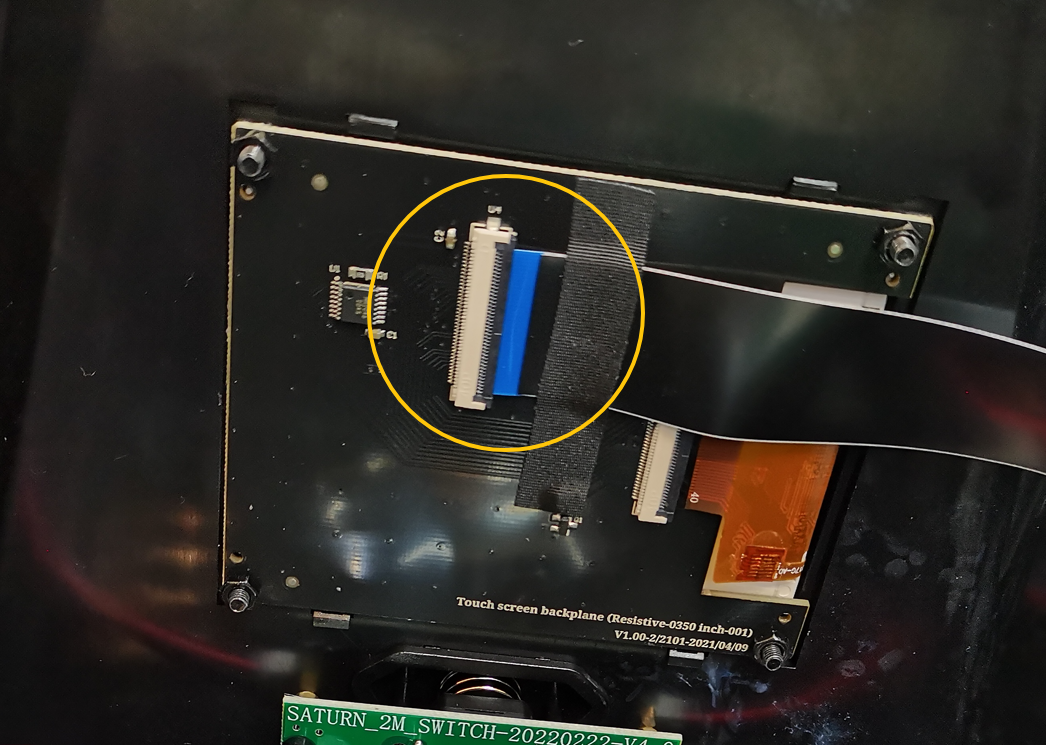
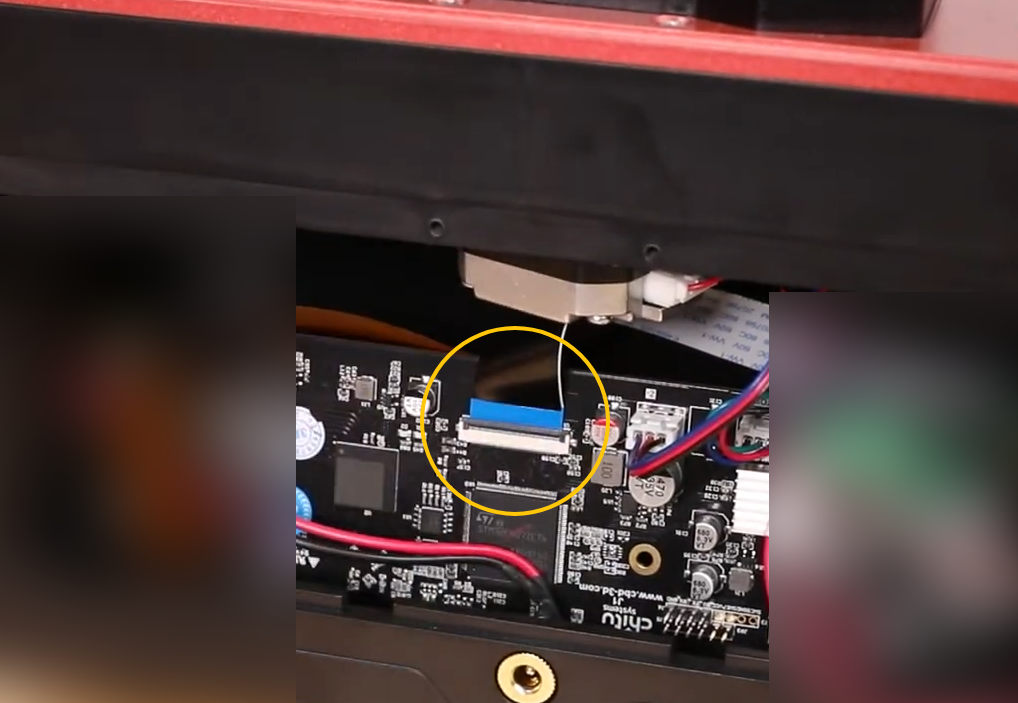
- If the cable is damaged, take photos and contact technical support.
- If the cable is loose, reconnect and reinstall the touch screen cable.
¶ 5. Check the Power Adapter
- Use a multimeter to check whether the adapter output voltage is approximately 24V DC.
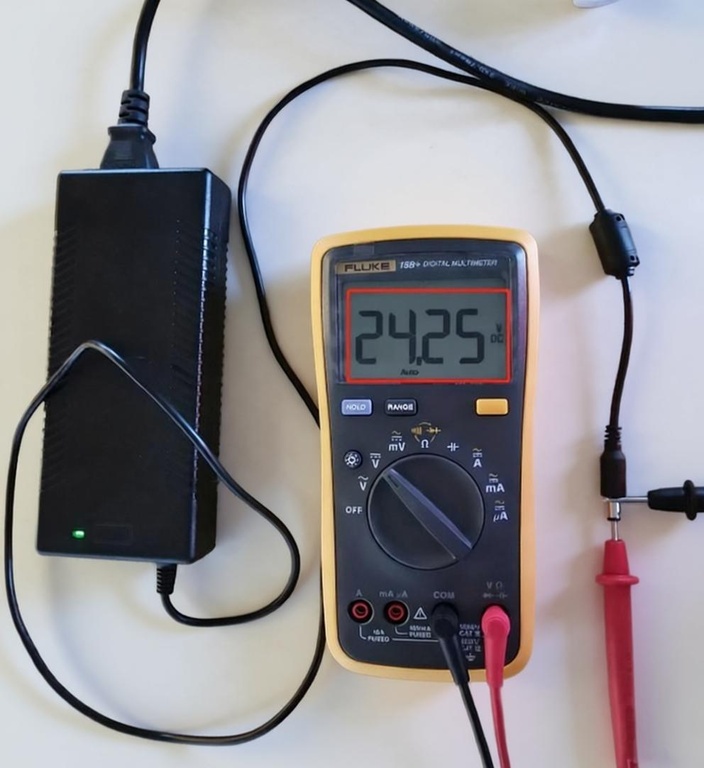
- If another ELEGOO printer adapter or Mercury adapter is available, temporarily use another 12V/24V adapter for testing.
- Check whether the printer touch screen can light up normally.
- If the touch screen lights up after replacing the adapter, the original adapter may be damaged. Replace the adapter and its cable.
- If the adapter output voltage is normal, continue checking the printer's internal components.
¶ 6. Check the Output Voltage
- Turn off the power switch and disconnect the adapter.
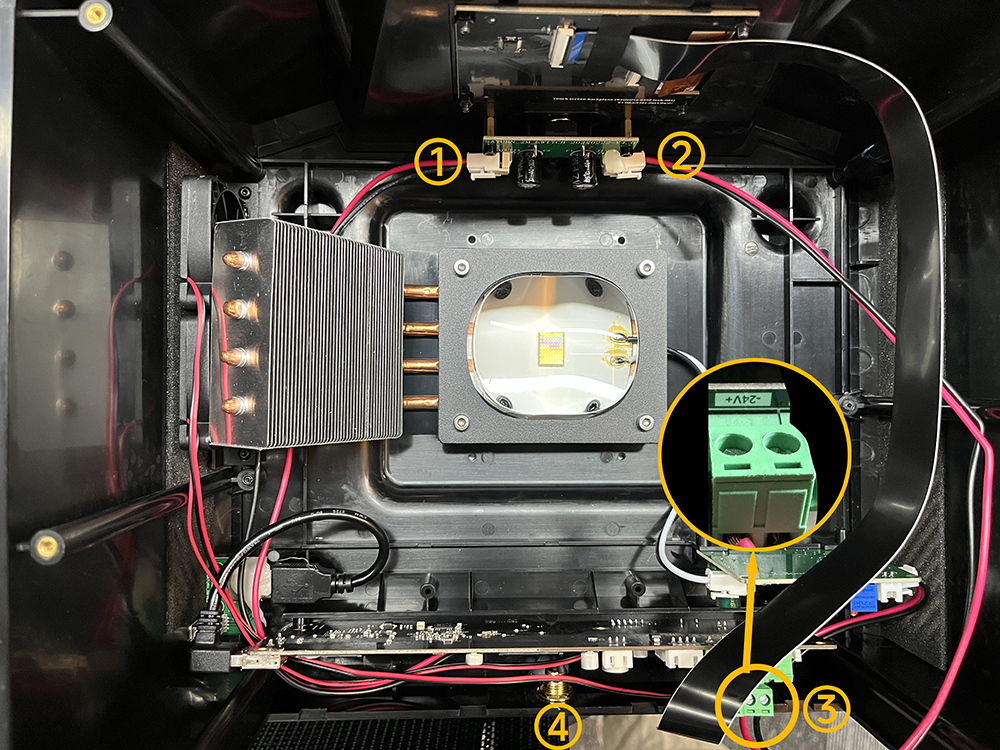
- Disconnect the four connectors shown below.
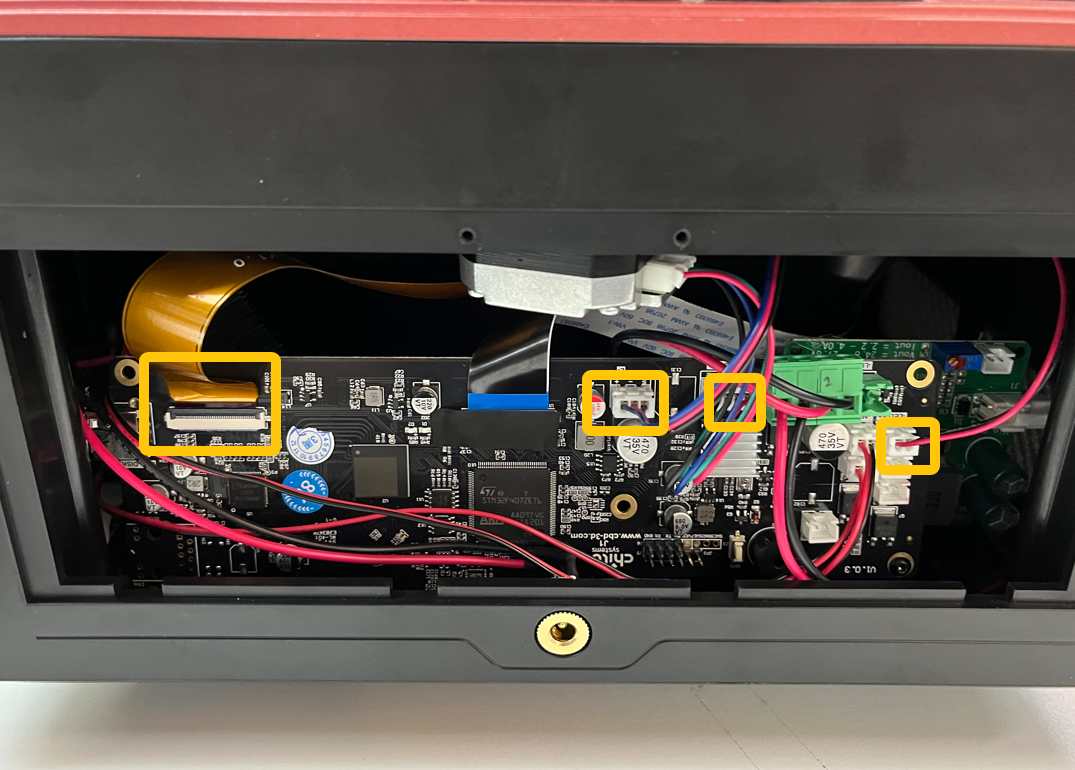
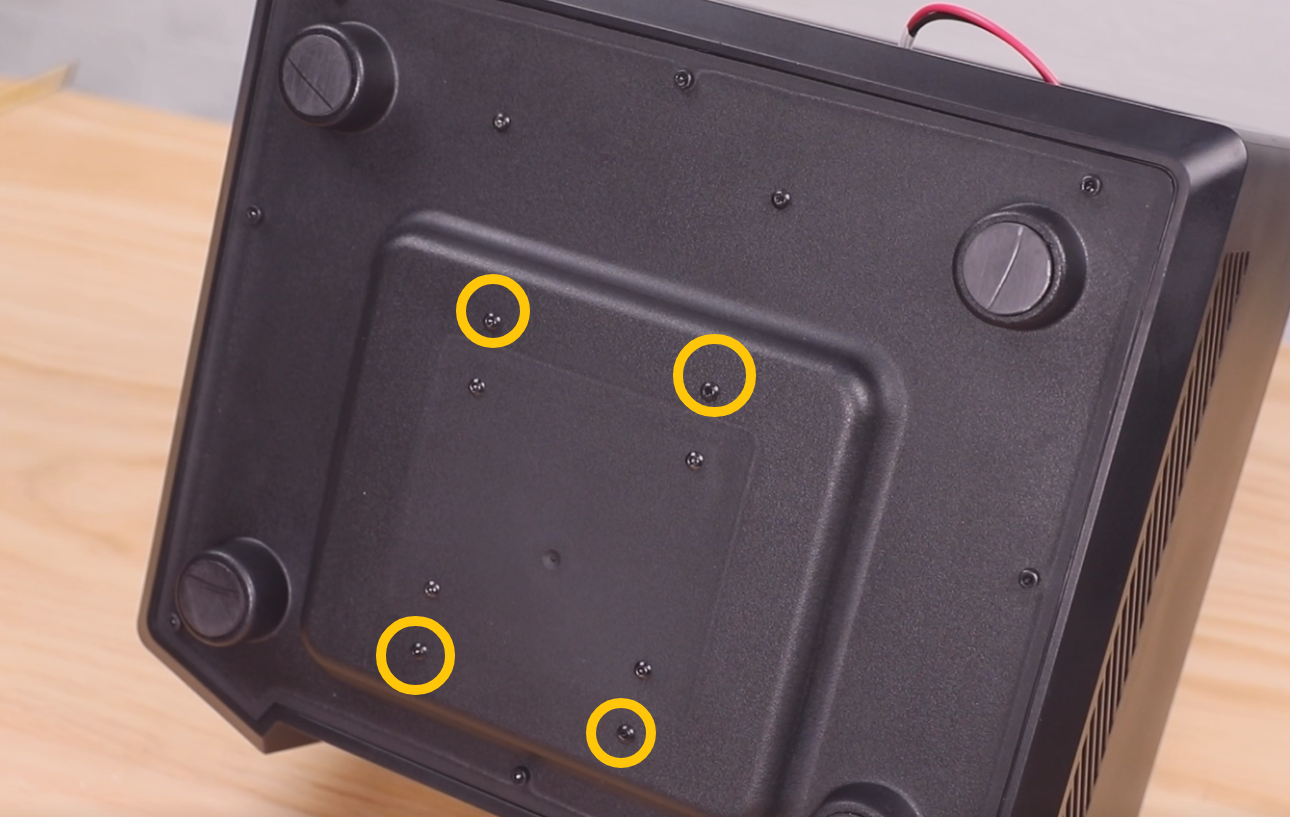
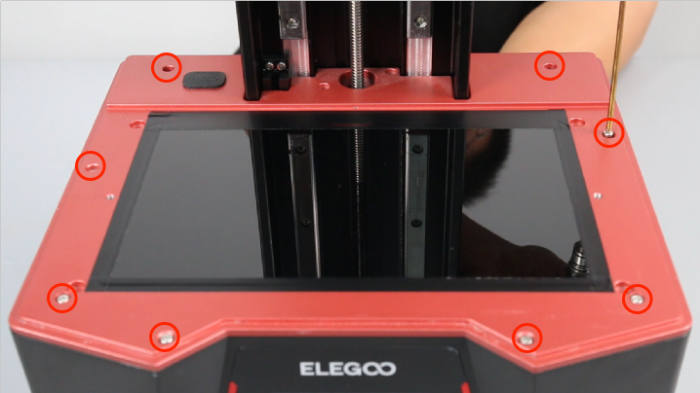
- Place the printer horizontally. Use a 2.0 mm Allen key to remove the four screws securing the UV Light Cover.
- Use a 2.0 mm Allen key to remove the ten screws securing the middle plate.
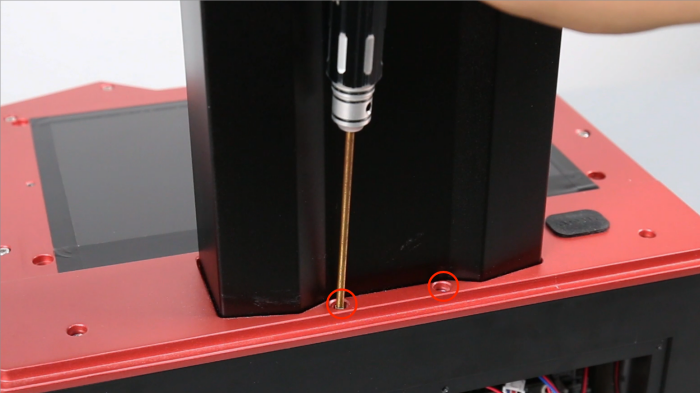
- Remove the middle plate.
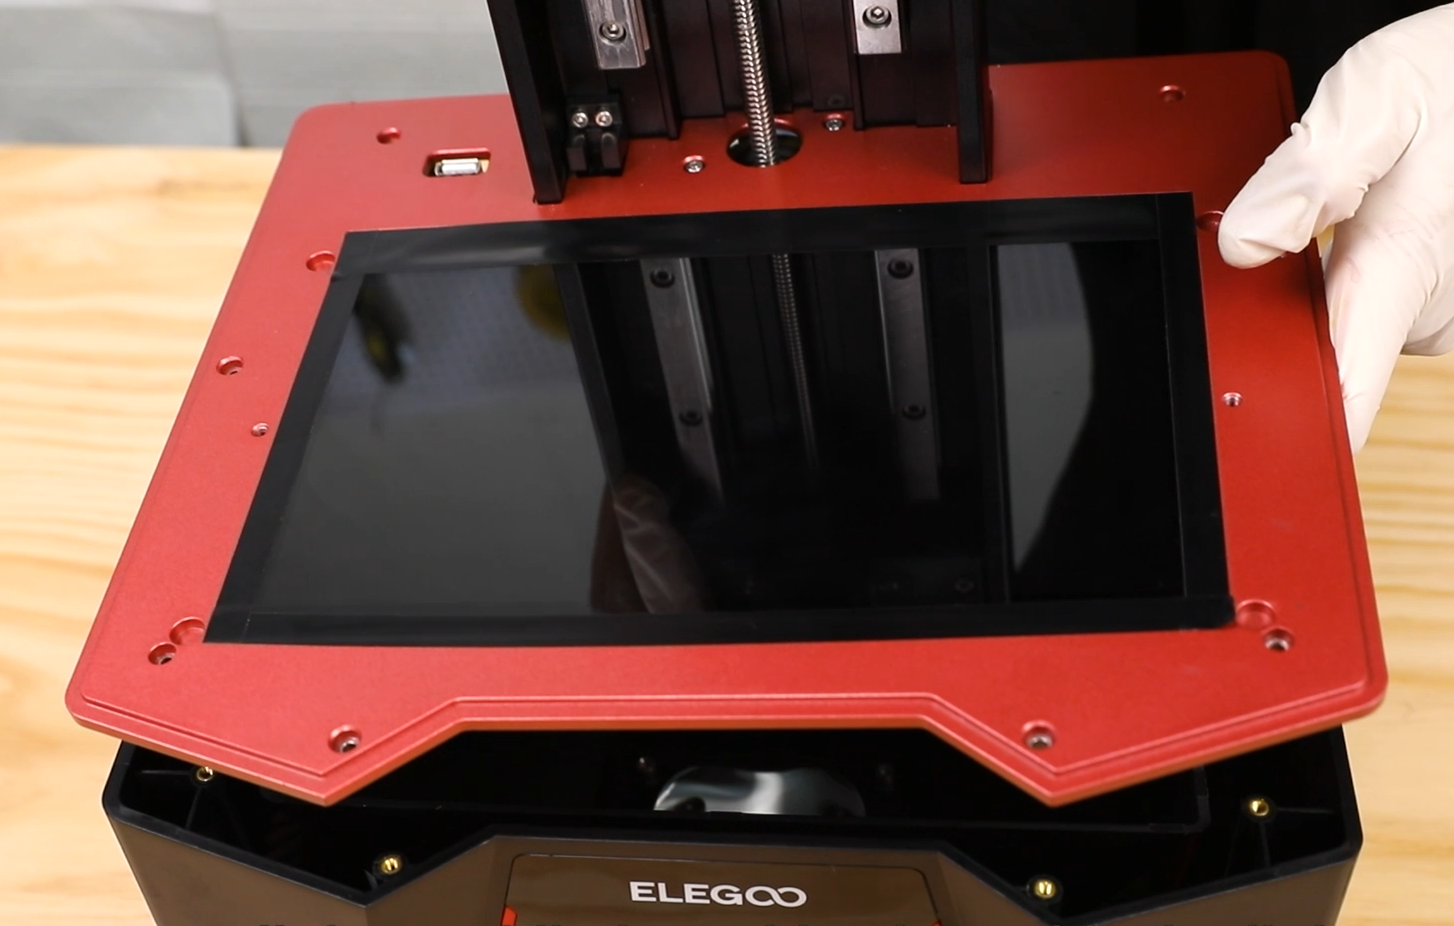
- Reconnect the DC power cable terminal to the mainboard.
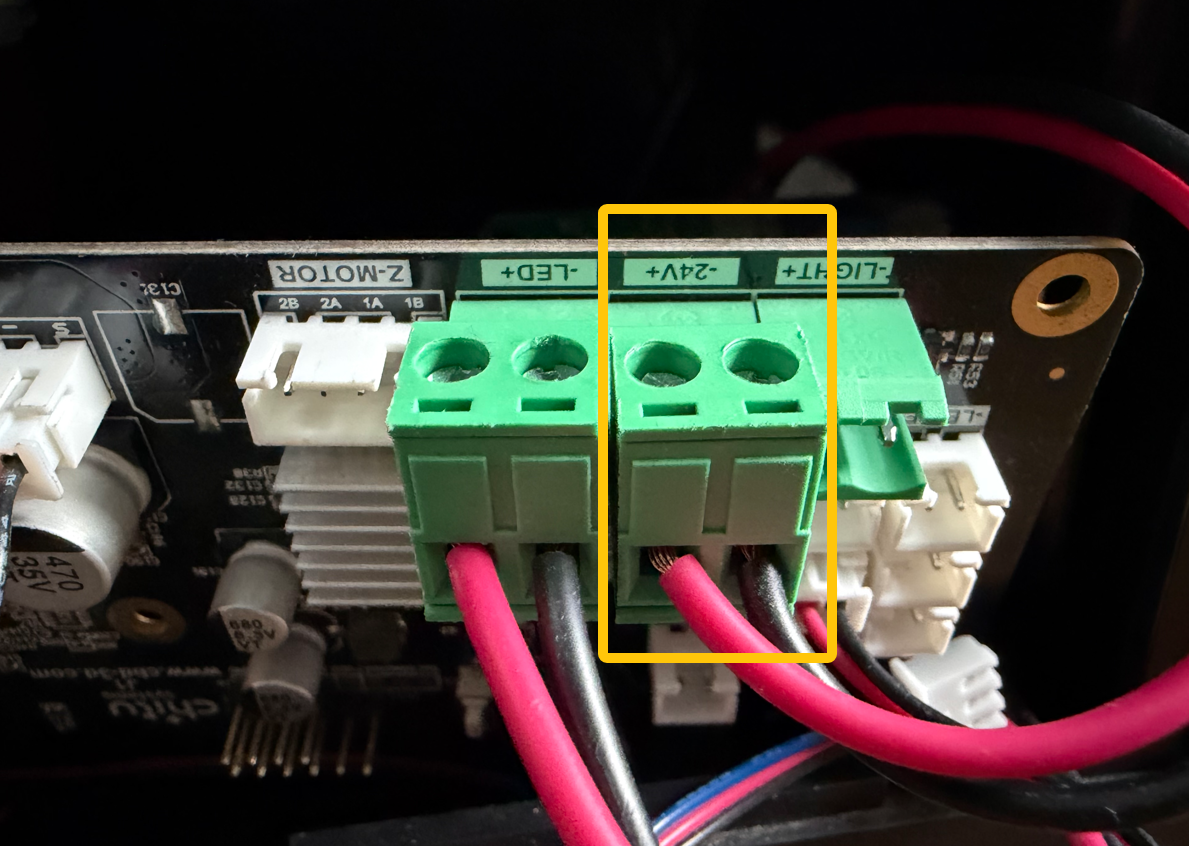
- Connect the adapter to the printer and turn on the power switch.
- Measure the voltage at the following four points.
The following troubleshooting results are based on the assumption that the adapter output voltage is normal.
- If point ① does not have 24V voltage output, the DC power socket ④ may have poor contact.
- If point ① has 24V output voltage but point ② does not, the power PCB board may be faulty. Perform the bypass test in Step 7 for confirmation.
- If points ① and ② have 24V output voltage but point ③ does not, the cable between point ② and point ③ may have poor contact.
- If points ①, ②, and ③ all have 24V output voltage but the touch screen still does not light up, the touch screen or mainboard may be faulty.
¶ 7. Bypass Test
- Turn off the power switch and disconnect the adapter.
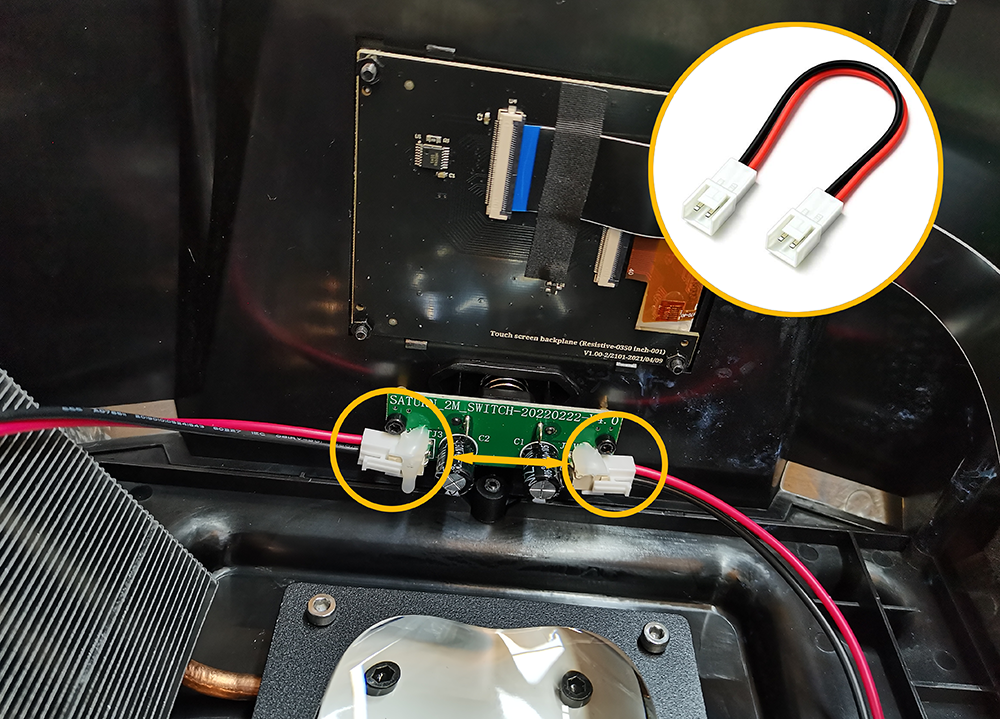
- Disconnect both connectors from the power PCB board.
- Connect a 2-pin cable with VH3.96 connectors on both ends to the two marked connectors.
- Reconnect the power supply and turn on the printer.
- If the touch screen lights up at this time, the power PCB board is faulty and needs to be replaced.
¶ Contact Technical Support
Please contact technical support (Email: 3dp@elegoo.com) and provide the following inspection results for further analysis.
Note: Some steps require the use of a multimeter. If a multimeter is not available, you may skip these steps.
- Does the printer have any resin leakage?
- After removing the USB drive and restarting the printer, does the printer return to normal operation?
- Does the power adapter have a normal output voltage? Is the indicator light on the adapter illuminated?
- Is the touch screen cable damaged or loose?
- After powering on the printer, does the indicator light on the mainboard turn on normally?
- Does the mainboard power connector ③ have an input voltage of approximately 24V?
- Does the left side ① of the power PCB board have an input voltage of approximately 24V? Does the right side ② of the power PCB board have an input voltage of approximately 24V?
- During the bypass test, can the touch screen light up normally?
¶ Help Us Improve
If you have any ideas or suggestions about the wiki pages, please let us know through the ELEGOO official feedback channel: