¶ Tutorial Video
https://www.youtube.com/watch?v=DXsGf1PAfRw
¶ Tools and Materials
- A 2.5 mm Allen wrench x 1
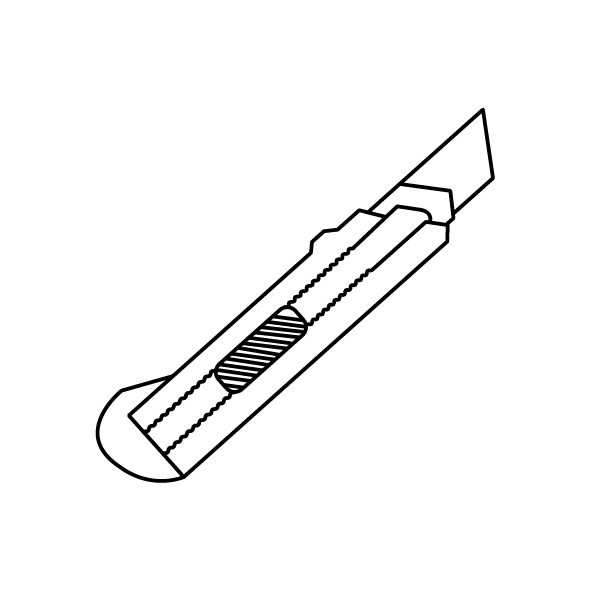
- An utility knife x 1
¶ Precautions and Machine state before starting operation
Power off the printer and unplug the power cord.
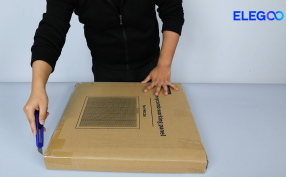
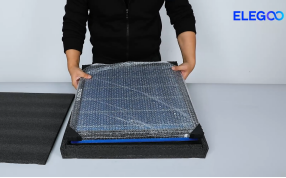
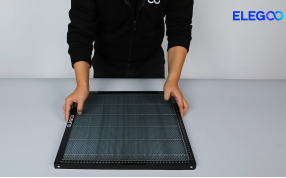
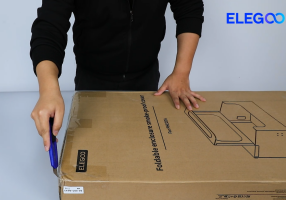
¶ Operation guide: Unbox the Honeycomb Plate
Step 1 - Use a utility knife to cut the tape on the box and remove the honeycomb plate.
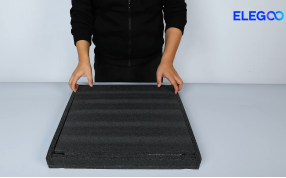
Step 2 - Remove the packaging foam, the plastic foot protectors, and take out the honeycomb plate and aluminum plate.
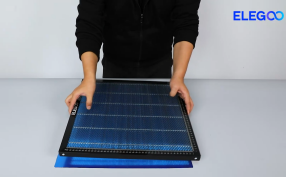
Step 3 - Tear off the protecting film on the front cover of the aluminum plate. Put the honeycomb plate on the aluminum plate for future use.
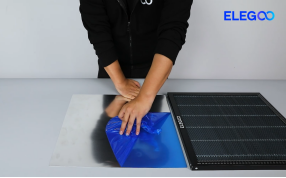
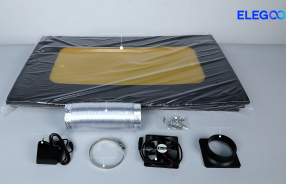
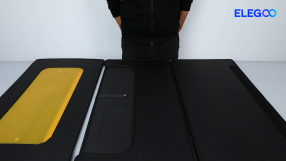
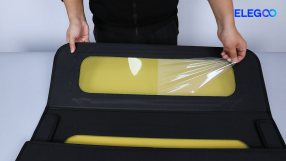
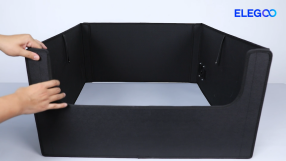
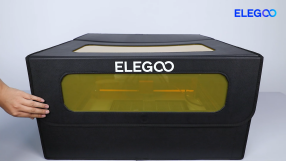
¶ Operation guide: Unbox and Install the Enclosure
Step 1 - Use a utility knife to cut the tape on the box and take out the enclosure and accessories.
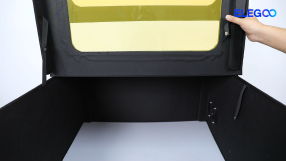
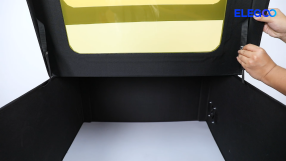
Step 2 - Tear off the protective film from the yellow area of the enclosure.
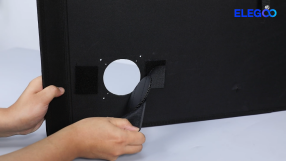
Step 3 - Take out the right panel assembly and unfold ot. Remove the fan port cover.
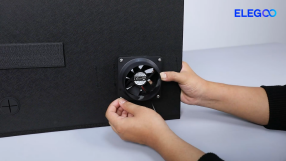
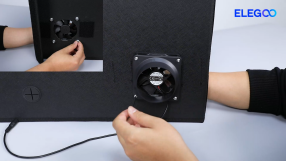
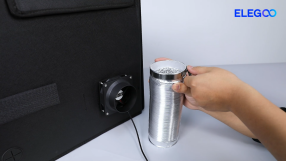
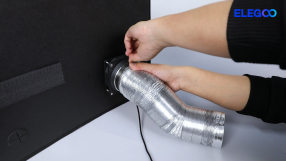
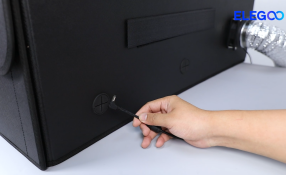
Step 4 - Align the exhaust hose connector and the fan with the screw holes outside the fan. Thread the screws through the connector, the fan and the screw holes. Screw a nut on the screw that goes into the inside of the fan port and tighten it with a 2.5 mm Allen wrench (the marked side of the exhaust fan faces outwards).
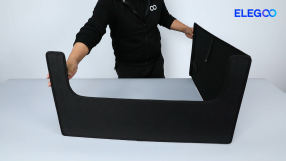
Step 5 - Join the left rear panel with the right front panel to form a quadrilateral shield. Close the top cover, and join the left, right and rear edges of the top cover to the enclosure.

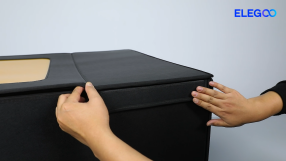
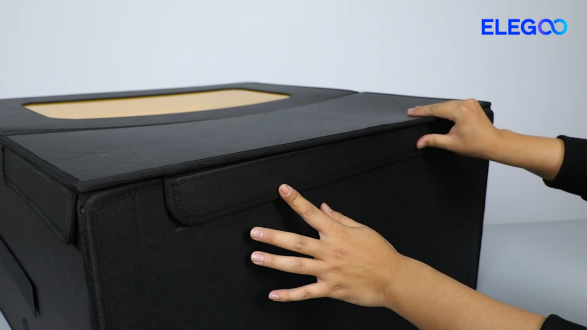
Step 6 - Lift the top cover. Join the connecting belt of the top cover to the two sides of the enclosure.
Step 7 - Prepare the exhaust hose. Put the fume hose clamp on one end of the exhaust hose.
Step 8 - Stretch the exhaust hose and place the other end outside the window.

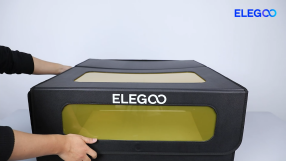
¶ Operation guide: Instruction of the Honeycomb Plate and Enclosure
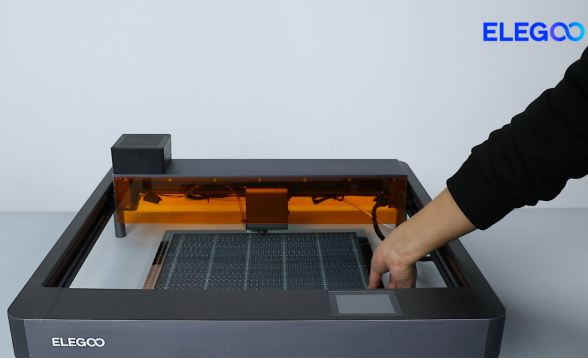
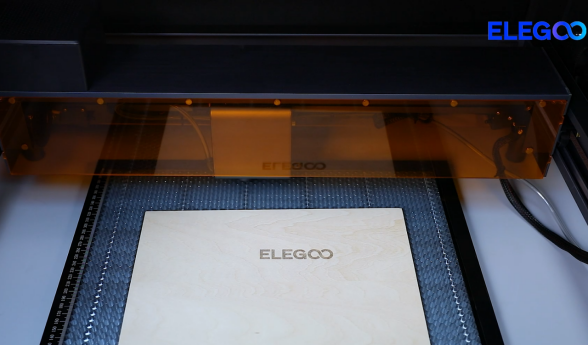
Step 1 - Prepare the engraving machine. Push the X-axis to the back side. Place the honeycomb plate and the aluminum plate in the engraving area, at the center of the machine. The honeycomb plate and the aluminum plate can protect the surface of the machine's platform.
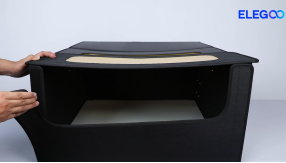
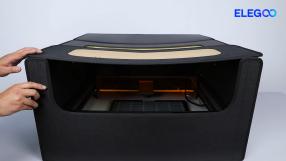
Step 2 - Lift the top cover of the enclosure. Open the left side of the front. Place the enclosure iver the machine. Adhere the left side of the front plate and close the top cover.
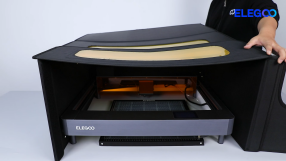
Step 3 - Thread the round plug of the 24V power cord through the reserved hole at the front of the right side panel of the enclosure, insert it into the power connector of the engraving machine, and power on the machine.
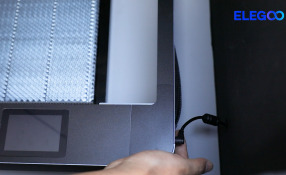
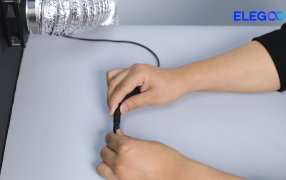
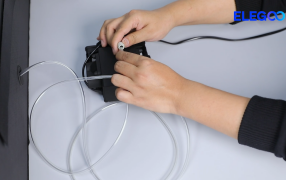
Step 4 - Connect the port of the smoke exhaust fan with the power port. Pass the air hose of the air pump through the reserved hole from the inside of the right-side panel.
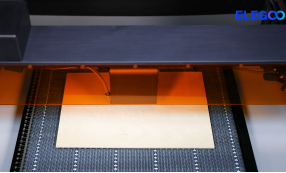
Step 5 - Place the engraving wooden board on the center of the honeycomb plate. Move the X-axis above the plate and remove the shield.
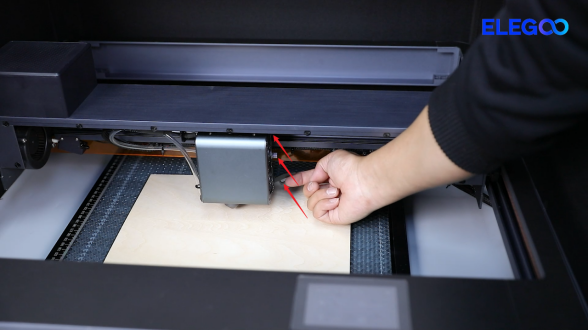
Step 6 - Put down the focus positioning bar, loosen the hand-twist screws that fix the laser device to make the laser head fall naturally by gravity.
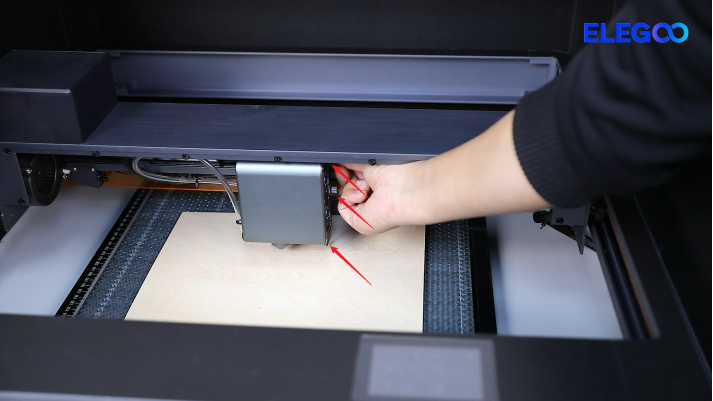
Step 7 - When the focus positioning bar of the laser head touches the wooden board and stops, tighten the hand-twist screws that fix the laser, and then retract the focus positioning bar.
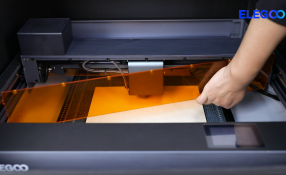
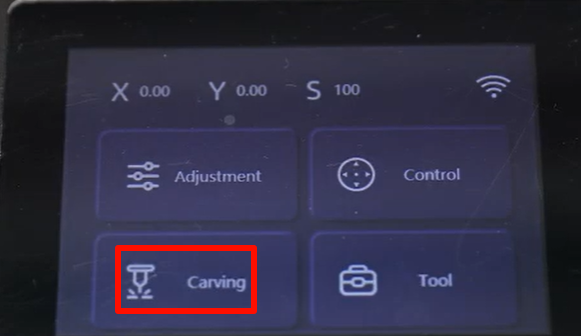
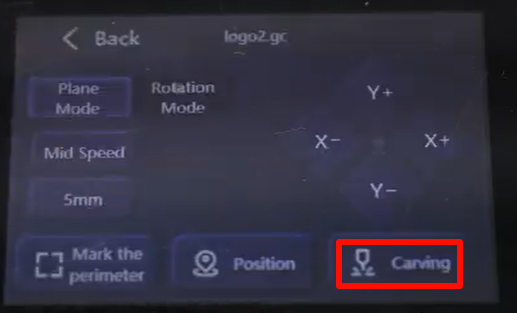
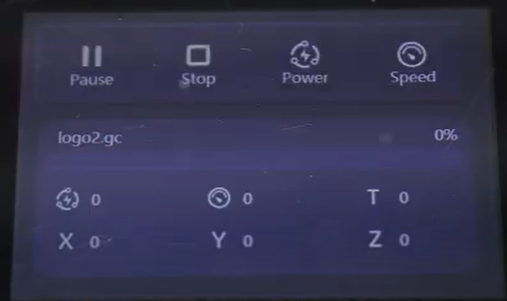
Step 8 - Reinstall the shield. Click "Carving" on the touchscreen.

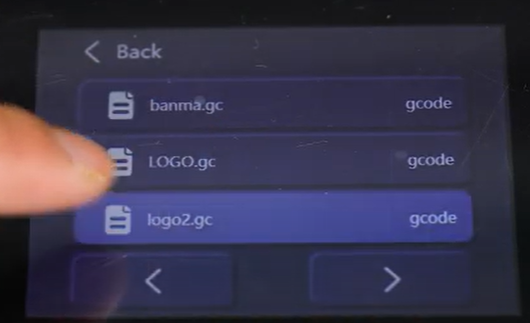
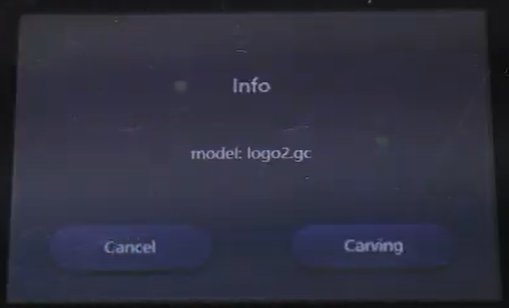
Step 9 - Select the file to be engraved.
Step 10 - Click "Position - Confirm" to determine the origin position and then click "Confirm".
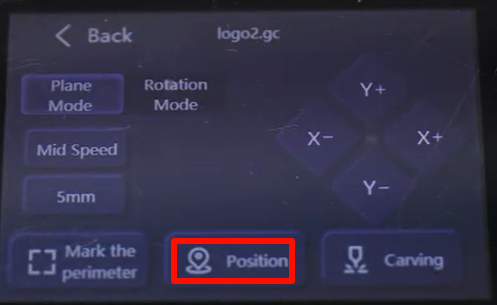

Step 11 - Click "Position - Confirm" to determine the origin position and then click "Confirm".
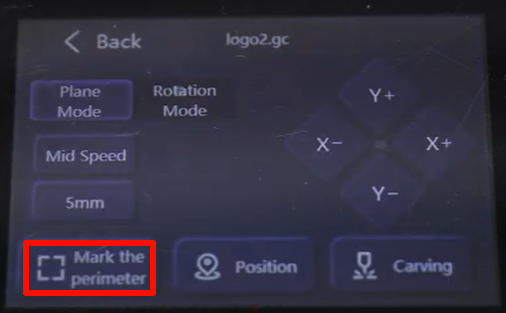
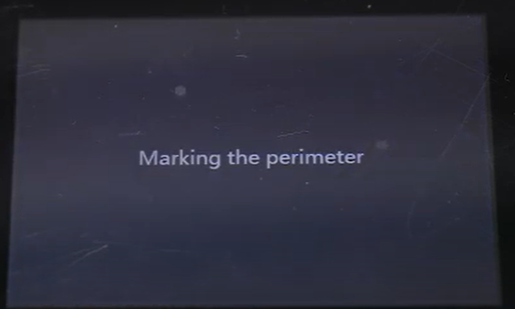
Step 12 - Click "Marking the perimeter". After the edge patrol is completed, click "Carving" and the machine will engrave the pattern.
Step 13 - In the carving interface, click "Pause" or "Stop" to cancel the engraving. When engraving the model, close the enclosure so that the smoke cannot disperse;

Step 14 - After the carving is finished, make sure that the smoke is eliminated completely before opening the smoke hood. Turn off the switch and disconnect the power cord.
¶ Precautions
- When the laser head starts working, please wear laser goggles to protect your eyes.
- Please keep the working area of the machine flat and clean. Do not place flammable objects near the machine. Residues accumulated during cutting and engraving must be cleaned regularly to prevent fires. Do not place flammable objects near the machine. Residues accumulated during cutting and engraving must be cleaned regularly to prevent fires.
- Do not engrave or cut any unknown materials. The vaporization or melting of many materials will release harmful fumes and cause personal injury.
- Do not leave the machine unattended, as it may cause a fire.
- Ensure that the space is well-ventilated when operating the machine so that the machine can exhaust fumes properly.
- The machine contains high-speed running parts, so be careful not to pinch your hands.
- This product is not suitable for children to use alone and should be operated with the supervision of a guardian, and take appropriate protection to avoid personal injury.
- In case of emergency, please turn off the power directly.