Notes for use
This limit switch installation guide is only suitable for users who have a 3D printer. The parts in the tutorial need to be printed with a 3D printer. To use the officially provided model files, you must select the limit switches shown in the picture below.
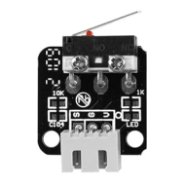
Online shopping search keywords: CR-10S limit switch (Taobao/JD.com/Pinduoduo) CR-10S limit switch (Amazon)
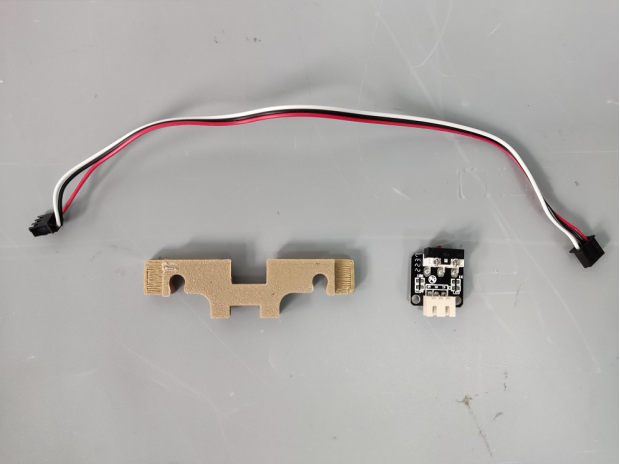
Bill of materials
●Limit switch x2
●15cm XH2.54-3P cable x1
●140cm XH2.54 3P cable x1
●Cable tie x5
●PM3*8 screw x1
●PM3*6 self-tapping screws x2
●X-axis limit switch printed model x1
●Y-axis limit switch printed modelx1
Limit switch printer download link
X-axis limit switch printed model, STL file download link:
https://drive.google.com/file/d/193AMYL0baBkOGaarZtu4bTabPZLMSriz/view?usp=sharing
X-axis limit switch printed part.STL
Y-axis limit switch printed model, STL file download link:
https://drive.google.com/file/d/1CSkMJcE6RMgEcmc_w9MLDWho-t7GGrFG/view?usp=sharing
Y-axis limit switch printed part.stl
Installation guide
Install the Y-axis limit switch
Step 1: Install the limit switch on the printed model.
 |
Parameter settings
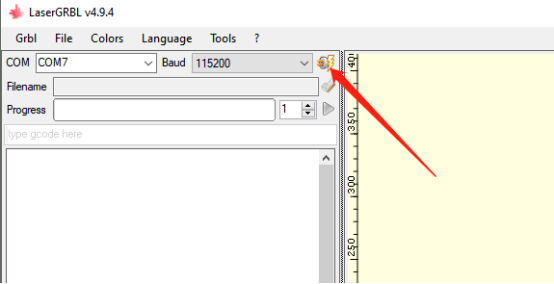
Method 1: Set the limit switch value in LaserGRBL.
Step 1: Open the LaserGRBL software, select the correct port number and baud rate, and click Connect (the red arrow indicates the Connect button).
 |