¶ UART Serial Communication Test
This example program demonstrates the UART (serial) data send and receive functionality using the ESP32 combined with a TFT LCD screen. It shows how to send formatted data through the serial port, how to receive external serial data and display it in real-time on the LCD screen, with automatic text wrapping support for long messages.
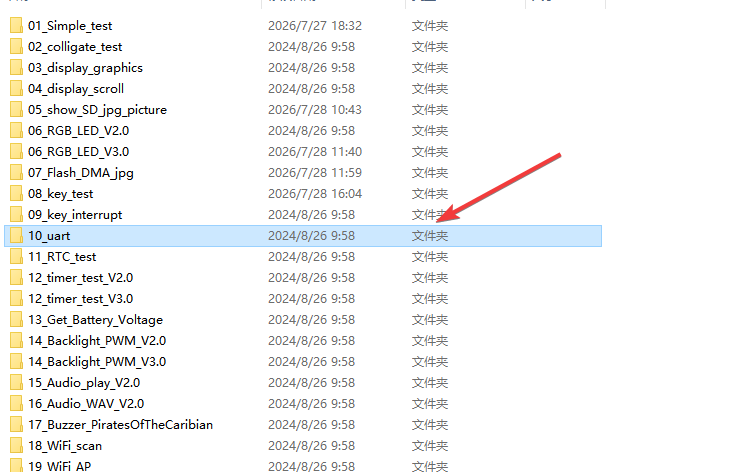
¶ Code Explanation
This example code is based on the ESP32-WROOM-32E microcontroller.
¶ Basic Configuration
The following introduces the basic configuration of this program:
- Library Inclusion: Includes the
TFT_eSPI.hlibrary for LCD screen display functionality. TFT_eSPI is a dedicated TFT LCD driver library designed for ESP32, supporting multiple screen controllers. - Pin Definitions: Pin assignments for the ESP32-WROOM-32E are documented in the program comments:
| LCD Pin | ESP32 Pin | Description |
|---|---|---|
| CS | 15 | Chip Select |
| DC/RS | 2 | Data/Command Select |
| RESET | EN | Reset Signal |
| SDI/MOSI | 13 | Master Out Slave In |
| SCK | 14 | Clock Signal |
| SDO/MISO | 12 | Master In Slave Out |
| BL | 21 | Backlight Control |
| VCC | 5V | Power Supply |
| GND | GND | Ground |
- Variable Definition: Defines a string variable
r_datafor storing received serial data. - Object Instantiation: Creates a
TFT_eSPI my_lcdobject as the entry point for all subsequent screen operations.
¶ setup() Function Details
The setup() function completes serial port and LCD screen initialization, and demonstrates various serial data formatted output methods. It runs only once when the ESP32 powers up or resets.
void setup()
{
  Serial.begin(115200); //Set the serial port baud rate 115200
  my_lcd.begin();
  my_lcd.setRotation(0);
  my_lcd.fillScreen(TFT_BLACK);
  my_lcd.setTextColor(TFT_GREEN);
  my_lcd.drawString("This is uart test!!",0,10,2);
  my_lcd.drawString("receive data :",0,25,2);
  my_lcd.setTextColor(TFT_WHITE);
  Serial.println(55, BIN); //Binary
  Serial.println(55, OCT); //octonary
  Serial.println(55, DEC); //decimalism
  Serial.println(55, HEX); //hexadecimal
  Serial.println(9.19999, 0); //Keep 0 decimal places
  Serial.println(9.11999, 1); //Keep 1 decimal places
  Serial.println(9.11119, 4); //Keep 4 decimal places
  Serial.println('Q');
  Serial.println("Hello! this send.");
  Serial.print("x =");
  Serial.print(20);
  Serial.print(",y =");
  Serial.print(40);
  Serial.print('\n');
}
¶ Serial Port Initialization
Serial.begin(115200);
Serial.begin(115200): Sets the serial port baud rate to 115200 for debug information output and serial data communication. 115200 is a common high baud rate suitable for large data volume transmission.
¶ LCD Screen Initialization
my_lcd.begin();
my_lcd.setRotation(0);
my_lcd.fillScreen(TFT_BLACK);
my_lcd.begin(): Initializes the TFT_eSPI library and LCD screen hardwaremy_lcd.setRotation(0): Sets screen rotation to 0° (portrait mode)my_lcd.fillScreen(TFT_BLACK): Fills the entire screen with black as the display background
¶ Initial Interface Display
my_lcd.setTextColor(TFT_GREEN);
my_lcd.drawString("This is uart test!!",0,10,2);
my_lcd.drawString("receive data :",0,25,2);
my_lcd.setTextColor(TFT_WHITE);
my_lcd.setTextColor(TFT_GREEN): Sets text color to greenmy_lcd.drawString("This is uart test!!",0,10,2): Displays welcome message at coordinates (0, 10) with font size 2my_lcd.drawString("receive data :",0,25,2): Displays prompt text at coordinates (0, 25) with font size 2my_lcd.setTextColor(TFT_WHITE): Switches text color to white for subsequent data display
¶ Serial Formatted Output Demonstration
The code demonstrates various formatted output methods for Serial.println() and Serial.print():
¶ Numeric Base Conversion
Serial.println(55, BIN);  // Binary output: 110111
Serial.println(55, OCT);  // Octal output: 67
Serial.println(55, DEC);  // Decimal output: 55
Serial.println(55, HEX);  // Hexadecimal output: 37
Outputs the number 55 in binary, octal, decimal, and hexadecimal formats to the serial monitor respectively.
¶ Floating Point Precision Control
Serial.println(9.19999, 0);  // 0 decimal places: 9
Serial.println(9.11999, 1);  // 1 decimal place: 9.1
Serial.println(9.11119, 4);  // 4 decimal places: 9.1112
Demonstrates how to control the number of decimal places when outputting floating point numbers. The second parameter specifies the number of decimal places to retain.
¶ Character and String Output
Serial.println('Q');                 // Output single character: Q
Serial.println("Hello! this send.");  // Output string with newline
Serial.println('Q'): Outputs the single characterQand automatically adds a newlineSerial.println("Hello! this send."): Outputs a string with a newline
¶ Multi-segment Concatenated Output
Serial.print("x =");
Serial.print(20);
Serial.print(",y =");
Serial.print(40);
Serial.print('\n');
Using Serial.print() (without ln) allows concatenating and outputting multiple segments of data on the same line, finally using '\n' to add a newline. This is very useful when formatted combined output is needed.
¶ loop() Function Details
The loop() function is the main loop of the Arduino program, running repeatedly after the setup() function completes. It is responsible for detecting data received from the serial port and displaying it in real-time on the LCD screen.
void loop()
{
  int i = 0,j=0;
  String temp;
  if(Serial.available() > 0)//Serial port receives data
  {
      r_data = Serial.readString();//Obtain the data received by the serial port
      Serial.println(r_data);
      //Serial.println(r_data.length());
      my_lcd.fillRect(0, 40, my_lcd.width(), my_lcd.height()-40,TFT_BLACK);
      if((r_data.length()-1)<30)
      {
        my_lcd.drawString(r_data,5,40,2);
      }
      else
      {
        for(i=0; i<=((r_data.length()-1)/29); i++)
        {
          j = r_data.length()-i*29;
          if(j<29)
          {
              temp = r_data.substring(29*i);
          }
          else
          {
            temp = r_data.substring(29*i,29*i+29);
          }
          my_lcd.drawString(temp,5,40+15*i,2);
        }
      }
  }
  delay(1000);
}
¶ Serial Data Detection
if(Serial.available() > 0)
Serial.available(): Returns the number of bytes currently readable in the serial port buffer- When data is available for reading (greater than 0), the data processing flow is entered
¶ Data Reading
r_data = Serial.readString();
Serial.readString(): Reads string data from the serial port until a timeout or newline character is encountered- Stores the read data in the
r_datastring variable - The received data is then echoed back to the serial monitor via
Serial.println(r_data)for debugging purposes
¶ Display Area Clearing
my_lcd.fillRect(0, 40, my_lcd.width(), my_lcd.height()-40, TFT_BLACK);
Fills the screen area starting from y=40 with black to clear previously displayed received data, preparing for new data display.
¶ Short Text Display (Less than 30 Characters)
if((r_data.length()-1)<30)
{
  my_lcd.drawString(r_data,5,40,2);
}
When the received data length (minus 1) is less than 30 characters, it is displayed completely at coordinates (5, 40) with font size 2.
¶ Long Text Wrapped Display (30 Characters or More)
else
{
  for(i=0; i<=((r_data.length()-1)/29); i++)
  {
    j = r_data.length()-i*29;
    if(j<29)
    {
        temp = r_data.substring(29*i);
    }
    else
    {
      temp = r_data.substring(29*i,29*i+29);
    }
    my_lcd.drawString(temp,5,40+15*i,2);
  }
}
When the received data is long, the program automatically splits it into lines of up to 29 characters each for display:
-
Loop Count Calculation:
for(i=0; i<=((r_data.length()-1)/29); i++)- Calculates how many lines the data needs to be split into based on total data length
- Each line contains at most 29 characters
-
Remaining Characters Calculation:
j = r_data.length()-i*29- Calculates the number of remaining characters after the current line
-
Substring Extraction:
- When remaining characters
jis less than 29:temp = r_data.substring(29*i)extracts all characters from the start position to the end - Otherwise:
temp = r_data.substring(29*i, 29*i+29)extracts 29 characters for the current line
- When remaining characters
-
Wrapped Display:
my_lcd.drawString(temp, 5, 40+15*i, 2)- Each line starts at Y coordinate 40, with 15 pixels spacing between lines
- Font size is 2 for clear readability on the screen
¶ Loop Delay
delay(1000);
Delays 1000 milliseconds (1 second) after each loop cycle to reduce CPU usage while ensuring timely response to serial data.
¶ Summary
This example program demonstrates the integration of ESP32 UART serial communication and TFT LCD screen through the following steps:
- Initialization: Configures the serial port baud rate to 115200, initializes the LCD screen, and displays the initial welcome interface
- Data Send Demonstration: Shows various formatting methods for serial monitor output, including different number bases, floating point precision, character and string output
- Data Receive and Display: Loops to detect serial data reception, displays the received data on the LCD screen in real-time, with automatic text wrapping support
Key functions used in the program:
Serial.begin(): Initializes the serial port and sets the baud rateSerial.println(): Sends data with automatic newlineSerial.print(): Sends data (without newline), supports concatenated outputSerial.available(): Checks if there is data available in the serial port bufferSerial.readString(): Reads string data from the serial portmy_lcd.begin(): Initializes the LCD screenmy_lcd.setRotation(): Sets screen rotation anglemy_lcd.fillScreen(): Fills the entire screen with a specified colormy_lcd.fillRect(): Fills a rectangular area with a specified colormy_lcd.drawString(): Draws a string at a specified positionString.substring(): Extracts a substring
¶ Modification Guide
If you need to modify the code display behavior, you can refer to the following aspects for adjustment:
-
Modify Serial Baud Rate:
- Change the baud rate parameter in
Serial.begin(115200), such as9600,38400, etc.
- Change the baud rate parameter in
-
Modify Screen Rotation:
- Adjust the parameter in
my_lcd.setRotation(0)(0-3) to change the screen display orientation
- Adjust the parameter in
-
Modify Initial Display Content:
- Edit the string content in
my_lcd.drawString()to customize the welcome message
- Edit the string content in
-
Modify Text Color:
- Change the color parameter in
my_lcd.setTextColor(), such asTFT_RED,TFT_BLUE, etc.
- Change the color parameter in
-
Modify Line Split Character Count:
- Adjust the
29character limit in the code to change the maximum characters per line
- Adjust the
-
Modify Refresh Frequency:
- Change the delay value in
delay(1000)to adjust the data detection interval
- Change the delay value in
-
Add New Formatted Outputs:
- Add new
Serial.println()orSerial.print()calls insetup()to test more output formats
- Add new