¶ WiFi STA Connection Test Example
This example program demonstrates the complete process of connecting to WiFi using the ESP32 development board in Station (STA) mode. It displays the connection status via the TFT LCD screen and shows network information upon successful connection, including SSID, IP address, and MAC address.
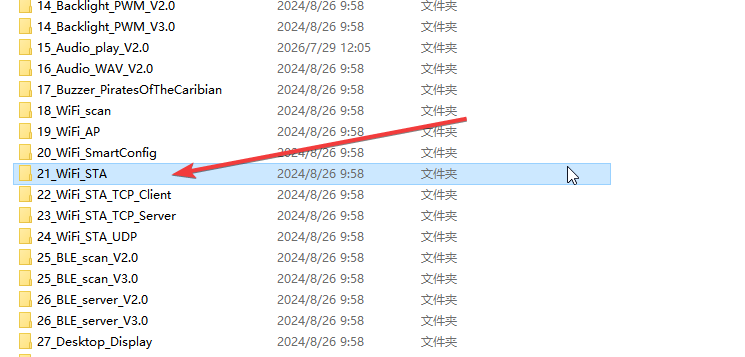
¶ Code Explanation
This example code is based on the ESP32-WROOM-32E. The operation logic is applicable to all ESP32 series development boards.
¶ Basic Configuration (Brief)
The following sections cover the program initialization and core configuration parts:
#include <TFT_eSPI.h>
#include <WiFi.h>

//Manually modifying parameters
const char *ssid = "ssid";
const char *password = "password";

char t_buf[100] = {0};

int i = 0;

TFT_eSPI my_lcd = TFT_eSPI();
- Library Inclusion: Includes
TFT_eSPI.h(screen driver library) andWiFi.h(WiFi functionality library) for LCD display and network connection features, respectively. - WiFi Credentials: Defines
ssidandpasswordvariables to store the WiFi network name and password to connect to. Users need to manually modify these according to their environment. - Buffer and Variables: Defines a character array
t_buffor formatted string storage and an integerifor connection timeout counting. - Object Instantiation: Creates a
TFT_eSPIobjectmy_lcdas the entry point for screen operations.
¶ setup() Function Details
The setup() function completes the screen initialization, WiFi configuration, and connection attempt. It runs once when the ESP32 is powered on or reset.
void setup()
{
  Serial.begin(115200);
  my_lcd.begin();
  my_lcd.setRotation(0);
  my_lcd.fillScreen(TFT_WHITE);
  my_lcd.setTextColor(TFT_RED);
  WiFi.mode(WIFI_STA);
  WiFi.setSleep(false);
  my_lcd.drawString("Start connecting to WiFi...", 22,85,2);
  WiFi.begin(ssid, password);
  while(WiFi.status()!= WL_CONNECTED)
  {
      i++;
      delay(500);
      Serial.print(".");
      if(i>360)
      {
        break;
      }
  }
  if(i>360)
  {
    while(1)
    {
      my_lcd.fillRect(22, 85, my_lcd.width()-1, 25,TFT_WHITE);
      delay(500);
      my_lcd.drawString("connection failed!!!", 22,85,2);
      delay(500);
    }
  }
  else
  {
     my_lcd.fillRect(22, 85, my_lcd.width()-1, 25,TFT_WHITE);
     my_lcd.setTextColor(TFT_GREEN);
     my_lcd.drawString("Connection successful!!!", 22,85,2);
     my_lcd.setTextColor(TFT_BLUE);
     sprintf(t_buf, "SSID : %s", ssid);
     my_lcd.drawString(t_buf, 22,105,2);
     sprintf(t_buf, "  IP : %s", WiFi.localIP().toString().c_str());
     my_lcd.drawString(t_buf, 22,125,2);
     sprintf(t_buf, " MAC : %s", WiFi.macAddress().c_str());
     my_lcd.drawString(t_buf, 22,145,2);
  }
}
¶ Screen and Serial Initialization
Serial.begin(115200);
my_lcd.begin();
my_lcd.setRotation(0);
my_lcd.fillScreen(TFT_WHITE);
Serial.begin(115200): Sets the serial baud rate to 115200 for debug message output.my_lcd.begin(): Initializes the TFT screen.my_lcd.setRotation(0): Sets the screen orientation to the default (portrait/landscape mode 0).my_lcd.fillScreen(TFT_WHITE): Fills the entire screen with white as the background.
¶ WiFi Configuration and Connection
WiFi.mode(WIFI_STA);
WiFi.setSleep(false);
my_lcd.drawString("Start connecting to WiFi...", 22,85,2);
WiFi.begin(ssid, password);
WiFi.mode(WIFI_STA): Sets the ESP32 to Station (client) mode to connect to a router.WiFi.setSleep(false): Disables WiFi sleep mode to ensure connection stability (optional optimization).WiFi.begin(ssid, password): Starts attempting to connect to the specified WiFi network.
¶ Connection Wait and Timeout
while(WiFi.status()!= WL_CONNECTED)
{
    i++;
    delay(500);
    Serial.print(".");
    if(i>360)
    {
      break;
    }
}
This is a loop-wait process used to check the WiFi connection status:
- Loop Condition: Continuously checks if
WiFi.status()equalsWL_CONNECTED. - Timing Mechanism: Delays 500 milliseconds per loop and increments the counter
iby 1. - Timeout Handling: When
i > 360(approximately 180 seconds), it forcibly exits the loop to prevent the program from waiting indefinitely.
¶ Result Handling: Connection Failed
if(i>360)
{
  while(1)
  {
    my_lcd.fillRect(22, 85, my_lcd.width()-1, 25,TFT_WHITE);
    delay(500);
    my_lcd.drawString("connection failed!!!", 22,85,2);
    delay(500);
  }
}
If the connection times out, the program enters an infinite loop:
- It flashes a "connection failed!!!" message on the screen.
- The user needs to check the WiFi credentials or network status and then reset the device.
¶ Result Handling: Connection Successful
else
{
   my_lcd.fillRect(22, 85, my_lcd.width()-1, 25,TFT_WHITE);
   my_lcd.setTextColor(TFT_GREEN);
   my_lcd.drawString("Connection successful!!!", 22,85,2);
   my_lcd.setTextColor(TFT_BLUE);
   sprintf(t_buf, "SSID : %s", ssid);
   my_lcd.drawString(t_buf, 22,105,2);
   sprintf(t_buf, "  IP : %s", WiFi.localIP().toString().c_str());
   my_lcd.drawString(t_buf, 22,125,2);
   sprintf(t_buf, " MAC : %s", WiFi.macAddress().c_str());
   my_lcd.drawString(t_buf, 22,145,2);
}
If the connection is successful, the program displays the network information on the screen:
- Clears the connection status message area.
- Displays "Connection successful!!!" in green.
- Displays the following sequentially in blue:
- SSID: The name of the currently connected WiFi network.
- IP: The local area network IP address assigned to the ESP32.
- MAC: The physical hardware address of the ESP32.
¶ loop() Function Details
The loop() function is the main loop of the Arduino program, running indefinitely after setup() is executed.
void loop()
{
  delay(1000);
}
Since this example only demonstrates the connection process, the loop() is empty and only includes a 1-second delay. In actual applications, you can add network-based functional code here (such as an HTTP server, data upload, etc.).
¶ Summary
This example program demonstrates the ESP32's connection process as a WiFi client through the following steps:
- Initialize Screen and Serial Port: Configures display parameters and debug ports.
- Configure WiFi Module: Sets to Station mode and initiates connection.
- Monitor Connection Status: Uses a loop with a timeout mechanism to wait for the connection to complete.
- Provide Feedback:
- Displays detailed network information (SSID, IP, MAC) on success.
- Displays an error message on failure.
Key functions used in the program include:
WiFi.mode(): Sets the WiFi operating mode.WiFi.begin(): Starts the WiFi connection.WiFi.status(): Gets the current connection status.WiFi.localIP(): Gets the device's IP address.WiFi.macAddress(): Gets the device's MAC address.my_lcd.drawString(): Draws text on the screen.sprintf(): Formats strings.
¶ Modification Instructions
If you need to modify the code to suit your own environment, you can refer to the following aspects:
-
Modify WiFi Credentials:
- Change the
ssidandpasswordvariables at the top of the code to your own WiFi name and password.
- Change the
-
Adjust Timeout Period:
- Modify the value in
if(i>360). The current value is 360, representing 180 seconds (360 * 500ms).
- Modify the value in
-
Modify Screen Display Content:
- Change the strings in
my_lcd.drawString()to display custom information. - Adjust the coordinate parameters (x, y) to change the text position.
- Change the strings in
-
Change Display Colors:
- Modify the color parameters in
my_lcd.setTextColor()(e.g.,TFT_RED,TFT_GREEN, etc.).
- Modify the color parameters in
-
Add New Features:
- Add your desired network functional code in the
loop()function.
- Add your desired network functional code in the