¶ OVER VIEW
From previous lessons, we normally write and upload programs within Arduino App Lab. However, thanks to its special dual‑brain architecture, the UNO‑Q works fundamentally differently from common WiFi‑capable boards such as the ESP32 and UNO R4, with major differences in network‑communication logic.
As a result, an alternative implementation approach is required. This guide will walk you through setting up WiFi communication between the UNO‑Q and other development boards.
First, we will explain why this communication feature cannot be directly developed inside Arduino App Lab.
The Arduino UNO Q is a dual-core architecture:
- MPU (Linux side): Runs Debian Linux, handles network communication and complex computation.
- MCU (STM32 side): Runs Zephyr, handles real-time hardware control.
App Lab is designed around a containerized one-click runtime. It packages your Python code into a Docker container and manages the Bridge communication between Linux and MCU for you. This mechanism has the following limitations:
- Fixed Python entry point: App Lab expects the entry point to be App.run() + loop(), not Flask's app.run(). Pasting Flask code directly will cause startup failure.
- Network ports are not exposed: A Flask service inside an App Lab container cannot be accessed directly by an ESP32 on the same LAN, because the port listening method differs from manual execution.
- Restricted Bridge import: Outside App Lab (e.g., in an SSH terminal), directly writing from arduino.app_utils import Bridge will report ModuleNotFoundError, because the arduino package is pre-installed inside the App Lab container and is not installed in the system Python environment.
Therefore, to build a project where ESP32, other boards, and UNO Q communicate and control UNO Q, you must bypass App Lab and instead:
- Linux side: Log in via SSH and manually run the Flask service.
- MCU side: Use Arduino IDE to flash the Sketch separately.
¶ 2. Complete Workflow
-
SSH into UNO Q: ssh arduino@ip
Open PowerShell. For Windows users, there are two ways to launch it: you can search for it directly in the bottom‑left search bar, or navigate to your target folder, hold down the Shift key and right‑click to open PowerShell in this directory.
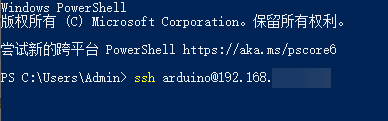
Enter the login password you previously set for the UNO‑Q. If the connection fails, verify whether the IP address is correct. If you have re‑flashed the board, a key mismatch may occur. In this case, you need to manually clear the old connection records.
ssh-keygen -R 192.168.xxx.xxx
- Create a virtual environment:
Enter the following commands in sequence.my_flask_projectis the folder name and can be modified as needed. The finalvenvinpython3 -m venv venvis the virtual‑environment folder name, which can also be customized.
   mkdir ~/my_flask_project

    cd ~/my_flask_project

   python3 -m venv venv

   source venv/bin/activate
If you are using it for the first time, you need to install Python3. Please follow the steps below.
  sudo apt update

sudo apt install python3 python3-venv python3-pip -y
- Install dependencies:
pip install flask

pip install https://github.com/arduino/app-bricks-  py/releases/download/release%2F0.8.0/arduino_app_bricks-0.8.0-py3-none-any.whl

pip install numpy watchdog
- Write app.py and run it:
app is the file name of the Python code. You can customize this name, but the name used in the running command must match the actual file name.
nano app.py

python3 app.py
-
Use Arduino IDE to flash the MCU Sketch to UNO Q; select Arduino UNO Q under Tools > Board.
-
Use Arduino IDE to flash the ESP32 client code; select ESP32 Dev Module under Tools > Board.
-
Browser test: http://192.xxx.xxx.xxx:5000/led/on
¶ 3. Overall Architecture
The data flow is as follows:
  ESP32 (client)

↓ Sends HTTP GET /led/on or /led/off

UNO Q Linux side (Flask server, port 5000)

↓ Calls Bridge.call("set_led_state", True/False)

UNO Q MCU side (Arduino Sketch)

↓ Executes digitalWrite(LED_BUILTIN, LOW/HIGH)

Onboard LED
Data flow explanation: The ESP32 sends an HTTP request over WiFi to the UNO Q's Linux system. The Flask server on Linux parses the request and calls a function registered on the MCU via the internal Bridge. The MCU executes digitalWrite to control the LED.
¶ 4. SSH Connection
¶ 4.1 Confirm UNO Q Is Online
UNO Q needs to be connected to the LAN via WiFi or Ethernet cable to be accessible via SSH. If you previously connected it through App Lab, it is already online; otherwise, configure WiFi in the App Lab terminal.
¶ 4.2 Get the UNO Q IP Address
In the App Lab terminal, run:
ip addr show
Or:
hostname -I
Find an address of the form 192.168.x.x and write it down.
¶ 4.3 SSH Login from Your Computer
Open your computer's terminal (PowerShell or CMD on Windows, Terminal on Mac/Linux) and enter:
ssh arduino@ip
For example:
ssh arduino@192.168.102.51
On the first connection, you'll be asked whether to trust the host. Type yes, then enter the password (the one you set during App Lab initialization by default).
¶ 4.4 What Success Looks Like
After a successful login, the prompt will change to something like:
arduino@ELEGOO:~$
This means you have entered the UNO Q Linux system and can proceed with the following operations.
¶ 4.5 Exit SSH
Type exit to disconnect.
¶ 5. Creating a Virtual Environment
If you have already completed this step following the tutorial above, you do not need to repeat the whole process. If not, please complete the creation procedure by following the steps.
¶ 5.1 Why a Virtual Environment Is Needed
The Debian system on UNO Q follows PEP 668. Running pip3 install flask directly will produce:
error: externally-managed-environment
You must create a virtual environment to isolate dependencies.
¶ 5.2 Install python3-venv
If you get ensurepip is not available when creating the environment, first install the component package:
sudo apt update

sudo apt install python3-venv
¶ 5.3 Create and Activate the Virtual Environment
Create the project directory:
mkdir ~/my_flask_project

cd ~/my_flask_project
Create the virtual environment:
python3 -m venv venv
Activate the virtual environment (the prompt will show (venv) after success):
source venv/bin/activate
Install Flask:
pip install flask
Note: Every time you open a new SSH terminal, you must first run source ~/my_flask_project/venv/bin/activate to reactivate the environment.
¶ 6. Download and Install the arduino Package
¶ 6.1 Why It's Needed
The Python code on the Linux side needs to call MCU functions through Bridge, which requires importing arduino.app_utils. This package is not published on public PyPI, so you must manually install the official wheel file from GitHub.
¶ 6.2 Installation Command
With the virtual environment activated, run:
pip install https://github.com/arduino/app-bricks-py/releases/download/release%2F0.8.0/arduino_app_bricks-0.8.0-py3-none-any.whl

pip install numpy watchdog
¶ 6.3 Verification
python3 -c "from arduino.app_utils import App, Bridge; print('OK')"
If no error is reported, the package was installed successfully.
¶ 7. Basic Operations in the Virtual Environment
¶ 7.1 Create a Python File
nano app.py
nano app.py creates a Python file named app. After entering this command in the terminal, you will enter the file‑editing interface, where you can paste the corresponding code.
¶ 7.2 Paste Code
In nano, right-click to paste, or use Ctrl+Shift+V (depending on your terminal).
Programming directly within the UNO‑Q terminal may not be as convenient as on a Windows PC. Alternatively, you can write code on your local computer and upload it to the UNO‑Q remotely.
scp your_local_path\app.py arduino@192.168.x.x:~/your_file/
scp C:\Users\Admin\Desktop\app.py arduino@192.168.172.187:~/my_flask_project/
¶ 7.3 Save and Exit
- Ctrl + O → Enter → Save
- Ctrl + X → Exit
¶ 7.4 Run the Flask Service
python3 app.py
You should see output similar to:
- Running on all addresses (0.0.0.0)
- Running on http://127.0.0.1:5000
- Running on http://192.168.201.187:5000
Write down 192.168.201.187; you will need it for the ESP32 later.
¶ 7.5 View Files in the Current Directory
ls -la
¶ 7.6 View Current IP
hostname -I
¶ 7.7 Edit an Existing File
nano app.py
¶ 7.8 Stop a Running Program
Press Ctrl + C.
¶ CODE
¶ 8. Flask Server Code (Linux Side)
Create app.py with the following content:
from flask import Flask
from arduino.app_utils import App, Bridge
import threading

app = Flask(__name__)

@app.route('/led/on')
def led_on():
    Bridge.call("set_led_state", True)
    return "LED ON"

@app.route('/led/off')
def led_off():
    Bridge.call("set_led_state", False)
    return "LED OFF"

def run_flask():
    app.run(host='0.0.0.0', port=5000)

threading.Thread(target=run_flask, daemon=True).start()
App.run()
Run:
python3 app.py
¶ 9. Browser Testing Methods
¶ 9.1 Test in a Computer Browser
Make sure the Flask service is running, then visit in your computer's browser:
http://192.168.201.187:5000/led/on
- If it shows LED ON and the onboard LED lights up → the entire chain is working.
- If it shows LED ON but the LED doesn't light up → check the MCU's LED level logic (swap LOW and HIGH).
¶ 9.2 Turn-Off Test
http://192.168.201.187:5000/led/off
If the UNO Q LED turns on and off, the program chain is working correctly. If not, please recheck.
¶ 9.3 Test with curl in the SSH Terminal
curl http://localhost:5000/led/on
curl http://localhost:5000/led/off
¶ 10. MCU Side Arduino Sketch (Flash with Arduino IDE)
¶ 10.1 Preparation
- Open Arduino IDE.
- Install the Arduino UNO Q or Zephyr board support in Boards Manager.
- Install Arduino_RouterBridge in Library Manager.
- Select Arduino UNO Q under Tools > Board, and the corresponding port under Tools > Port.
¶ 10.2 Sketch Code
#include "Arduino_RouterBridge.h"

void set_led_state(bool state) {
    // UNO Q onboard LED is active LOW
    digitalWrite(LED_BUILTIN, state ? LOW : HIGH);
}

void setup() {
    pinMode(LED_BUILTIN, OUTPUT);
    digitalWrite(LED_BUILTIN, HIGH); // Initially off

    Bridge.begin();
    Bridge.provide("set_led_state", set_led_state);
}

void loop() {
    // Empty loop, waiting for Bridge calls
}
¶ 10.3 Flashing
If you are not connecting UNO Q directly via USB, choose the wireless connection option when selecting the port. Click Upload and wait for compilation and upload to complete.
Key point: The function name "set_led_state" registered in Bridge.provide must match exactly what is called in Bridge.call("set_led_state", ...) on the Python side, including case.
¶ 11. ESP32 Side Code, Flashing, and Testing
¶ 11.1 Important: Switch the Board
ESP32 and UNO Q are two different boards. In Arduino IDE:
- Select ESP32 Dev Module (or your actual ESP32 model) under Tools > Board.
- Select the ESP32's corresponding port under Tools > Port.
If the board is still set to UNO Q, compilation will report WiFi.h: No such file or directory.
¶ 11.2 ESP32 Code
#include <WiFi.h>
#include <HTTPClient.h>

const char* ssid = "Your WiFi Name";
const char* password = "Your WiFi Password";
const char* unoq_ip = "192.168.201.187"; // Replace with your UNO Q IP

void setup() {
  Serial.begin(115200);
  WiFi.begin(ssid, password);
  while (WiFi.status() != WL_CONNECTED) {
    delay(500);
    Serial.print(".");
  }
  Serial.println("\nWiFi Connected");
}

void loop() {
  HTTPClient http;

  // Turn on
  http.begin("http://" + String(unoq_ip) + ":5000/led/on");
  http.GET();
  http.end();
  delay(5000);

  // Turn off
  http.begin("http://" + String(unoq_ip) + ":5000/led/off");
  http.GET();
  http.end();
  delay(5000);
}
¶ 11.3 Flashing and Verification
- Modify ssid, password, and unoq_ip.
- Click Upload to flash to the ESP32.
- Open the serial monitor (baud rate 115200). After seeing WiFi Connected, the ESP32 will toggle the UNO Q LED every 5 seconds.
¶ 11.4 Notes
- Same LAN: ESP32 and UNO Q must connect to the same router.
- Keep Flask running: The Flask service in the SSH terminal must keep running for the ESP32 to control successfully.
- IP may change: 192.168.201.187 is assigned by DHCP and may change after a reboot. Reconfirm with hostname -I.
- Serial monitor: If the ESP32 keeps printing dots without showing WiFi Connected, the WiFi name or password is incorrect.
¶ 12. Common Troubleshooting
| Problem | Cause | Solution |
|---|---|---|
| externally-managed-environment | System Python is protected | Use a virtual environment |
| ensurepip is not available | Missing python3-venv | sudo apt install python3-venv |
| ModuleNotFoundError: No module named 'arduino' | arduino package not installed | Install the GitHub wheel file |
| WiFi.h: No such file or directory | IDE board is set to UNO Q | Switch to ESP32 board |
| Web page shows LED ON but LED doesn't light | LED level logic is reversed | Swap LOW and HIGH |
| ESP32 cannot connect to UNO Q | IP changed or Flask not running | Confirm IP with hostname -I, check Flask process |
| Flask fails to start, port in use | Port 5000 occupied by another program | Change port or kill the occupying process |
| curl works but ESP32 doesn't | ESP32 and UNO Q on different subnets | Check router settings |
¶ 13. Code Explanation
¶ 13.1 Python Code Explanation
Code block: Import modules
from flask import Flask
from arduino.app_utils import App, Bridge
import threading
Function: Import required modules
from flask import Flask: Imports the Flask framework to create a lightweight web server that receives HTTP requests from the ESP32.from arduino.app_utils import App, Bridge: Imports App and Bridge from the official Arduino Python package. App keeps the program running, and Bridge handles communication with the MCU.import threading: Imports the threading module so the Flask service and the App main loop can run simultaneously.
Code block: Create Flask instance
app = Flask(__name__)
Function: Create the Flask application instance
app = Flask(__name__): Creates a Flask application instance to which all subsequent routes are registered.
Code block: Define the LED-on route
@app.route('/led/on')
def led_on():
    Bridge.call("set_led_state", True)
    return "LED ON"
Function: Define the /led/on route
@app.route('/led/on'): Defines a route triggered when a browser or the ESP32 visits /led/on.Bridge.call("set_led_state", True): Calls the set_led_state function registered on the MCU with True (turn on).return "LED ON": Returns the string LED ON to the requester.
Code block: Define the LED-off route
@app.route('/led/off')
def led_off():
    Bridge.call("set_led_state", False)
    return "LED OFF"
Function: Define the /led/off route
@app.route('/led/off'): Defines a route triggered when /led/off is visited.Bridge.call("set_led_state", False): Calls the MCU function with False (turn off).return "LED OFF": Returns the string LED OFF to the requester.
Code block: Start Flask and App
def run_flask():
    app.run(host='0.0.0.0', port=5000)

threading.Thread(target=run_flask, daemon=True).start()
App.run()
Function: Start the Flask service and App main loop
def run_flask():: Defines a function that encapsulates the Flask startup logic.app.run(host='0.0.0.0', port=5000): Makes Flask listen on all network interfaces (0.0.0.0) on port 5000, so any device on the LAN can access it.threading.Thread(target=run_flask, daemon=True).start(): Starts Flask in a new thread. daemon=True means the thread will automatically end when the main program exits.App.run(): Keeps the App framework running so Bridge communication remains available.
¶ 13.2 ESP32 Code Explanation
Code block: Import libraries and configure
#include <WiFi.h>
#include <HTTPClient.h>

const char* ssid = "Your WiFi Name";
const char* password = "Your WiFi Password";
const char* unoq_ip = "192.168.201.187";
Function: Import libraries and define network parameters
#include <WiFi.h>: Imports the ESP32 WiFi library for connecting to wireless networks.#include <HTTPClient.h>: Imports the HTTP client library for sending HTTP requests to UNO Q.const char* ssid = "Your WiFi Name": Enter your router's WiFi name.const char* password = "Your WiFi Password": Enter your WiFi password.const char* unoq_ip = "192.168.201.187": Enter the UNO Q's LAN IP address.
Code block: setup function
void setup() {
  Serial.begin(115200);
  WiFi.begin(ssid, password);
  while (WiFi.status() != WL_CONNECTED) {
    delay(500);
    Serial.print(".");
  }
  Serial.println("\nWiFi Connected");
}
Function: Initialize serial and WiFi connection
Serial.begin(115200): Initializes serial communication at 115200 baud for debugging output.WiFi.begin(ssid, password): Makes the ESP32 start connecting to the specified WiFi.while (WiFi.status() != WL_CONNECTED) { ... }: Loops until the connection succeeds, printing a dot every 500 ms.Serial.println("\nWiFi Connected"): Prints a message after a successful connection.
Code block: loop function
void loop() {
  HTTPClient http;

  http.begin("http://" + String(unoq_ip) + ":5000/led/on");
  http.GET();
  http.end();
  delay(5000);

  http.begin("http://" + String(unoq_ip) + ":5000/led/off");
  http.GET();
  http.end();
  delay(5000);
}
Function: Loop sending HTTP requests to control the LED
HTTPClient http;: Creates an HTTP client object.http.begin("http://" + String(unoq_ip) + ":5000/led/on"): Builds the GET request URL to turn on the LED.http.GET(): Sends the GET request.http.end(): Releases HTTP client resources.delay(5000): Waits 5 seconds before toggling state.- The second half does the same, requesting /led/off to turn it off.
¶ 13.3 MCU Code Explanation
Code block: Import Bridge library
#include "Arduino_RouterBridge.h"
Function: Import the UNO Q Bridge library
#include "Arduino_RouterBridge.h": Imports the UNO Q Bridge library for RPC communication between the Linux side and the MCU side.
Code block: Define the LED control function
void set_led_state(bool state) {
    digitalWrite(LED_BUILTIN, state ? LOW : HIGH);
}
Function: Define the LED control function callable from Linux
void set_led_state(bool state): Defines a function that receives a boolean state and controls the LED.digitalWrite(LED_BUILTIN, state ? LOW : HIGH): The UNO Q onboard LED is active LOW, so state = true outputs LOW (on), otherwise HIGH (off).
Code block: setup function
void setup() {
    pinMode(LED_BUILTIN, OUTPUT);
    digitalWrite(LED_BUILTIN, HIGH);

    Bridge.begin();
    Bridge.provide("set_led_state", set_led_state);
}
Function: Initialize pins and Bridge
pinMode(LED_BUILTIN, OUTPUT): Sets the onboard LED pin to output mode.digitalWrite(LED_BUILTIN, HIGH): Initially turns off the LED.Bridge.begin(): Initializes Bridge communication.Bridge.provide("set_led_state", set_led_state): Registers the set_led_state function with Bridge so the Linux side can call it by this name.
Code block: loop function
void loop() {
    // Empty loop, waiting for Bridge calls
}
Function: Empty loop waiting for calls
void loop() { }: Empty loop. The MCU only needs to wait for calls from the Linux side and does not need to do anything on its own.
¶ 14. Code Extensions
¶ 14.1 Controlling Multiple Pins
If you want to control other LEDs or relays connected to the UNO Q, you can register more functions on the MCU side:
void set_pin_13(bool state) {
    digitalWrite(13, state ? HIGH : LOW);
}

void set_pin_12(bool state) {
    digitalWrite(12, state ? HIGH : LOW);
}
Then register them in setup():
Bridge.provide("set_pin_13", set_pin_13);
Bridge.provide("set_pin_12", set_pin_12);
Add the corresponding routes on the Python side:
@app.route('/pin13/on')
def pin13_on():
    Bridge.call("set_pin_13", True)
    return "PIN13 ON"

@app.route('/pin13/off')
def pin13_off():
    Bridge.call("set_pin_13", False)
    return "PIN13 OFF"
¶ 14.2 Passing Numeric Parameters
If you want the ESP32 to send a brightness value (PWM), you can change it to:
MCU side:
void set_led_brightness(int value) {
    analogWrite(LED_BUILTIN, value);
}

Bridge.provide("set_led_brightness", set_led_brightness);
Python side:
@app.route('/led/brightness/<int:value>')
def led_brightness(value):
    Bridge.call("set_led_brightness", value)
    return f"Brightness set to {value}"
ESP32 accesses:
http://192.168.201.187:5000/led/brightness/128
¶ 14.3 Adding a Status Query Interface
You can add a route on the Python side to query the current LED state:
led_state = False

@app.route('/led/on')
def led_on():
    global led_state
    led_state = True
    Bridge.call("set_led_state", True)
    return "LED ON"

@app.route('/led/status')
def led_status():
    return "LED is ON" if led_state else "LED is OFF"
¶ 14.4 Reading Sensor Data from UNO Q with ESP32
If a sensor is connected to the UNO Q, you can register a read function on the MCU side:
float read_temperature() {
    return analogRead(A0) * 0.1;
}

Bridge.provide("read_temperature", read_temperature);
Python side:
@app.route('/sensor/temperature')
def temperature():
    value = Bridge.call("read_temperature")
    return f"Temperature: {value}"
The ESP32 can then retrieve temperature data via HTTP GET.
¶ 14.5 Notes
- Bridge calls are synchronous; the Python side will wait for the MCU to return a result.
- Do not call Bridge.call again inside an MCU Bridge callback, as this may cause a deadlock.
- Refer to the official UNO Q pinout for pin numbering to avoid using special-function pins.
¶ 15. Summary
| Component | Development Method | Responsibility |
|---|---|---|
| UNO Q Linux | SSH + virtual environment + Flask | Receives HTTP requests, calls Bridge |
| UNO Q MCU | Arduino IDE flashing Sketch | Registers Bridge functions, controls LED |
| ESP32 | Arduino IDE flashing | Sends HTTP requests |
When all three work together, you have a complete chain where the ESP32 remotely controls the UNO Q onboard LED over WiFi.
¶ Appendix: Complete File List
| File/Component | Location | Purpose |
|---|---|---|
| app.py | UNO Q ~/my_flask_project/ | Flask server, receives ESP32 requests |
| venv/ | UNO Q ~/my_flask_project/ | Python virtual environment |
| MCU Sketch | Arduino IDE flashed to UNO Q | Registers set_led_state Bridge function |
| ESP32 Sketch | Arduino IDE flashed to ESP32 | Sends HTTP GET requests |