¶ overview
Only perform the following board‑flashing steps if the UNO‑Q fails to boot or enter the system due to unexpected interruption during firmware update or after executing certain Linux commands. This operation is not recommended under other circumstances.
Go to the website, locate Arduino Flasher CLI, download the version compatible with your computer operating system to your local drive, and extract the downloaded archive.
https://www.arduino.cc/en/software/#app-lab-section
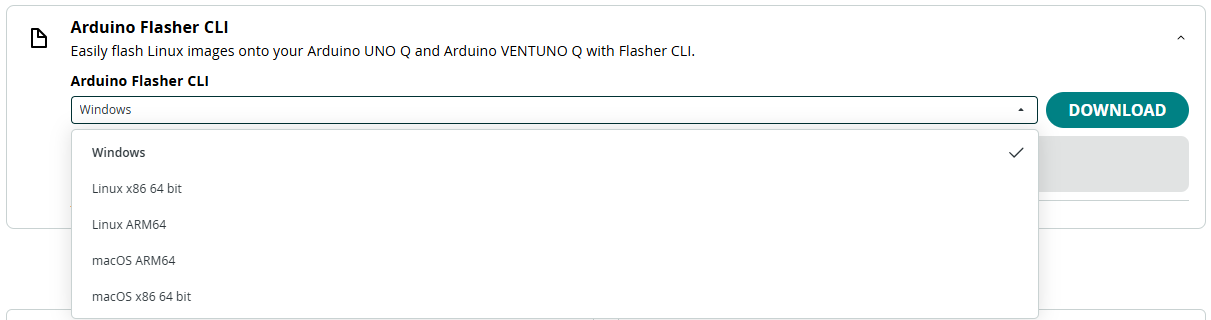
After extracting the files locally, you will see three files inside the folder, including an executable exe file. It cannot be launched by double‑clicking; you need to run it via the CMD command‑line.
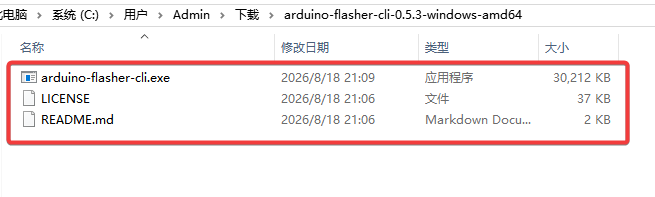
Hold down the Shift key and right‑click inside this folder to open a PowerShell window. Enter the command:
.\arduino-flasher-cli.exe flash latest
Input yes when the confirmation prompt appears, and wait for the driver package download to finish.

After the download finishes, the tool will wait for the UNO‑Q connection to start flashing. Here comes the most critical step: power off the UNO‑Q, then short the two pins of JCTL (EDL) on the board using a jumper cap or Dupont wire.
These pins are located on the header at the top‑left corner of UNO‑Q, the two pins closest to the main chip. You can also refer to the silkscreen label and locate the two pins in the same column as AREF.
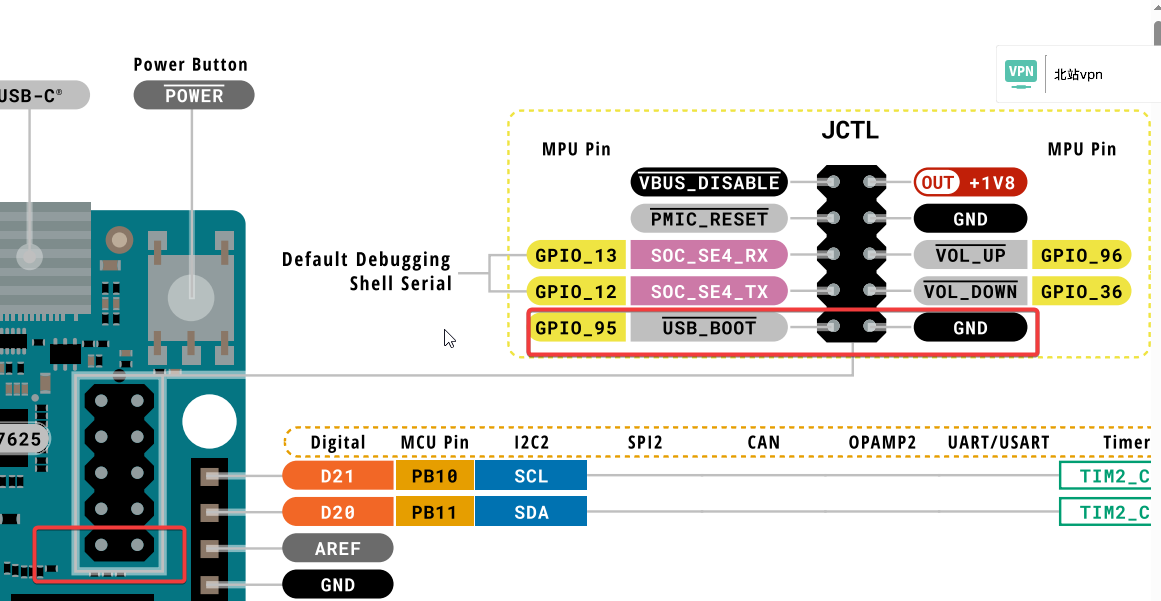
Power on the UNO‑Q after confirming the short‑circuit connection. The tool will detect the device automatically. If detection fails and flashing does not start, check whether the jumper is properly connected or re‑plug the USB cable.
⚠️Note: Do not close the PowerShell window, otherwise you will need to re‑download resources. Do not disconnect the USB cable during flashing. The flashing process will exit automatically upon completion; please wait for several minutes. If flashing fails, repeat all steps described above.