¶ Boot the system with UNO‑Q
Besides being programmable via Arduino IDE and Arduino App Lab, the UNO‑Q itself is also a micro‑computer.
The UNO‑Q features a dual‑brain architecture: the Qualcomm QRB2210 MPU runs a full Debian Linux system as the main computing unit; the STM32‑MCU handles real‑time I/O, Arduino Sketch execution and hardware peripheral control. The two systems are independent of each other and can work cooperatively.
¶ Mode Introduction (Single‑Board Computer Mode)
The UNO‑Q does not require a Windows or macOS host. Connect a display, keyboard‑mouse and powered docking station, and it will boot directly into the Debian desktop system for use as a mini‑PC.
Supported applications: Web browser, file manager, Python programs, on‑board pre‑installed Arduino App‑Lab, AI inference, network services.
Memory version recommendation: Prefer the 4 GB memory variant. The 2 GB version may stutter when running the desktop GUI and is better suited for headless Arduino operation without a display.
¶ Core Division of Labor
- MPU (Linux main core): Desktop system, networking, AI, Python programs, HDMI video output.
- STM32‑MCU (real‑time secondary core): Arduino sketches, GPIO pins, sensors, motors, on‑board LED3 / LED4, 8×13 dot‑matrix. Linux cannot access MCU pins directly; communication with Arduino must go through the Bridge API.
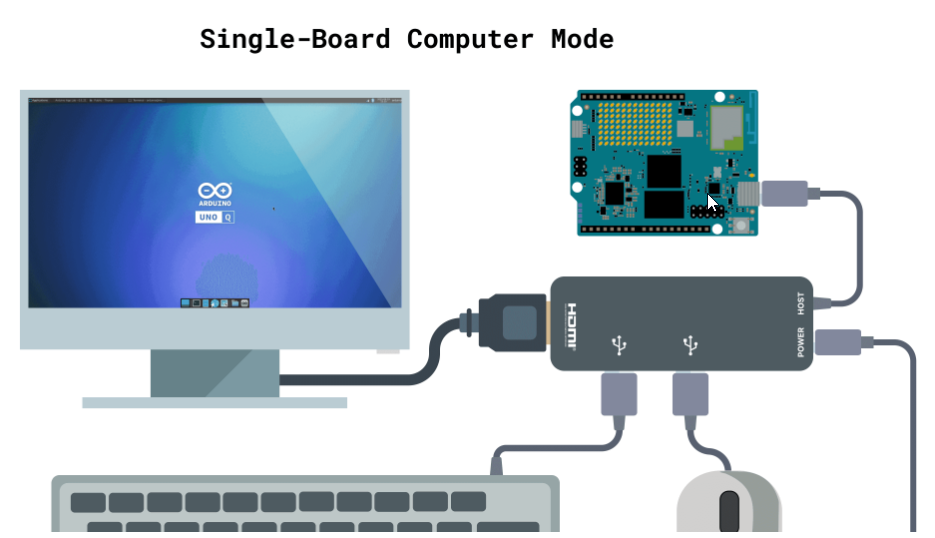
To set up the UNO Q as a single-board computer, you will need the following hardware and software components.
¶ Hardware Requirements
- Arduino® UNO Q
- USB Mouse
- USB Keyboard
- HDMI Display
- Power Supply +5 VDC at 3 A (to power the USB-C dongle)
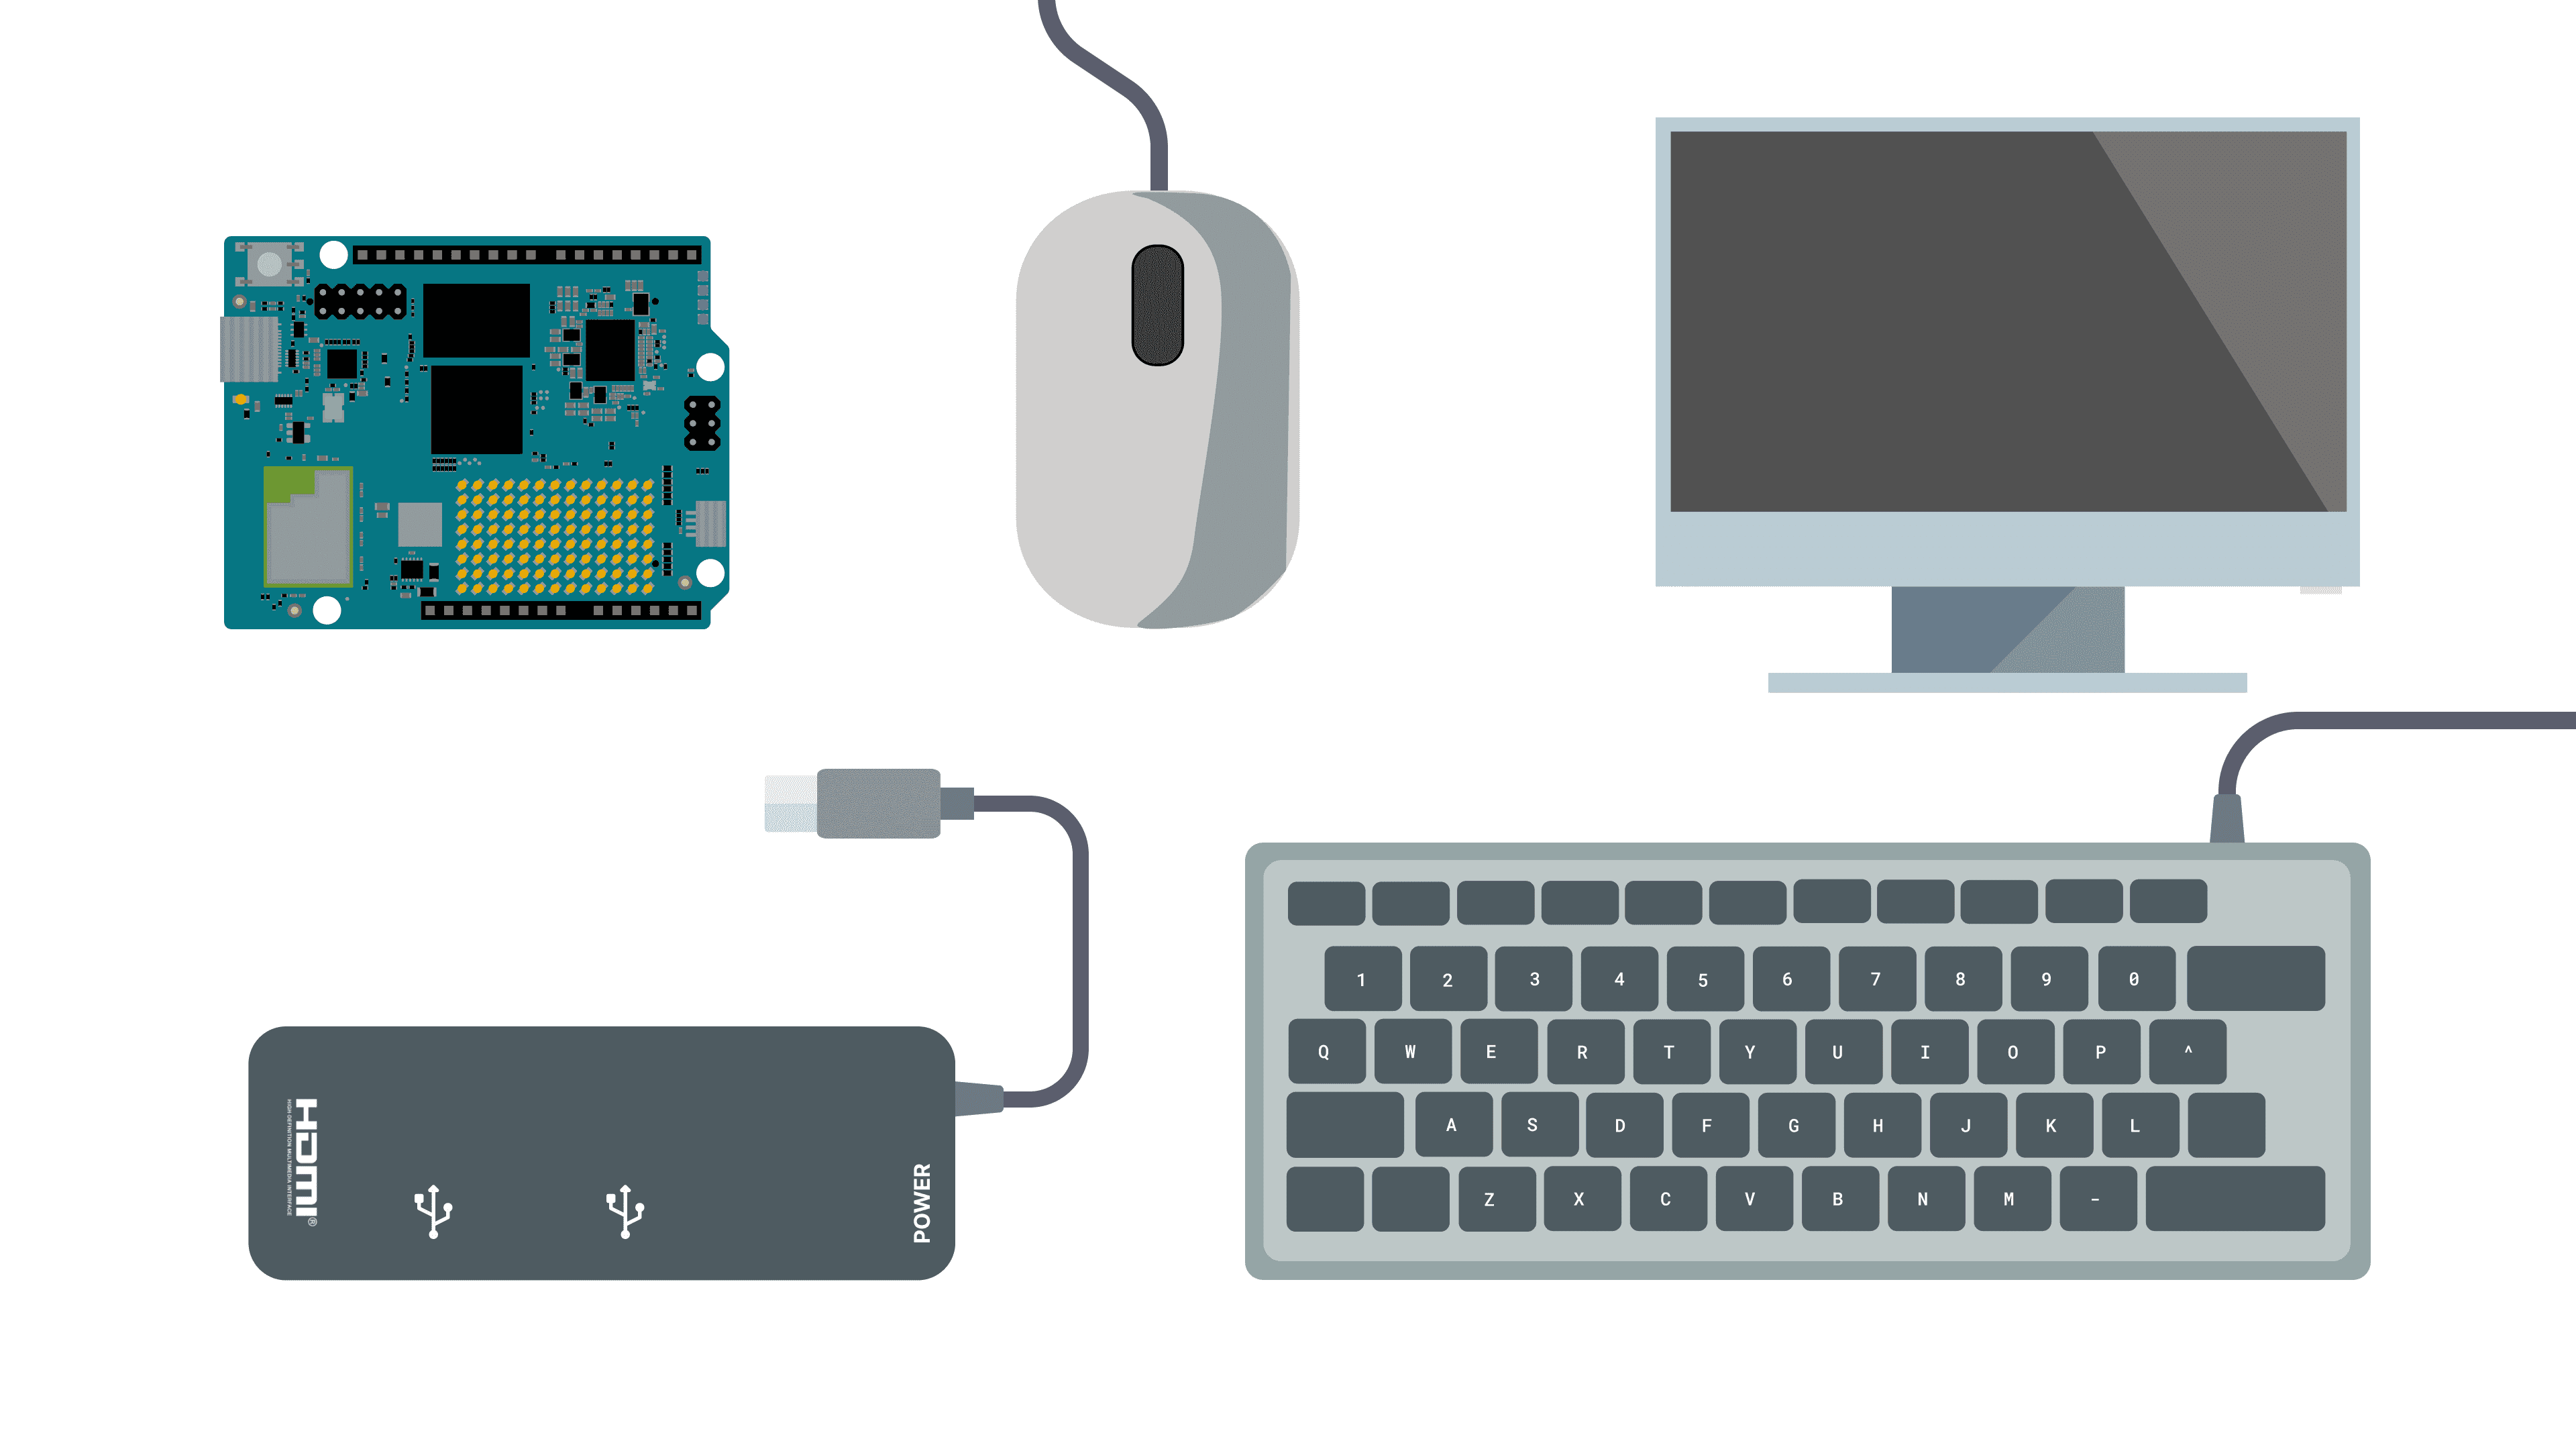
Open the kit box and take out the 5V power supply, 8‑in‑1 docking station, HDMI cable and UNO‑Q controller. The mouse, keyboard and monitor need to be prepared by yourself.
Plug the USB connector of the docking station into the USB port of UNO‑Q. Connect the 5V power adapter to the first USB power port of the docking station.
The kit includes an HDMI cable and an Ethernet cable. Connect one end of the HDMI cable to the docking‑station HDMI port and the other end to your monitor. The Ethernet cable is optional. UNO‑Q has built‑in Wi‑Fi for wireless network access.
If you purchased the 4G kit version, the package contains two 3D‑printed enclosure kits.
First open the 3D PRINTED PROTECTIVE CASE, install the UNO‑Q and secure it with screws. Screws and a screwdriver are included in the kit.
Then open the MINI PC 3D PRINTED INTEGRATED CASE. Place the pre‑assembled UNO‑Q together with the docking station inside, and adjust their position properly.
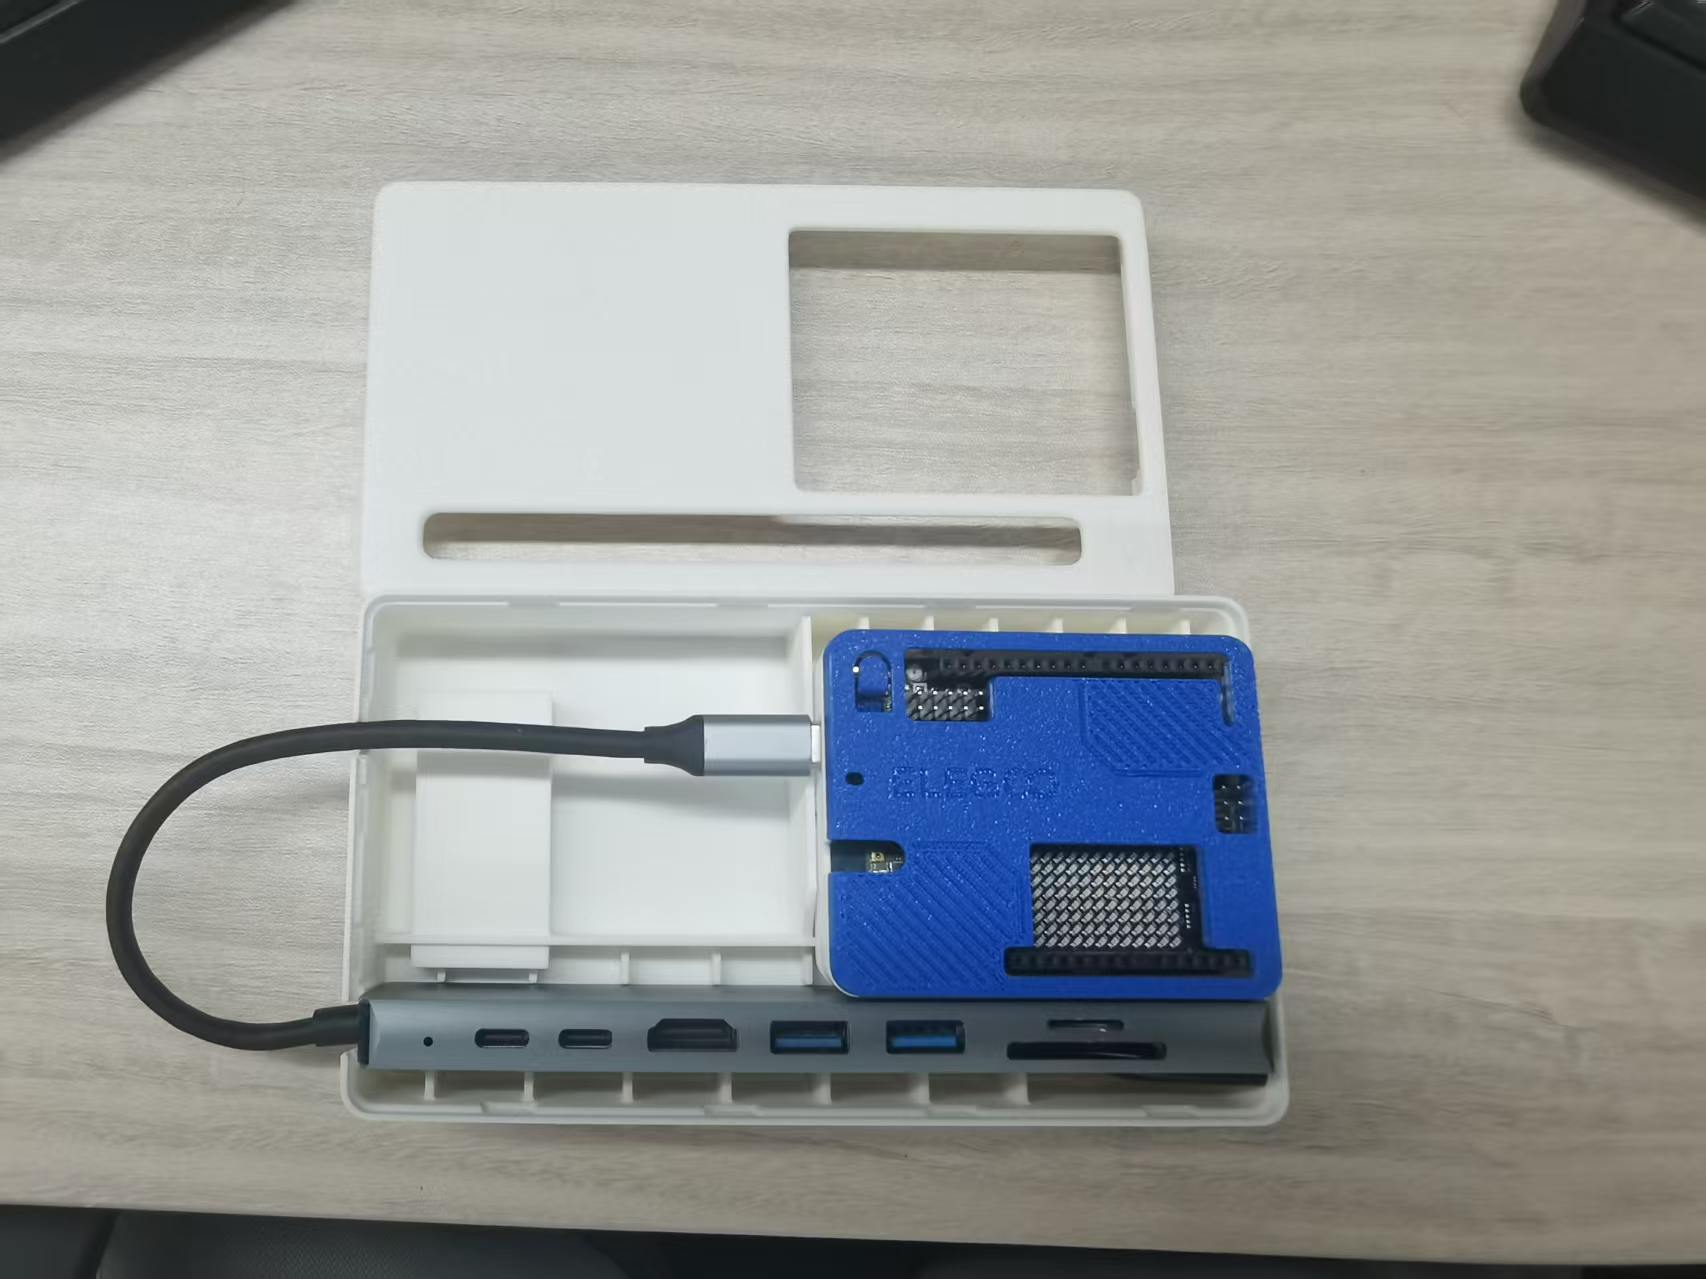
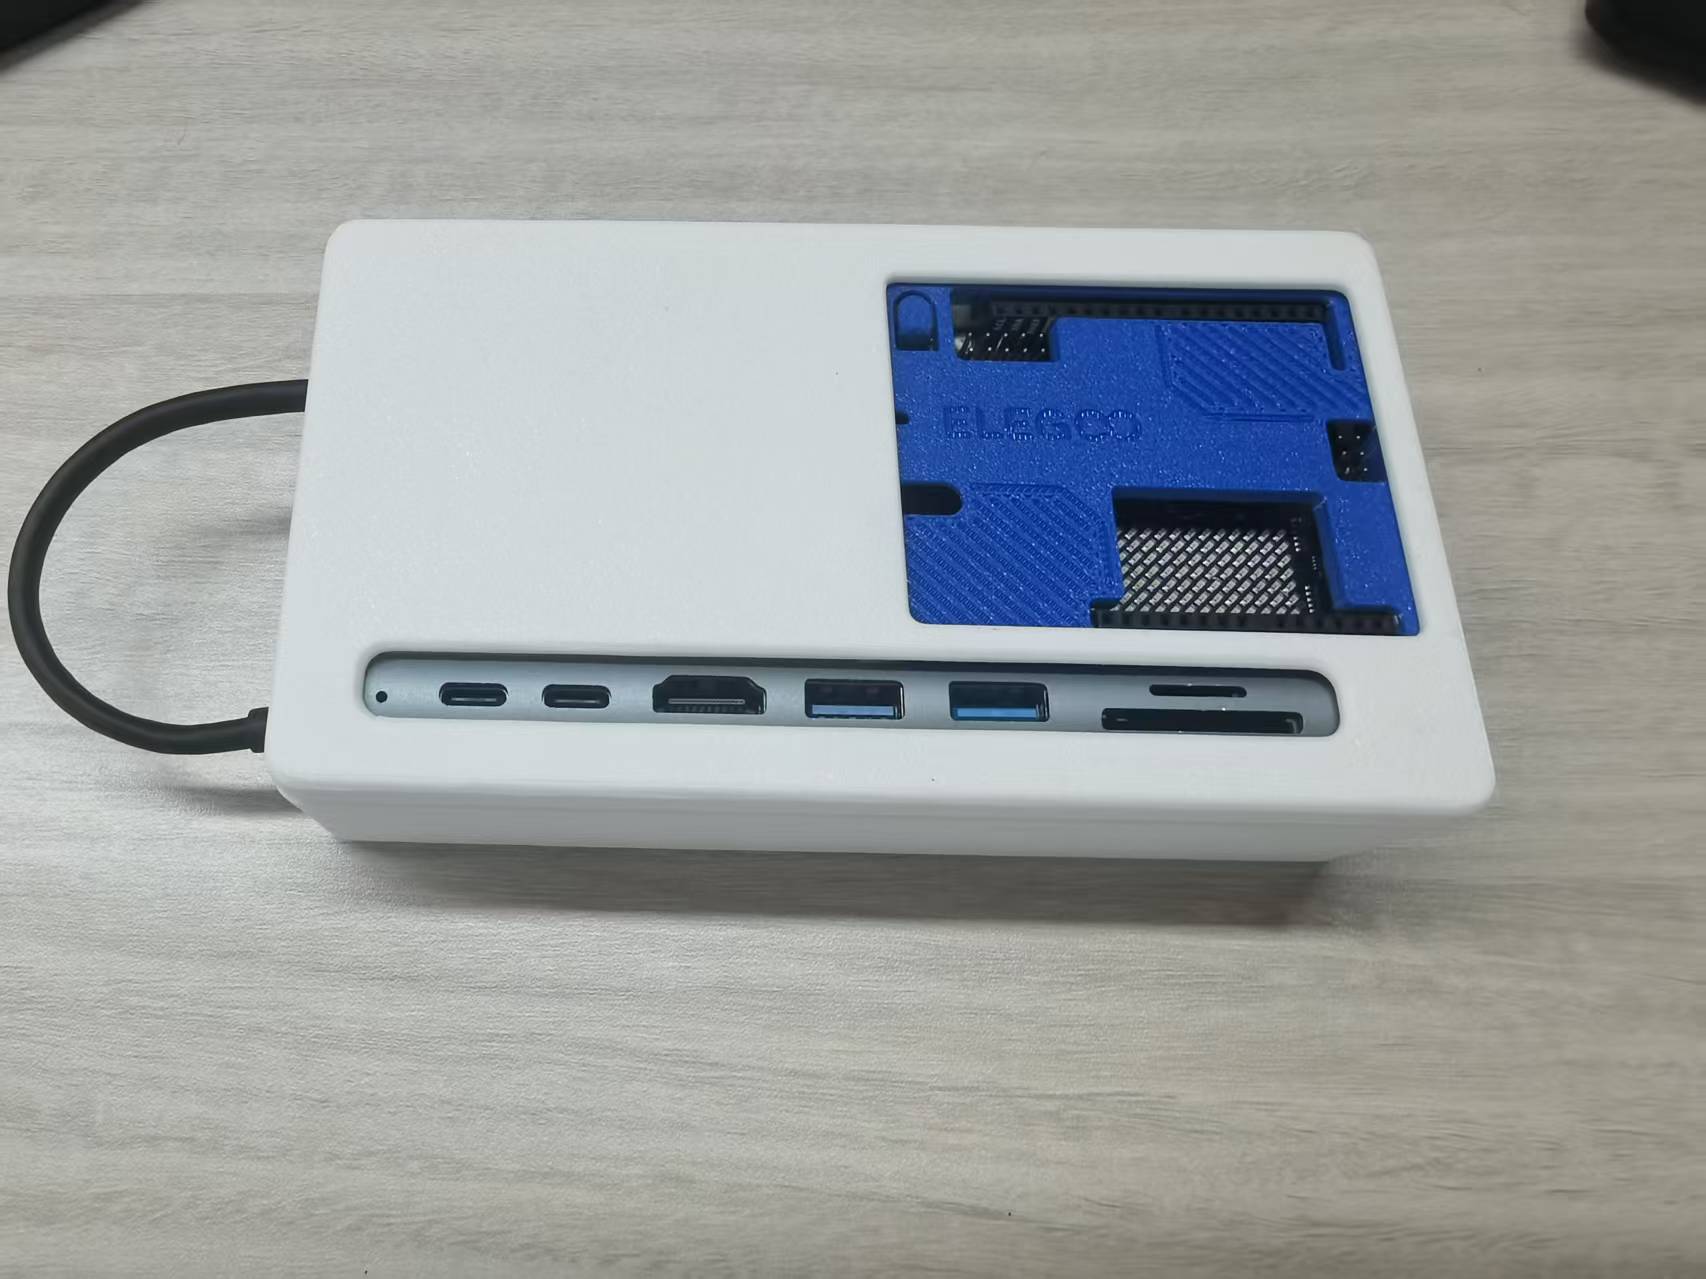
After installation, connect all cables to their corresponding ports. When all connections are finished, power on with the 5V power supply. This power adapter comes with a built‑in switch, so you do not need to plug/unplug the power cable repeatedly for easier operation.
The first boot may take around 30 seconds. If the board fails to start for a long time, double‑check the power supply and HDMI cable connections. You can verify power status by observing the UNO‑Q dot‑matrix display: it should show a boot animation then turn off when powered correctly. You may also try re‑plugging the HDMI cable.
When the UNO Q finishes booting, the Debian login screen will appear. The default username is arduino and in the password field enter a custom password:
- Username: arduino
- Password: new-password
- You will then be asked to confirm your password.
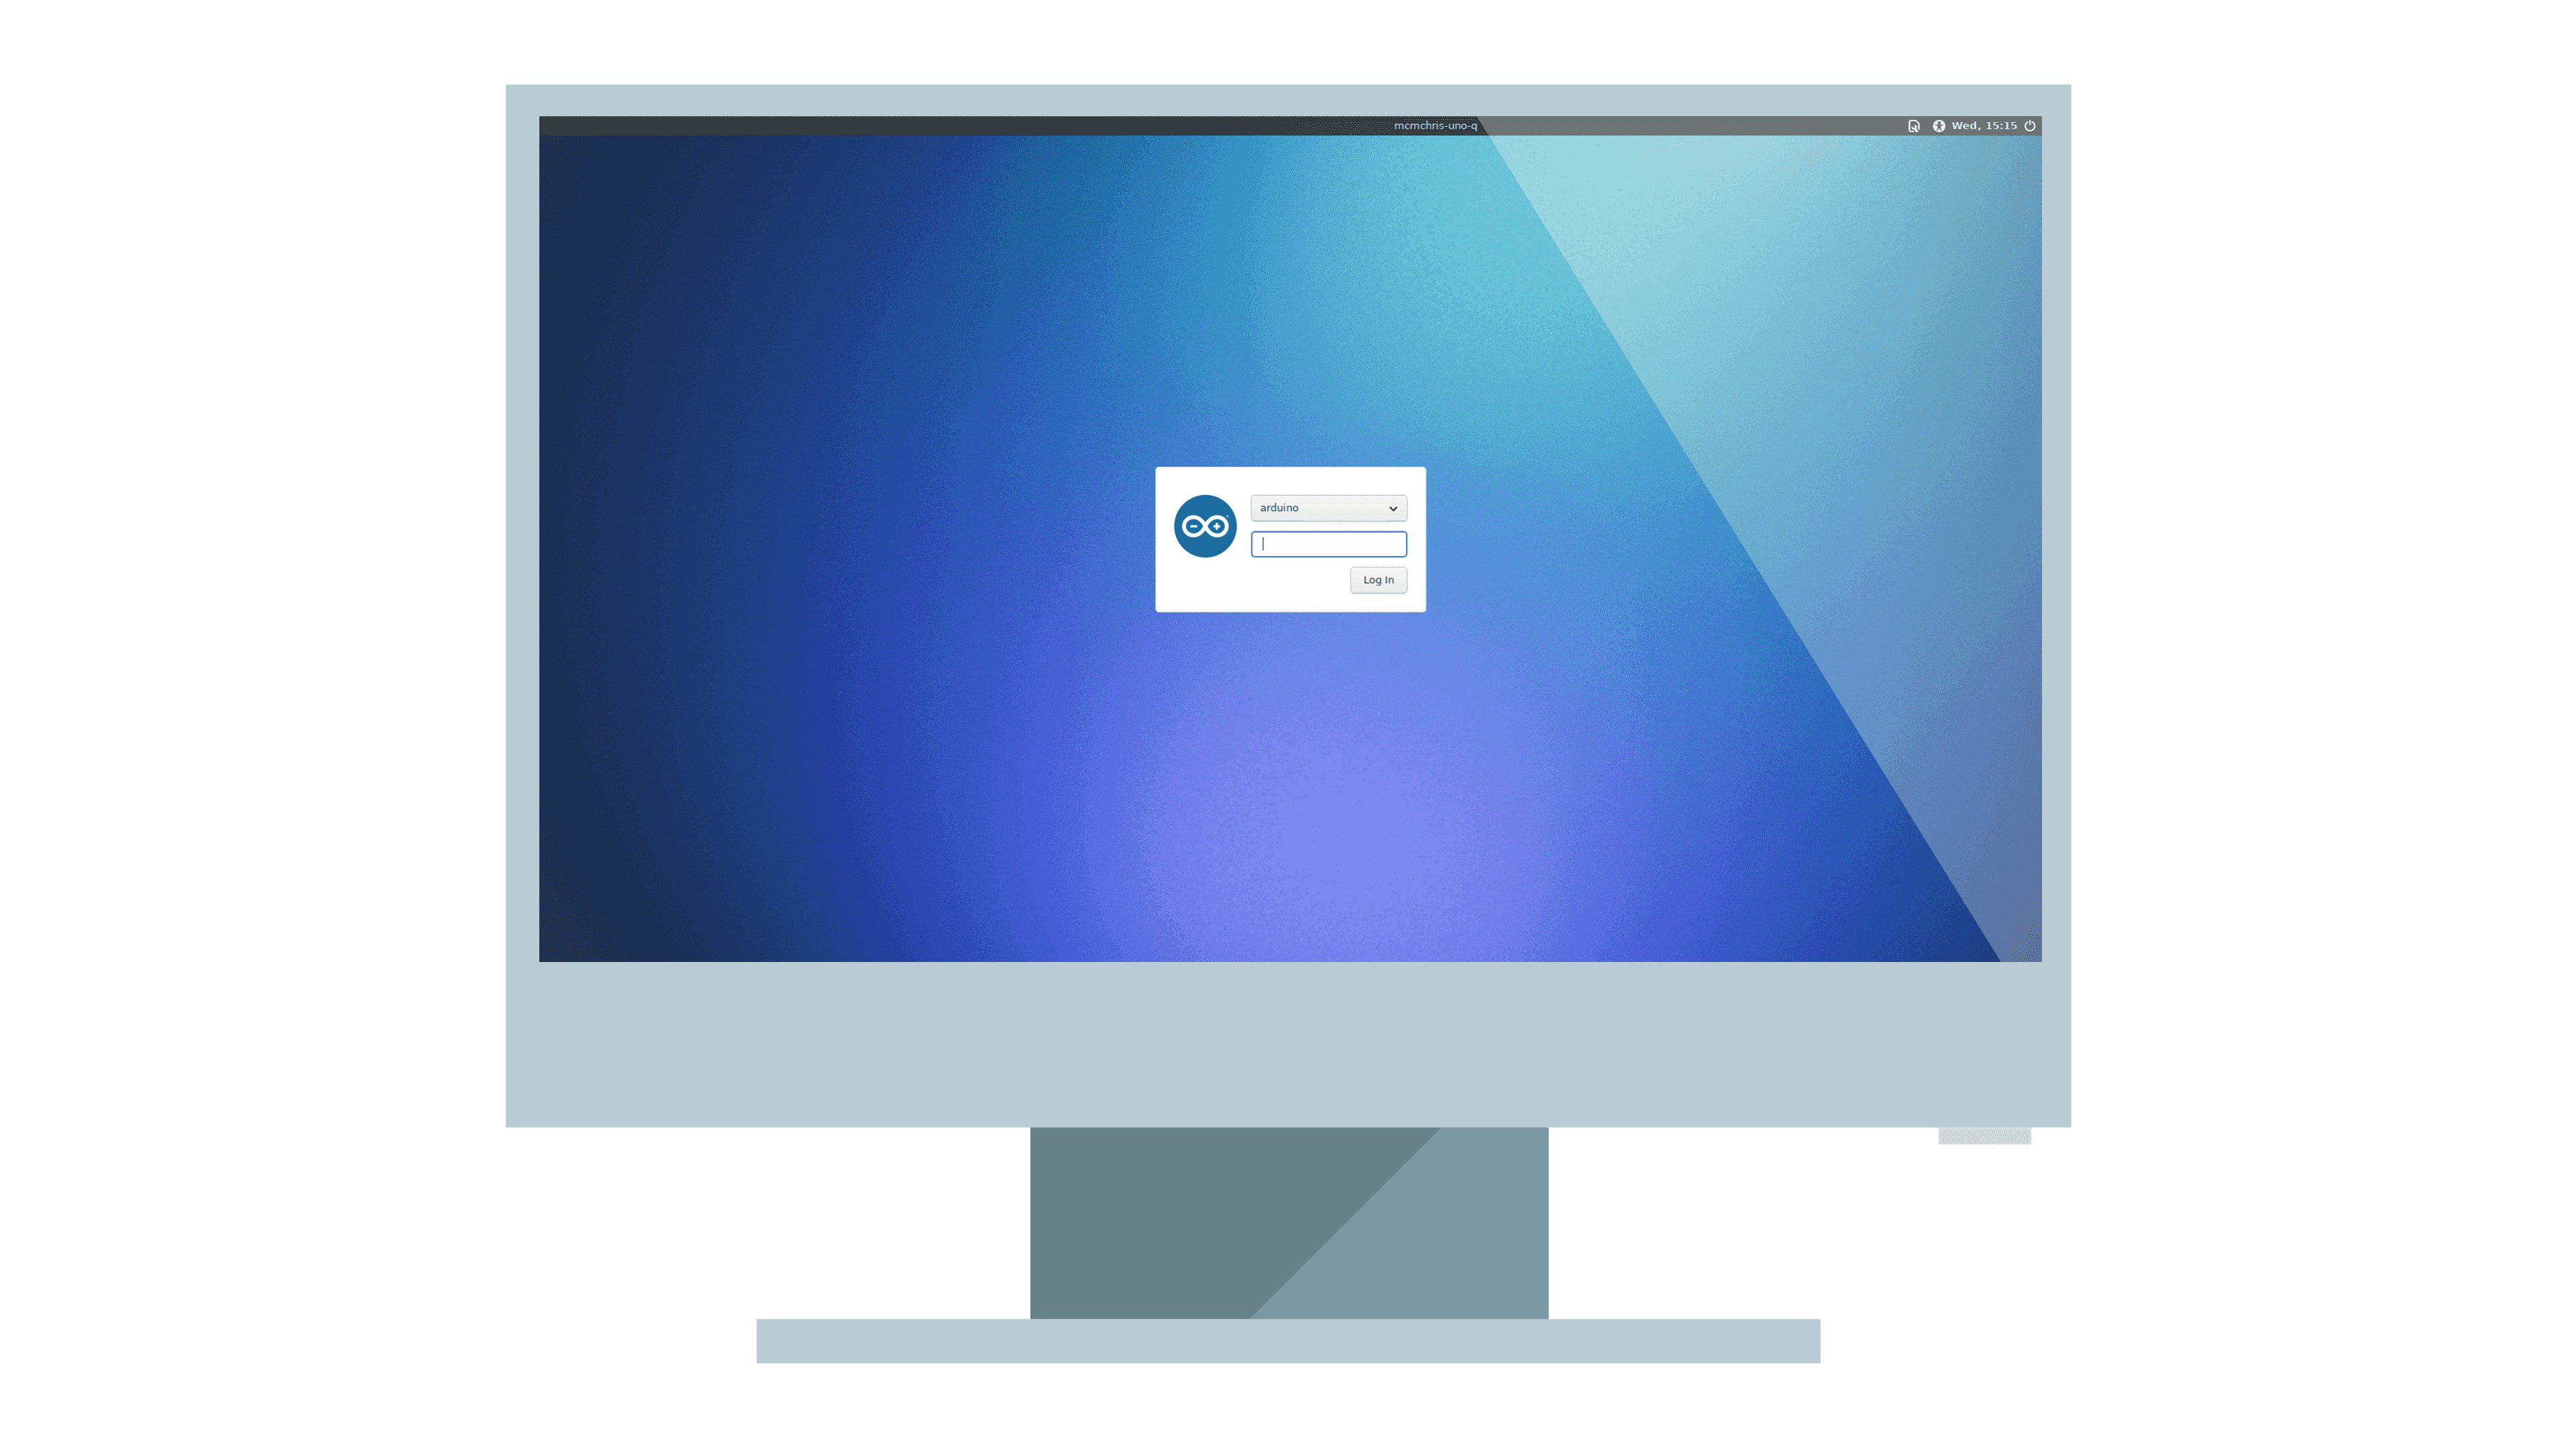
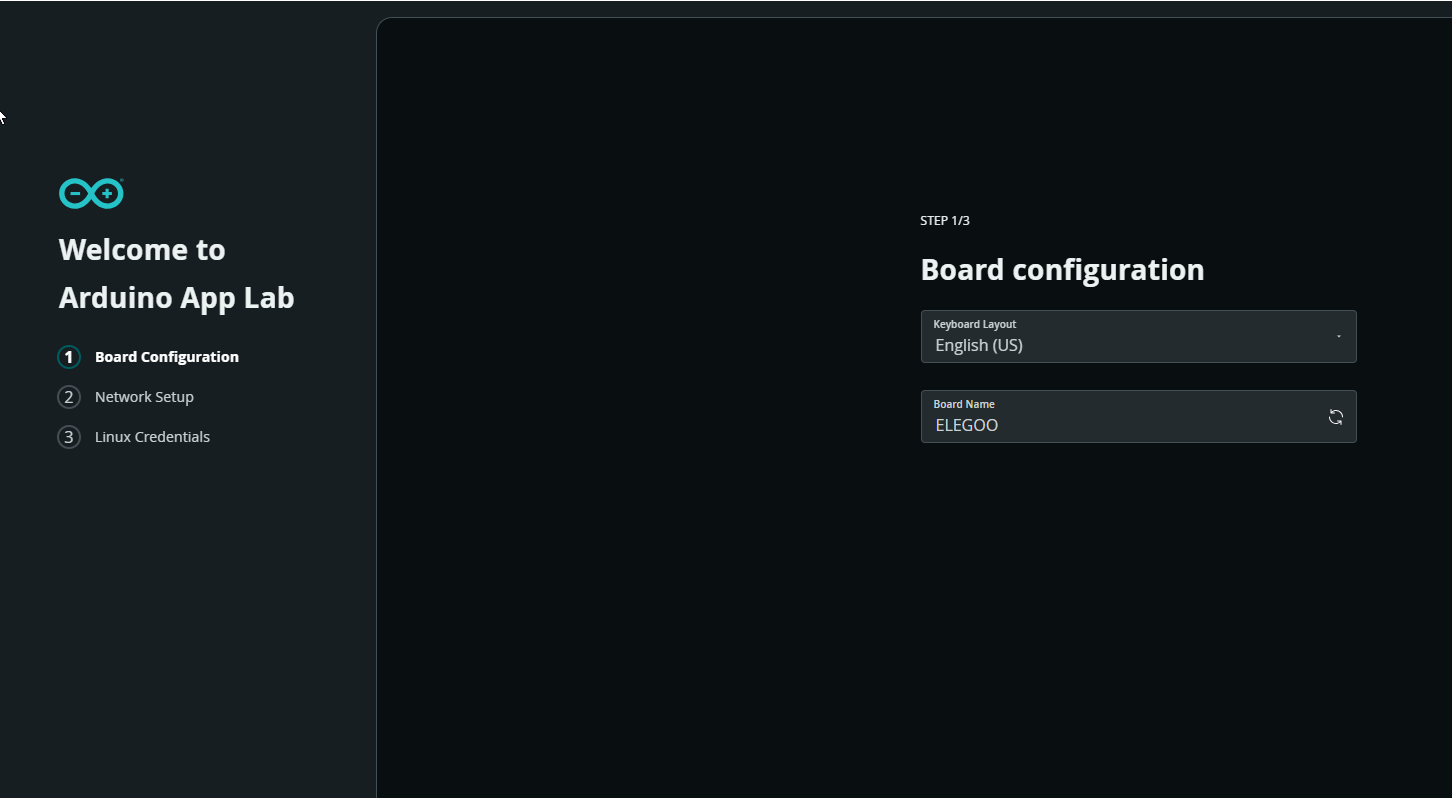
Arduino App Lab will open automatically and guide you through a one-time board configuration process with the following steps:
Set your keyboard configuration and the board name:
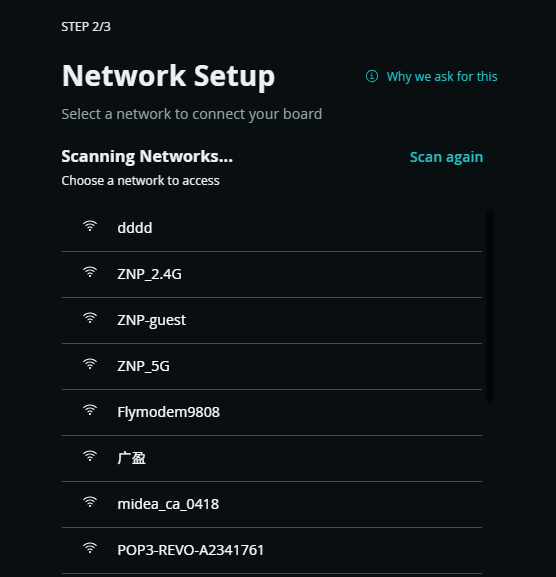
Select your Wi-Fi® network SSID and enter its password to connect to it.If you need to switch Wi‑Fi networks, click the signal icon in the upper‑right corner and select the target Wi‑Fi.
Set your Linux login credentials. You can use the same password you set at login time or change it by entering a new one.
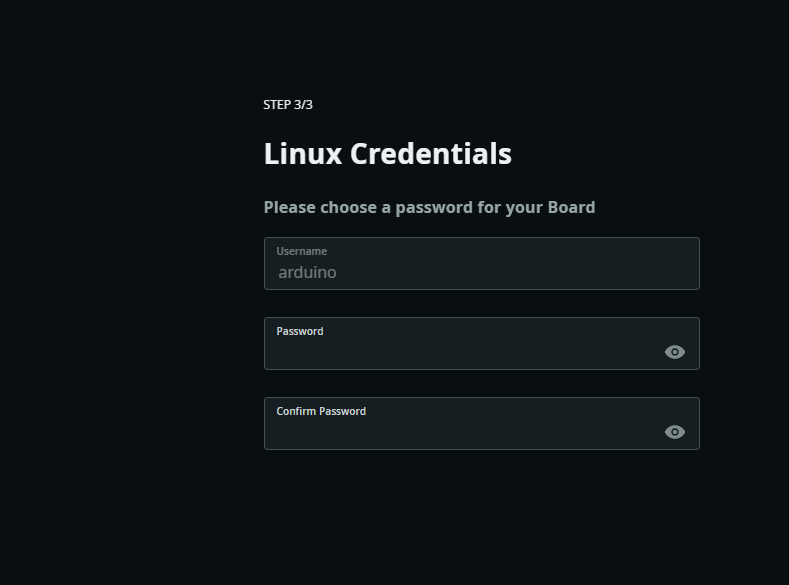
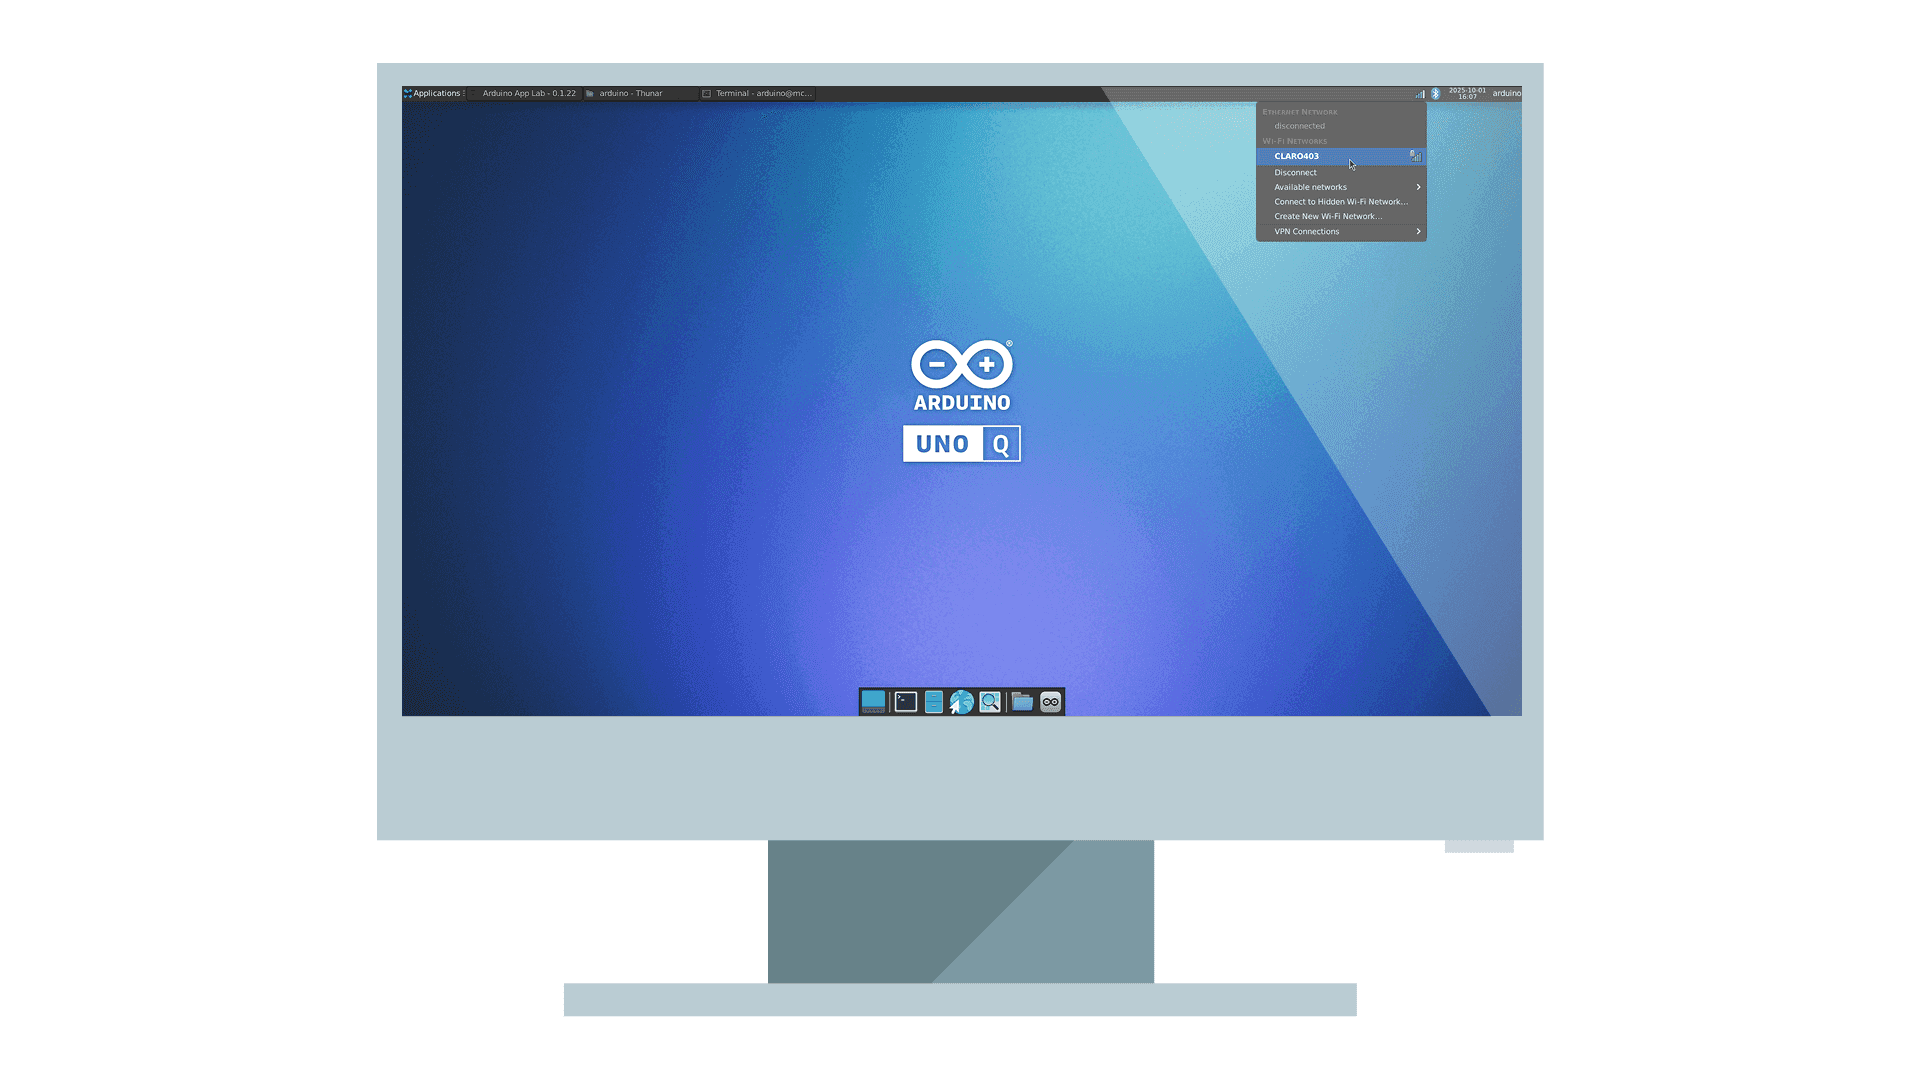
When entering Arduino App‑Lab, an update pop‑up window may appear. It is recommended to finish the update on your local computer before opening the application. Direct on‑device update may fail due to network issues and cost extra time.
Out of the box, the Debian-based image on the UNO Q already comes with several useful applications pre-installed, allowing you to get started immediately:
Chromium Browser: surf the web, check your email, and use cloud-based productivity tools.
Terminal: manage files, run Linux commands, install software, and interact with the system at a deeper level.
Vim Editor: a powerful text editor available in the terminal, useful for editing configuration files or writing code.
File Manager: organize your documents, images, and downloads in a graphical interface.
Media Player: play audio and video files locally (VLC installation needed).
These built-in applications give you everything you need for daily computing tasks without requiring additional installations. Of course, you can always expand your environment by installing more software using Debian’s package manager (apt).
For example, to install VLC media player run the following command in the terminal:
sudo apt install vlc
To use a USB camera we can install Cheese, an app that provides a graphical interface to take snapshots and record:
sudo apt install cheese
If you want to connect more peripherals while all existing ports are occupied, purchase an additional docking station with Type‑C port. Plug the new docking station into the second Type‑C port of the existing docking station, and the newly‑added docking station will function normally.
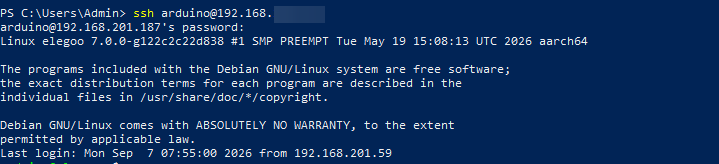
You can also connect to the UNO‑Q remotely. This allows you to operate the UNO‑Q from your local computer and save the USB ports otherwise occupied by the mouse and keyboard.
First you need to get the IP address of UNO‑Q. Open the terminal interface on UNO‑Q and enter the command hostname -I. Check the output result; usually the first address starting with 192. is the target IP.
hostname -I
Please note: The UNO‑Q must connect to a 2.4 GHz Wi‑Fi network and share the same network with the computer used for remote control.
Type powershell in the Windows search bar to launch it. Alternatively, hold down the Shift key and right‑click inside a folder window.
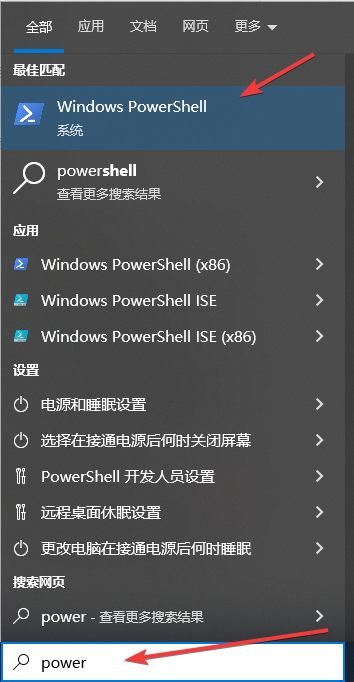
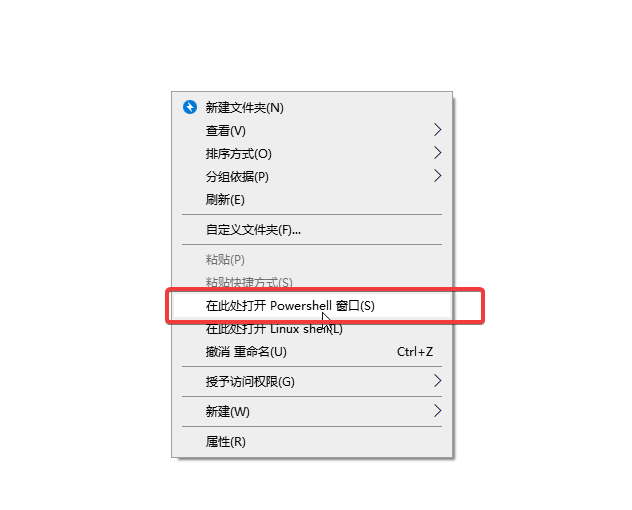
Enter ssh arduino@192.xxxxx in the PowerShell window and check for response from the UNO‑Q. If a timeout occurs, verify whether the IP address is correct and confirm both devices are on the same Wi‑Fi network.

After you successfully connect to UNO‑Q, you will be prompted for a password. Enter the login password you previously set for the UNO‑Q.