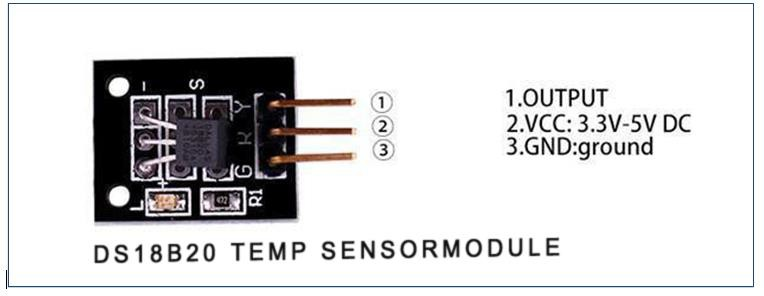
¶ DS18B20 Temperature Sensor Module
¶ Overview
In this experiment, we will learn how to use DS18B20 module test the environmental temperature and
make a thermometer.Since the previous temperature sensor output is analog, we need to add additional A/D and D/A chip into the circut. These cause a big challenge. So we are create the Ds18b20 module.
The new DS18B20 Temperature Sensor Module is very good solve the problem. is economical, has a
unique 1-wire bus and is fully compatible with the Arduino platform .Users can easily form a sensor
network with this module.
¶ DS18B20 Temperature Sensor
A module with a digital ‘One Wire’ temperature sensor (DS18B20). A 4.7Kohm pullup resistor is included for the bus signal. Additional sensors can be added to the bus and individually addressed. Only one pullup resistor should be connected to the bus, irrespective of the number of sensors connected.
• Temperature range: -55 to +125°C
• Typical accuracy: 0.5°C
• Resolution: 9-12Bit, depending on the program


¶ Principle
DS18B20 module uses a single bus. The power supply voltage range of 3.0 V to 5.5 V and no standby
power supply. It can Measure temperature range from-55 degree to +125 degree with accuracy
of+/-0.5°C. The temperature sensor features programmable DPI which can be set between 9 and 12.
The temperature itself is represented by 12 bits and can be reported at a maximum rate of once
every 750 milliseconds.
Each DS18B20 contains a unique serial number so that multiple DS18B20 chips can exist in abus.
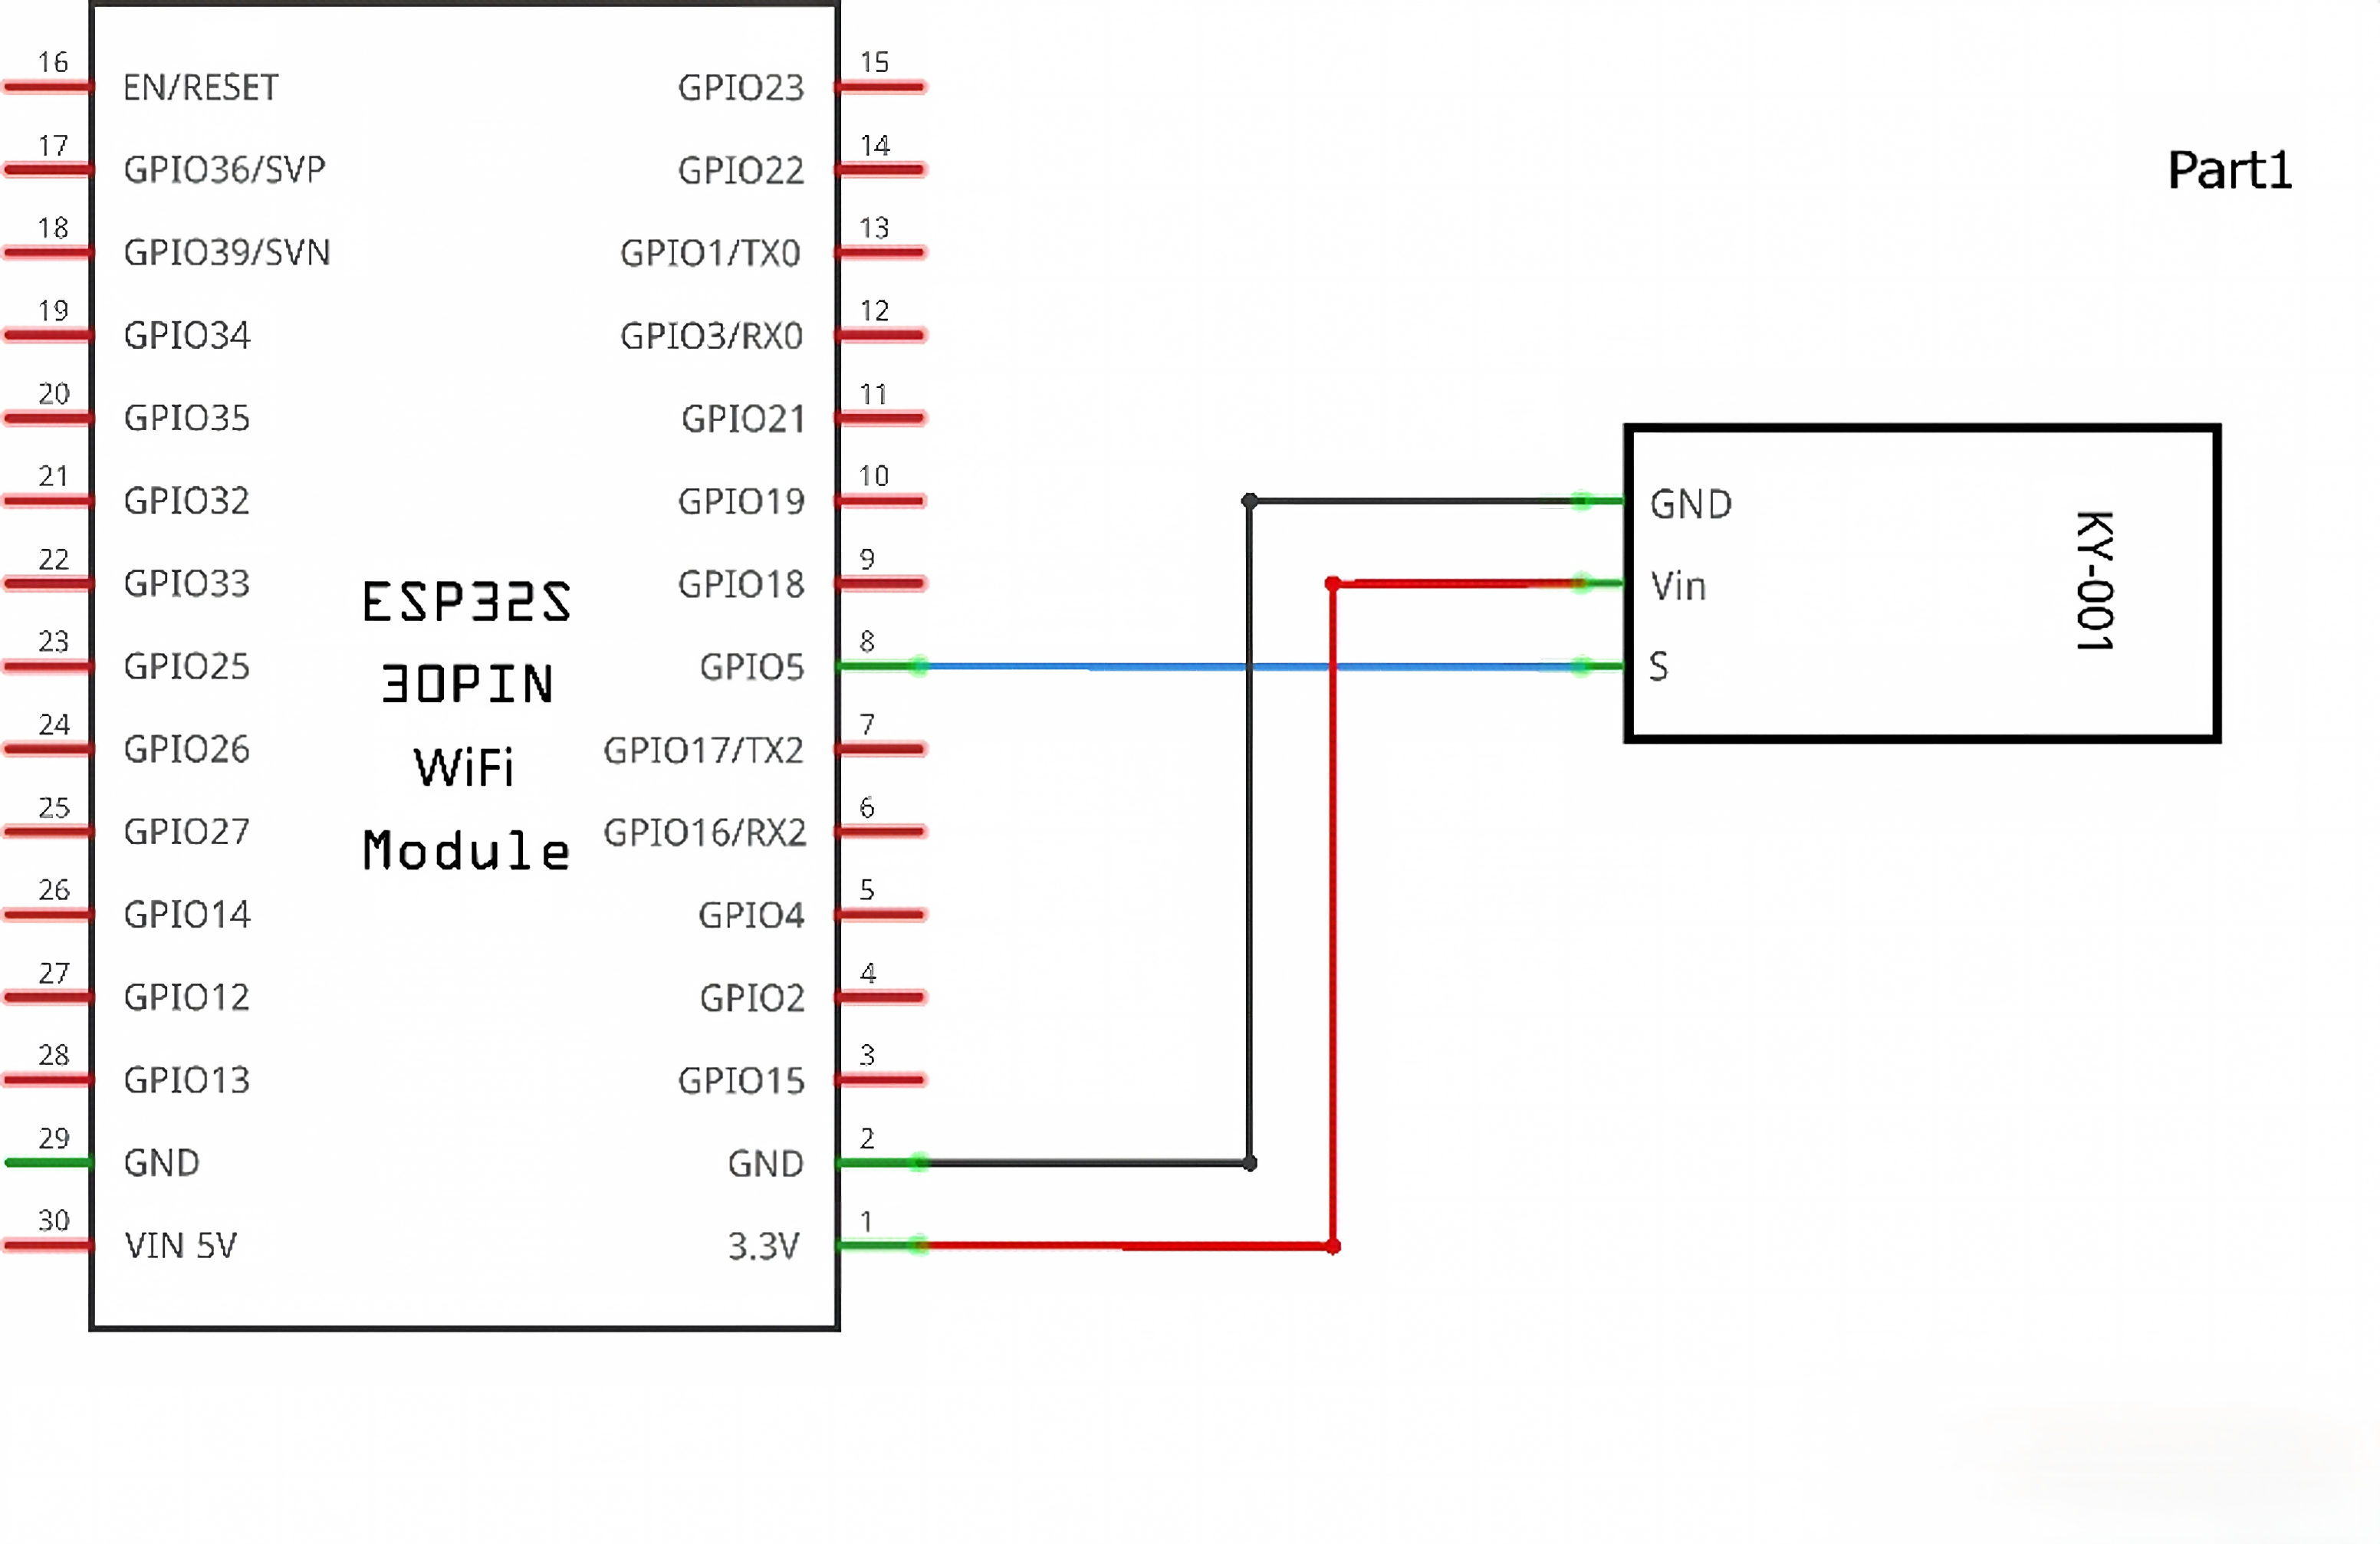
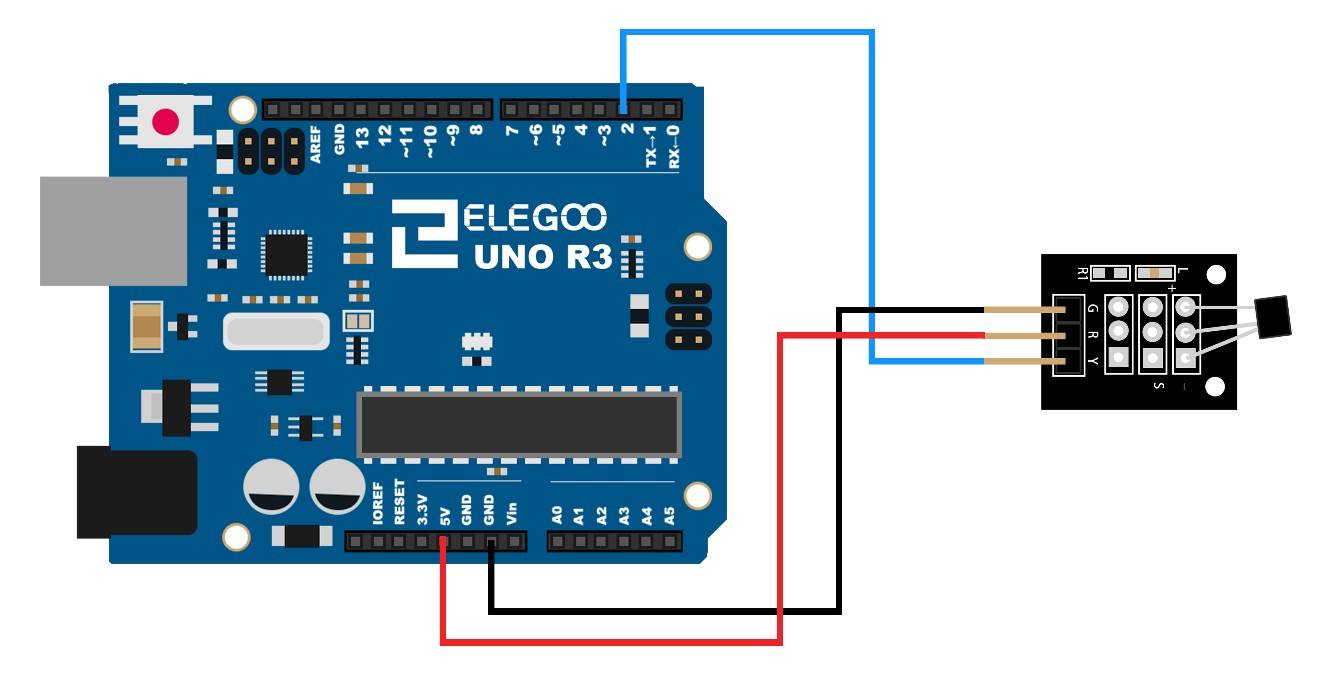
¶ Connection Schematic
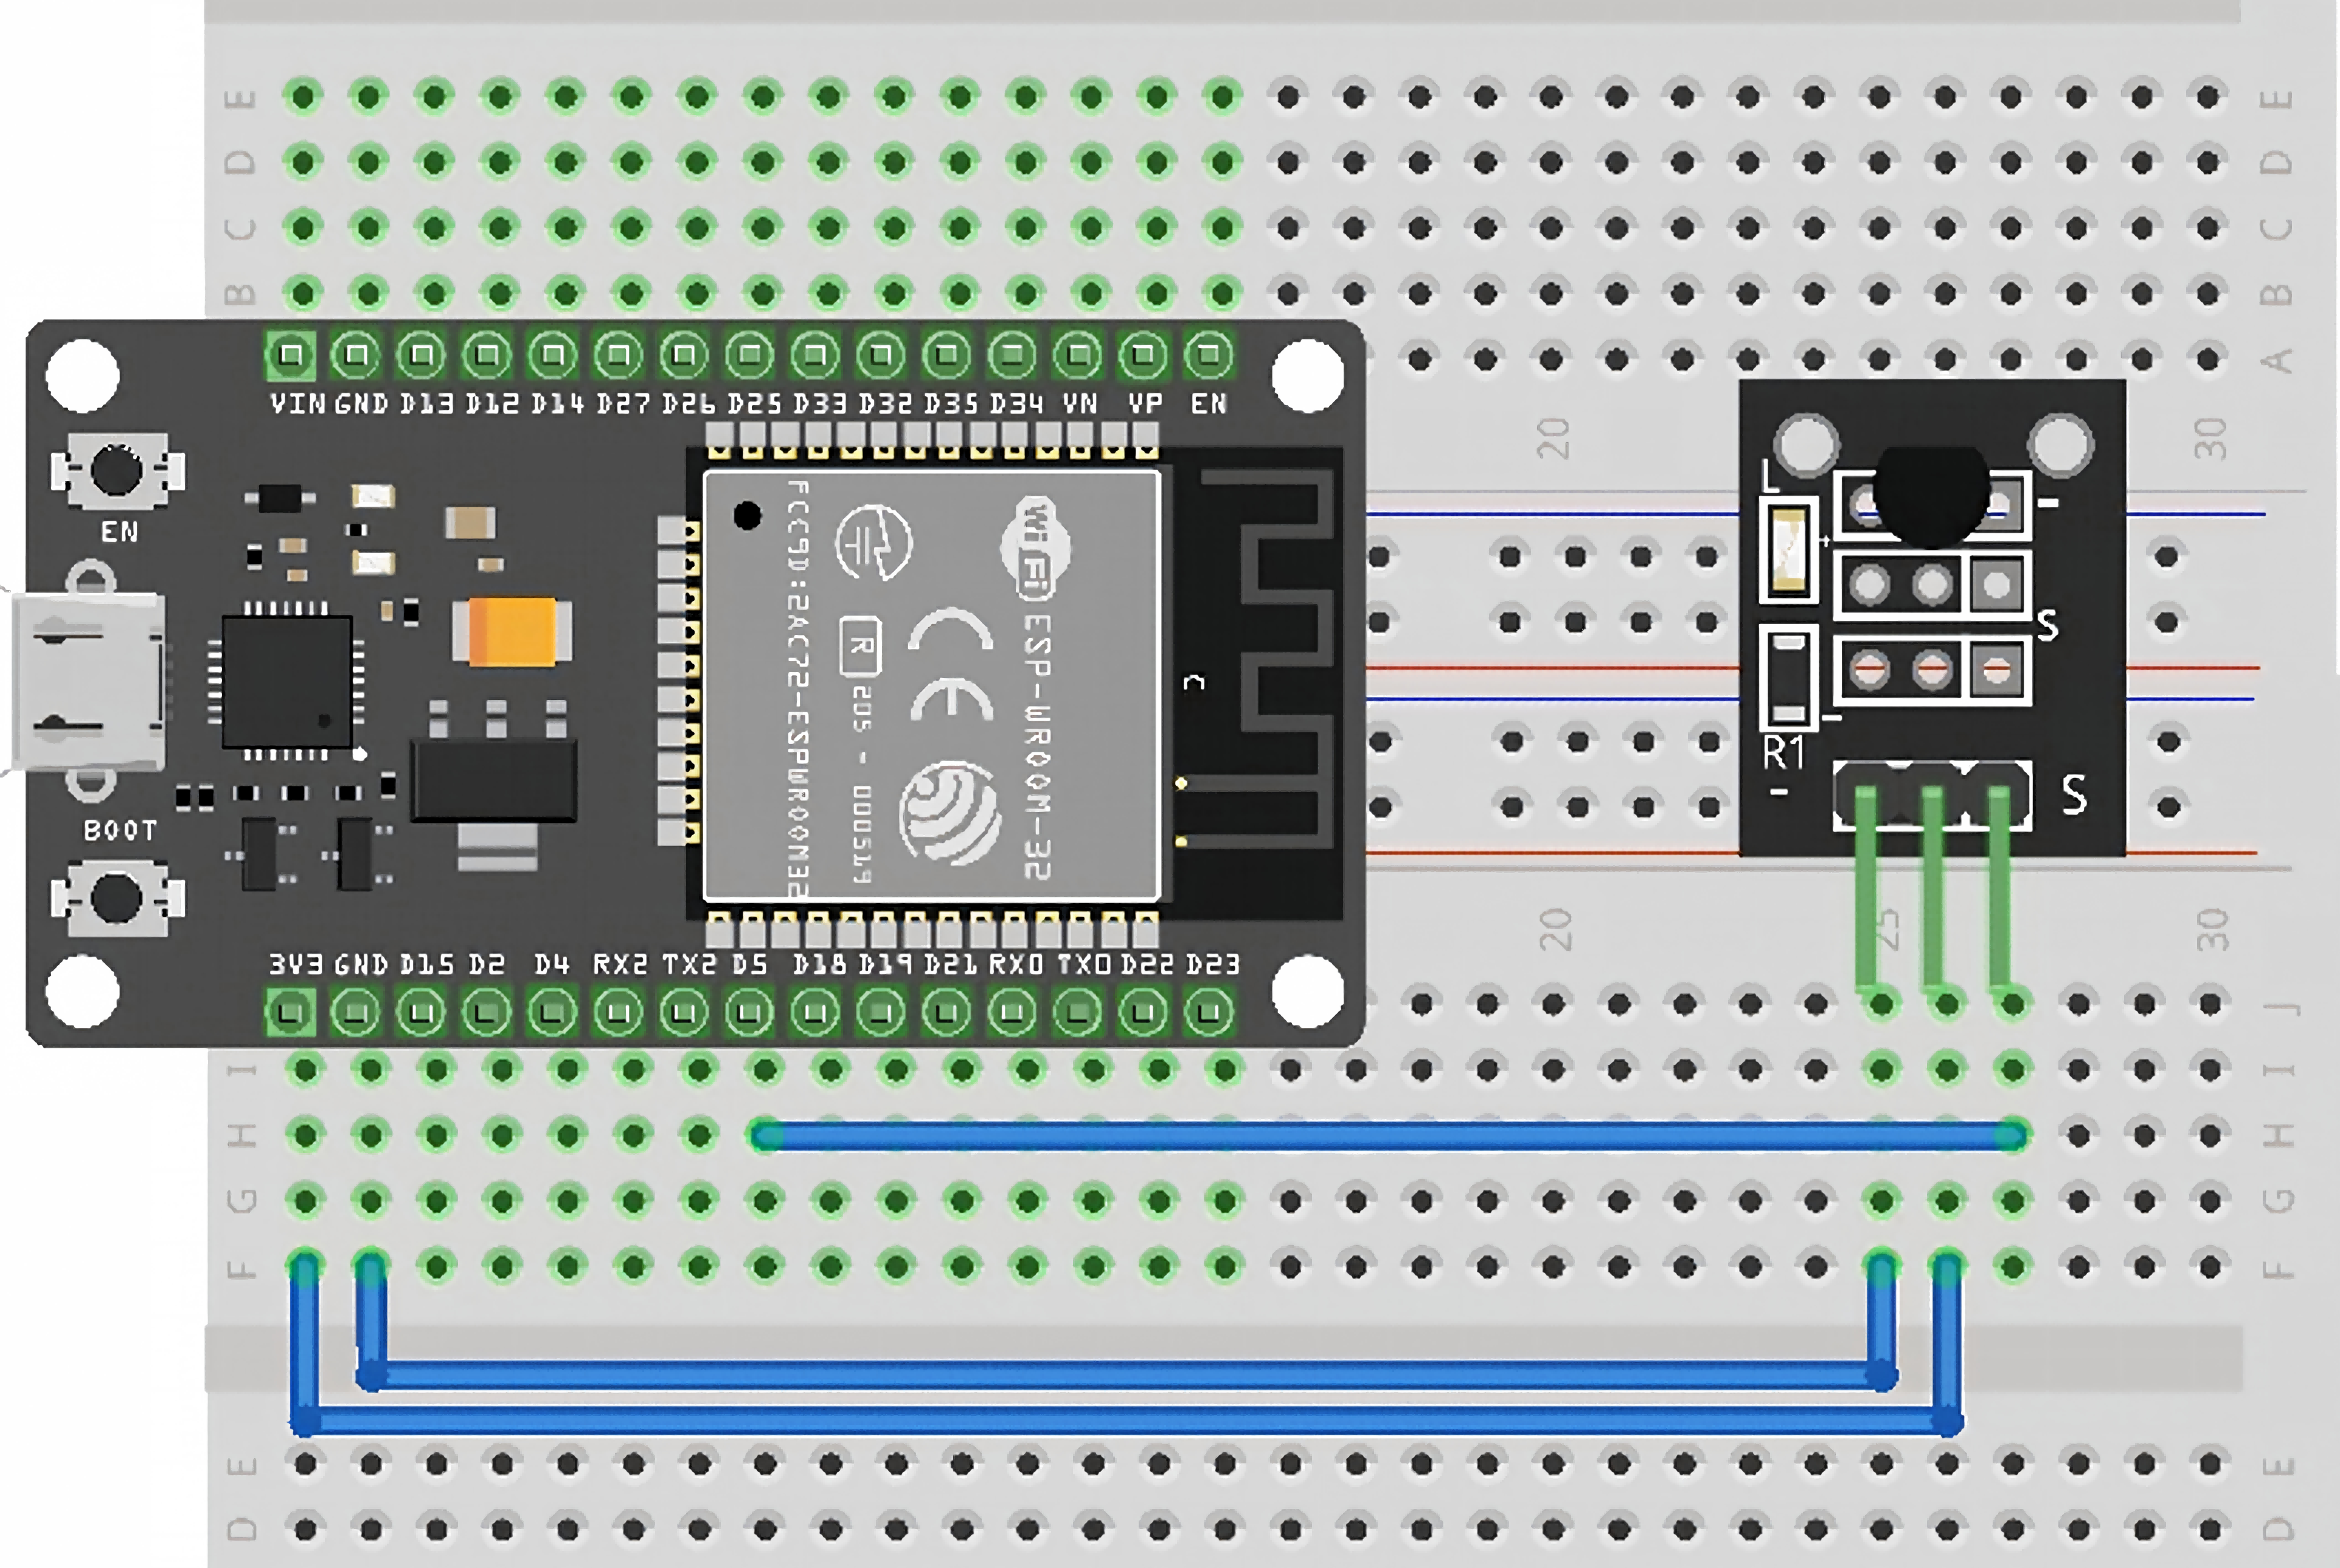
¶ Wiringdiagram

¶ Code
You can click the blue text link to download the program file to your local device, and double-click the file to open it after the download is complete. Please note: Before opening the file, ensure that you have installed the Arduino IDE development environment and completed the installation of relevant components such as the board support package and driver corresponding to the board.
¶ Import Library Files
#include <OneWire.h>
#include <DallasTemperature.h>
OneWire.h:Implements the OneWire communication protocol for devices like DS18B20
DallasTemperature.h: High-level library specifically for Dallas/Maxim temperature sensors
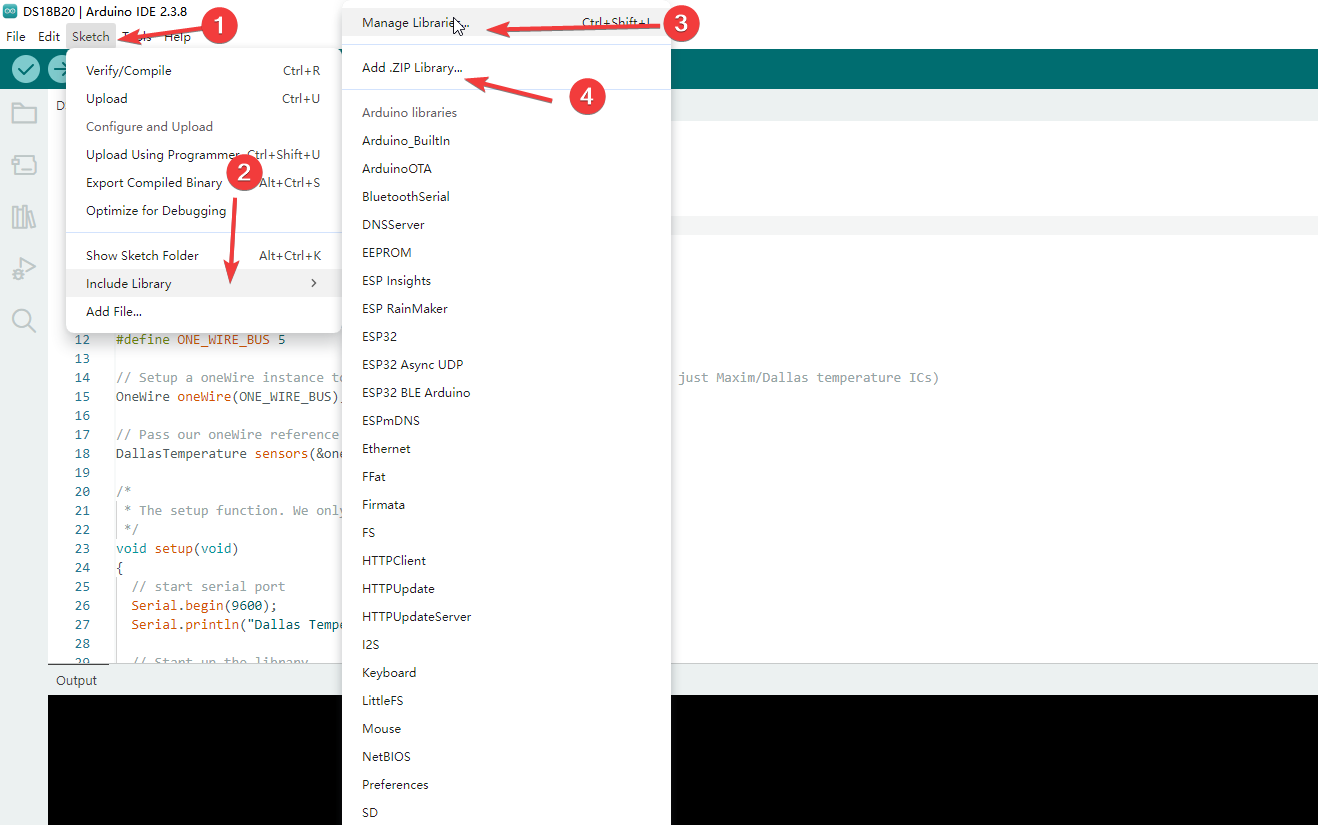
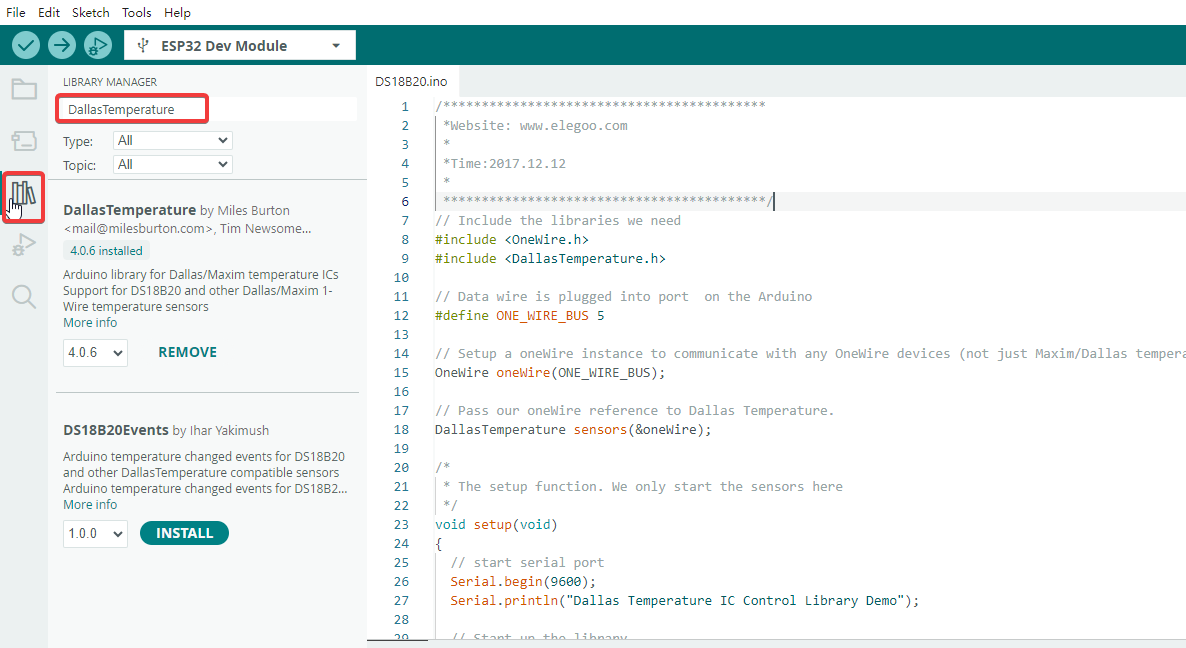
You can download the required library files by following Steps 1 to 3 shown in the figure. Search for the target library and complete the download and installation. If online download fails, click Step 4 and select the local library file provided in the supporting folder of this tutorial for manual installation.
¶ Pin Definition
#define ONE_WIRE_BUS 5
- Defines the DS18B20 data pin connected to Arduino digital pin 5
- DS18B20 uses OneWire protocol, requiring only one data line for communication
- The above pin configuration is adapted to the ESP32 main control board. If you use UNO or MEGA 2560, you can either change the pin number in the code to 2, or keep the original code unchanged and just connect the signal wire to pin 5.
¶ Object Instantiation
- OneWire Object
OneWire oneWire(ONE_WIRE_BUS);
- Creates a OneWire communication object
- Parameter ONE_WIRE_BUS specifies the data pin number
- Handles low-level OneWire timing and signals
- DallasTemperature Object
DallasTemperature sensors(&oneWire);
- Creates a temperature sensor control object
- Parameter &oneWire is a pointer to the OneWire object
- Decouples high-level temperature operations from low-level communication
¶ setup() Initialization Function
void setup(void)
{
Serial.begin(9600);
Serial.println("Dallas Temperature IC Control Library Demo");
sensors.begin();
}
sensors.begin()
Purpose : Initialize the sensor library and search for all DS18B20 devices on the bus
Execution Process :
- Send reset pulse to the bus
- Wait for sensor response
- Search and record each sensor's 64-bit unique address
- Ready to accept commands
¶ loop() Main Loop (Core Logic)
void loop(void)
{
Serial.print("Requesting temperatures...");
sensors.requestTemperatures();
Serial.println("DONE");Serial.print("Temperature for the device 1 (index 0) is: ");
Serial.println(sensors.getTempCByIndex(0));
}
- Function 1:
sensors.requestTemperatures()
Core Purpose : Trigger all connected DS18B20 sensors to perform a temperature measurement
- Function 2:
sensors.getTempCByIndex(0) //Sensor index, starting from 0
Core Purpose : Read the Celsius temperature value from the specified sensor
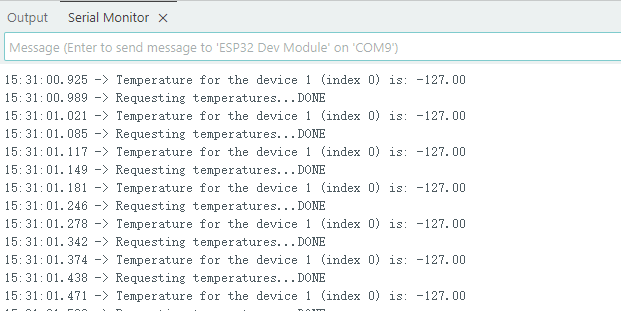
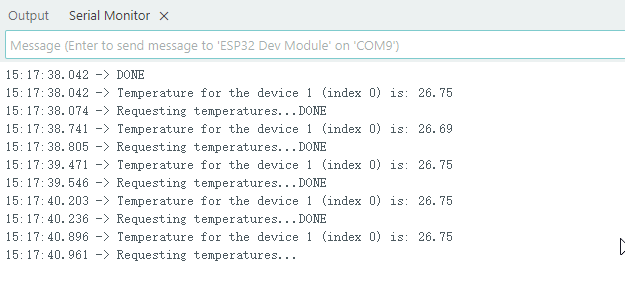
After correctly wiring the DS18B20 temperature sensor to the mainboard and keeping the pin defined in the code consistent with the actual wired pin, upload the program and open the serial monitor. You will see printed data similar to the example shown in the figure. When you bring your hand close to or hold the sensor probe, you can observe that the real-time temperature value rises gradually.
¶ Trouble shooting
- If similar error messages appear during program compilation, it means the required dependent library for the project has not been installed. Follow the library installation method mentioned above, search the name of the missing library shown in the error prompt in the library manager search box, install it, and then recompile the program.

- If negative values appear in the output data as shown in the figure, there is no need to panic. This problem is mostly caused by inconsistency between the actual wiring and the pins defined in the code. Carefully check whether the sensor wiring position matches the pin number set in the program to troubleshoot the fault.