¶ Issue Description
During the homing process, the extruder cannot stop lowering, even though the nozzle comes into contact with the PEI plate and the heated bed.
¶ Reasons
-
The PEI plate is not correctly installed.
-
The proximity switch is not aligned with the heated bed.
-
The frame is not stably installed.
-
The Z offset value is incorrect.
-
The proximity switch is damaged.
¶ Troubleshooting Steps
¶ Tools needed for troubleshooting
-
A tape measure
-
A 2.0 mm Allen key
¶ Step 1 Install the PEI plate properly over the heated bed.
Note: The proximity switch can only detect metal material. The PEI plate is made of metal, which can be detected by the proximity switch.
Before the homing process (starting printing or during the printing), put the PEI plate above the heated bed.
¶ Step 2 Check whether the proximity switch is tilted.
-
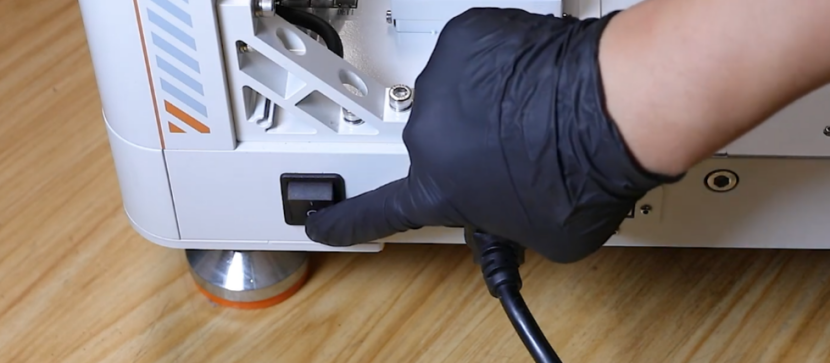
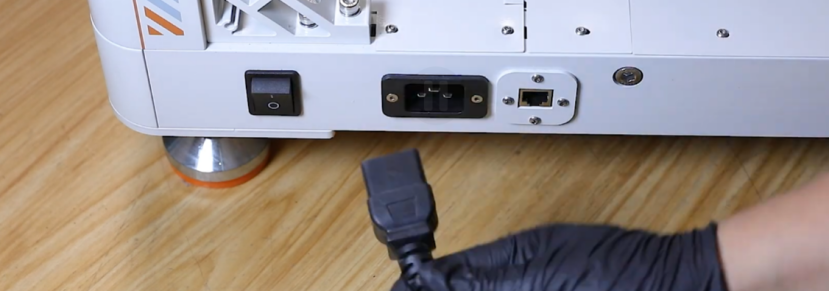
Turn the power switch OFF (symbol "〇") and unplug the power supply cable.
-
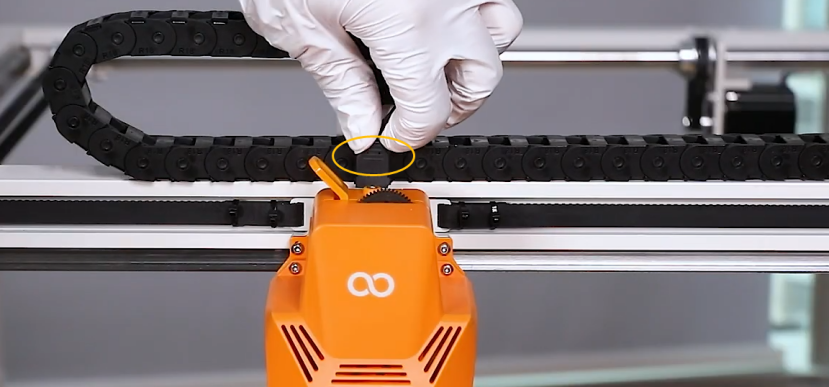
Unplug the extruder adapter cable.
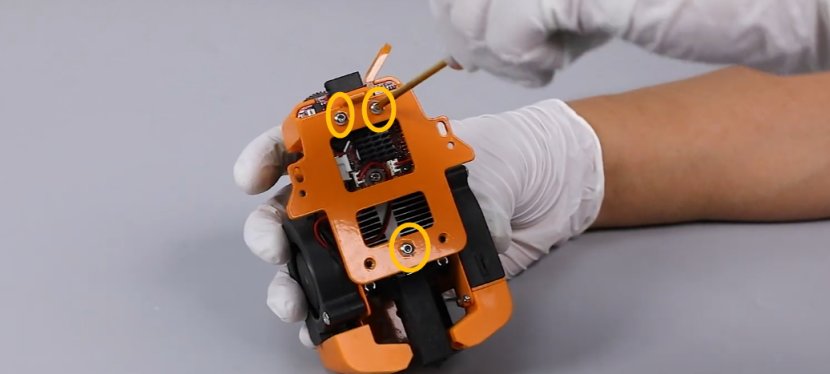
-
Release and remove the two marked screws shown in the picture below.
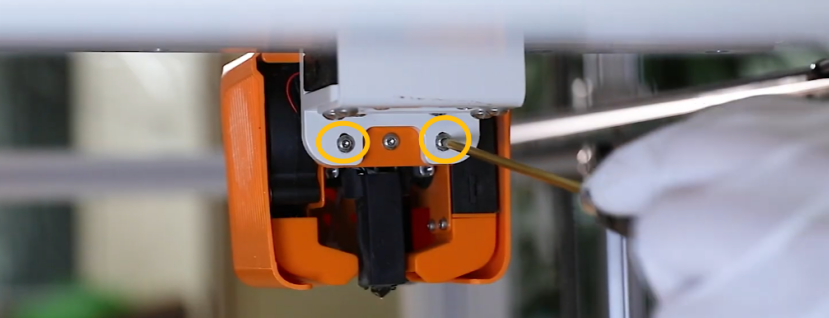
-
Release and remove the two marked screws shown in the picture below. Hold the extruder when removing the two screws.
-
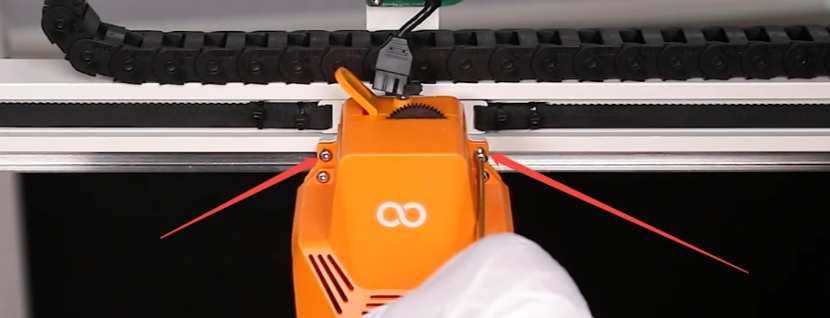
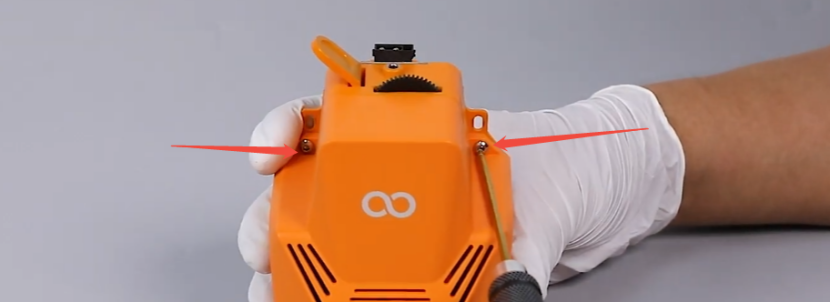
Release and remove the two marked screws securing the front cover of the extruder.
-
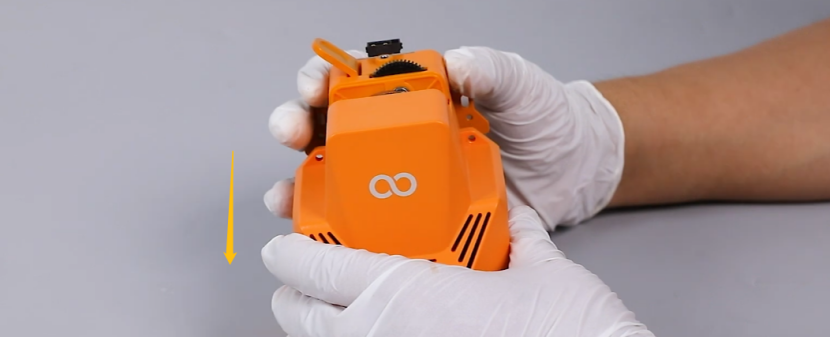
Remove the front cover of the extruder.
-
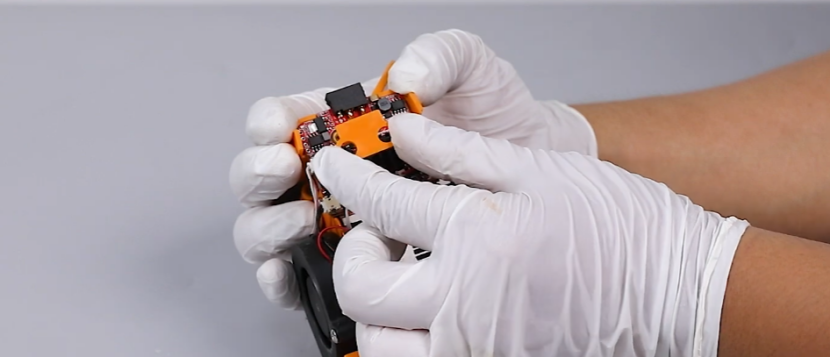
Release and remove the three screws securing the back support plate of the extruder. Remove the back support plate.
-
Remove the pressure plate of the extruder board.
-
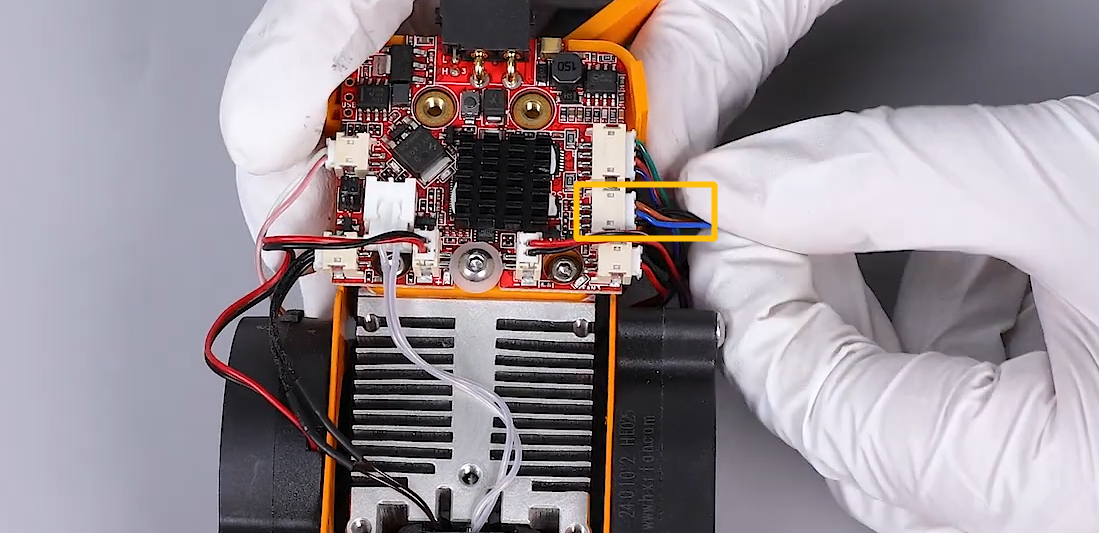
Check whether the screw securing the proximity switch is loose.
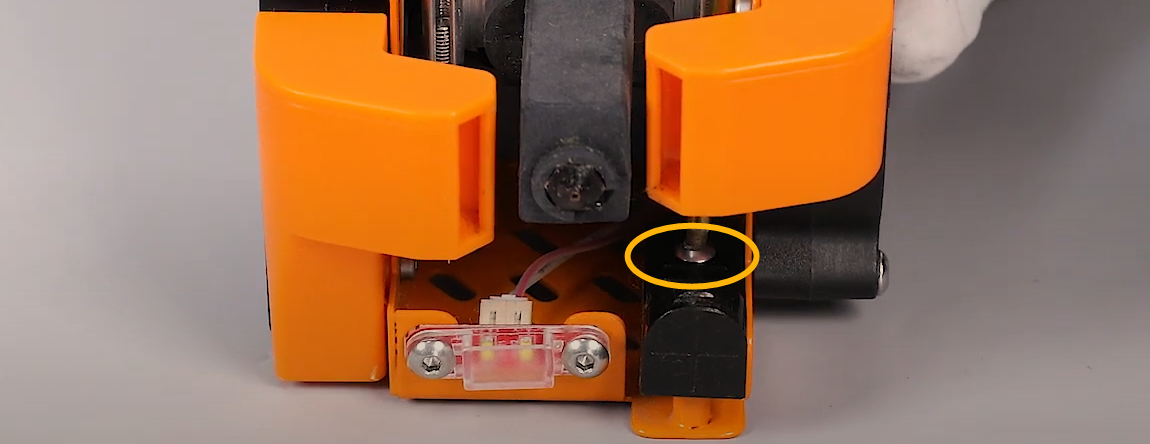
-
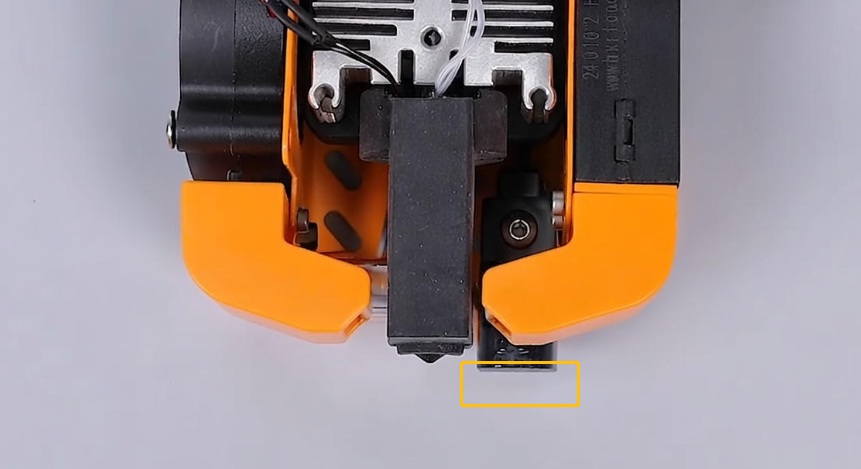
Check whether the proximity switch is tilted.
Note: The detection surface of the proximity switch must be aligned with the PEI plate.
-
Re-plug the proximity switch cable.
¶ Step 3 Check whether the Z offset value is correctly set.
-
To check whether the Z offset setting procedures are correctly performed and whether the Z offset value is properly set:
Refer to the tutorial video below for confirming.
Note: The Z offset value of each printer is different and the value typically ranges from -2 to -1.
https://www.youtube.com/watch?v=kUxeEWSaQDs OrangeStorm Giga Assembly Tutorial: 10:00-13:47 -
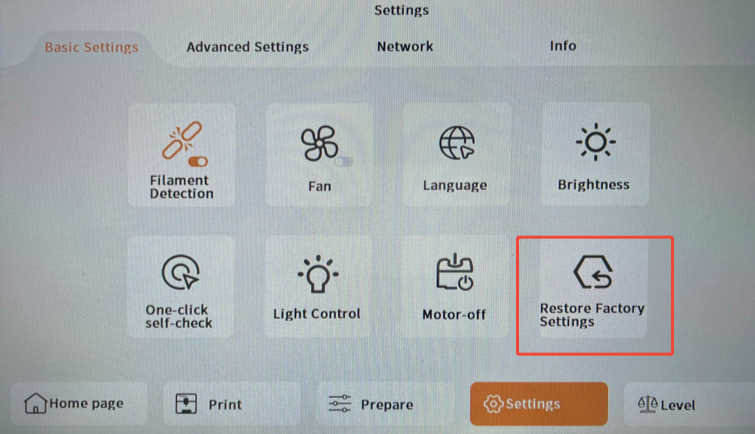
To re-set the Z offset value and the auto-levelling settings:
- Select Settings - Basic Settings - Restore Factory Settings on the touch screen.
- Re-set the Z offset value.
¶ Step 4 Check whether the frame is installed properly.
-
Turn the power switch OFF (symbol "〇") and unplug the power supply cable.
-
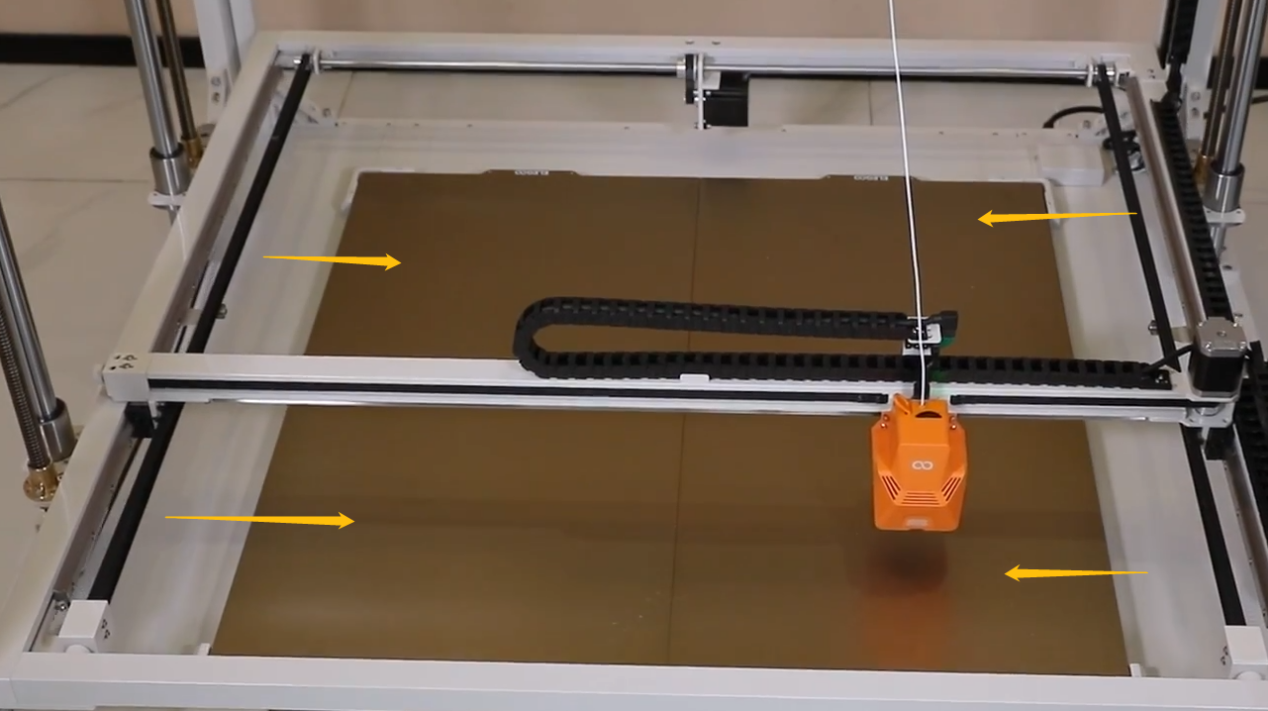
Check whether the frame is aligned with the PEI plate.
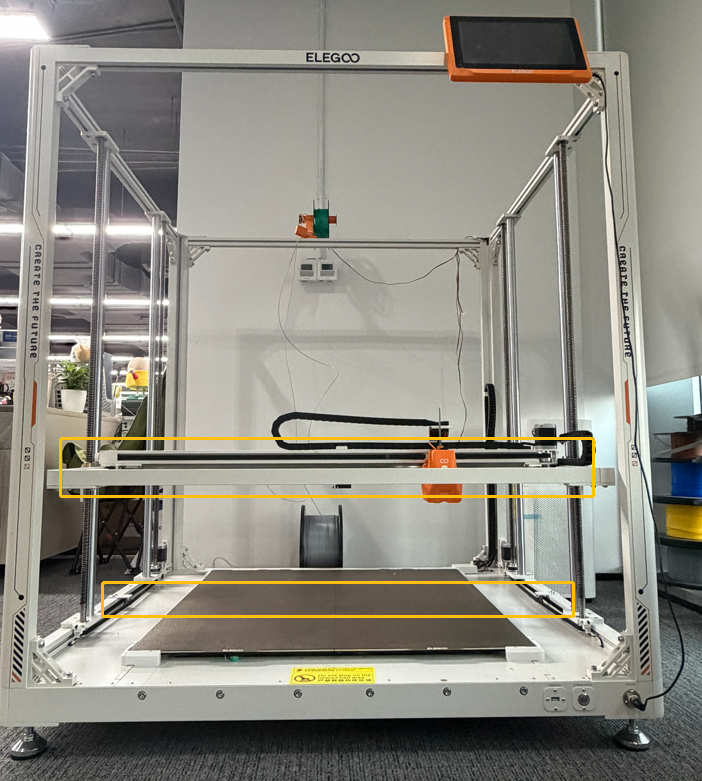
-
If you cannot inspect whether the PEI plate and the frame are aligned, measure the distance from each of the two Z-axis bearings to their base to ensure the distances are identical.
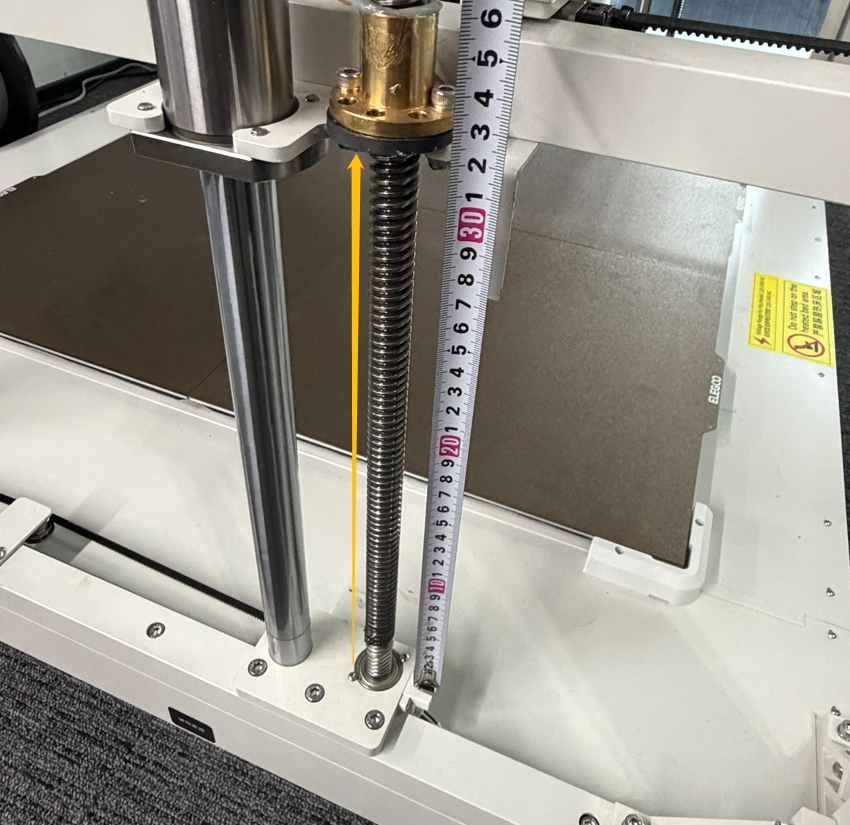
- If the distance is not identical, pull the Z-axis belt to adjust the Z-axis height.
Note: The Z-axis will rise if you pull the Z-axis belt (on the inner left side) in the direction of the yellow arrow. The Z-axis will descend if you pull the Z-axis belt in the direction of the red arrow.
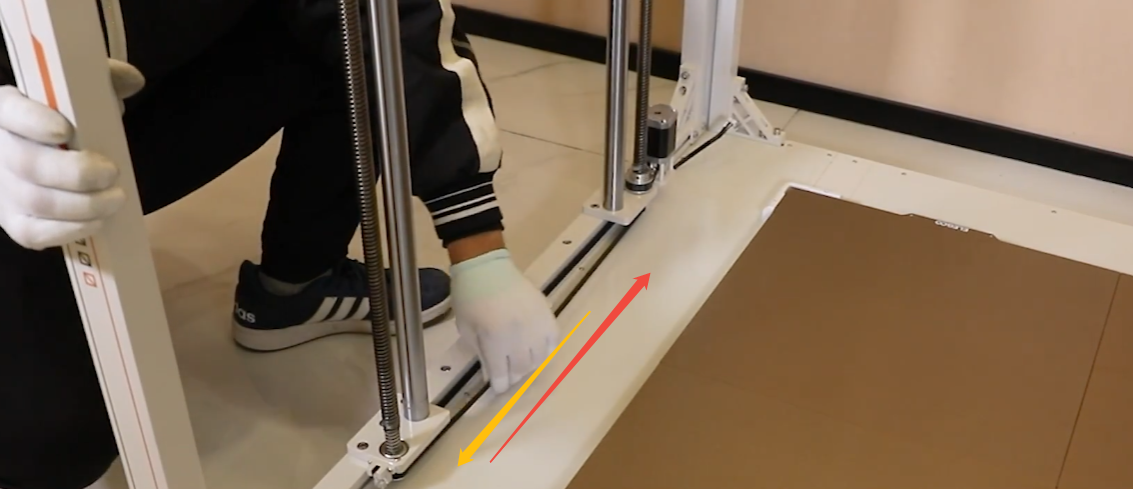
- If the distance is not identical, pull the Z-axis belt to adjust the Z-axis height.
¶ Still Have Issues?
Perform troubleshooting in accordance with the above instructions will not invalidate your printer's warranty. If the issue still persists after completing the steps in this tutorial, it indicates that the proximity switch should be replaced.