¶ Issue Description
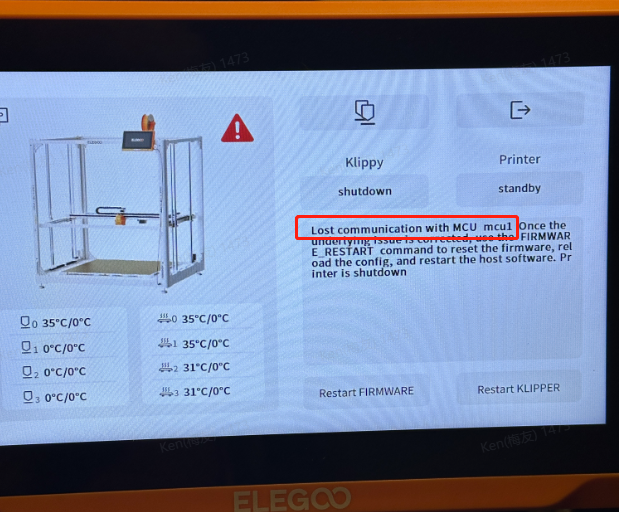
The touch screen or Fluidd displays an error message: Lost communication with MCU mcu1 once the underlying issue is corrected,use the FIRMWARE RESTART command to reset the firmware,reload the config,and restart the host software. Printer is shutdown
¶ Reasons
-
Poor contact in the CANbus, CANbus extruder adapter board, chamber adapter board, etc.
-
The CANbus, extruder adapter board, chamber adapter board or other components are defected.
¶ Troubleshooting Steps
¶ Tools necessary for toubleshooting
- 2.0 mm Allen key
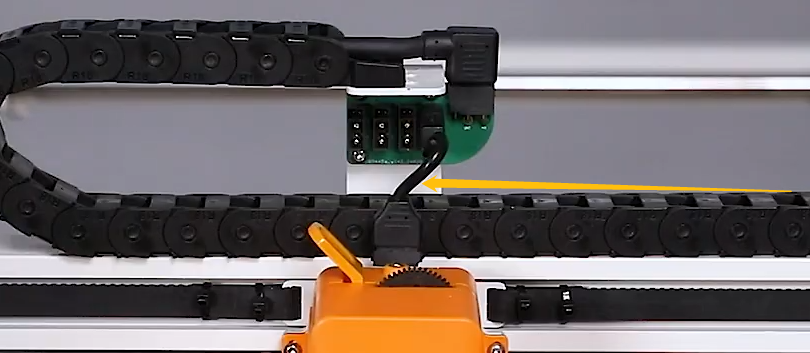
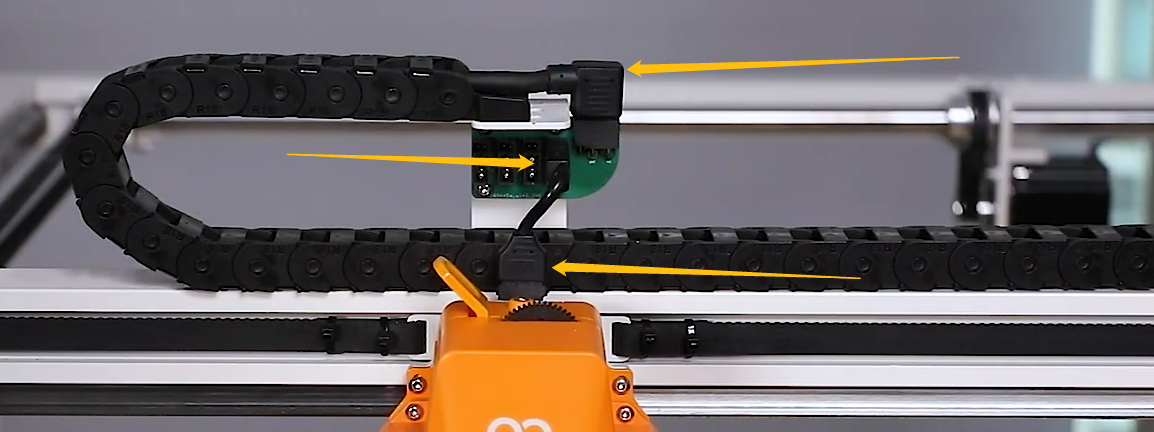
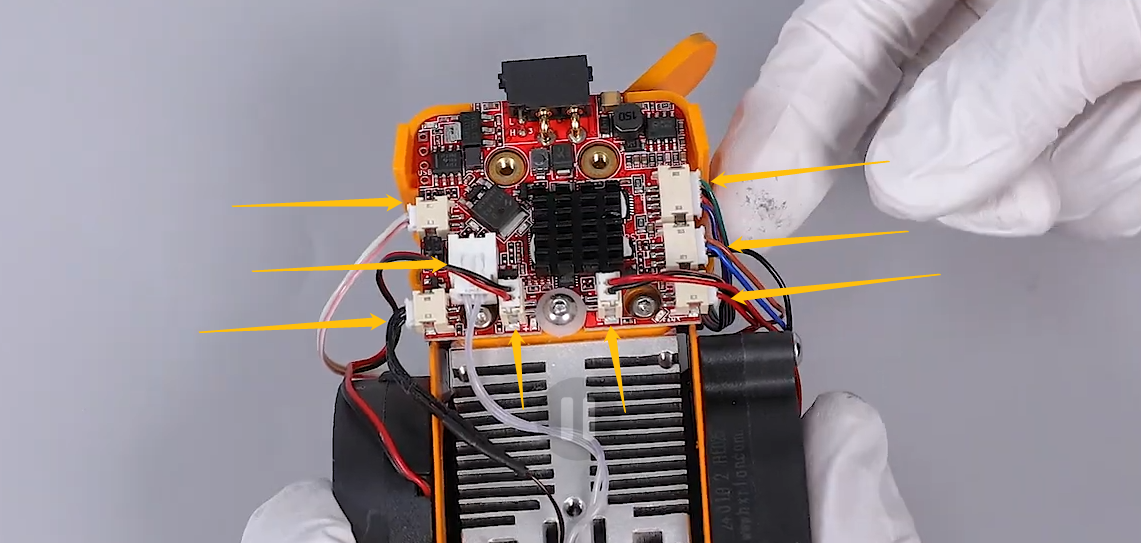
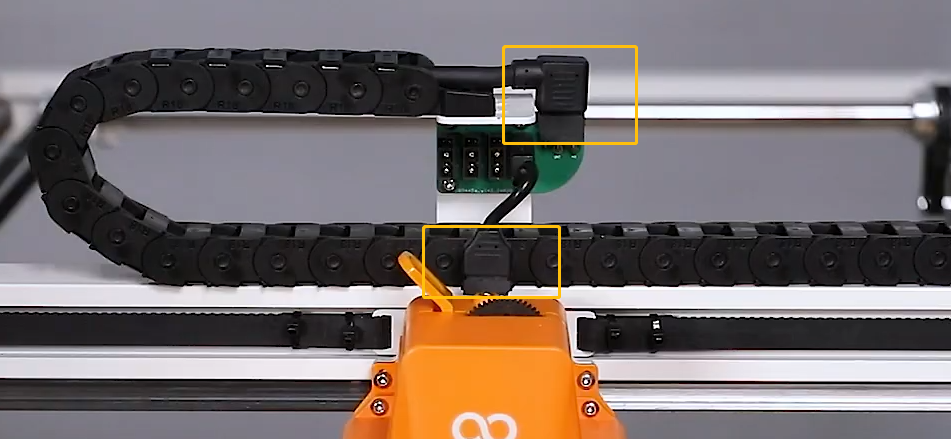
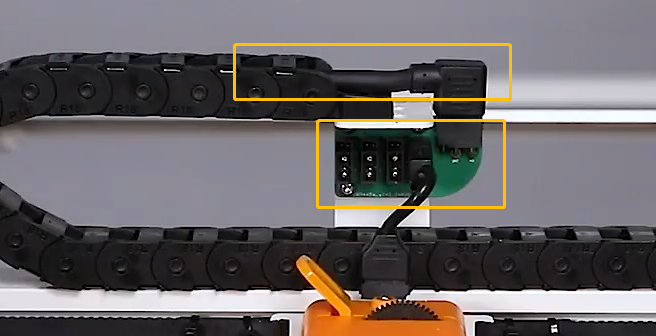
¶ 1.Re-plug the nozzle adapter cable.
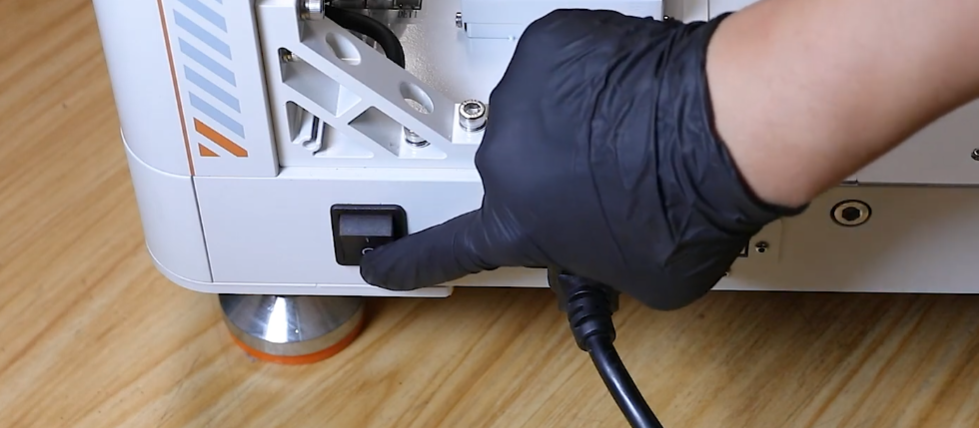
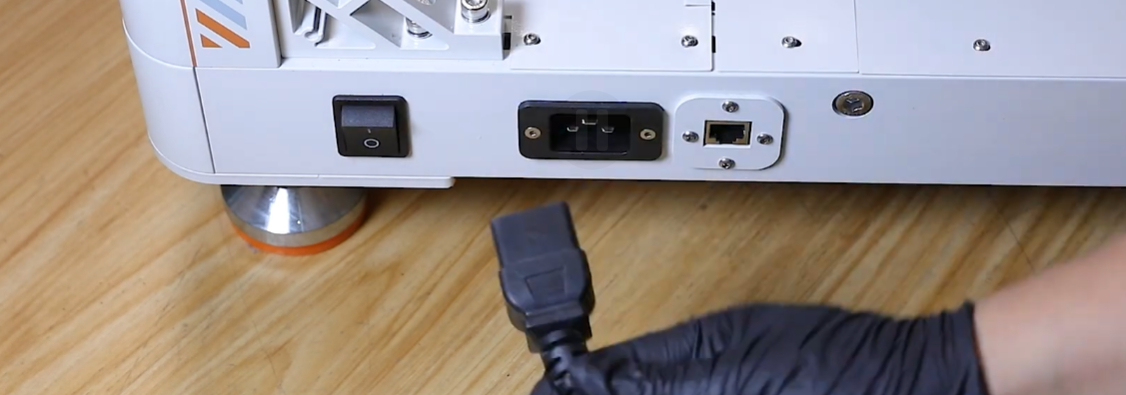
a. Turn the power switch OFF (symbol "〇") and unplug the power supply cable.
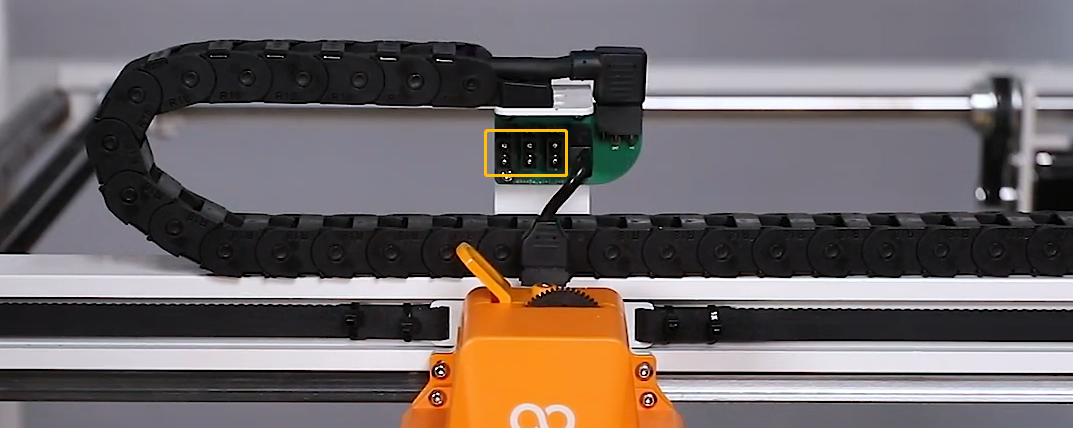
b. Re-plug the three marked cables shown in the picture below.
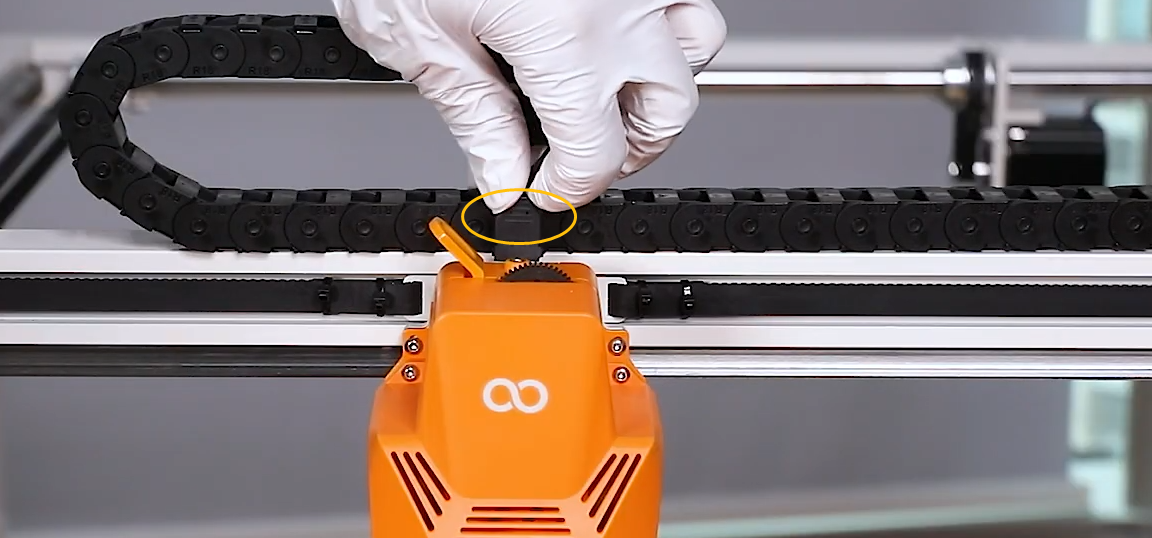
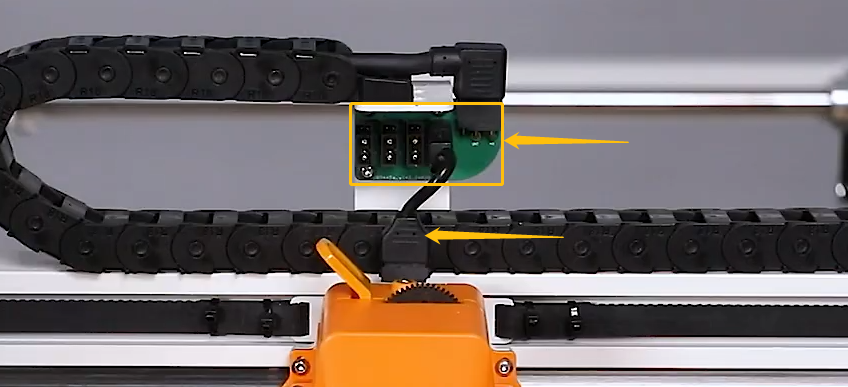
c. If the issue still occurs, turn the power switch OFF (symbol "〇"). Plug the extruder adapter cable into another port on the CAN
expansion board..
d. Turn the power switch ON (symbol "|") . Check whether the issue still occurs. If the error message disappears, it indicates that the issue is solved. It is necessary to replace a new expansion board.
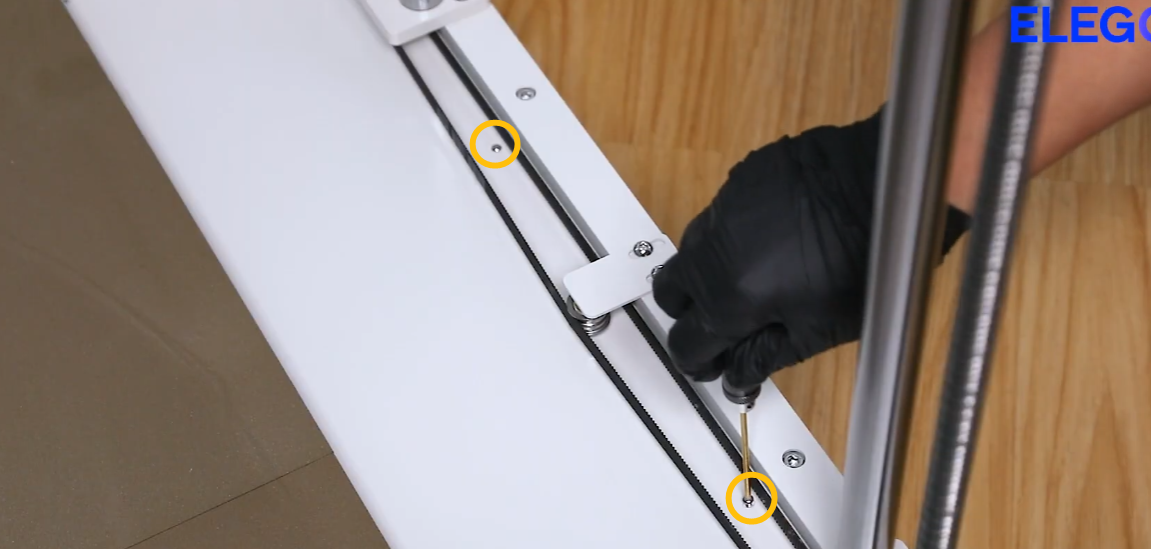
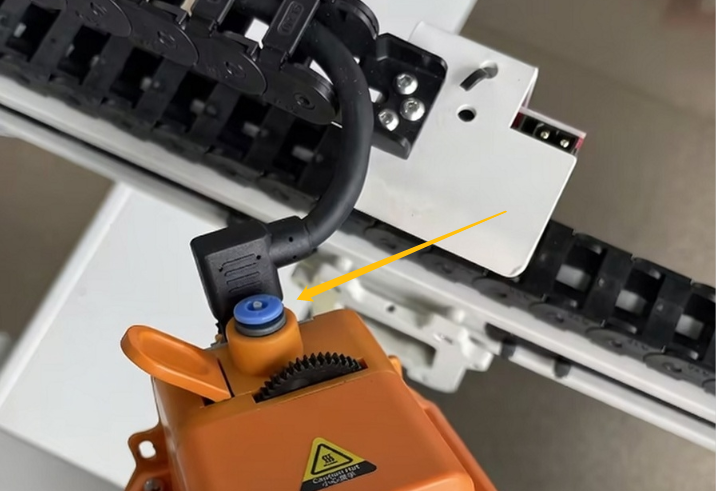
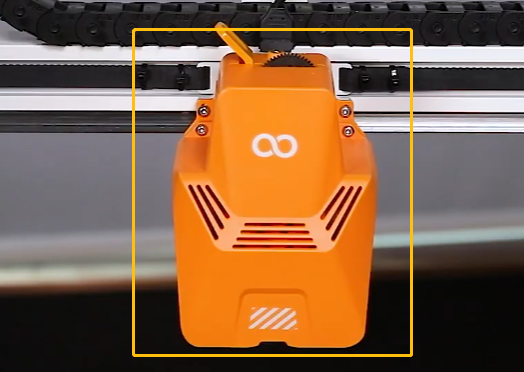
¶ 2.Re-plug the cables connected to the extruder.
a. Unplug the extruder adapter cable.
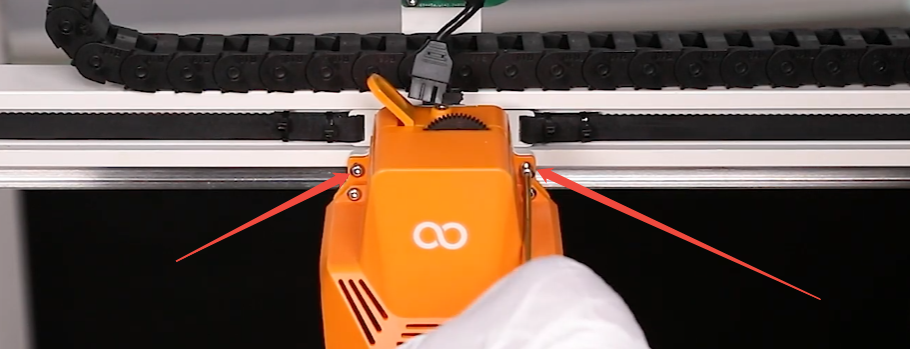
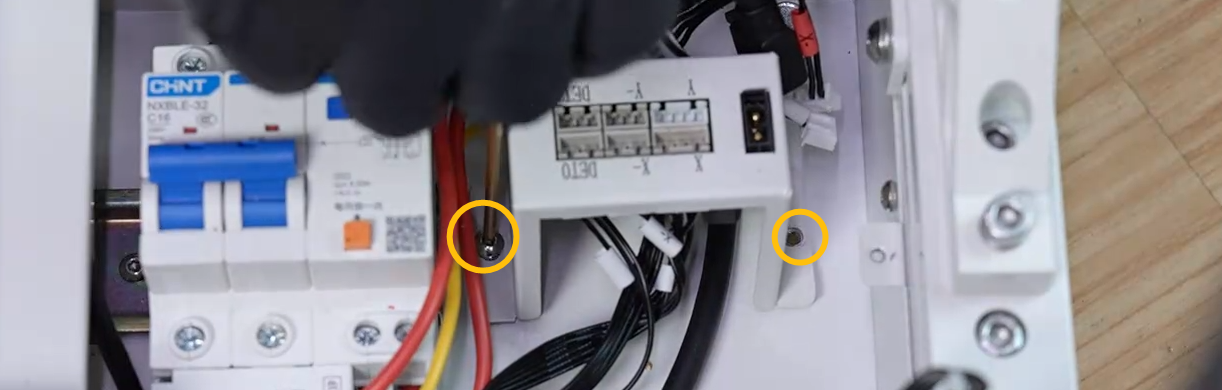
b. Release and remove the two marked screws shown in the picture below.
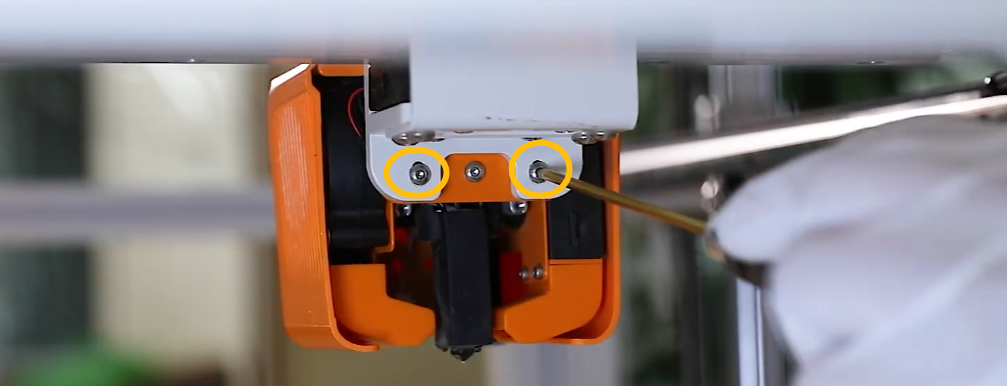
c. Hold the extruder to prevent it from falling when removing the two marked screws shown in the picture below.
d. Release and remove the two marked screws shown in the picture below.
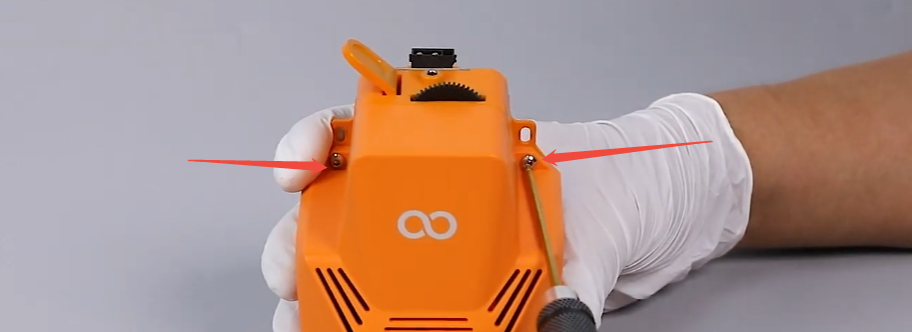
e. Remove the front cover of the extruder.

f. Release and remove the three marked screws shown in the picture below.
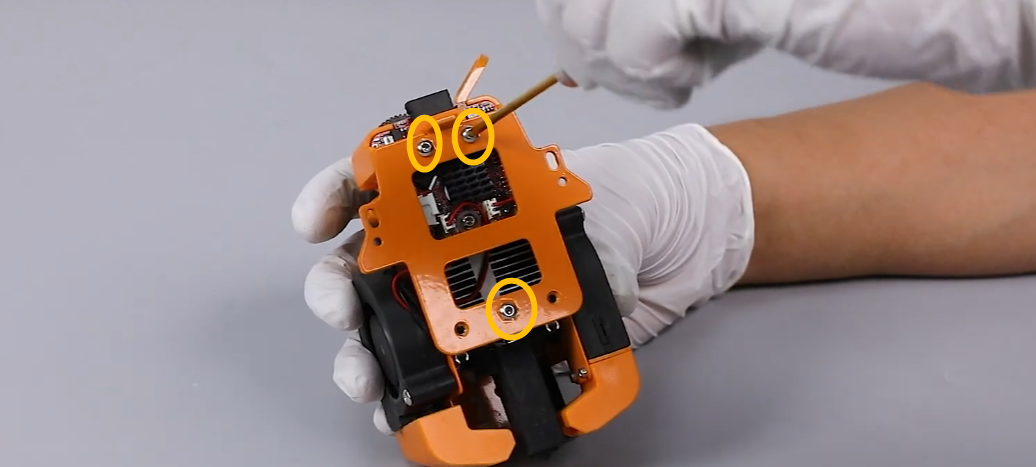
g. Remove the press plate.
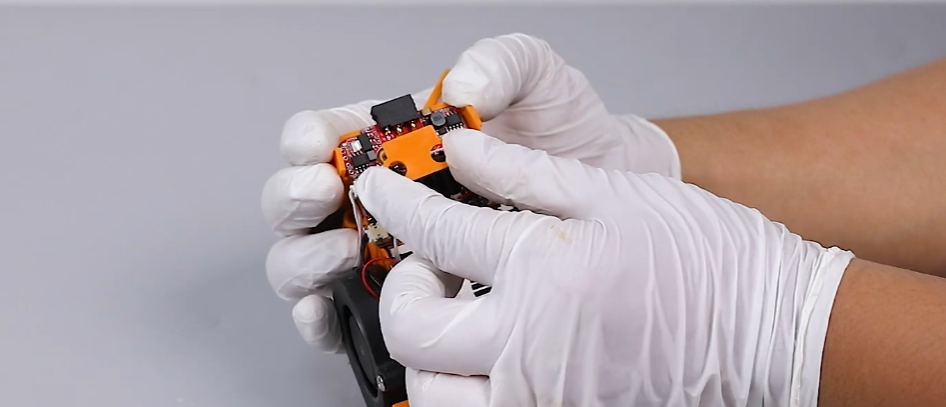
h. Re-plug the cables connected to the extruder.
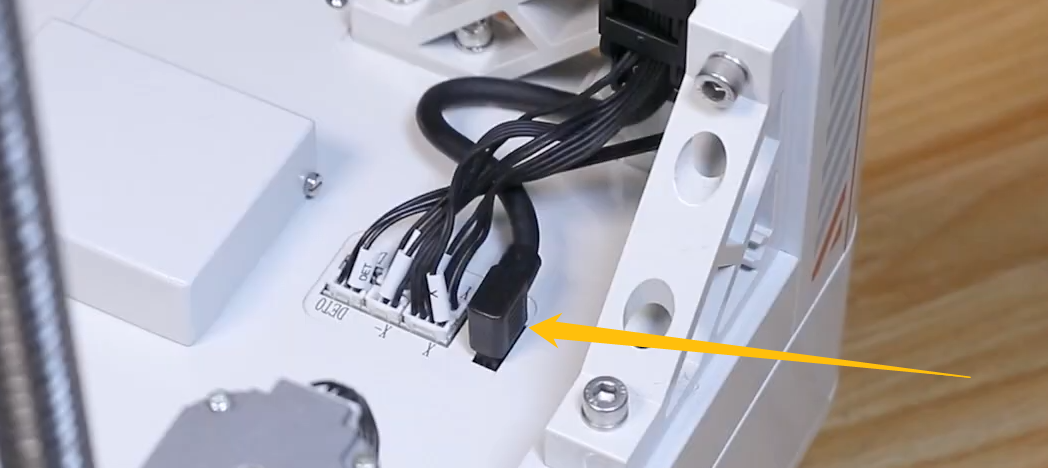
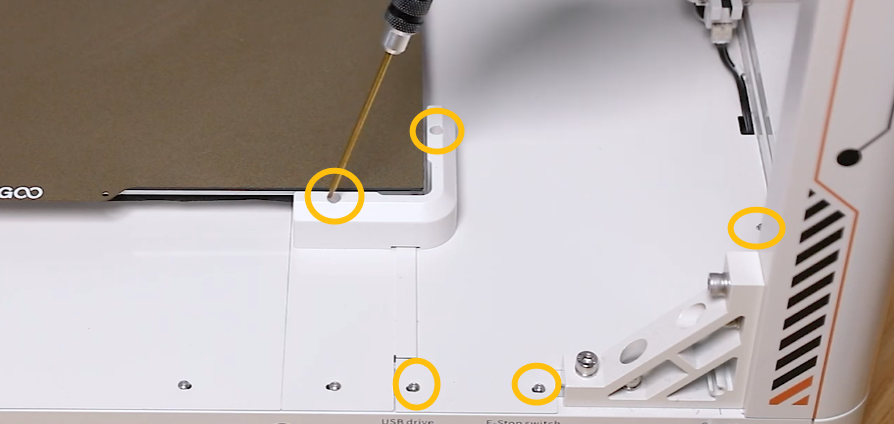
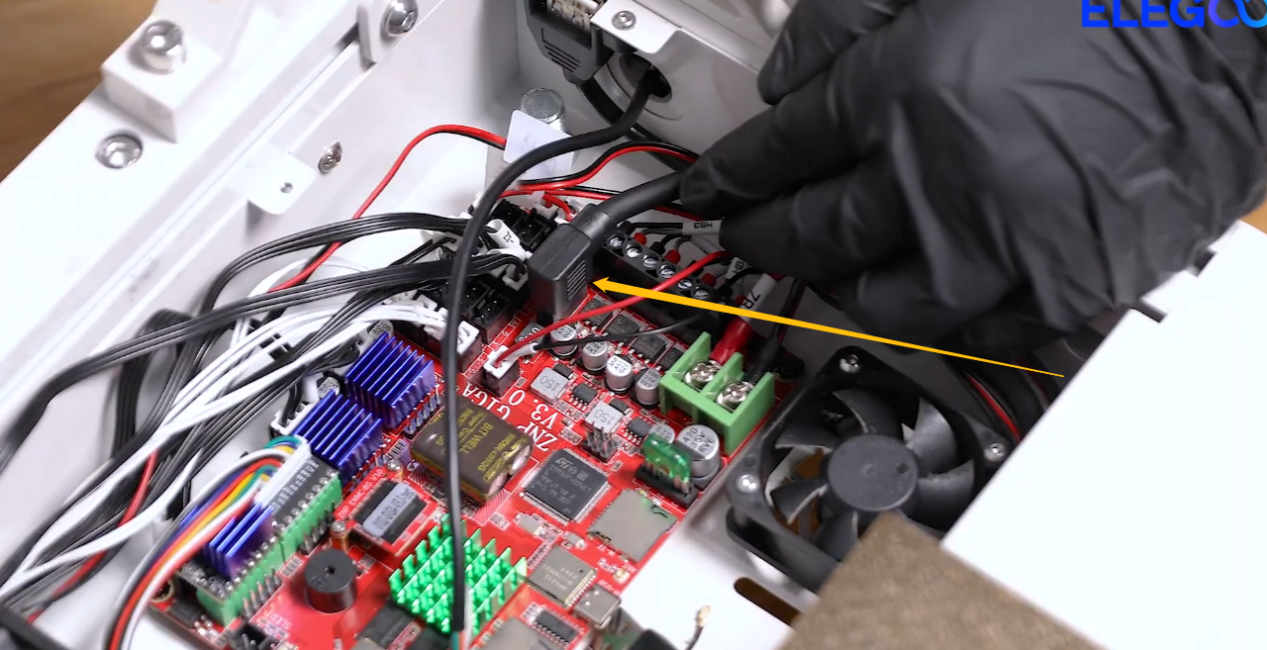
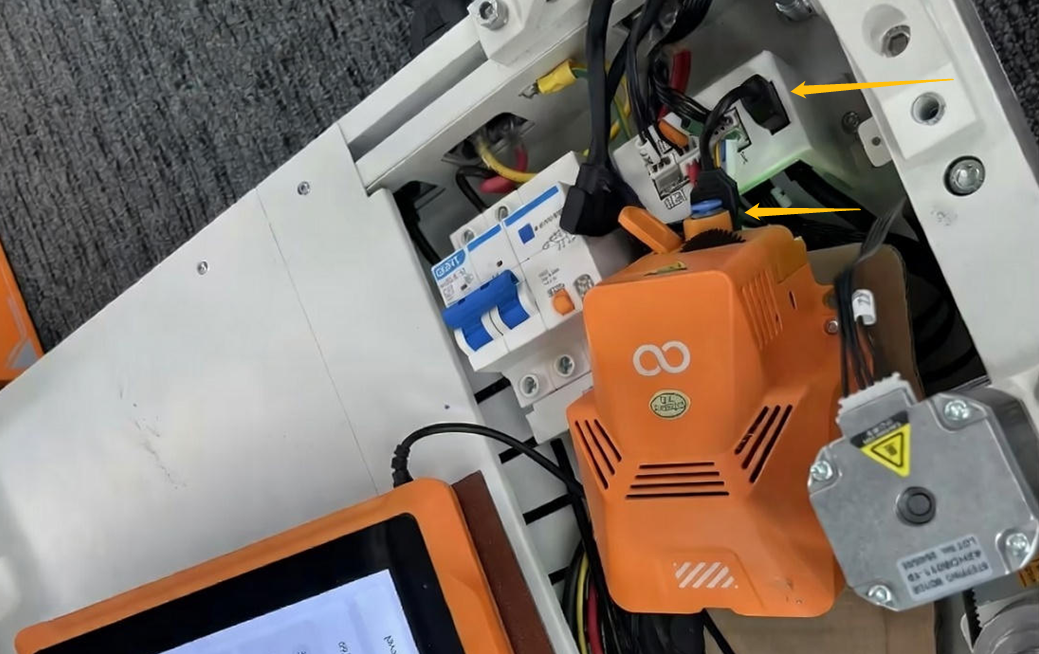
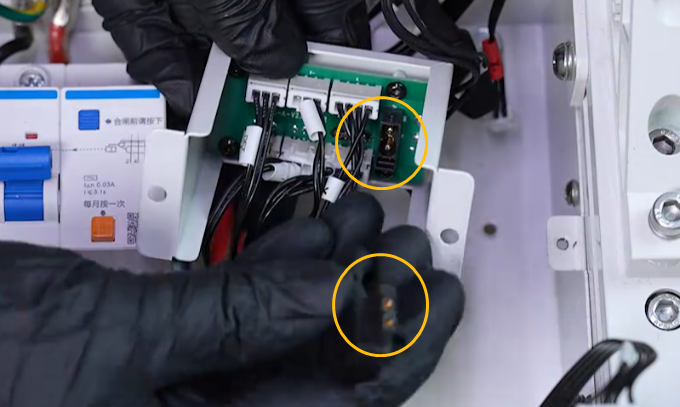
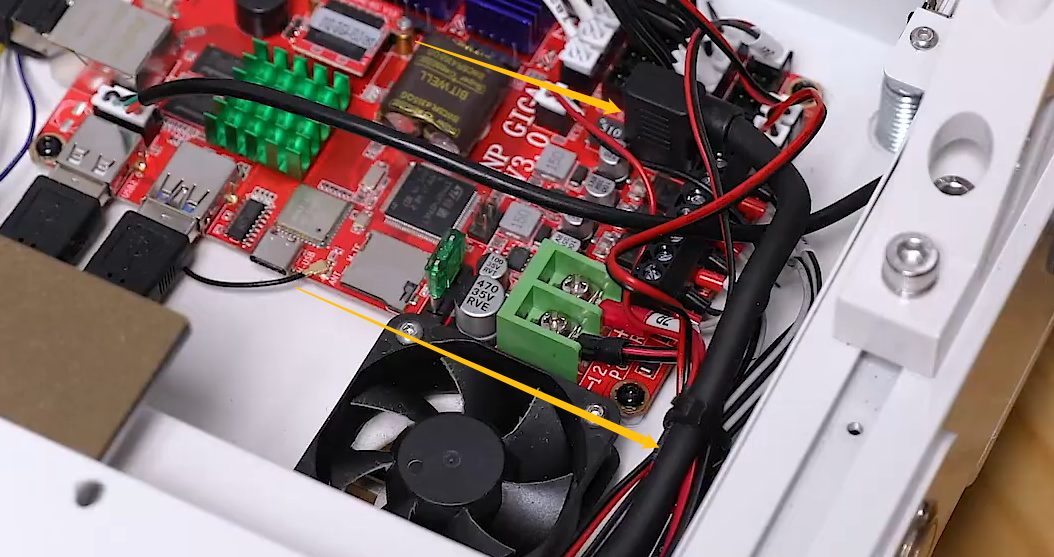
¶ 3.Re-plug the CANbus cable on the motherboard side.
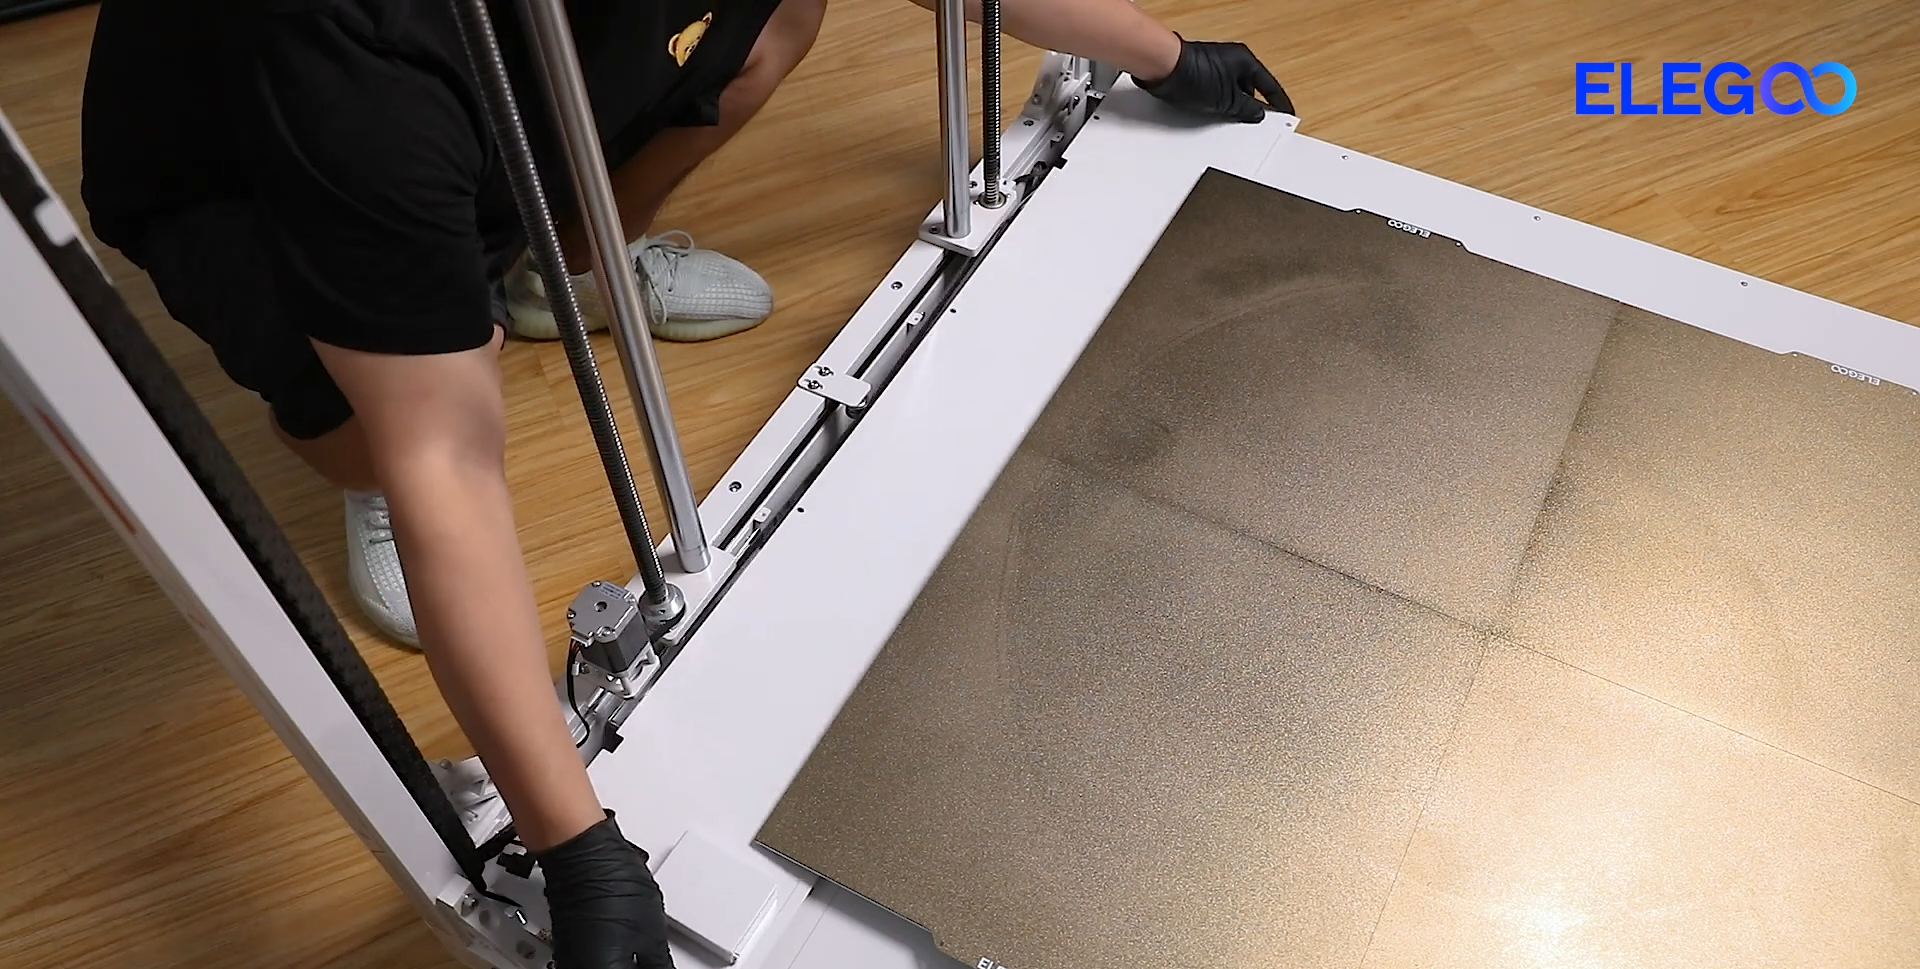
a. Release and remove the three marked screws shown in the picture below.
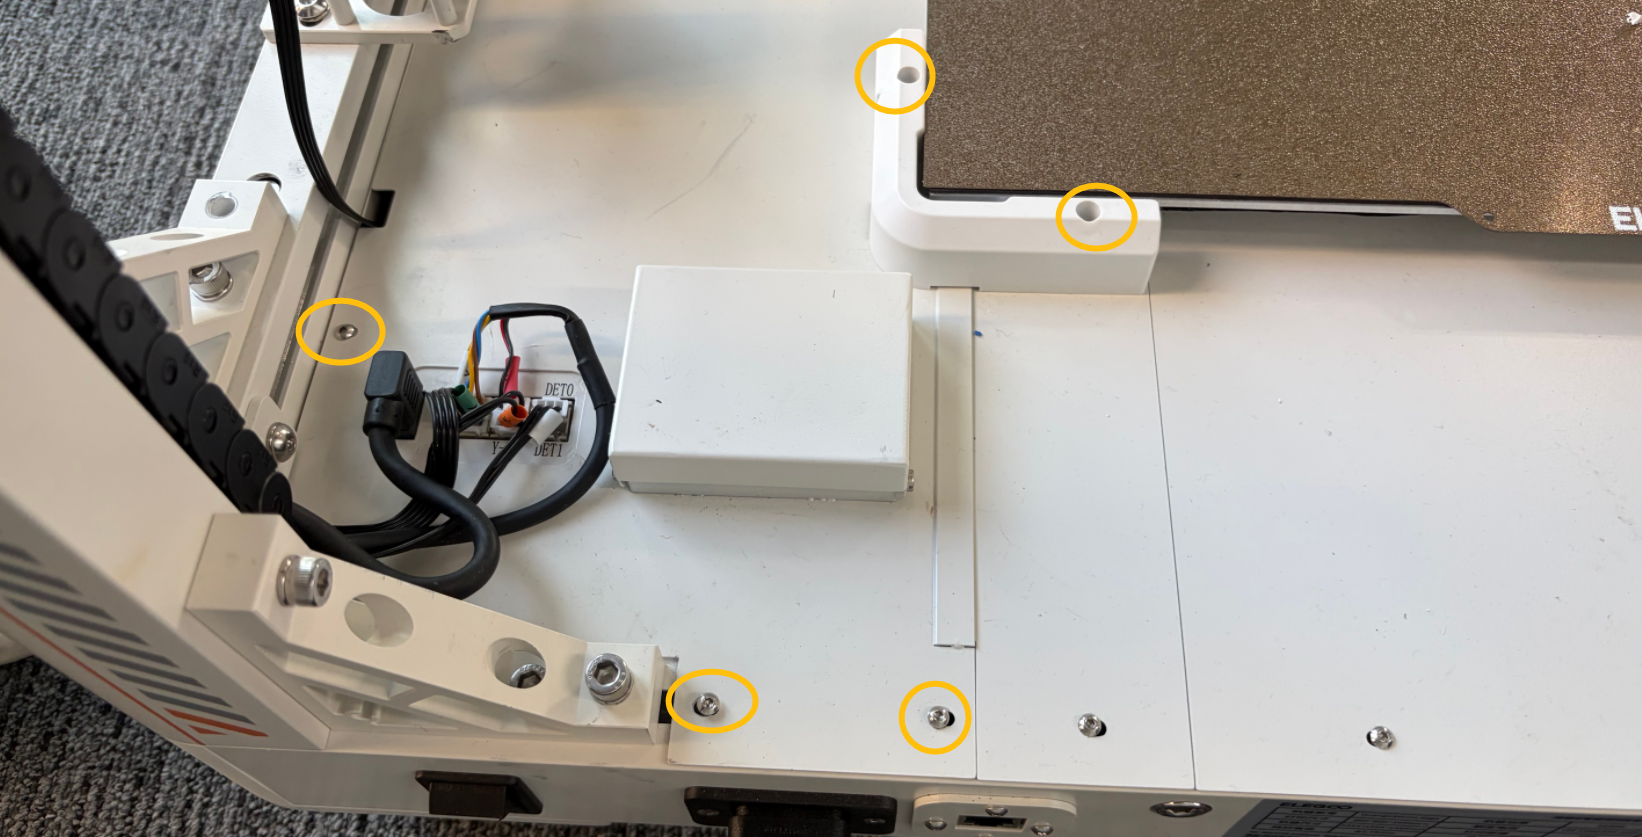
b. Unplug the marked cables shown in the picture below.
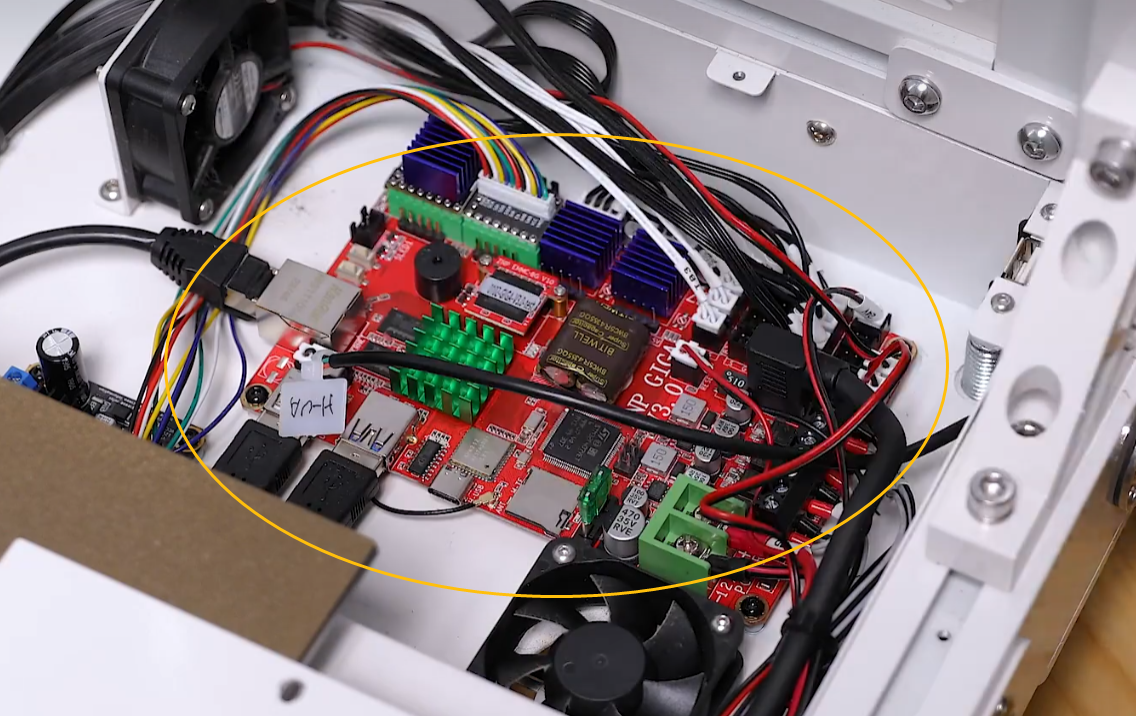
c. Remove the motherboard cover.
d. The motherboard is located in the marked area.
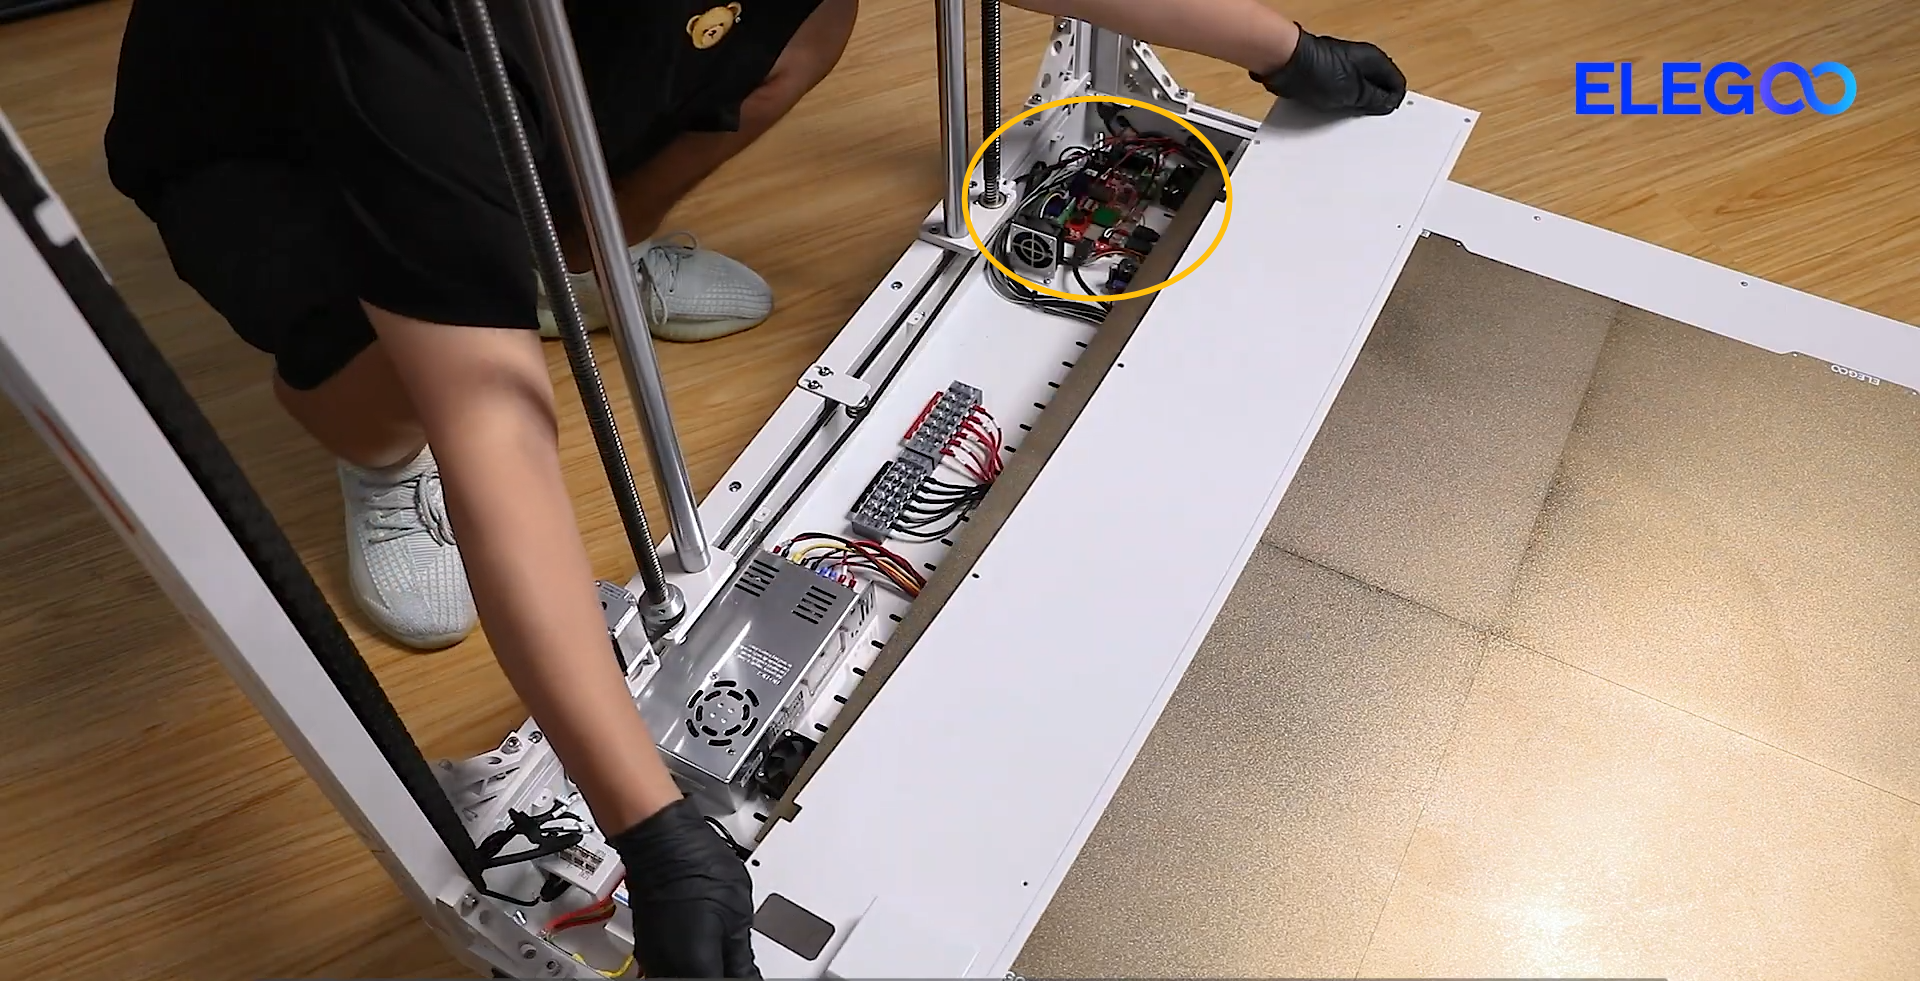
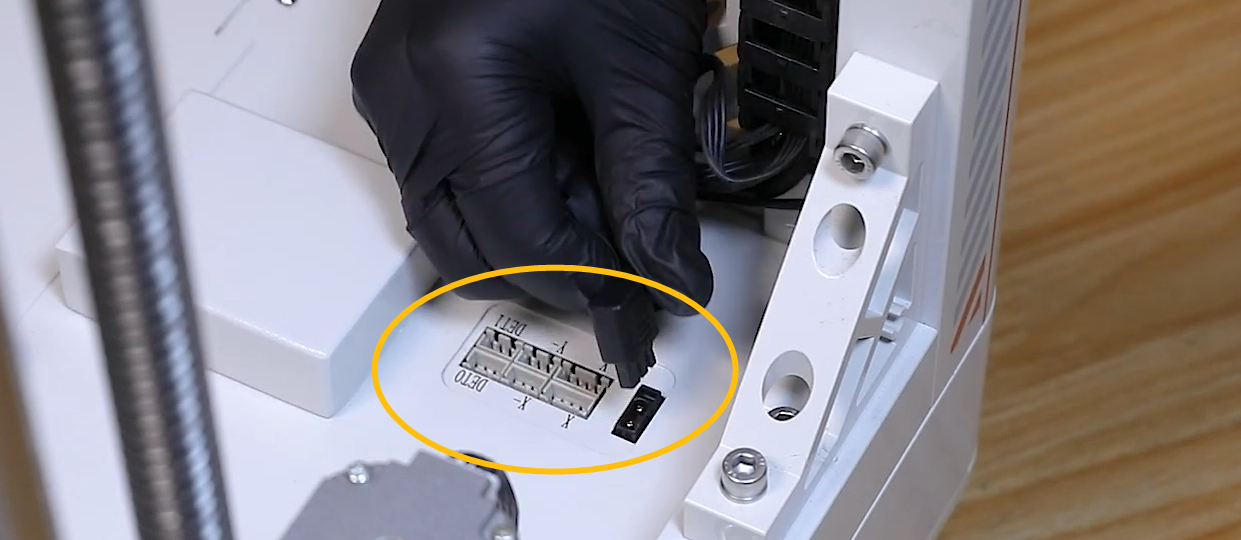
e. Re-plug the marked cable shown in the picture below.
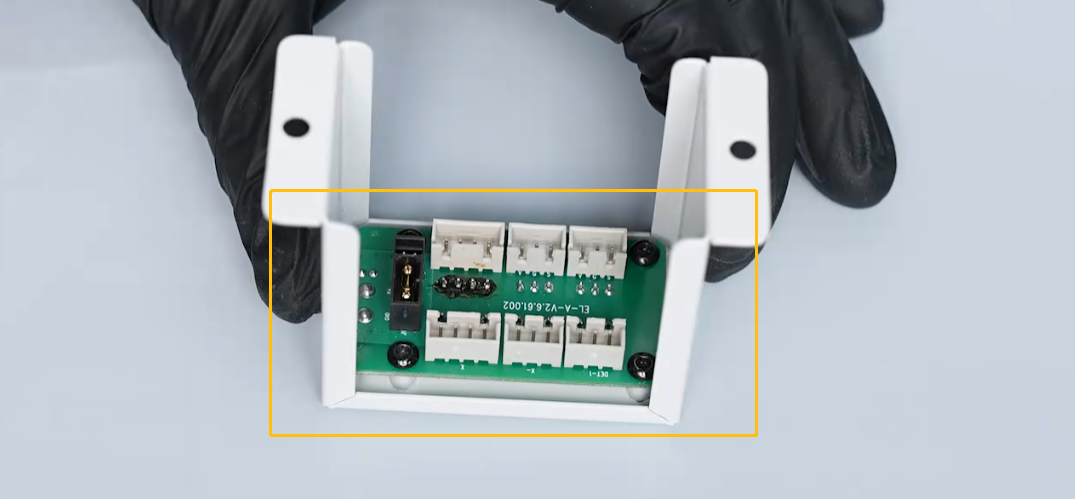
¶ 4.Re-plug the CANbus cable on the back cover of the chamber adapter board.
a. The chamber adapter board is located in the marked area.
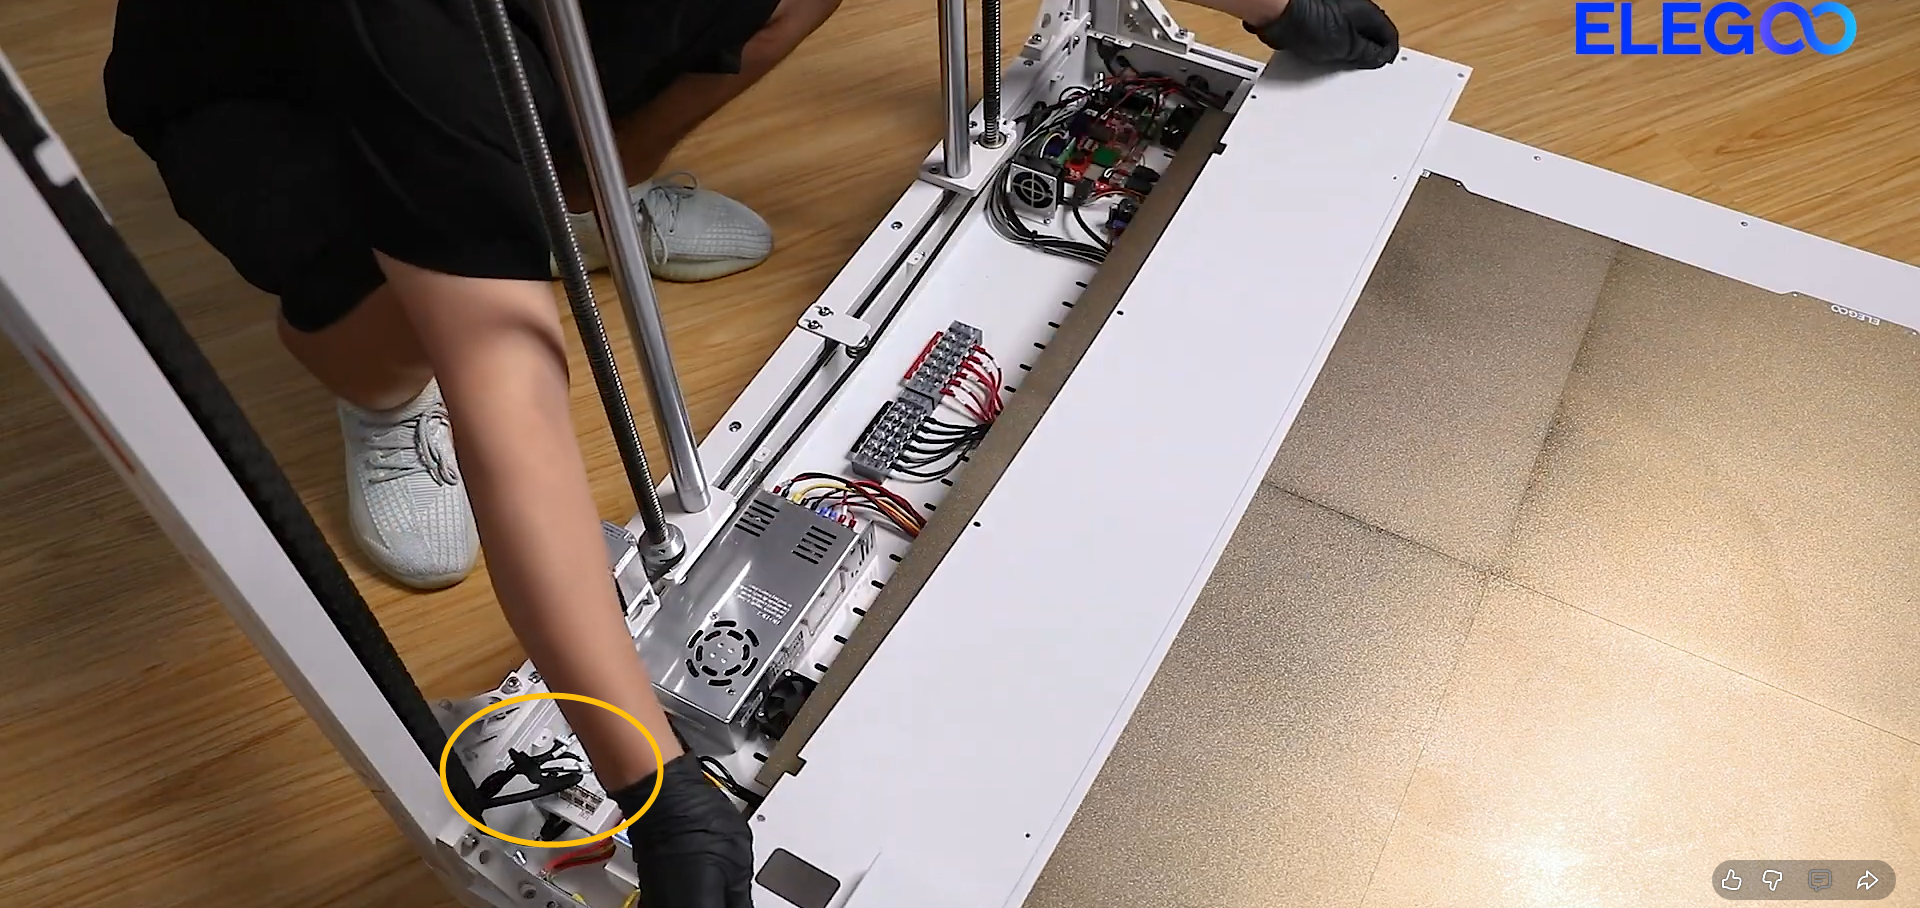
b. After removing the two screws, turn the chamber adapter board over.
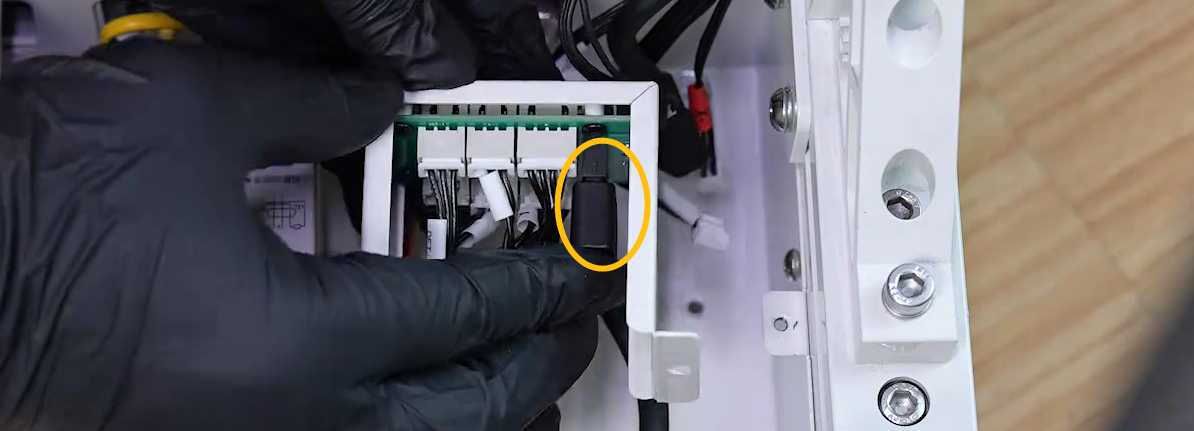
c. Re-plug the marked cable shown in the picture below.
¶ 5.Connect the extruder to the CAN bus cable for testing.
a. Turn the power switch OFF (symbol "〇") and unplug the power supply cable.
b. Unplug the extruder adapter cable and the CAN bus cable.
c. Remove the extruder.
d. Plug the CAN bus cable into the extruder.
e. Turn the power switch ON (symbol "|") . Check whether the issue still occurs.
-
If the error message doest not occur, it indicates that the issue is solved. It is necessary to replace a new extruder adapter cable and a new CAN expansion board.
-
If the issue still occurs, follow the steps below for further troubleshooting.
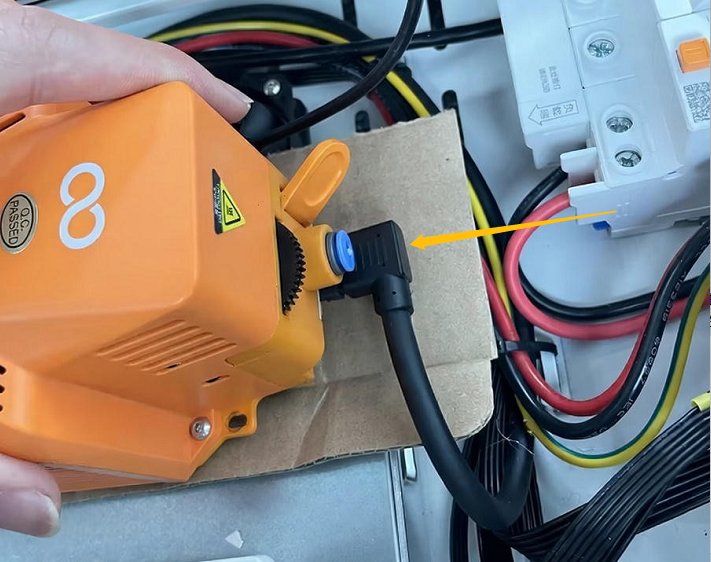
¶ 6.Plug the extruder into the CAN bus for testing.
a. Turn the power switch OFF (symbol "〇") and unplug the power supply cable.
b. Connect extruder with the chamber adapter board with the extruder adapter cable.
c. Place the extruder temporarily inside the chamber. Make sure that the bottom of the chamber is insulated to avoid short circuit. For example, place a piece of cardboard beneath the extruder to prevent the contact with other components.
d. Turn the power switch ON (symbol "|") . Check whether the issue still occurs.
- If the error message does not occur, it indicates that the issue is solved. It is necessary to replace a new CAN bus cable and a new CAN expansion board.
- If the issue still occurs, follow the steps below for further troubleshooting.
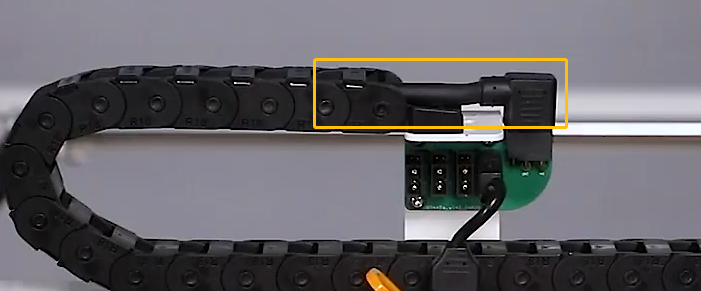
¶ 7.Connect the extruder with the CAN bus cable for testing.
a. Turn the power switch OFF (symbol "〇") and unplug the power supply cable.
b. Unplug the CAN bus cable on the back cover of the chamber adapter board.
c. Connect the extruder with the CAN bus adapter cable.
d. Turn the power switch ON (symbol "|") . Check whether the issue
still occurs.
- If the error message still occurs, it indicates that the CAN bus cable, extruder adapter cable, the CAN expansion board and the
chamber adapter board should be replaced.\
CAN bus cable↓
CAN expansion board & extruder adapter cable↓
Chamber adapter board↓
¶ 8.Connect the extruder to the port on the motherboard for testing.
a. Turn the power switch OFF (symbol "〇") and unplug the power supply cable. Unplug the CAN expansion cable.
b. Connect the extruder to the port on the motherboard with the extruder adapter cable.
 \
\
c. Turn the power switch ON (symbol "|") . Check whether the error message still occurs on the touch screen.
- If the error message does not occur, it indicates that the CAN bus cable, the CAN bus adapter cable, the CAN expansion board and the chamber adapter board should be replaced.
CAN bus cable↓
CAN expansion board & extruder adapter cable↓
Chamber adapter board↓
CAN bus adapter cable↓
- If the error message still occurs, it indicates that one of the following components is defected: the motherboard, the extruder, or the extruder adapter cable.
Motherboard↓
 \
\
Extruder↓
Extruder adapter cable↓