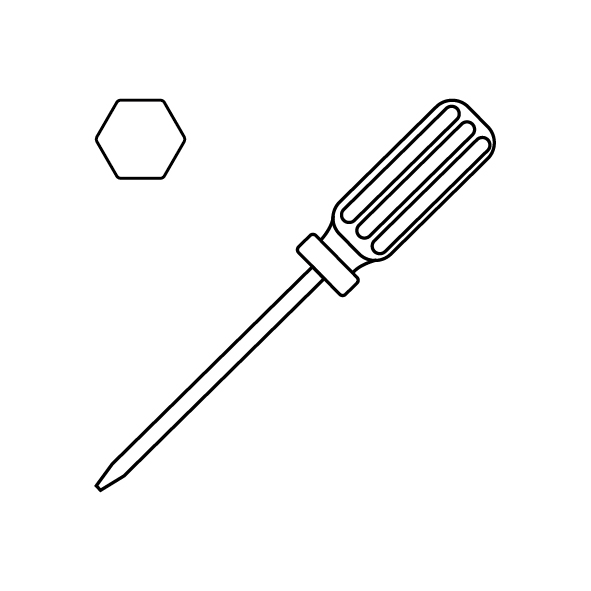
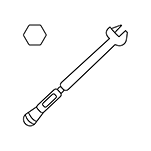
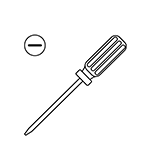
¶ Tools and Materials
- A 2.0 mm Allen key
- A 3.0 mm Allen key
- A 4.0 mm Allen key
- A 5.0 mm Allen key
- 8.0 mm Open wrench
- A flat head screwdriver
¶ Tutorial Video
Coming soon.
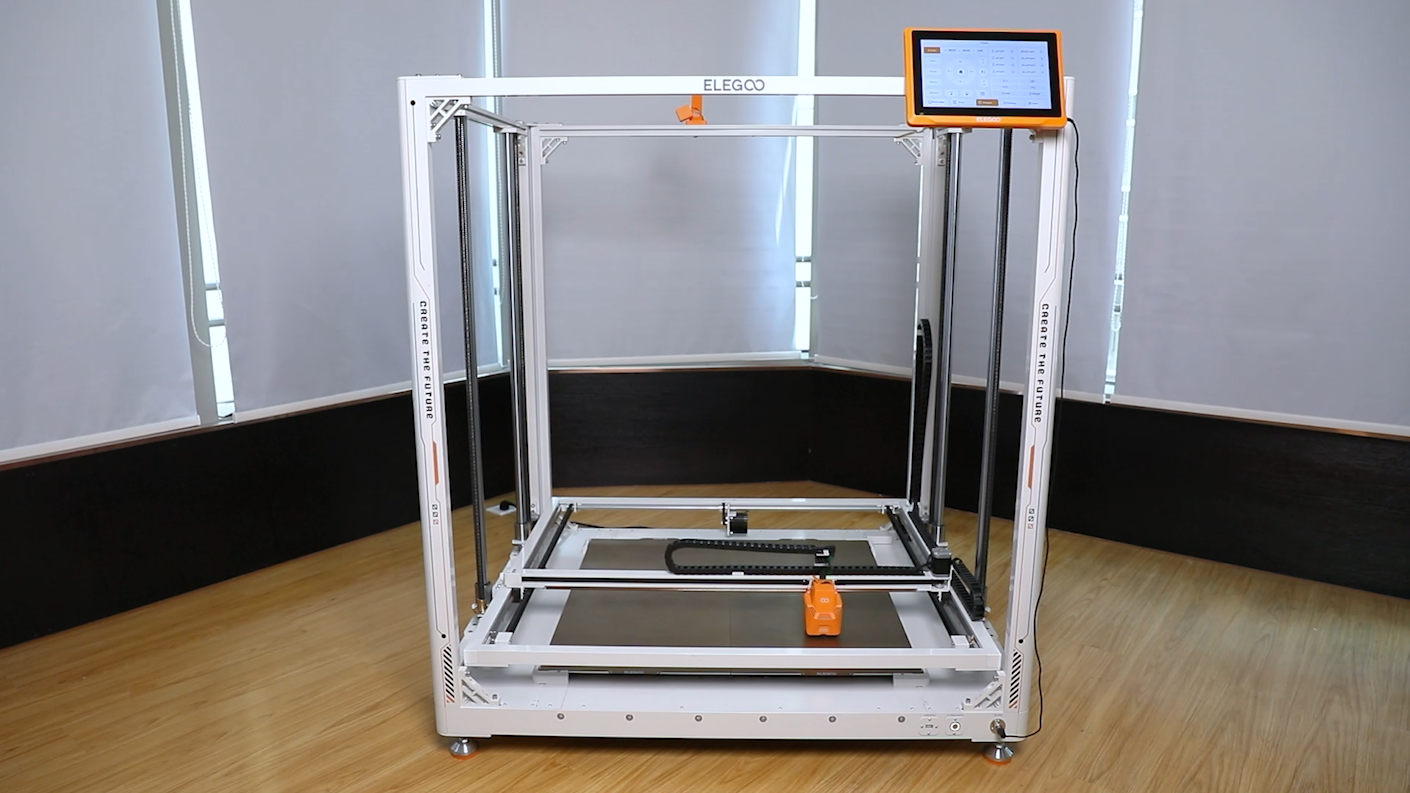
¶ Instruction
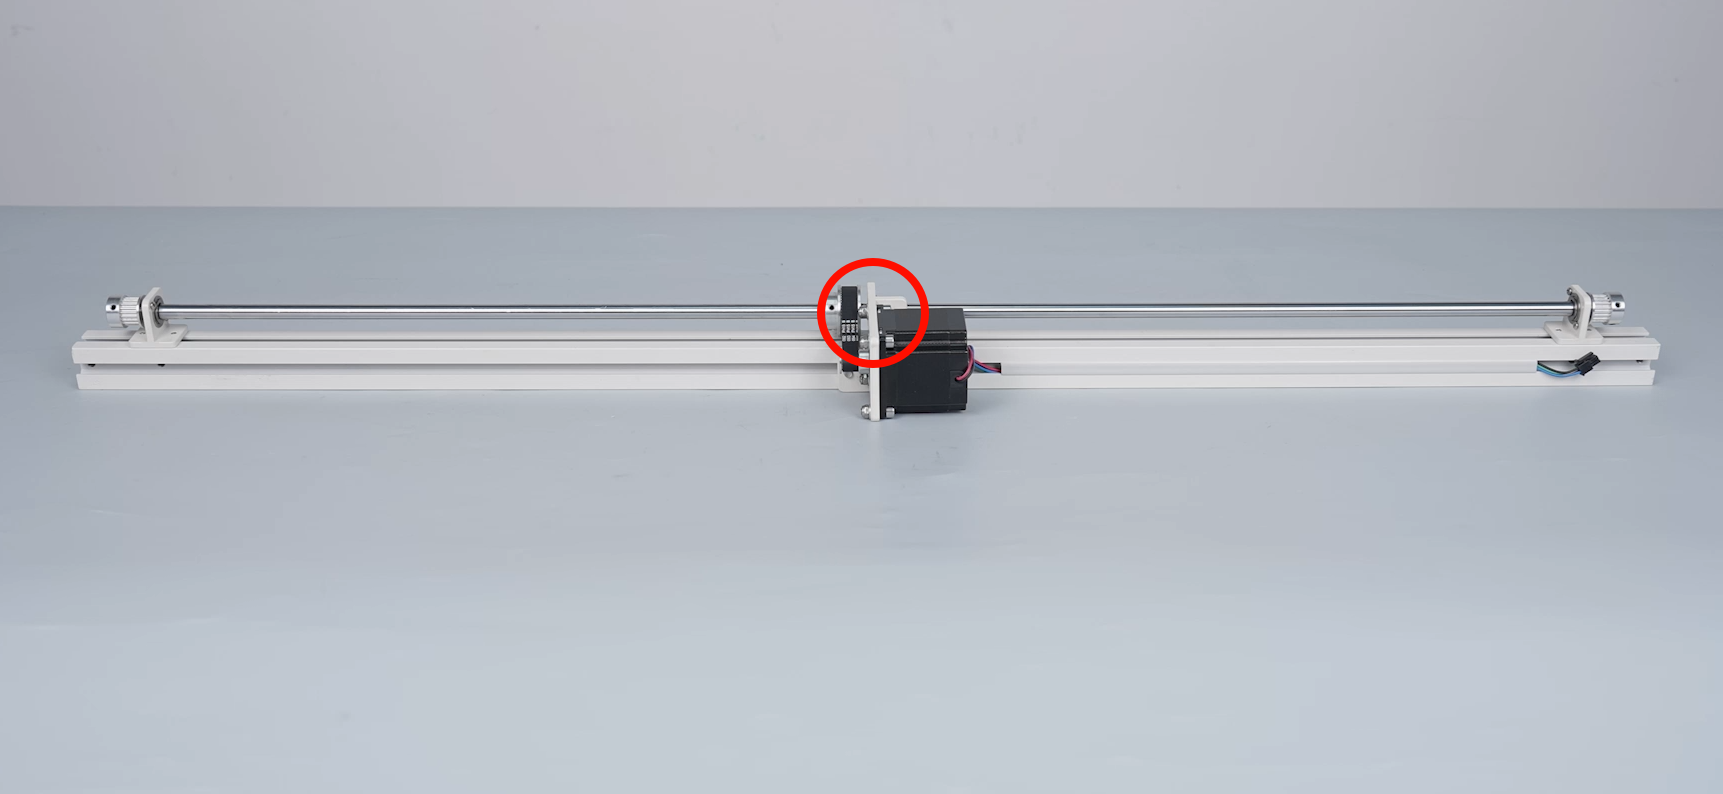
¶ Remove the Y-axis plain shaft
- Power off the printer and unplug the power cord.
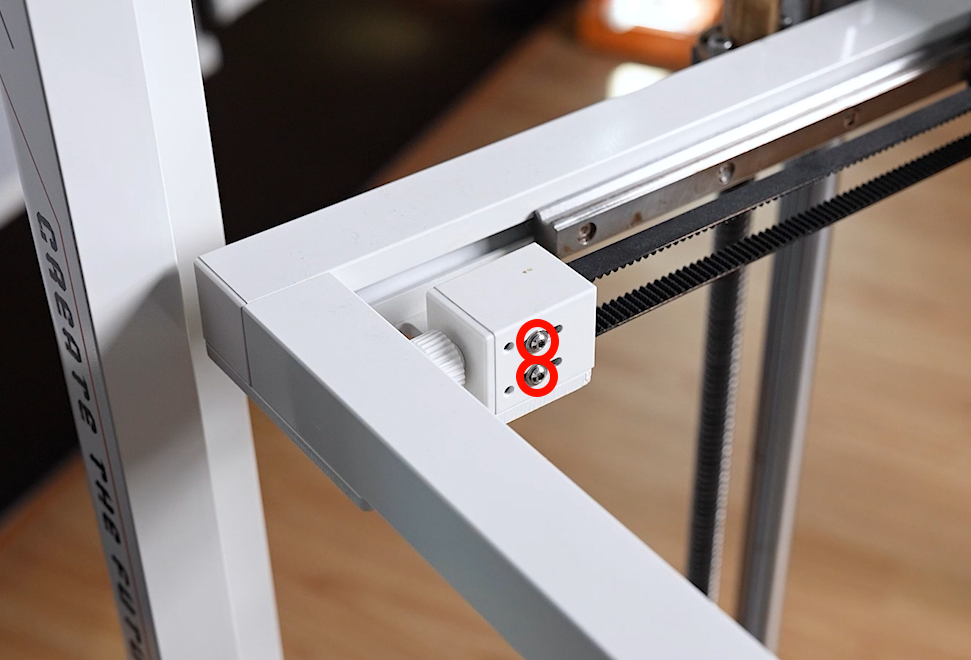
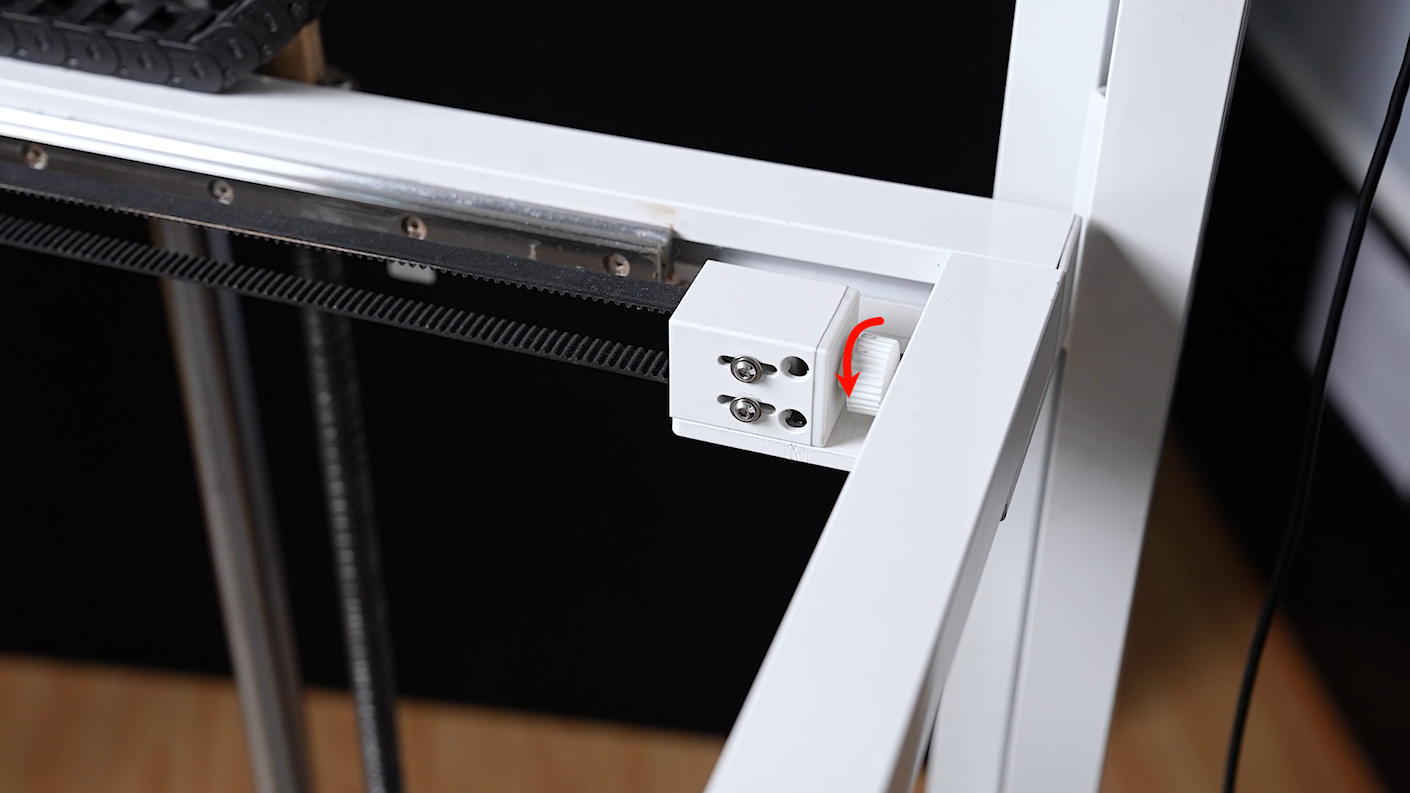
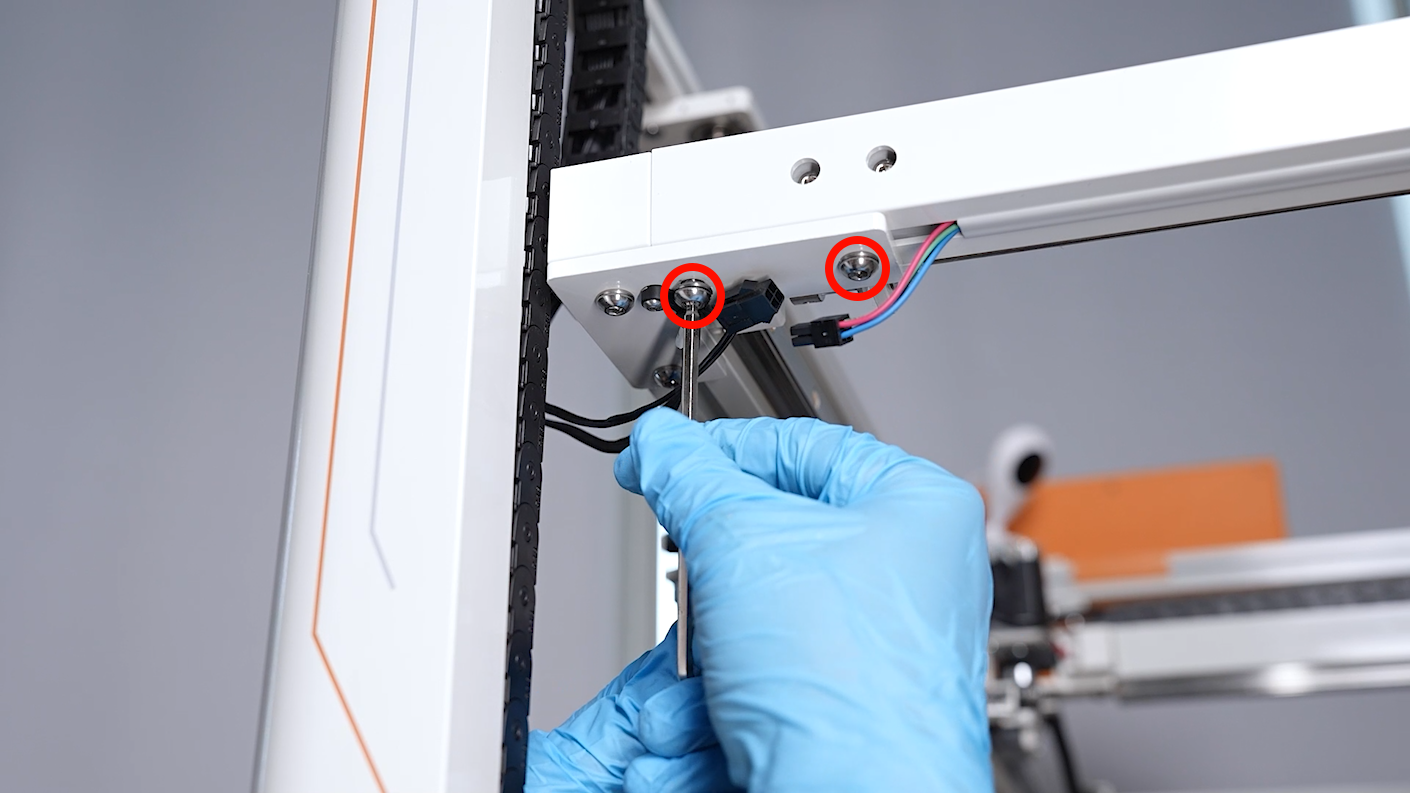
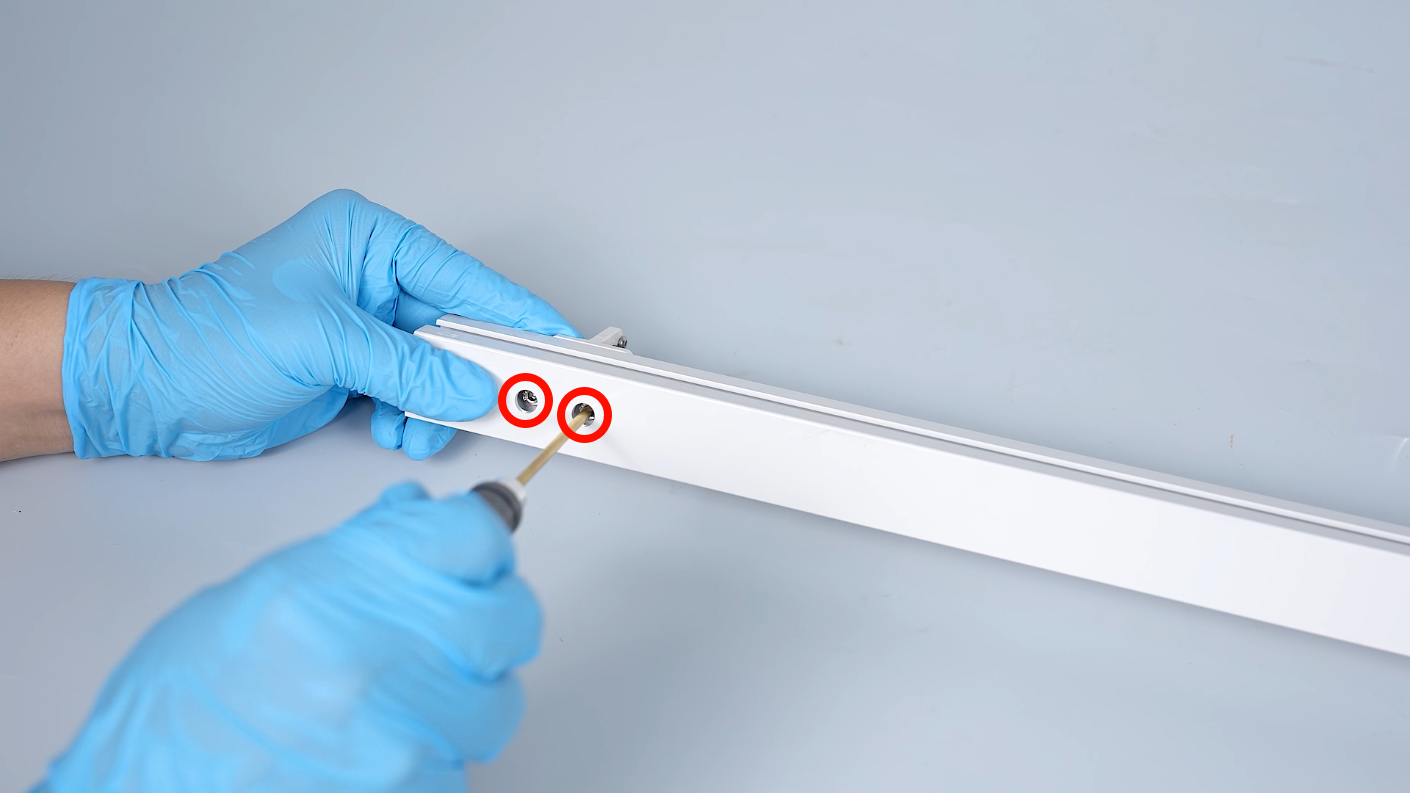
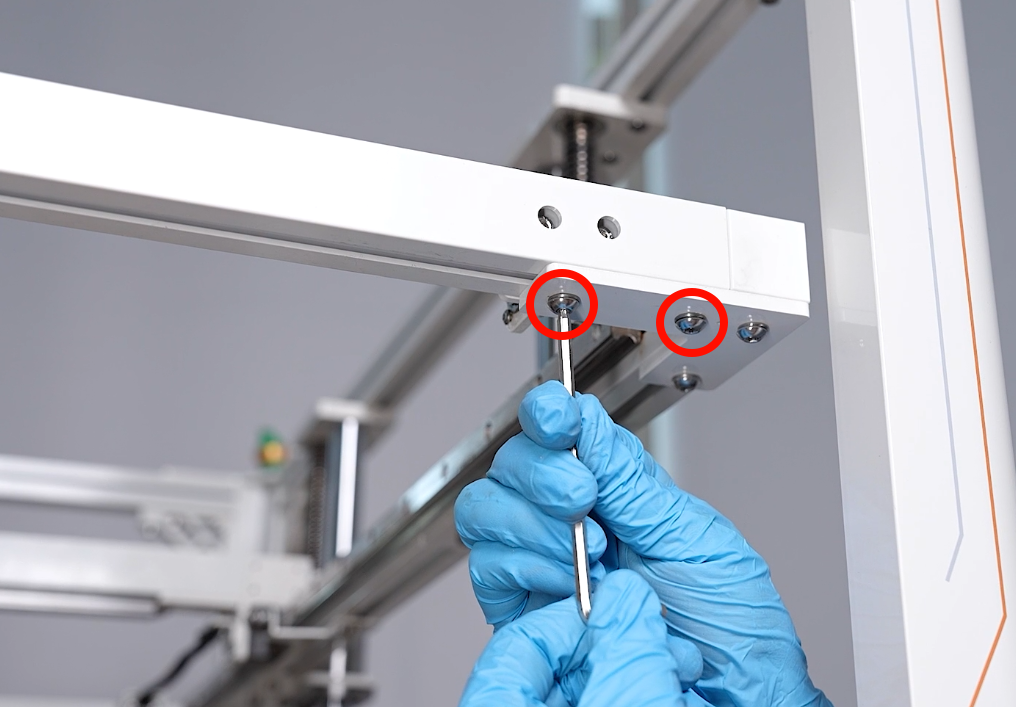
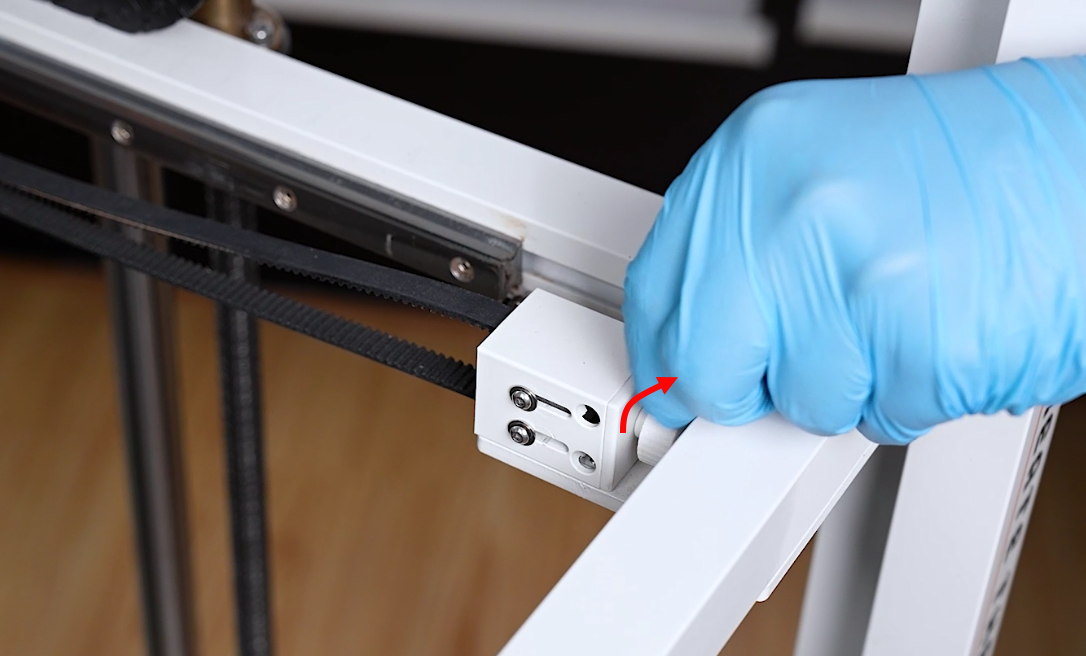
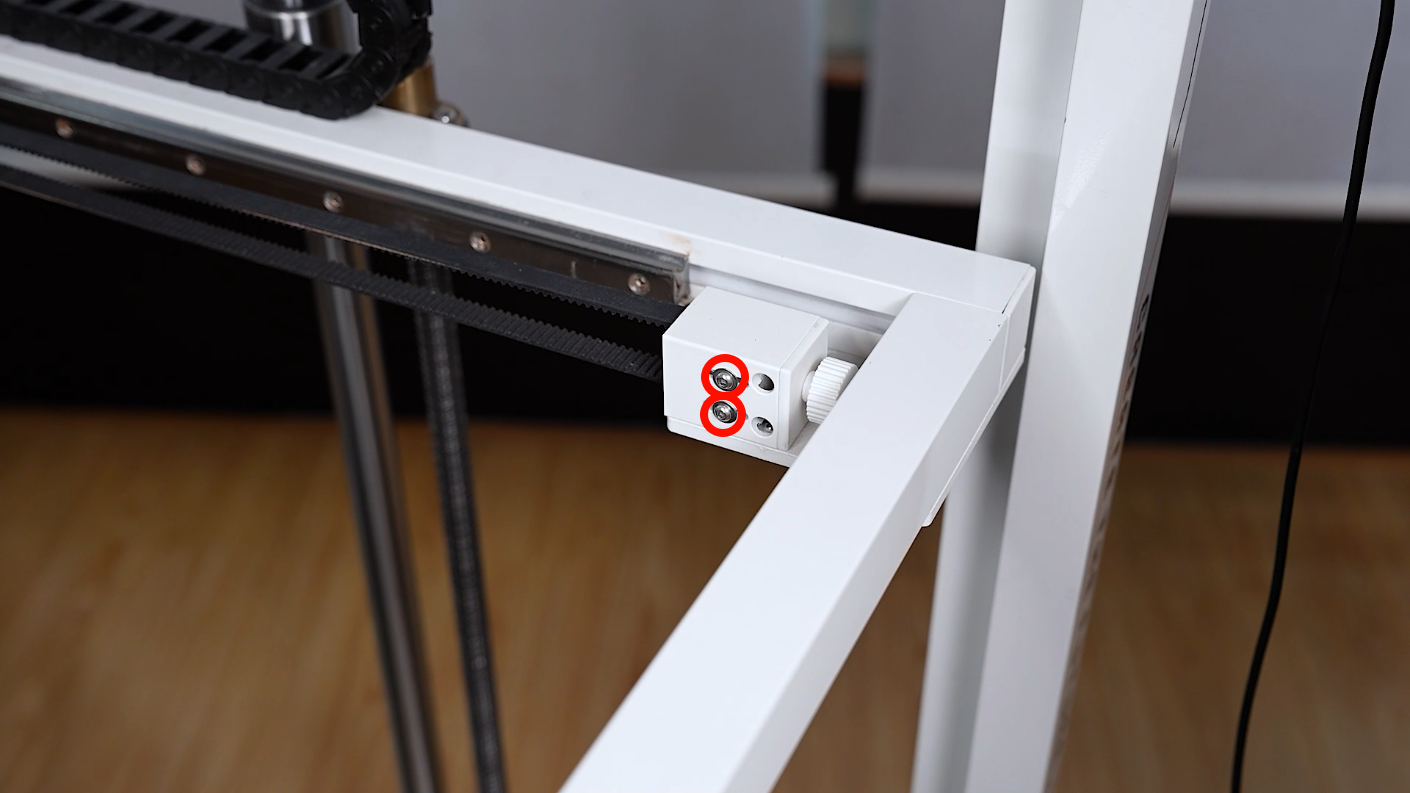
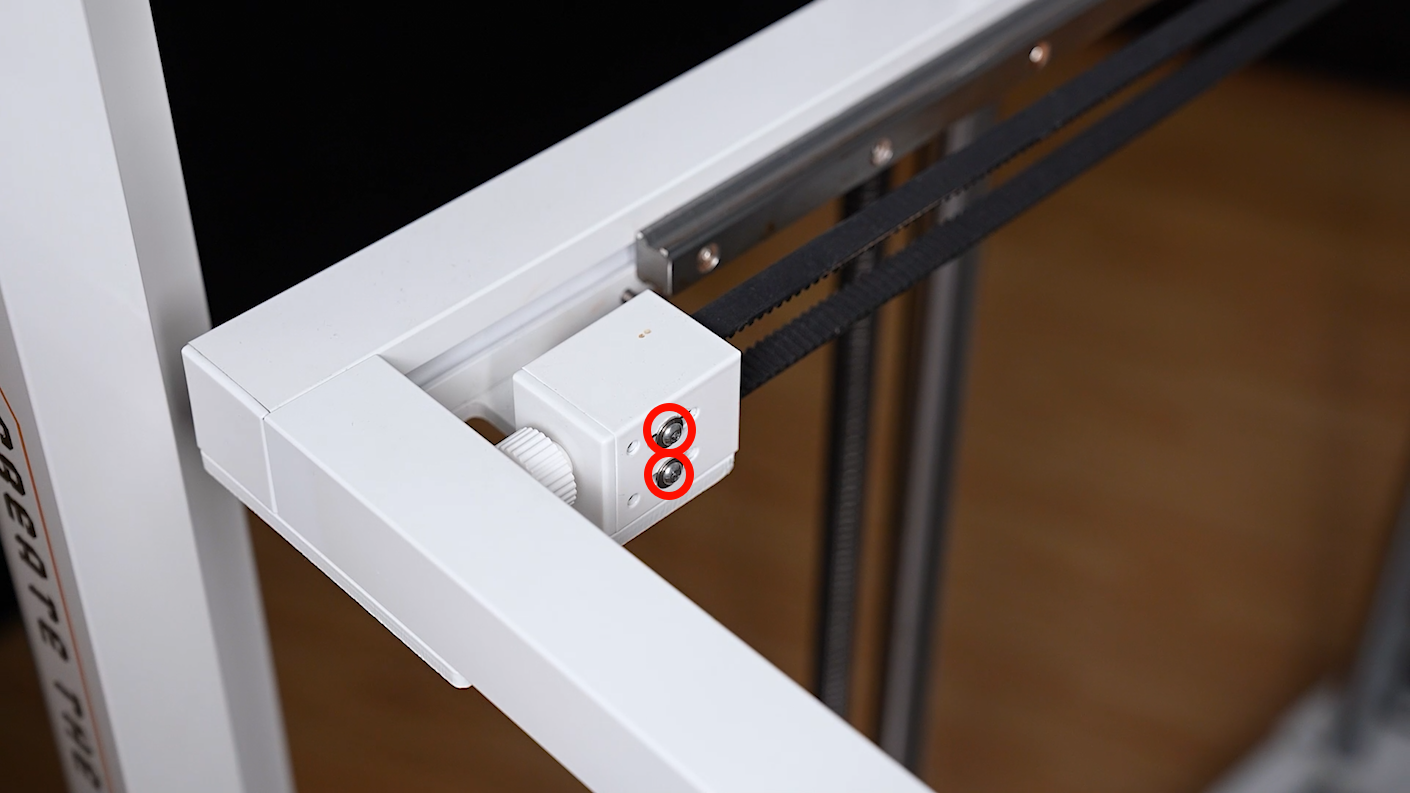
- Loosen the 2 screws securing the belt tensioner using a 2.0 mm Allen key.
- Rotate the nuts securing the belt tensioner and loosen the nuts.
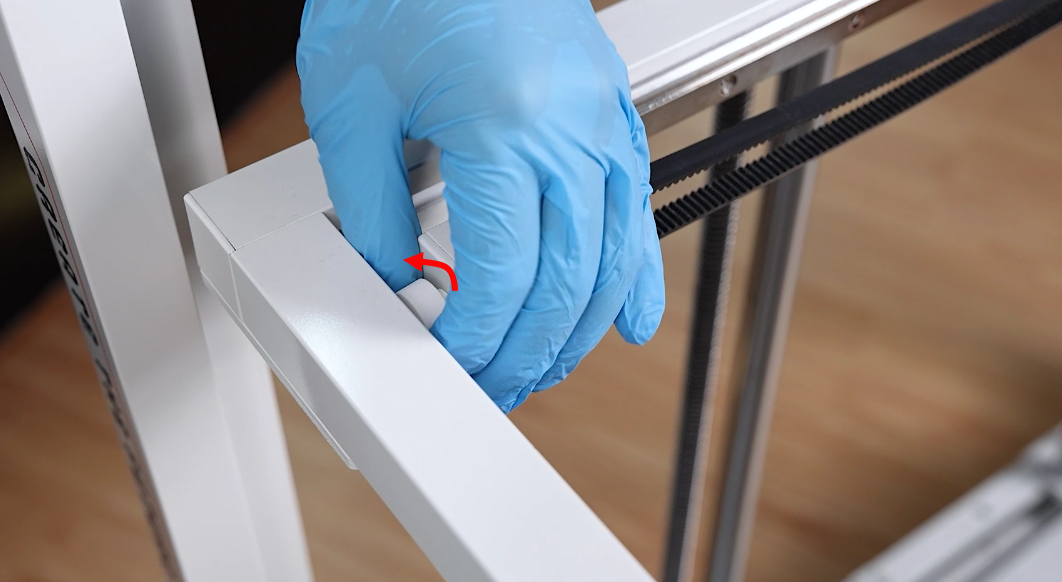
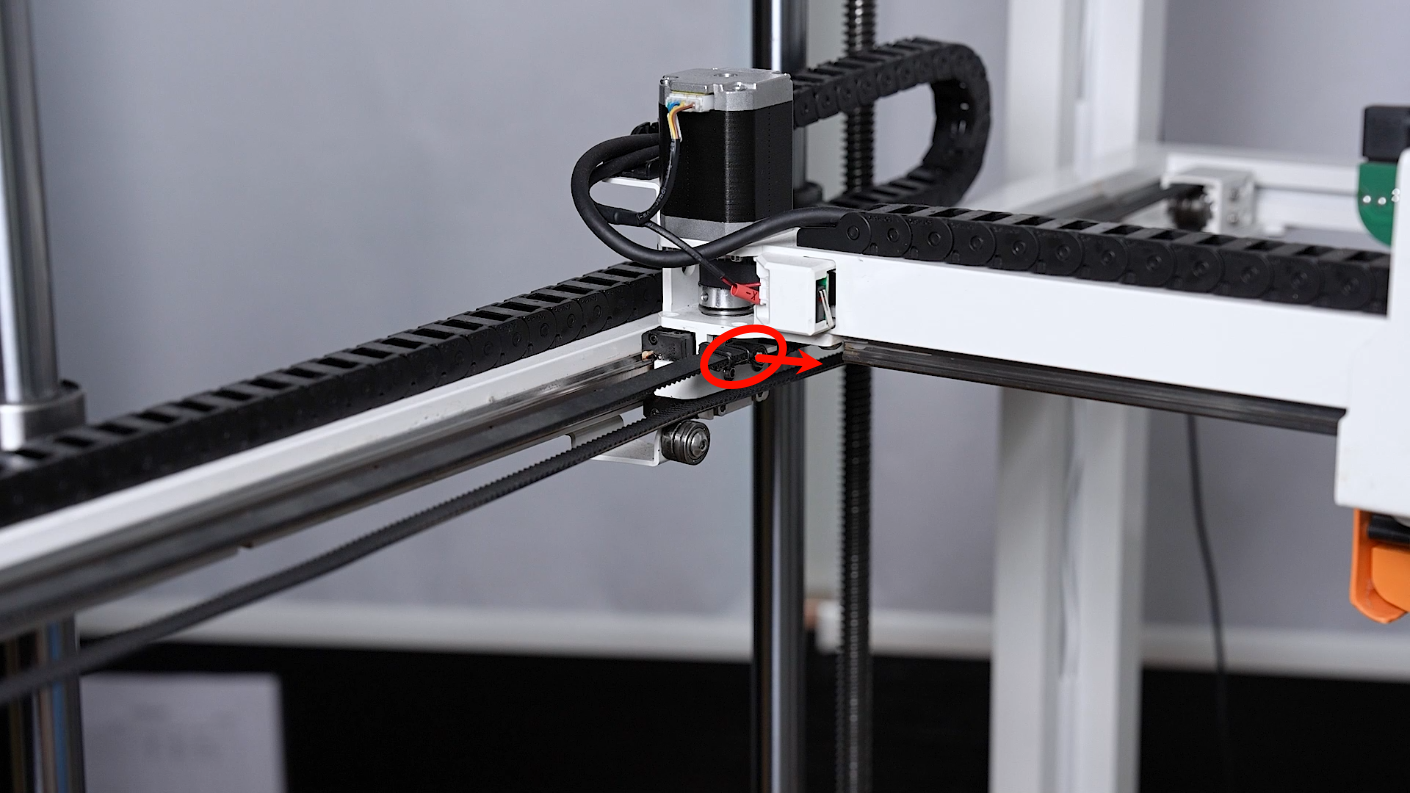
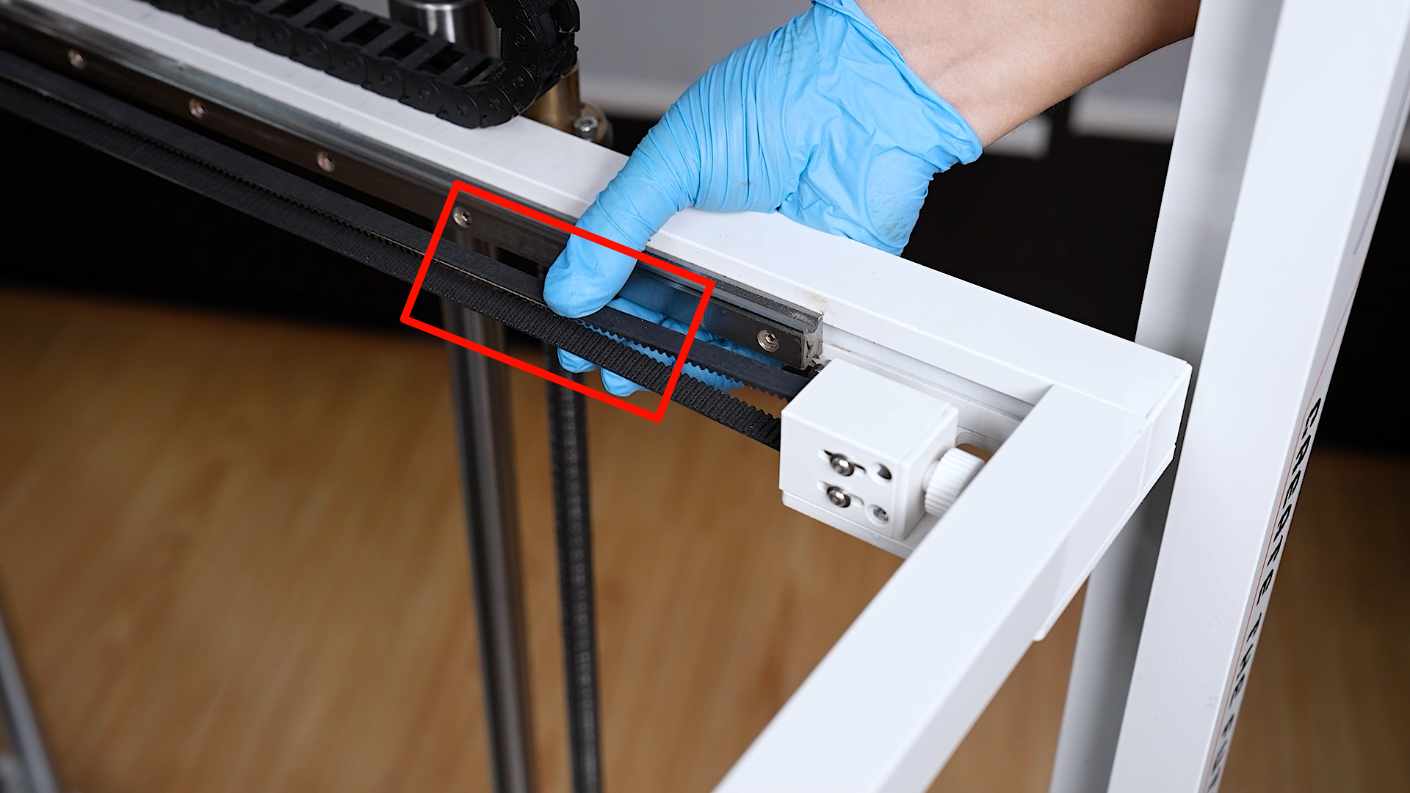
- Take off the timing belt end from the holder on the Y-axis.
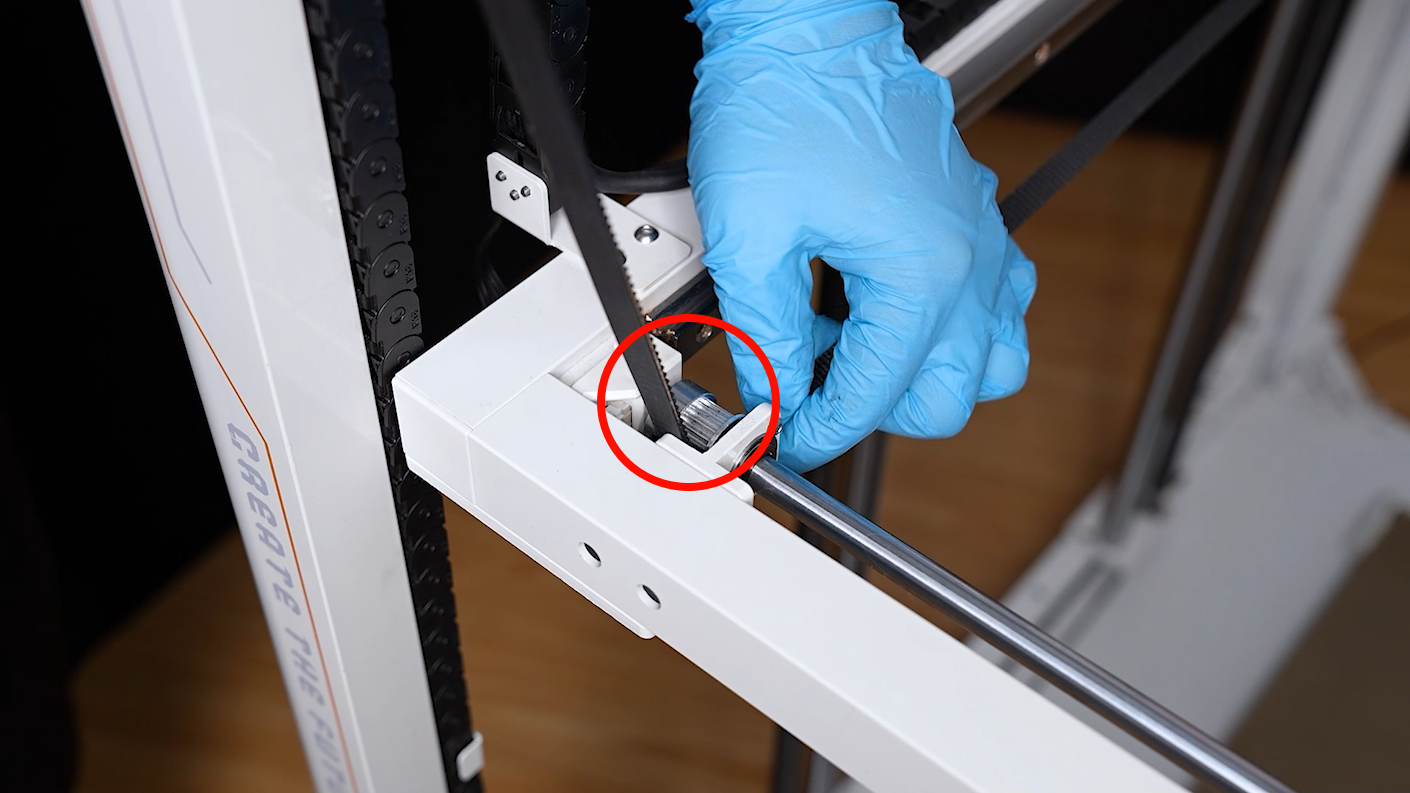
- Remove the timing belt from the timing pulley on the Y-axis plain shaft.

- Remove the other timing belt of the Y-axis in the same way.
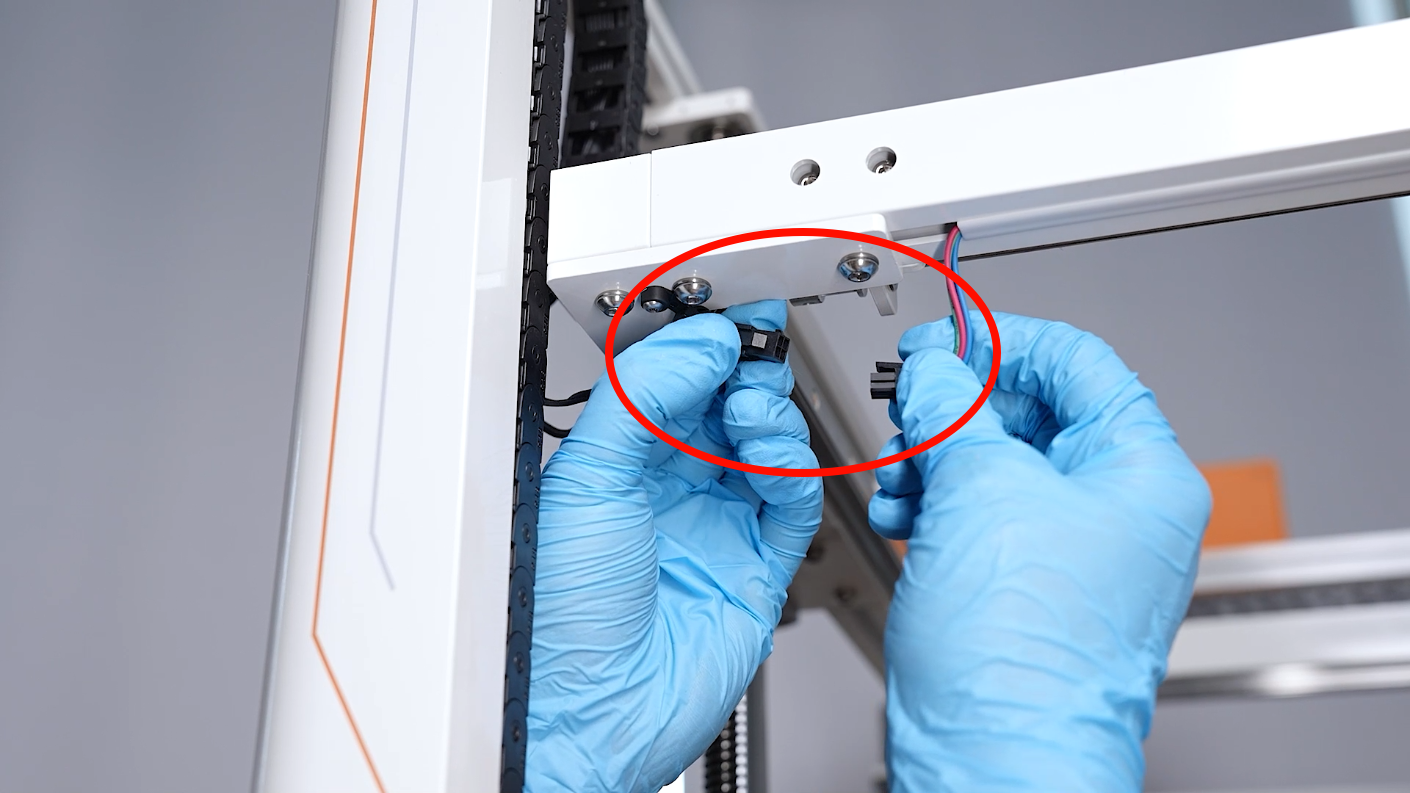
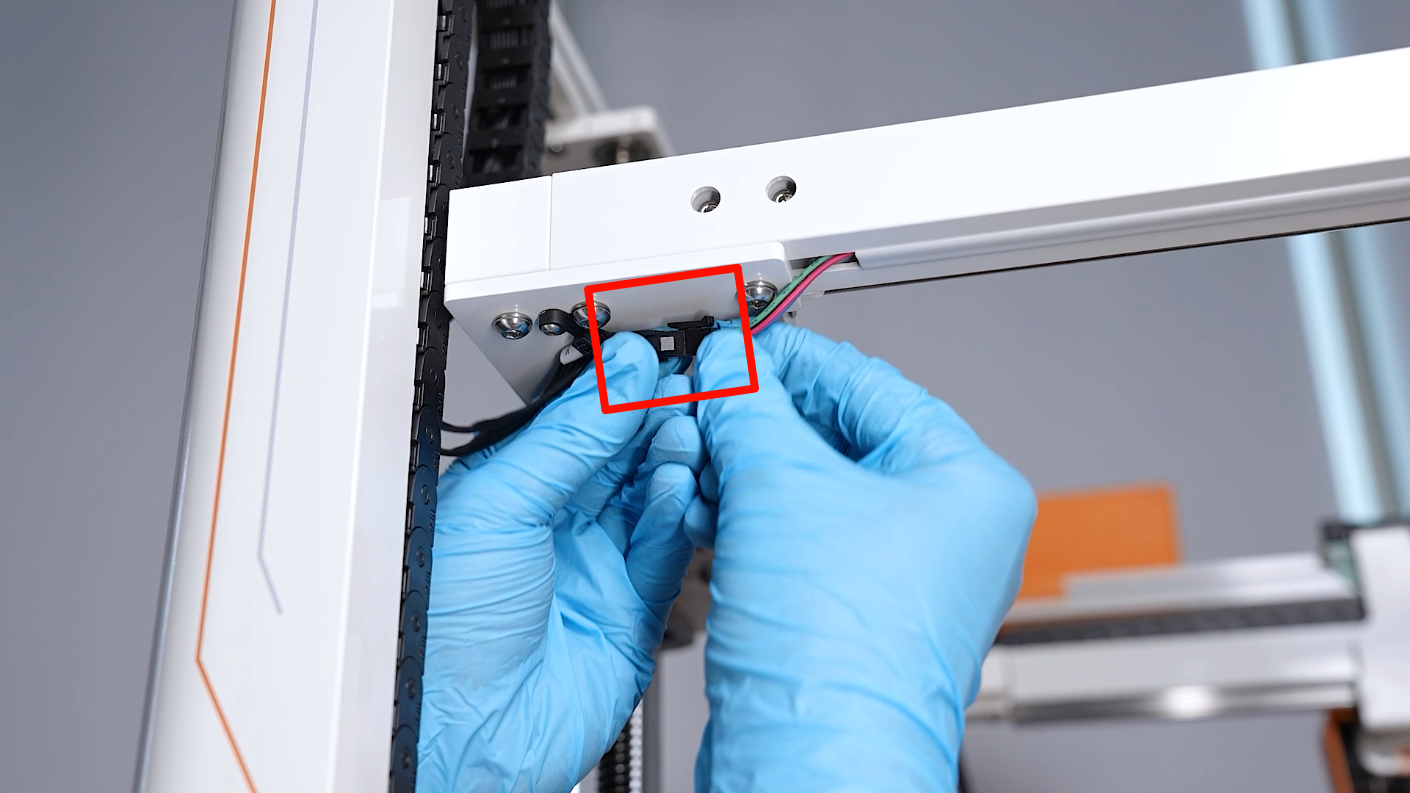
- Unplug the cables of the Y-axis motor.
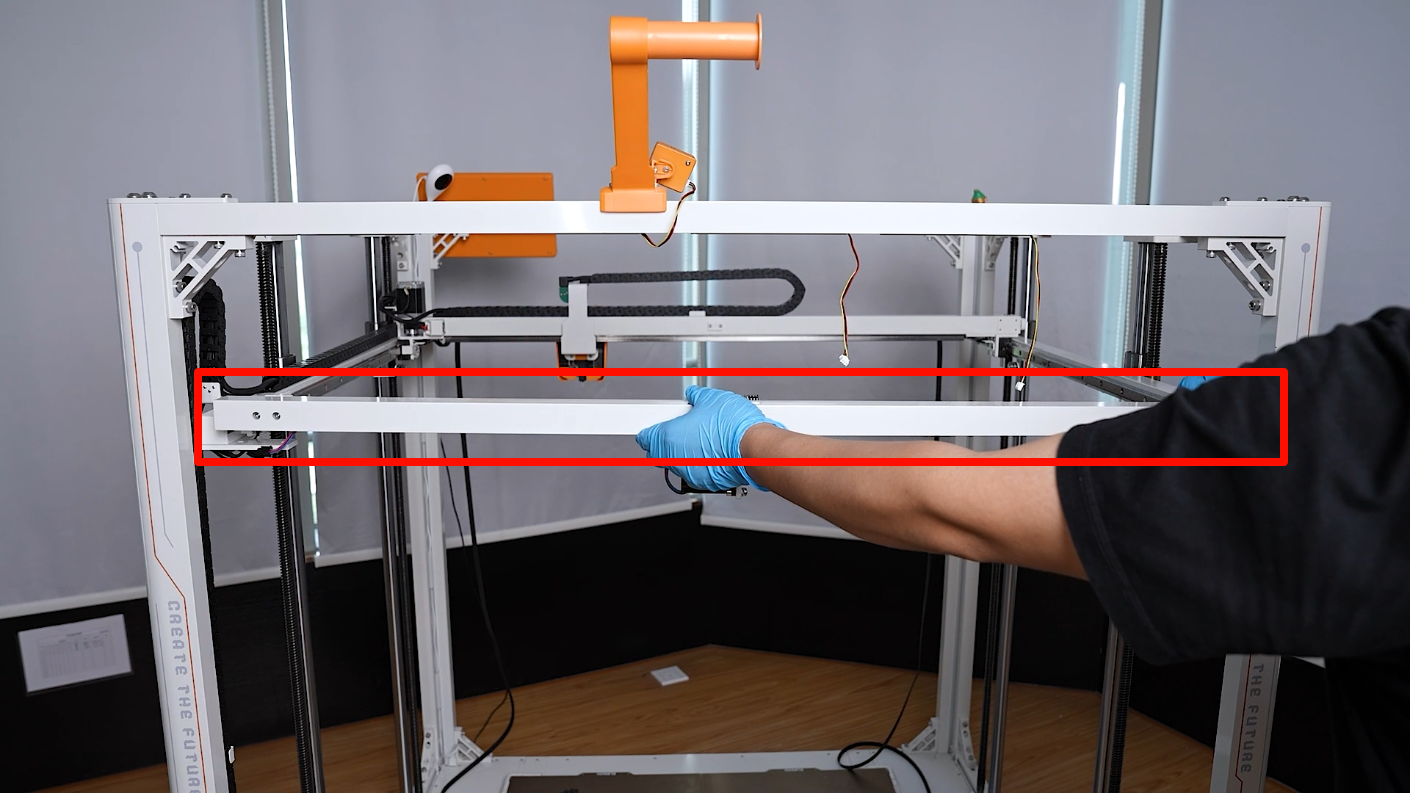
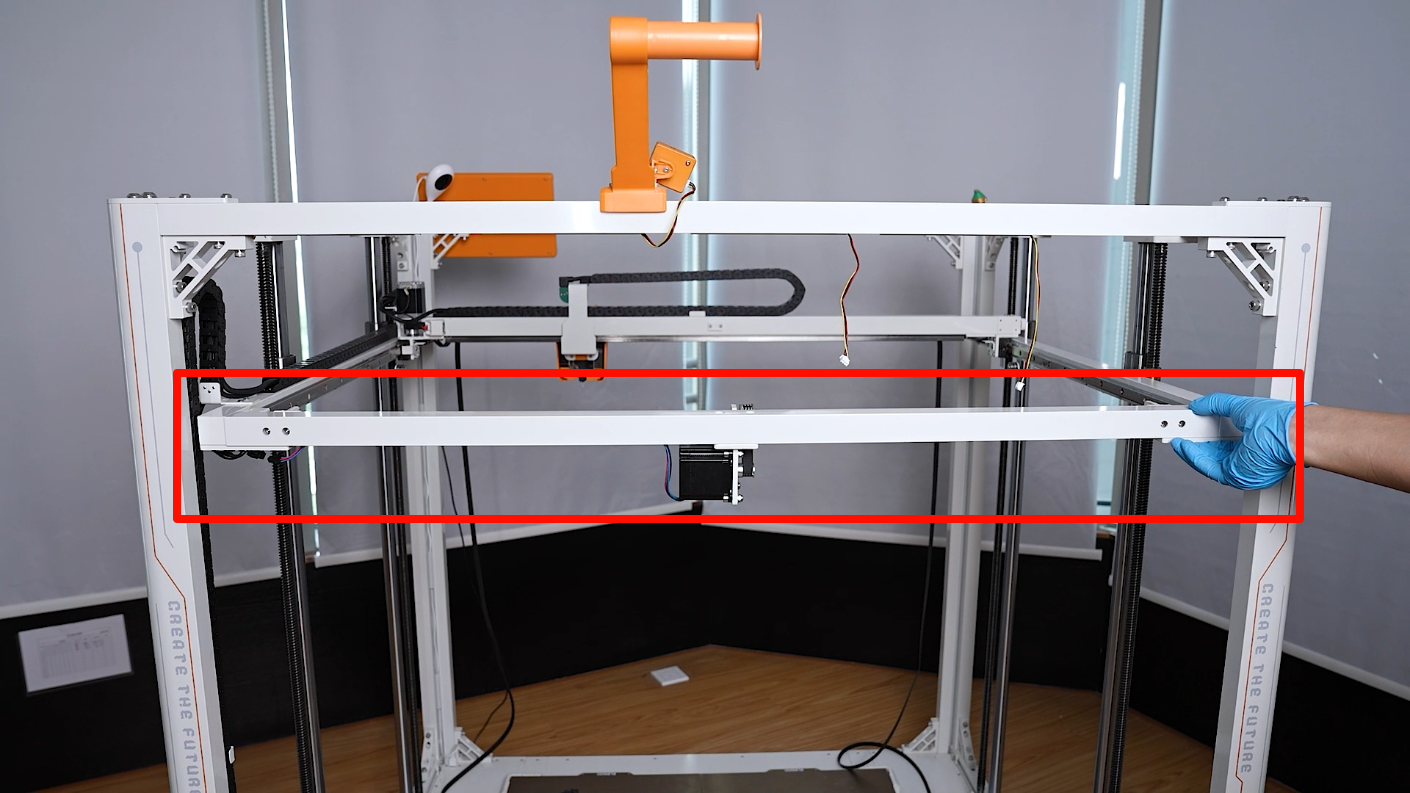
- Loosen the two screws on the bottom of the Y-axis using a 4.0 mm Allen key. Remove the Y-axis assembly.
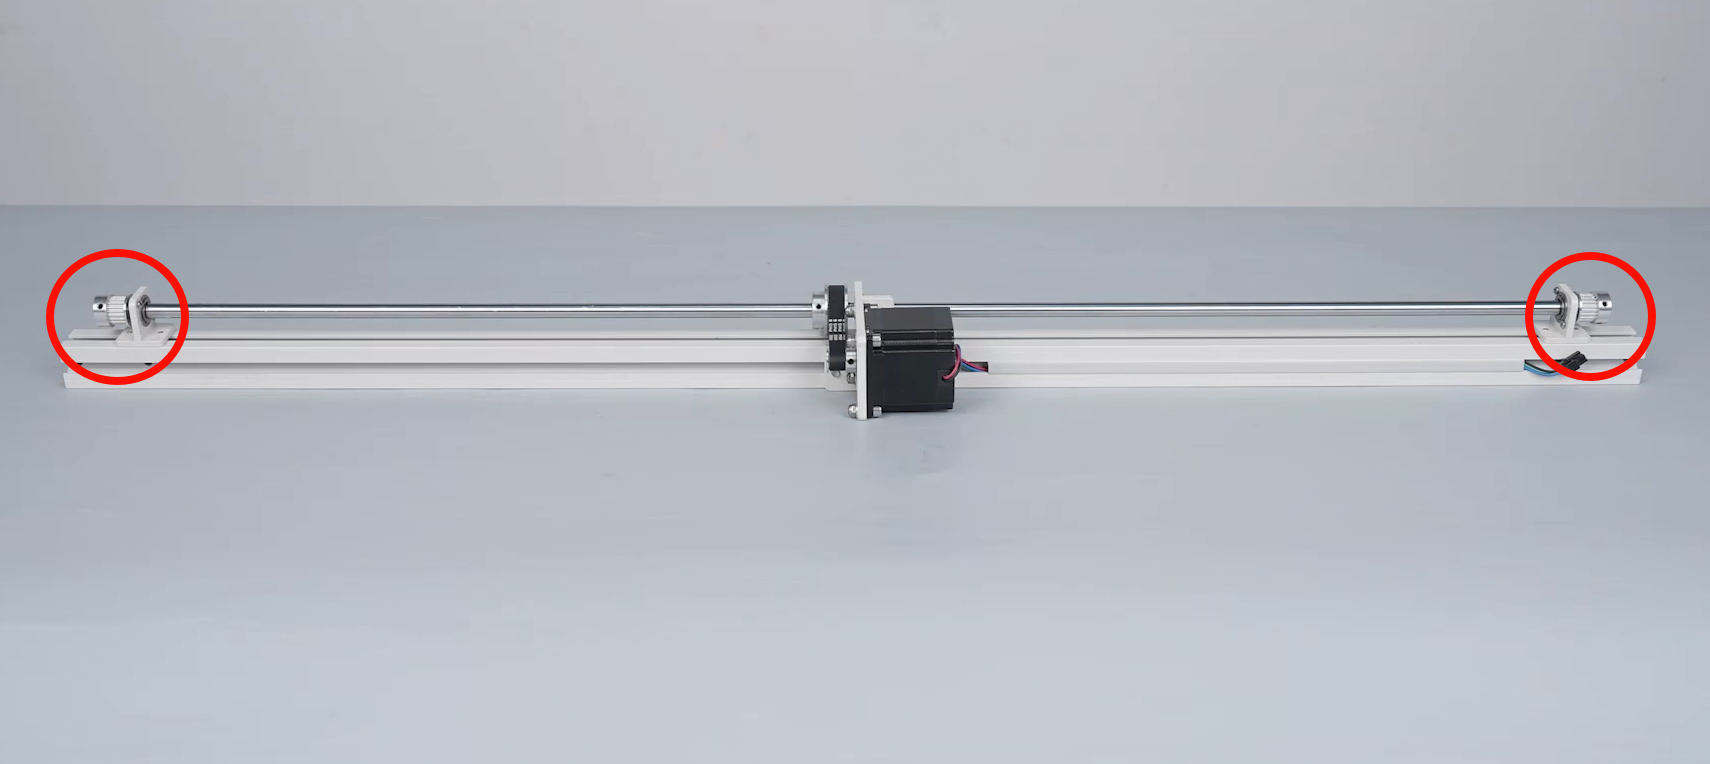
¶ Replace the bearings on the two sides of the Y-axis plain shaft
¶ Remove the old bearings
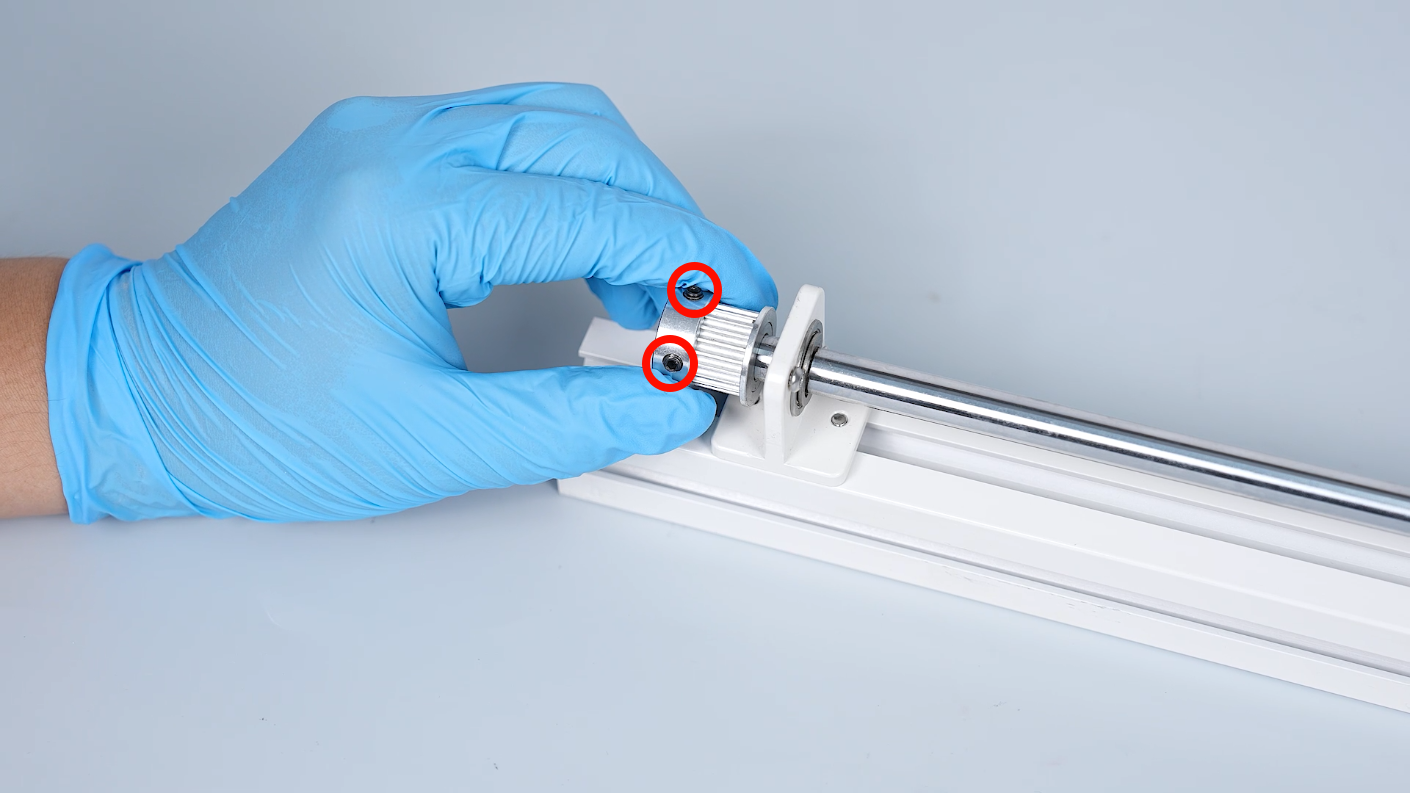
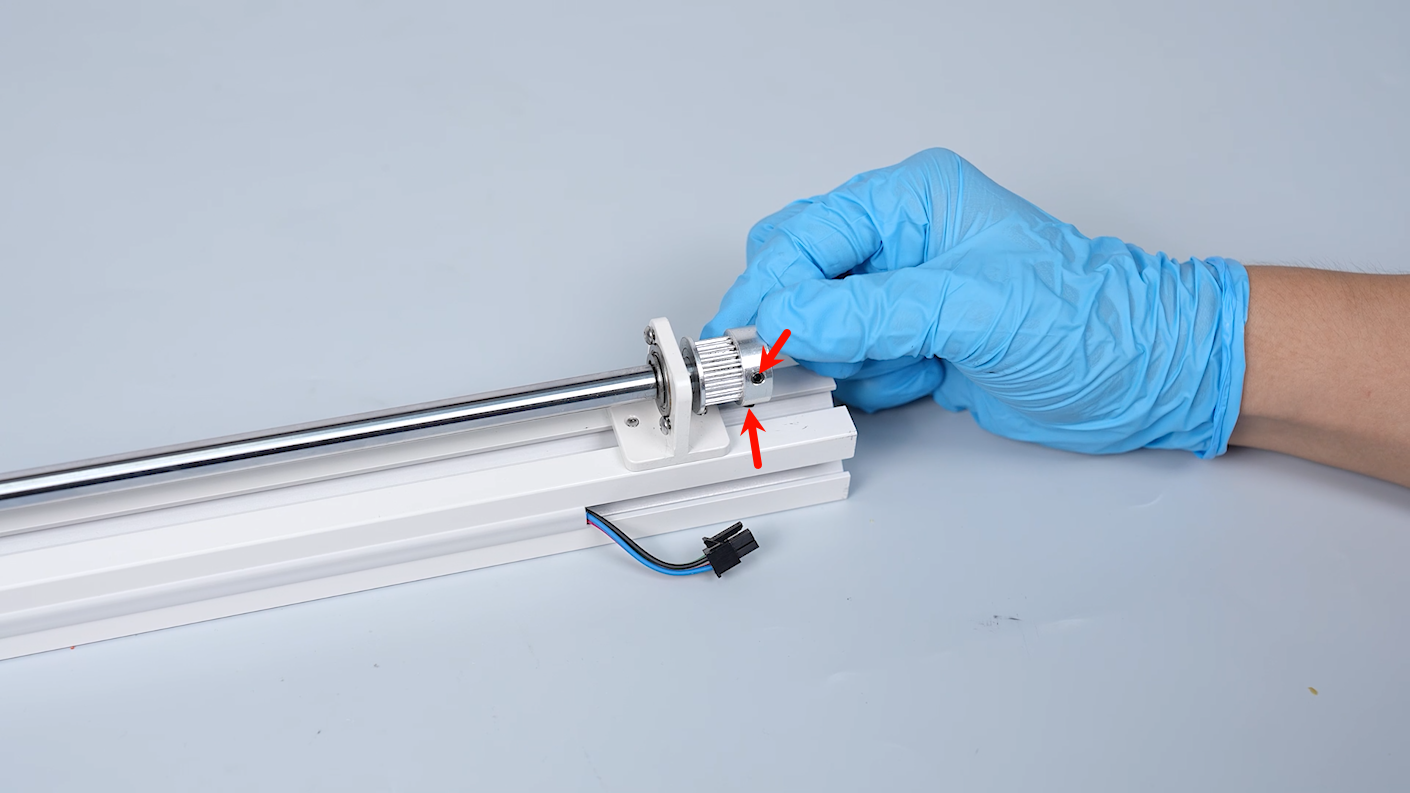
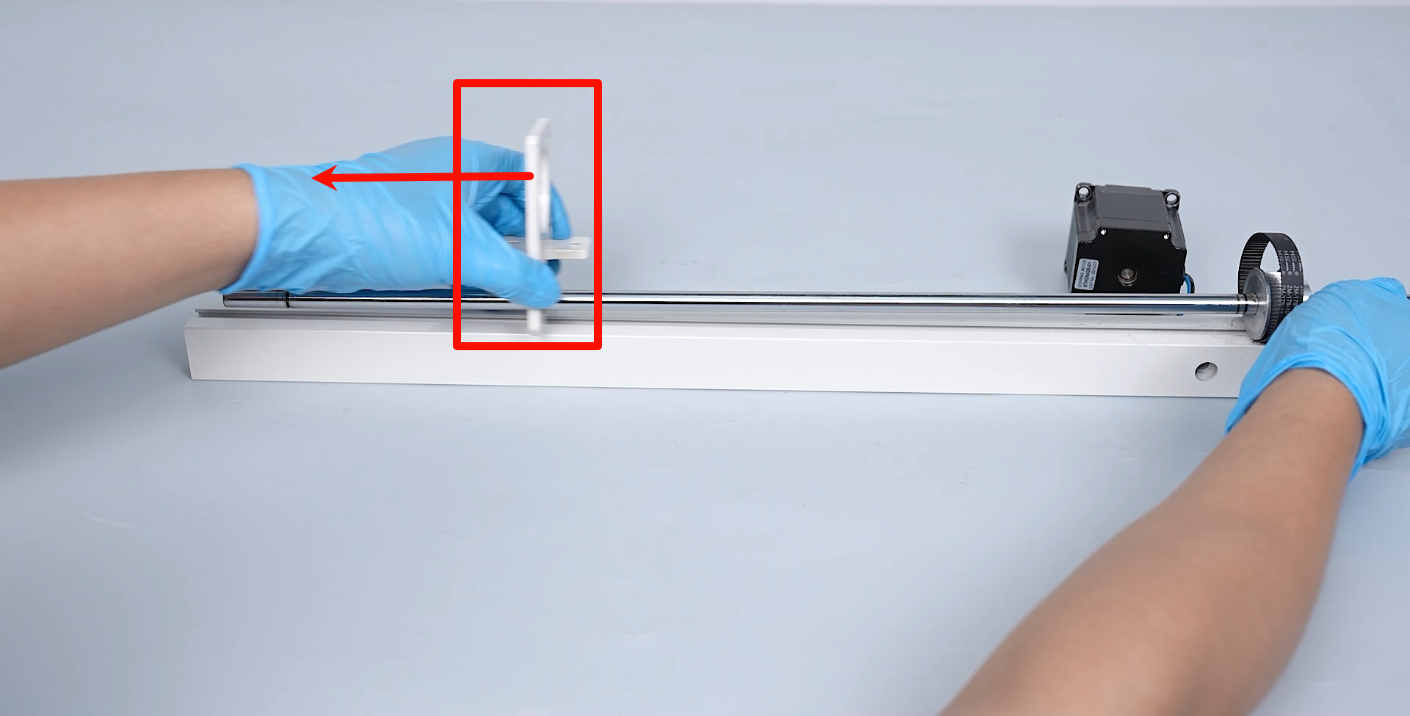
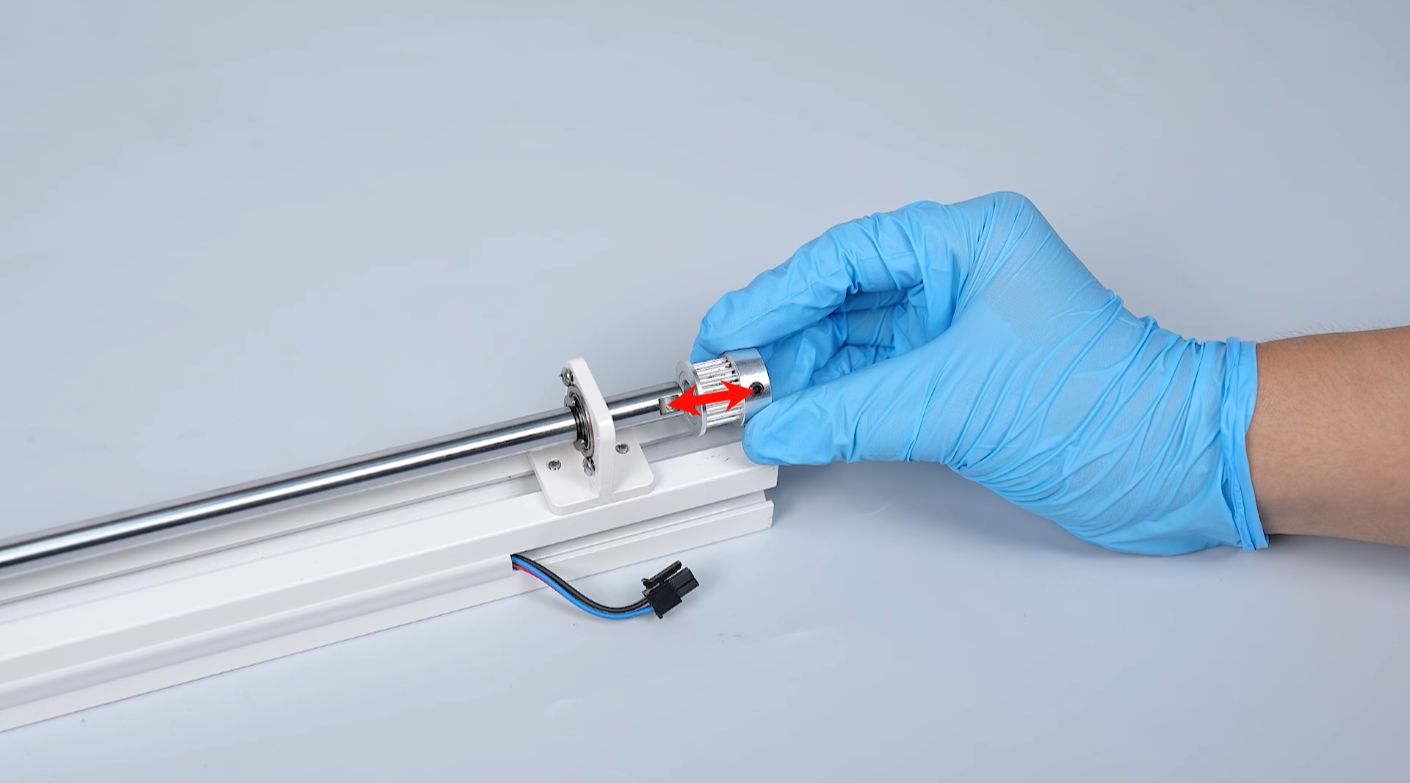
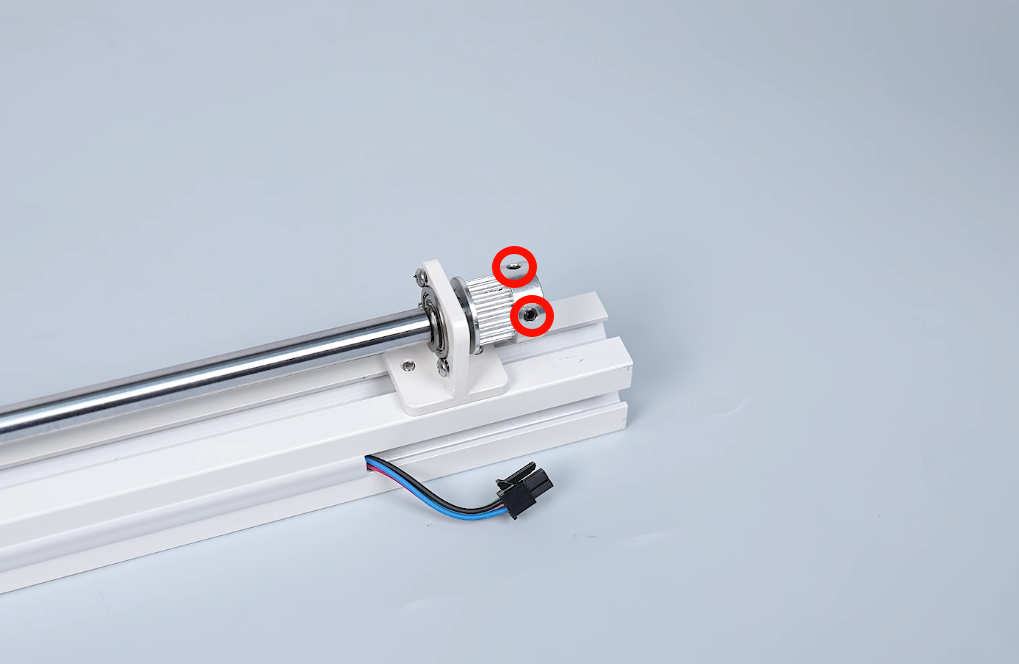
- Loosen the two screws securing the timing pulley using a 2.0 mm Allen key. Remove the timing pulley.
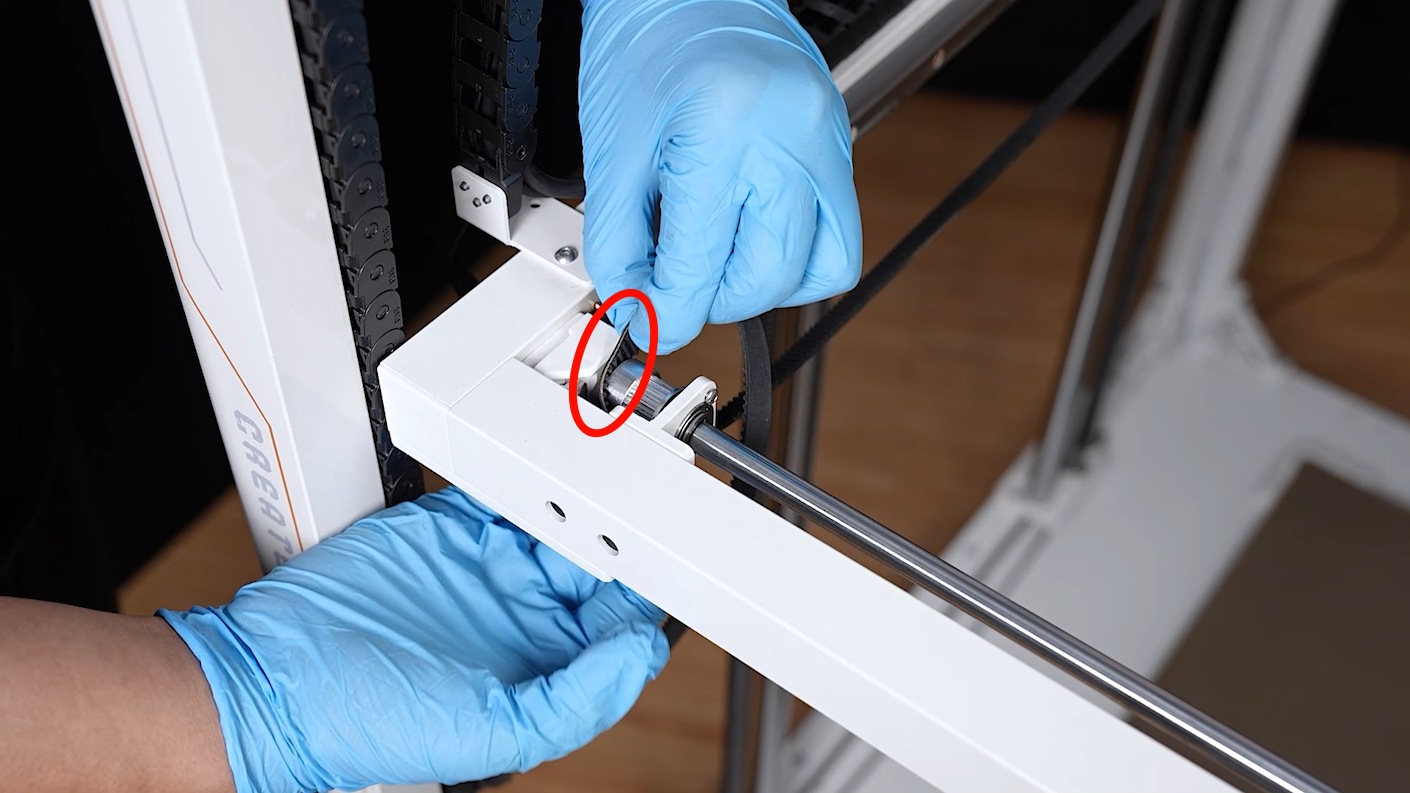
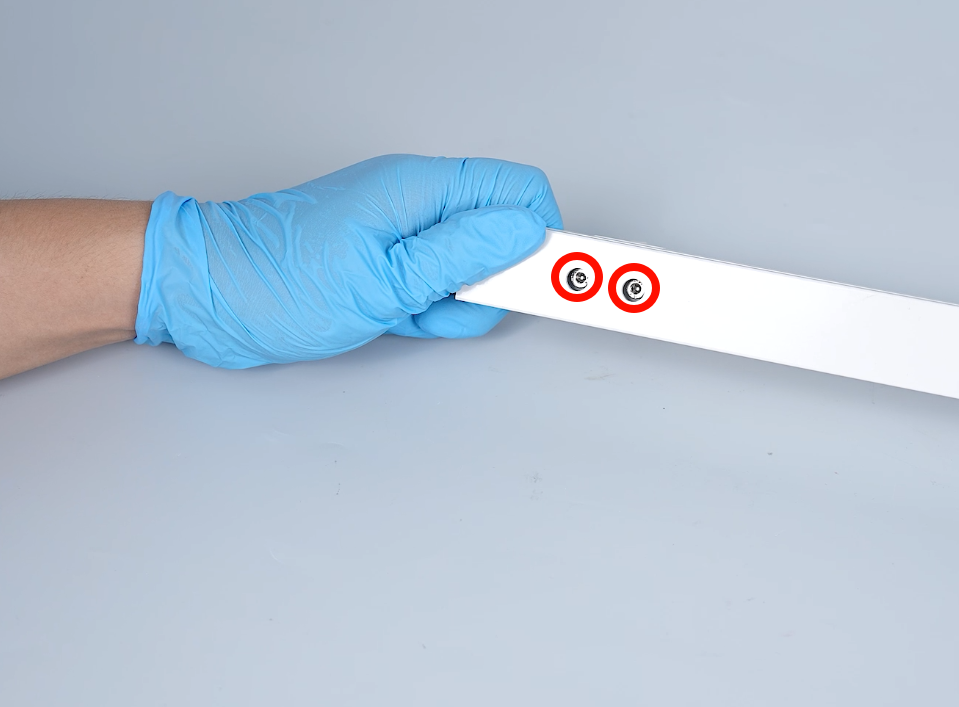
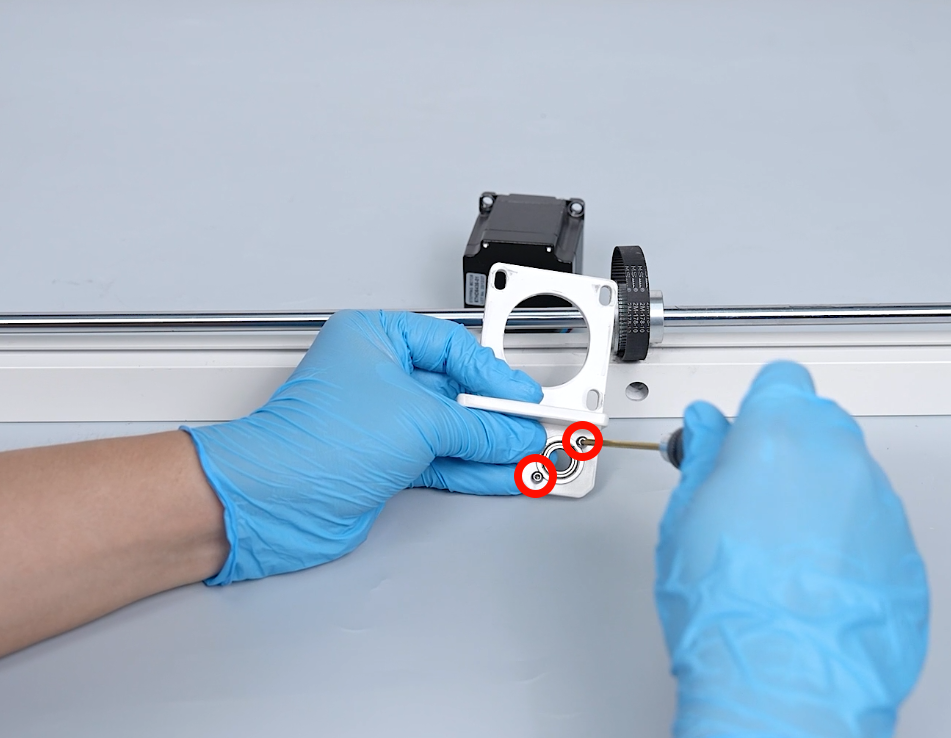
- Loosen the two screws securing the Y-axis bearing coupler using a 3.0 mm Allen key.
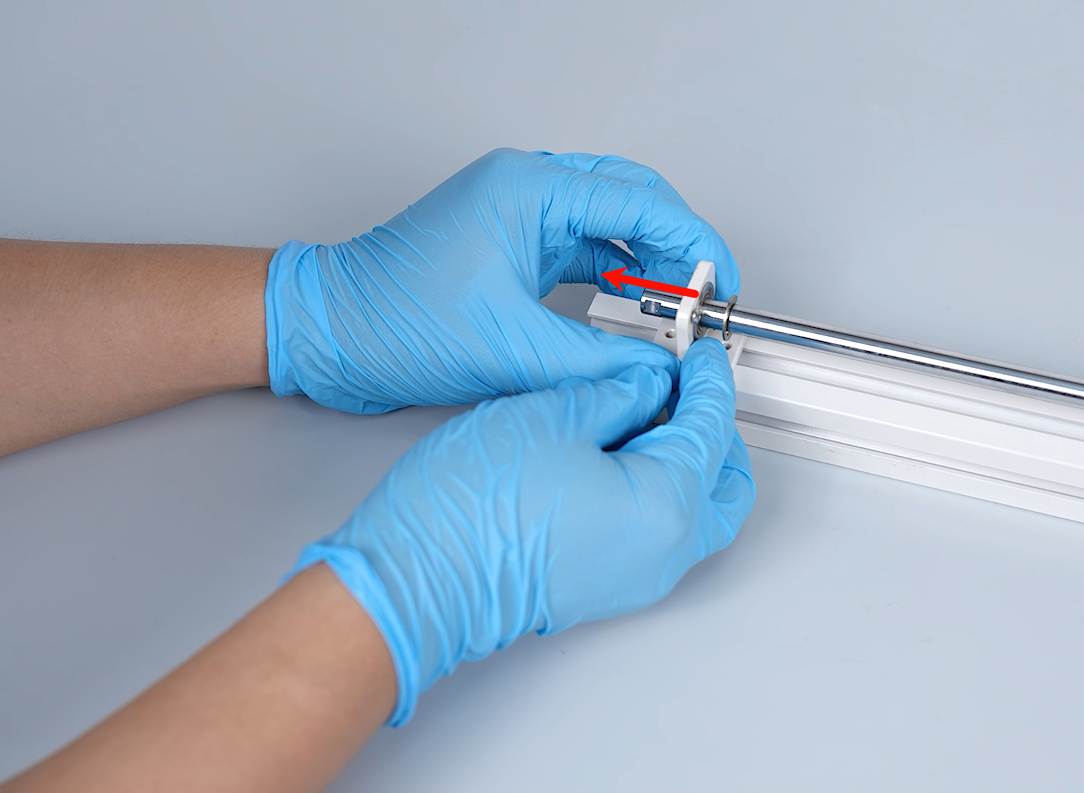
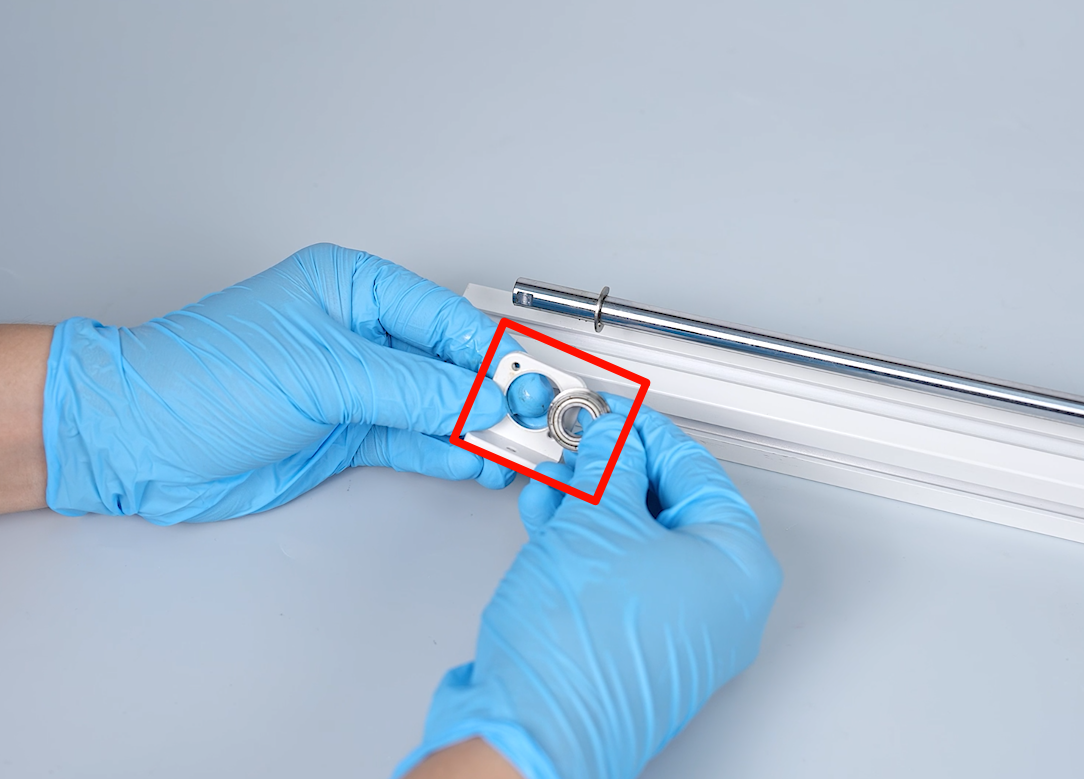
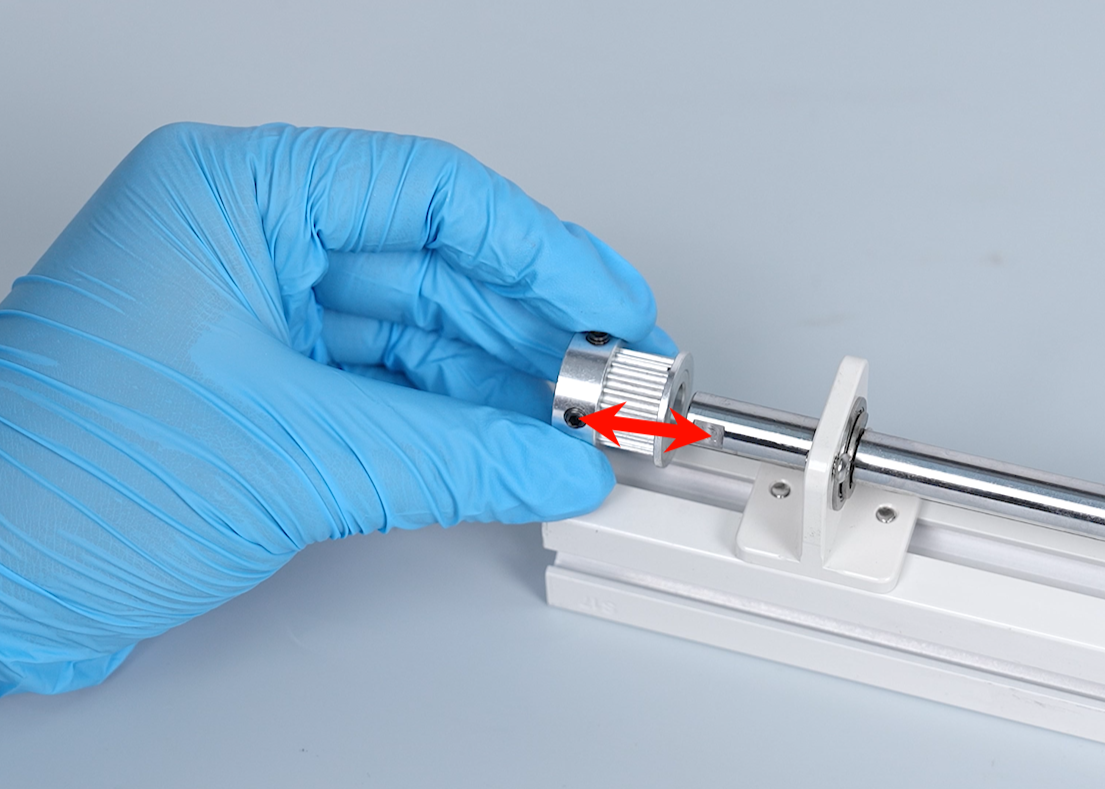
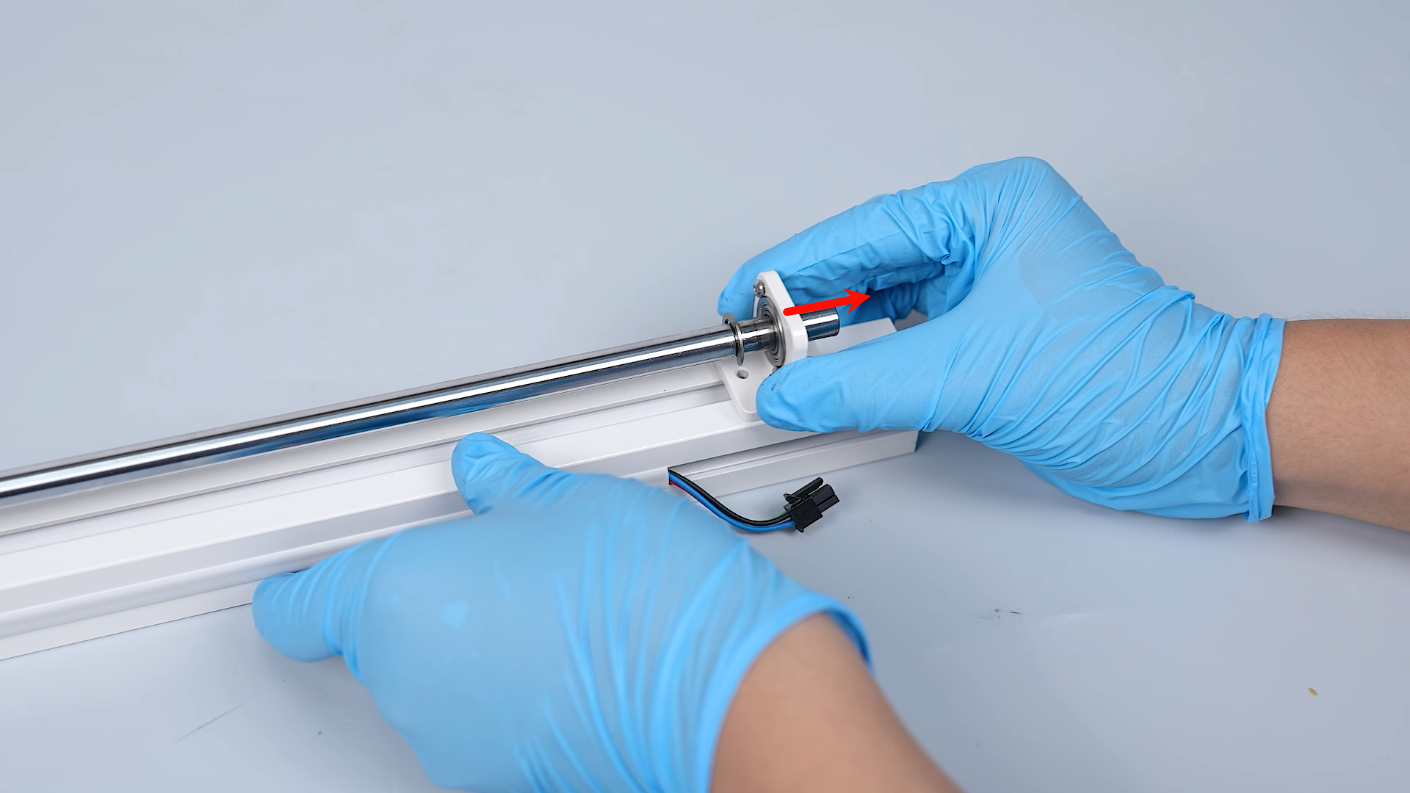
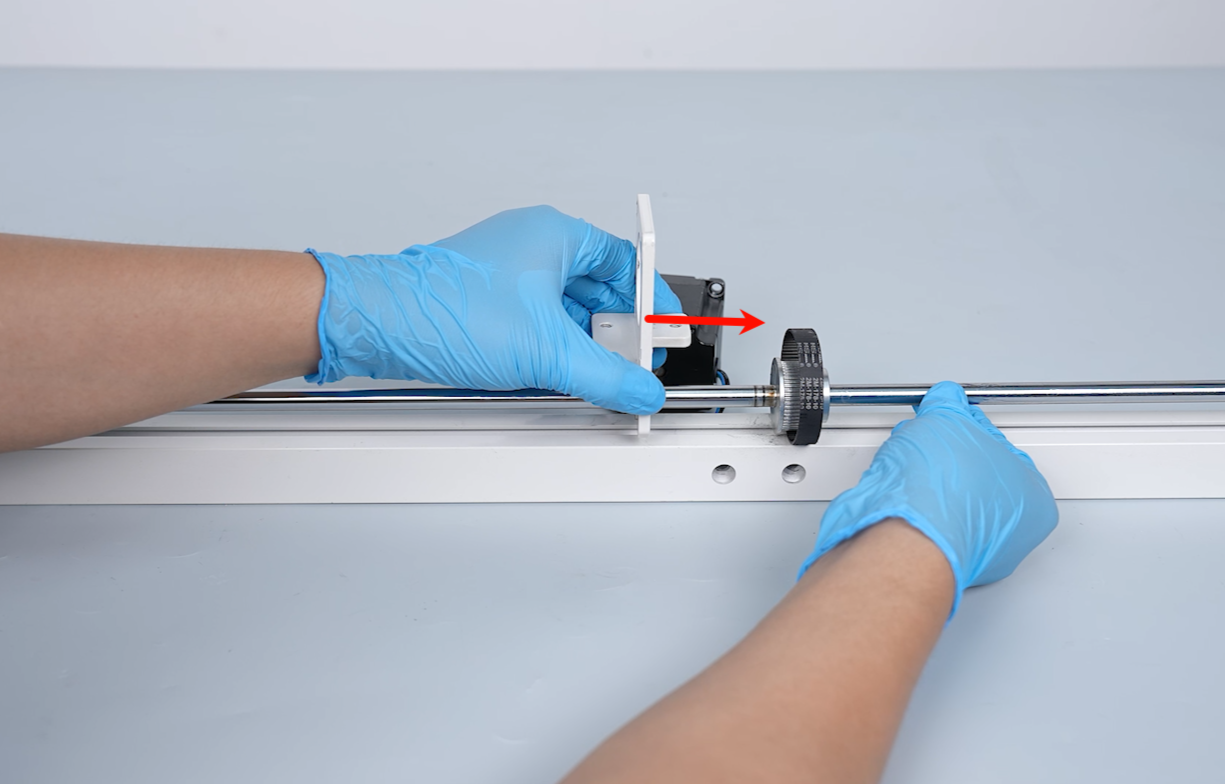
- Remove the bearing assembly from the Y-axis plain shaft.
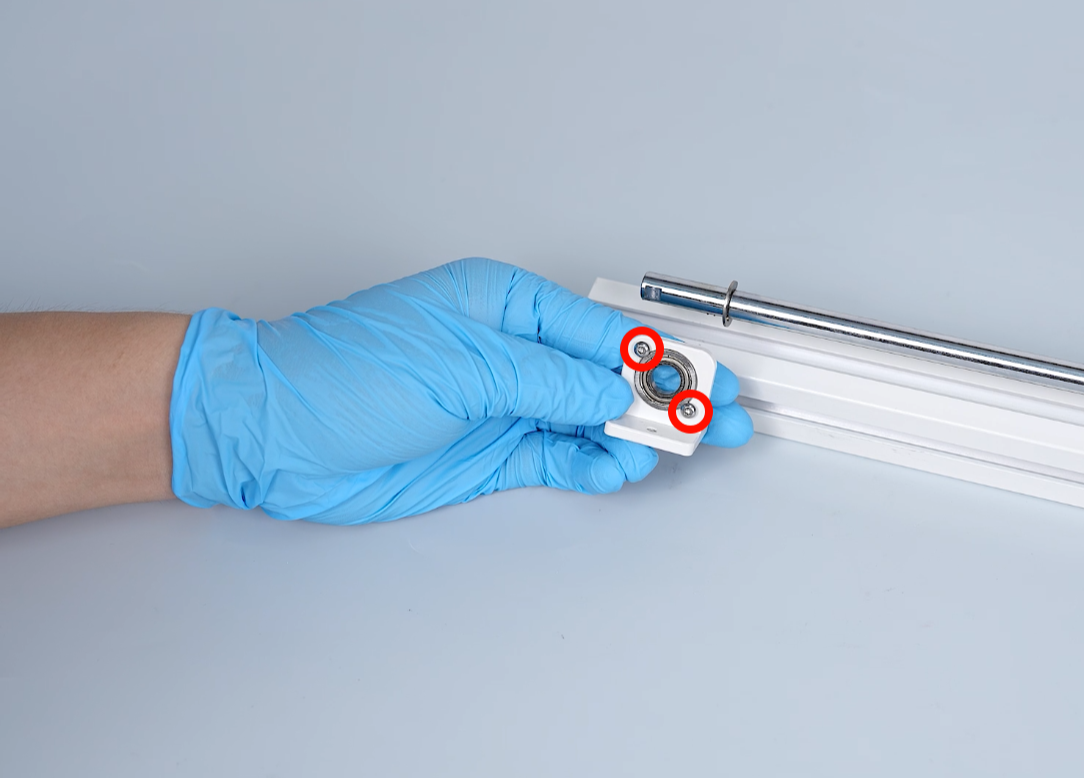
- Loosen the two screws securing the bearing using a 2.0 mm Allen key. Remove the old bearing.
¶ Install the new bearing
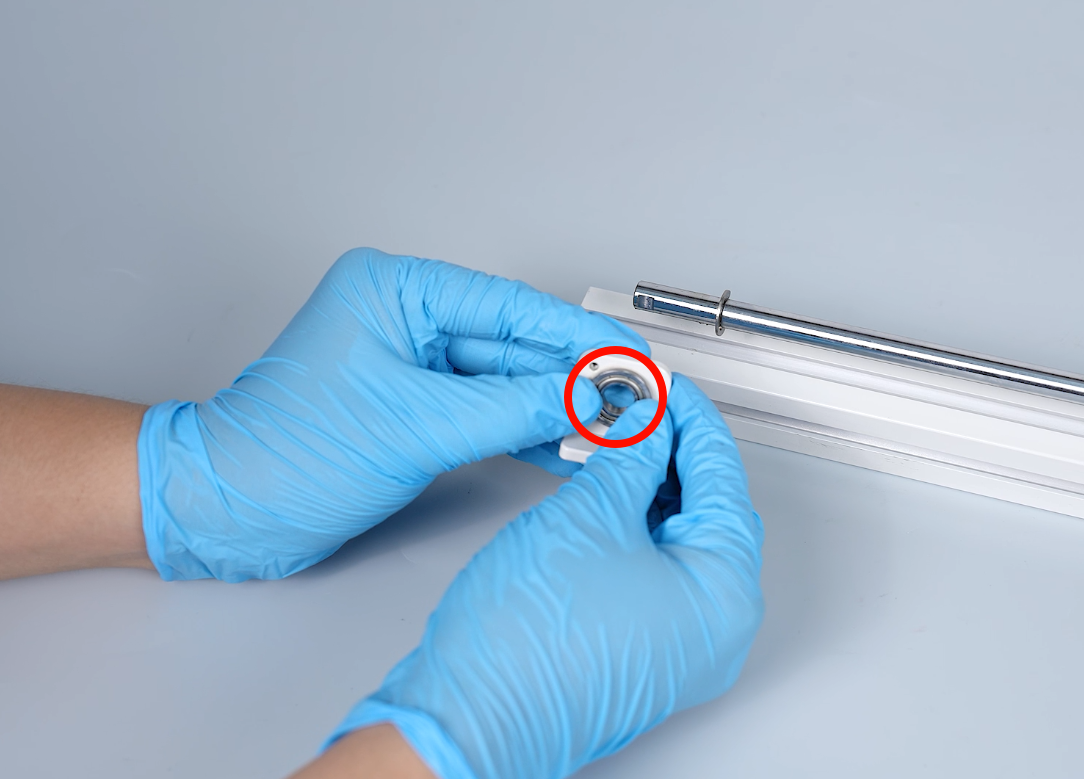
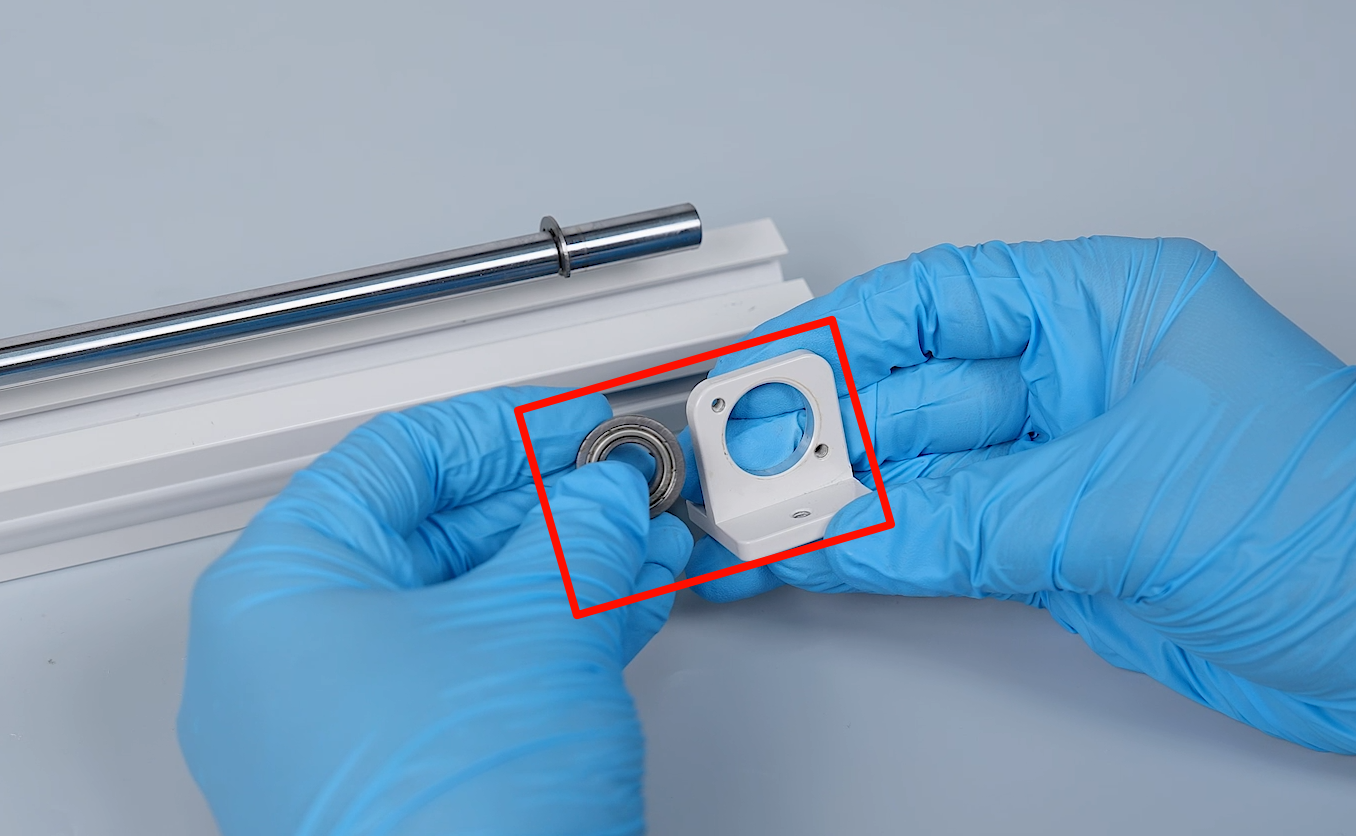
- Prepare the new bearing. Align the bearing with the installation holes and put it in the installation position. Tighten the two screws securing the bearing using a 2.0 mm Allen key.
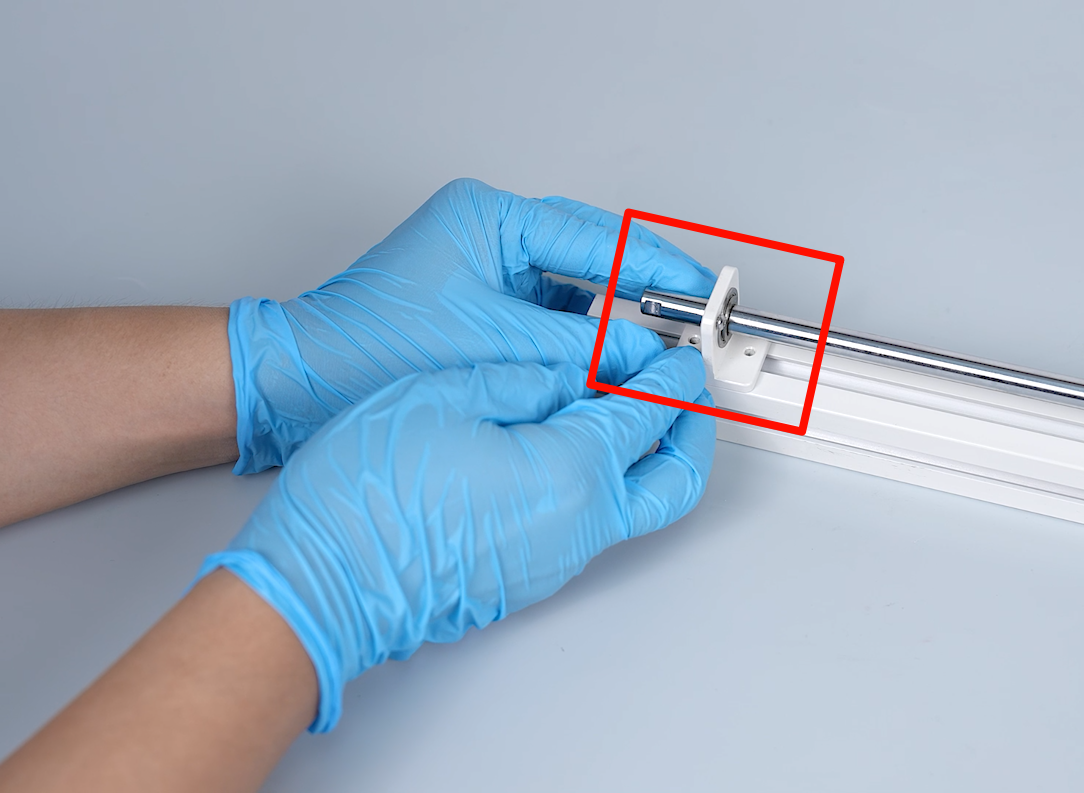
- Insert the bearing assembly onto the Y-axis plain shaft. Align it with the screw holes and put it in the installation position.
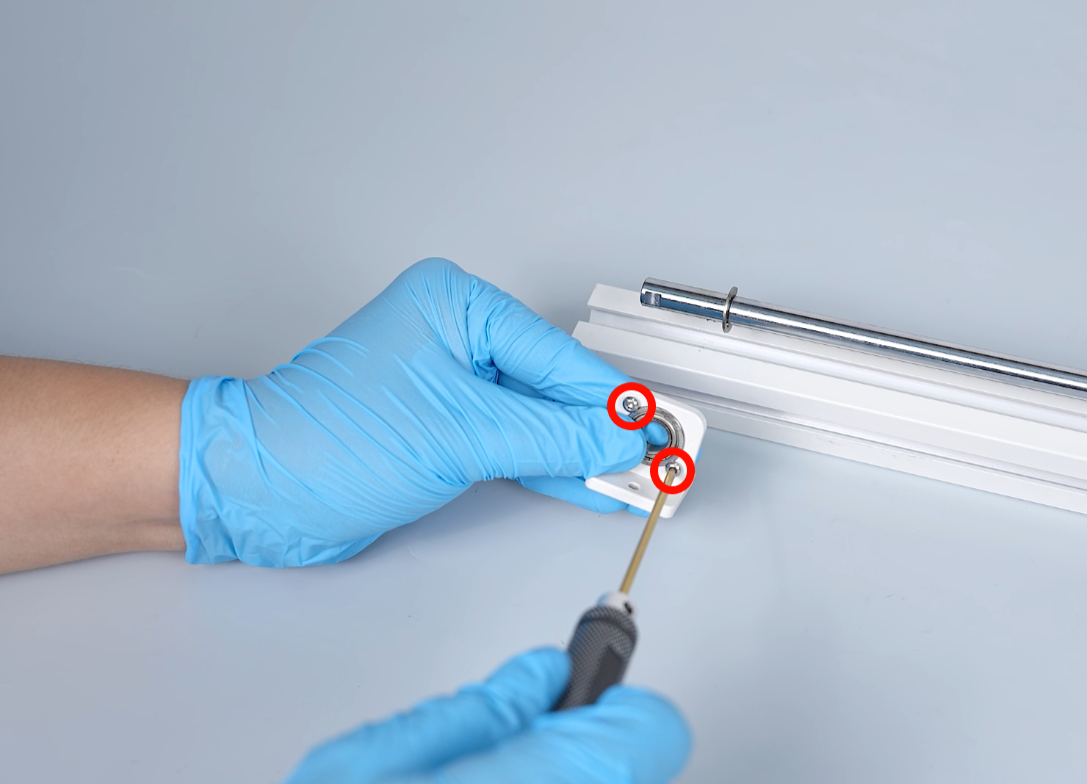
- Tighten the two screws securing the Y-axis bearing coupler using a 3.0 mm Allen key.
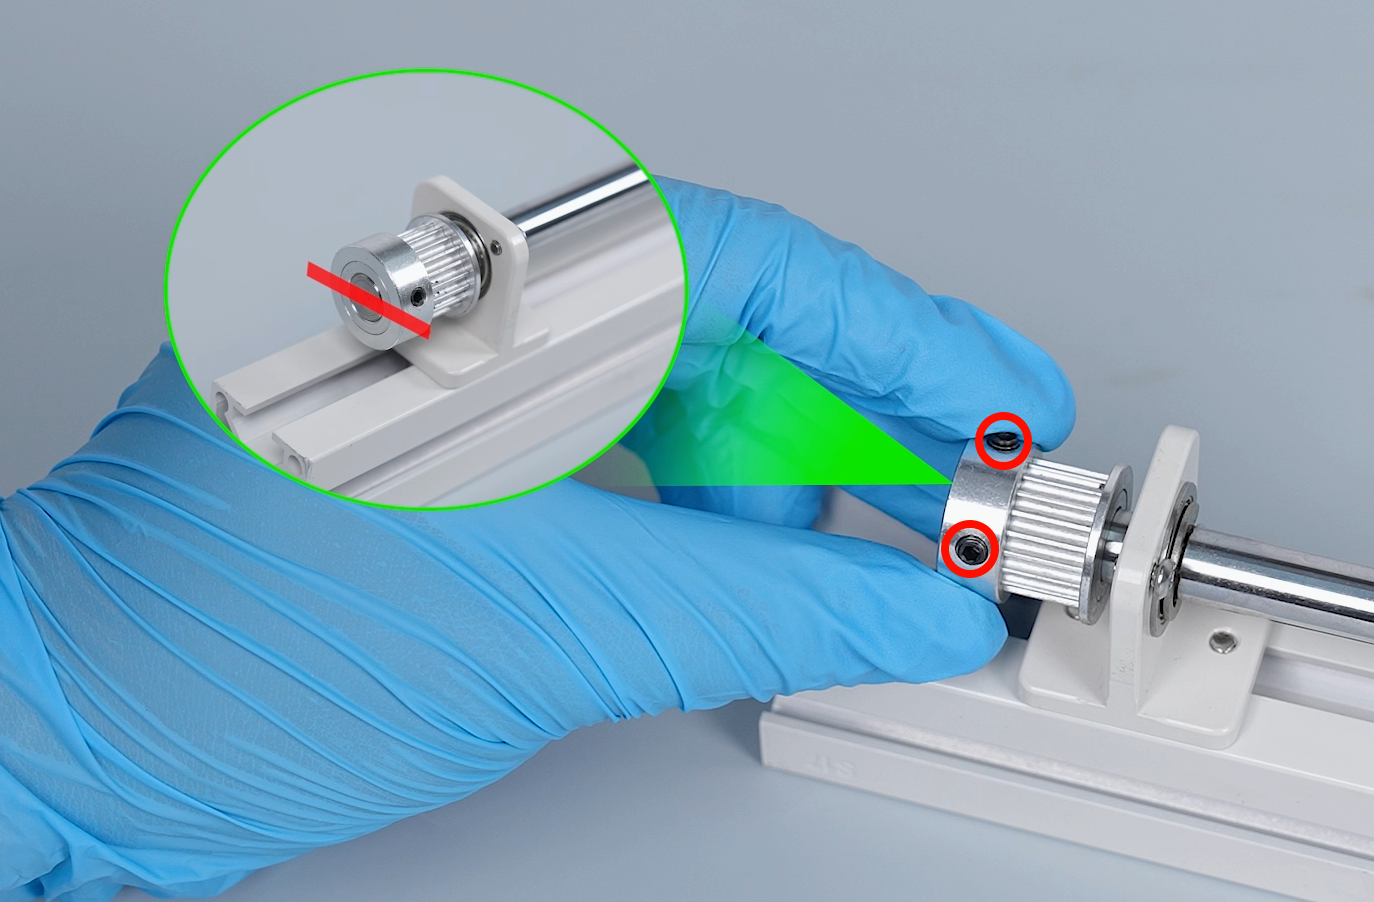
- Prepare the timing pulley. Align one of the screws with the indent on the plain shaft and put the pulley in the installation position. Tighten the two screws securing the timing pulley using a 2.0 mm Allen key.
Note: Align the front surface of the timing pulley with the flat surface of the plain shaft.
- Replace the other bearing in the same way.
¶ Replace the bearings on the Y-axis motor
¶ Remove the old bearings
- Loosen the two screws securing the timing pulley of the Y-axis on the motor cables side using a 2.0 mm Allen key. Remove the timing pulley.
- Loosen the two screws securing the Y-axis bearing coupler using a 3.0 mm Allen key.
- Remove the bearing copuler from the Y-axis plain shaft.
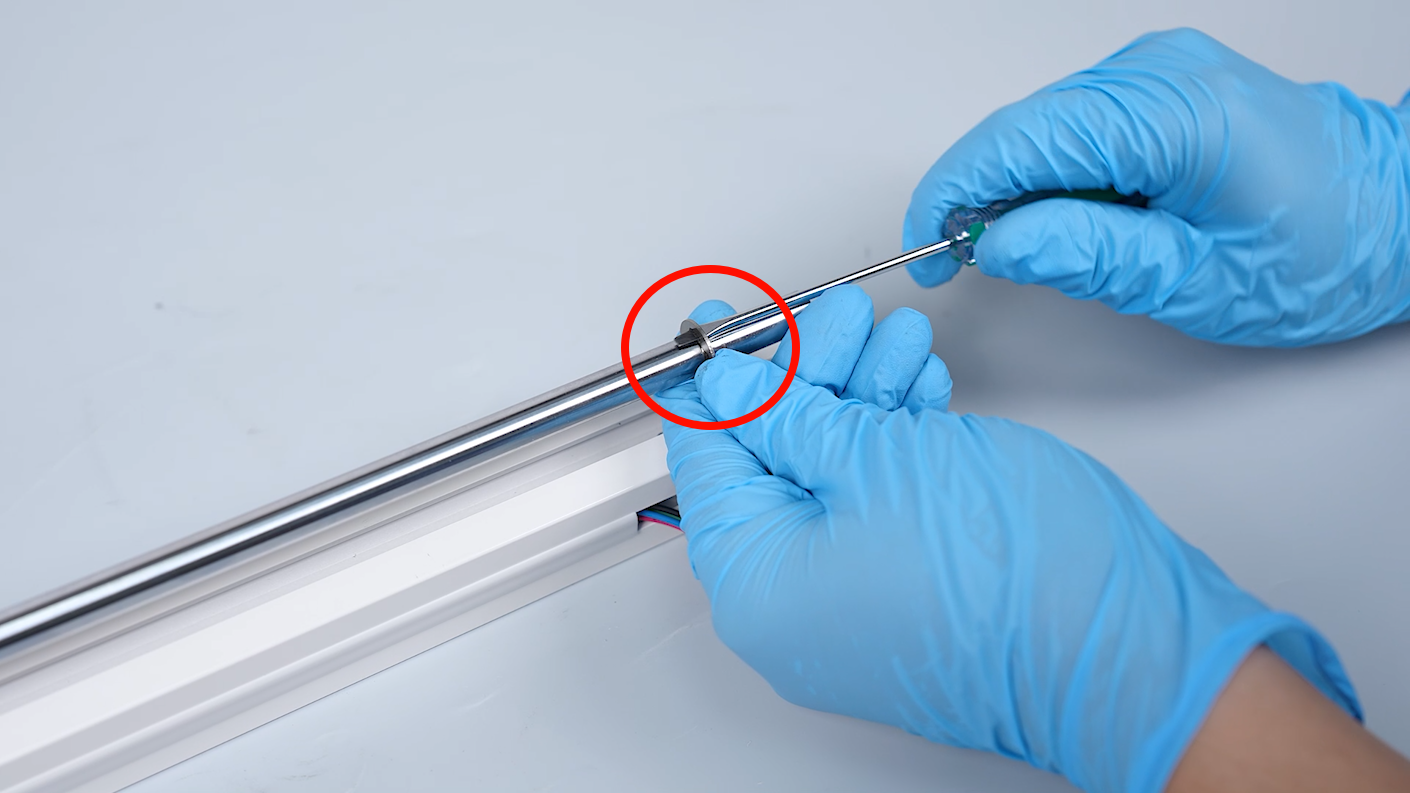
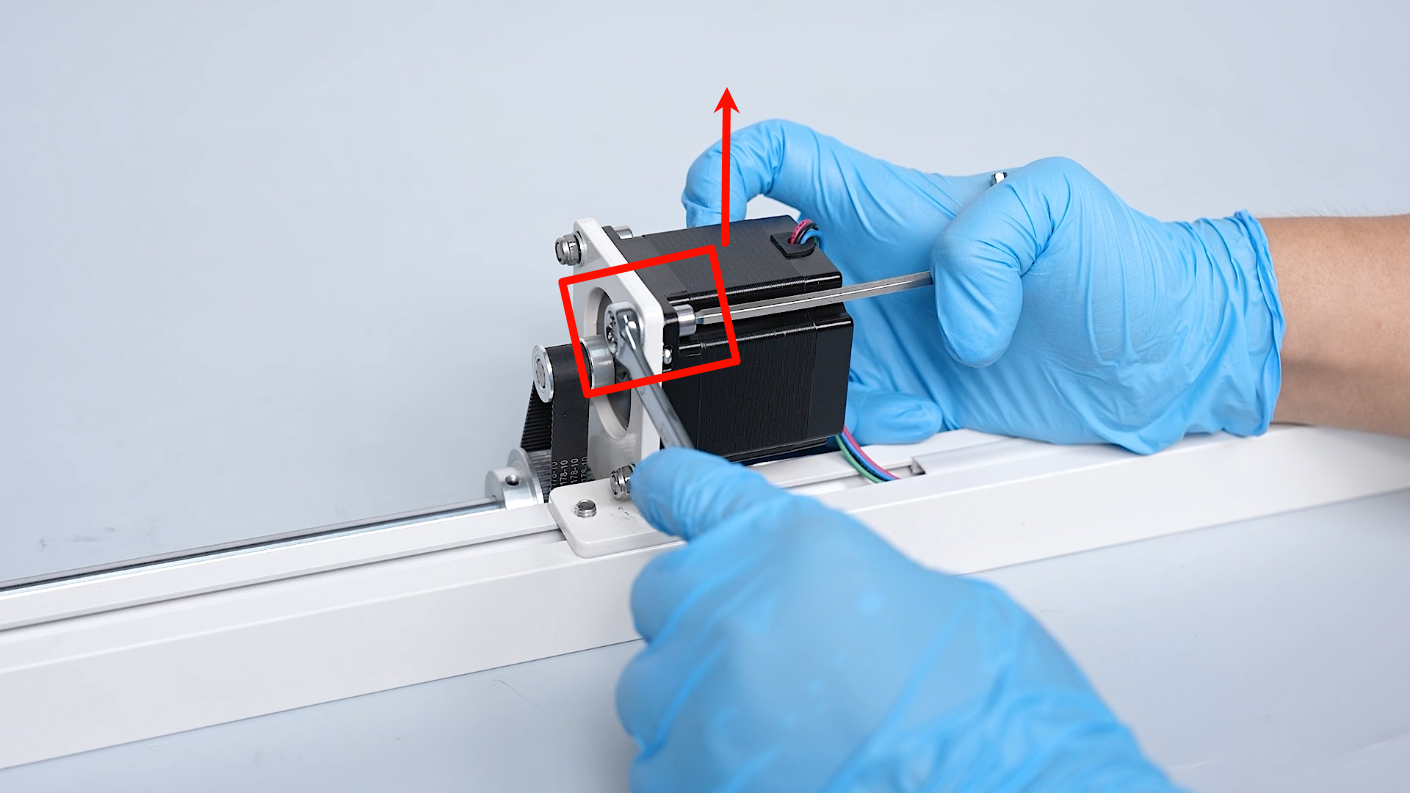
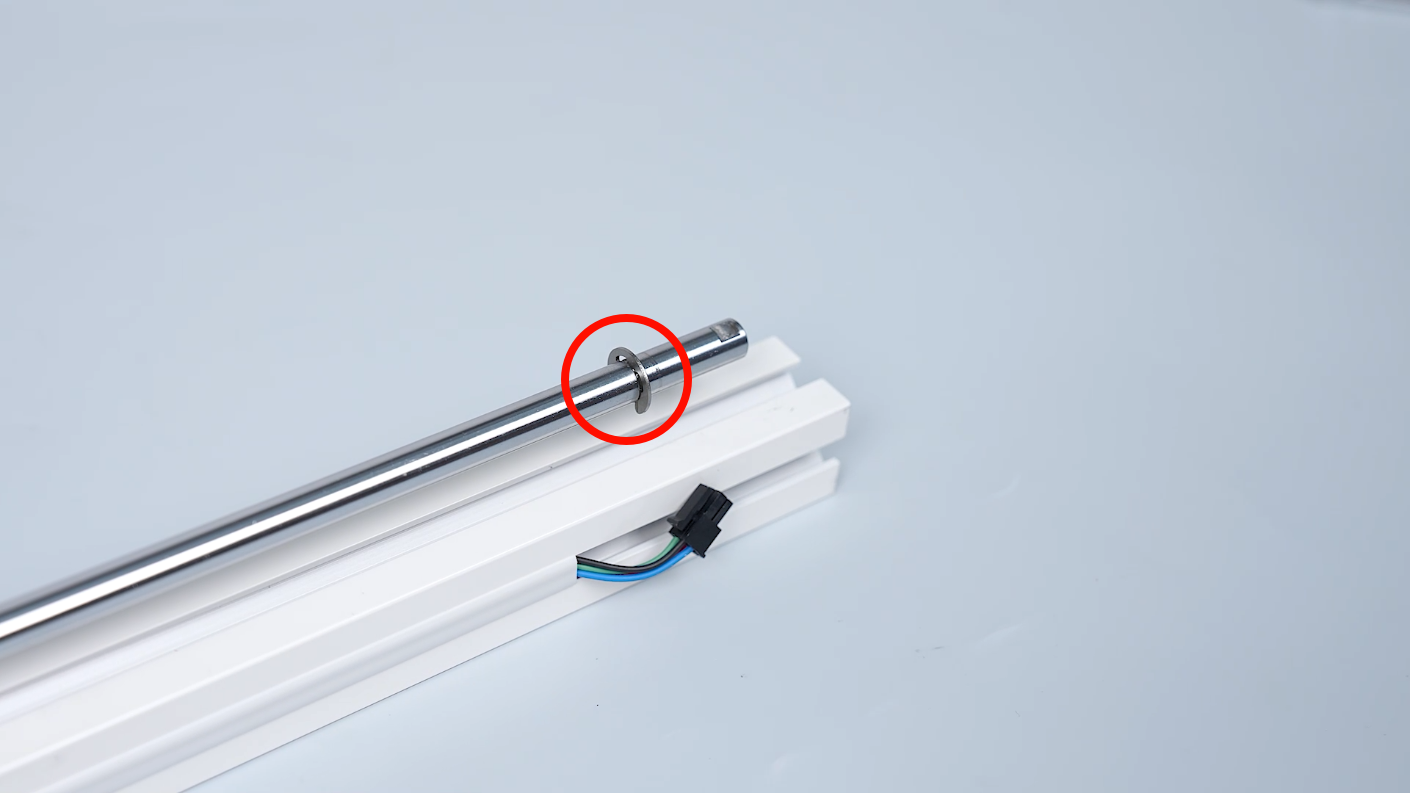
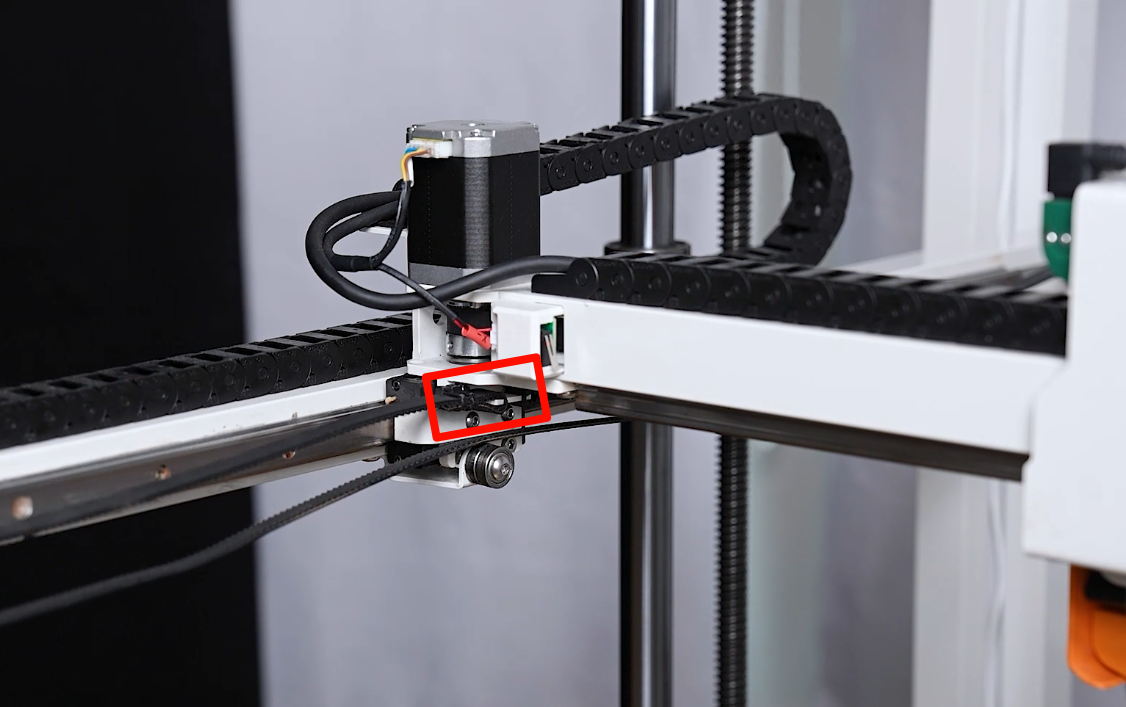
- Lift the circlip and remove it using a flat head screwdriver.
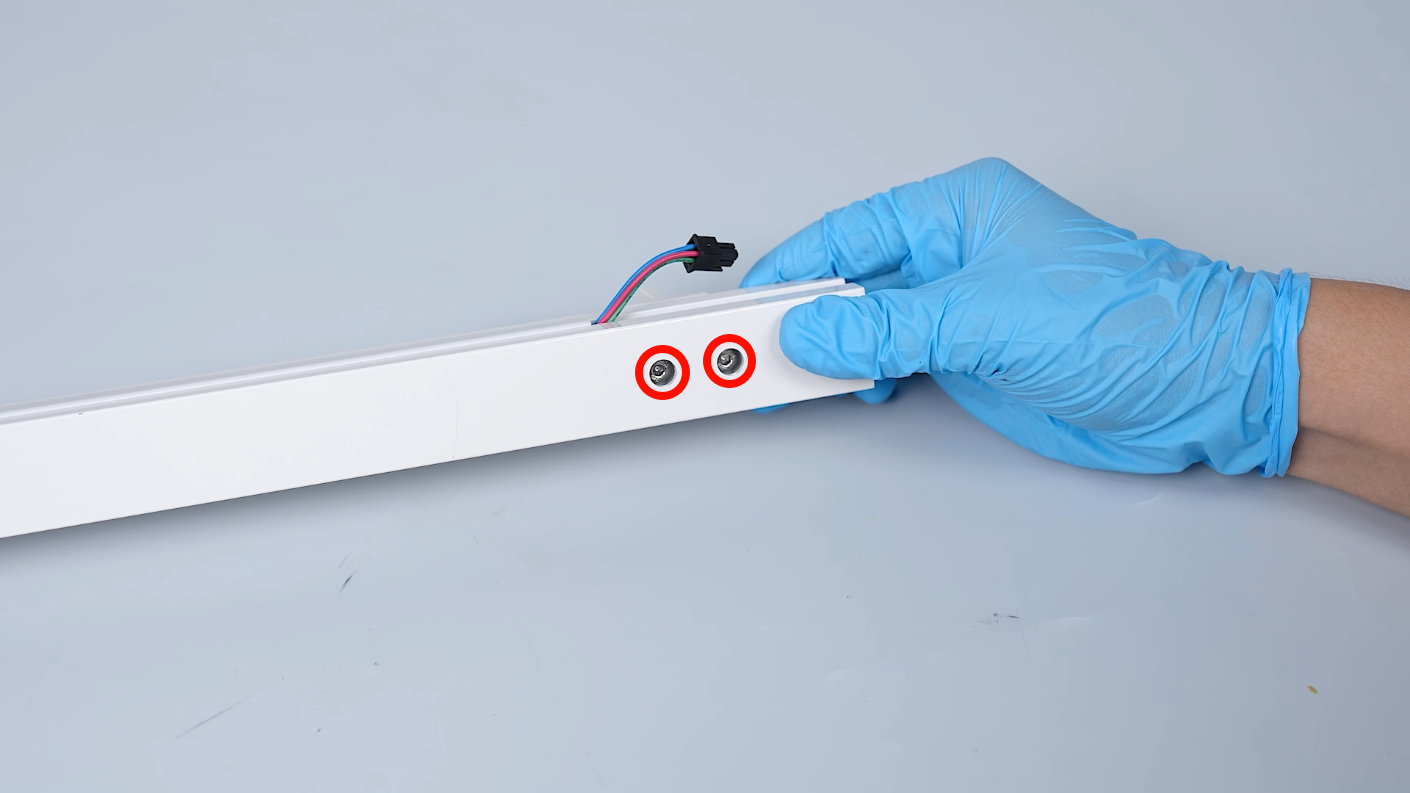
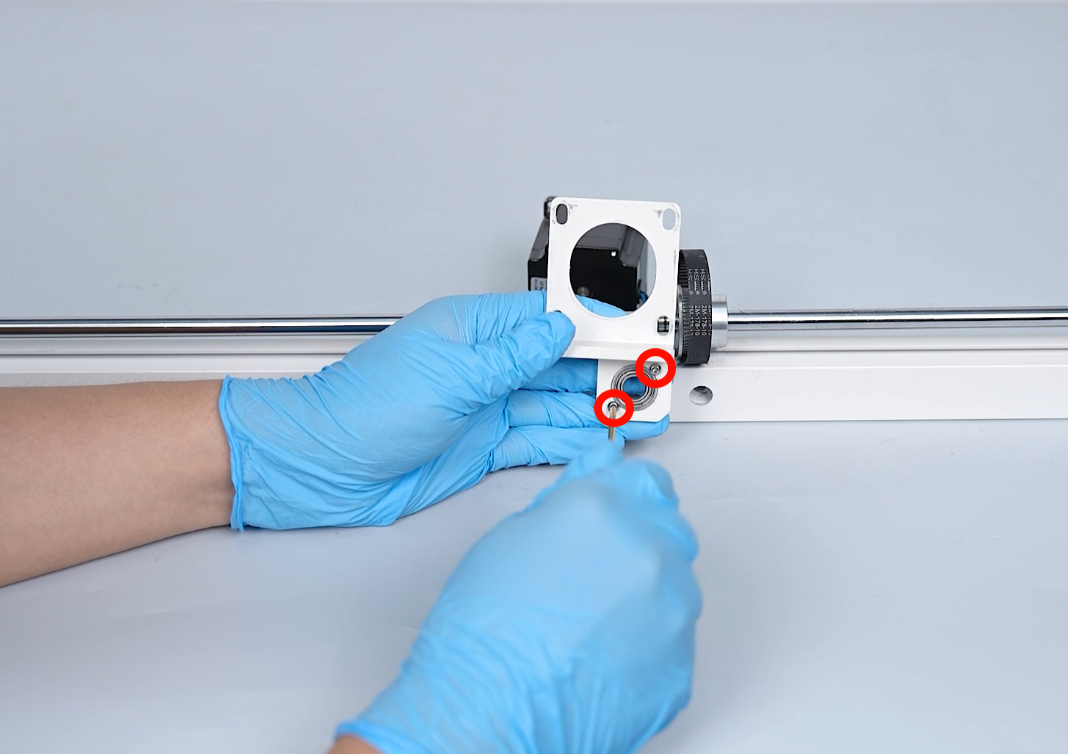
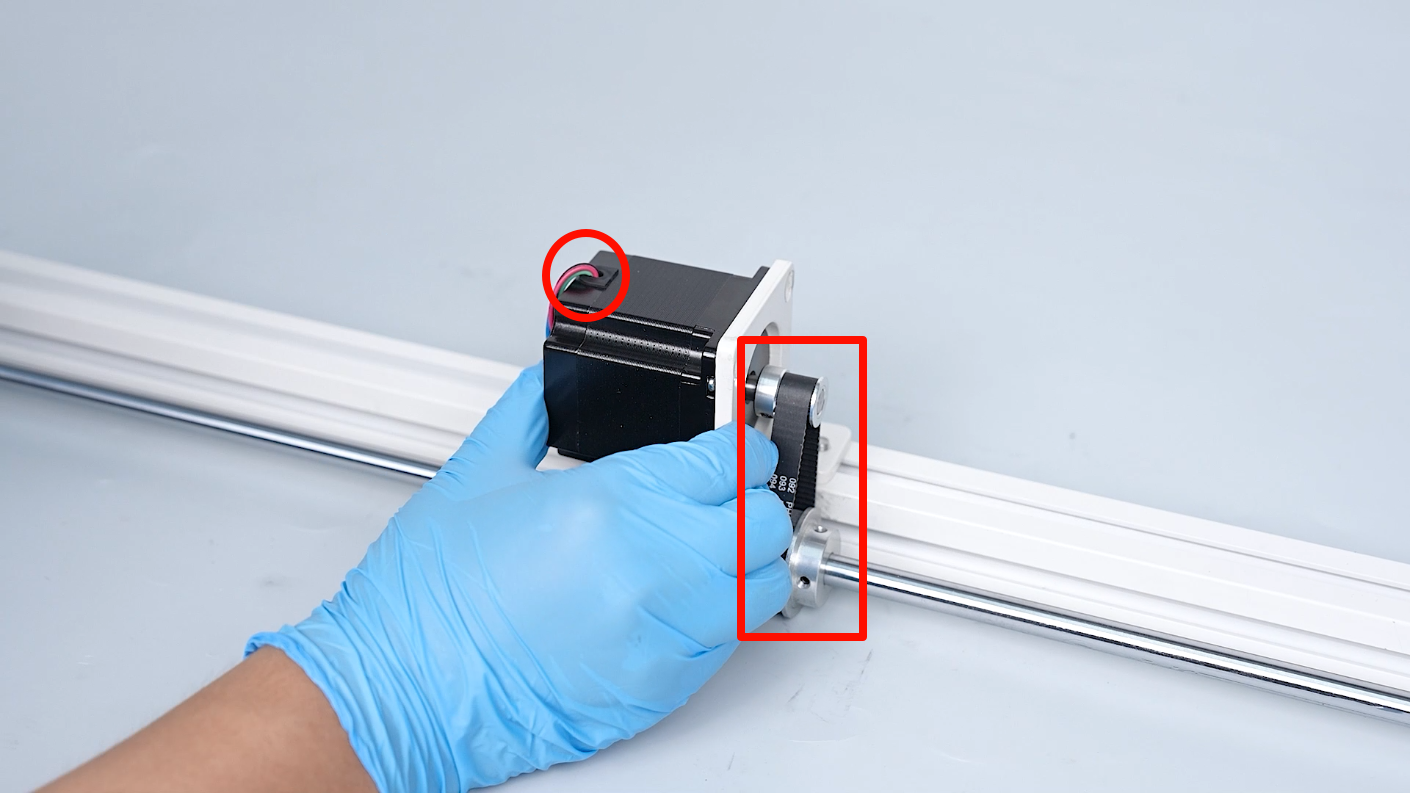
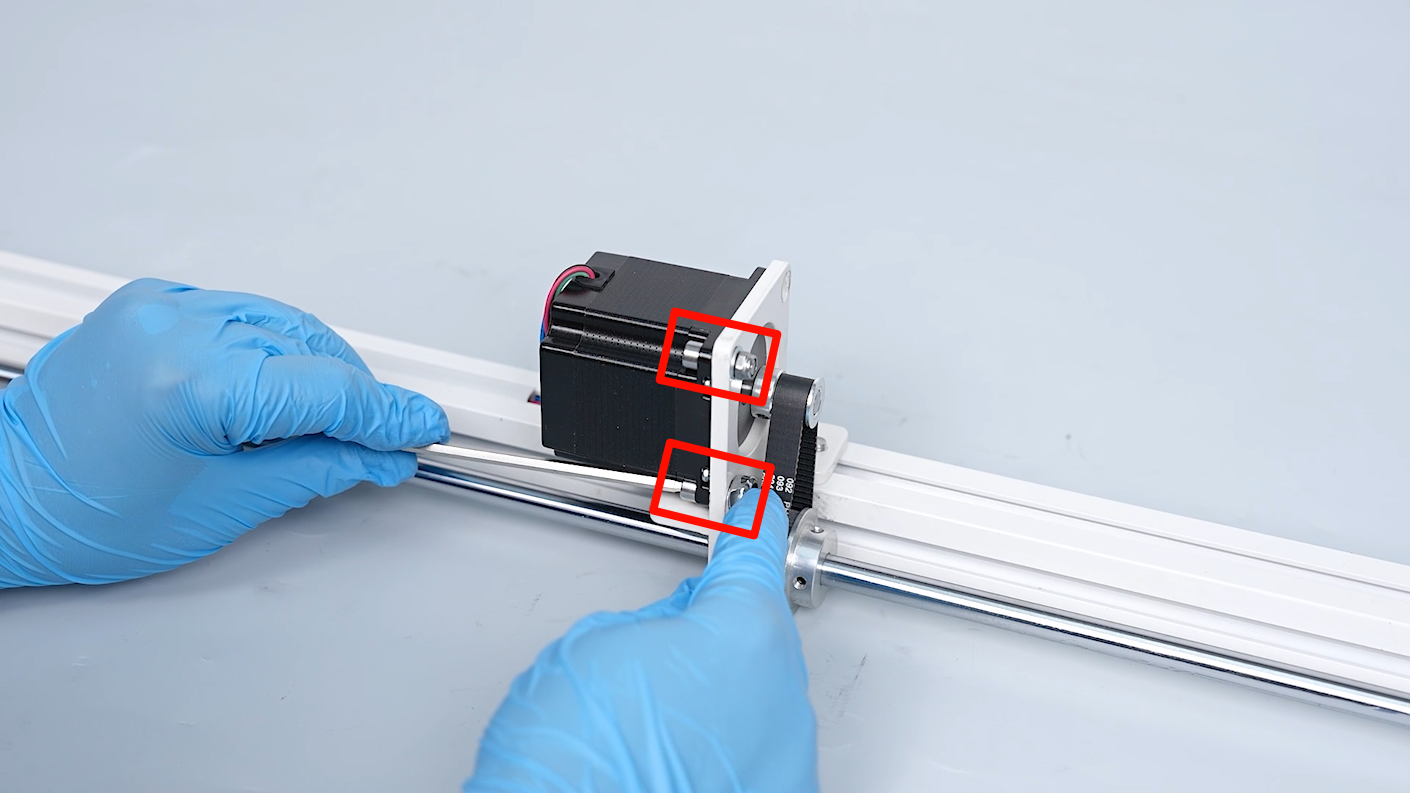
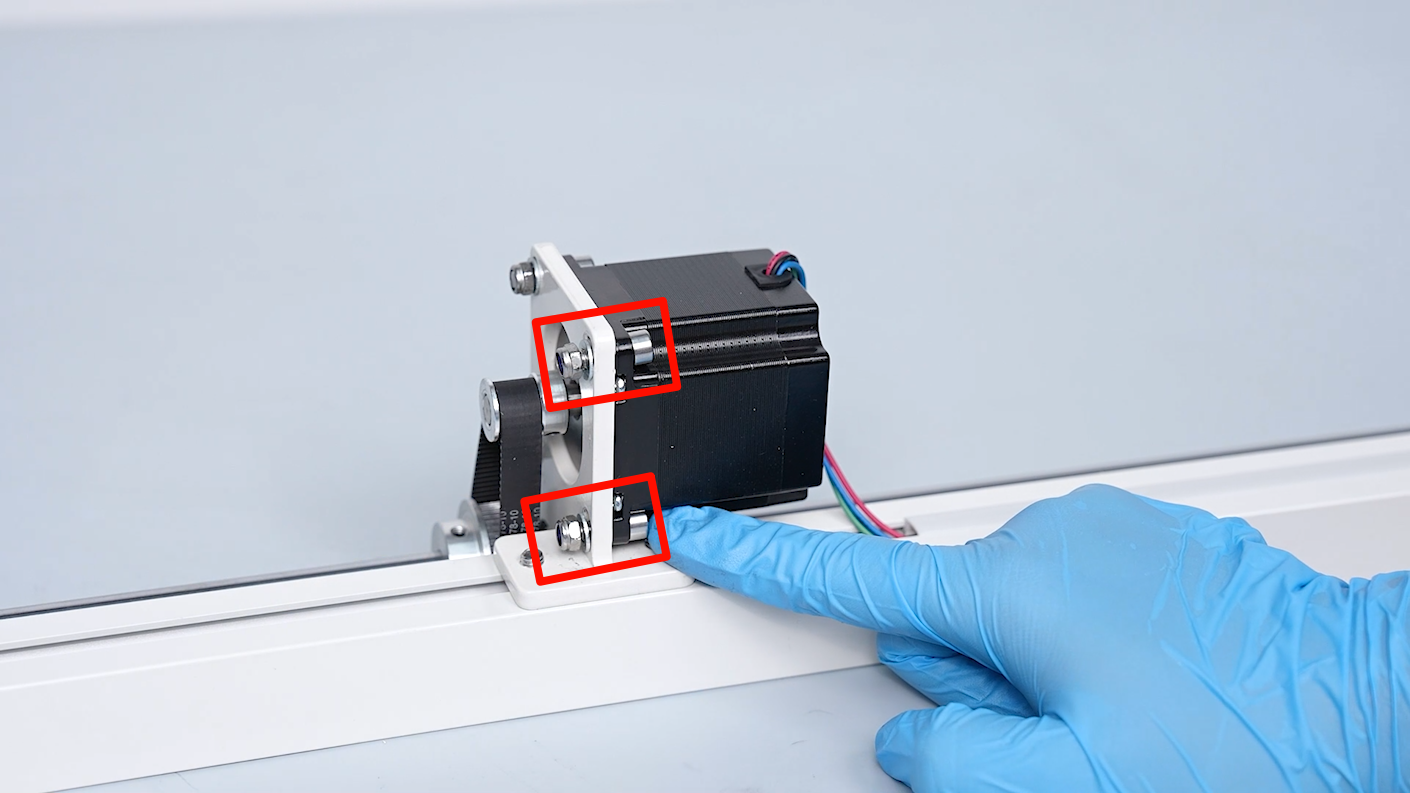
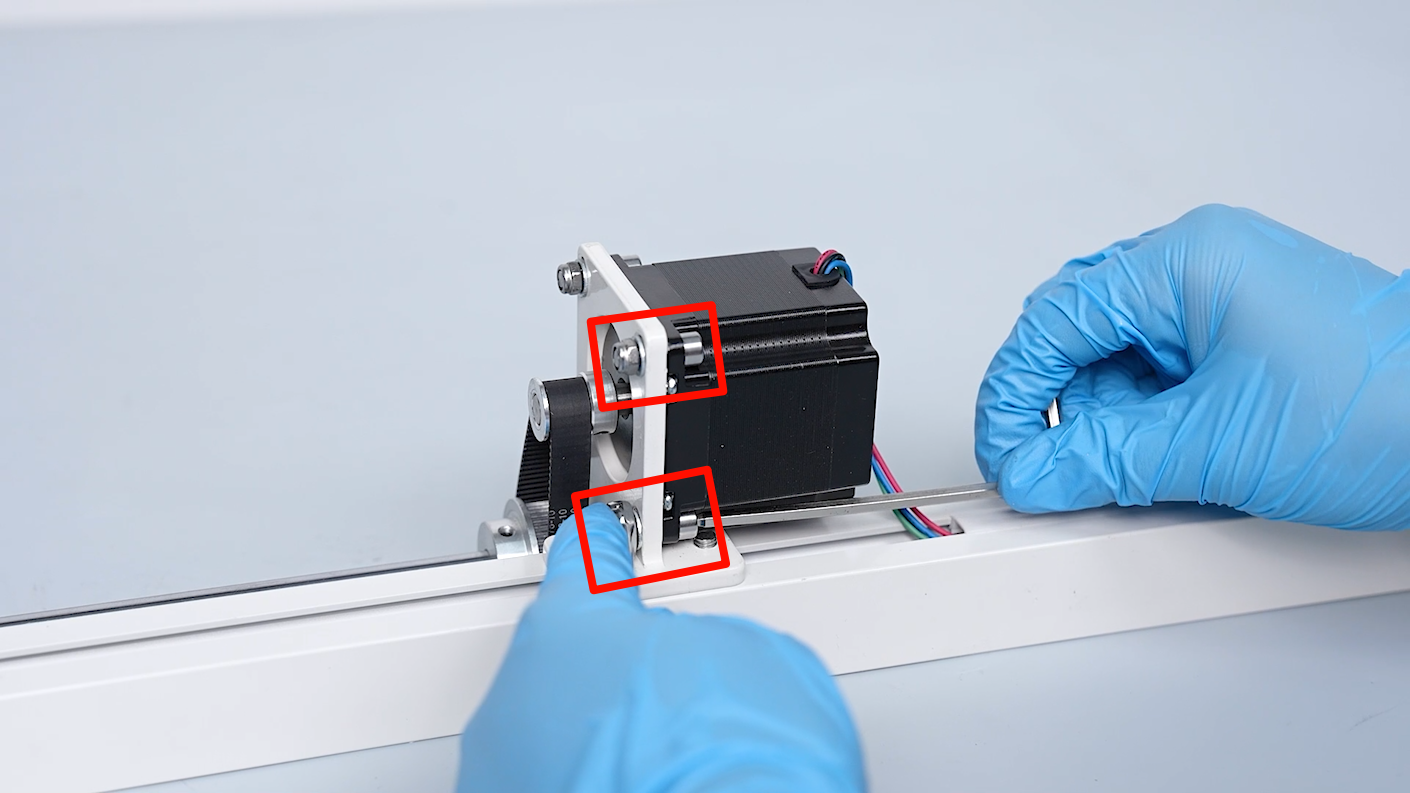
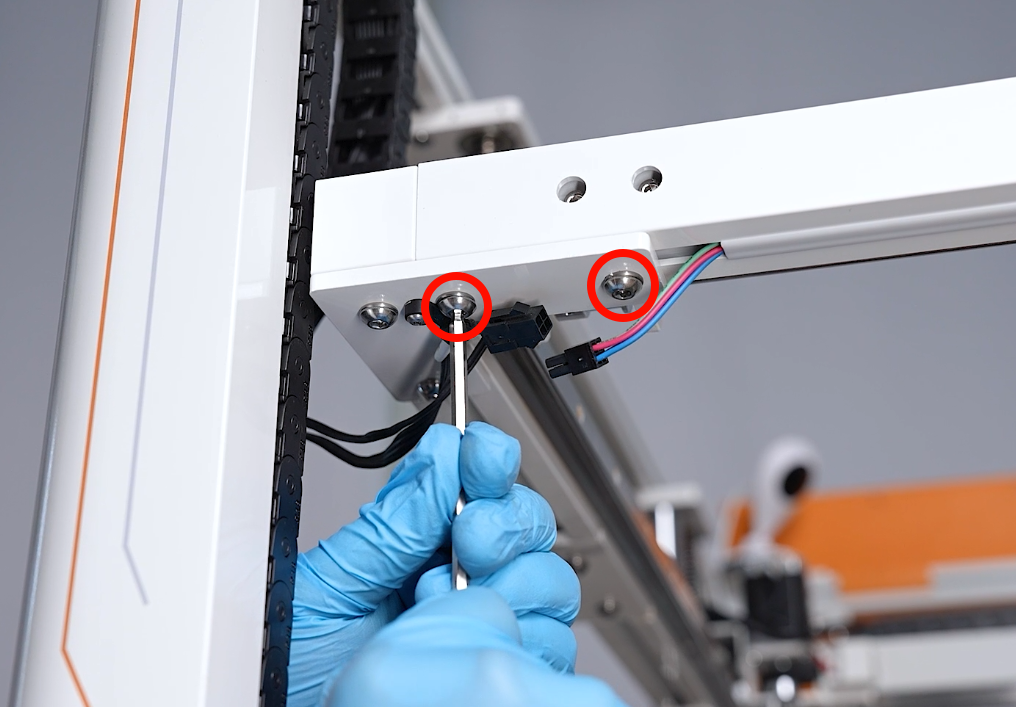
- Loosen the 4 screws securing the Y-axis motor using a 4.0 mm Allen key and 8.0 mm open wrench.
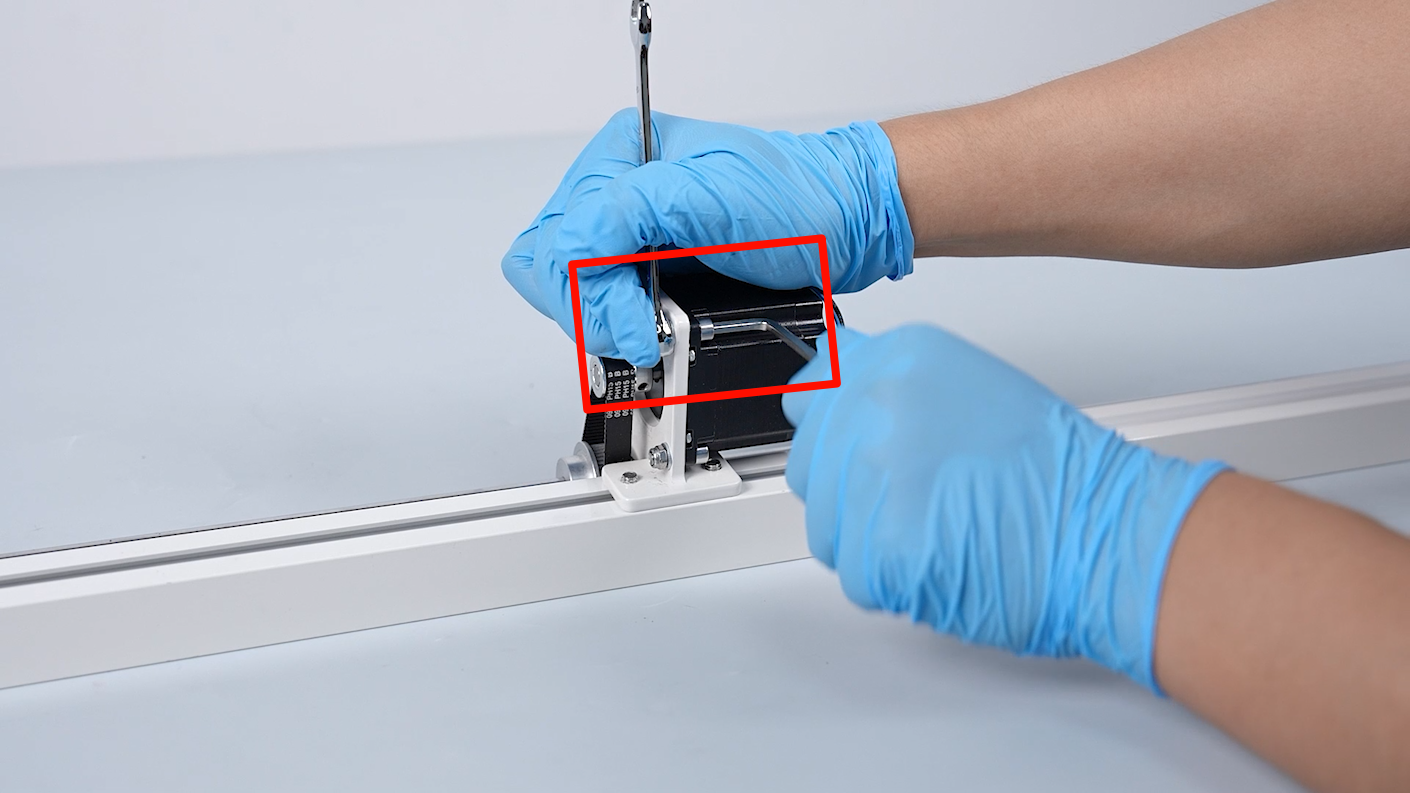
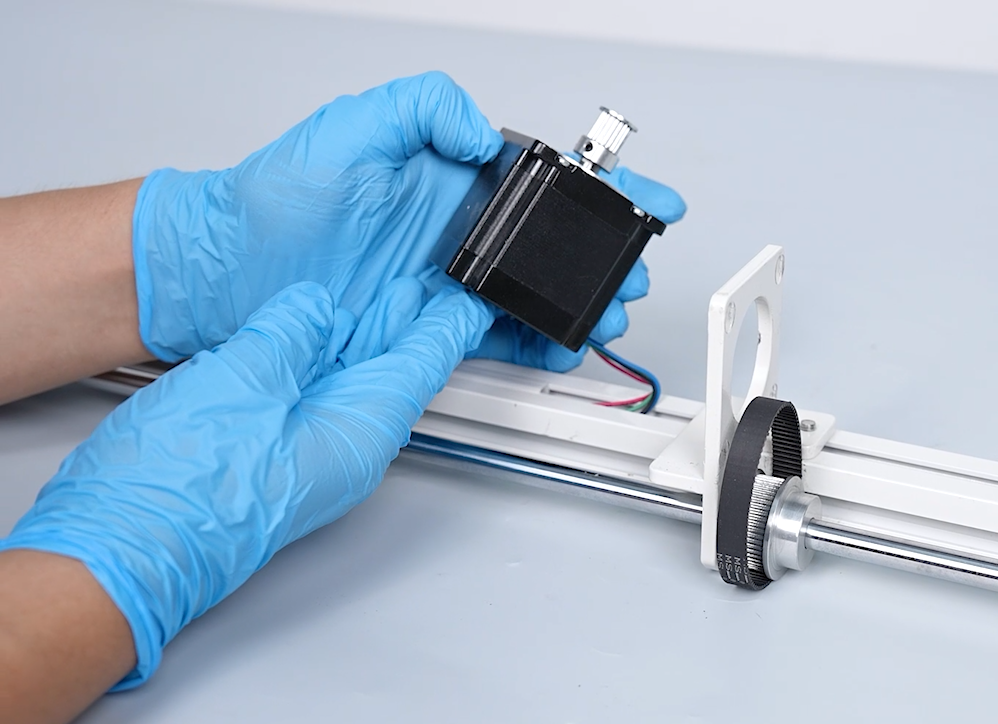
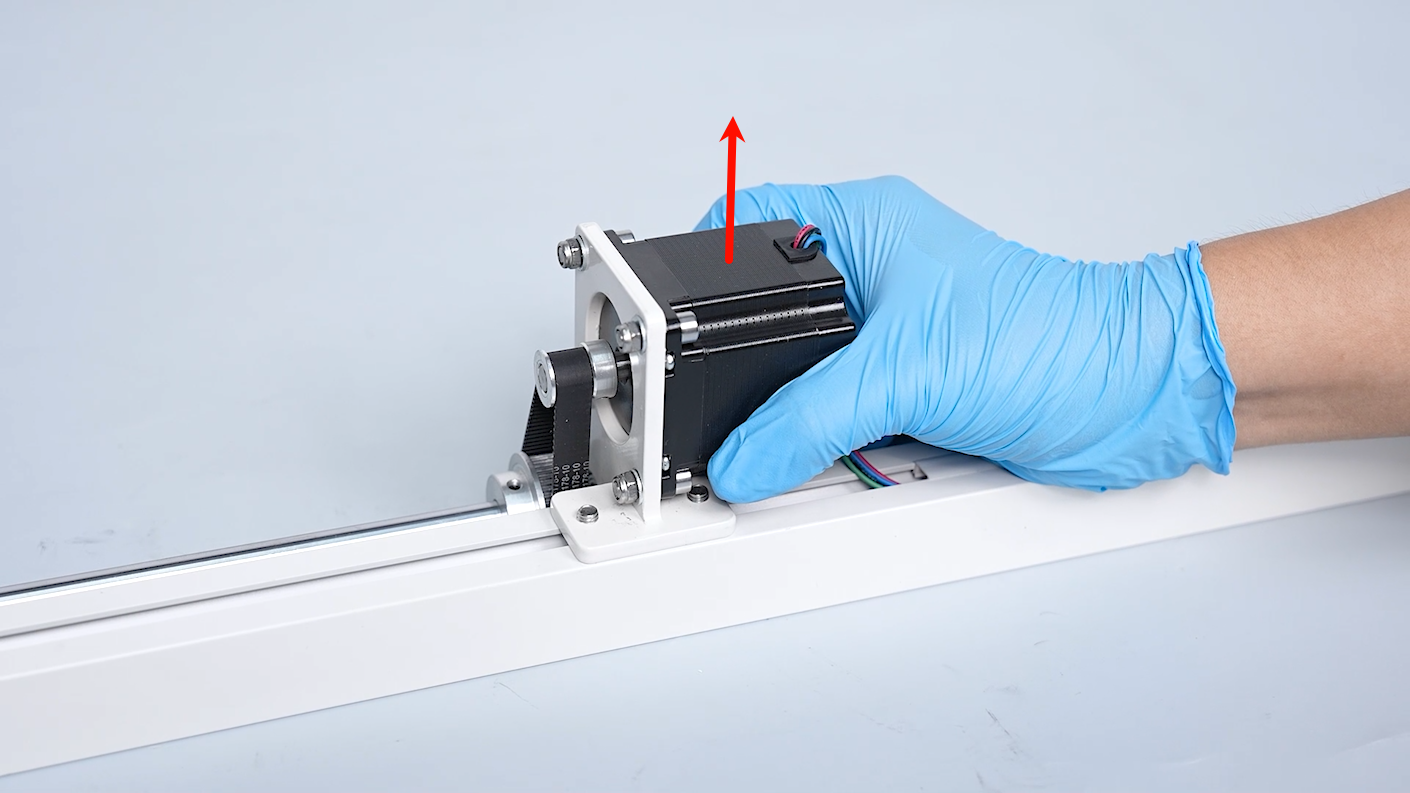
- Remove the Y-axis motor.
- Loosen the two screws securing the motor holder using a 5.0 mm Allen key.
- Remove the motor holder assembly from the Y-axis plain shaft.
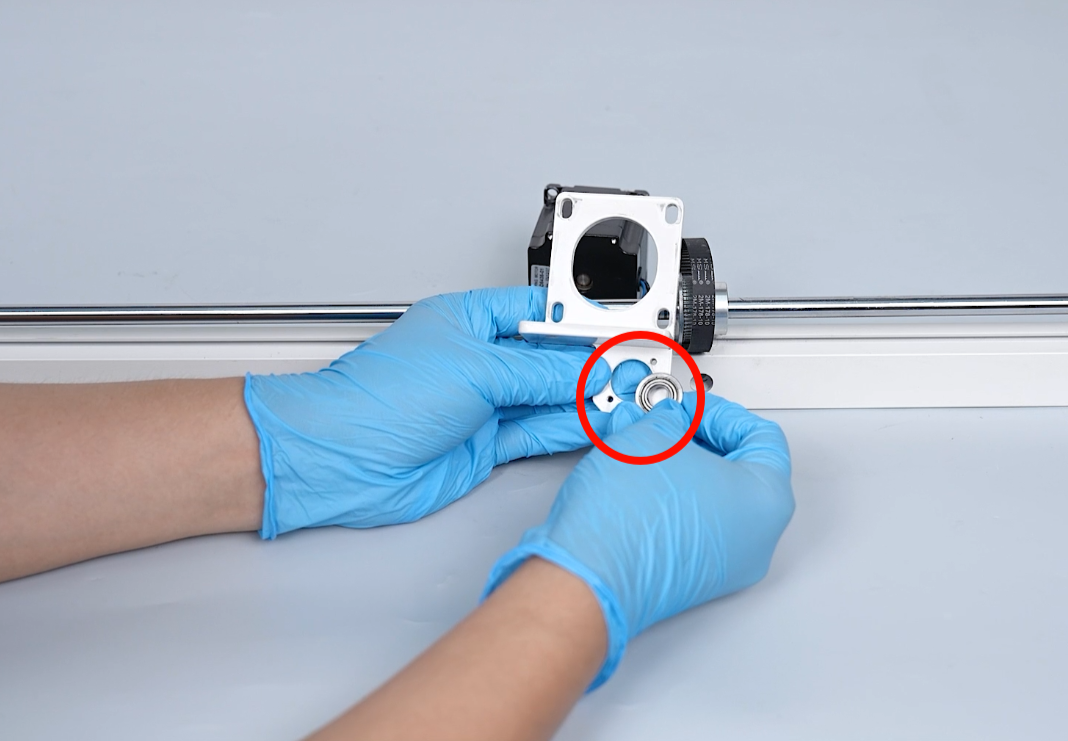
- Lossen the two screws securing the bearing using a 2.0 mm Allen key.
- Remove the old bearing.
¶ Install the new bearing
- Prepare the new bearing. Align the bearing with the installation holes and put it in the installation position.
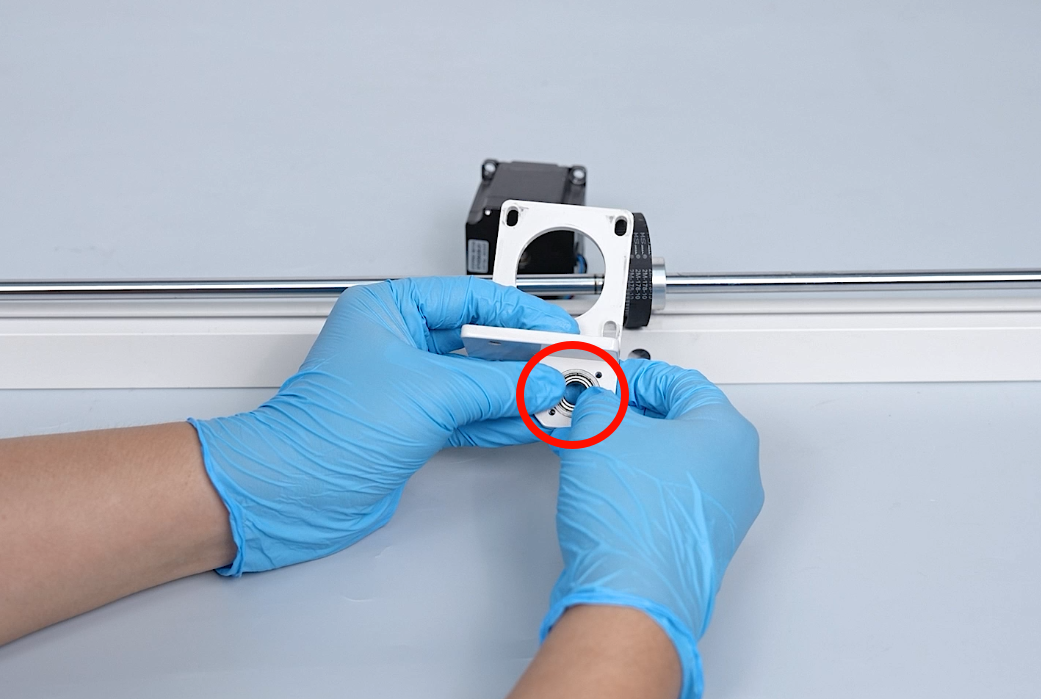
- Tighten the two screws securing the bearing using a 2.0 mm Allen key.
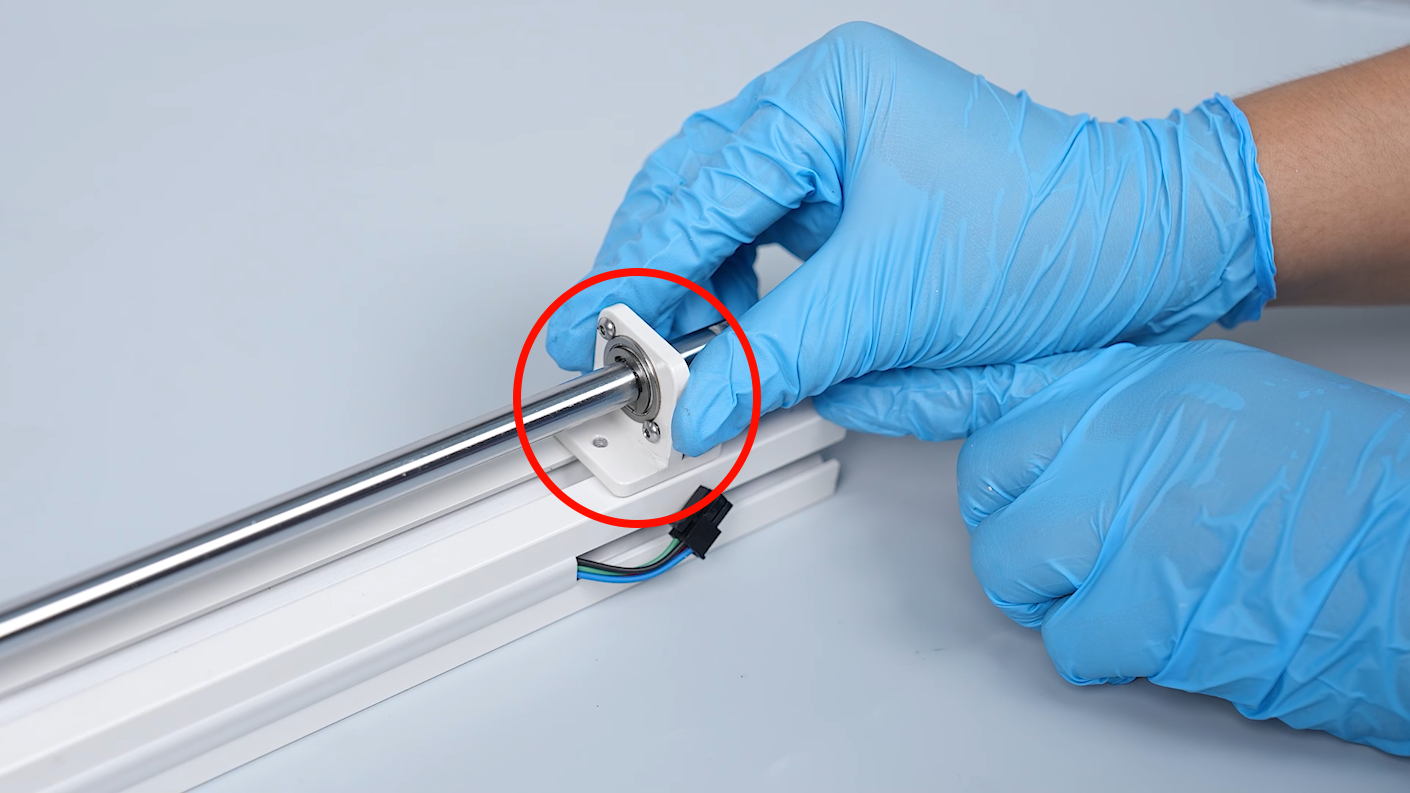
- Slide the motor holder into the Y-axis plain shaft.
Note: The motor holder has a fixed installation position.

- Tighten the two screws securing the motor holder using a 5.0 mm Allen key.

- Align the Y-axis motor with the screw holes and put the Y-axis motor in the installation position. Put the timing belt on the timing pulley of the Y-axis motor.
Note: The motor side without the ribbon cables must be facing towards the motor holder.
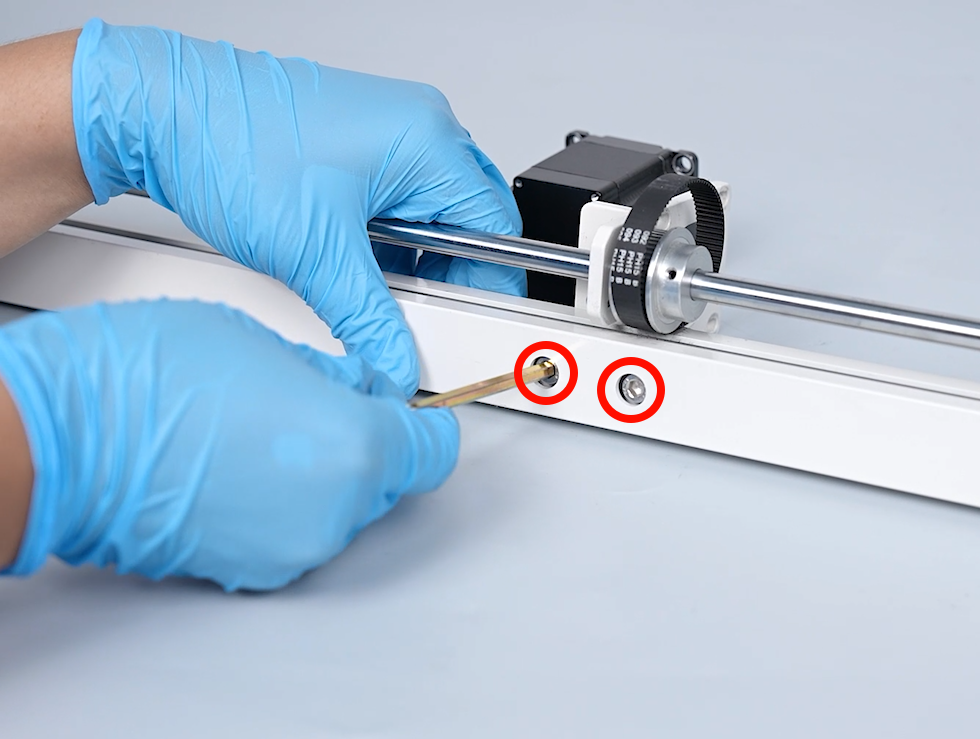
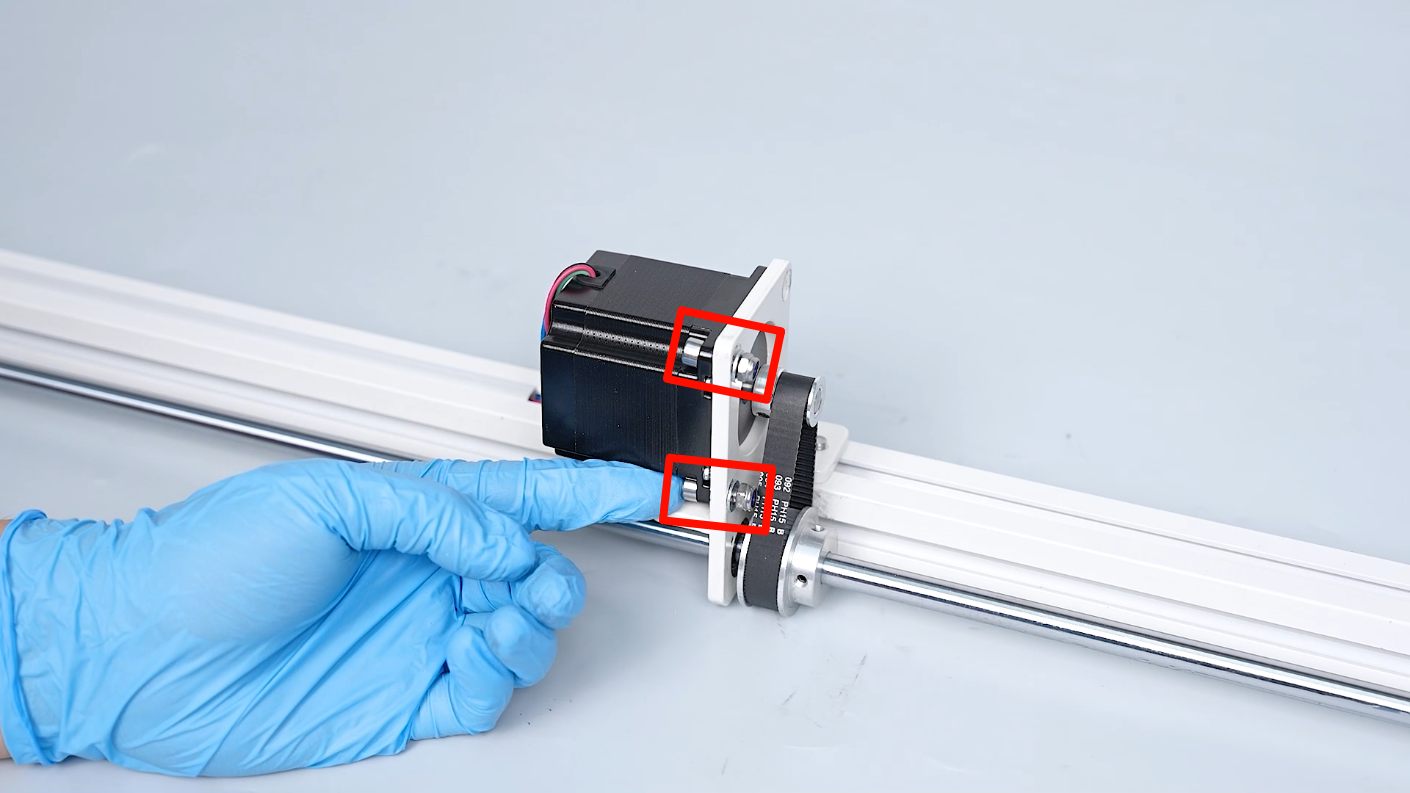
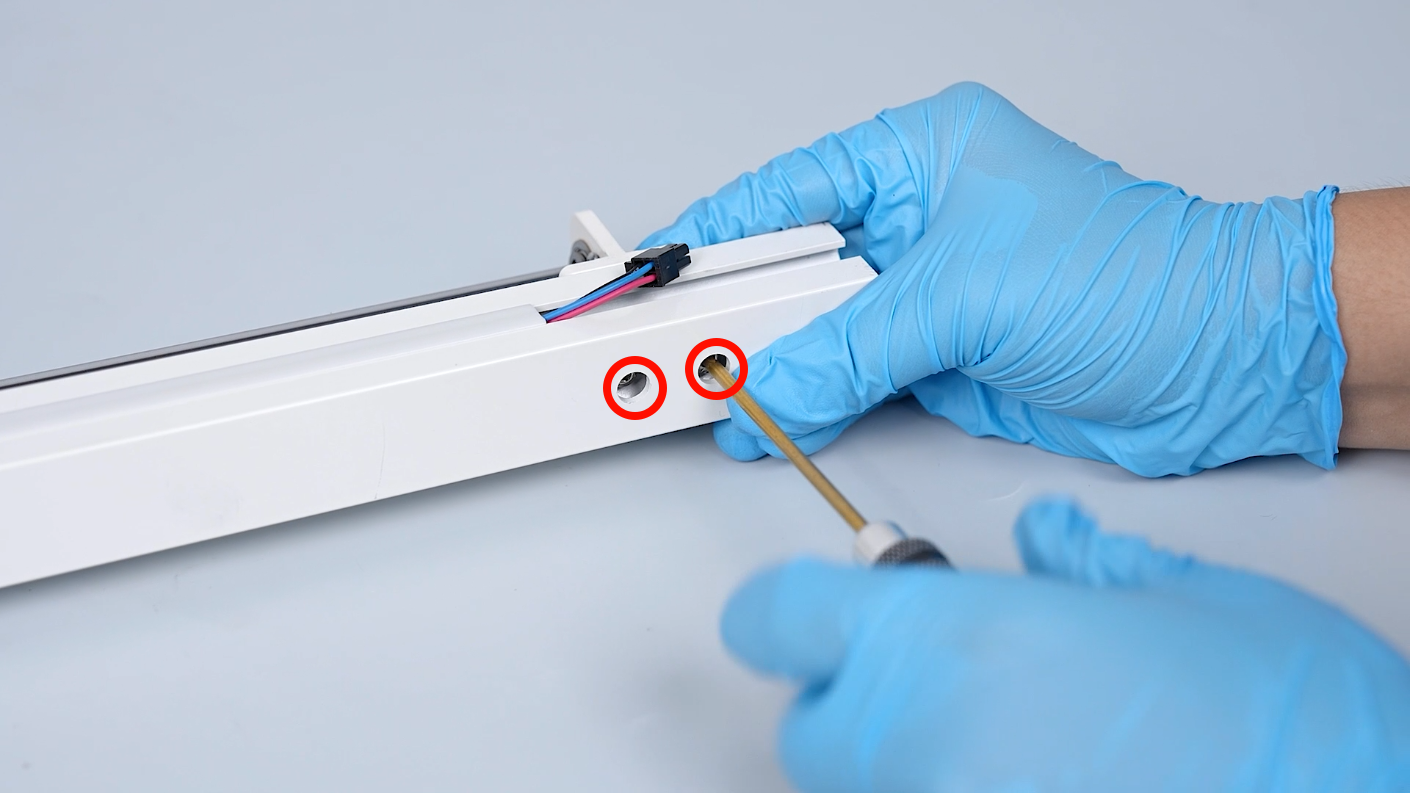
- Put the screws securing the motor into the installation holes. Put the spacers and nuts in the end of the screws. Tighten the 4 screws securing the Y-axis motor by three quarters depth using a 4.0 mm Allen key and 8.0 mm open wrench.
- Pull the Y-axis motor upwards and tauten the timing belt.Tighten the 4 screws securing the Z-axis motor completely.
- Prepare the circlip. Press it and insert into the groove.
- Insert the bearing assembly onto the Y-axis plain shaft. Align it with the screw holes and put it in the installation position.
- Tighten the two screws securing the Y-axis bearing coupler using a 3.0 mm Allen key.
- Prepare the timing pulley. Align one of the screws with the indent on the plain shaft and put the pulley in the installation position. Tighten the two screws securing the timing pulley using a 2.0 mm Allen key.
Note: Align the front surface of the timing pulley with the flat surface of the plain shaft.

¶ Install the Y-axis plain shaft
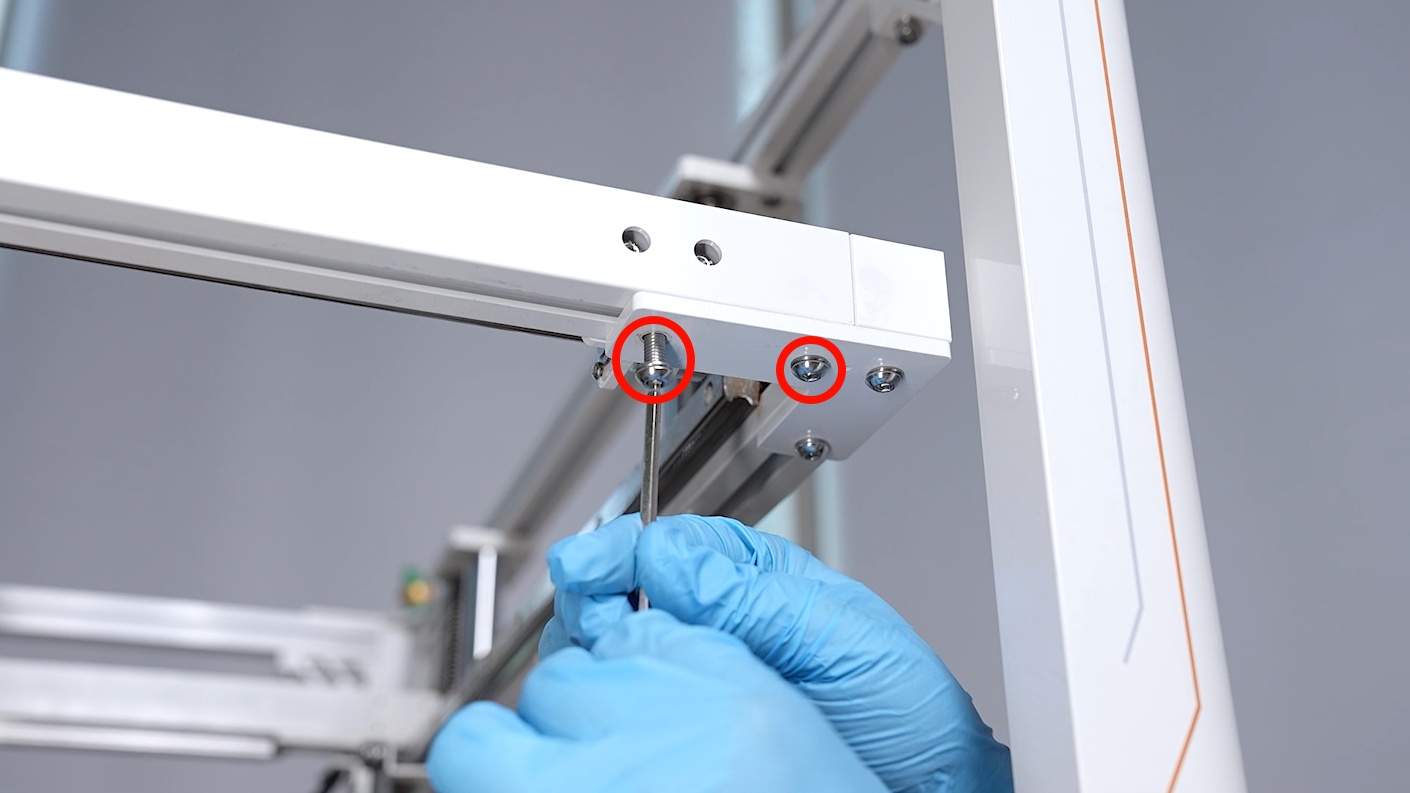
- Align the y-axis assembly with the screw holes and put it in the installation position. Tighten the two screws securing the Y-axis bottom using a 4.0 mm Allen key.
- Insert the cables of the Y-axis motor.
- Organize the timing belt of the Y-axis. Slide it through the timing belt of the Y-axis plain shaft.
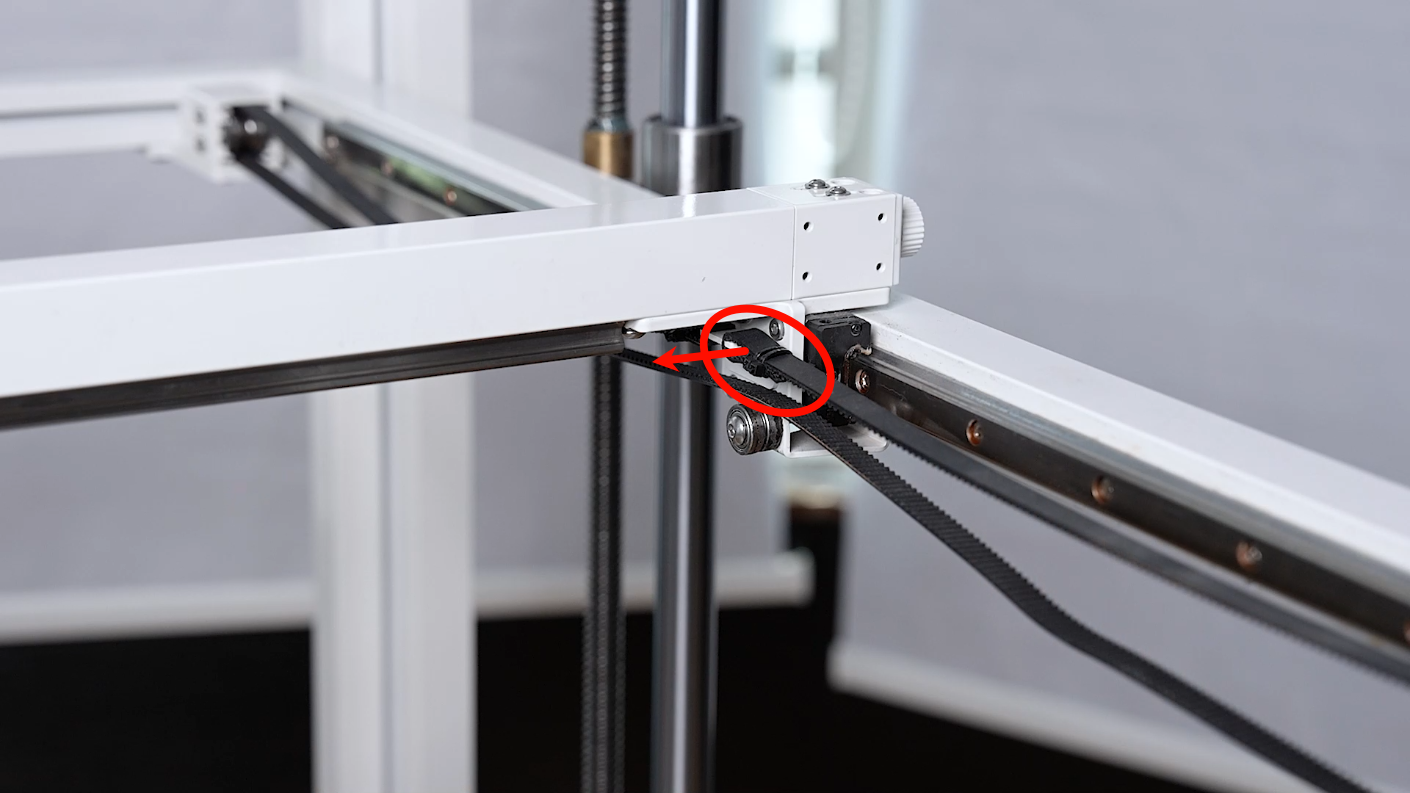
- Insert the front end of the timing belt onto the belt holder.
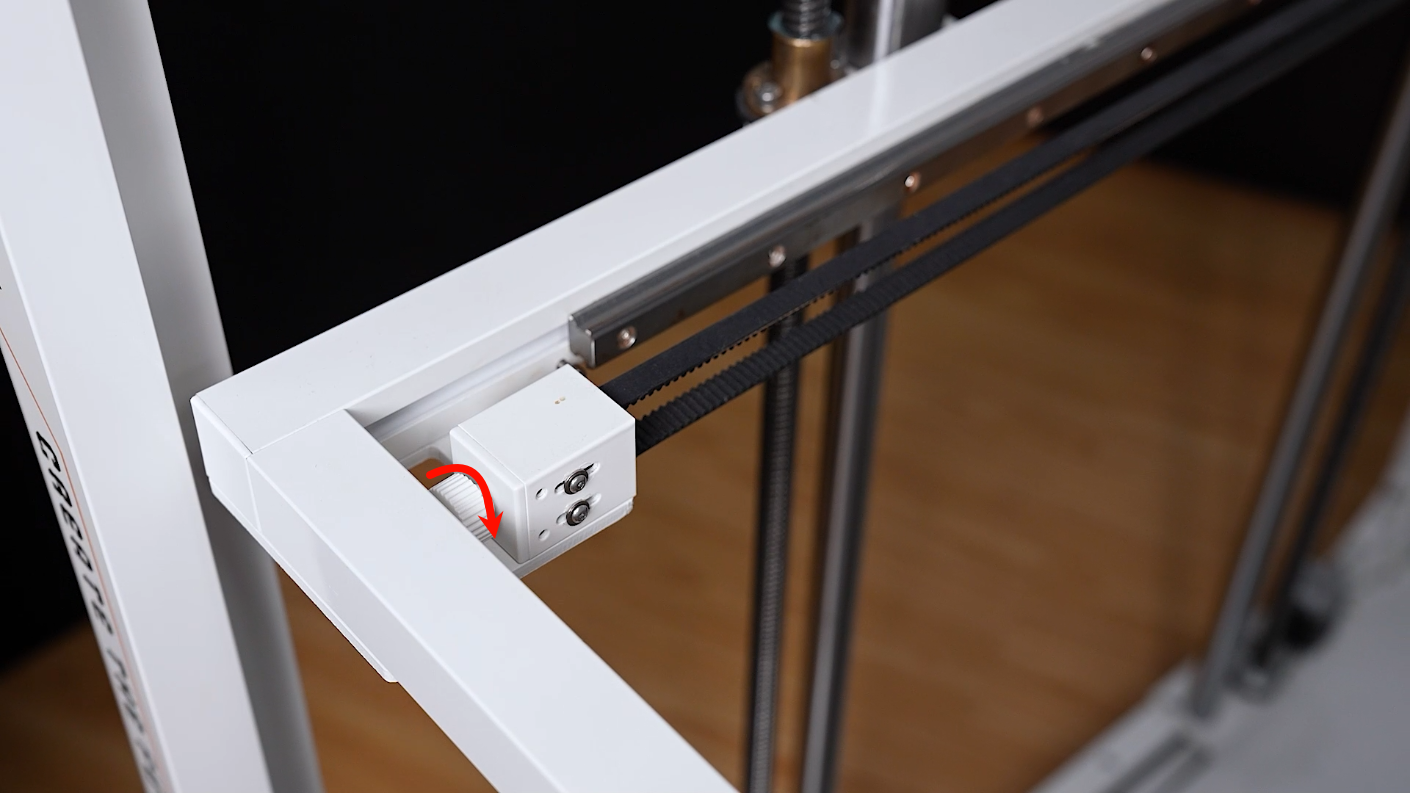
- Rotate the Y-axis belt tensioner knob and adjust the belt tension to moderate, not too loose or too tight.
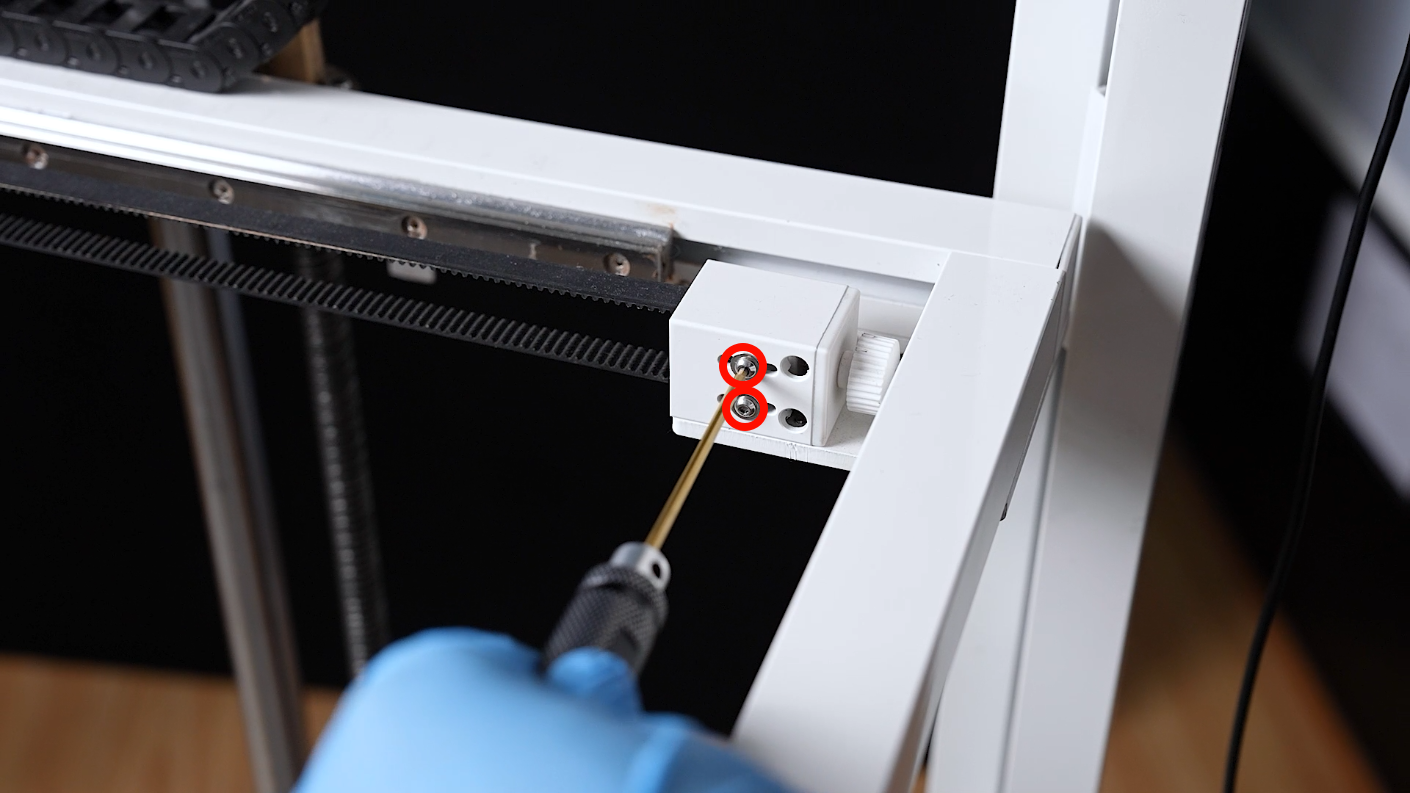
- Tighten the two screws securing the passive pulley slider using a 2.0 mm Allen key.
- Install and adjust the other timing belt in the same way.


- Plug in the power cord and power on the printer. On the touchscreen, click Prepare - all (Homing) . After the homing process, the printer is ready for use after working normally.