¶ Tools and Materials
- Lint-Free Cloth
- Cleaning tools for bolt
- Lubricant
¶ Tutorial Video
https://youtu.be/D9vJw038IhI
¶ Instructions
1. Power off the printer and unplug the power cord.
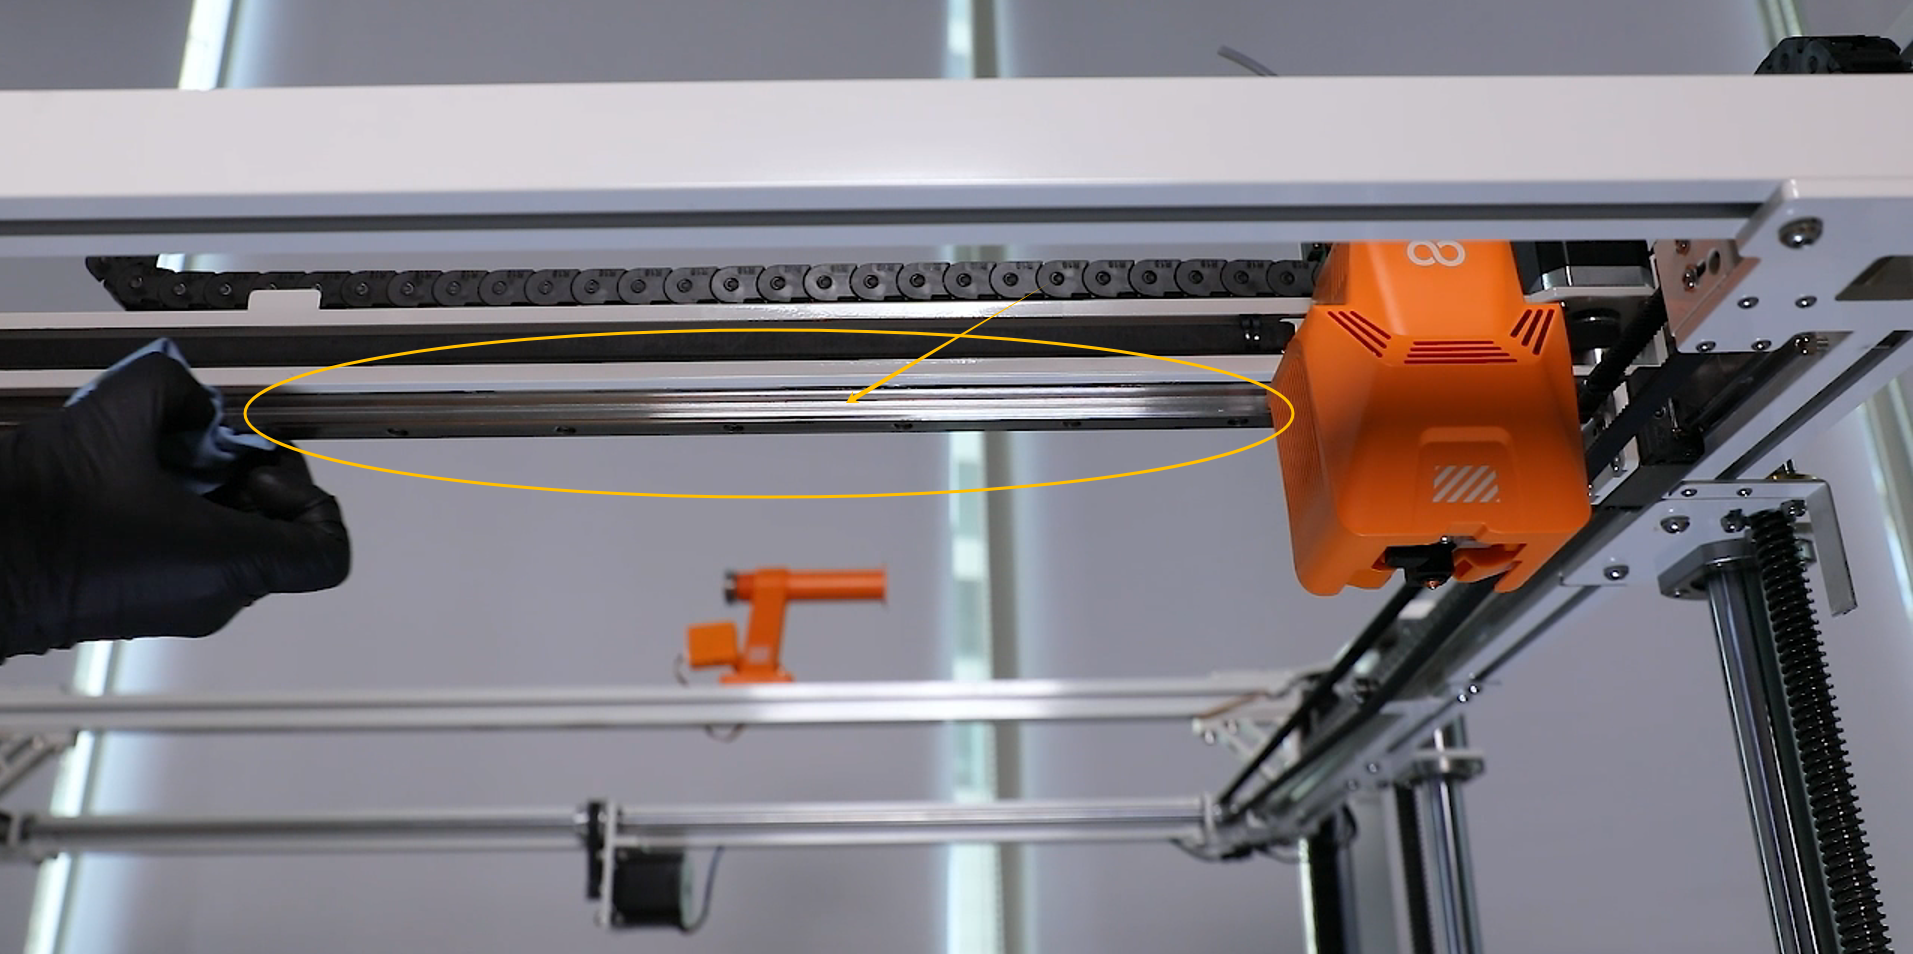
2. Wipe the X-axis guide rail with a lint-free cloth to remove any oil residue.
Note: Clean the oil residue from the grooves on both sides of the guide rail.
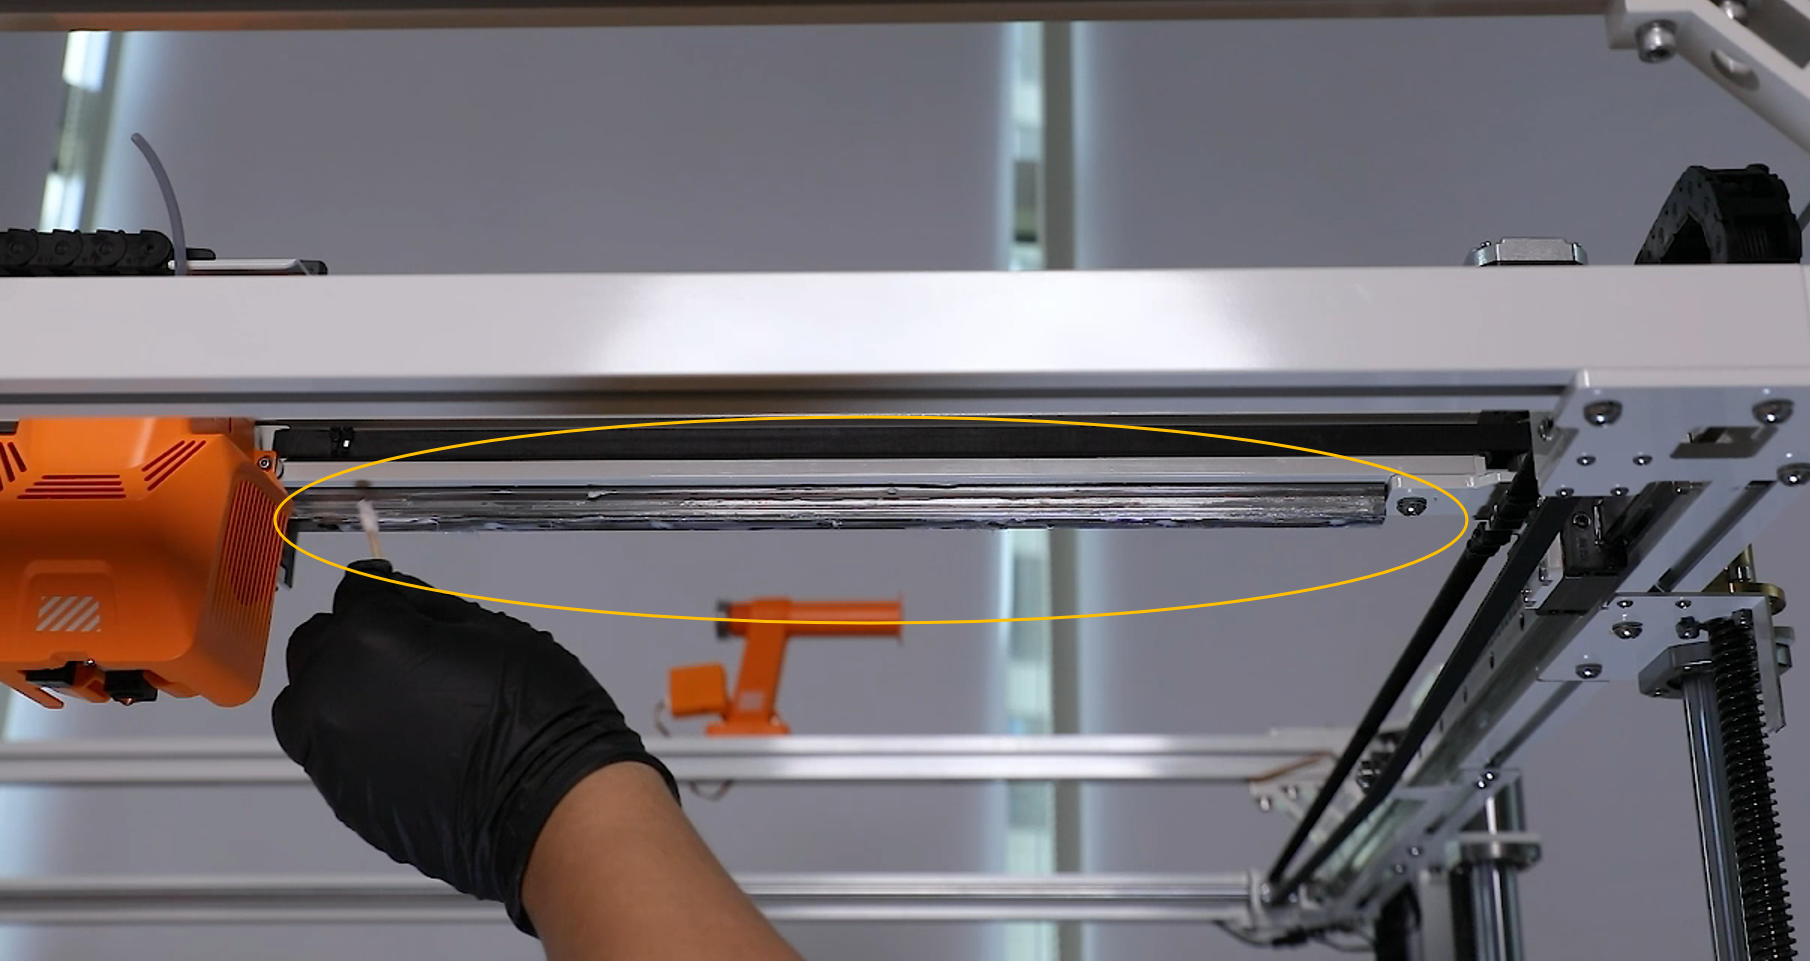
3. Use a cotton swab to evenly apply lubricant to the X-axis guide rail and grooves on both sides of the rail.
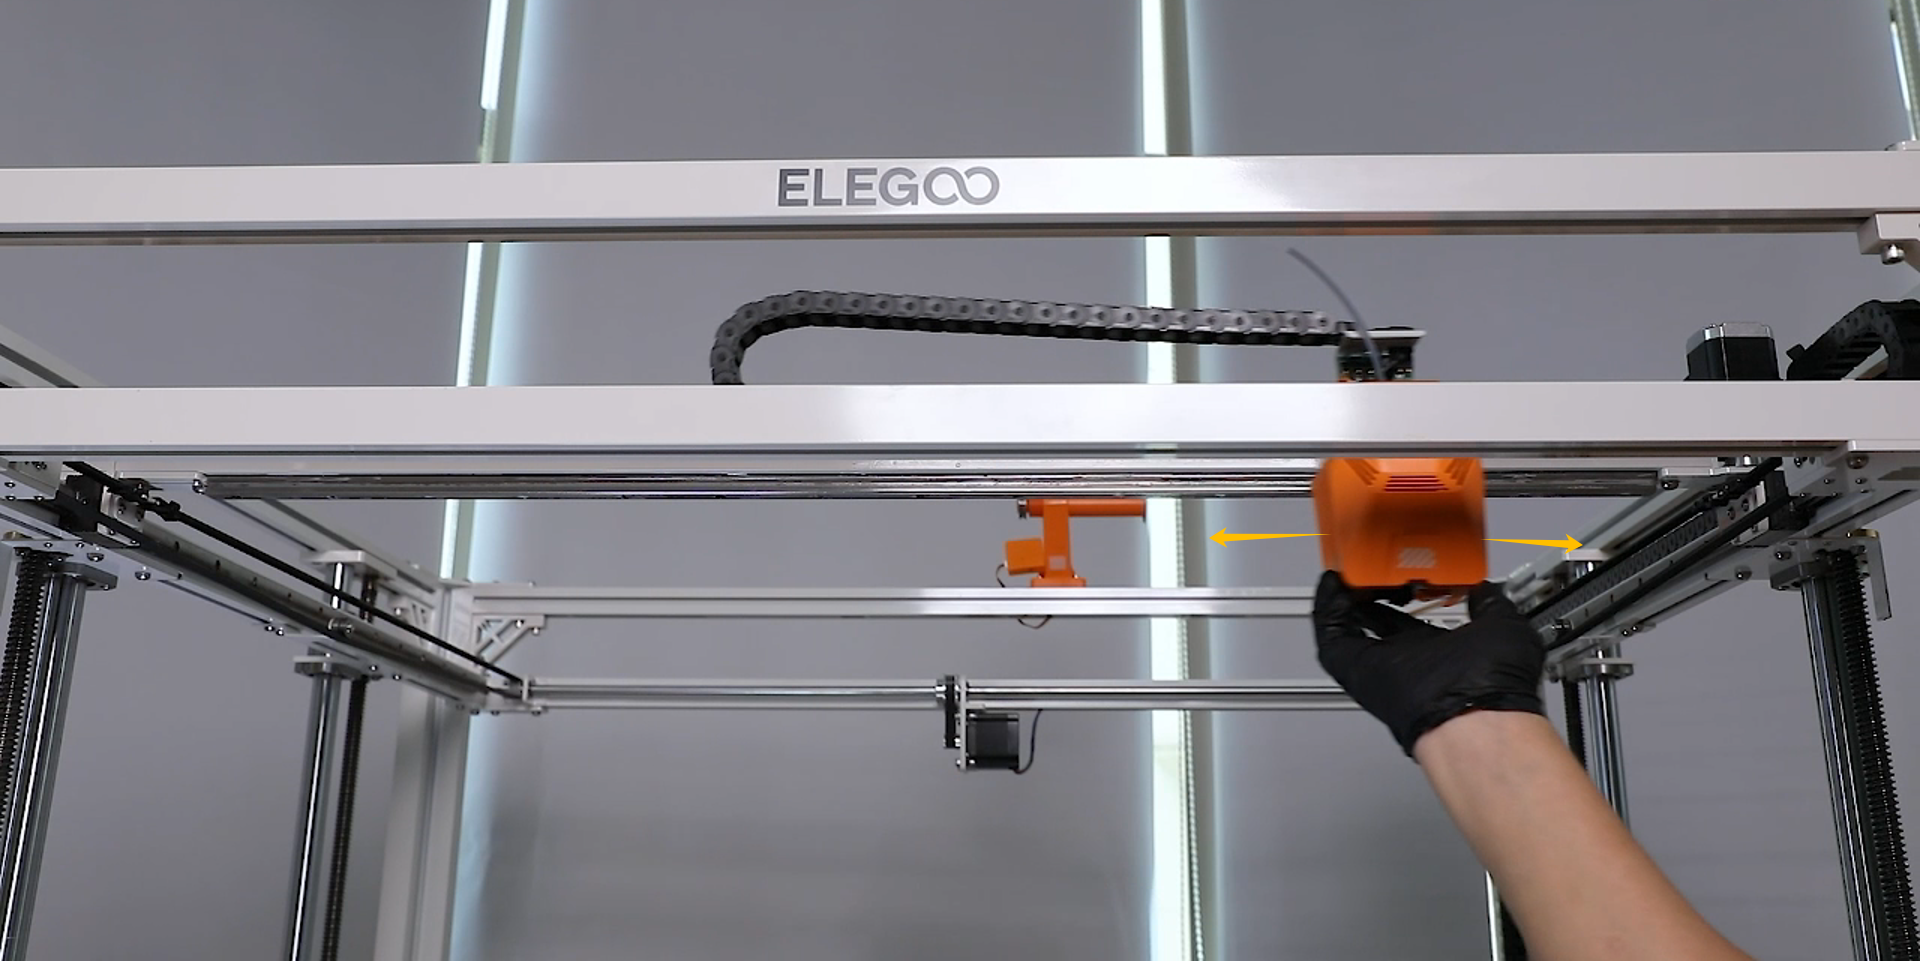
4. Gently move the 3D print head back and forth by hand to evenly distribute the lubricant.
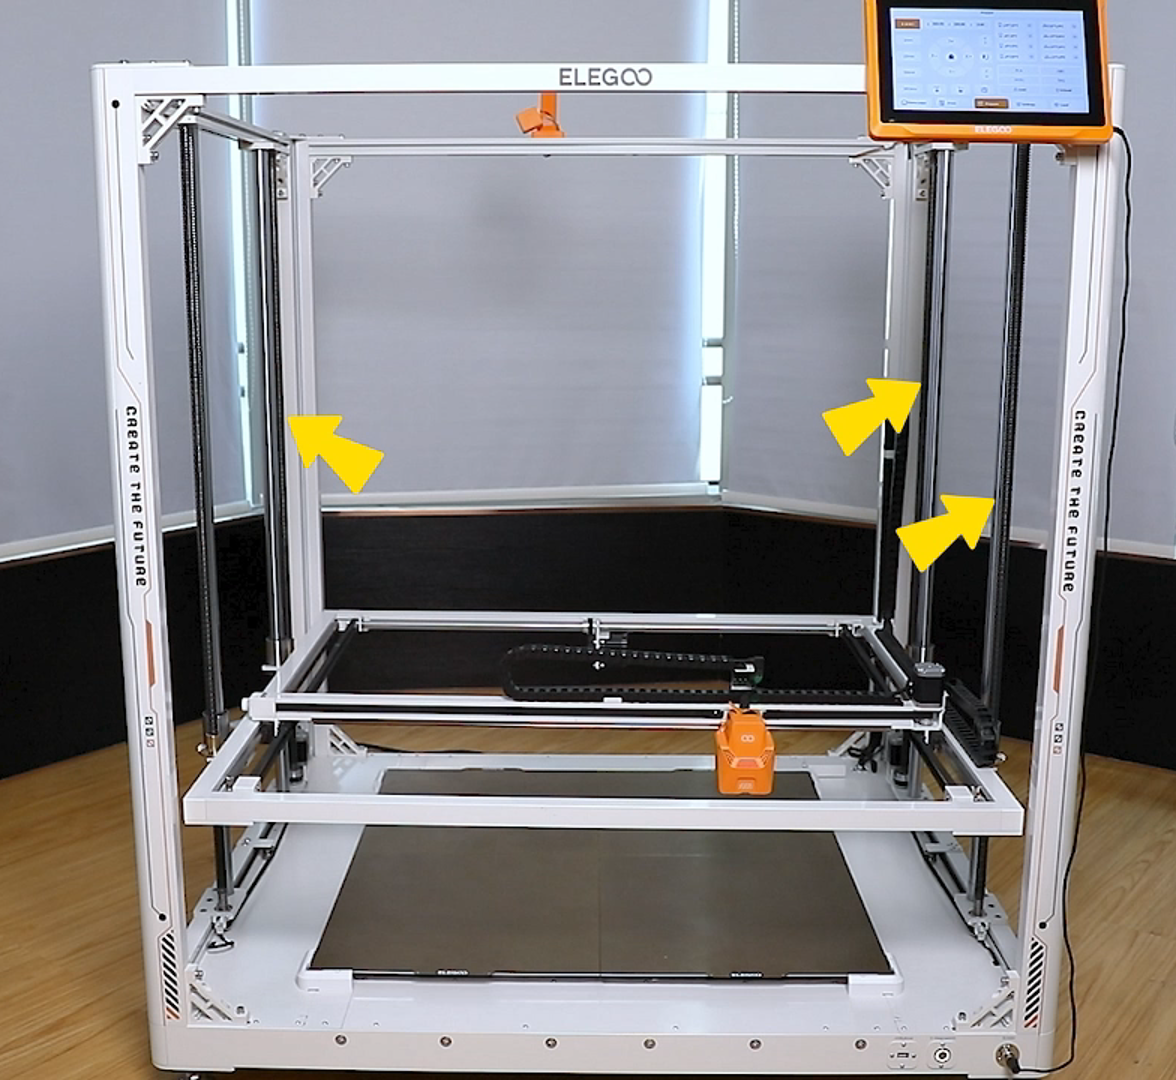
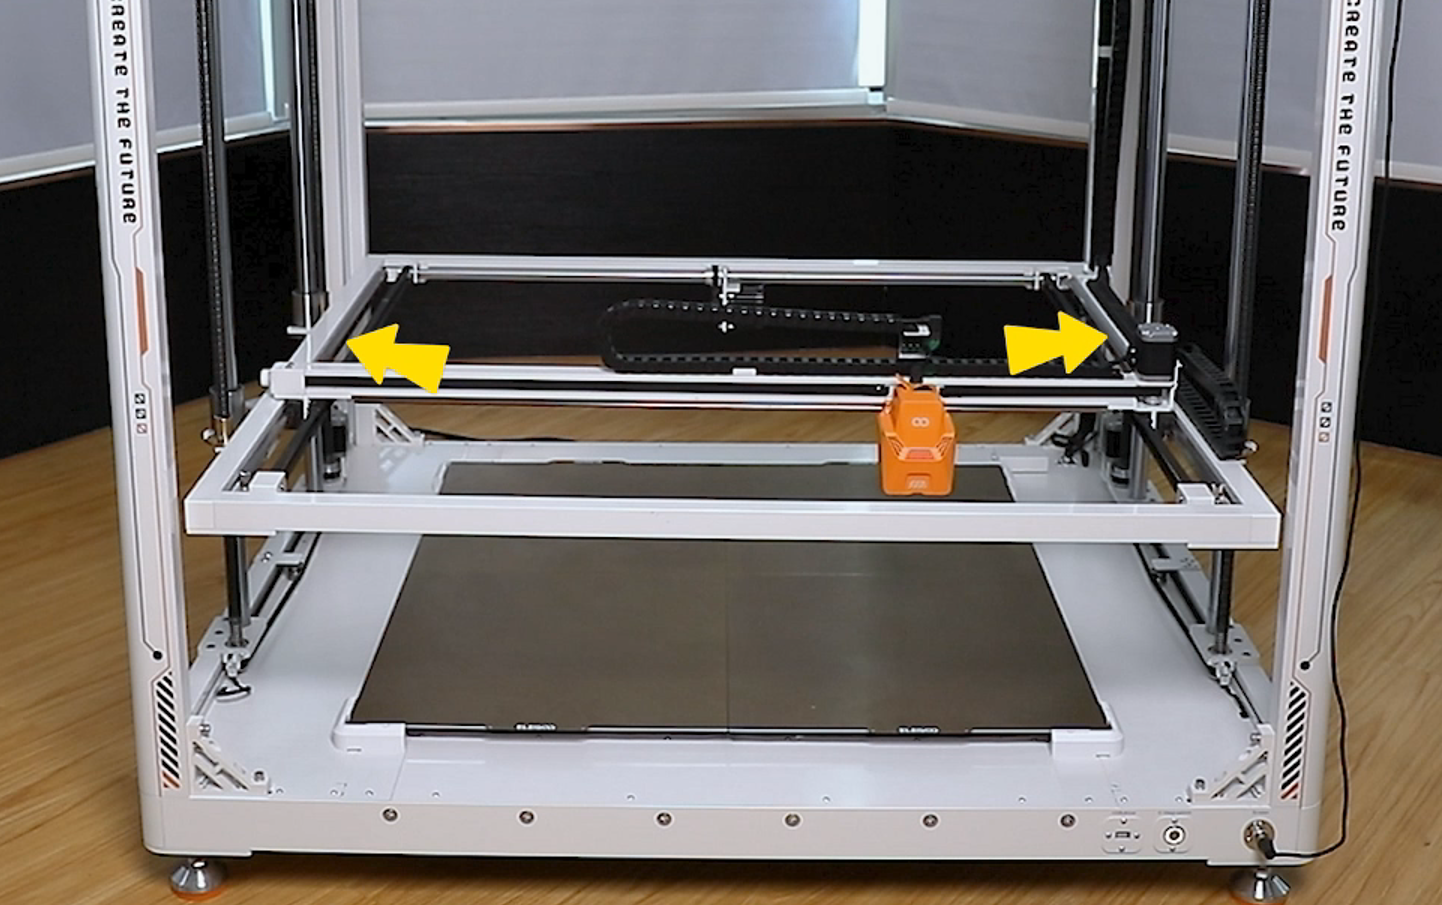
5. Clean the guide rails on both sides of the Y-axis in the same manner.
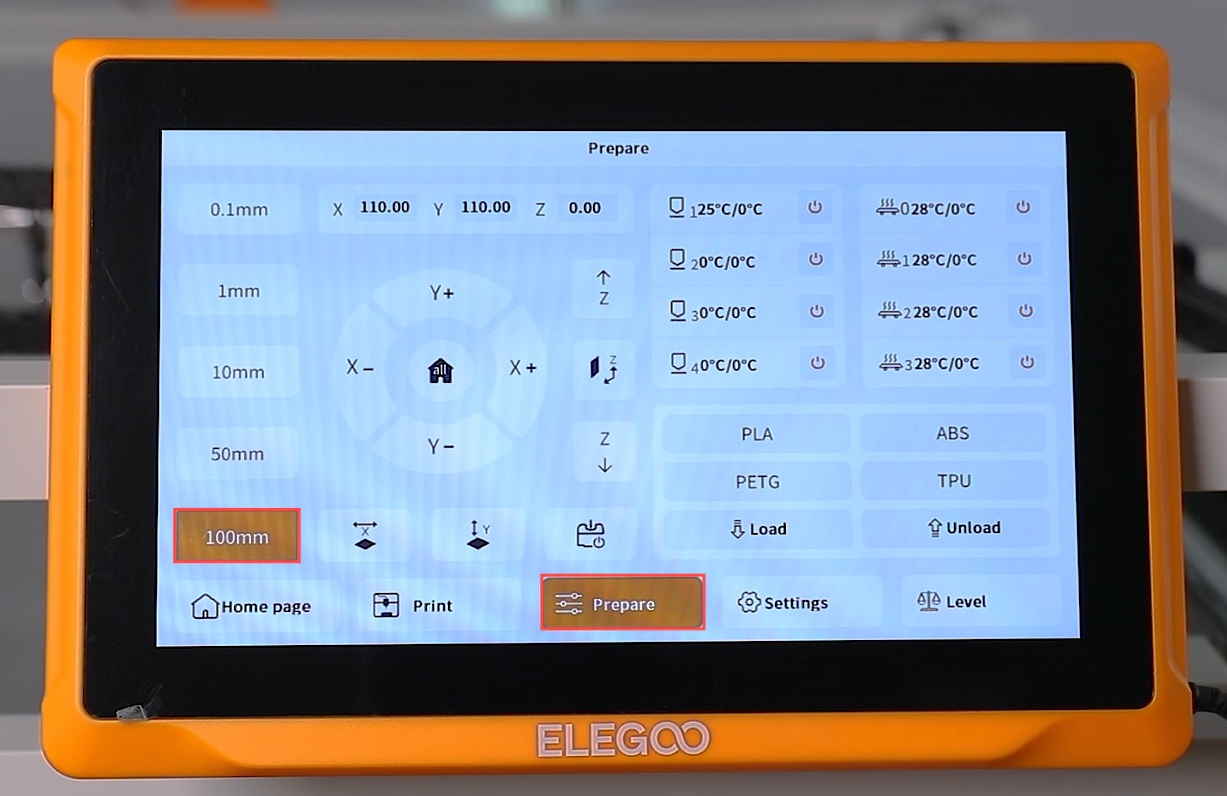
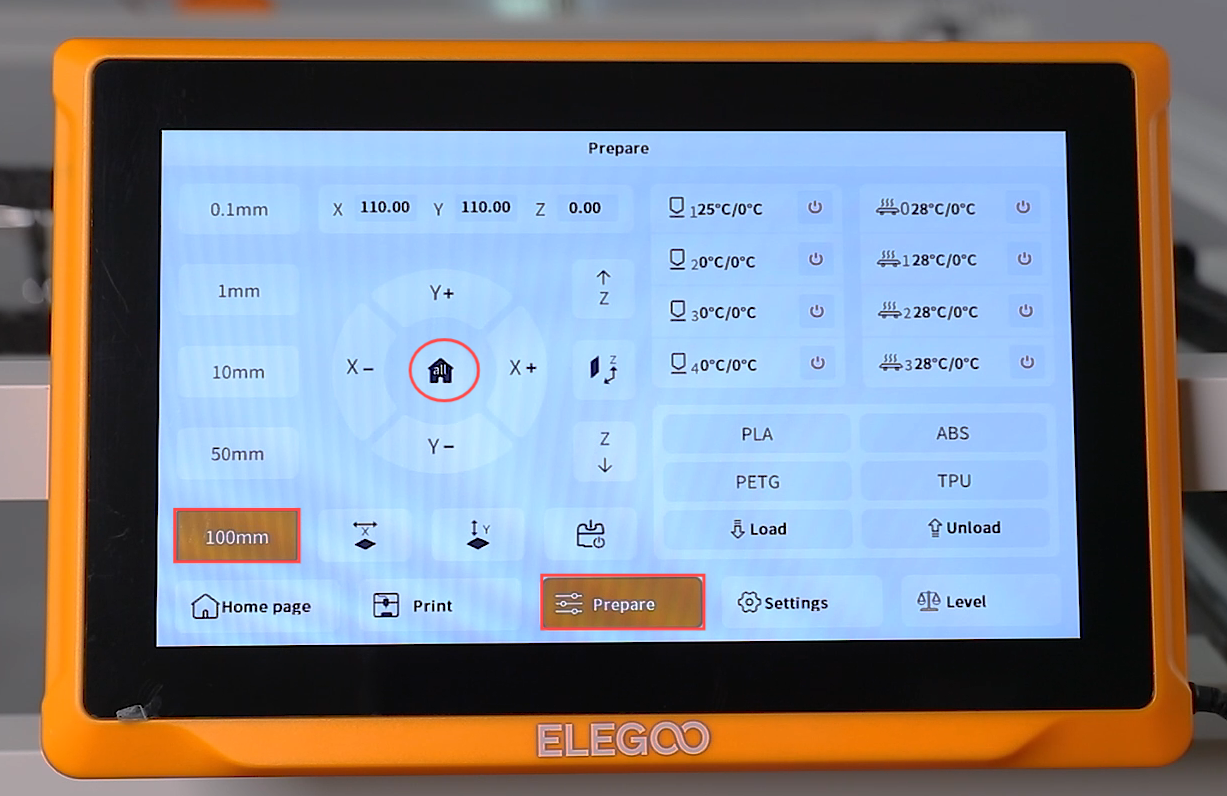
6. Connect the power cord and power on the printer. Touch "Prepare - 100 mm" on the touchscreen.
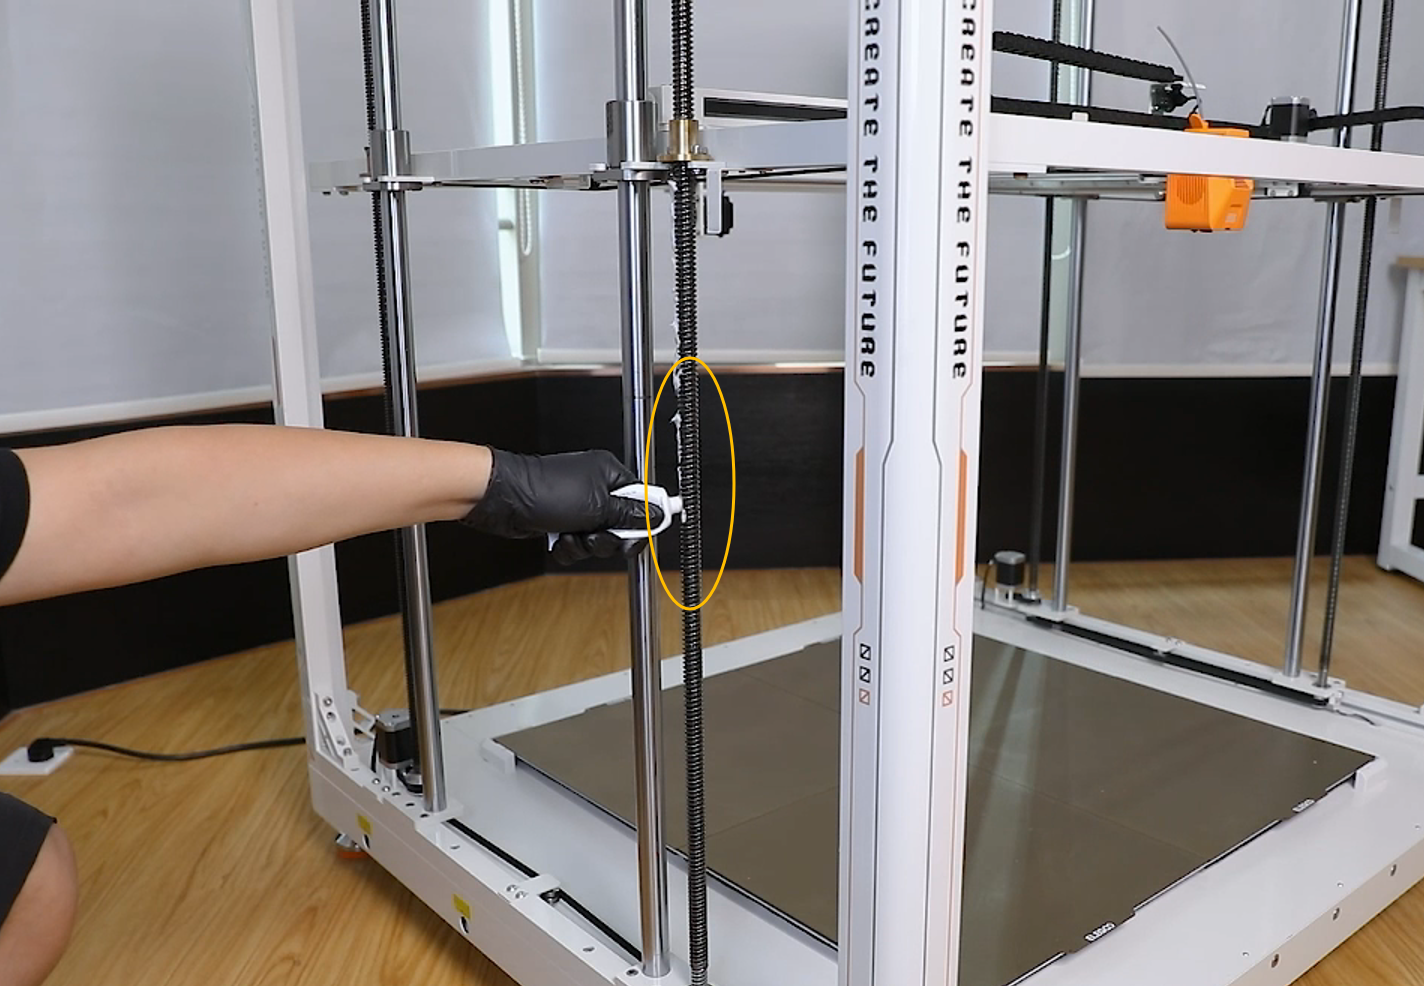
7. Place a lint-free cloth over the surface of the bolt and secure the cleaning tool to the cloth.
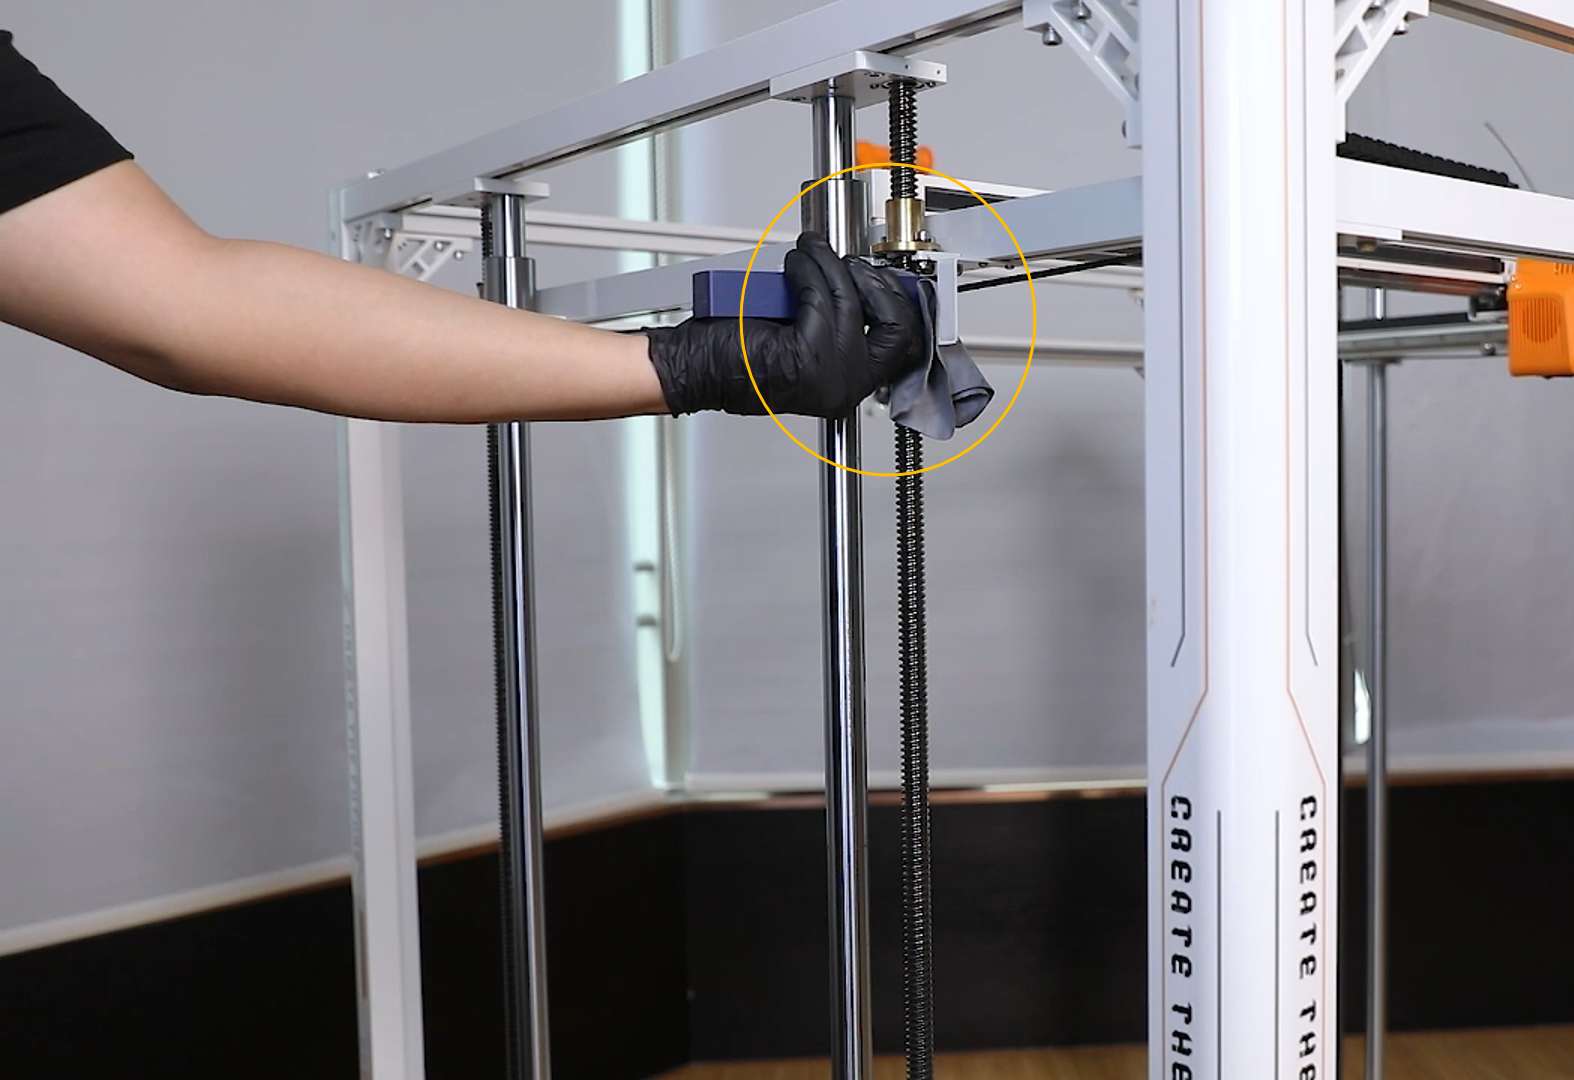
8. Use one hand to touch the "Down" or "Up" button on the touchscreen, while holding the cleaning tool in the other hand to clean the bolt thoroughly.
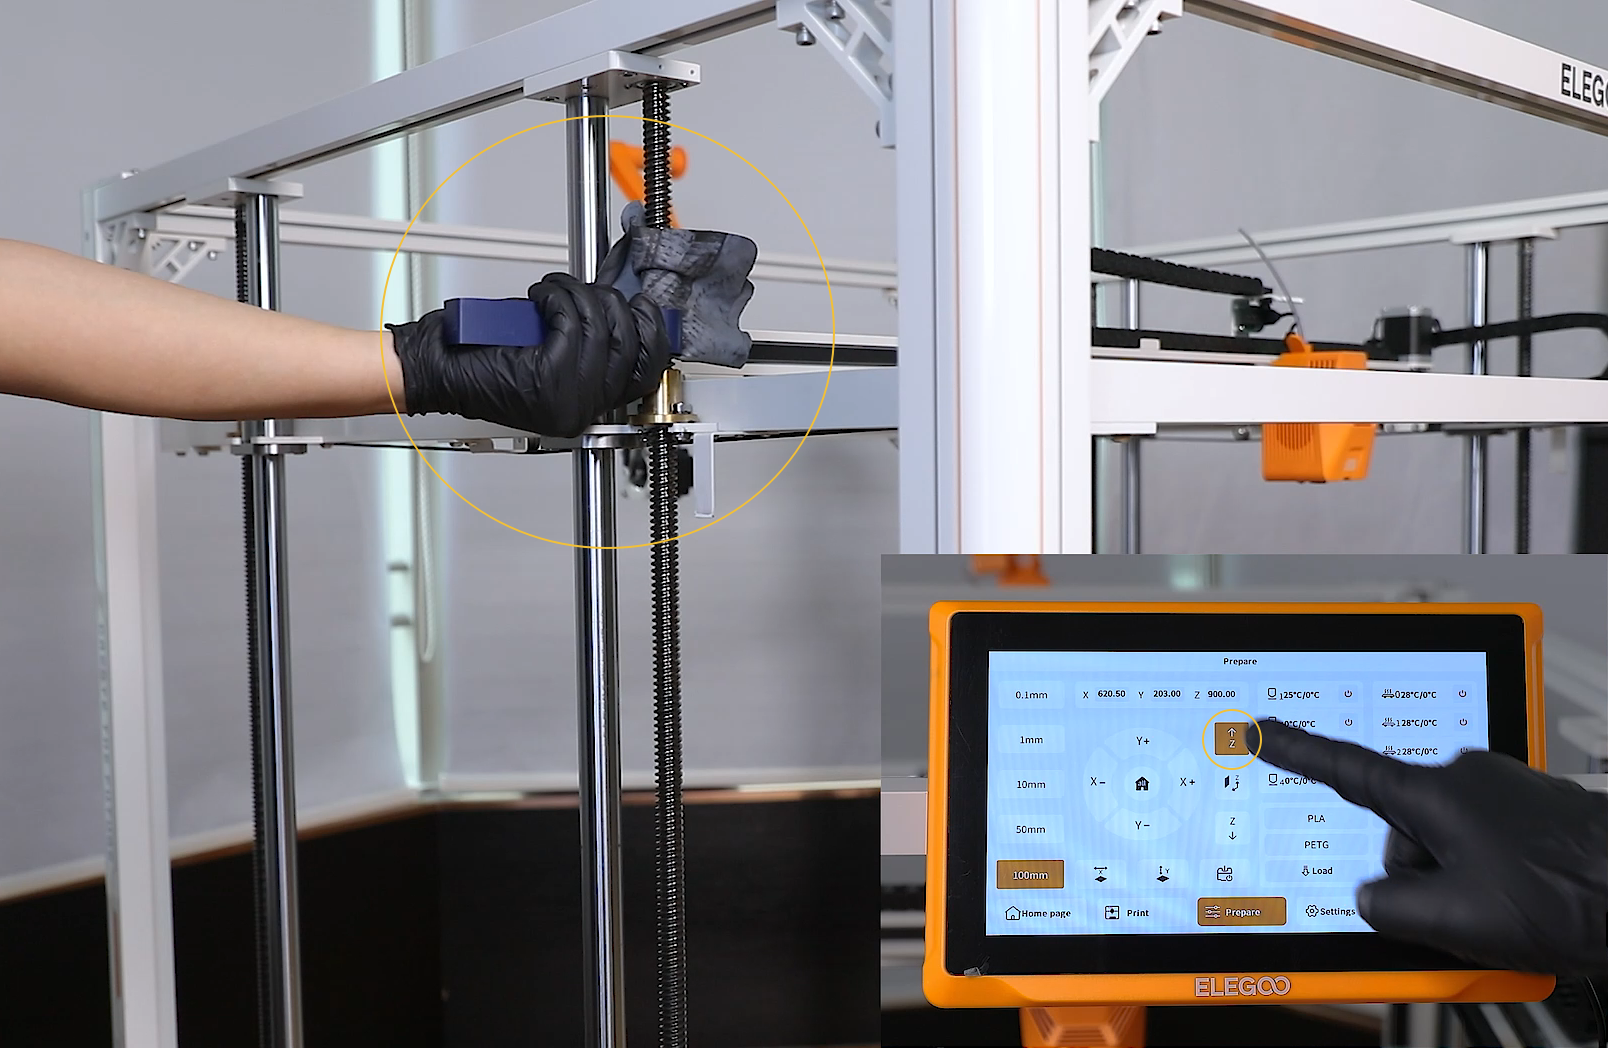
9. Thoroughly clean the remaining part of the bolt using the same method. Repeat the cleaning process several times to ensure it's completely clean.
10. Apply lubricant to both parts of the bolt, spreading it evenly with a cotton swab.
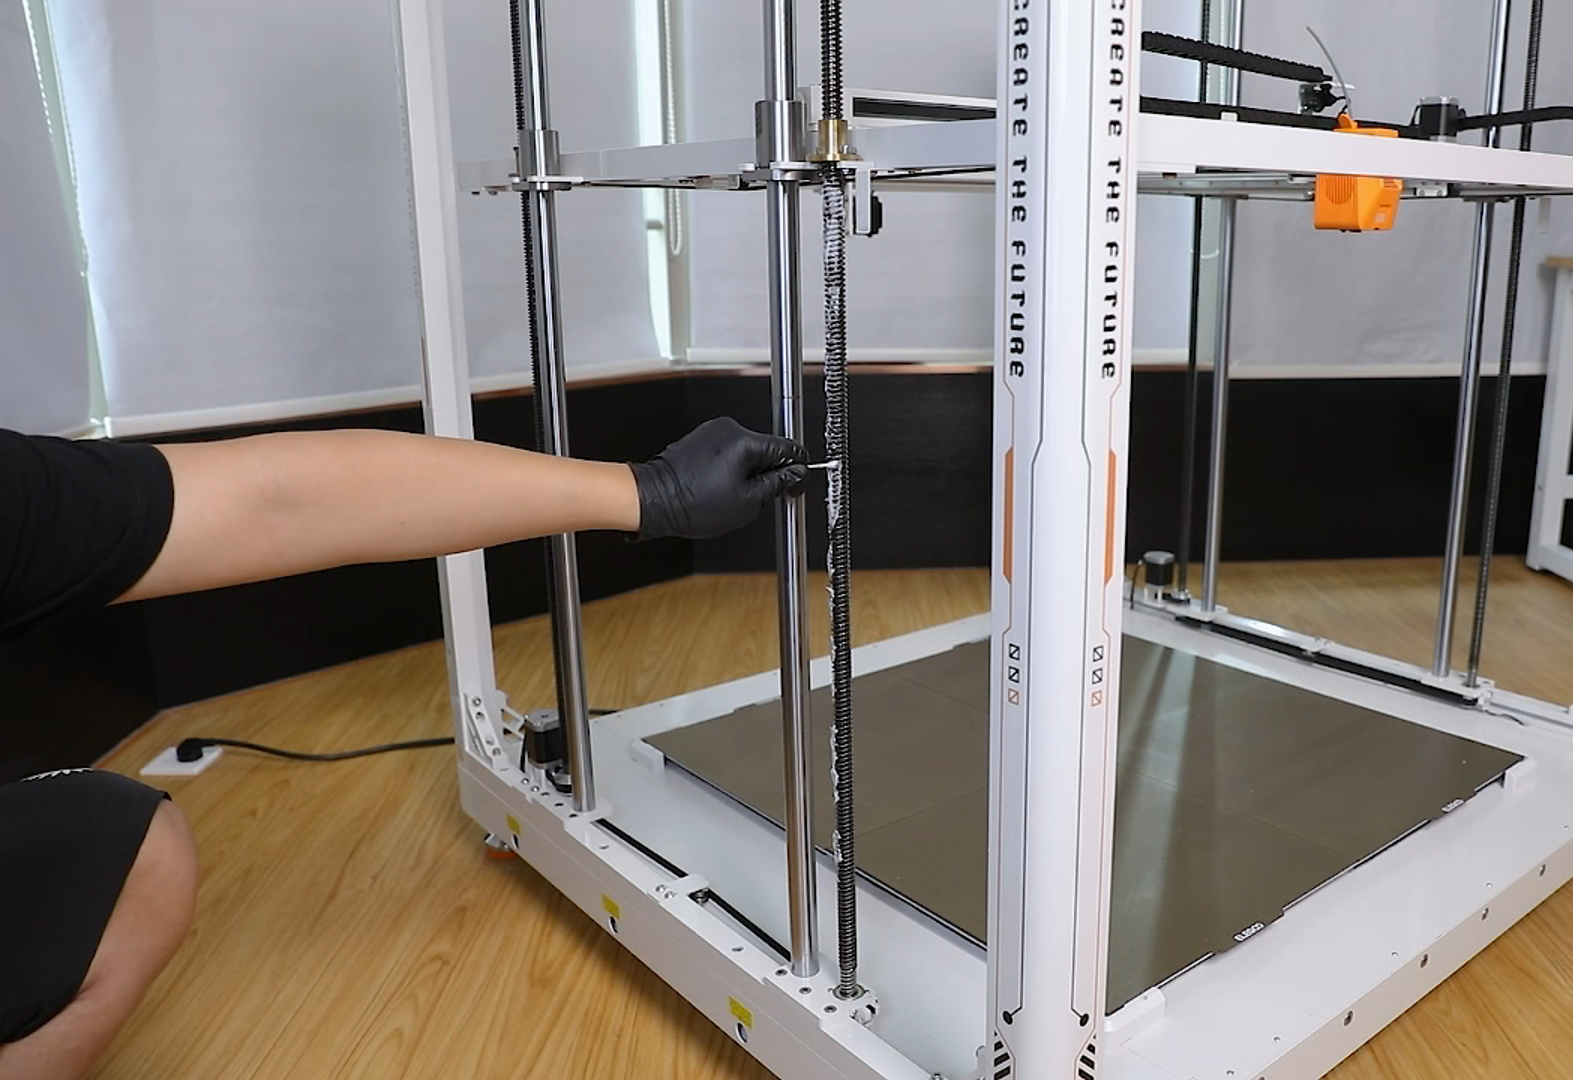
11. Touch the "Up" and "Home" buttons to move the Z-axis up and down repeatedly, ensuring even distribution of lubricant along the bolt.
12. Make sure to remove any excess lubricant accumulated on the surface of the bolt.
13. Clean the remaining bolts using the same method.