¶ Tools and Materials
A H2.5 Allen key
¶ Tutorial Video
Coming soon.
¶ Precautions
Before operation, power off the printer.
¶ Instruction
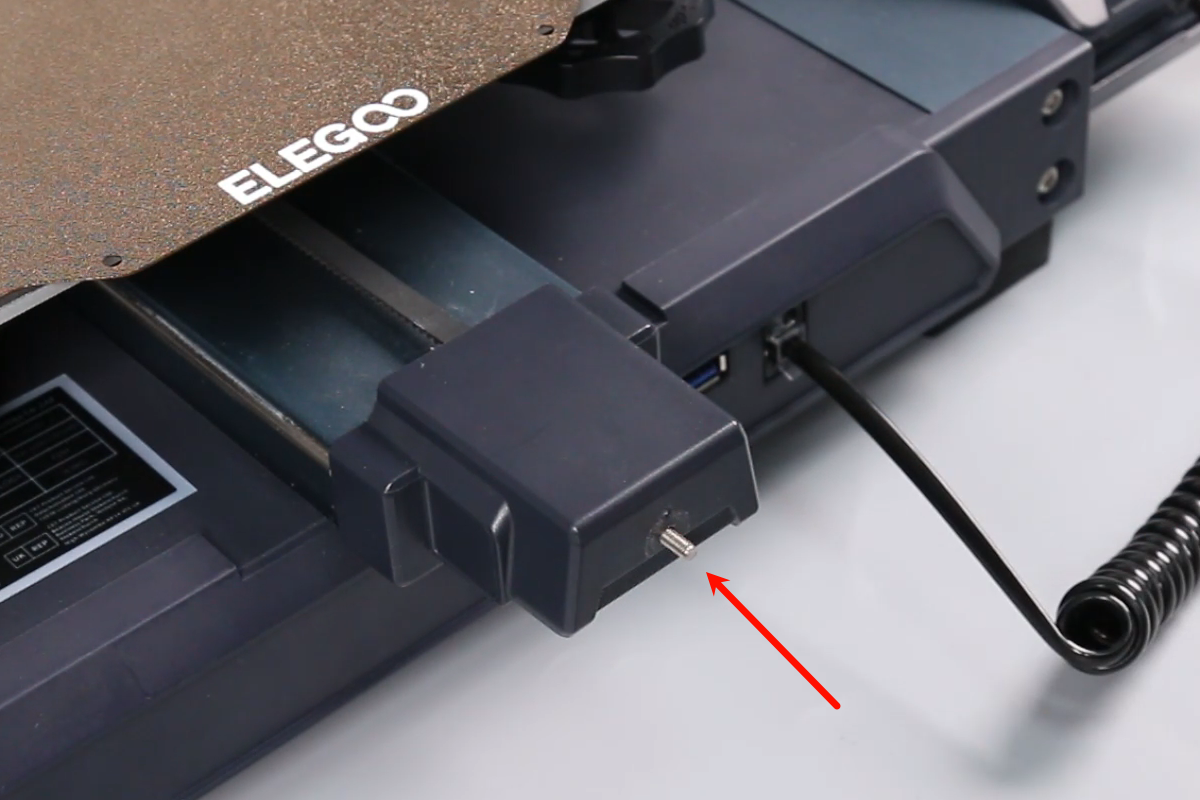
- Loosen the hand screw nut of the Y-axis belt tensioner.
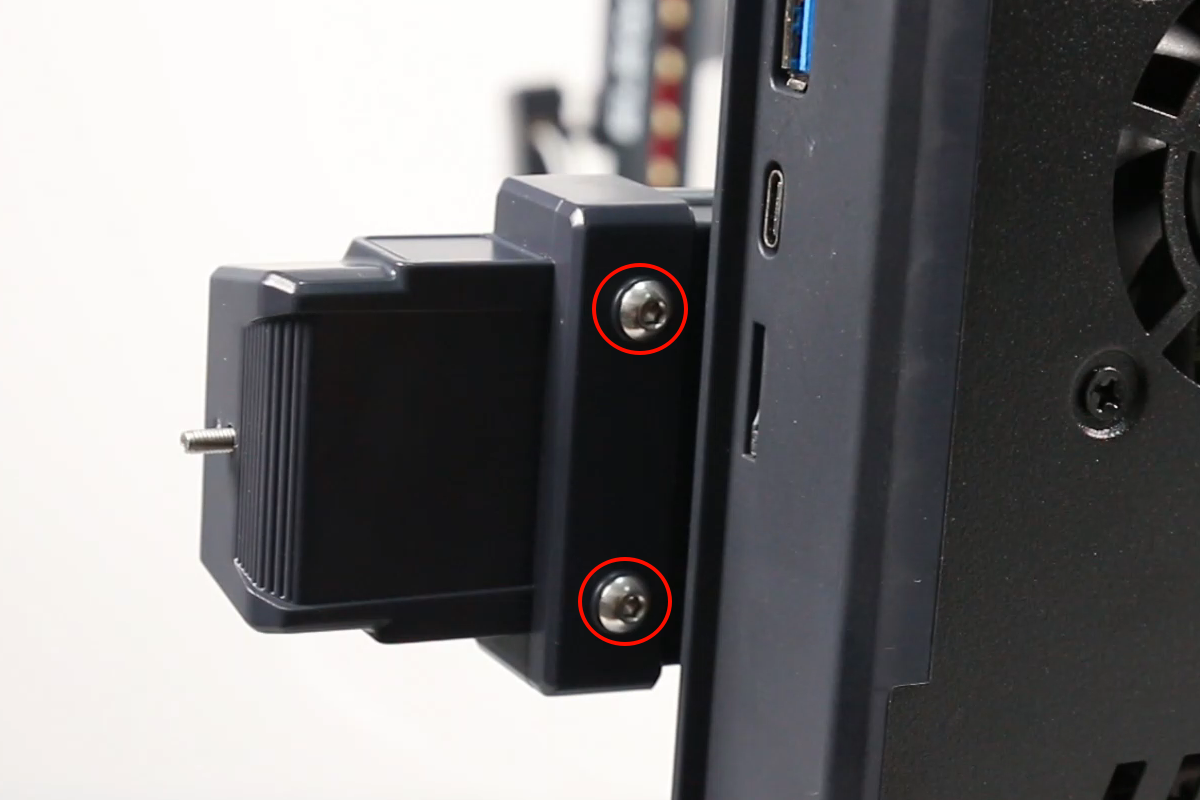
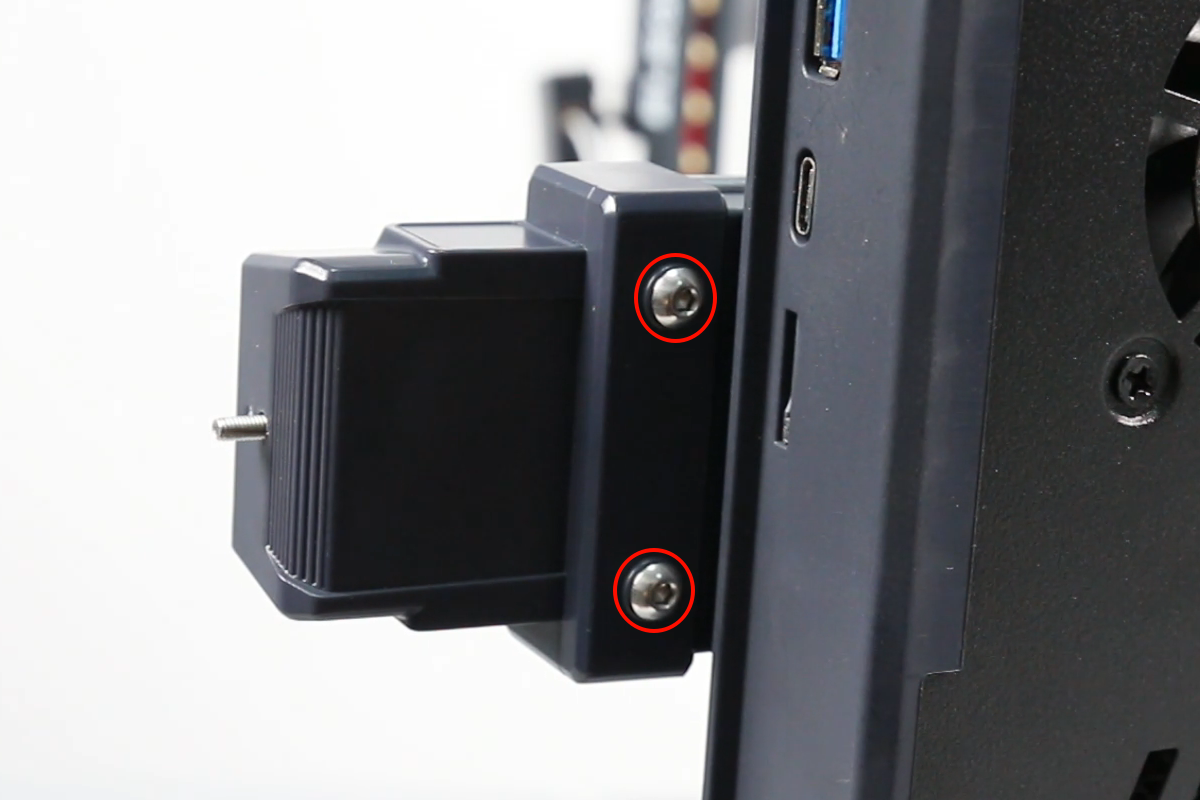
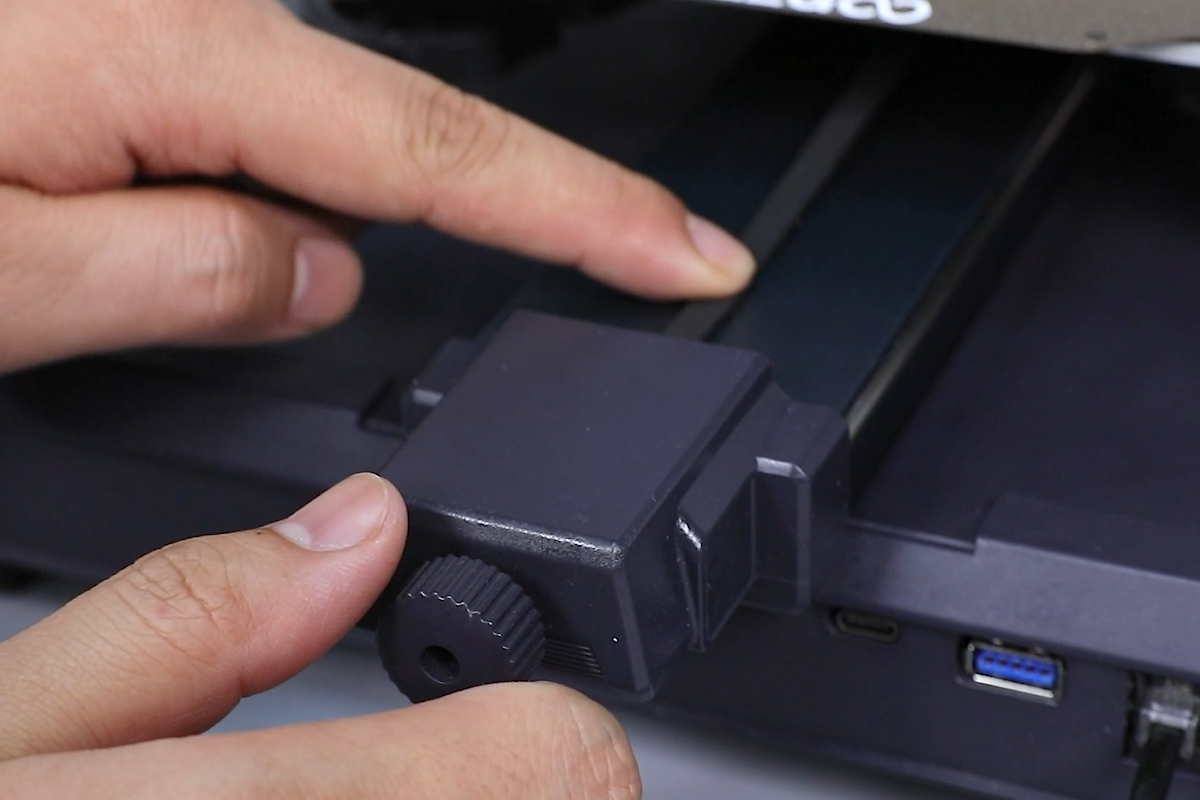
- Loosen the 2 screws securing the shell of the belt tensioner using a 2.0 mm Allen key, then remove the shell.
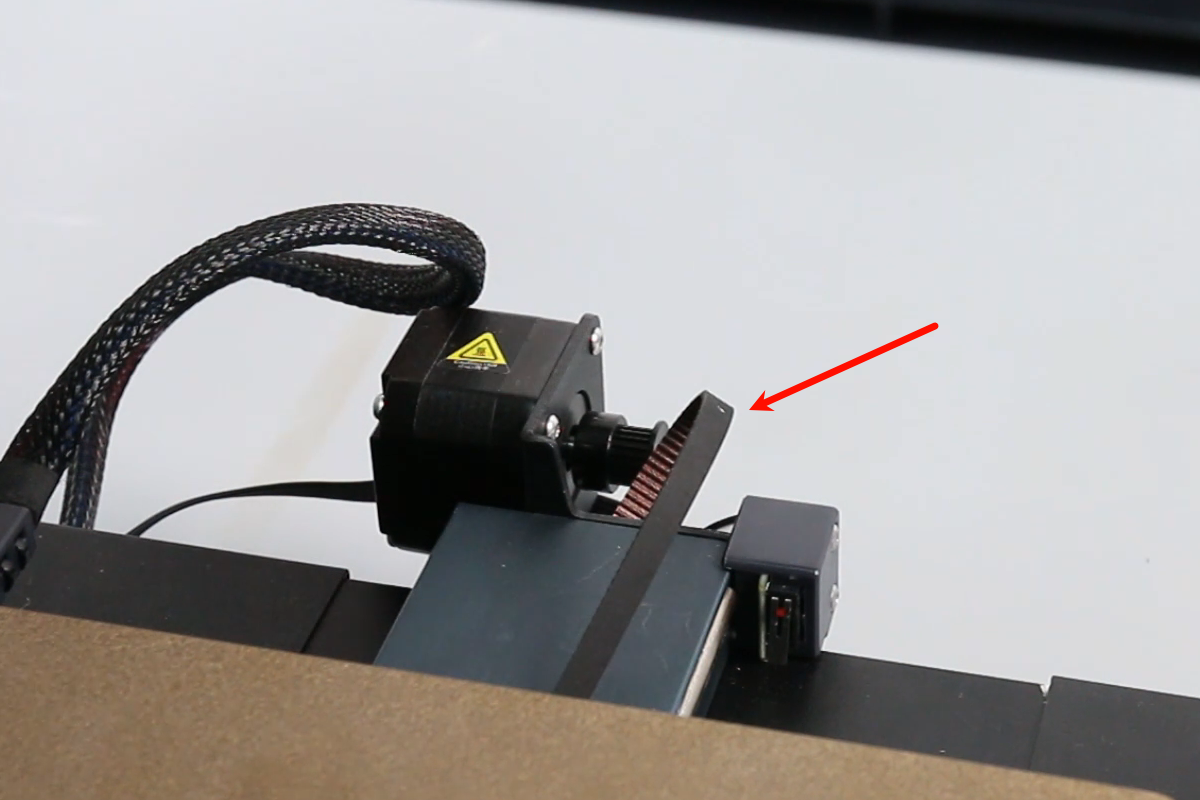
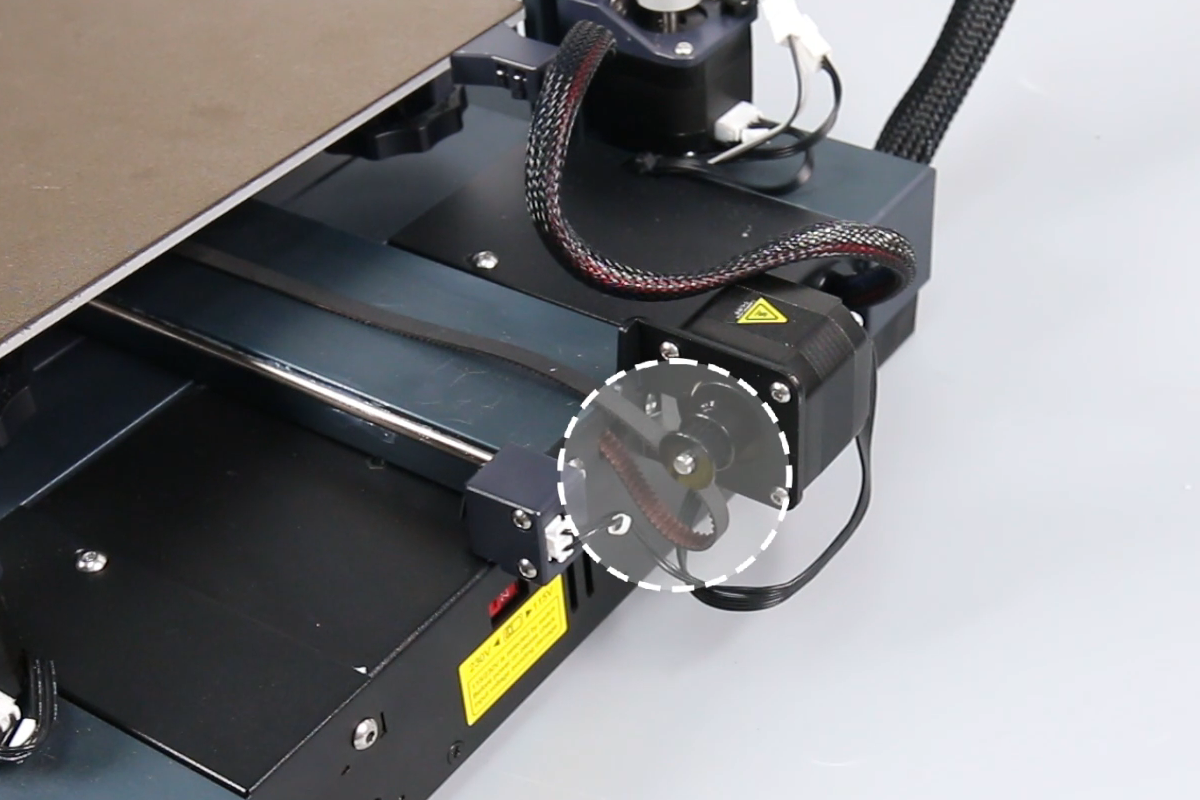
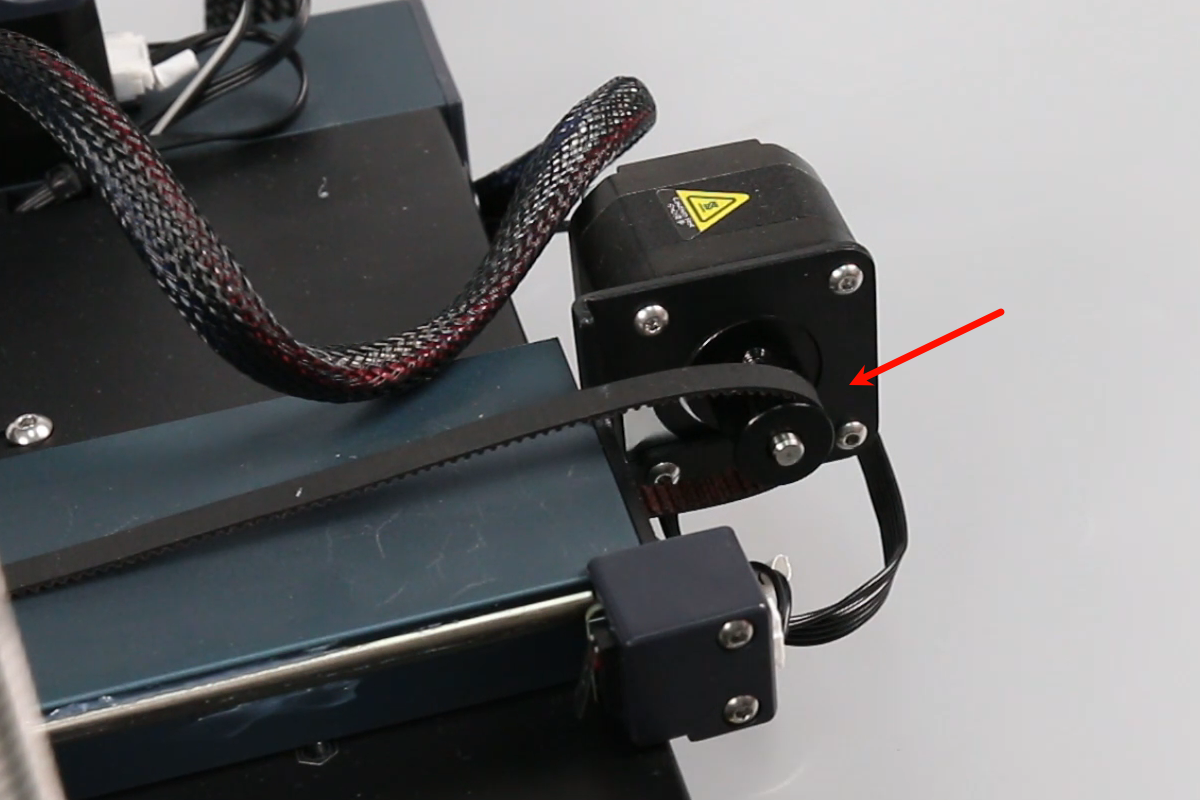
- Remove Y-axis the timing belt from the timing pulley on the Y-axis motor.
- Pull the heated bed forward. Remove the copper sleeve snap on the front end of the Y-axis timing belt from the groove of the heated bed holder.
- Pull the Y-axis timing belt out of the passive pulley assembly.
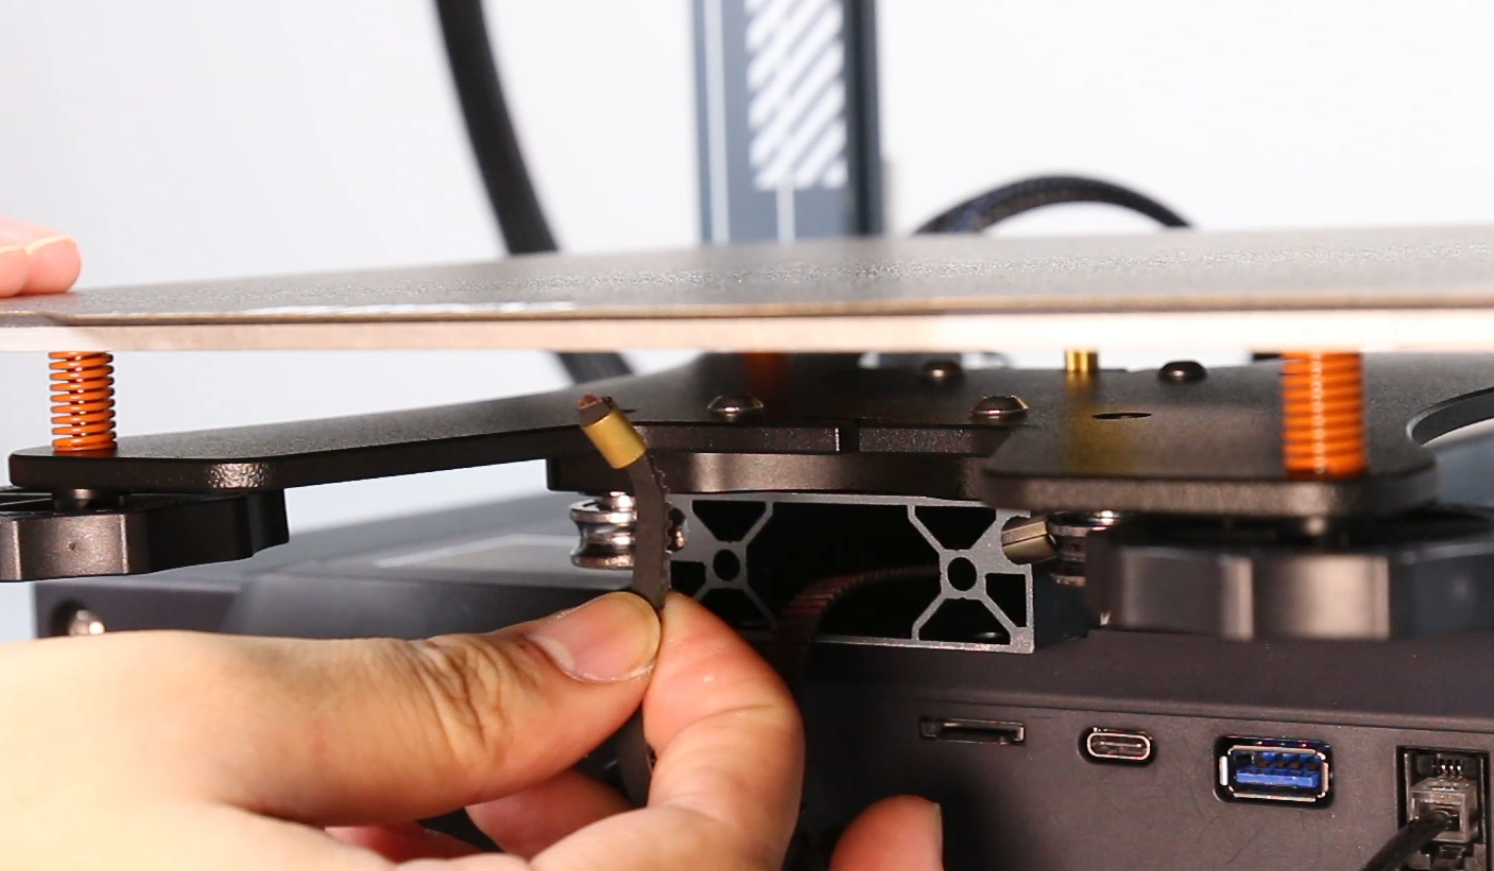
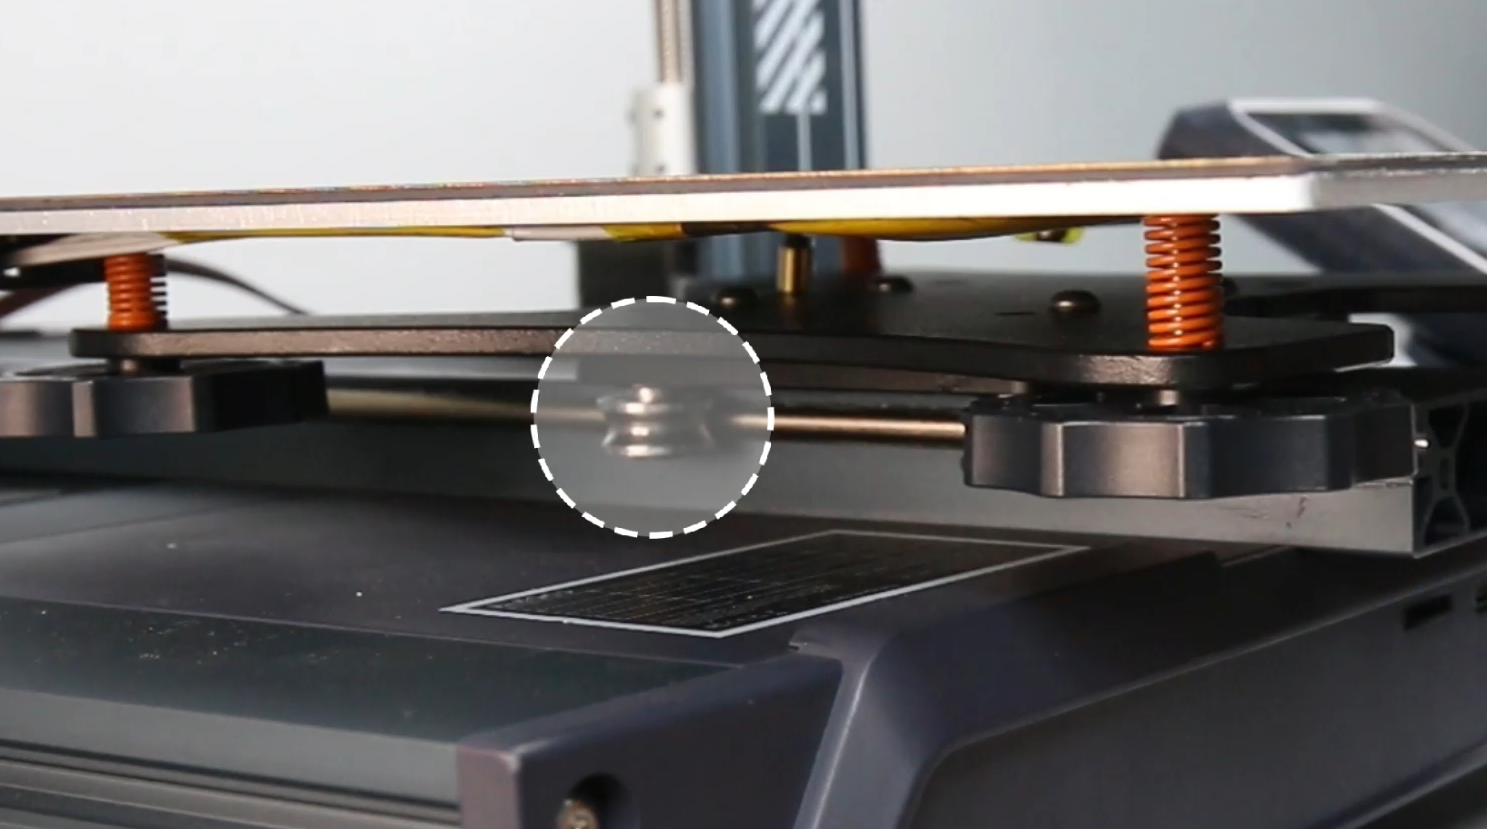
- Pull out the heated bed assembly. Remove the Y-axis timing belt copper sleeve snap in the groove at the rear end of the heated bed holder
- Install the new copper sleeve snap of the Y-axis timing belt into the groove at the rear end of the heated bed holder. Note: Pay attention to the belt mounting direction.
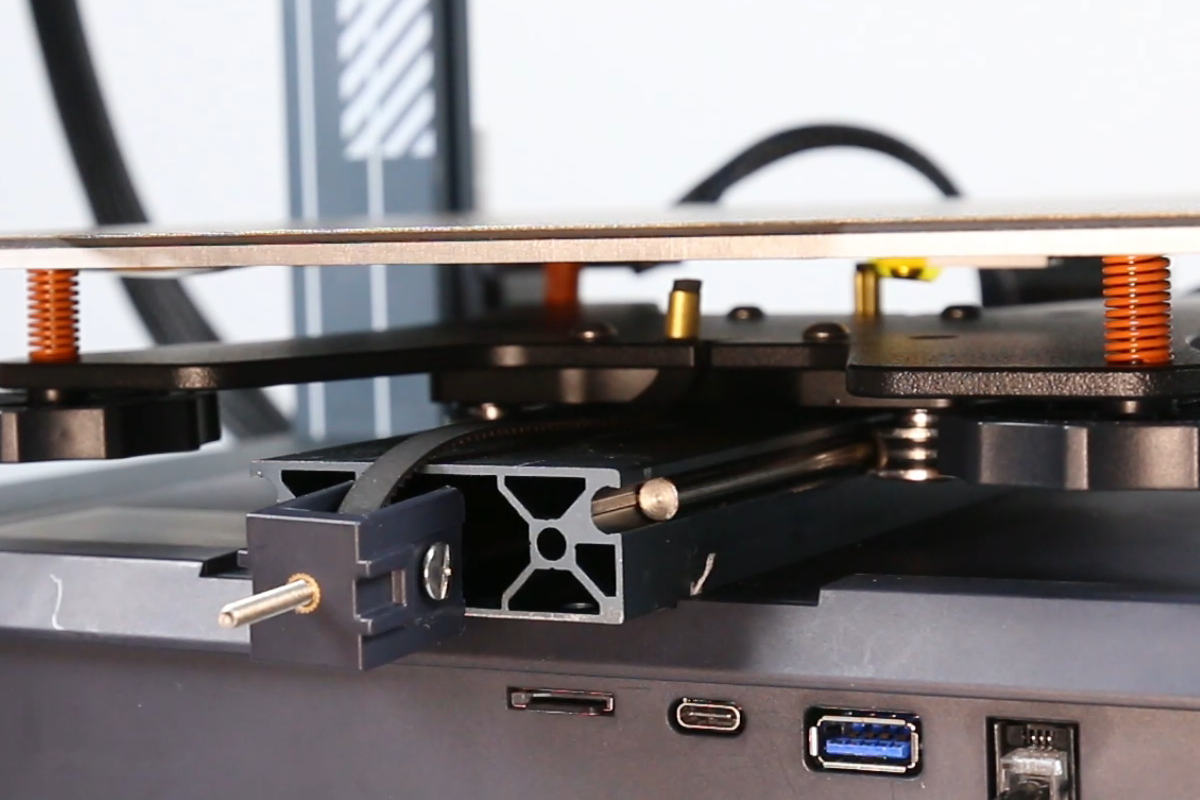
- From the front of the Y-axis aluminum profile, install the heated bed assembly to the rails. Note: The four pulleys on the bottom of the heated bed assembly must snap onto the rails.
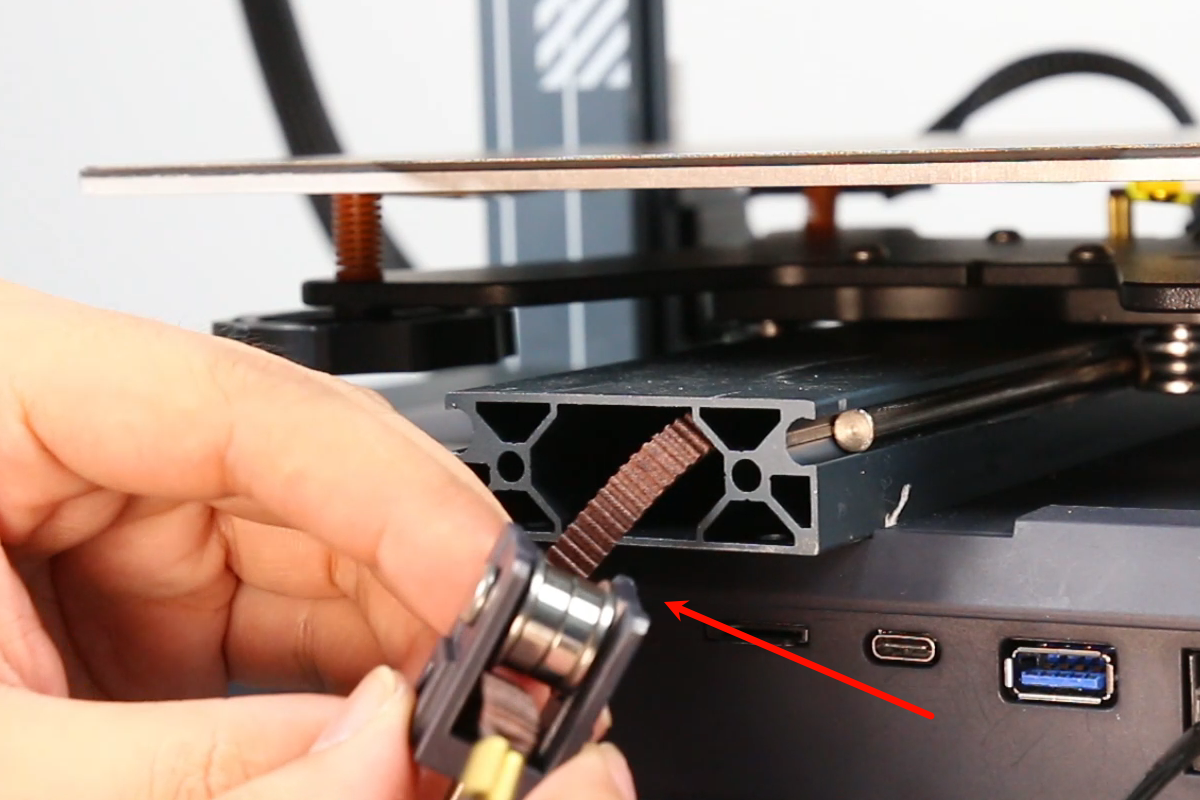
- Pass the Y-axis timing belt through the rear square hole of the aluminum profile. Do not put the Y-axis timing belt on the Y-axis motor timing pulley, which is convenient for subsequent operation.
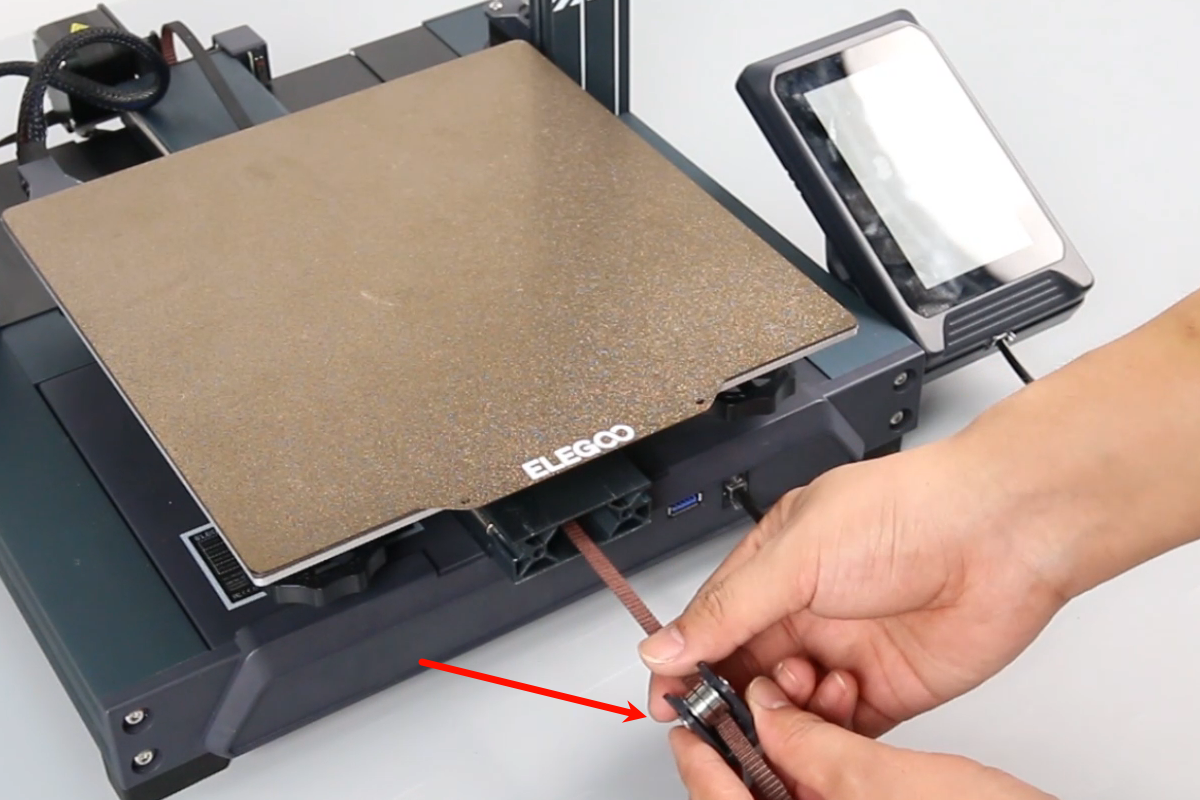
- Pass the front end of the Y-axis timing belt through the passive slider. Pay attention to the installation direction of the timing belt.
- Slide the heated bed assembly forward. Install the new copper sleeve snap of the front end of the Y-axis timing belt into the groove at the front end of the heated bed holder.
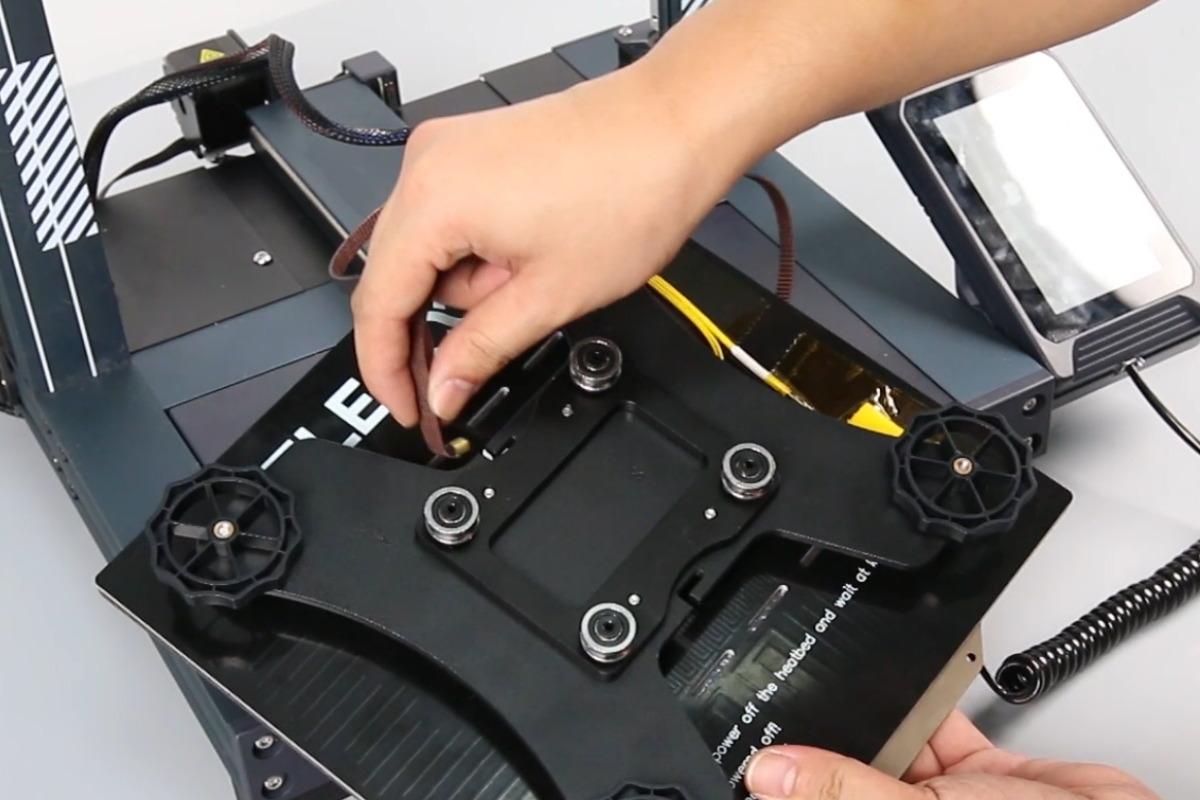
- Put the Y-axis timing belt onto the Y-axis motor timing puley durface. Install the belt tensioner housing.
- Install the belt tensioner housing. Tighten the 2 screws securing the shell of the belt tensioner using a 2.0 mm Allen key.
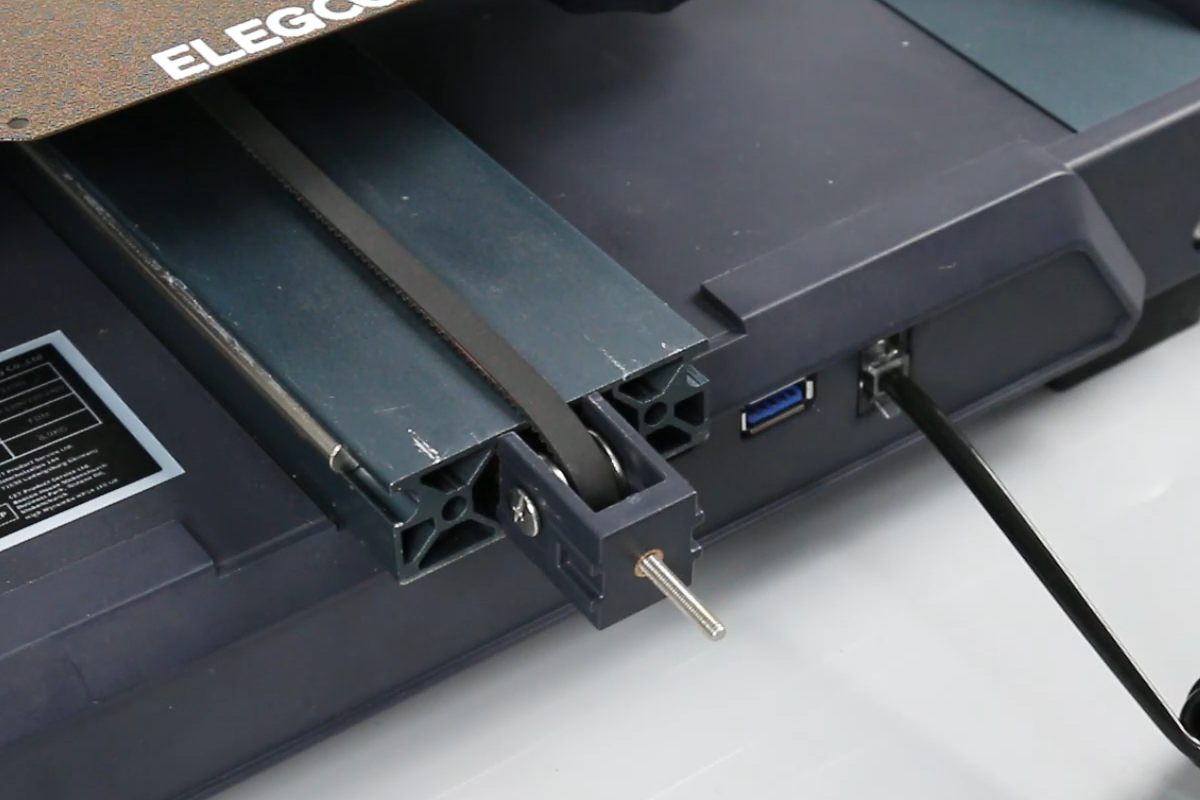
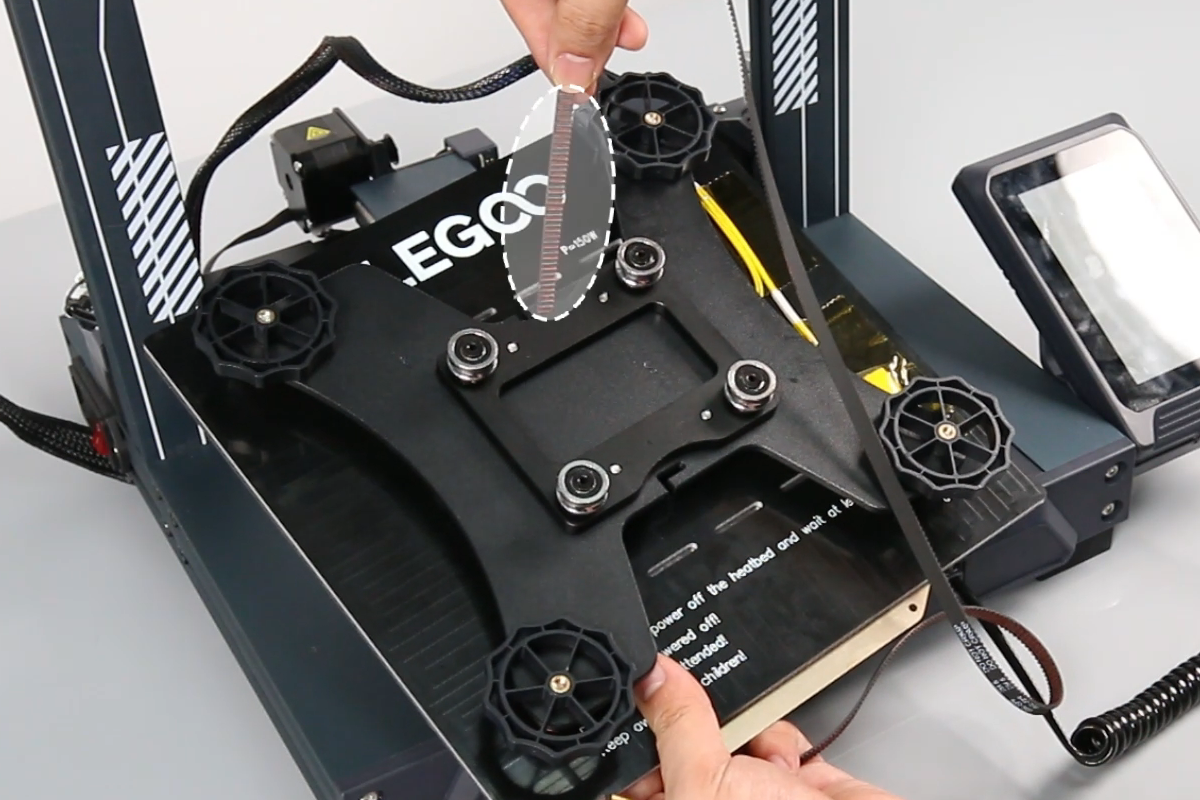
- Install the nut of the Y-axis belt tensioner, turn the Y-axis belt tensioner knob, and adjust the belt tension to moderate, not too loose or too tight.
- Power on the printer. After the homing process, the printer is ready for use.