¶ Tools and Materials
- 2.5mm Allen key x 1
- Phillips screwdriver x 1
¶ Tutorial Video
¶ Precautions
Before operation, power off the printer and unplug the power cord.
¶ Instruction
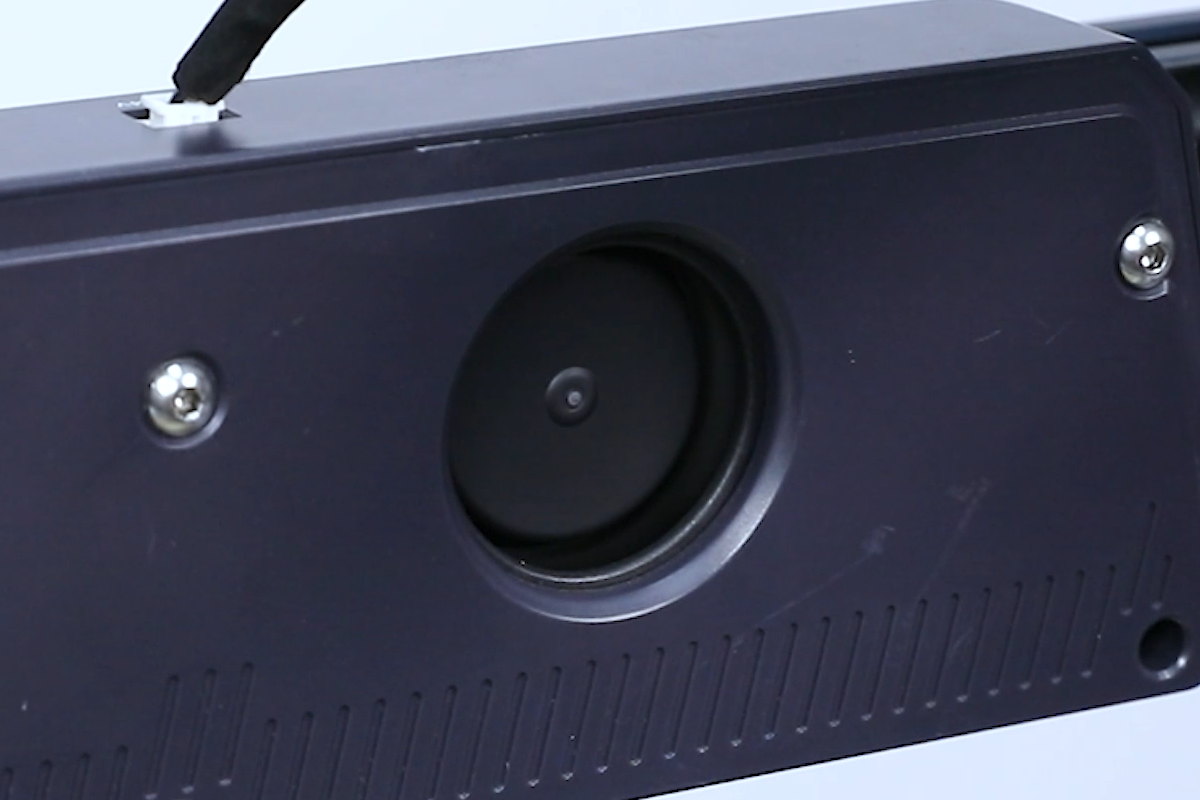
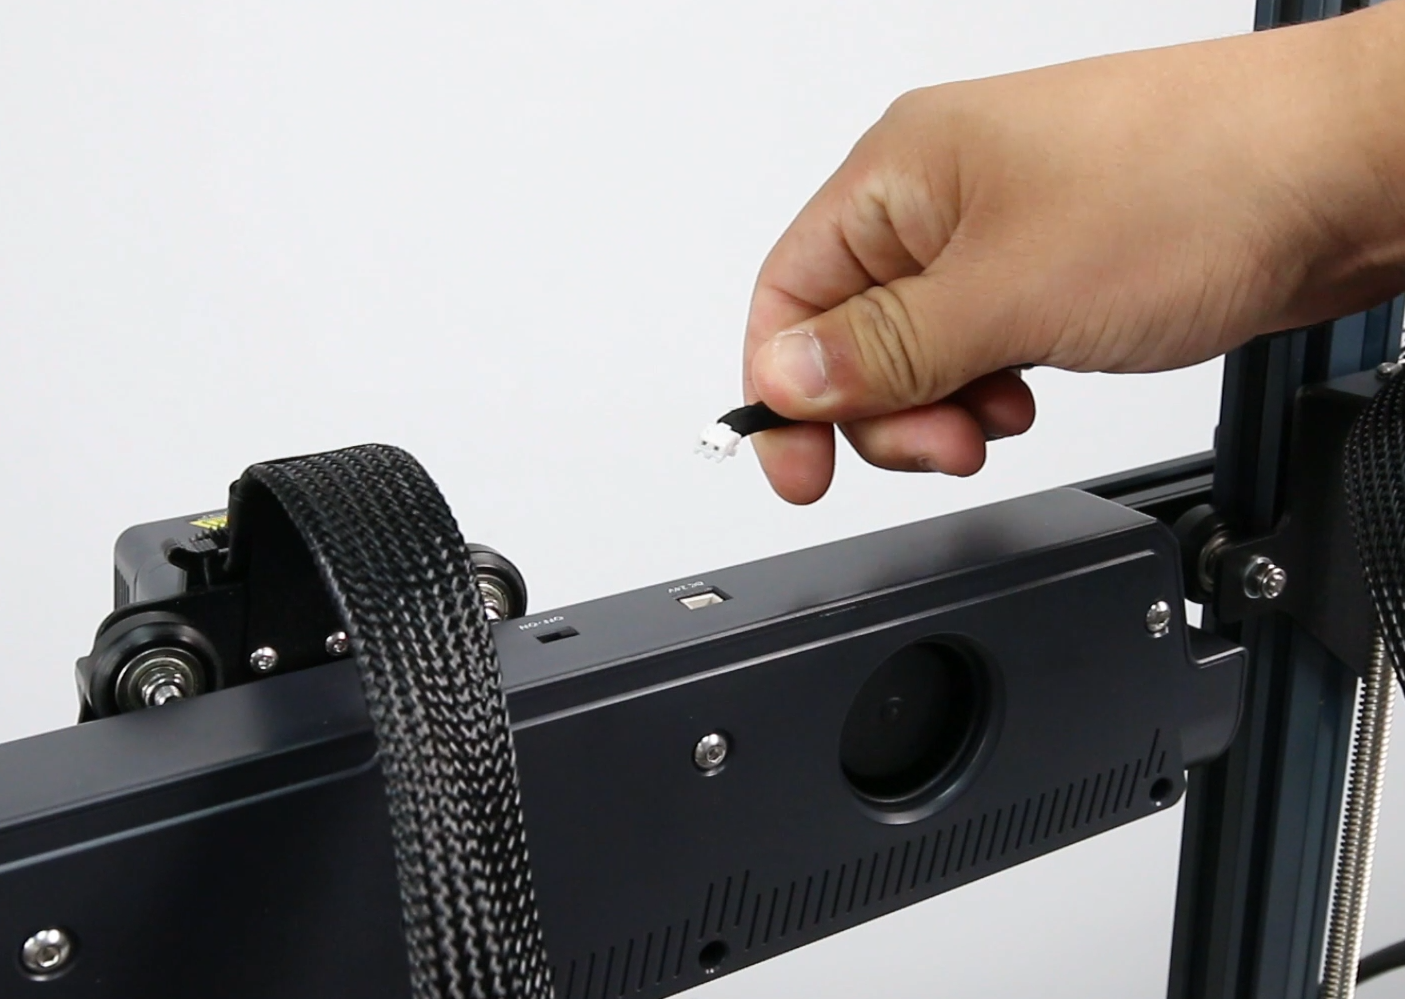
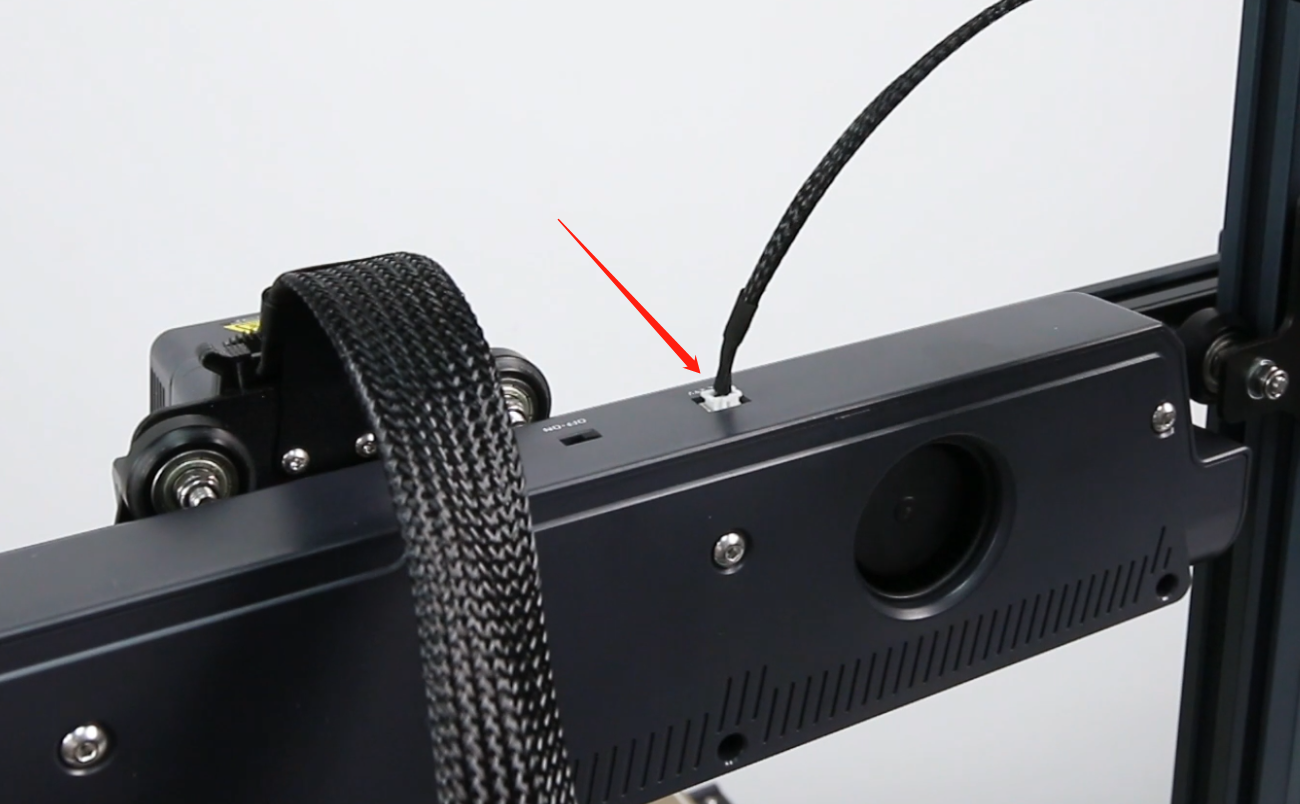
- Power off the printer. Unplug the port wires of the fan assembly located directly behind the print head. Loosen the four screws of the rear fan assembly using a 2.5mm Allen key. Remove the fan assembly.

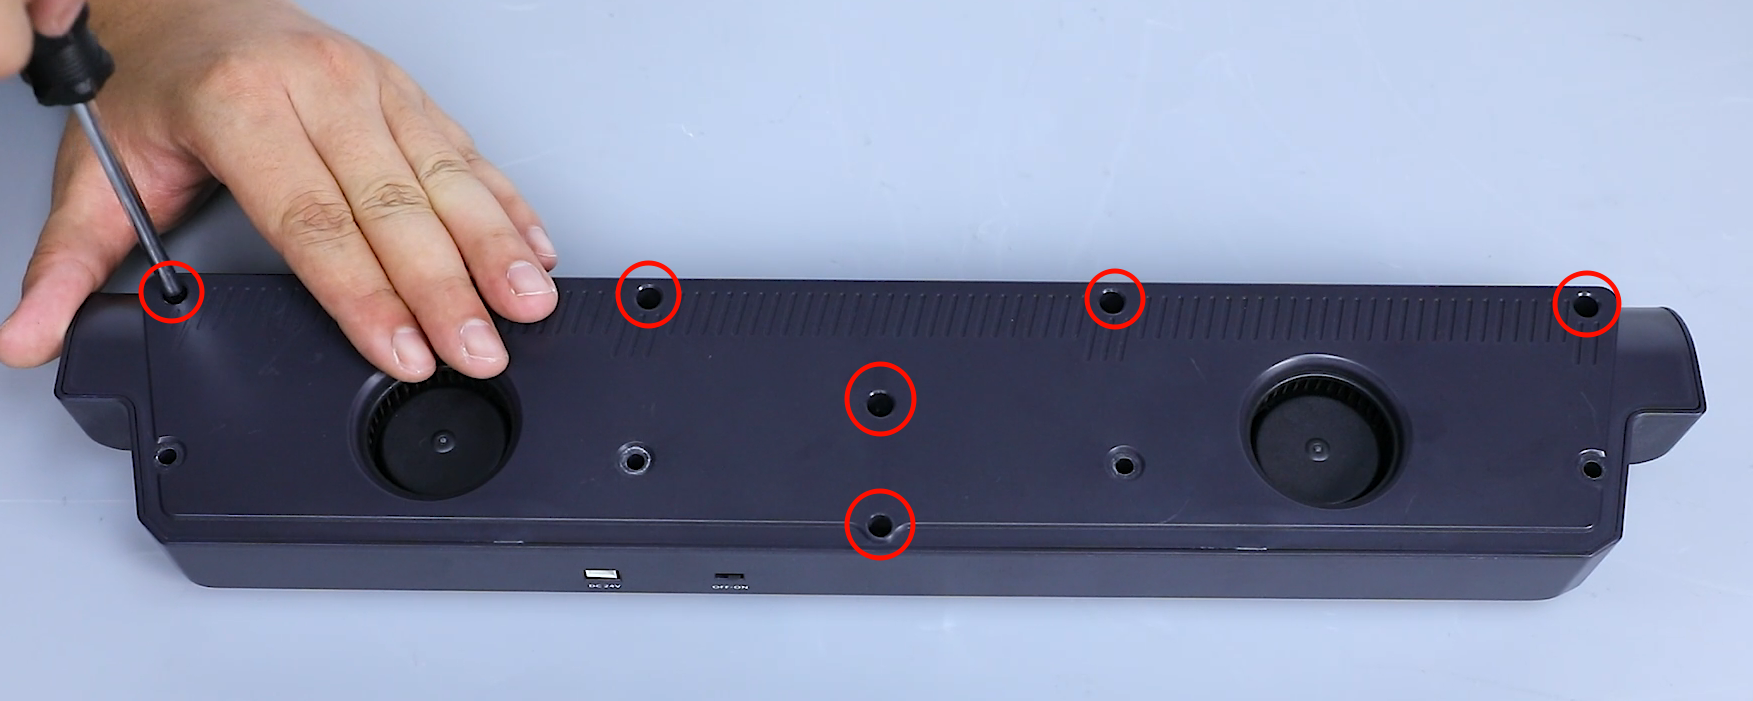
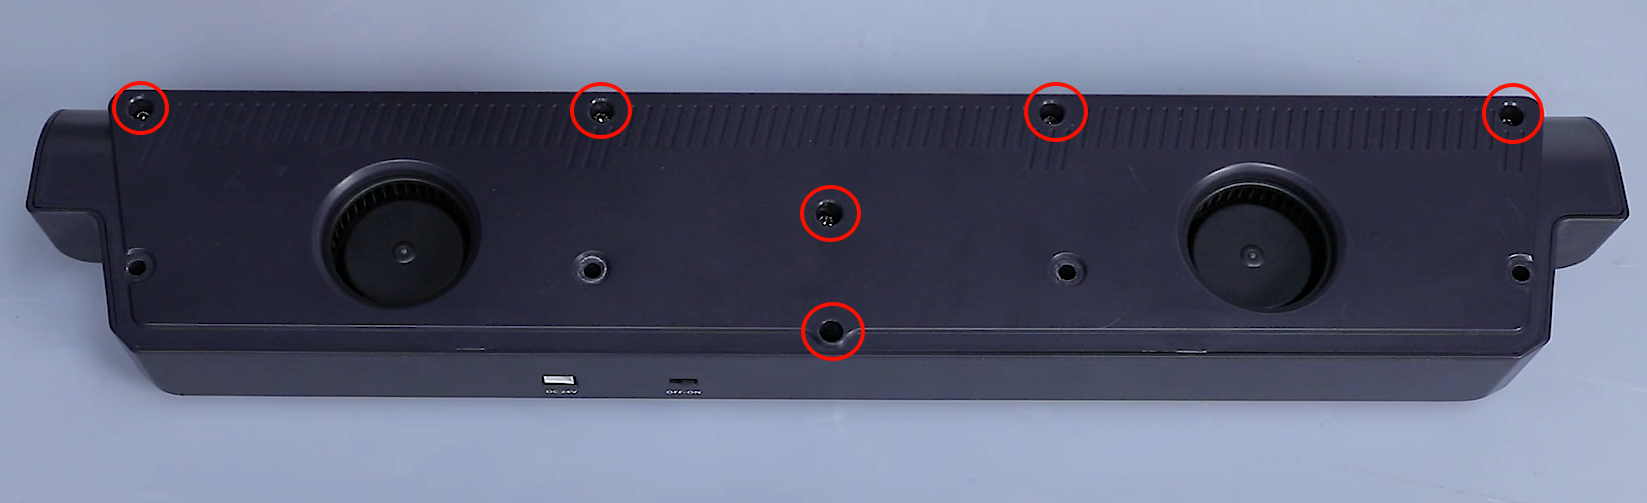
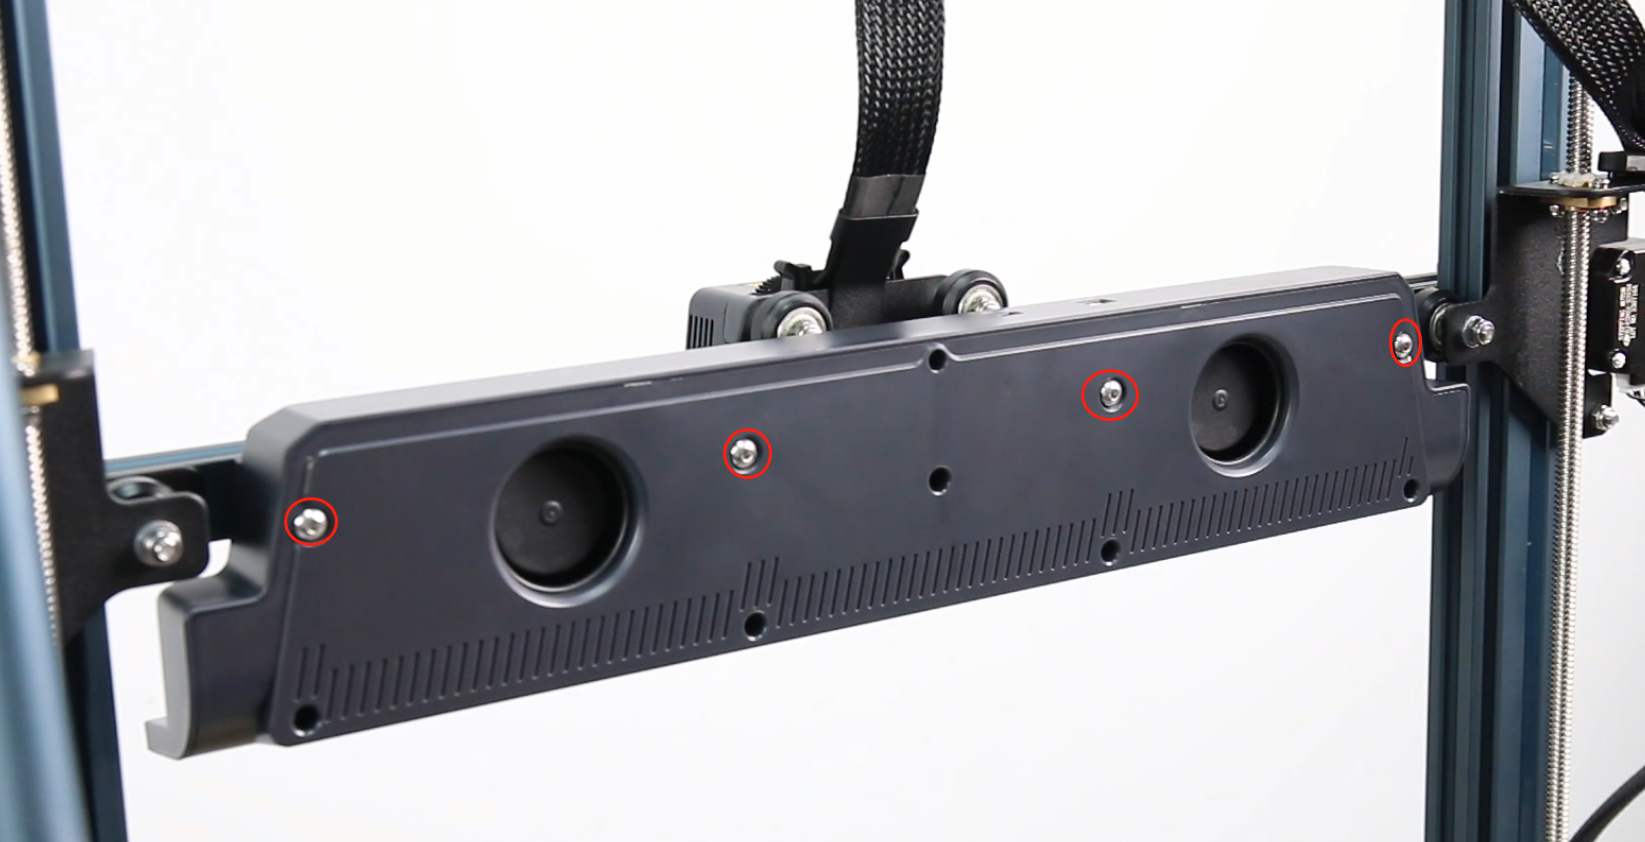
- Loosen the six screws securing the back cover of the auxiliary cooling fan using a Phillips screwdriver.
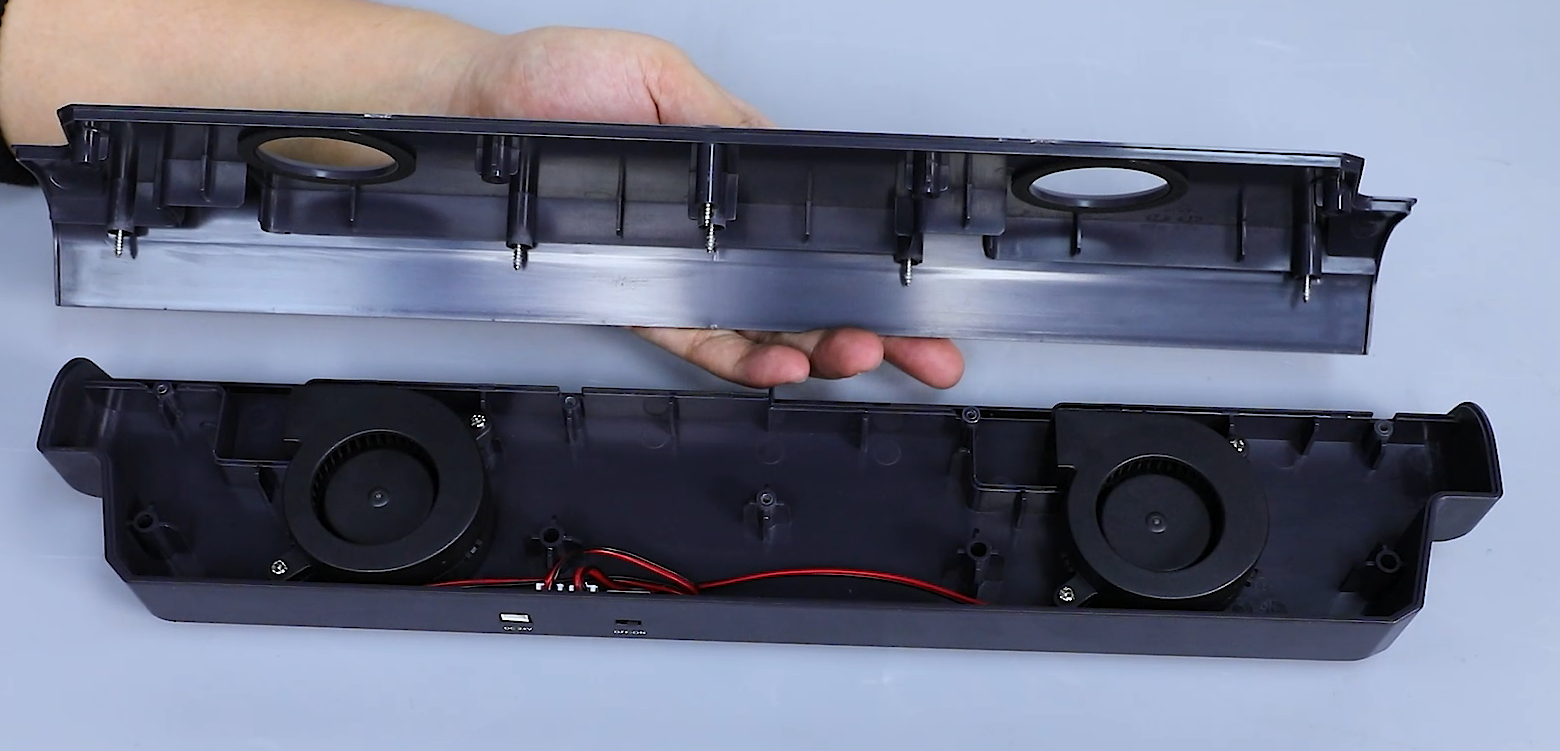
- Seperate the back cover of the auxiliary cooling fan and remove the cover.
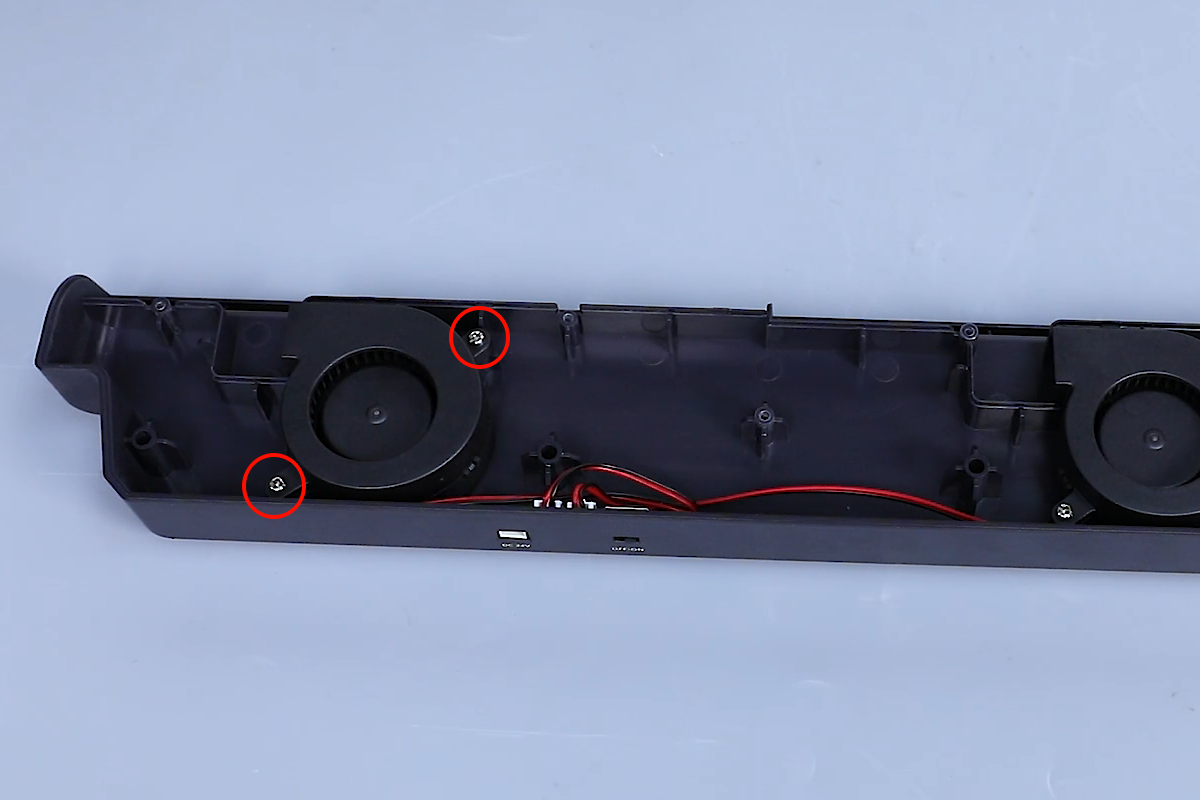
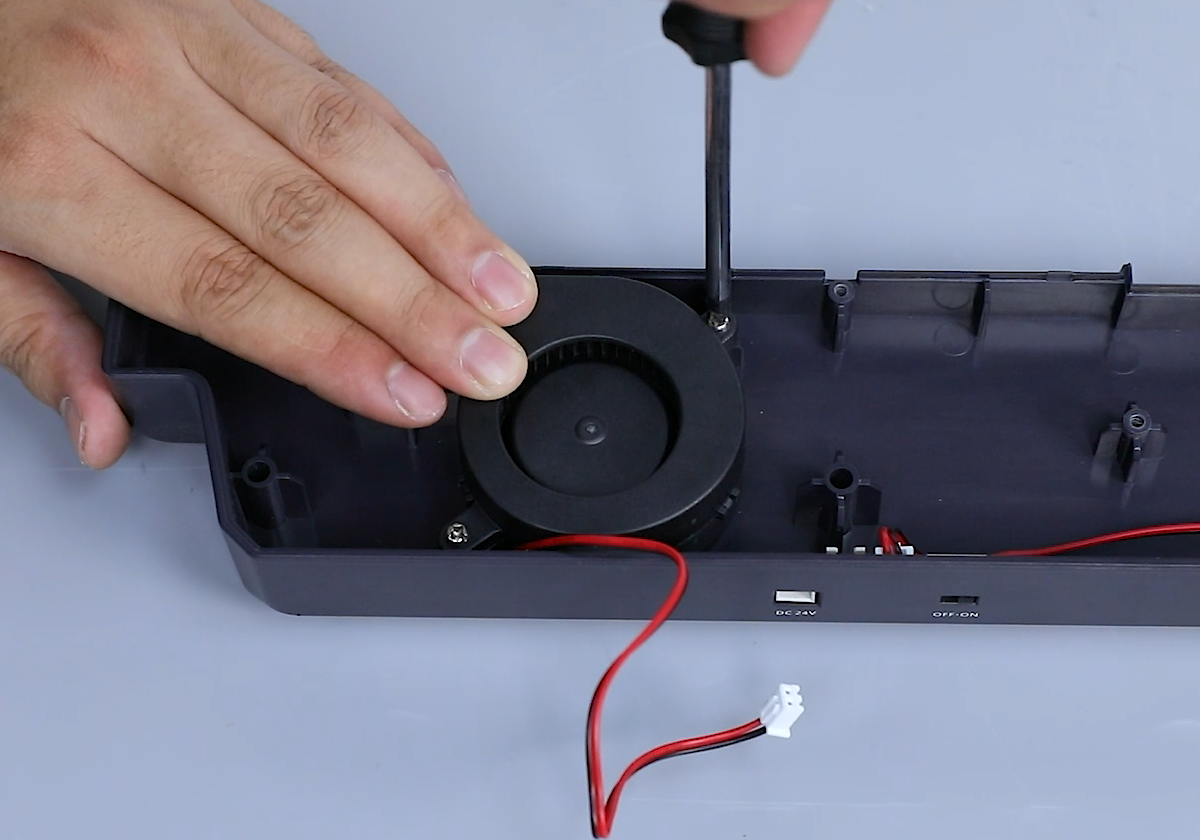
- Loosen the two screws securing the cooling fan using a Phillips screwdriver.
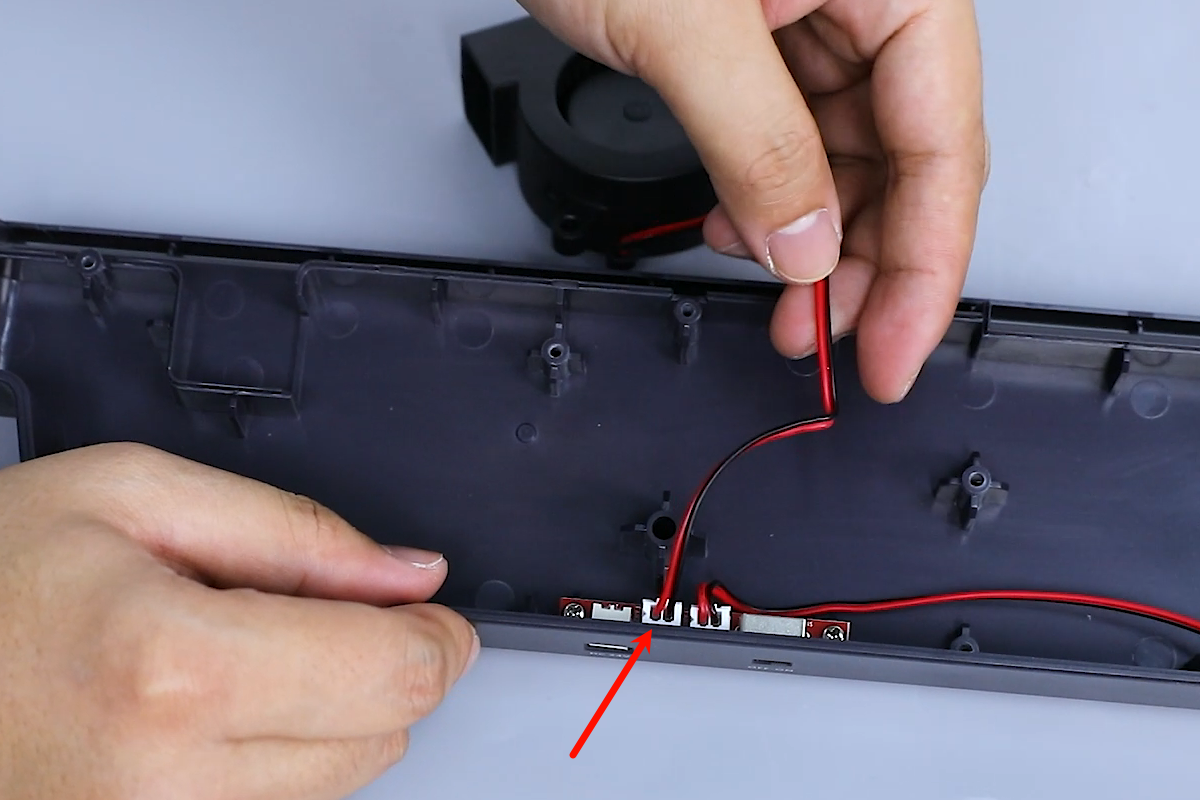
- Unplug the cable port of the cooling fan on the adapter board. Remove the cooling fan.
- Align the new auxiliary cooling fan with the screw holes and put it in the installation position. Tighten the two screws securing the auxiliary cooling fan using a Phillips screwdriver.
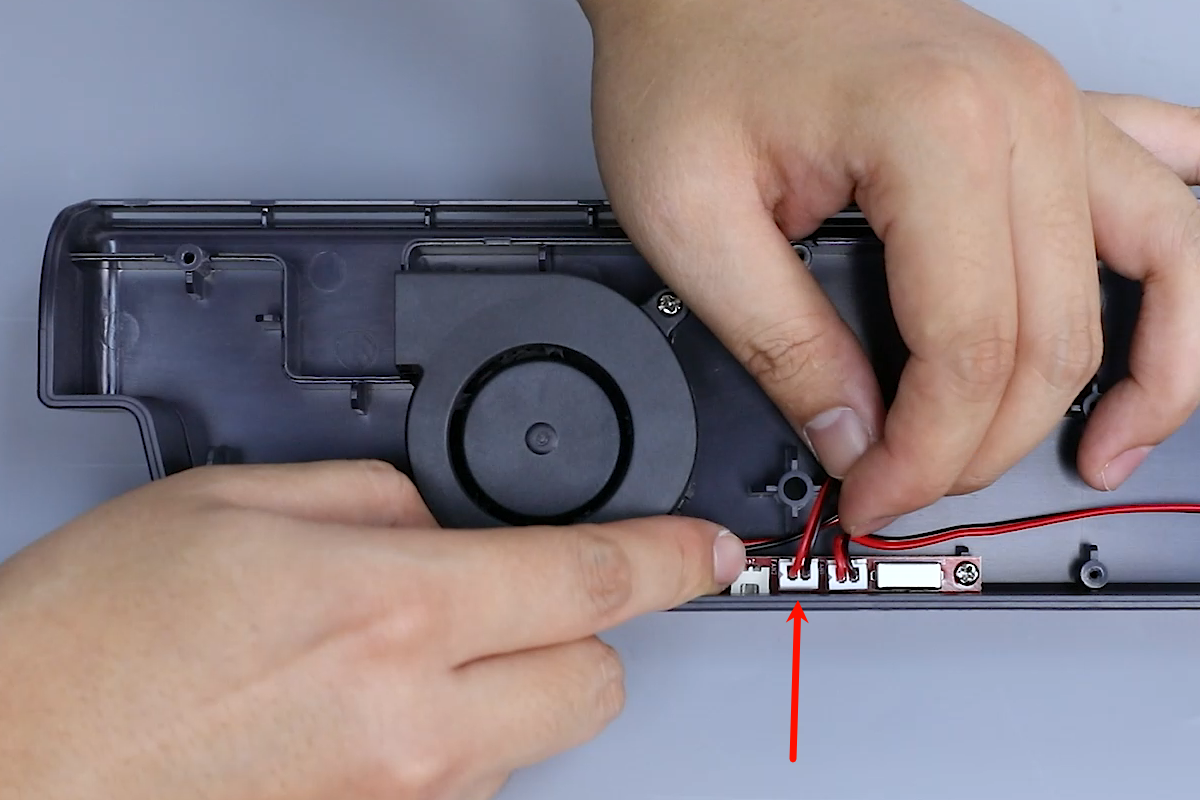
- Insert the cables of the cooling fan into the adapter board port.
- Install the back cover and tighten the four screws using a Phillips screwdriver.
- Align the fan assembly with the screw holes. The air outlet face downward. Tighten the four fixing screws of the rear fan assembly using the 2.5mm Allen key. Insert the fan assembly interface cable port.
- Power on the printer. Turn on the cooling fan. The printer is ready for use after the fan works normally.