¶ OTA Firmware Update
¶ Preparation Before Updating Firmware
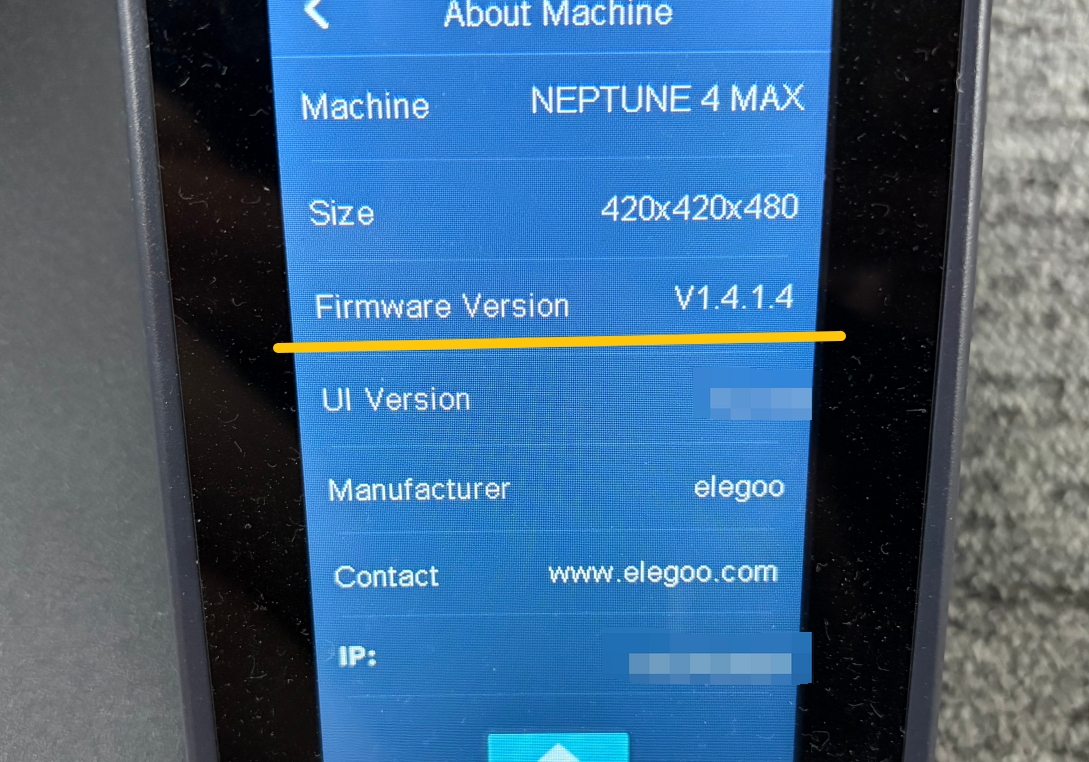
- On the touch screen, navigate to Settings > About Printer to confirm that the mainboard firmware version is V1.4.1.3 or higher. Otherwise, the printer cannot perform an OTA firmware update. If the firmware version is lower than V1.4.1.3, first update the firmware to V1.4.1.3 via U disk.
- Ensure the printer is connected to an Ethernet cable with internet access.
- Ensure the mainboard onboard memory is greater than 500 MB (confirm via the Fluidd interface).
.png)
¶ OTA Firmware Update Operation Steps
The OTA firmware update method for the Neptune 4+ series is the same
- After powering on the printer, click the Update button in the pop-up window.
.jpeg)
- If no firmware update prompt appears, navigate via the touch screen: Settings > About Printer > Firmware Version > Update.
.jpeg)
.jpeg)
.jpeg)
¶ Manual Firmware Update
¶ Important Notes
1. Before updating the firmware, confirm the printer version on the following page. Updating the incorrect firmware will brick the printer.
Confirm your Neptune 4 series printer version
- If the current mainboard firmware version is lower than V1.4.1.3, first update the mainboard firmware to V1.4.1.3. Otherwise, the printer cannot detect the new firmware.
- Do not power off the printer during the firmware update process.
¶ Firmware Download Links
Neptune 4 Plus Touchscreen + Mainboard Firmware V1.4.1.4
Neptune 4 Plus Touchscreen + Mainboard Firmware V1.4.1.3
¶ Required Tools
- U disk (USB flash drive)
- TF card (microSD card)
- Phillips screwdriver
- 2.0 mm Allen key
¶ Preparation Before Manual Firmware Update
- Ensure the touch screen is lit and the menu interface is accessible.
- Ensure the mainboard onboard memory is greater than 500 MB (confirm via the Fluidd interface).
- Confirm U disk format: The U disk for firmware update must be FAT32 formatted with capacity less than 16 GB.
- Confirm TF card format: The TF card for firmware update must be FAT32 formatted with allocation unit size of 4096 bytes.
¶ How to Format U Disk / TF Card on Windows Computer
.png)
¶ How to Format U Disk / TF Card on MAC Computer
.jpeg)
¶ Update Mainboard Firmware
- Ensure the printer touch screen is lit and you can enter the About Printer interface.
- Open the firmware package and locate the “ELEGOO_UPDATE_DIR” folder.
.png)
- Copy the “ELEGOO_UPDATE_DIR” folder from the firmware package to the root directory of the U disk.
.png)
- Insert the U disk into the printer U disk port.
.png)
- On the screen, tap Settings > About Printer, then tap the arrow at the bottom and follow the prompts to confirm the update.
.png)
- Wait for the firmware update to complete. The touch screen will restart automatically.
.png)
- After the touch screen enters the menu interface, go to the About Printer page and confirm that the mainboard firmware has been updated successfully.
¶ Update Touchscreen Firmware
- Turn off the printer power switch.
- Open the firmware folder > screen firmware, locate the “UI_1.2.22.tft” file, and copy it.
.png)
- Copy the “UI_1.2.22.tft” file to the root directory of the TF card.
.png)
- Use a 2.0 mm Allen key to loosen the four screws securing the back cover and remove the back cover.
.png)
- Insert the TF card into the TF card slot on the screen mainboard.
The gold finger side of the TF card must face upward; otherwise, the touch screen cannot read the TF card.
.png)
- Turn on the printer power. The touch screen firmware will update automatically.
.png)
.png)
-
After the firmware update completes, turn off the printer power switch. Push the TF card to the right to eject it, then remove the TF card.
.png)
-
Reinstall the touch screen back cover in its original position and tighten the screws. Return the touch screen to its original position.
¶ Calibration
Both OTA firmware update and manual firmware update require calibration. Power on the printer and confirm that the mainboard and touch screen firmware have been updated successfully.

On the touch screen, re-perform automatic leveling, Z offset calibration, and X-Y input shaping calibration.