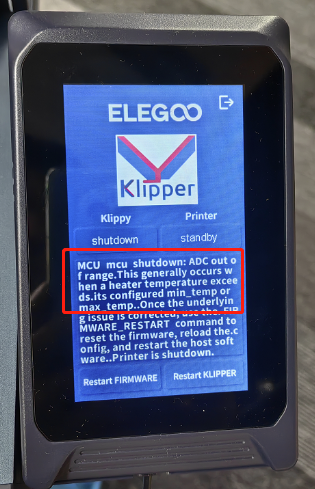
¶ What does it look like
This error message appears on the touchscreen during printing, or immediately after the printer is turned on.
¶ Tools necessary for toubleshooting
- A 2.0 mm Allen key
- A Phillips screwdriver
¶ Troubleshooting steps
¶ Step 1 Power off the printer and reinstall the cable.
In this case, it probably that the cable on the extruder is not installed properly, or the pins are bent. It is recommended to shut down the machine, reinstall the cable here, and wait for about a minute before turning on the machine. This fault message will be automatically eliminated.
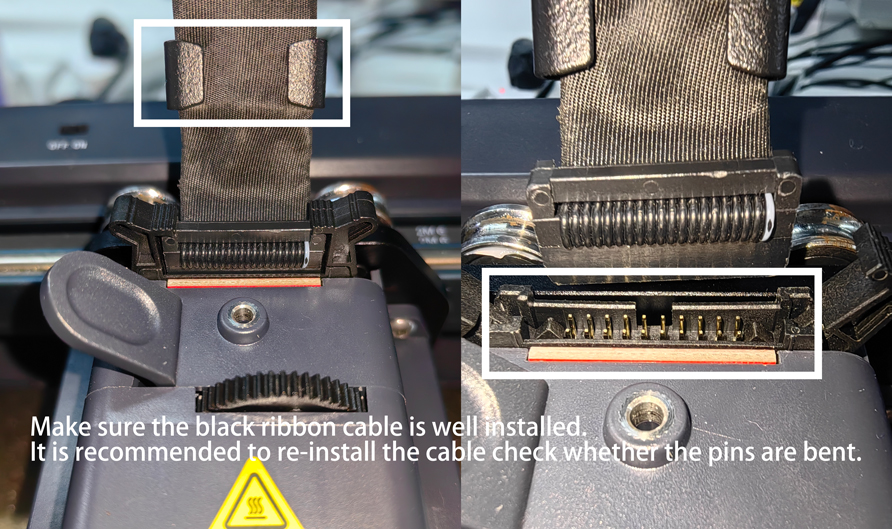
If the pins are bent, you can use external force to correct it. If it cannot be straightened, provide detailed photos and we will apply for an adapter PCB board to solve the issue.
¶ Step 2 Check whether the machine's Extruder and the thermal bed thermal wiring are damaged.
If it has been used for a period of time, you need to check whether the machine's Extruder and the thermal bed thermal wiring are damaged. If it has been used for a period of time, we need to check whether the wiring is damaged.
Refer to this video to check whether the hot end thermal wiring is damaged or the Th1 port is loose or damaged.
https://youtu.be/3Q5Ny6cYKow
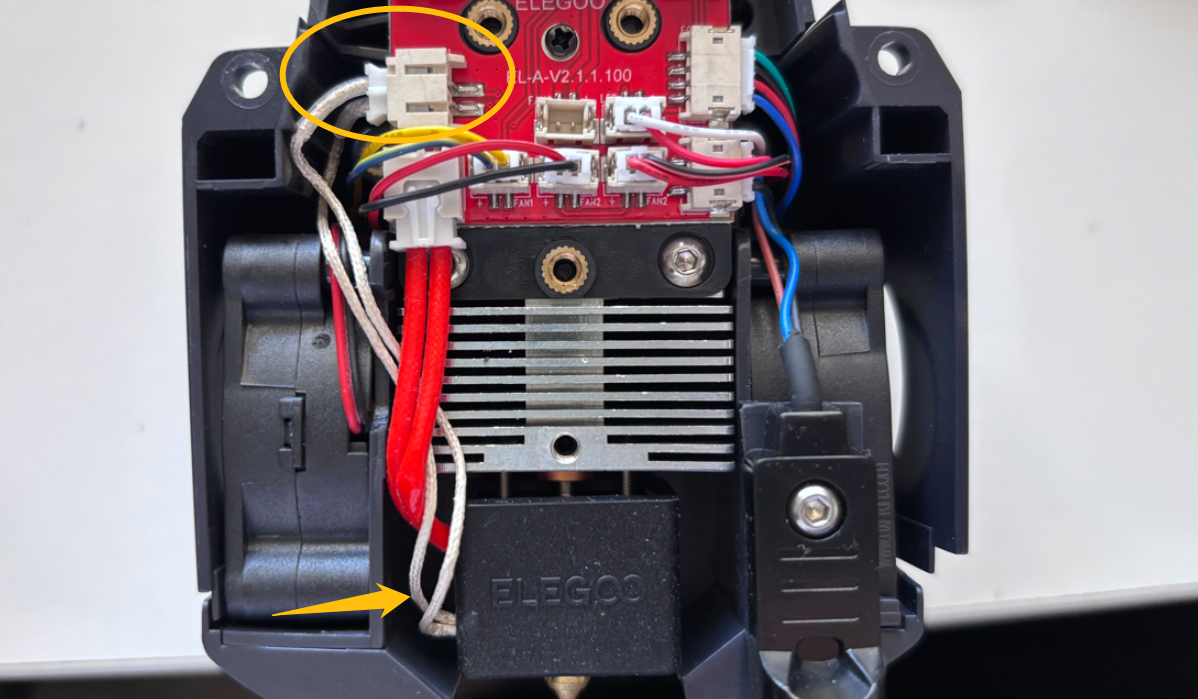
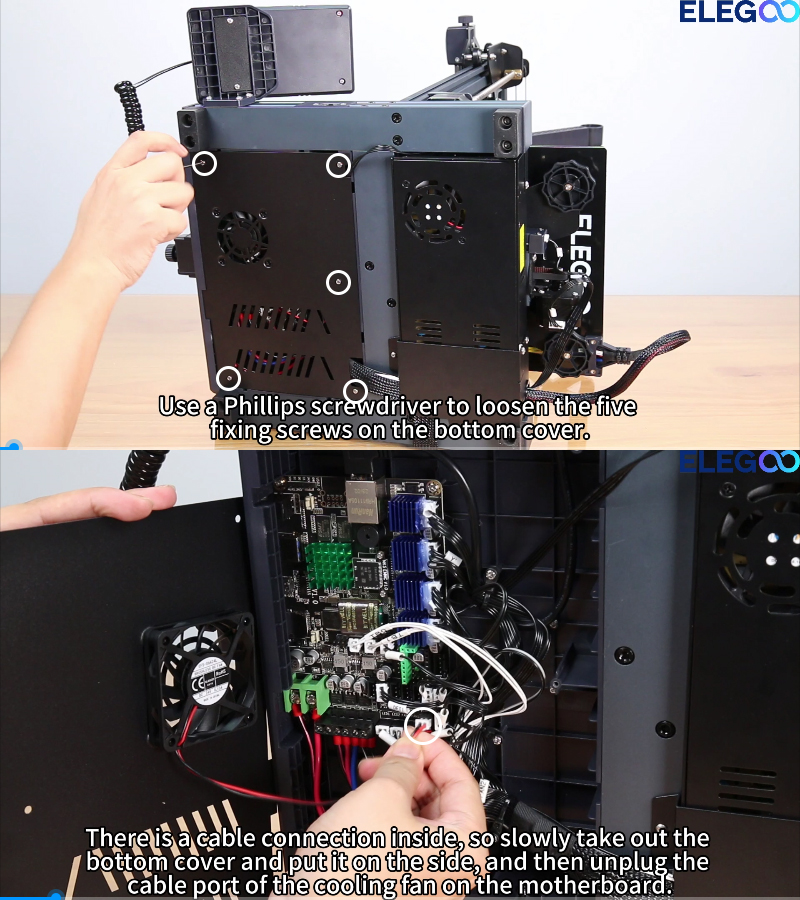
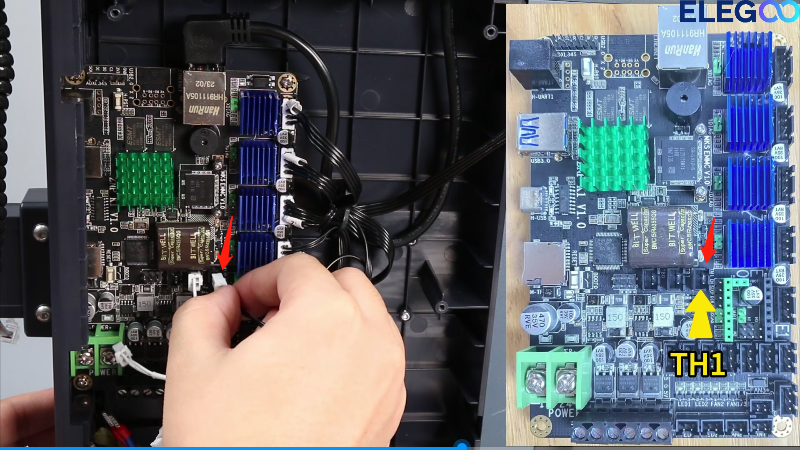
¶ Step 3 Check whether the internal TH1 wiring is damaged or loose.
Follow the steps below to open the bottom cover and check whether the internal TH1 wiring is damaged or loose.
https://www.youtube.com/watch?v=NmtXTwokpyg
Re-install the TH1 cable
¶ Step 4 Check whether the cables of TB0 and TB1 are well connected.
Check whether the cables of TB0 and TB1 are well connected. Neptune 4 has no heated bed partition, so there is only one TB0 cable wiring.
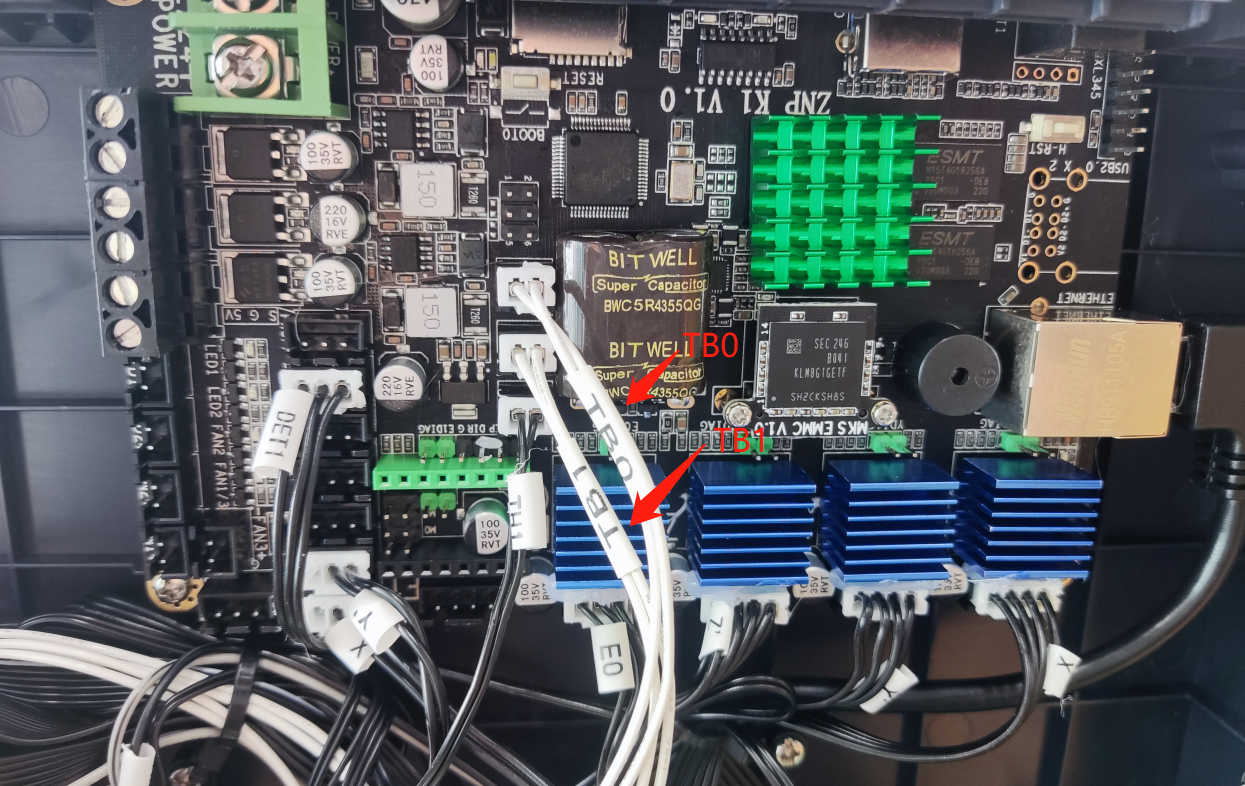
If possible, shut down the machine, move the bed to reduce the bending of the wiring here, restart the machine. Check whether the fault disappears.
If the fault goes away, the issue is in the bed's thermal wiring ,please let me know the results.
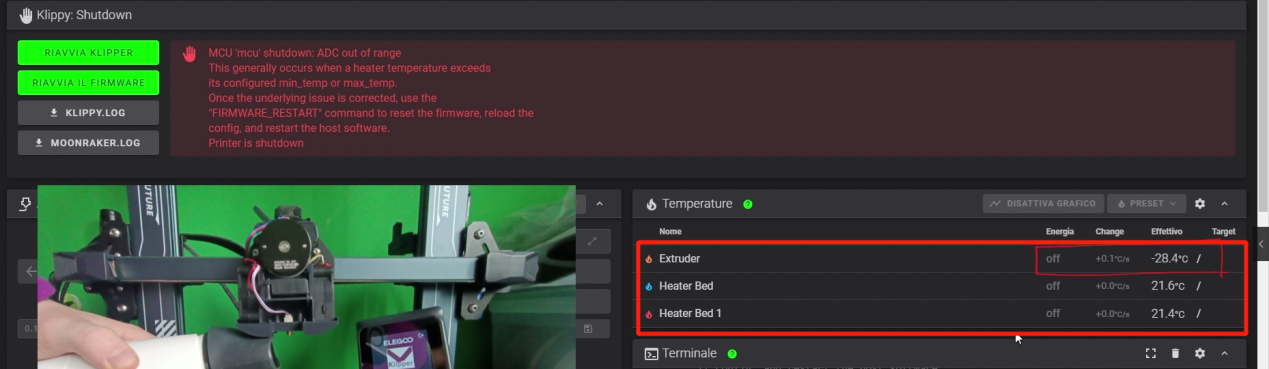
¶ Step 5 Check whether the temperature of the nozzle and bed is displayed normally.
If the issue cannot be found, refer to the online printing to perform troubleshooting online and check whether the temperature of the nozzle and bed is displayed normally.
As shown in the figure, the nozzle temperature shows a negative number.
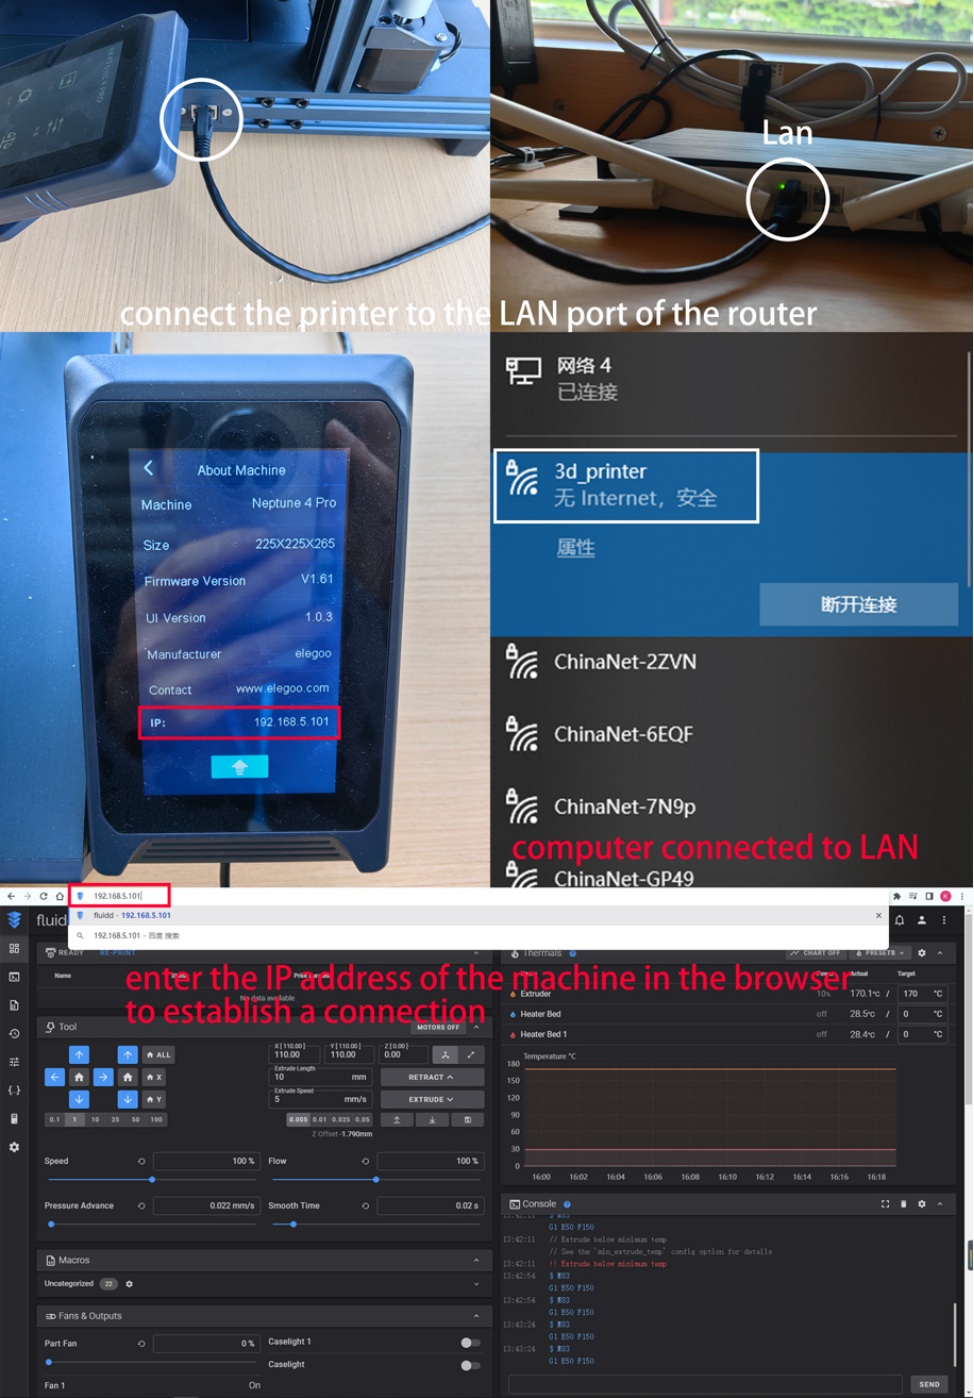
Neptune 4 series use klipper firmware and does not support using a USB cable to control the printer. It can only be controlled through the LAN. Refer to the printing tutorial https://youtu.be/z_RYmpIIvIc.
¶ Still have issues?
Following the above instructions to check the printer will not affect the printer's warranty.
If the issue persists after completing the above troubleshooting steps, contact the ELEGOO technical support team.