¶ Tools and Materials
- 2.5mm Allen key x 1
- 2.0mm Allen key x 1
- Phillips screwdriver x1
¶ Precautions
Power off the machine and wait for the print head to cool completely before working.
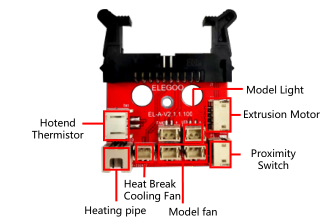
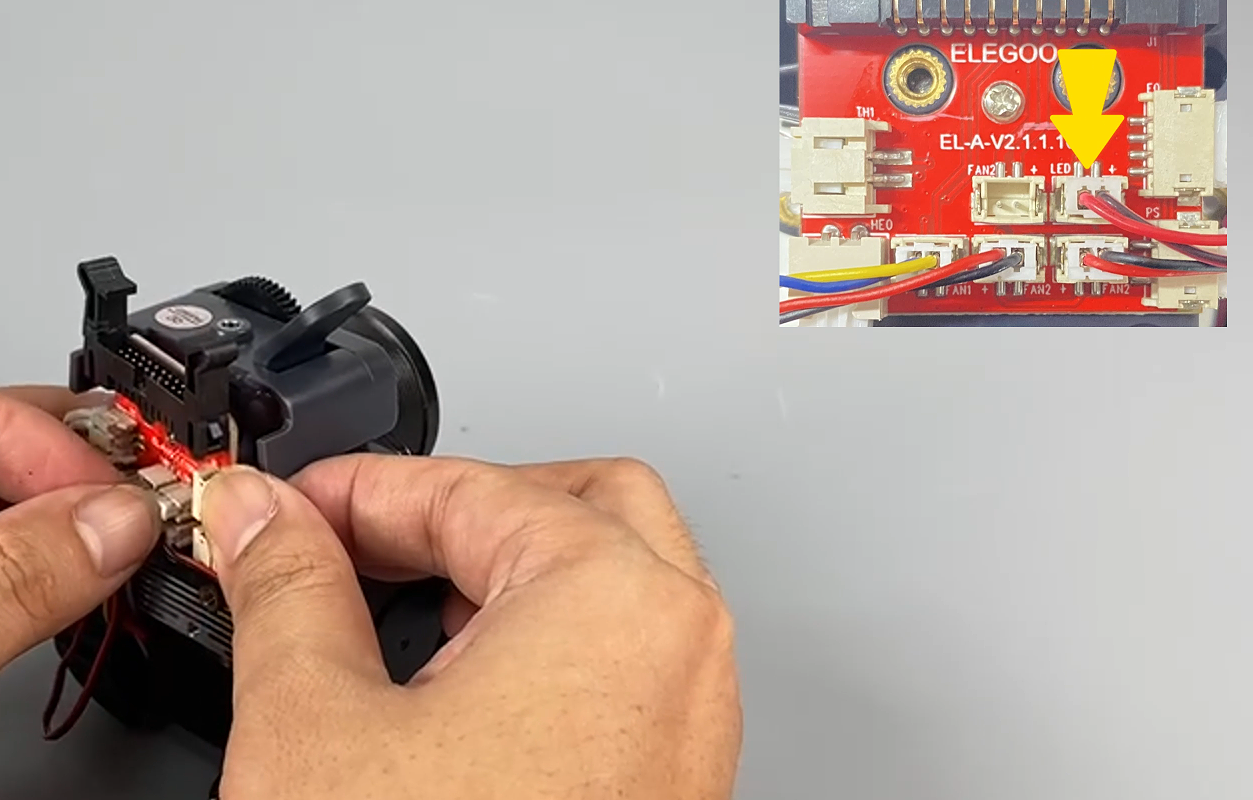
¶ Extruded adapter board wiring diagram
¶ Instruction
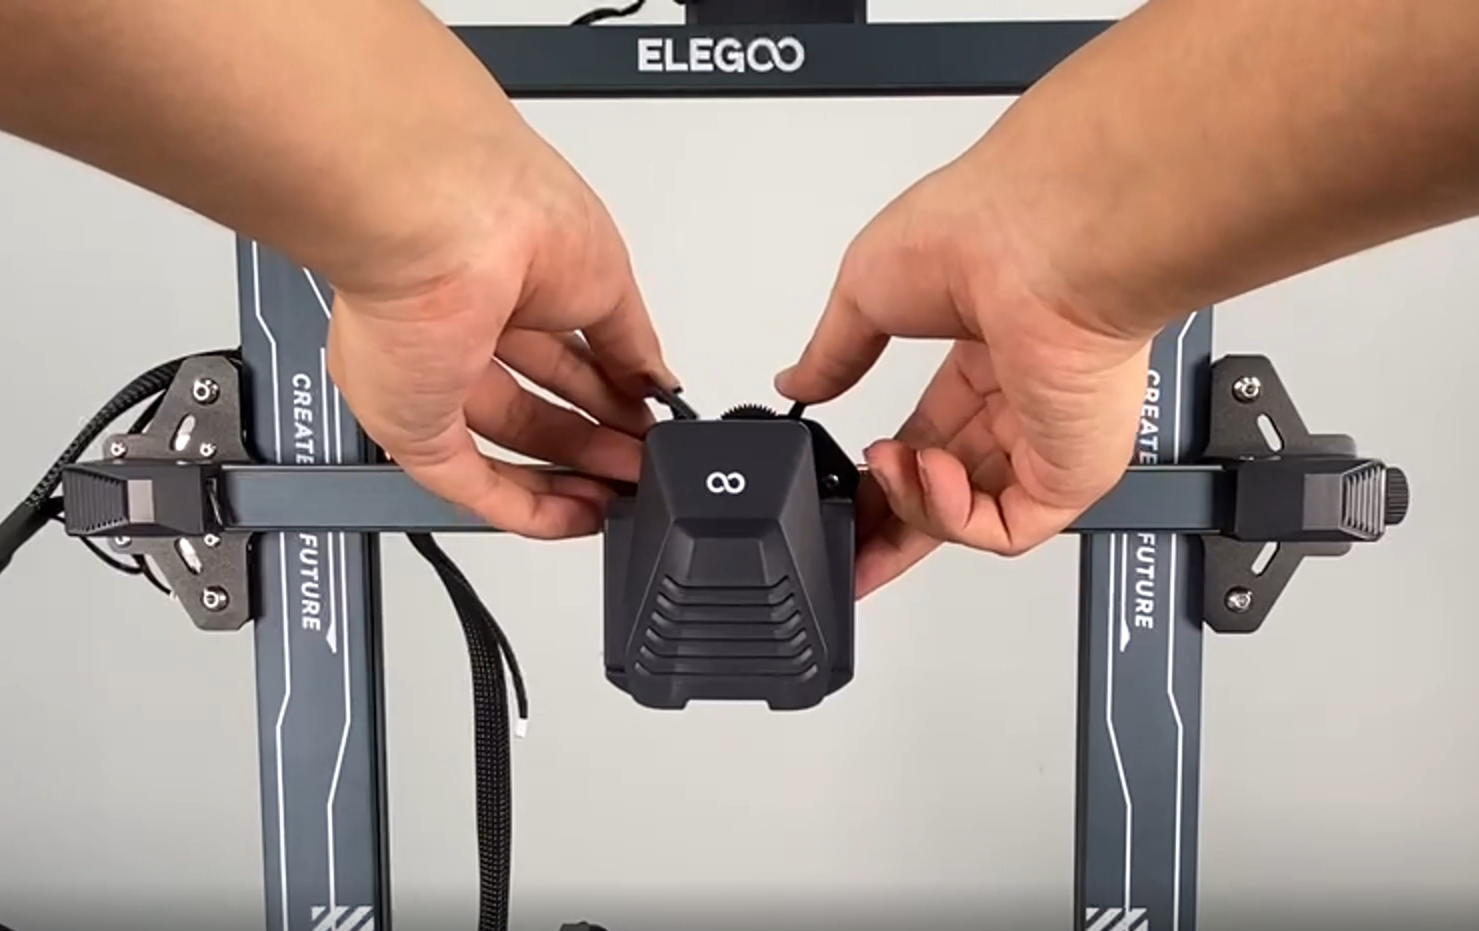
¶ 1 - Remove the print head
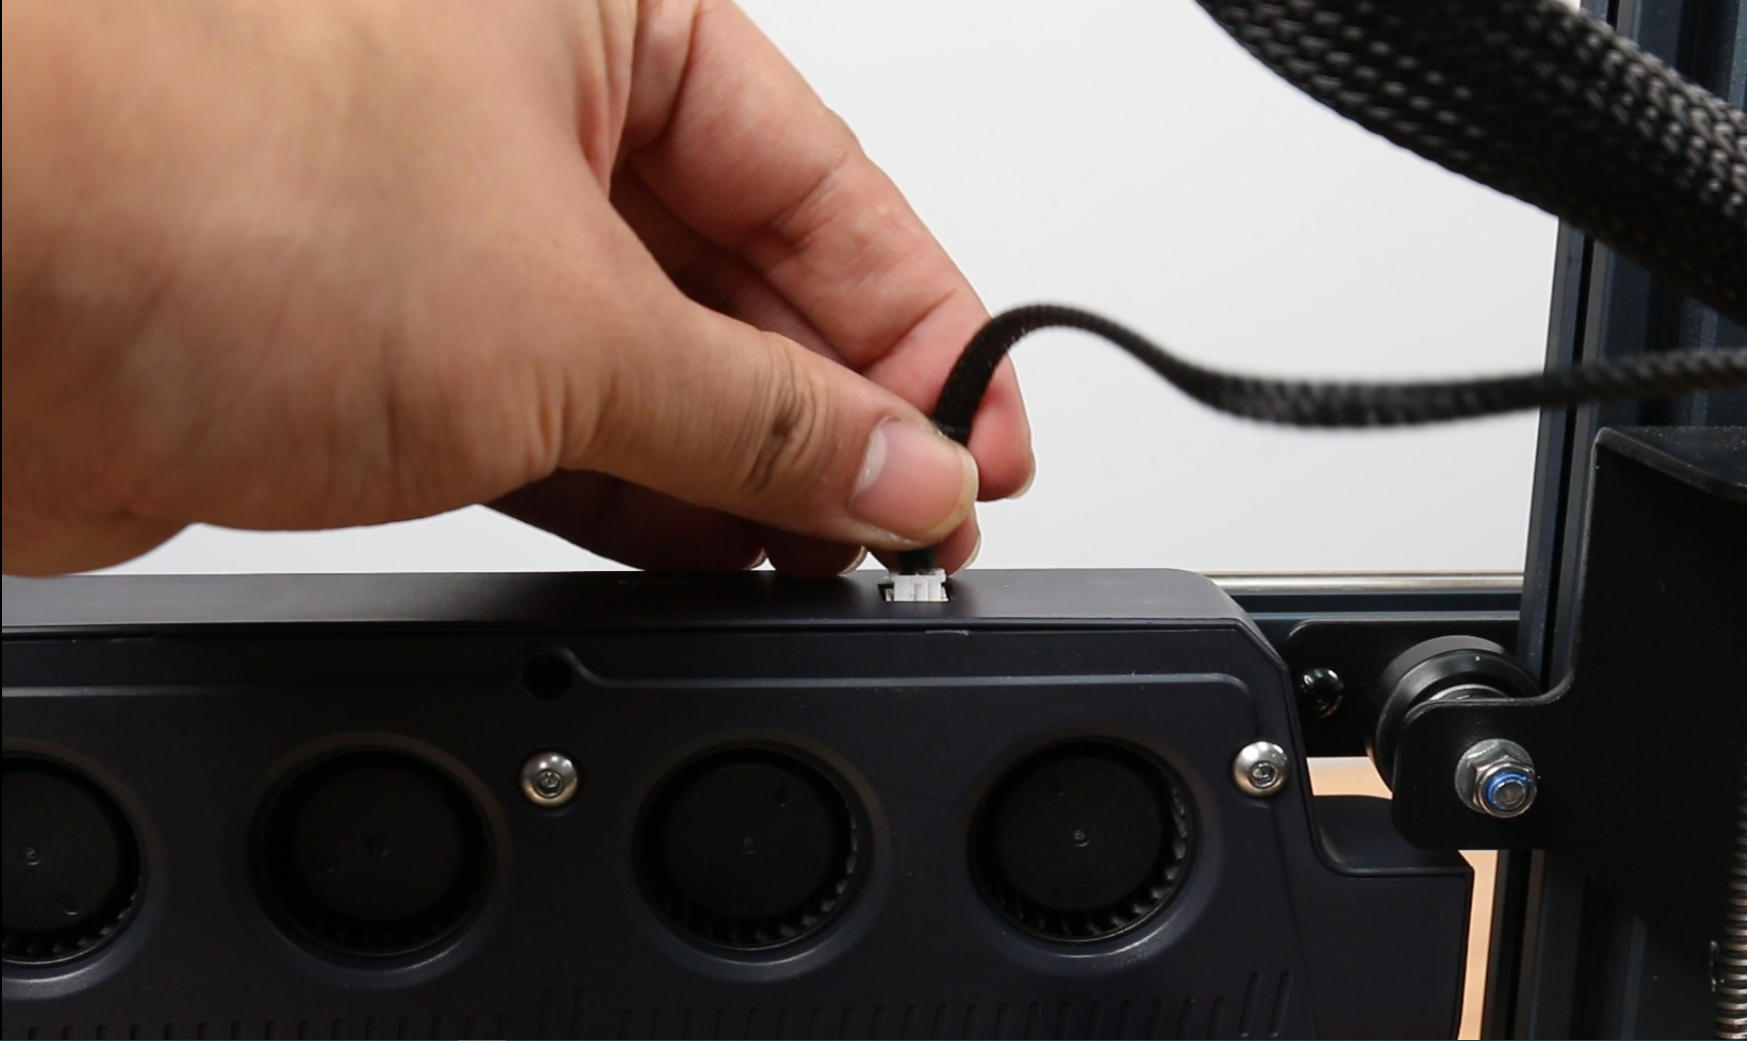
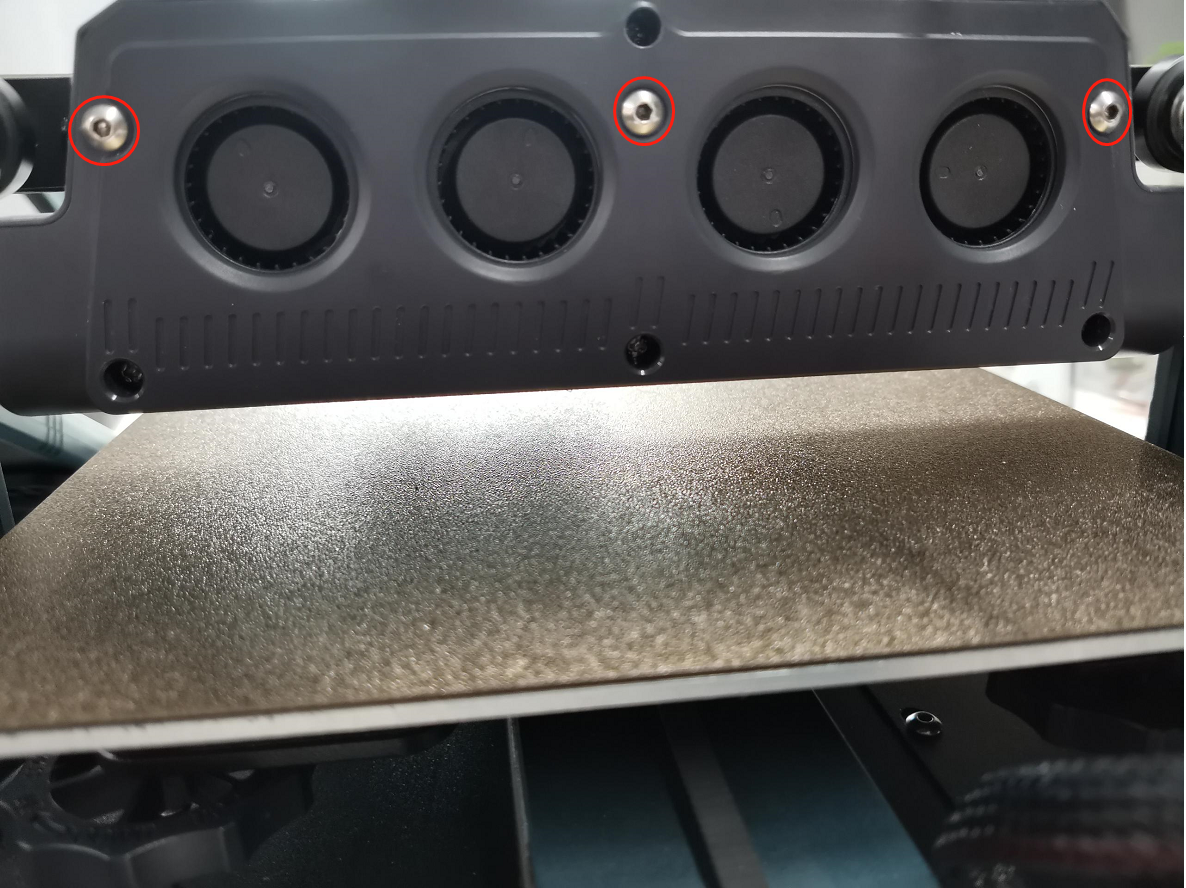
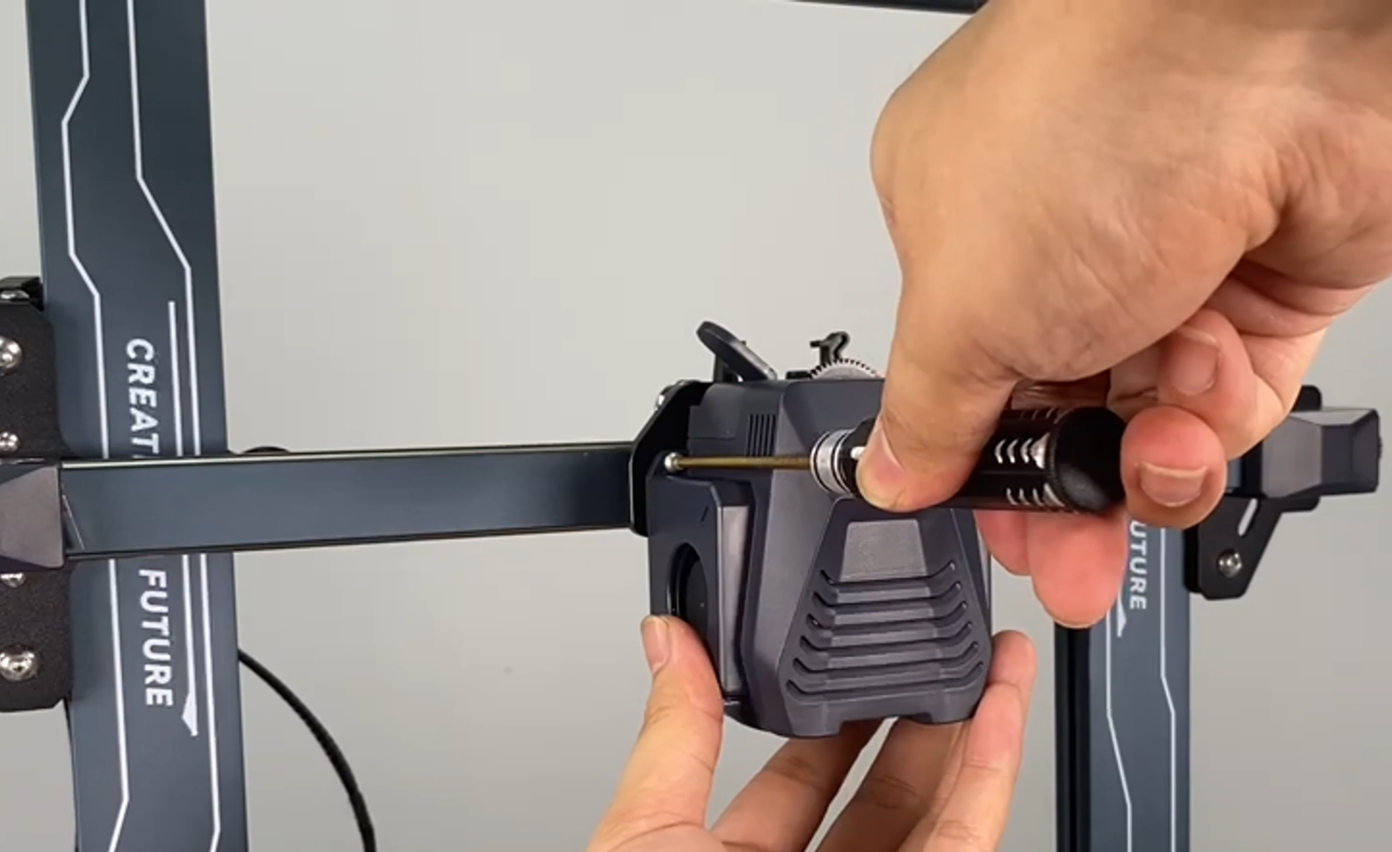
- Power off the printer. Unplug the port wires of the fan assembly located directly behind the print head. Loosen the three screws of the rear fan assembly using a 2.5mm Allen key. Remove the fan assembly.
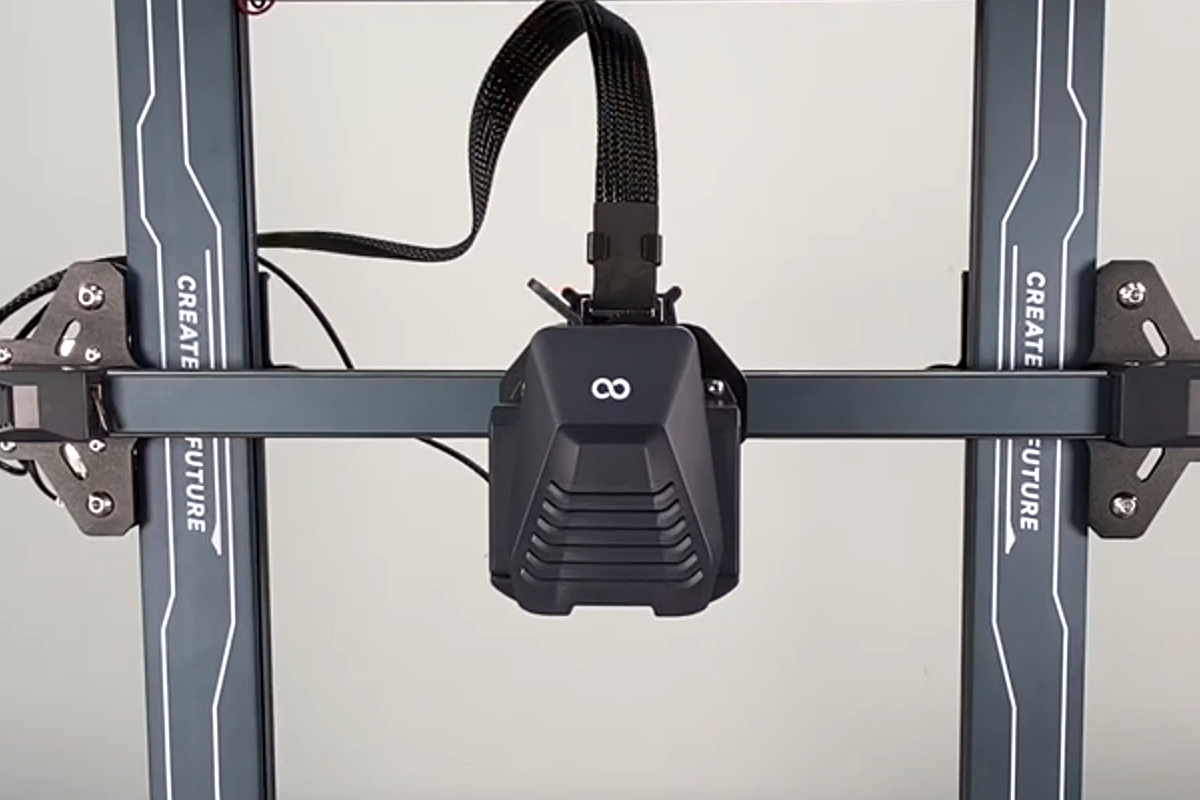
- Loosen the two screws securing the cable holder using a 2.5 mm Allen key. Then, loosen the two screws securing the print head assembly.

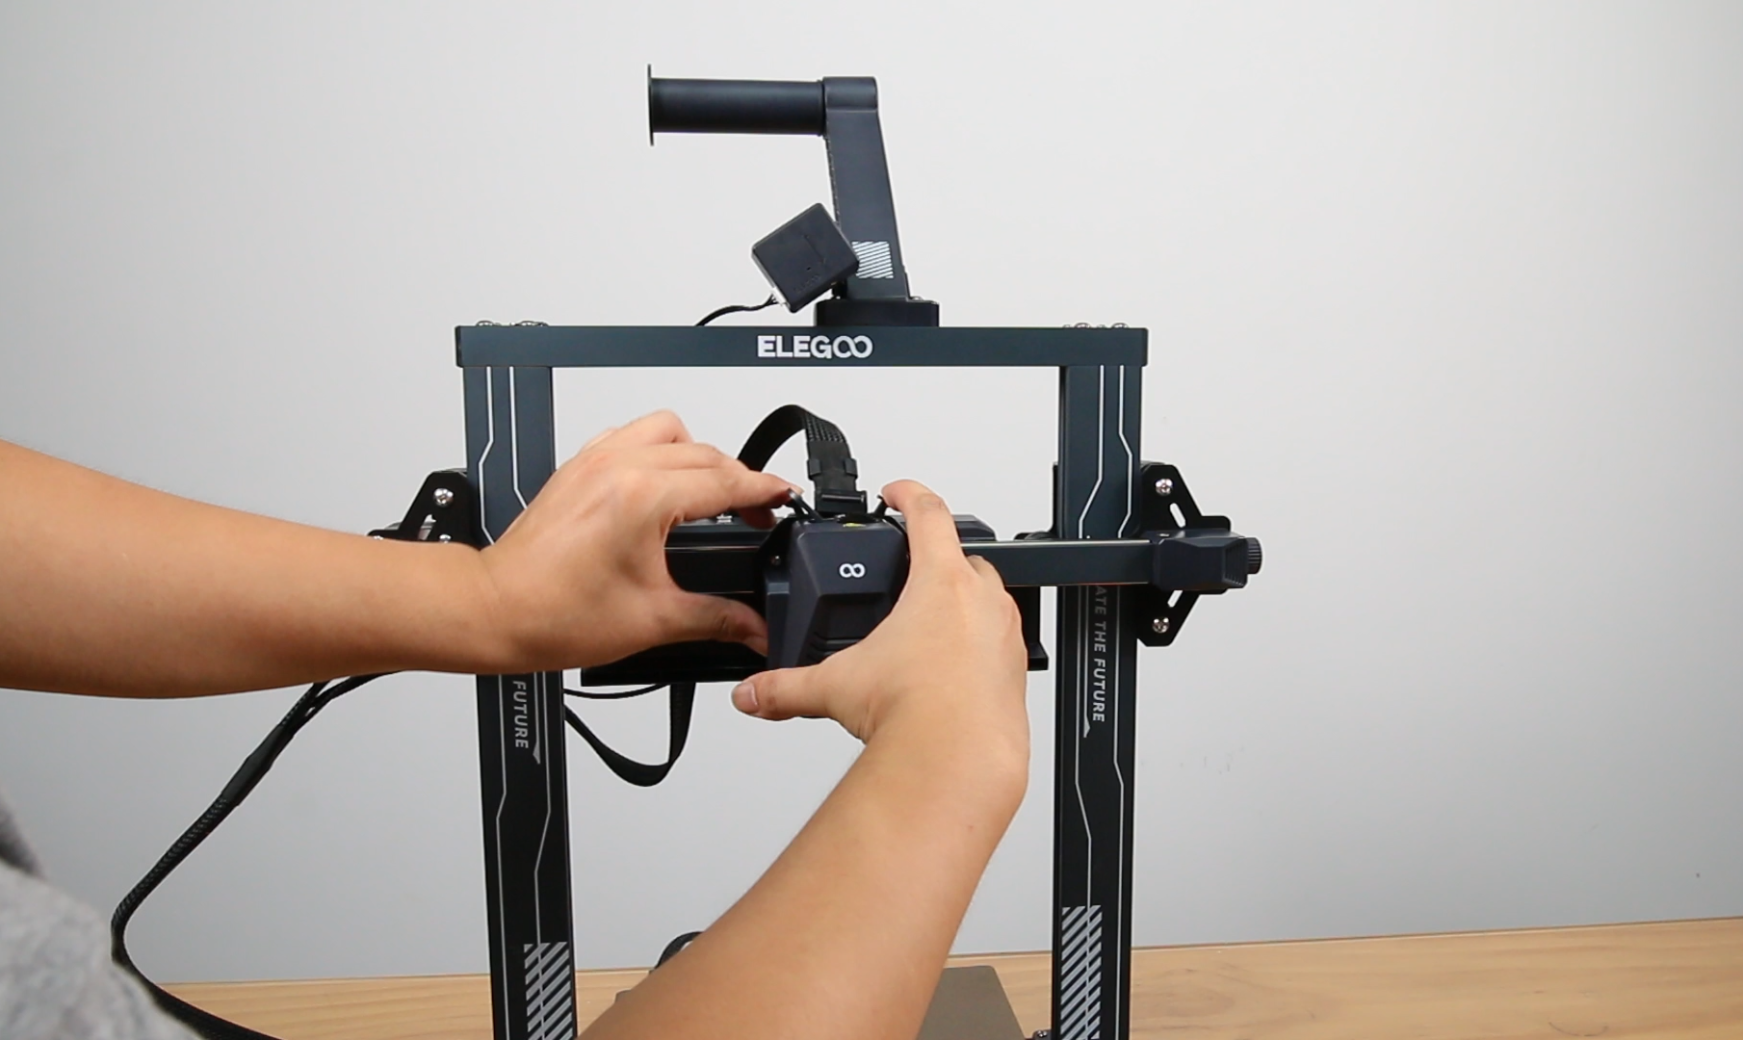
- Press the clip on both sides with your hand. The print head cable will automatically pop out, and then take out the print head cable.
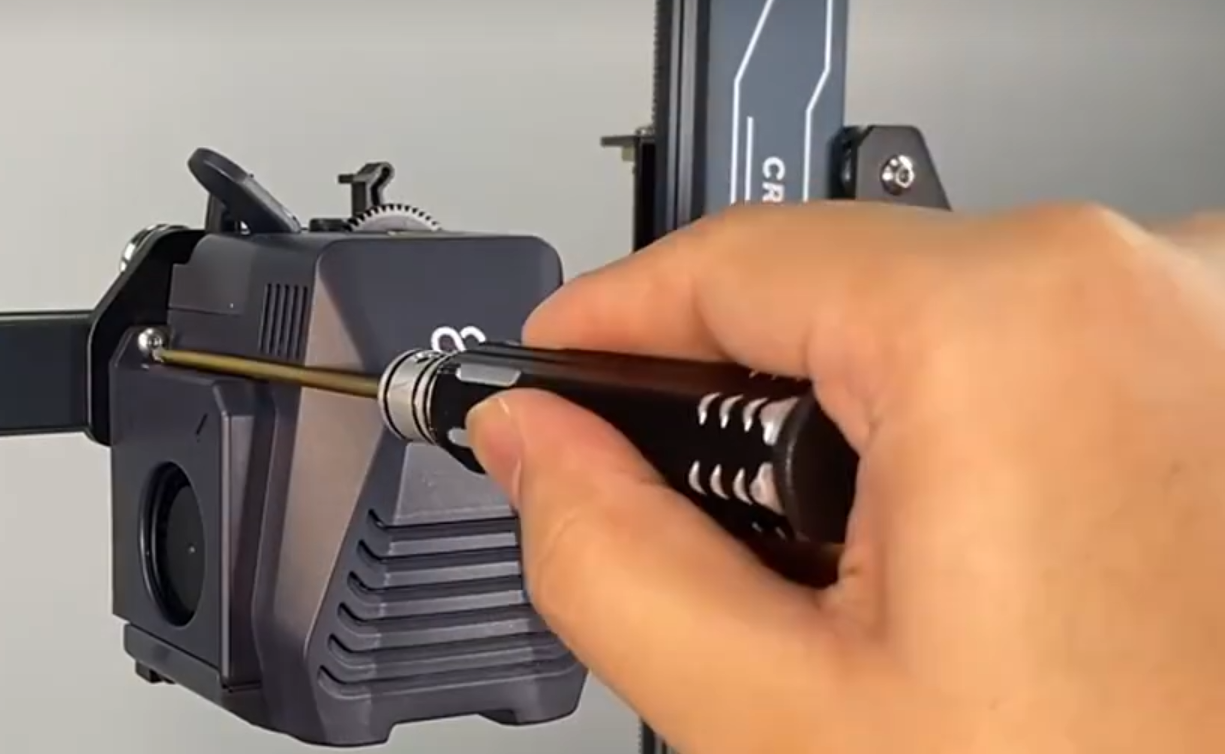
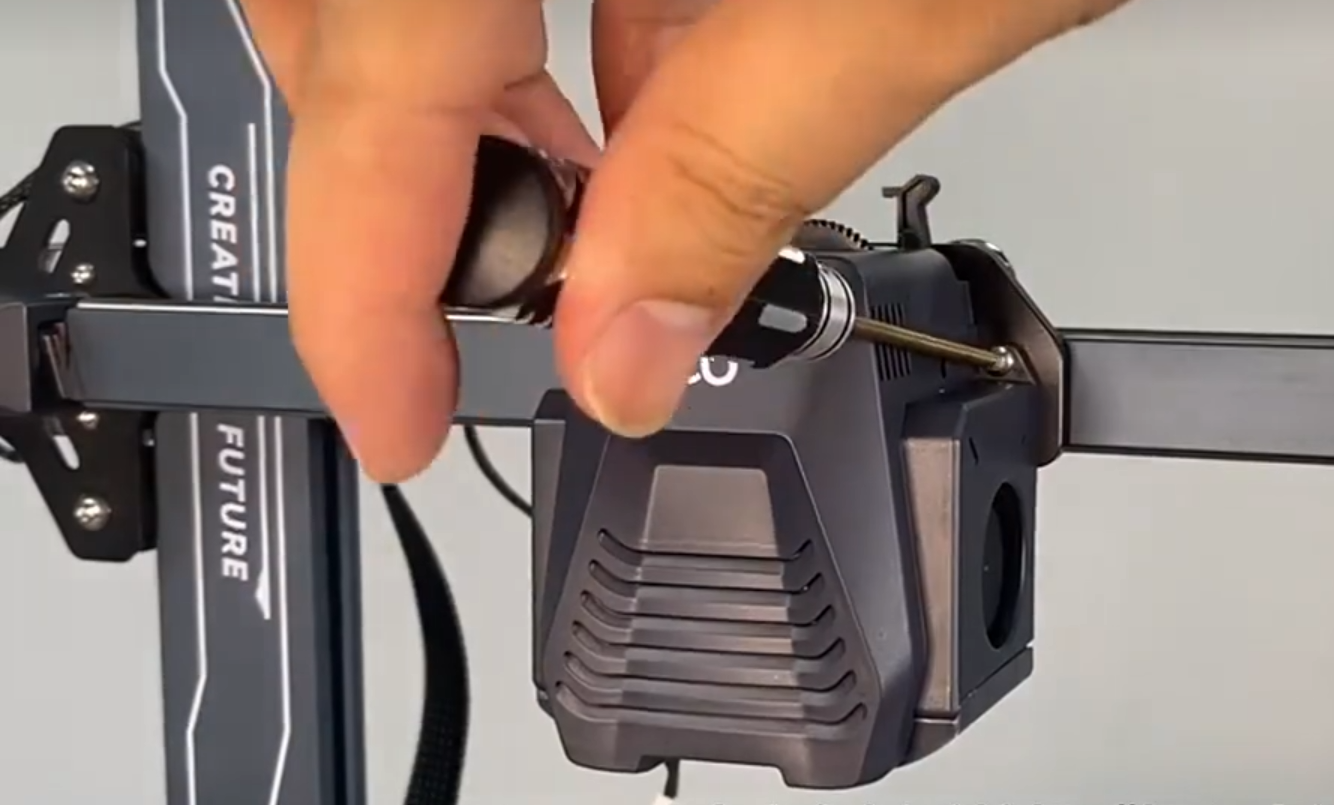
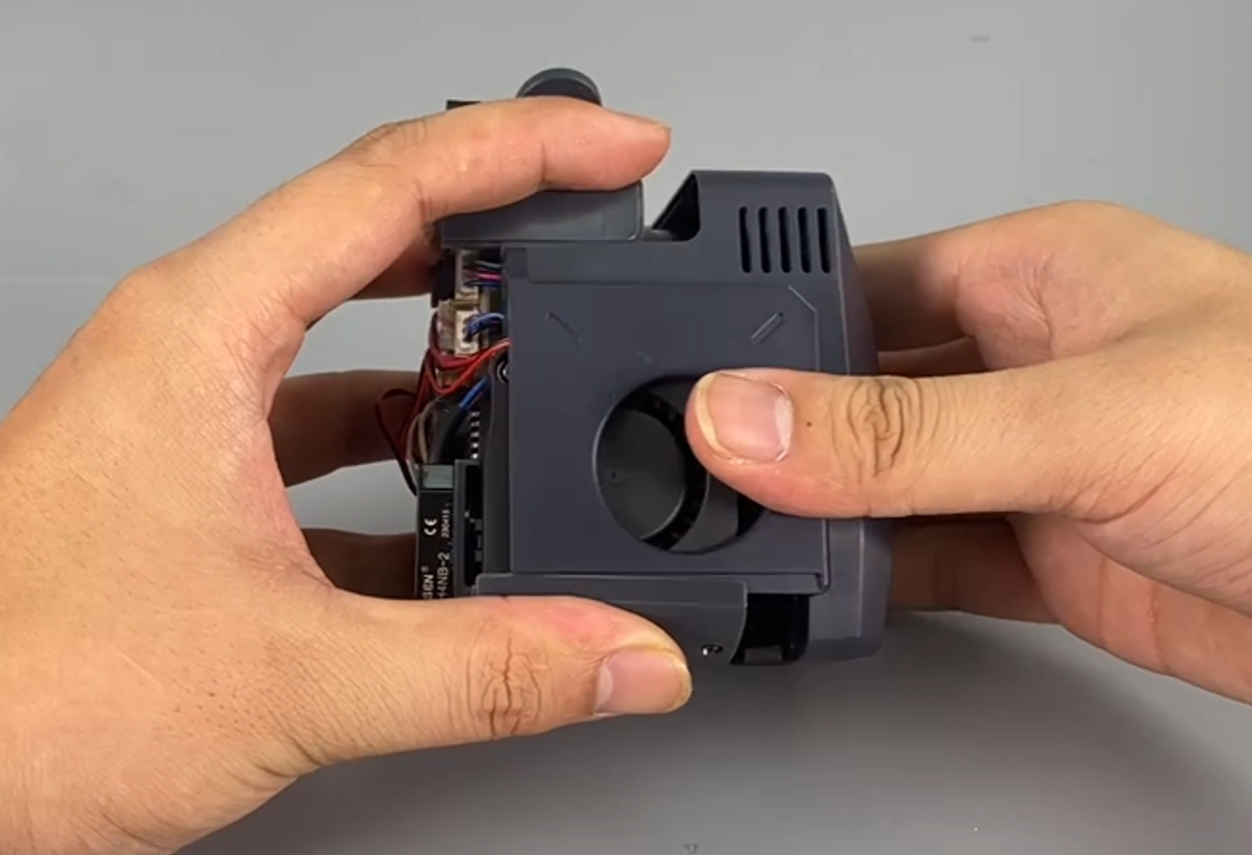
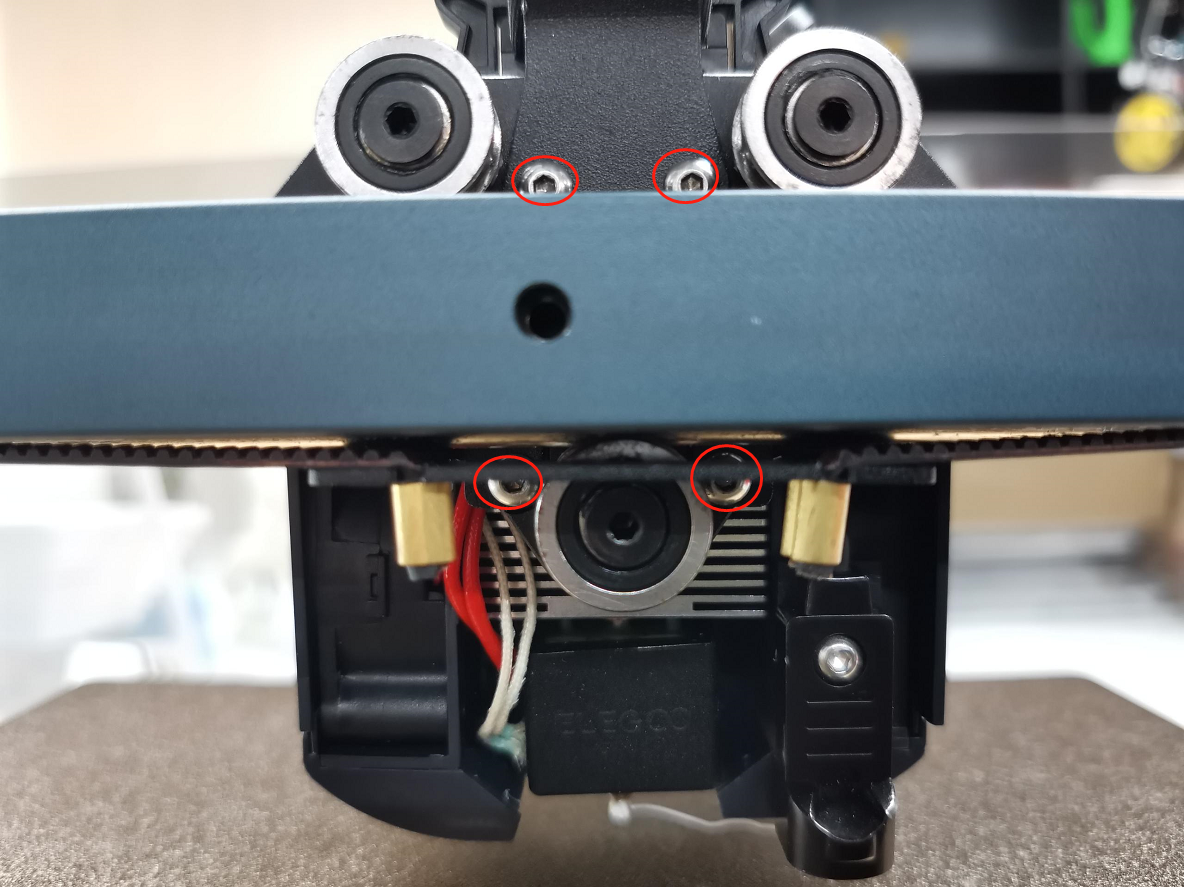
- Loosen the two screws securing the front cover of the printer using a 2.0 mm Allen key, then remove the print head assembly.
¶ 2 - Replace the extruder adapter board
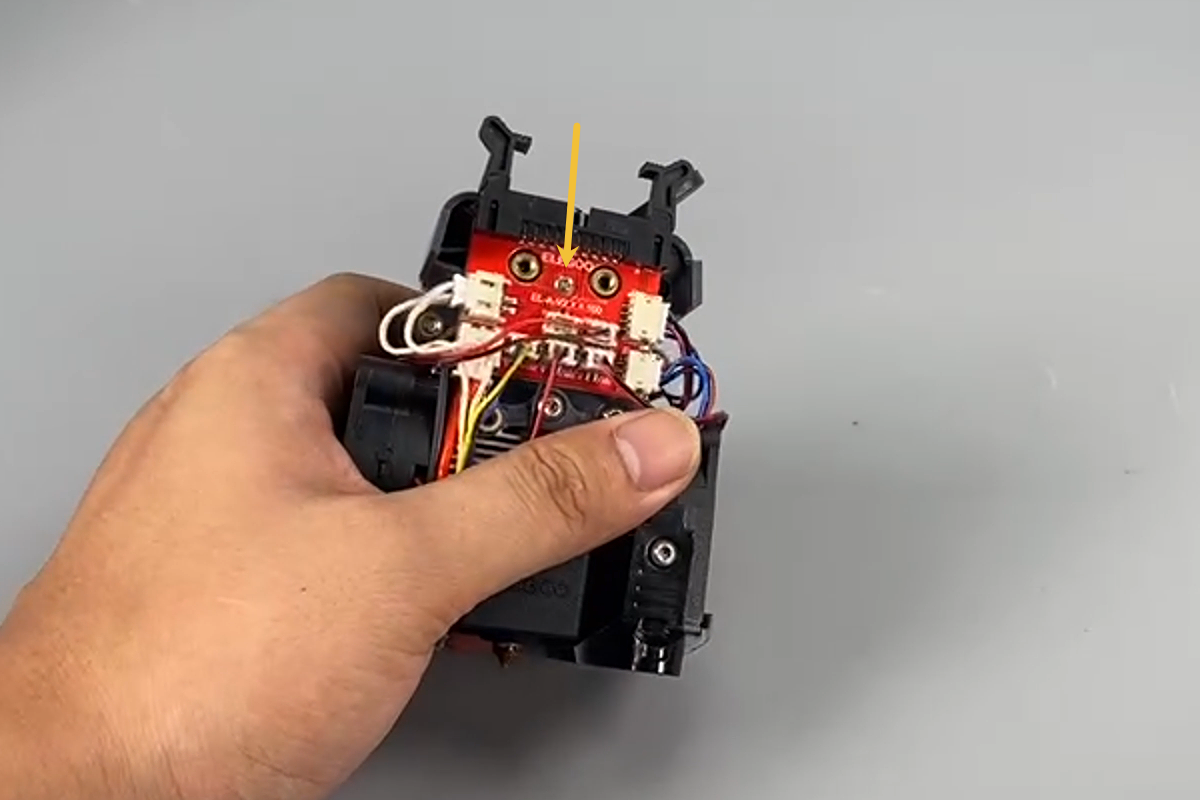
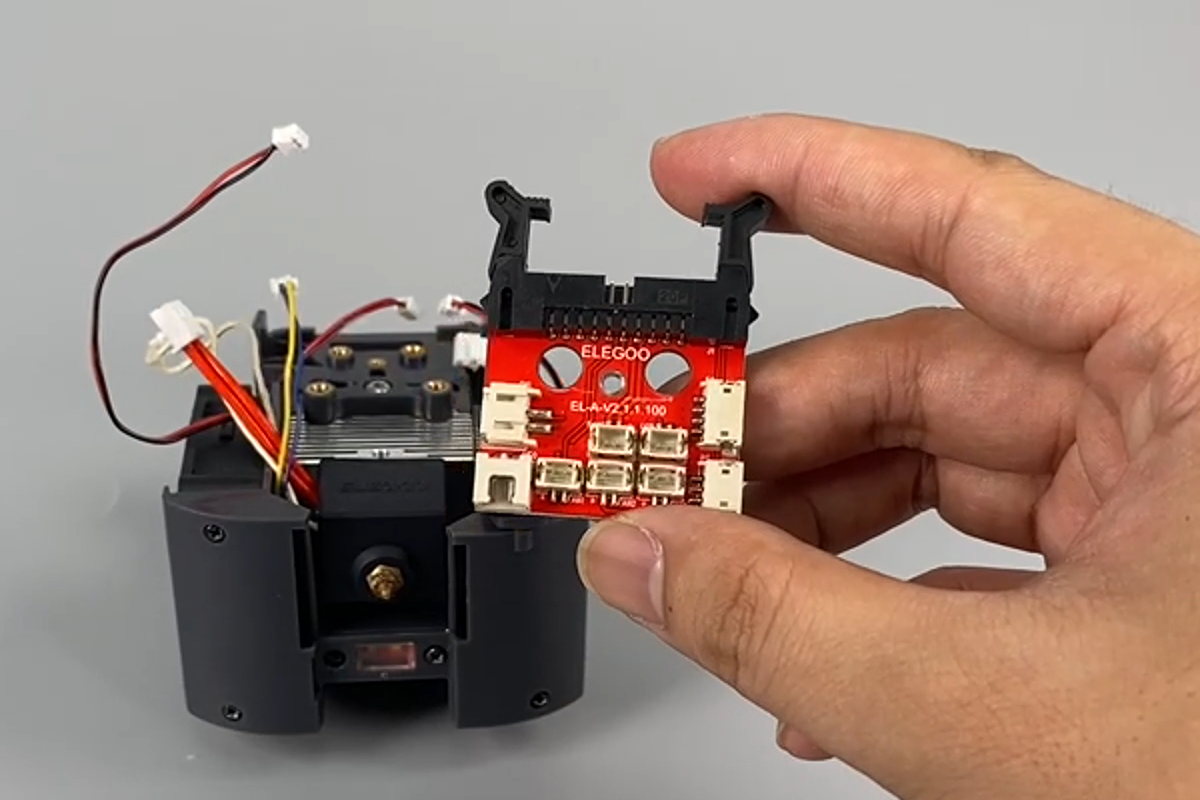
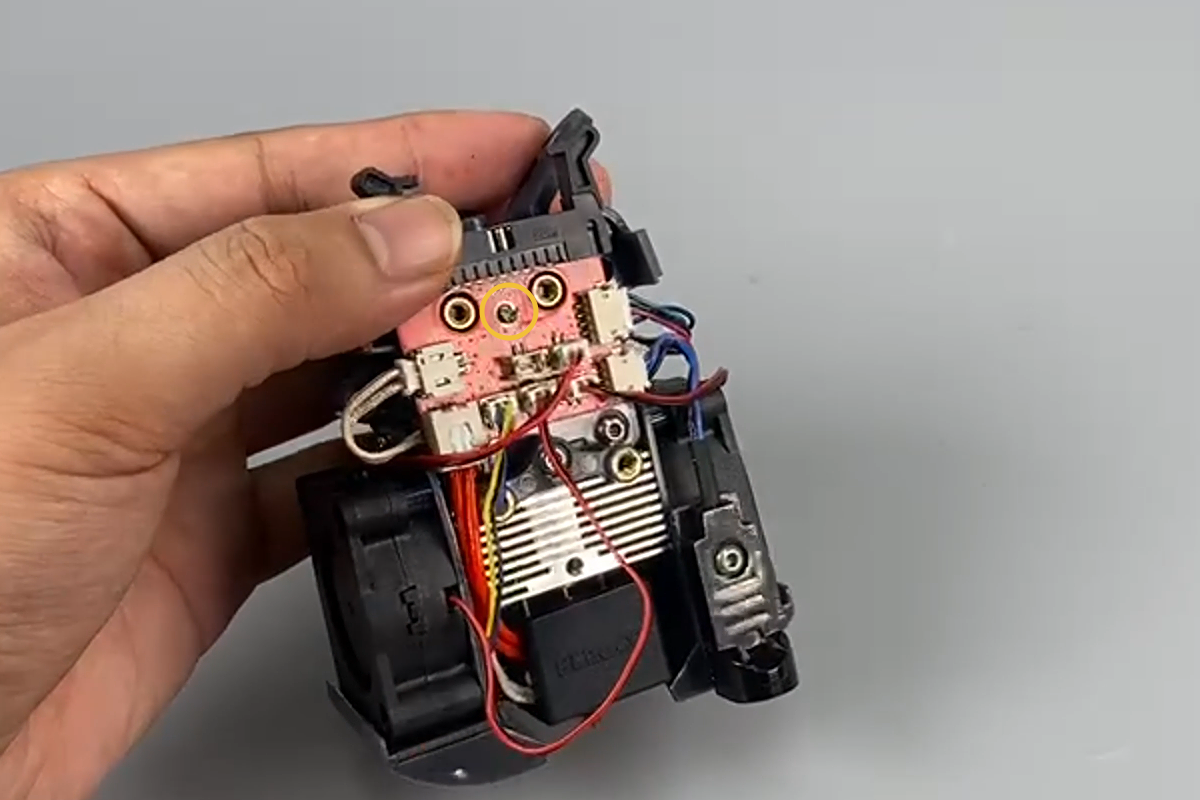
- Separate the front cover of the print head assembly. Unplug the cables on the adapter board.

- Loosen a fixed screw on the extruder adapter board using a Phillips screwdriver. Replace the extruder adapter board.
- Insert the thermistor cables into the HE1 port of the extruder adapter board.
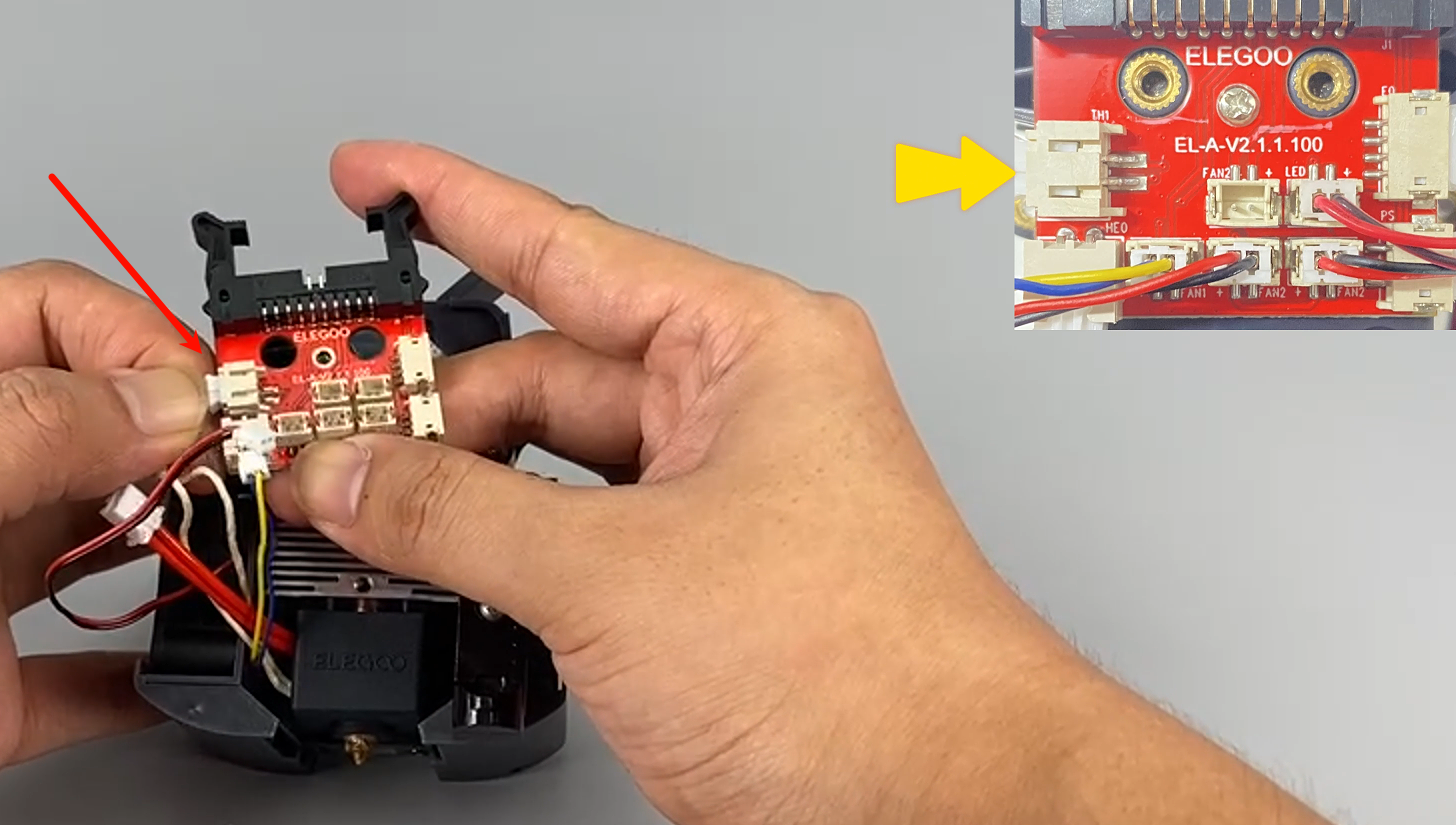
- Insert the cables of the heater into the HE0 port on the adapter board.

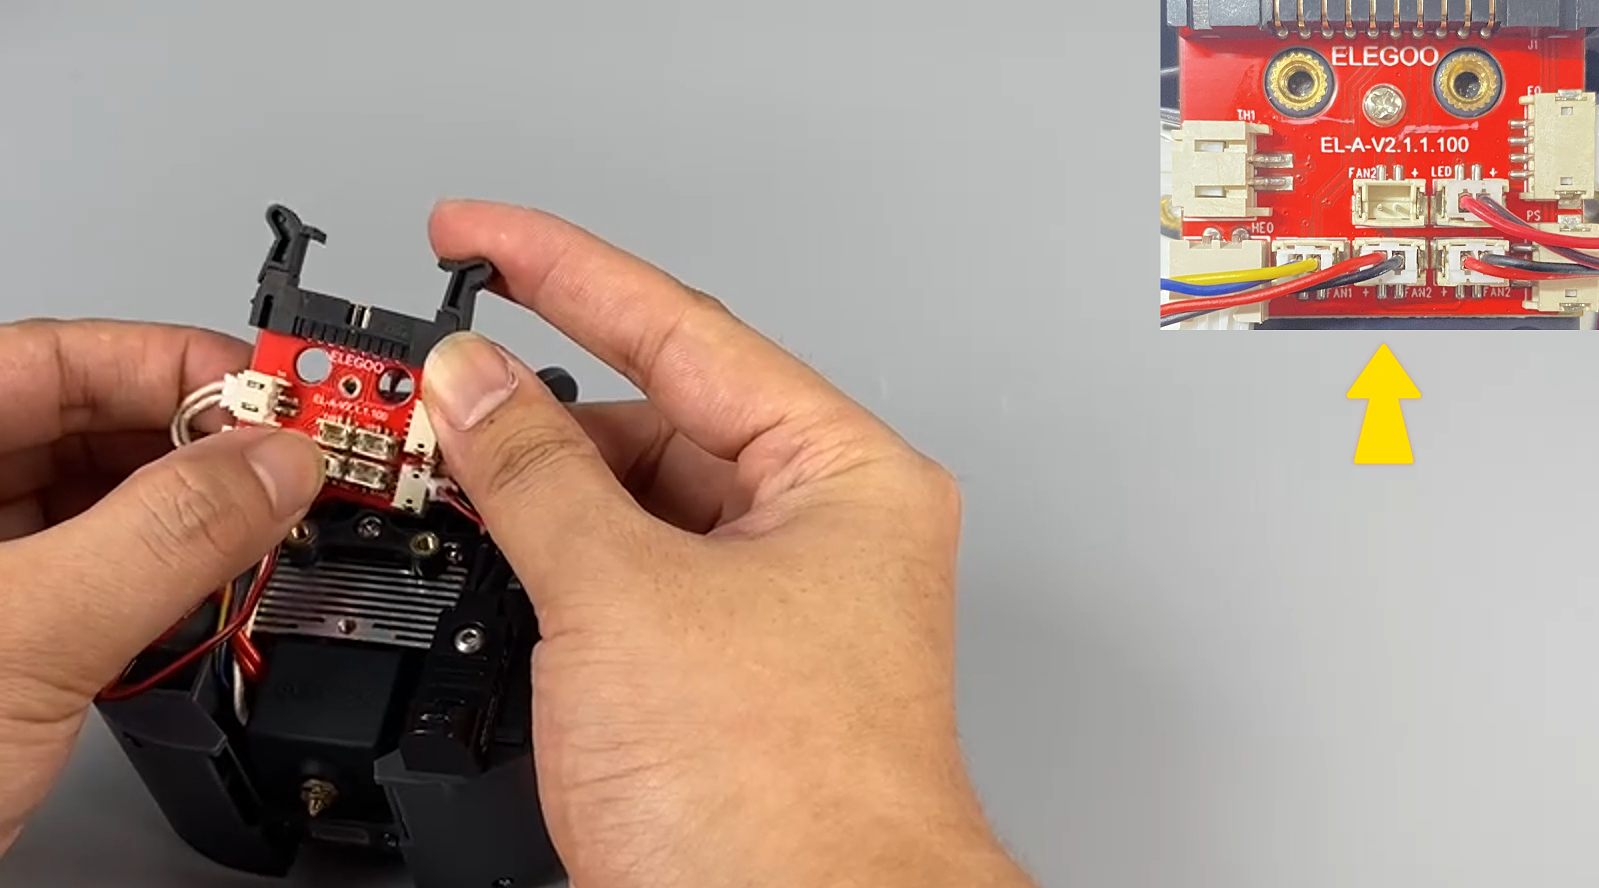
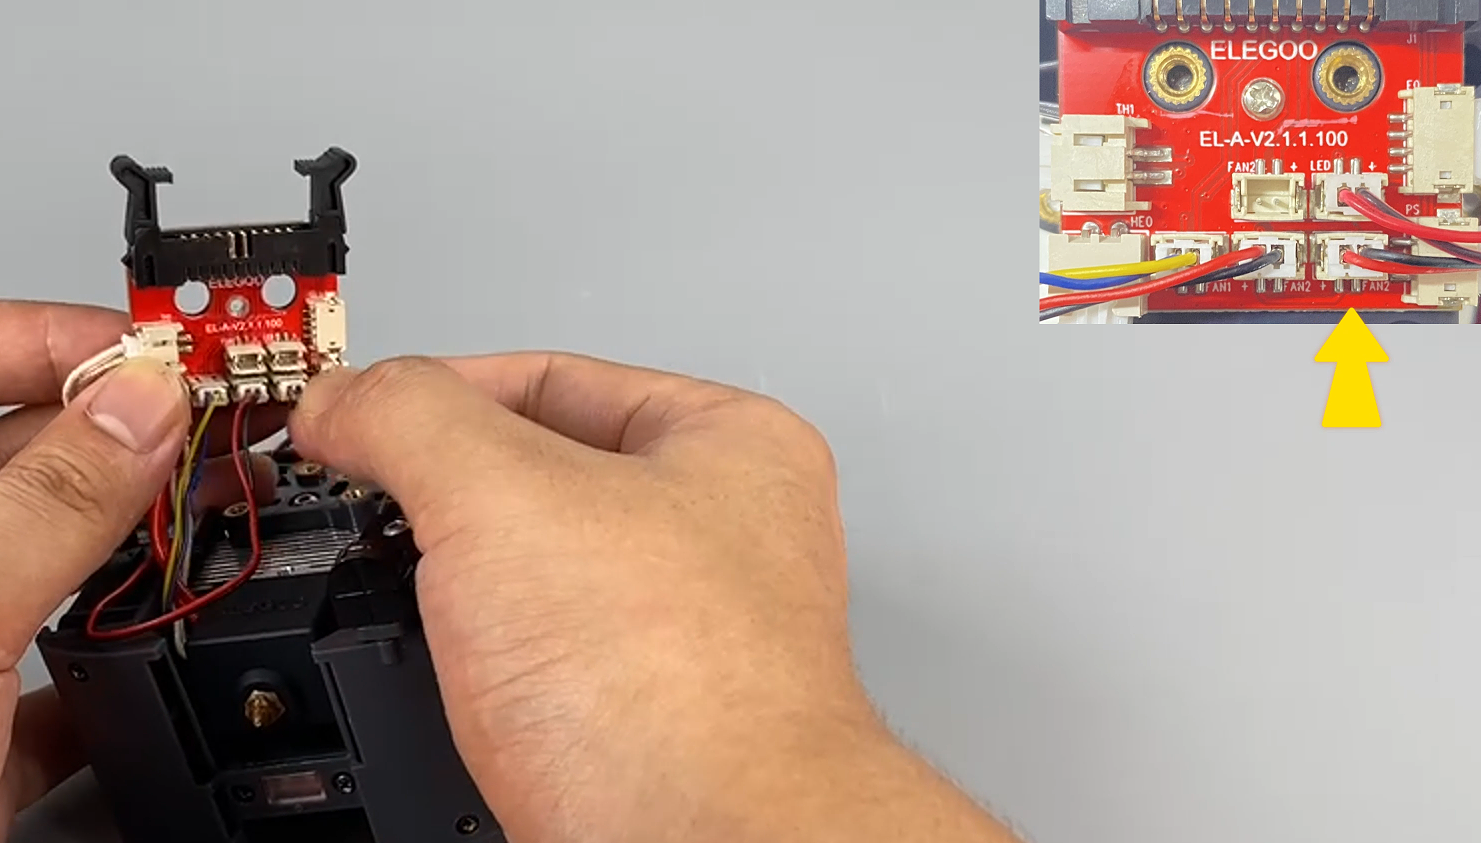
- Insert the ribbon cables of the heat break cooling fan into the FAN1 port on the adapter board.
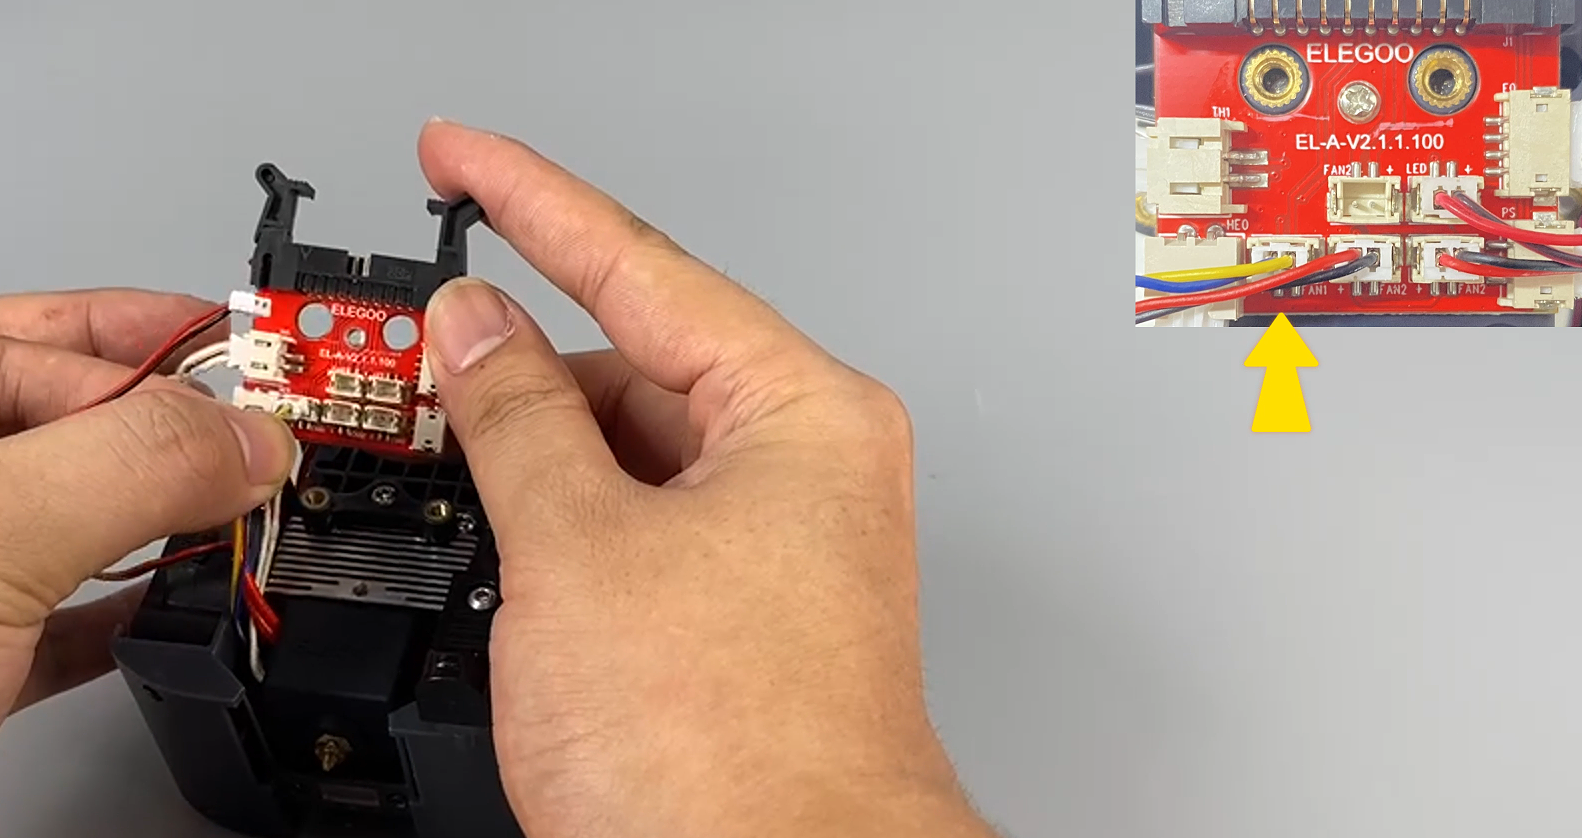
- Insert the cables of the left and right model cooling fans into the FAN2 ports on the extruder adapter board. The two FAN2 ports on the adapter board are compatible with each other.
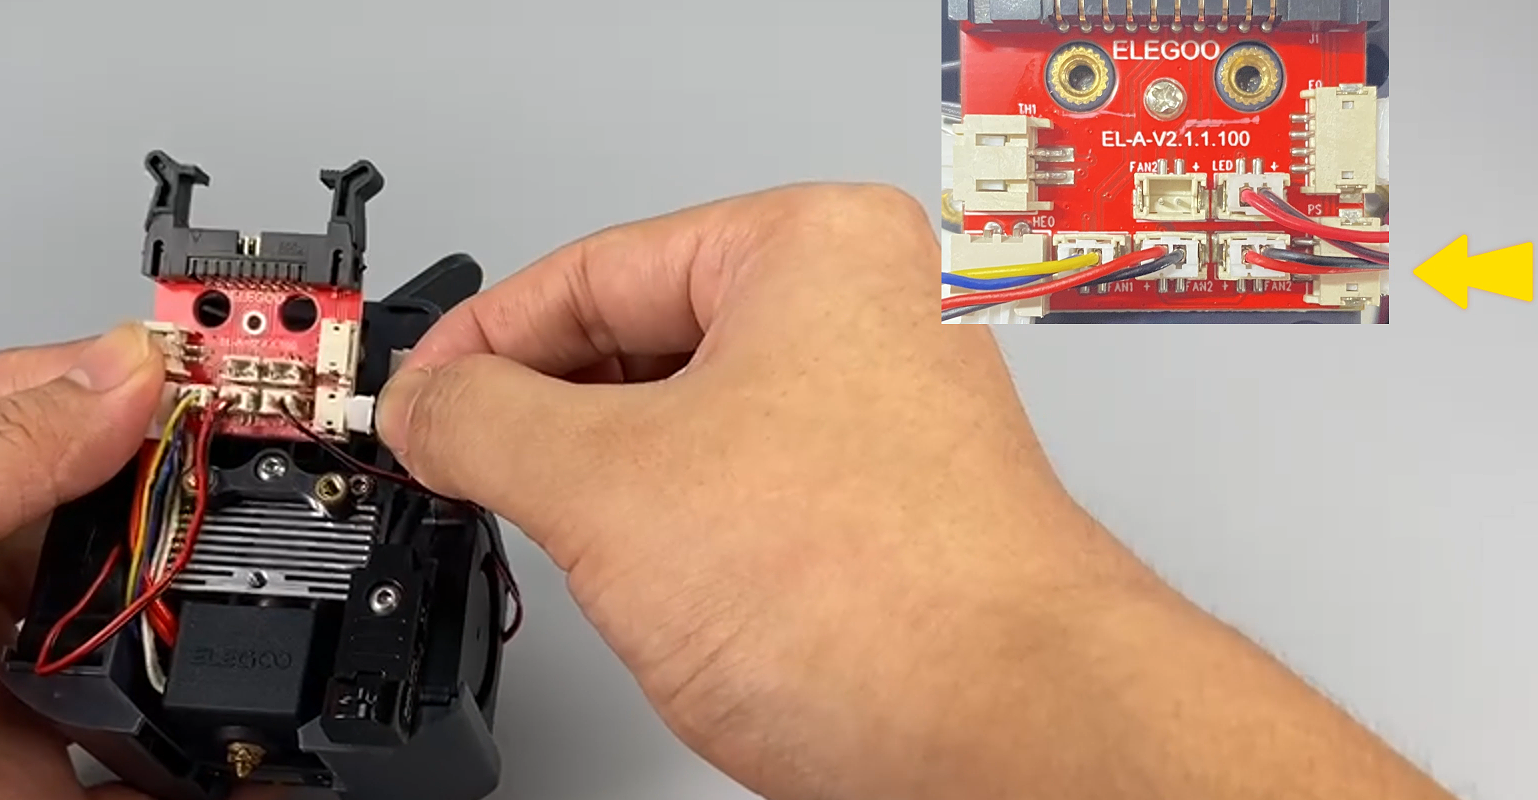
- Insert the cables of the proximity switch into the PS port on the extruder adapter board.
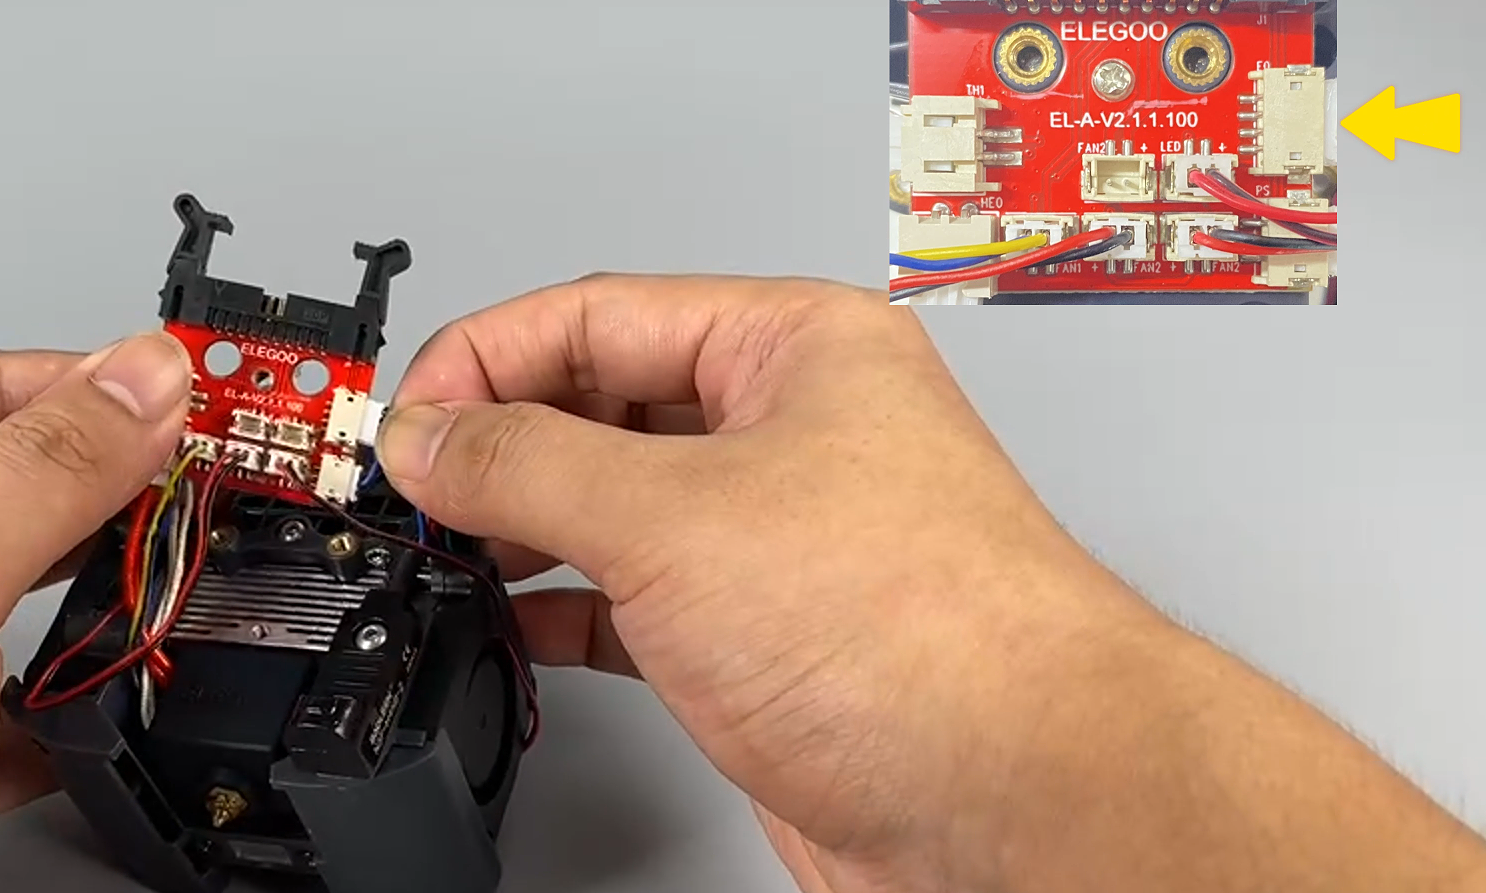
- Insert the cables of the extruded motor into the E0 port on the extruder adapter board.
- Insert the cables of the nozzle light into the LED port on the extruder adapter board.
- Tighten a fixed screw on the extruder adapter board using a Phillips screwdriver. Replace the extruder adapter board.
¶ 3 - Install the print head
- Mount the front cover of the print head assembly (grooved design, slide-in mounting).
- Put the print head assembly in the front of the print head. Tighten the two fixing screws of the front cover of the print head using the 2.0mm Allen key.

- Press the clips and insert the print head cable port into the port. The cable passes under the top profile.
- Tighten the two fixing screws of the cable fixture and two fixing screw of the print head using a 2.0mm Allen key.
- Align the fan assembly with the screw holes. The air outlet face downward. Tighten the three fixing screws of the rear fan assembly using the 2.5mm Allen key. Insert the fan assembly cable port.

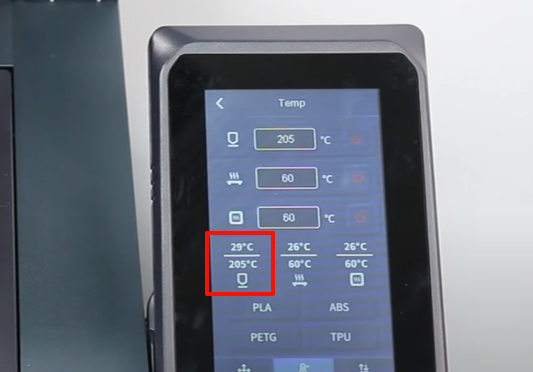
- Power on the printer. Select Prepare - Temperature. Set the temperature of the nozzle to 205 ℃.
- Press the extruder handle to feed the filament into the extruder, then click Feed and Retract on the touchscreen, set the length of the extruded filament, and click Feed.
- Observe that the filament is extruded normally from the nozzle. The printer is ready for use after it is re-leveled.