¶ Tools and Materials
- A 2.0 mm Allen key
- A 2.5 mm Allen key
- A new power
¶ Tutorial Video
¶ Instruction
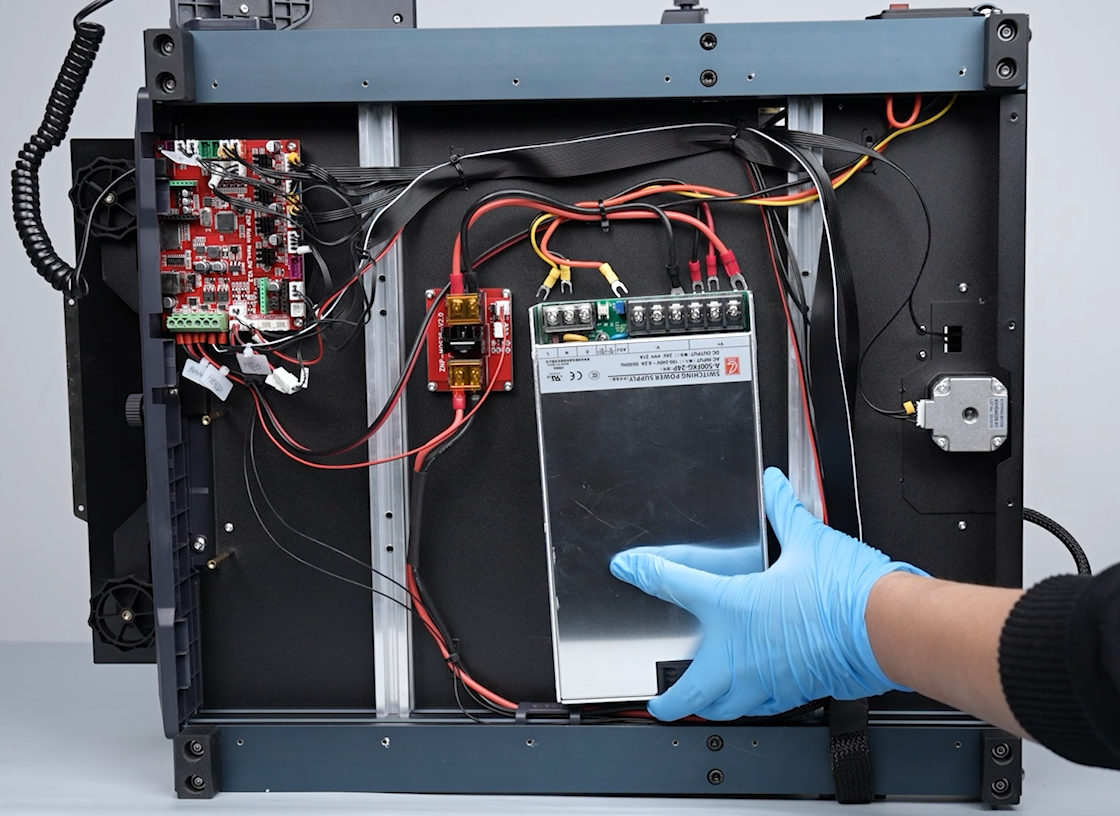
¶ Remove the old power
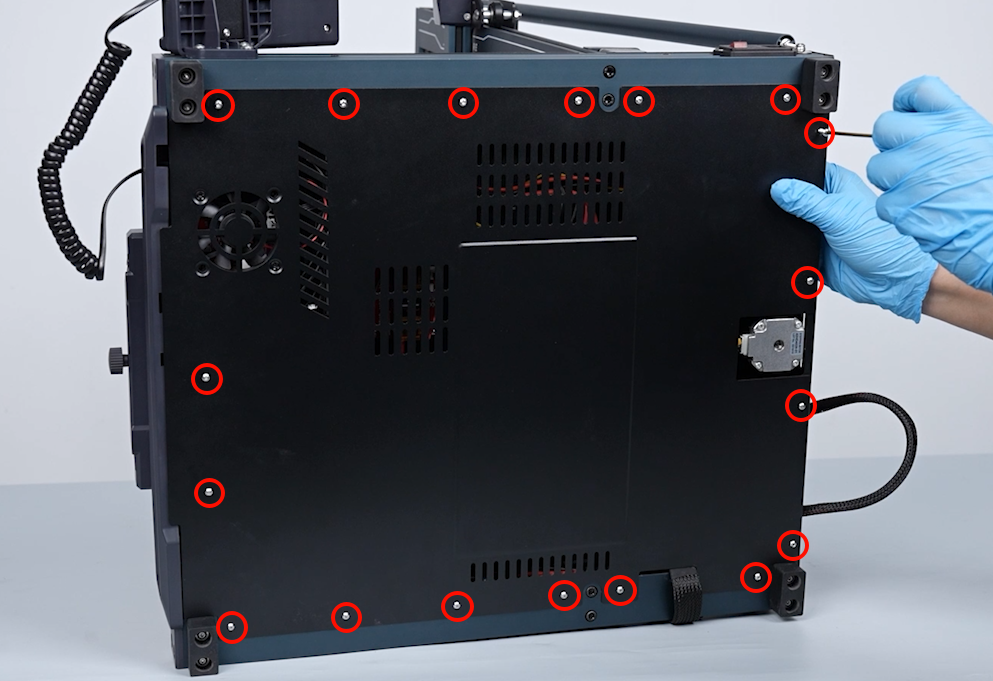
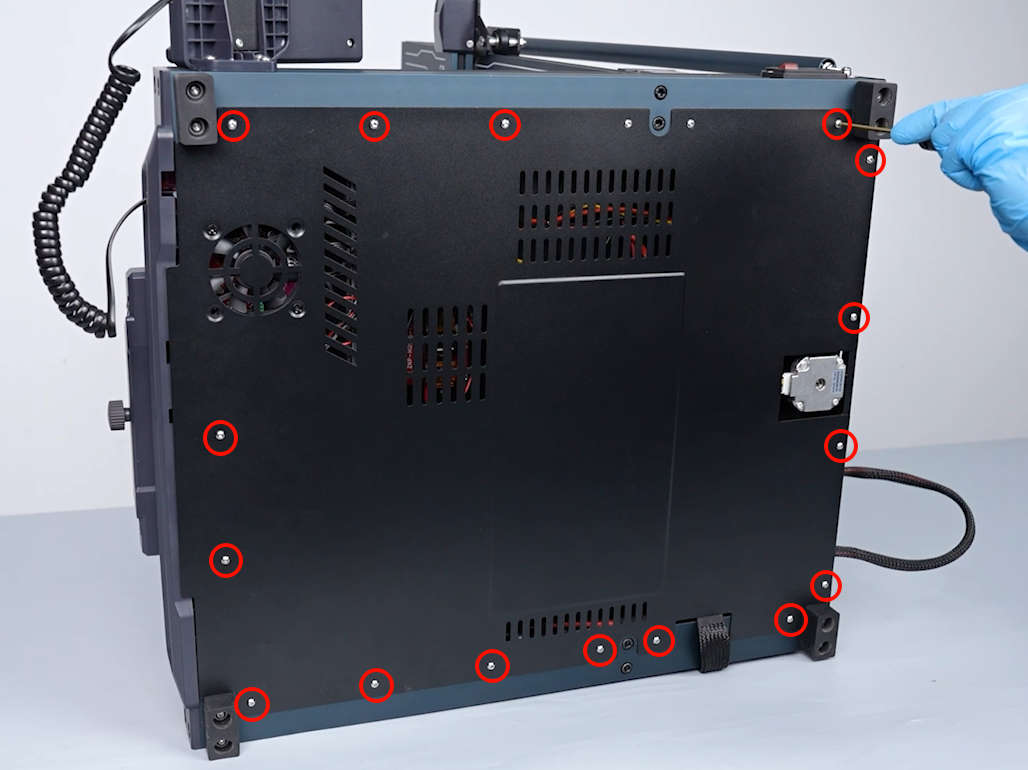
- Power off the printer and unplug the power cord. Loosen the 18 screws securing the bottom cover of the printer using a 2.0 mm Allen key.
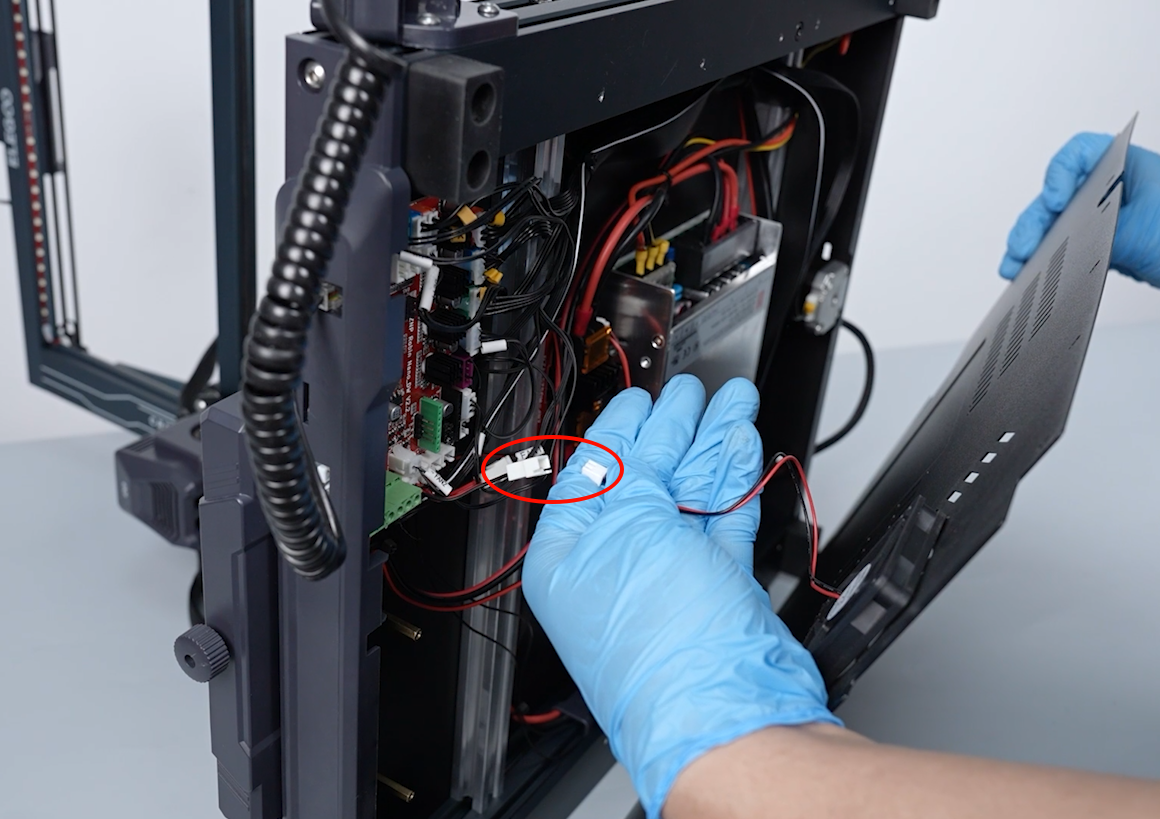
- Unplug the cable port of the motherboard cooling fan.
Note: Carefully remove the bottom cover since cables are seated inside the bottom.
- Lift the protective cover of the connecting cables port.
- Loosen the screws at the connecting cable ports of the power using a Phillips screwdriver and remove the connecting cables.
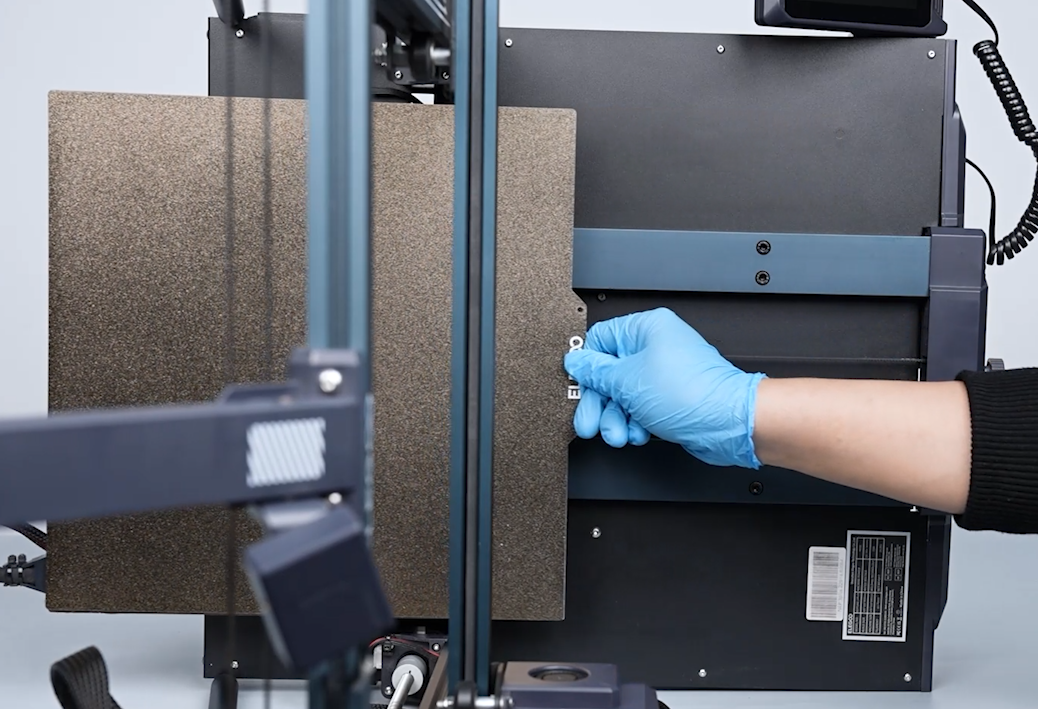
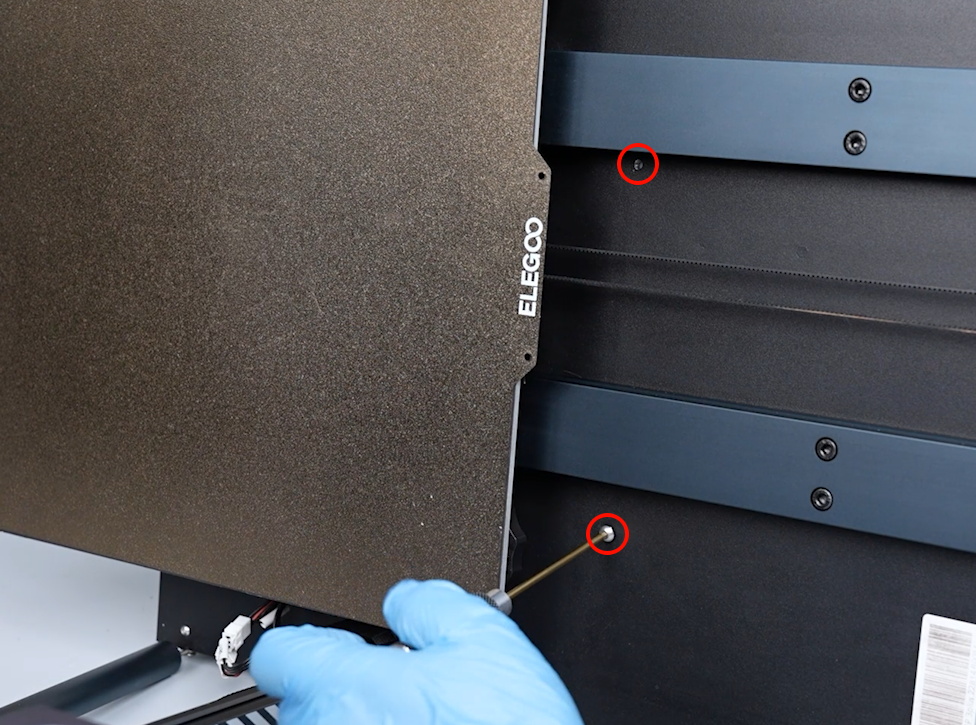
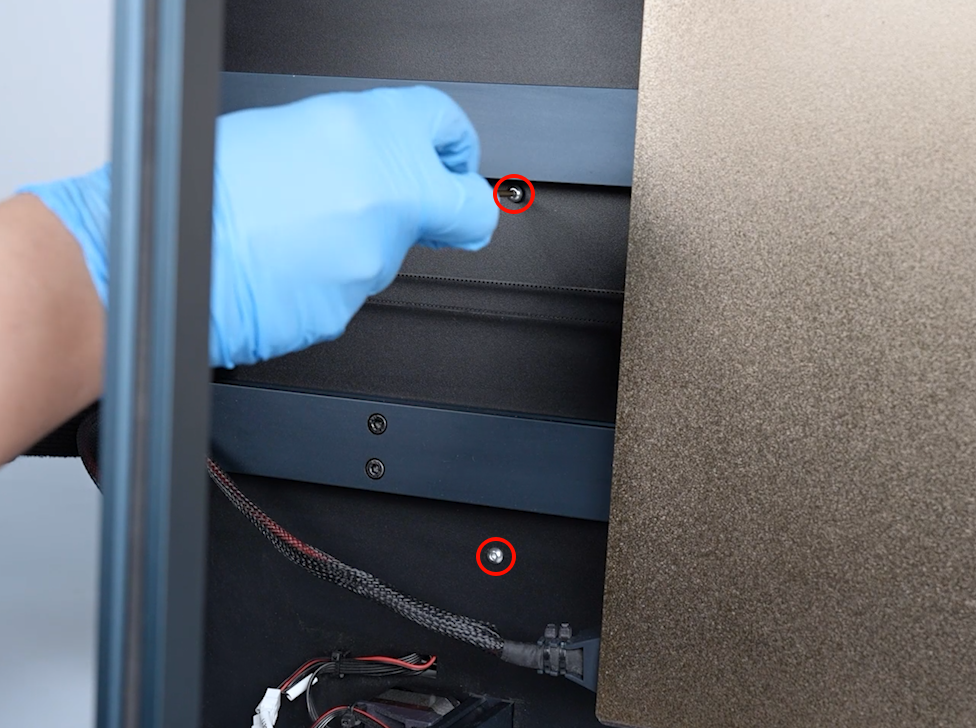
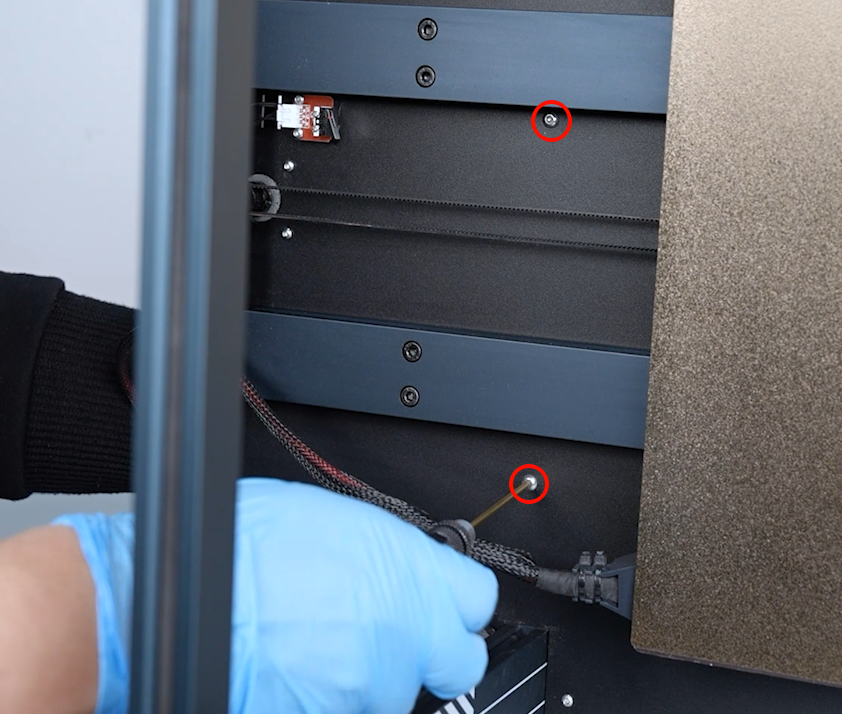
- Slide the heated bed. Loosen the 4 screws securing the power using a 2.5 mm Allen key. Remove the old power.
Note: Hold the power to prevent it from falling while loosening the last two screws.
¶ Install the new power
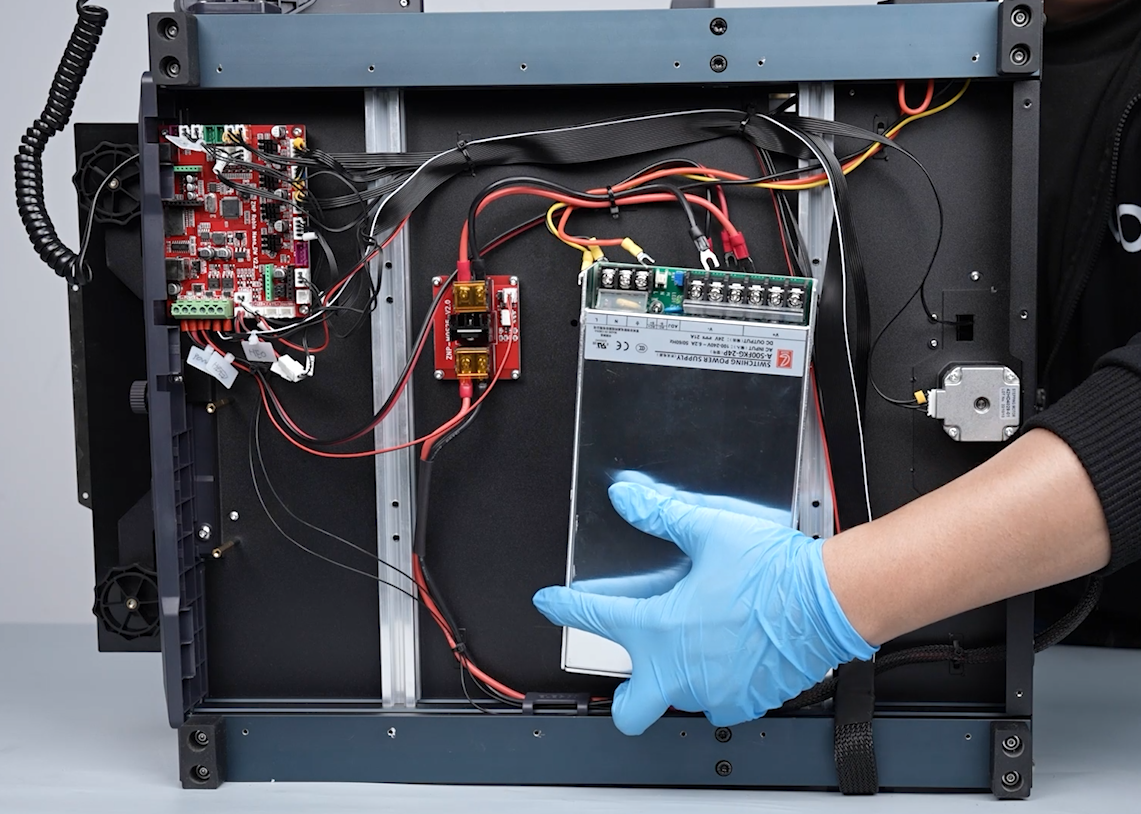
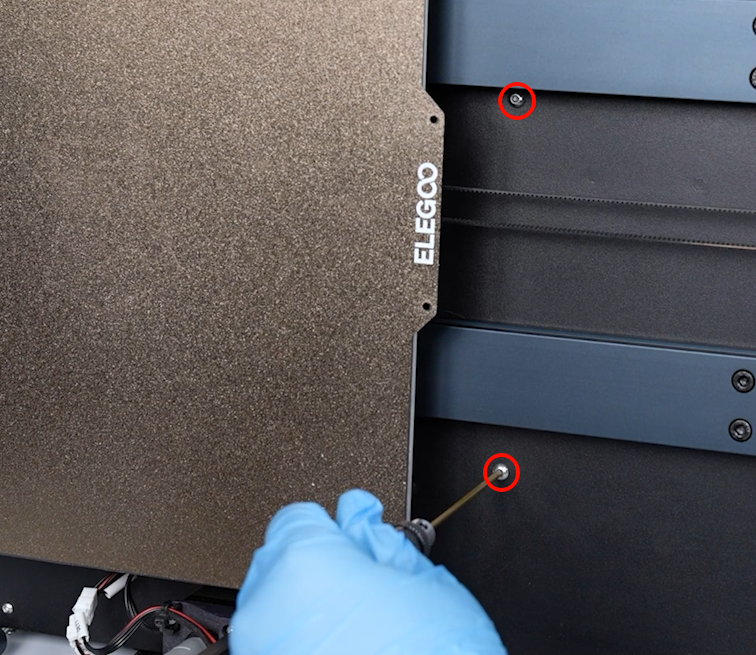
- Prepare the new power. Align the power with the screw holes and put it in the installation position. Tighten the four screws securing the power using the 2.5 mm Allen key.
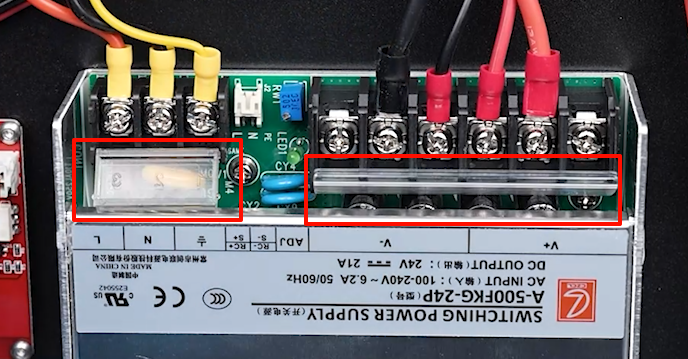
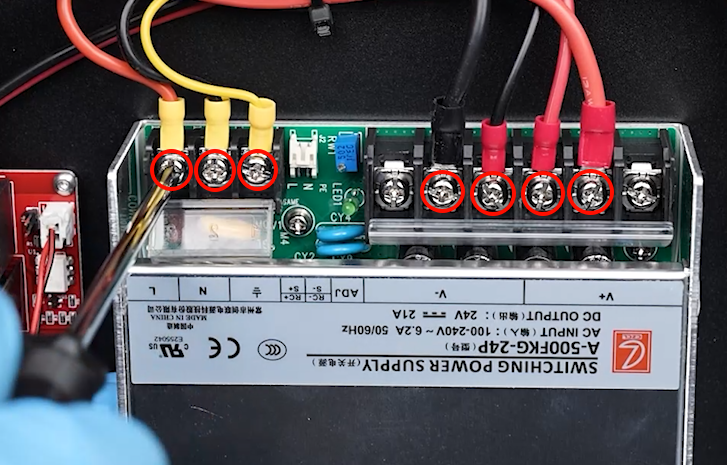
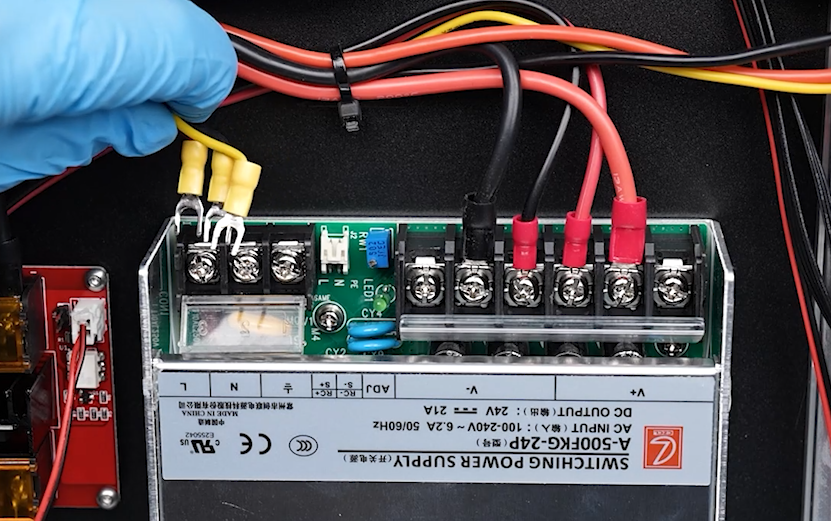
- At the input terminal, insert the red connecting cable with yellow terminal into the "L" port. Tighten the screw and secure them.
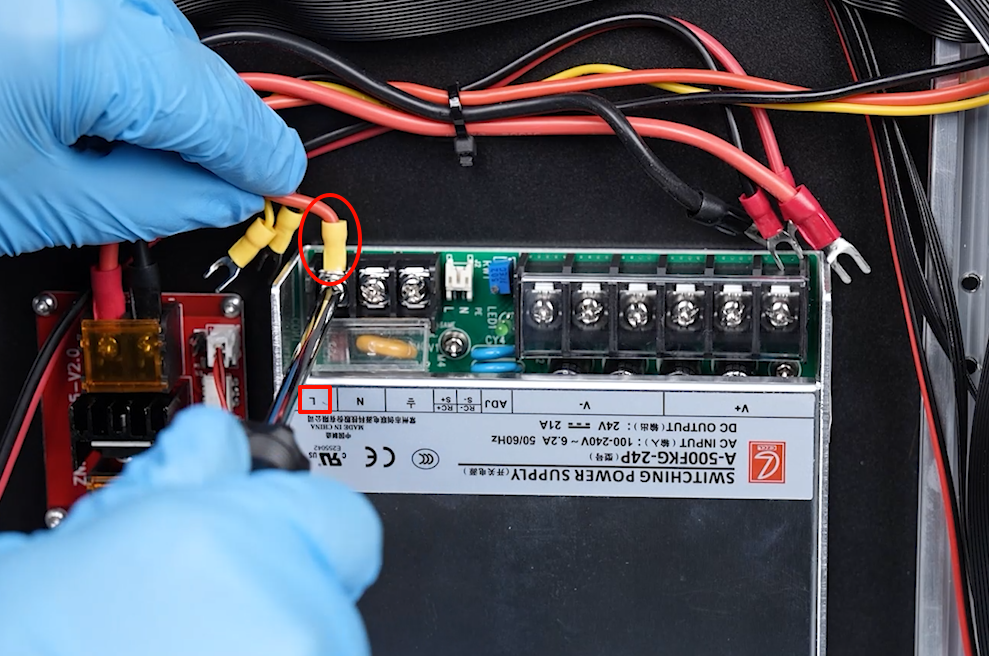
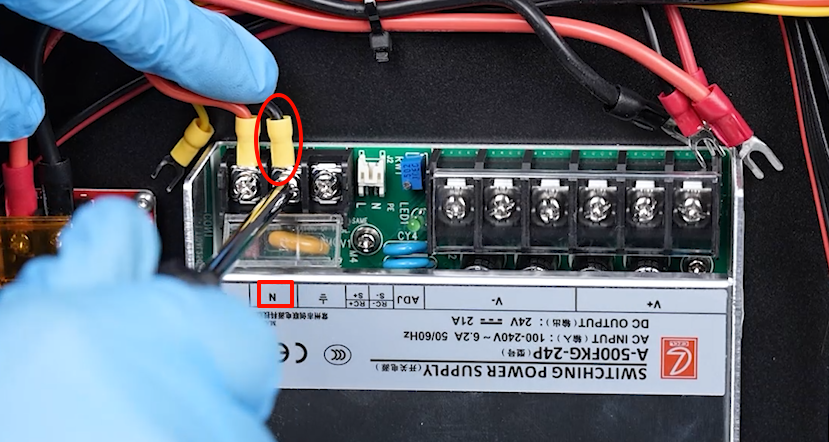
- Insert the black connecting cable with yellow terminal into the "N" port. Tighten the screw and secure them.
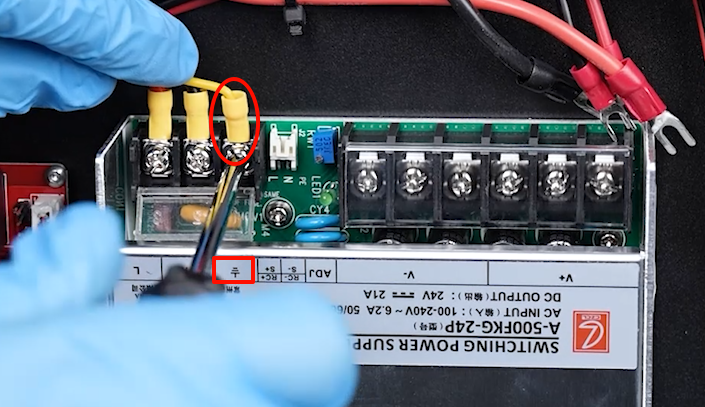
- Insert the yellow connecting cable with yellow terminal into the "⏚(grounding)" port. Tighten the screw and secure them.
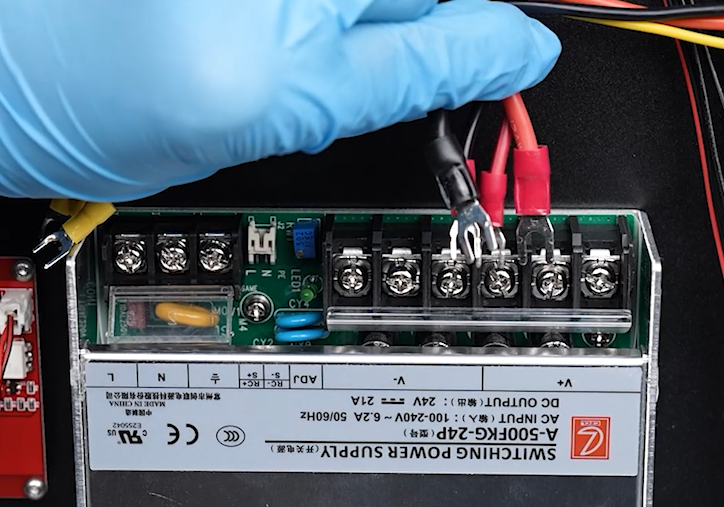
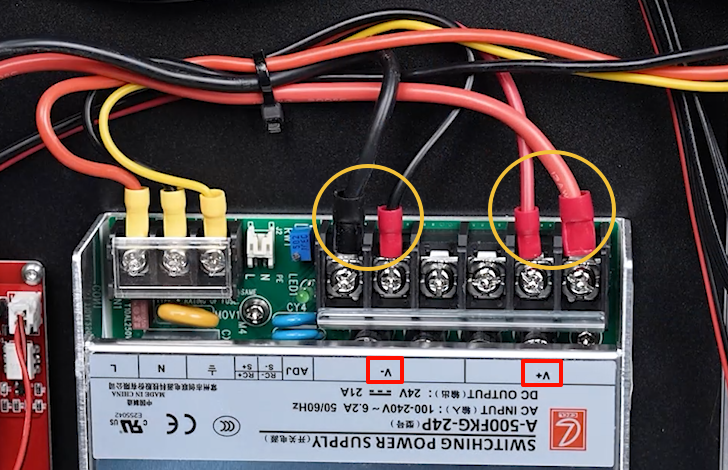
- At the input terminal, insert the remaining four connecting cables into the power port based on the principle that red color represents the anode, while the black color represents the cathode.
Note: V+ represents the anode and V- represents the cathode.
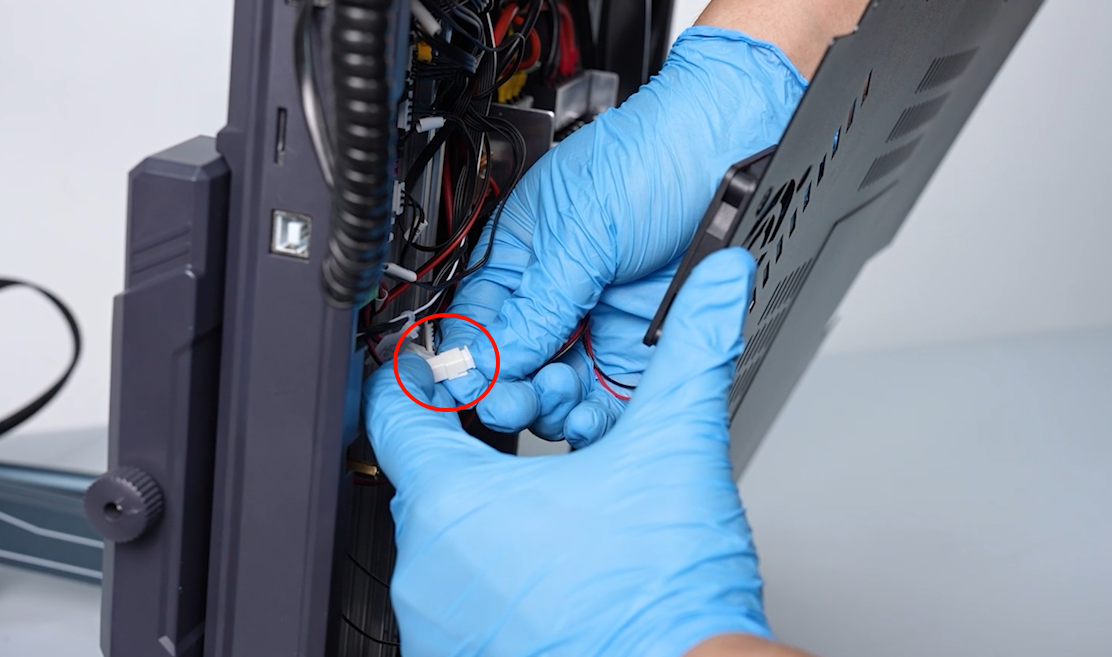
- Prepare the bottom cover of the printer. Insert the cables of the motherboard cooling fan into the FAN1 port.
- Put the bottom cover in the installation position by aligning it the the screw holes. Use a 2.0 mm Allen key to loosen the 18 screws securing the bottom cover.
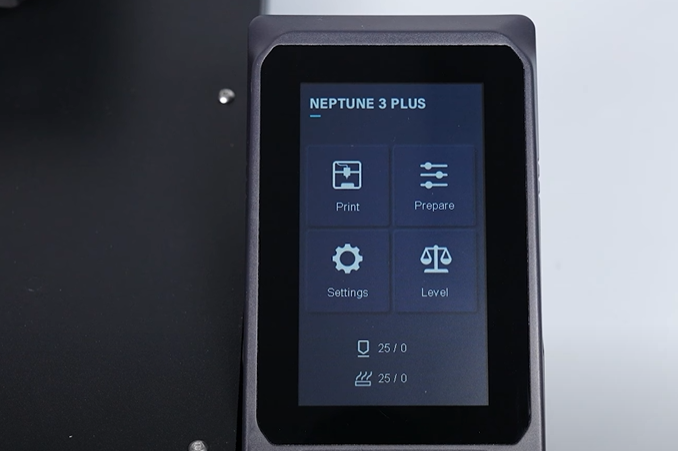
- Plug in the power cord and power on the printer. The printer is ready for use after the touchscreen works normally.