¶ Fault Symptoms
After starting a print, the Z-axis does not respond or moves intermittently with stuttering.
¶ Possible Causes
- The spring cable is stuck or obstructed.
- The screws securing the Z motor are loose.
- The Z-axis lead screw and linear guide lack lubrication.
- The anti-backlash nut is damaged.
- The Z motor connector is loose.
¶ Required Tools
- 2.0 mm Allen key
- 2.5 mm Allen key
- Cable ties
- White lithium grease
- Lint-free cloth
- Nitrile gloves
¶ Troubleshooting Steps
¶ Safety Warning
When using the touchscreen to control Z-axis movement, remove the build platform first and keep your hands, tools, and other objects away from moving Z-axis components to avoid pinching injuries or collisions.
Before opening the rear cover, cutting cable ties, adjusting internal cables, or loosening screws, turn off the printer and unplug the power cable. Do not touch internal electronic components or adjust cables with metal tools while the printer is powered on.
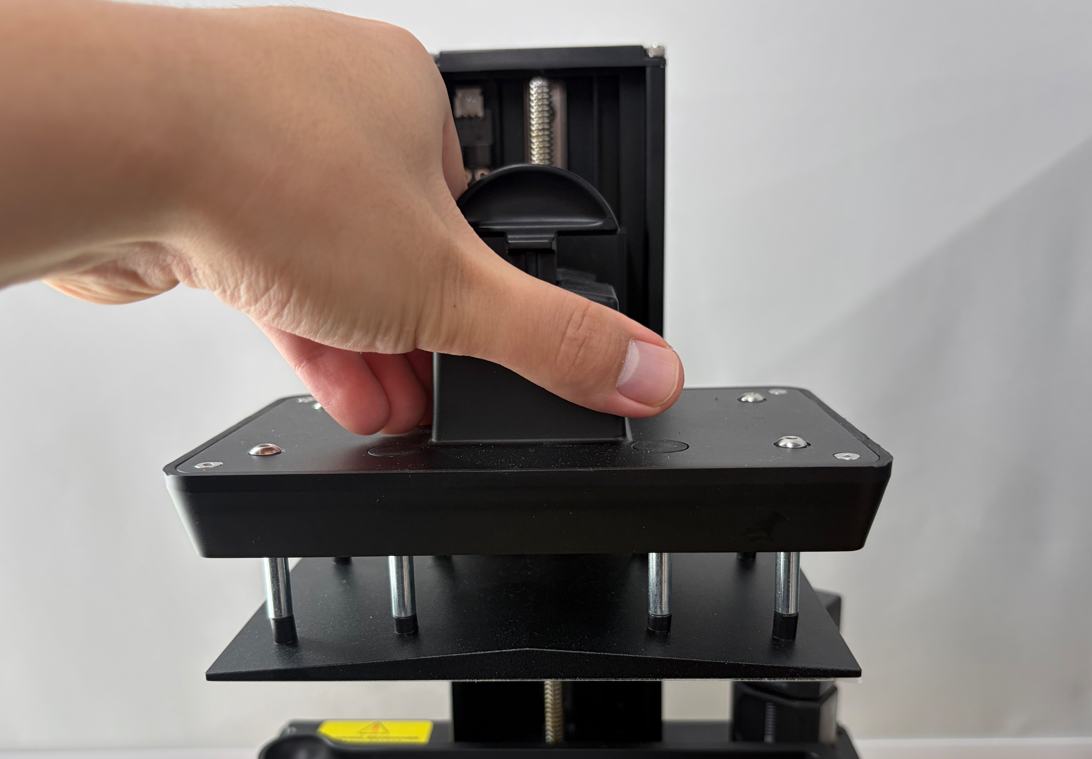
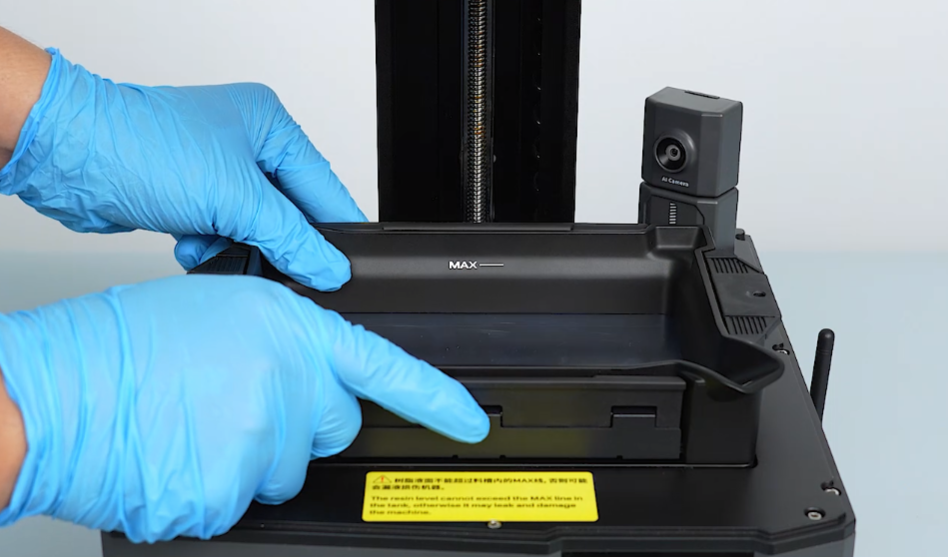
Note: To make the troubleshooting process easier, please remove the UV Cover, build plate, and resin tray before proceeding.
¶ 1. Check Whether the Spring Cable Is Stuck or Obstructed
-
Turn off the printer and unplug the adapter.
-
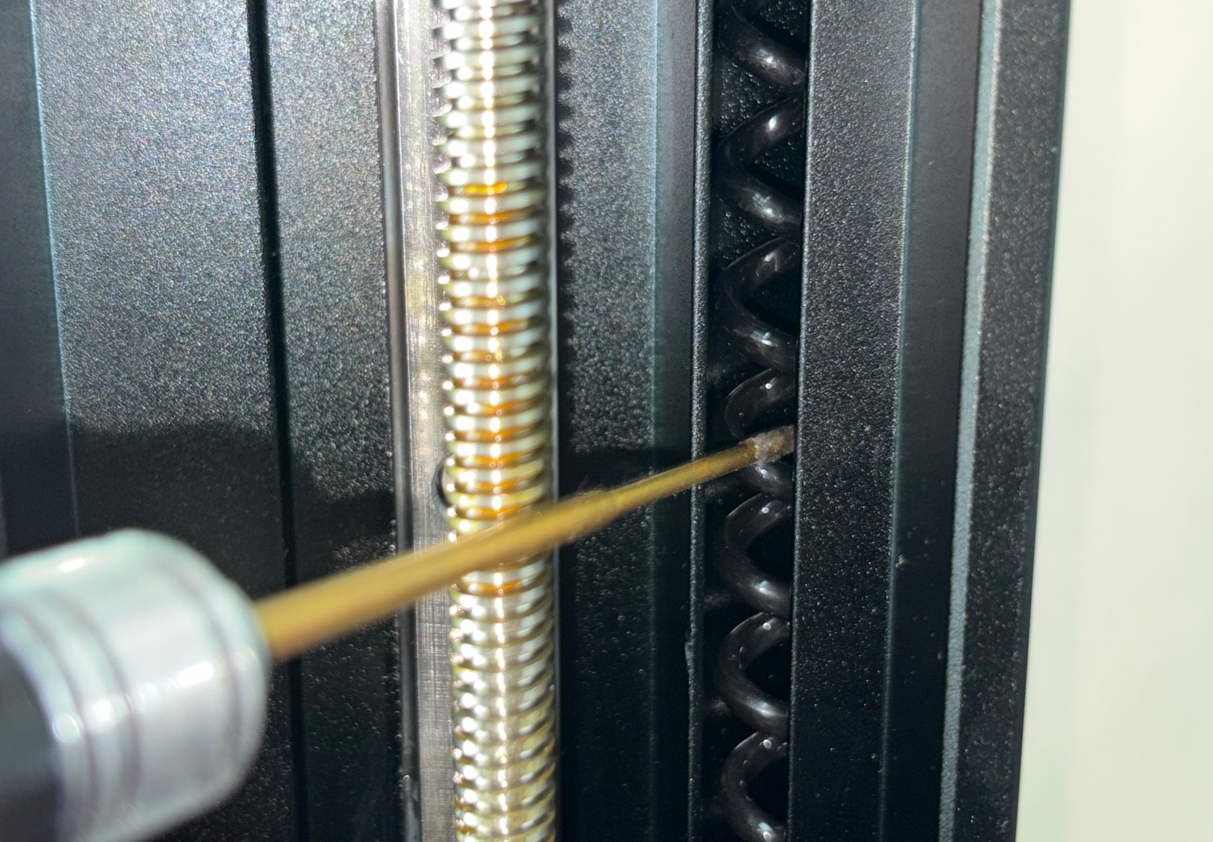
Check whether the spring cable is overlapping, bent, or stuck on other components.
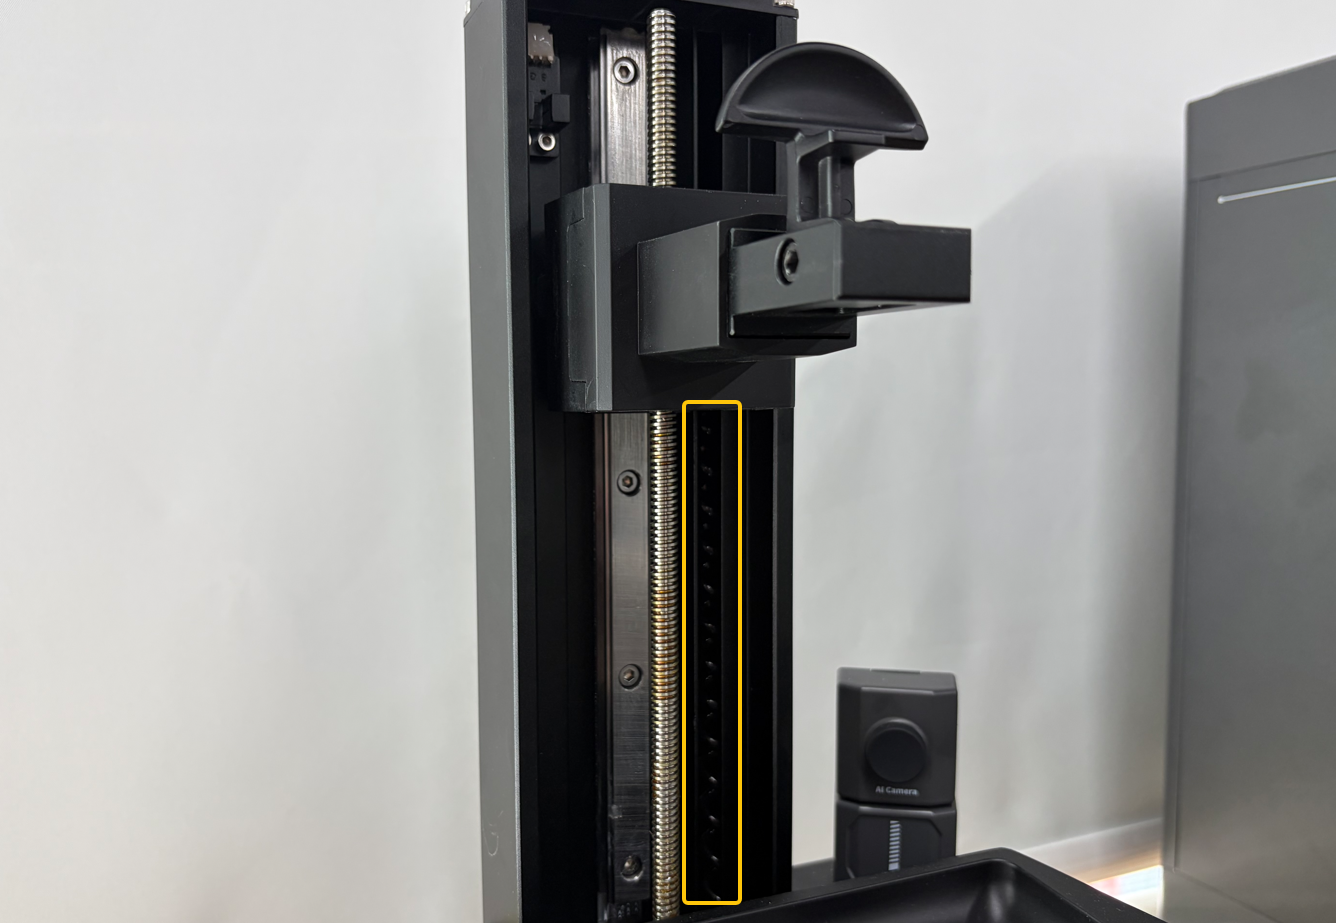
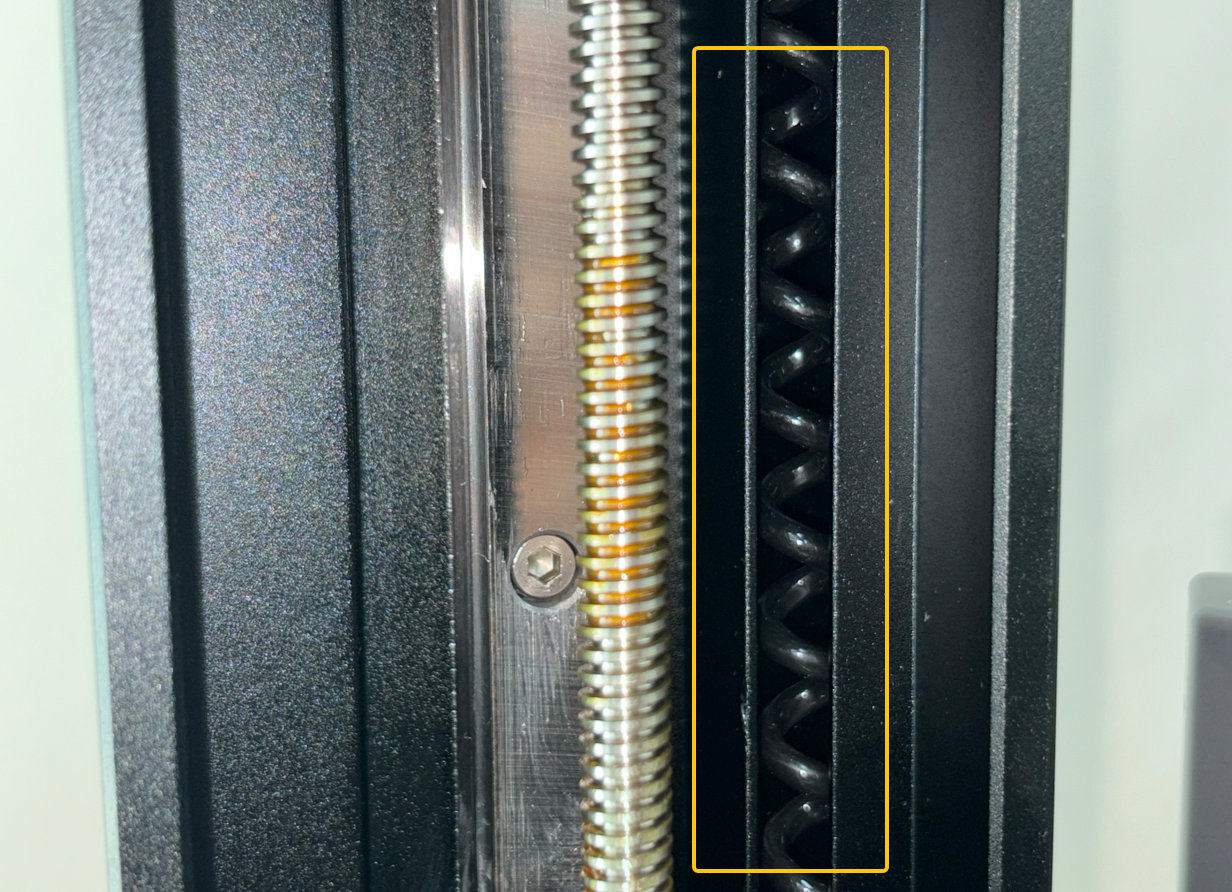
- If the spring cable is overlapping, bent, or stuck, use a screwdriver or another suitable tool to gently move the spring cable downward until it is no longer overlapping or stuck.
Note: When adjusting the spring cable, avoid squeezing, puncturing, or damaging the cable.
-
Remove the tool, reconnect the power, and turn on the printer.
-
Use the touchscreen to move the Z-axis up and down and check whether it moves smoothly.
- If the Z-axis moves smoothly, stop troubleshooting.
- If the Z-axis still operates abnormally, continue troubleshooting with the following steps.
¶ 2. Check Whether the Z Motor Mounting Screws Are Loose
- Check whether the top screws securing the Z motor are loose.
Note: If resin has leaked into the stepper motor, stop troubleshooting immediately. Do not use the printer temporarily. Turn off the printer, take photos, and contact technical support.
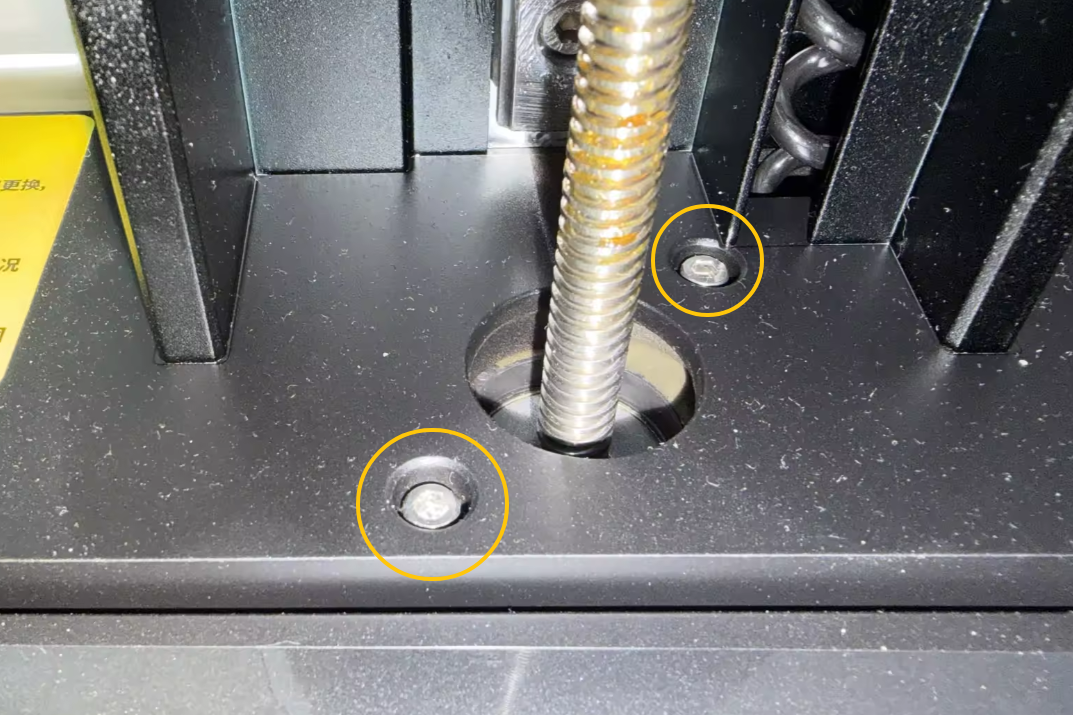
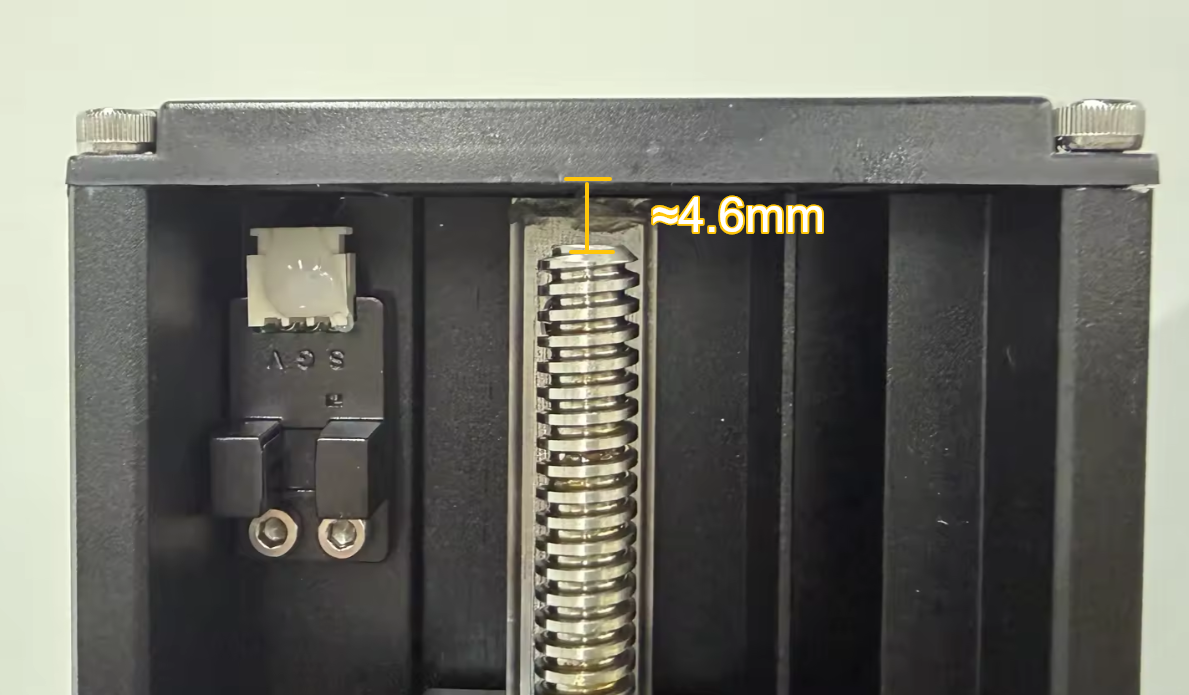
- As a reference, the distance between the Z-axis lead screw and the rear cover should be approximately 4.6 mm. If this distance is greater than 4.6 mm, the Z motor mounting screws may be loose and need to be tightened.
- If the Z motor mounting screws are not loose, continue troubleshooting with the following steps.
¶ 3. Lubricate the Z-axis Lead Screw and Guide Rail
-
Turn off the printer and unplug the adapter.
-
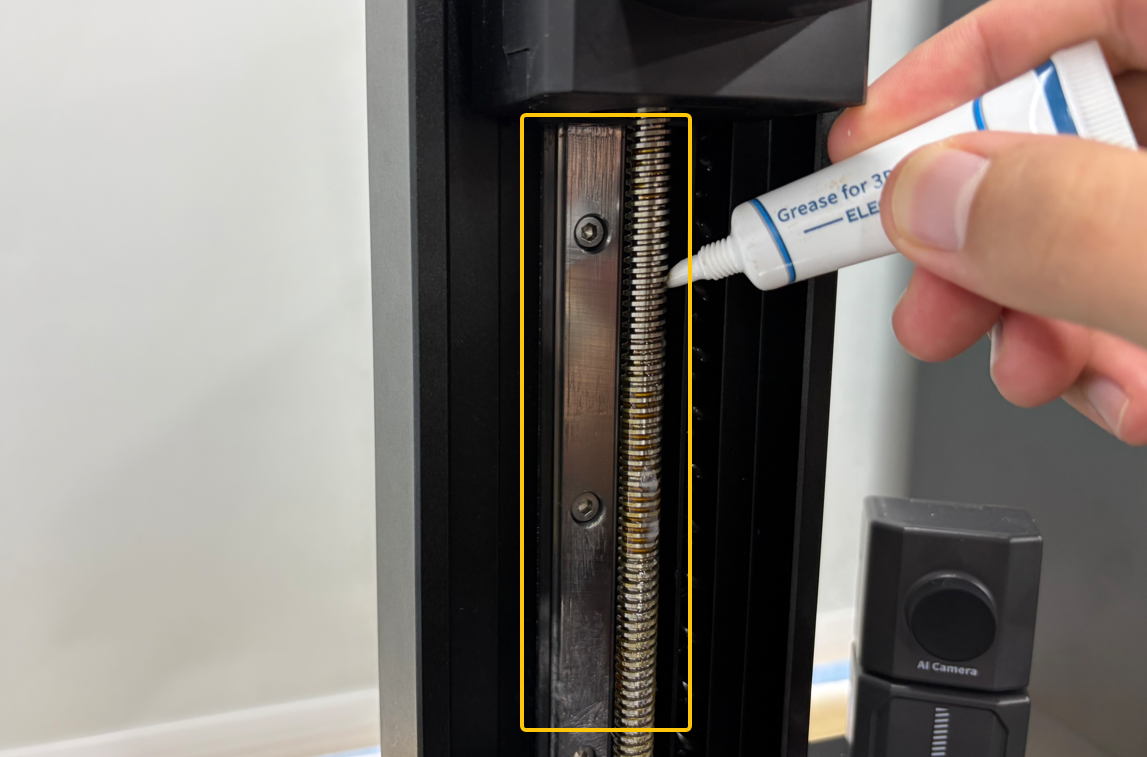
Use a lint-free cloth to clean the surface of the lead screw and guide rail.
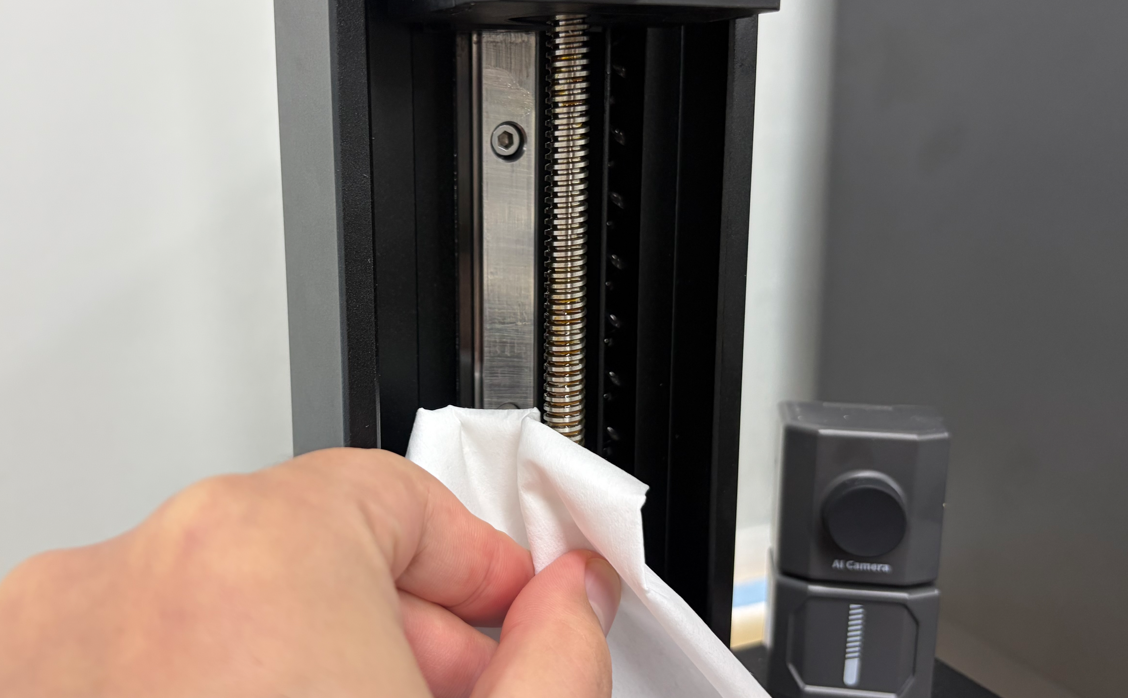
- Apply white lithium grease to the Z-axis lead screw and guide rail. White lithium grease is recommended. Make sure the surfaces of the lead screw and guide rail are fully lubricated.
-
Reconnect the power and turn on the printer.
-
Use the touchscreen to move the Z-axis up and down and check whether it moves smoothly.
- If the Z-axis moves smoothly, stop troubleshooting.
- If the Z-axis still operates abnormally, continue troubleshooting with the following steps.
¶ 4. Check the Z-axis Anti-Backlash Nut
-
Turn off the printer and unplug the adapter.
-
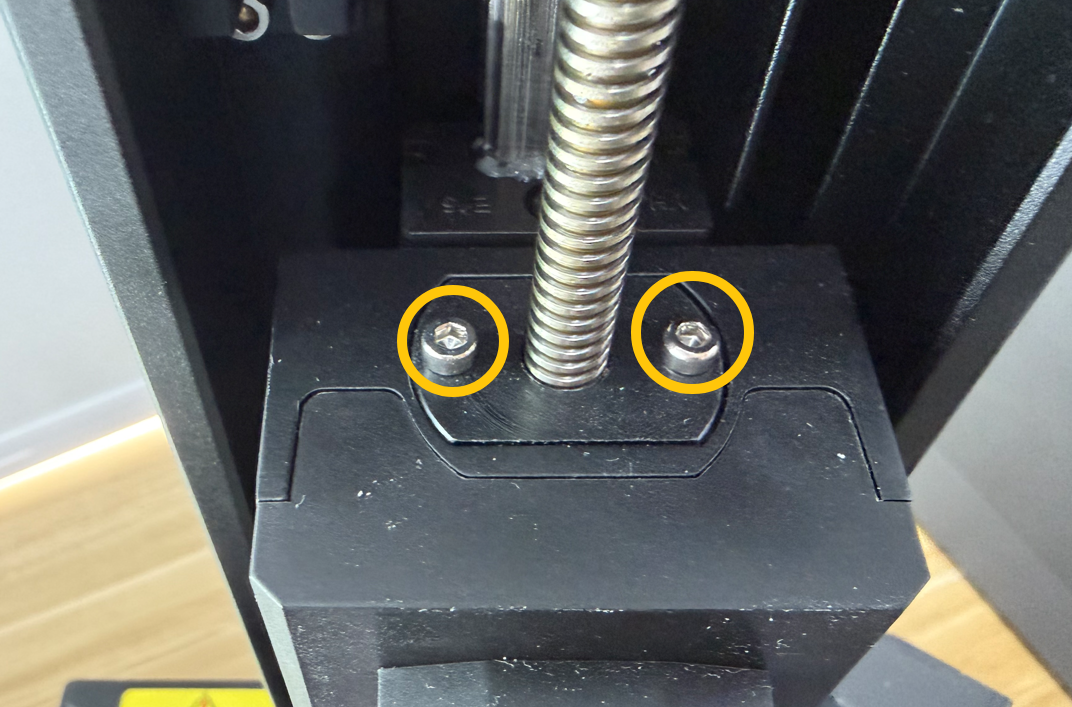
Locate the fixing screw for the anti-backlash nut on the Z motor.
-
Use a 2.5 mm Allen key to loosen the anti-backlash nut fixing screw.
-
Make sure the tool has been removed and keep your hands and other objects away from the Z-axis movement area.
-
Turn the printer back on.
-
Use the touchscreen to move the Z-axis up and down and check whether it operates normally.
- If the Z-axis operates normally after loosening the fixing screw, the anti-backlash nut needs to be replaced.
- If the Z-axis still does not operate normally after loosening the fixing screw, continue troubleshooting with the following steps.
Note: Before continuing further troubleshooting, tighten the fixing screw of the anti-backlash nut again.
¶ 5. Adjust the Spring Cable Length
-
Turn off the printer switch and unplug the adapter.
-
Use a 2.0 mm Allen key to remove the seven screws securing the rear cover.
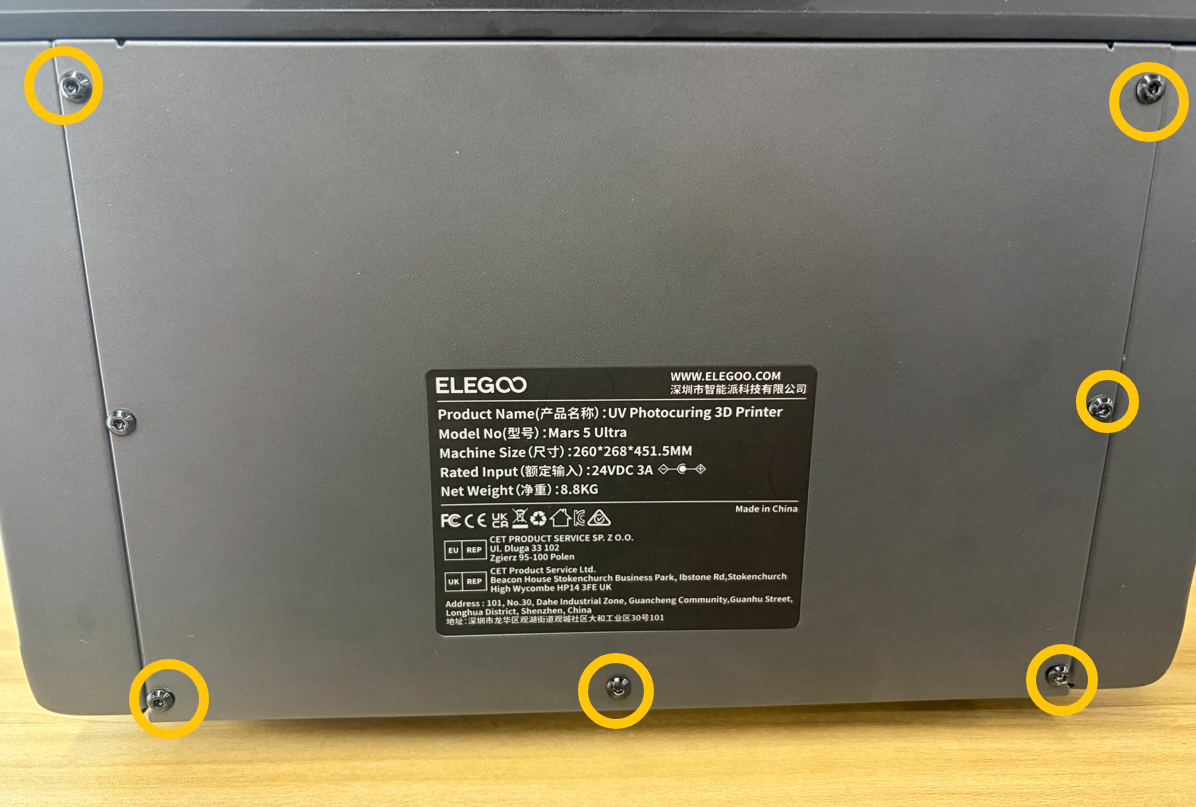
- Remove the rear cover of the printer.
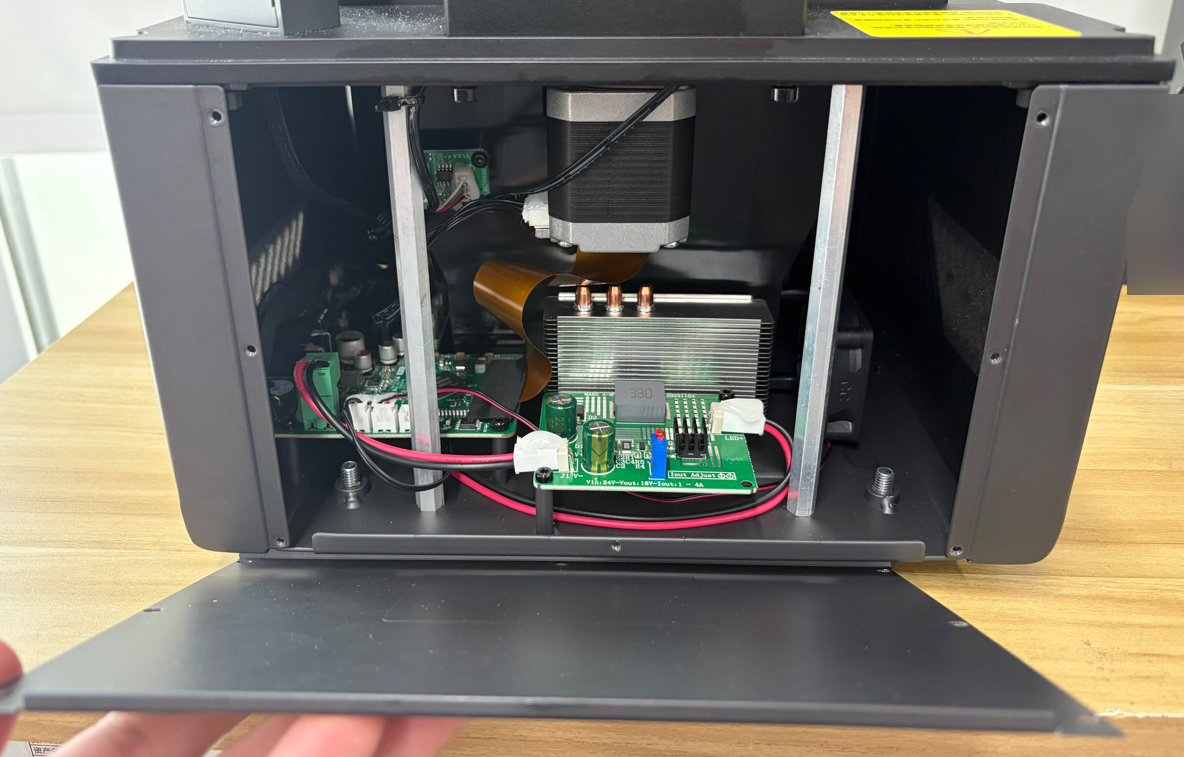
- Locate the cable tie securing the spring cable and cut the cable tie.
Note: Be careful not to cut the spring cable when cutting the cable tie.
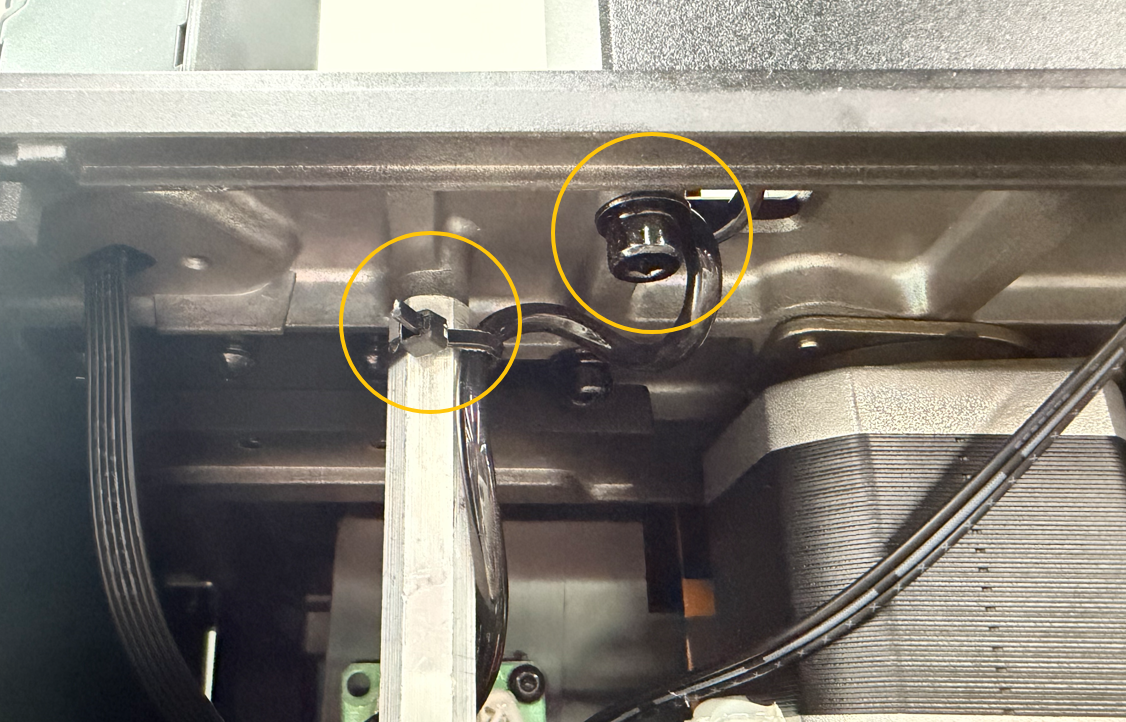
- Pull the spring cable downward so that it extends approximately two additional loops downward. Secure the spring cable again using a new cable tie.
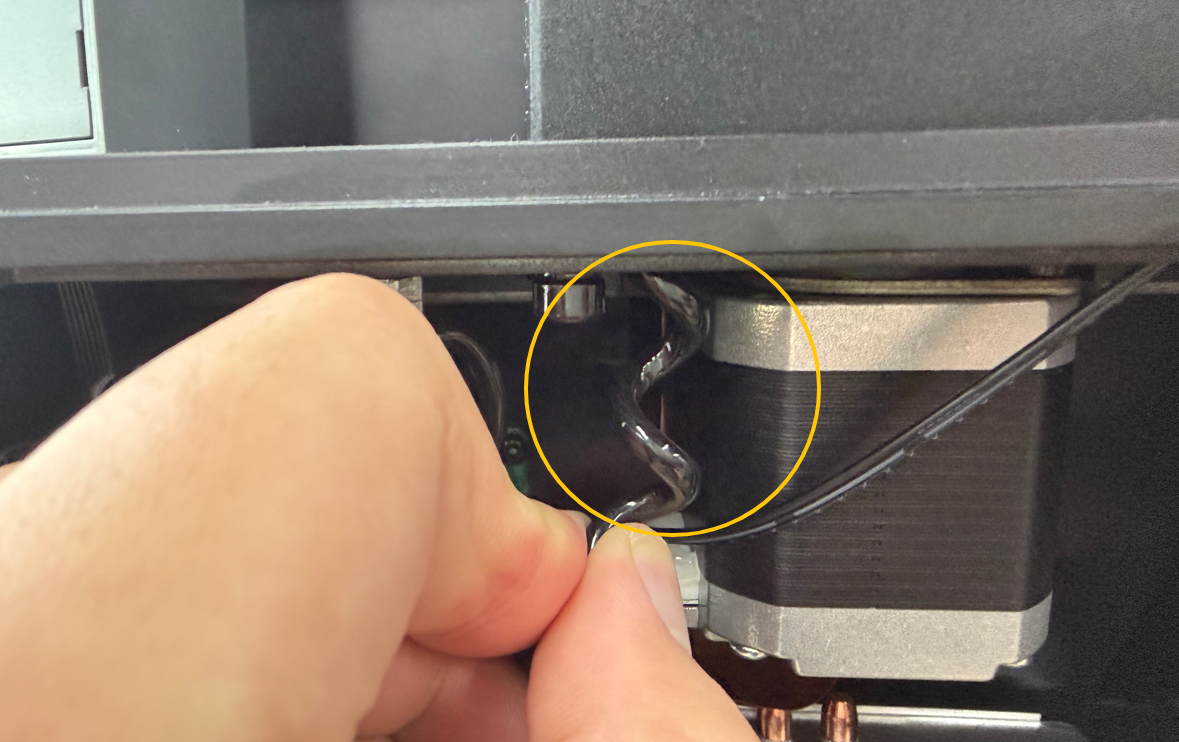
- Use the touchscreen to move the Z-axis up and down and check whether it moves smoothly.
- If the Z-axis moves smoothly, stop troubleshooting.
- If the Z-axis does not rotate or still moves with stuttering, continue troubleshooting with the following steps.
¶ 6. Check the Z Motor Connector
- Use a 2.5 mm Allen key to remove the three screws securing the upper part of the right panel.
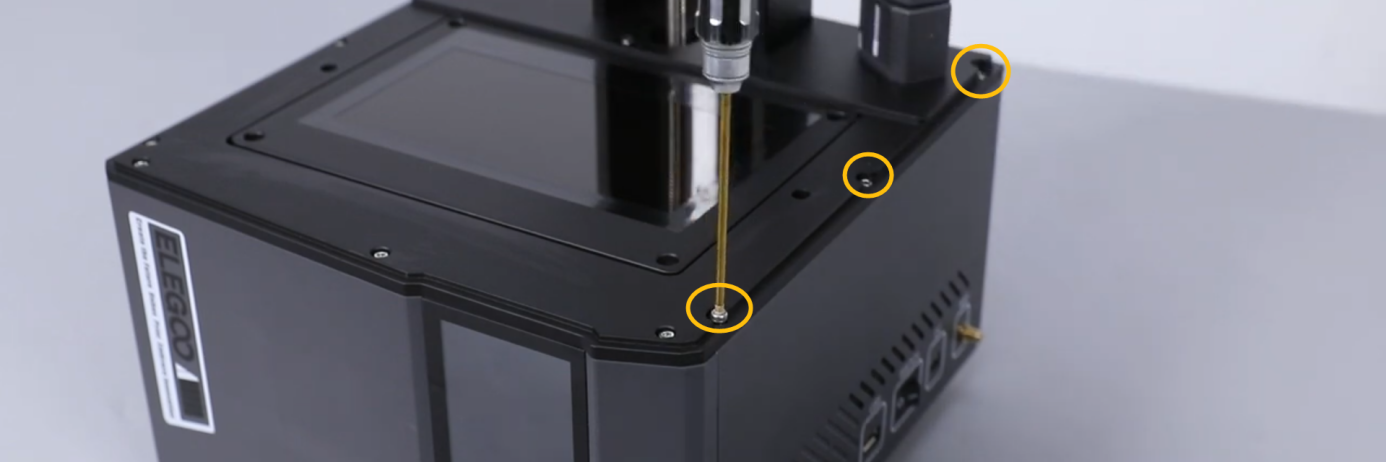
- Use a 2.0 mm Allen key to remove the three screws securing the lower part of the right panel.
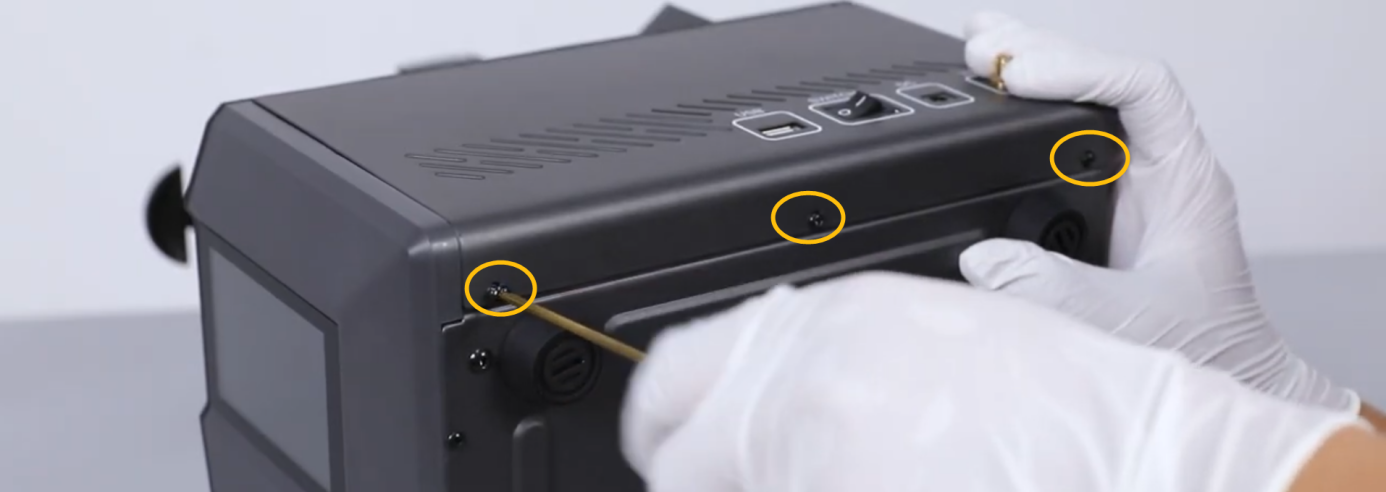
Note: A WiFi antenna cable is connected between the right panel and the mainboard. Be careful not to damage the antenna cable when removing the right panel.
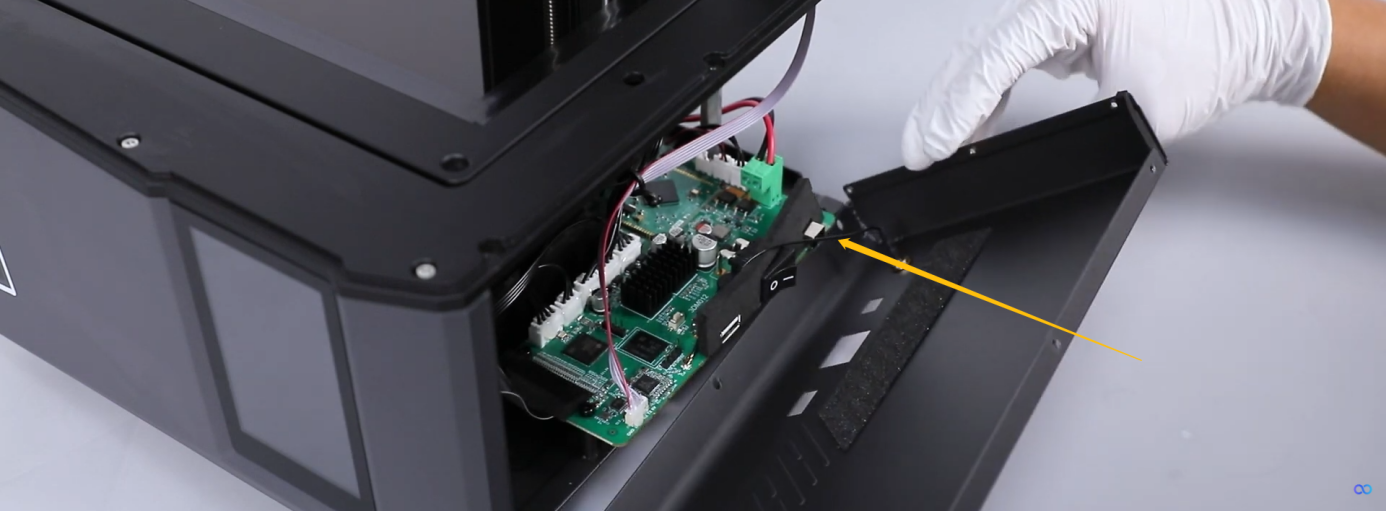
- Disconnect the WiFi antenna connector and remove the right panel.
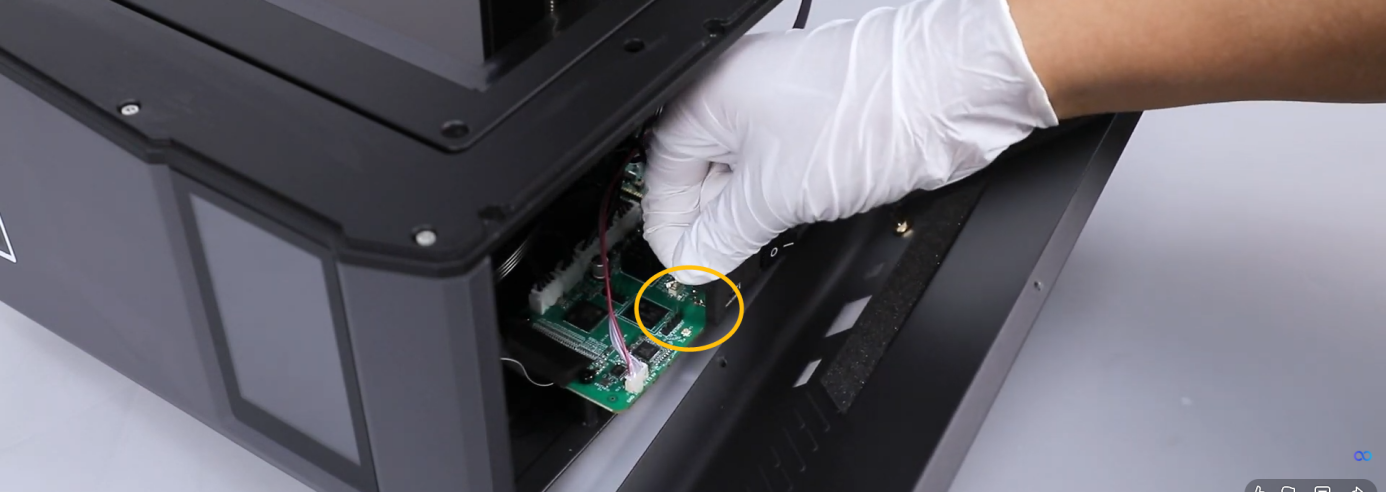
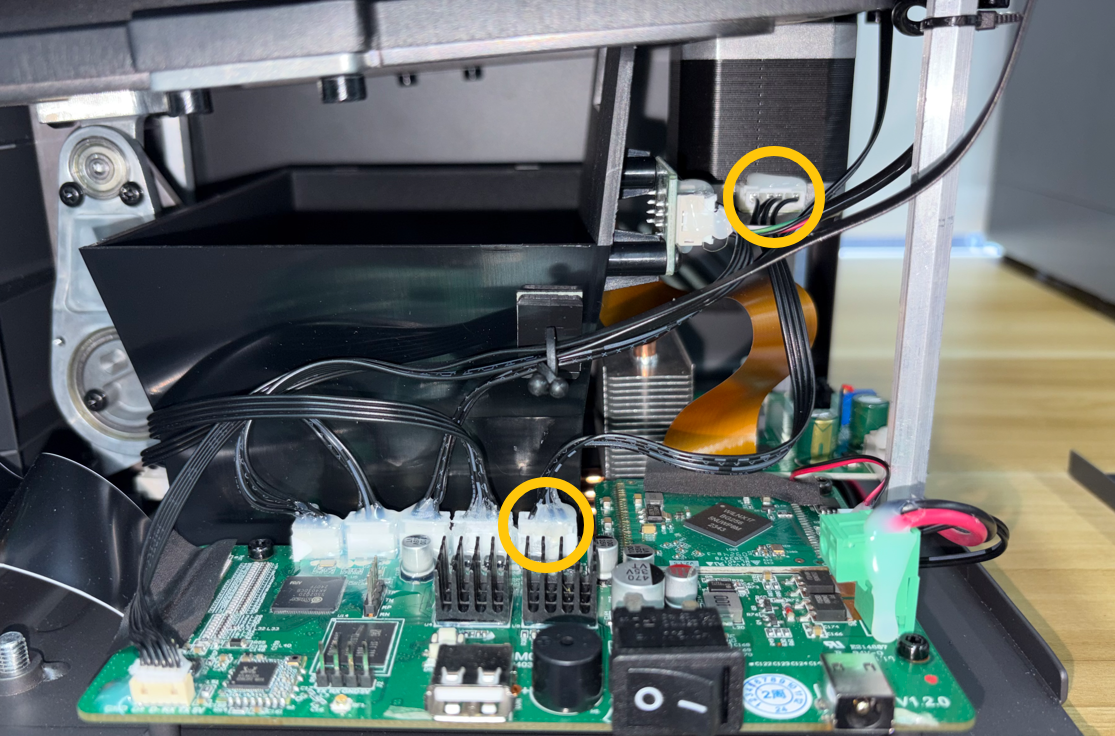
- Check whether the Z motor connector is loose or shows burn marks. Disconnect and reconnect the Z motor connector.
Note:
To prevent the connector from becoming loose, hot melt glue has been applied to secure the connector before shipment. If the connector is not loose, skip the reconnecting operation.
If the connector shows signs of burning, melting, or discoloration, provide photos to technical support and stop using the printer temporarily.
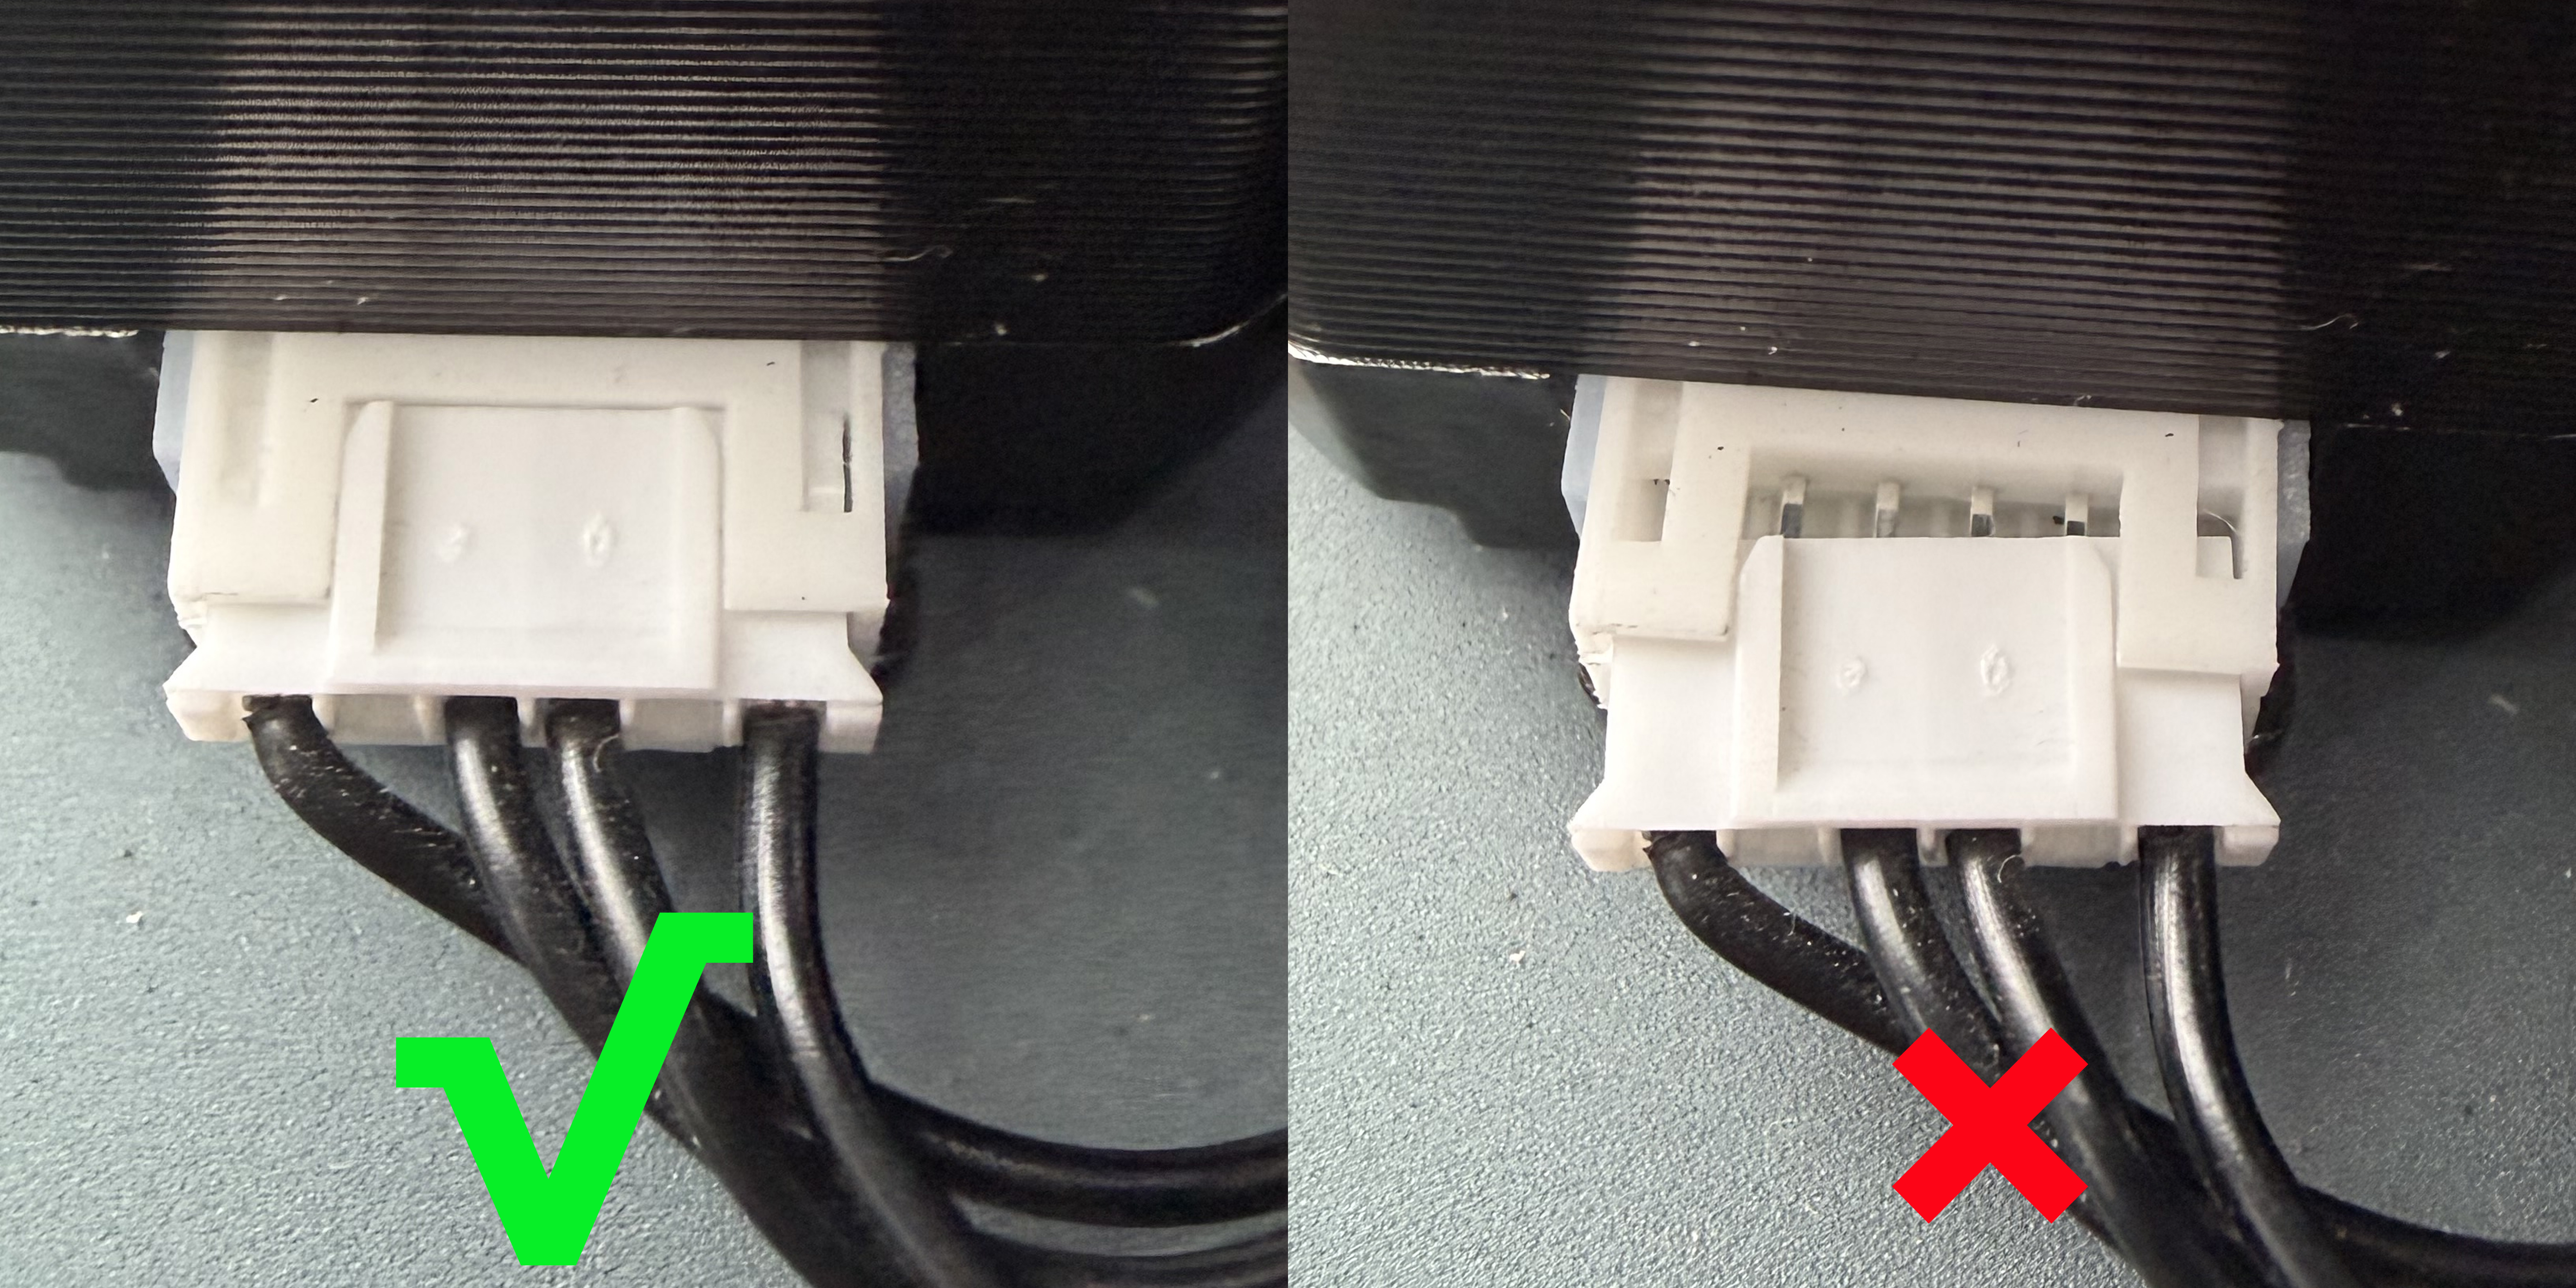
The following image shows the difference between a properly connected connector and a loose connector.
¶ Contact Technical Support
If the issue is still not resolved after completing all troubleshooting steps above, please provide the following information when contacting technical support:
Email: 3dp@elegoo.com
- Video — Showing the abnormal Z motor operation.
- Photo — Top area of the Z motor.
- Photo — Appearance of the spring cable.
- Photos — Appearance of both Z motor connectors.
- Test result — Whether the Z motor operates normally after loosening the anti-backlash nut fixing screw.
¶ Help us improve
If you have any ideas about the wiki pages, please let us know via ELEGOO official feedback channel