¶ Fault Symptoms
During the self-test process, the build plate continuously moves upward and hits the top without stopping.
¶ Possible Causes
- Dust or resin on the Z Axis limit switch trigger area
- Loose Z Axis limit switch connector
- Faulty Z Axis limit switch or limit switch cable
- Mainboard failure
¶ Required Tools and Materials
- 2.0 mm Allen key
- 2.5 mm Allen key
- 3.0 mm Allen key
- 75% Ethyl Alcohol
- Lint-free cloth
- Nitrile gloves
¶ Preparation Before Troubleshooting
¶ 1. Remove the UV Cover, Build Plate, and Resin Tank
To facilitate subsequent troubleshooting, please remove the UV Cover, Build Plate, and Resin Tank in advance.
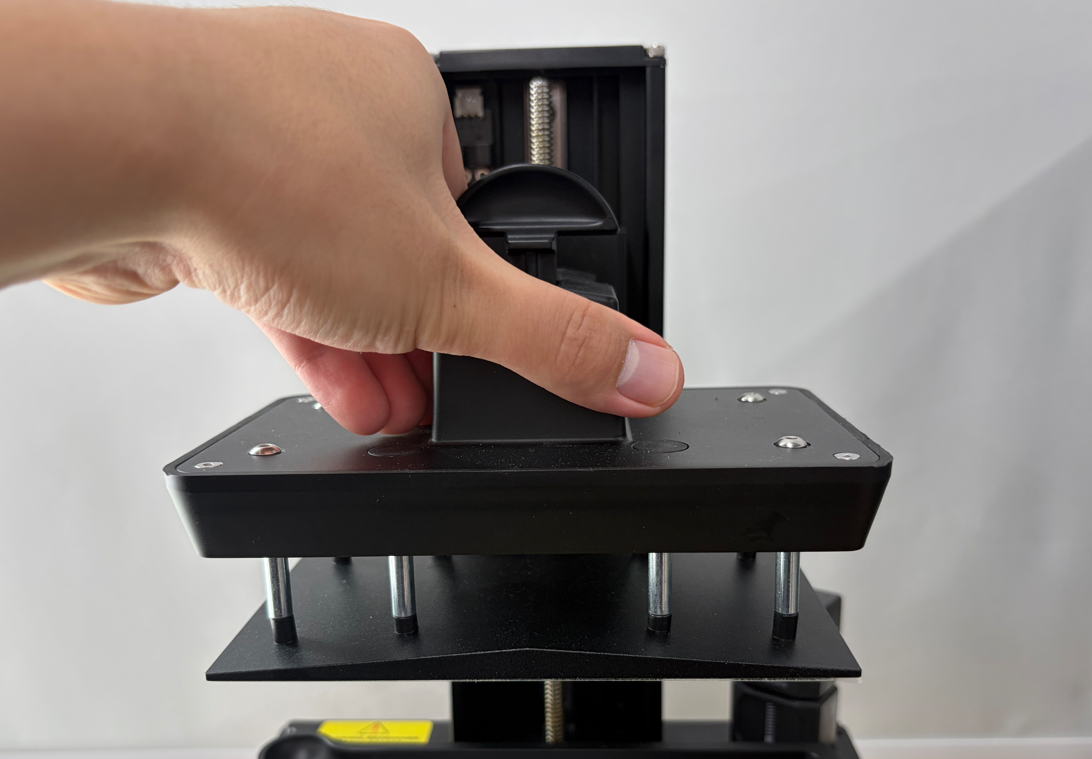
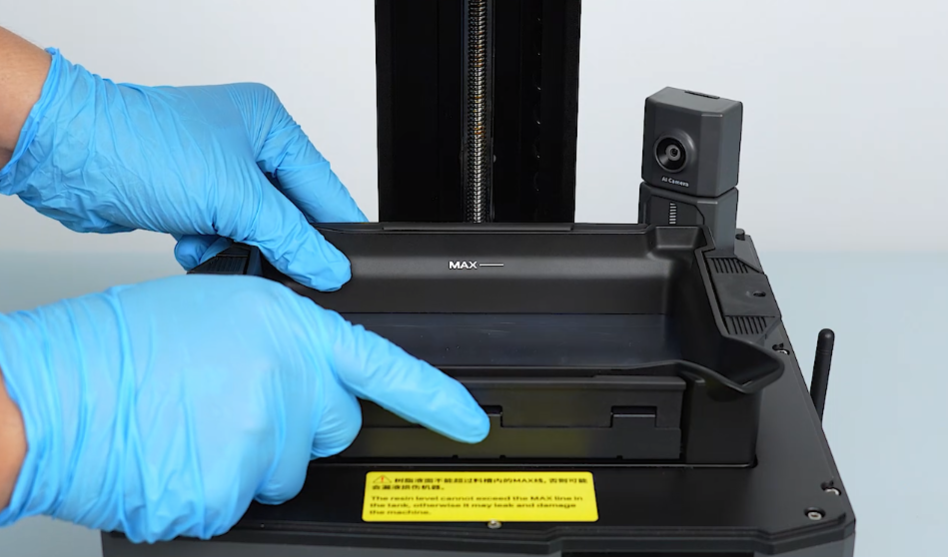
¶ 2. Lower the Z Axis Arm Manually
To prevent continuous Z Axis movement from damaging printer components:
- Turn off the power.
- Manually rotate the lead screw counterclockwise to lower the Z Axis arm to the lowest position.
Note:
There is grease on the surface of the lead screw. Please wear gloves before operation.
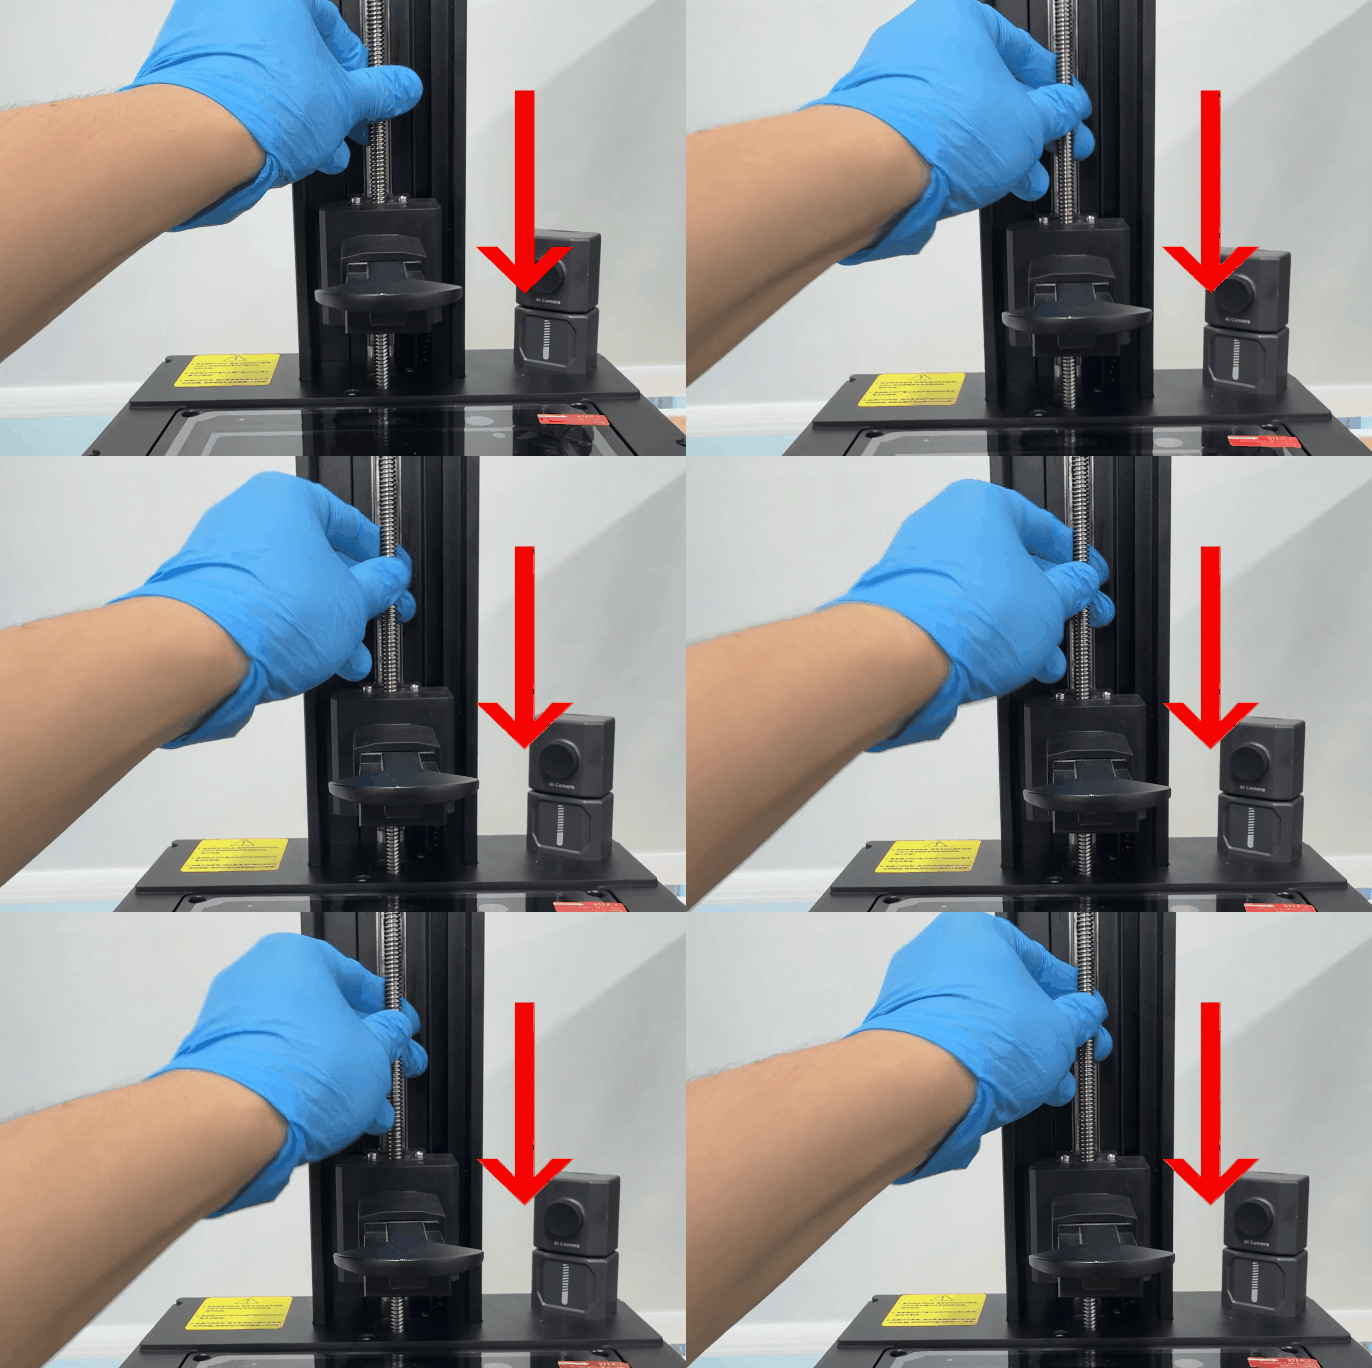
¶ Troubleshooting Steps
¶ 1. Check the Z Axis Limit Switch
¶ 1.1 Remove the Top Plate
- Turn off the printer power switch and unplug the adapter.
- Place the printer on its side.
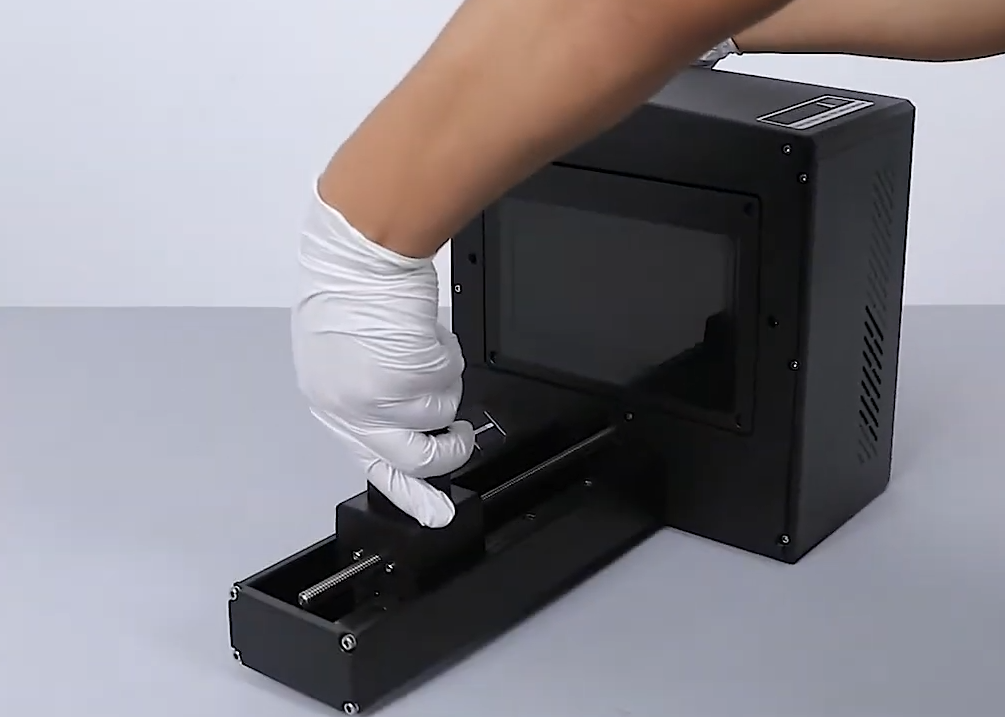
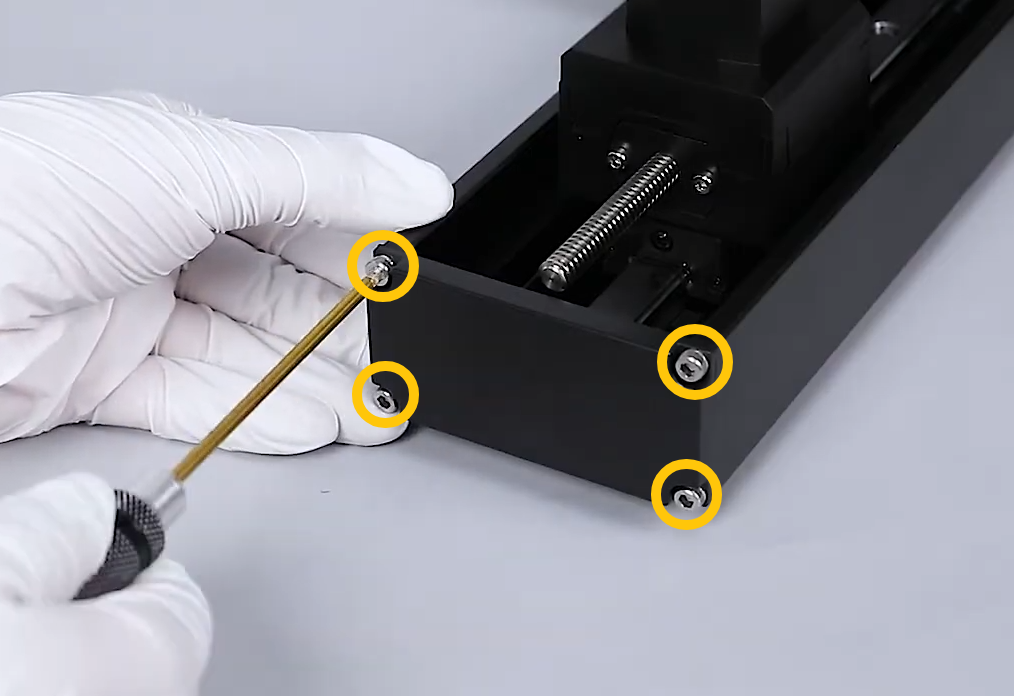
- Use a 3.0 mm Allen key to remove the four screws securing the top plate, then remove the top plate.
¶ 1.2 Check the Z Axis Limit Switch
Check the following items:
-
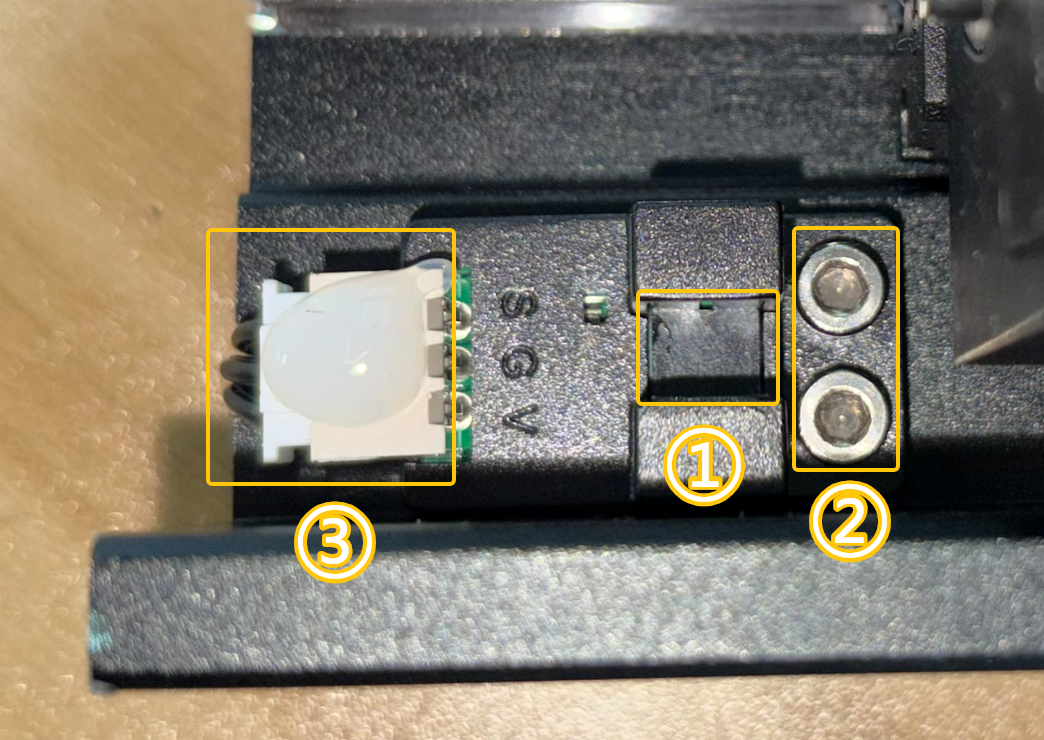
Check whether there is dust or resin on the Z Axis limit switch trigger area ①.
- If dust or resin is found, use a lint-free cloth with a small amount of Ethyl Alcohol to clean the surface of the limit switch.
-
Check whether the screws securing the Z Axis limit switch ② are loose.
- If loose, tighten them with a 2.5 mm Allen key.
-
Check whether the limit switch connector ③ is:
- Loose
- Damaged
- Burned
- Discolored
Troubleshooting results:
- If the connector is loose, reconnect it.
- If the connector is damaged, burned, or discolored:
- Take photos and contact technical support.
- Stop using the printer immediately.
- Keep the printer powered off.
Note:
To prevent the limit switch connector from becoming loose, hot melt glue has been applied here.
If no damage or looseness is found, do not remove the hot melt glue.
¶ 1.3 Test the Z Axis Limit Switch
After completing the above steps:
- Power on the printer.
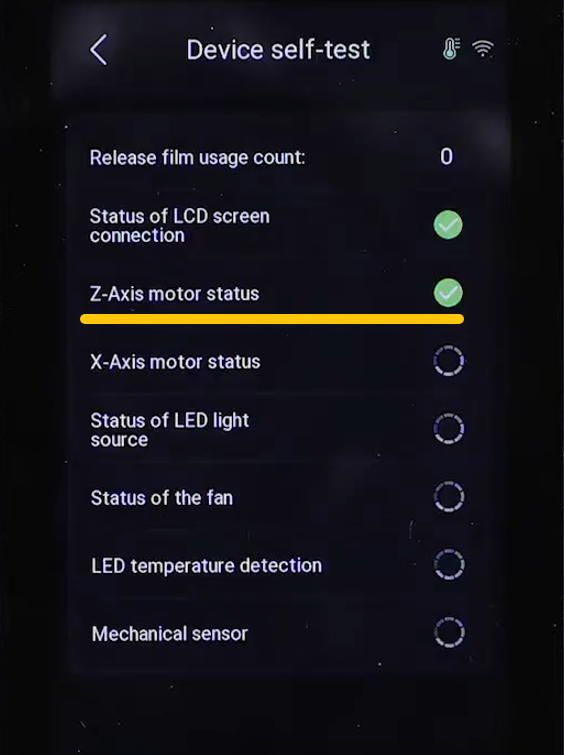
- Enter the self-test interface.
Note:
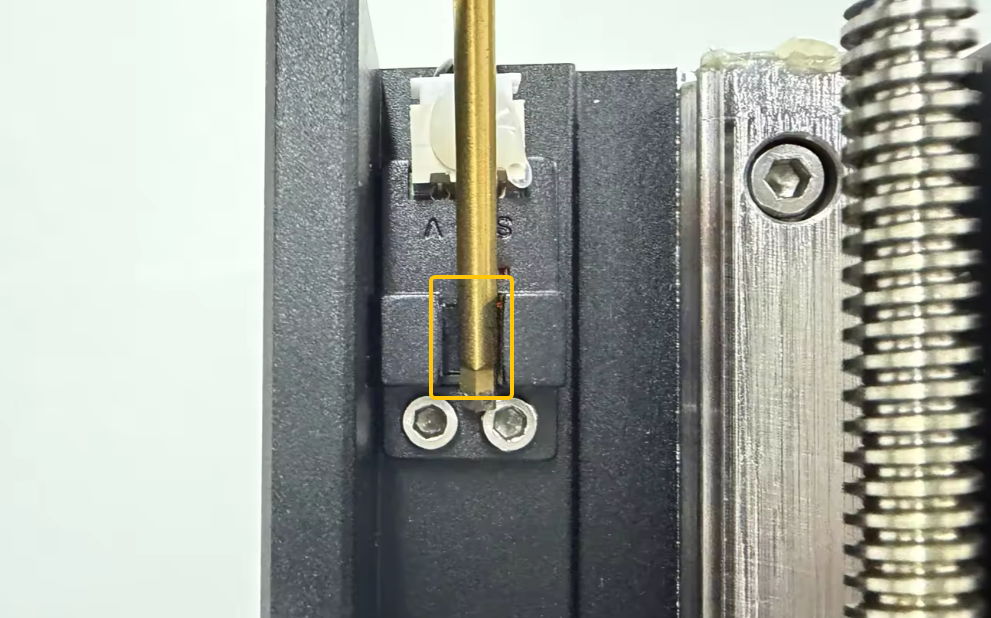
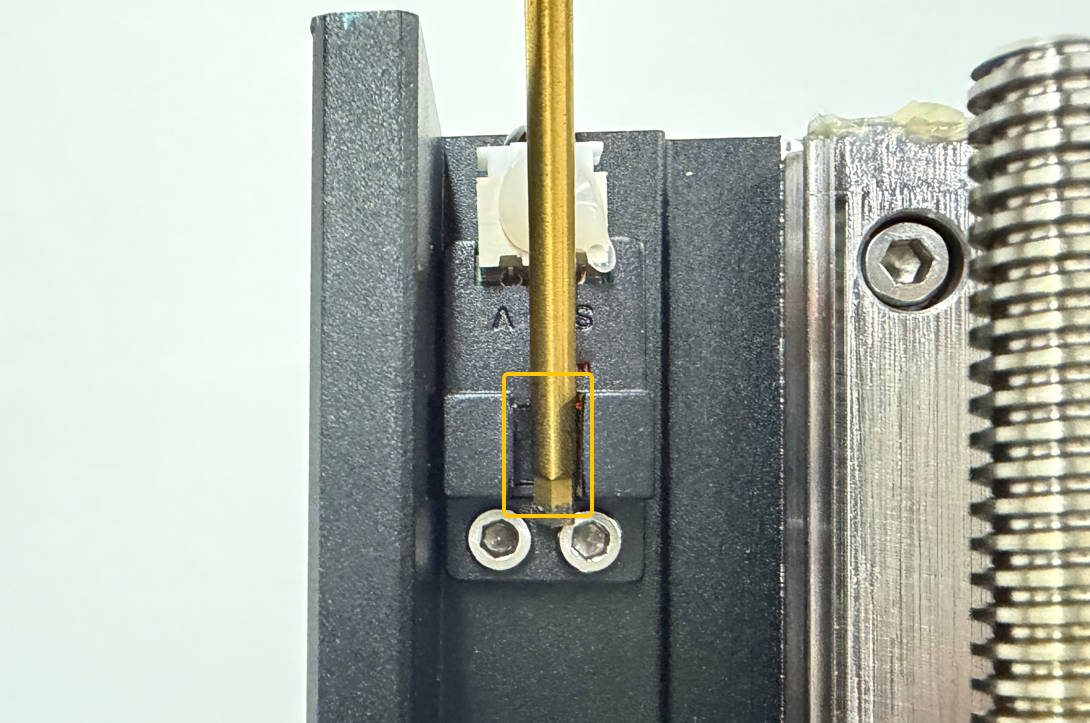
To prevent continuous Z Axis movement from damaging printer components, before the self-test reaches the Z Axis motor status, place any metal object in the Z Axis limit switch trigger area.
Check whether the Z Axis limit switch can be triggered normally.
Troubleshooting results:
- If the Z Axis still cannot stop moving when the Z Axis limit switch is manually triggered with a metal object:
- Immediately turn off the printer power switch.
- Unplug the adapter.
- Continue troubleshooting according to Step 2.
¶ 2. Check the Z Axis Limit Switch Connector on the Mainboard Side
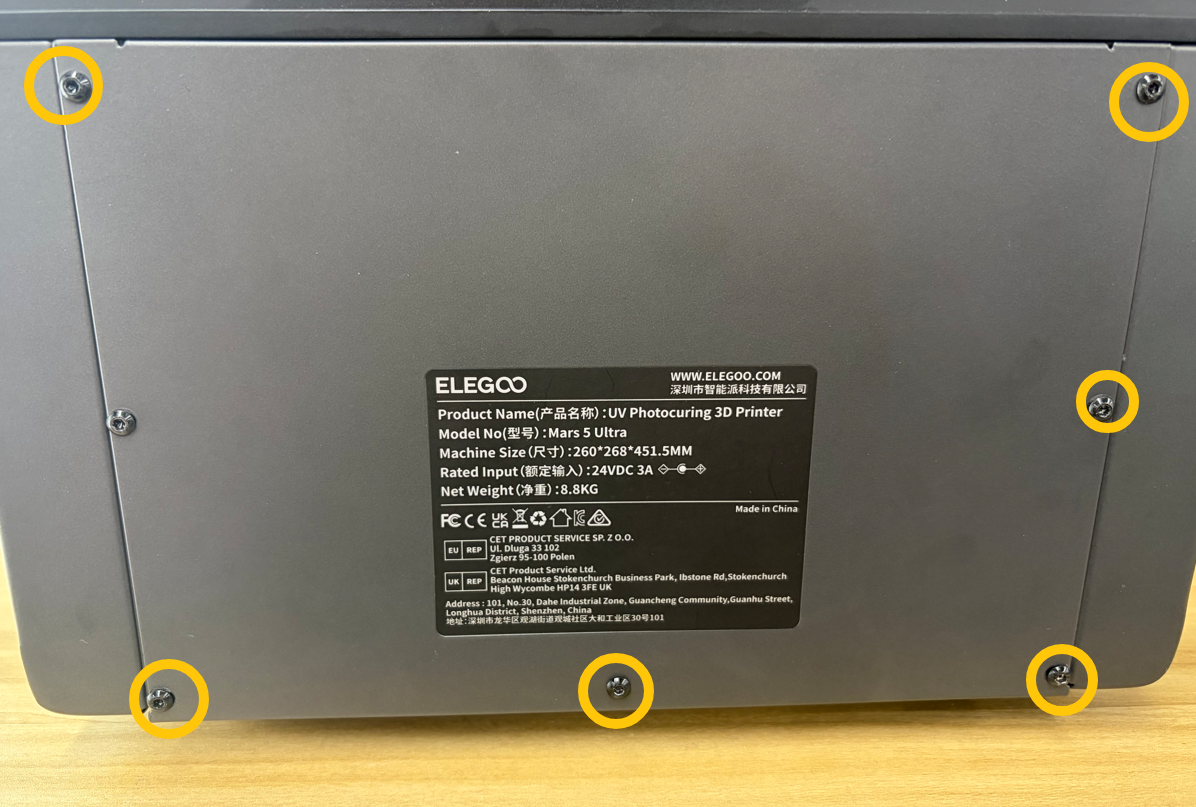
¶ 2.1 Remove the Rear Panel
- Use a 2.0 mm Allen key to remove the seven screws securing the rear panel.
- Remove the rear panel.
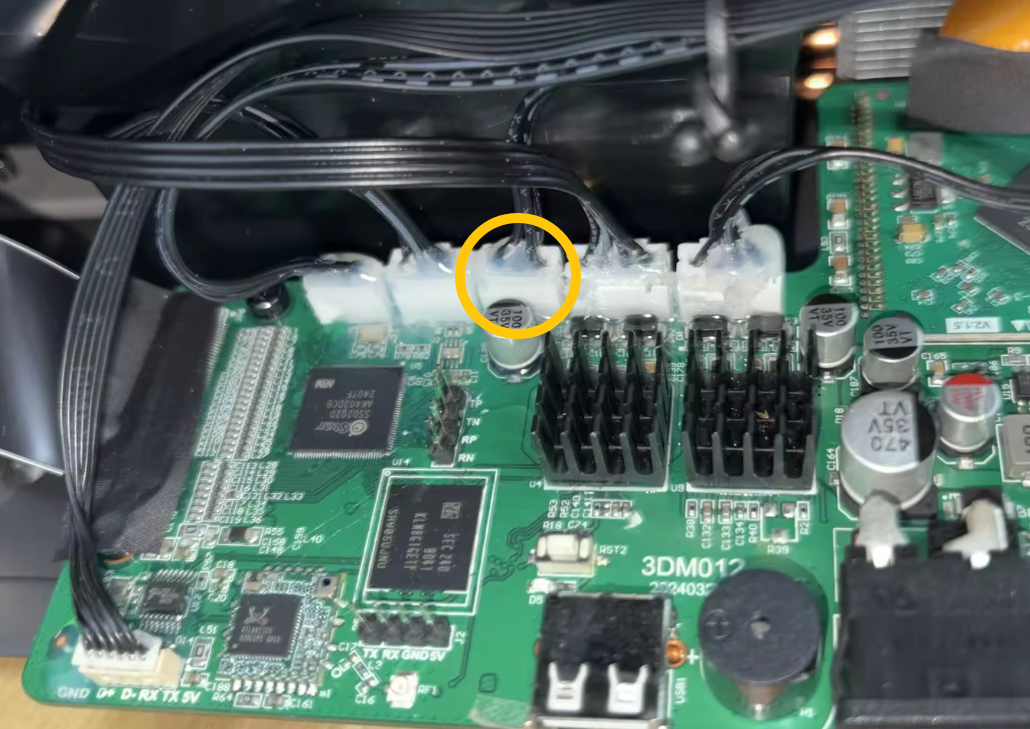
¶ 2.2 Check the Limit Switch Connector
Check whether the Z Axis limit switch connector is loose.
-
If the connector is loose:
- Reconnect it.
-
If the connector is not loose:
- Continue troubleshooting according to the following steps.
Note:
To prevent the limit switch connector from becoming loose, hot melt glue has been applied here.
If no damage or looseness is found, do not remove the hot melt glue.
¶ 3. Swap the X Axis and Z Axis Limit Switches for Test
¶ 3.1 Remove the Limit Switches
Refer to the following links to remove the Z Axis limit switch and X Axis limit switch:
- How to Remove the X Axis Limit Switch
- How to Remove the Z Axis Limit Switch
¶ 3.2 Swap the Limit Switches
- Swap the positions of the X Axis and Z Axis limit switches.
- Tighten the fixing screws.
- Reconnect the connectors.
¶ 3.3 Test the Limit Switch
- Power on the printer.
- Enter the self-test interface.
- Before the self-test reaches the Z Axis motor status, place any metal object in the Z Axis limit switch trigger area.
- Check whether the Z Axis limit switch can be triggered normally.
Troubleshooting results:
-
If the limit switch can be triggered at this time:
- The original Z Axis limit switch is faulty and needs to be replaced.
-
If the limit switch still cannot be triggered:
- The Z Axis limit switch cable or mainboard may be faulty.
¶ Contact Technical Support
If the issue is not resolved after completing the troubleshooting steps, please provide the following information when contacting technical support:
Email: 3dp@elegoo.com
Please provide:
-
Photos of the Z Axis limit switch.
- The photos should clearly show:
- Z Axis limit switch fixing screws
- Trigger area
- Connector
- The photos should clearly show:
-
Test result:
- After swapping the X Axis and Z Axis limit switches, can the Z Axis movement be manually stopped by triggering the limit switch?
¶ Help us improve
If you have any ideas about the wiki pages, please let us know via ELEGOO official feedback channel