¶ Tools and Materials
- 4.0mm Allen key
- A4 paper
- A hair dryer
¶ Instruction
¶ Step 1 - Remove the resin tank print and fine-tune the bulid plate screws
- Import the model file into the slicing software. Click "Slice Settings".
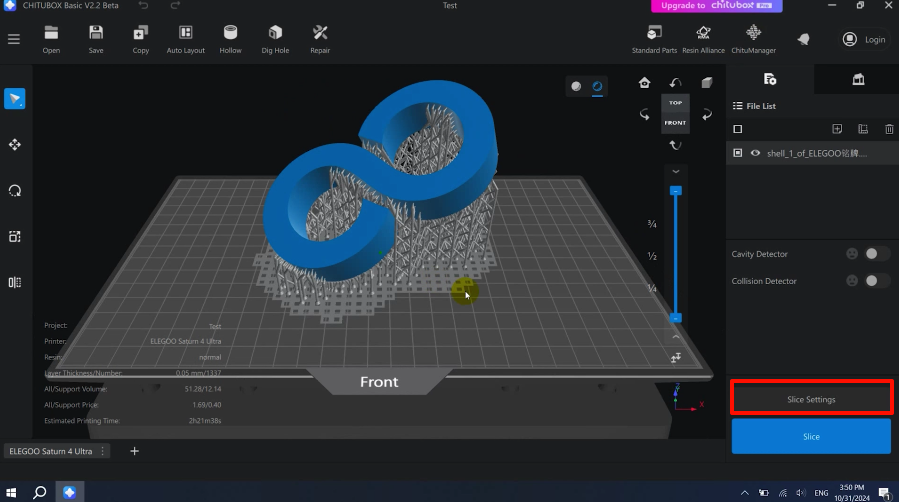
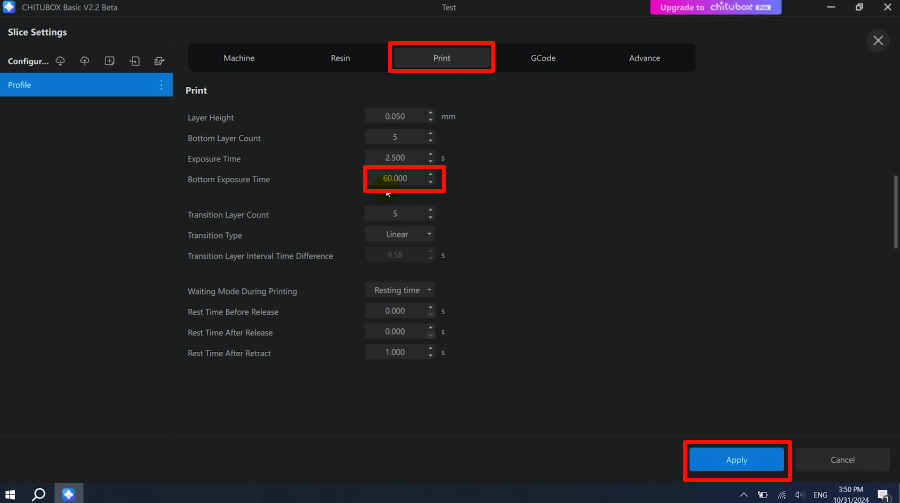
- Click "Print". In the parameter setting interface, set the "Underlying Exposure Time" parameter to 60s (or 90s). Click "Apply" to save the modified parameters.
Note: Set the bottom exposure time longer to allow more time to adjust the screws later.
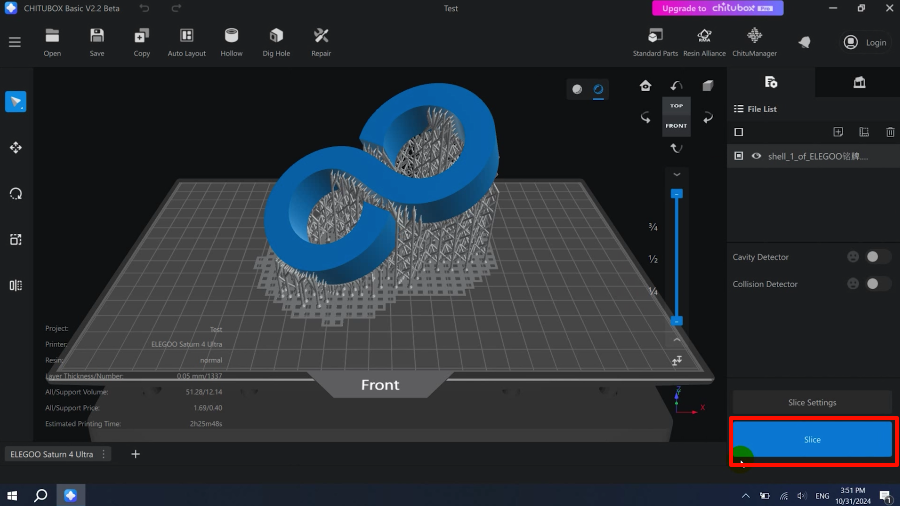
- Click "Slice" and save the sliced file to the USB flash drive.
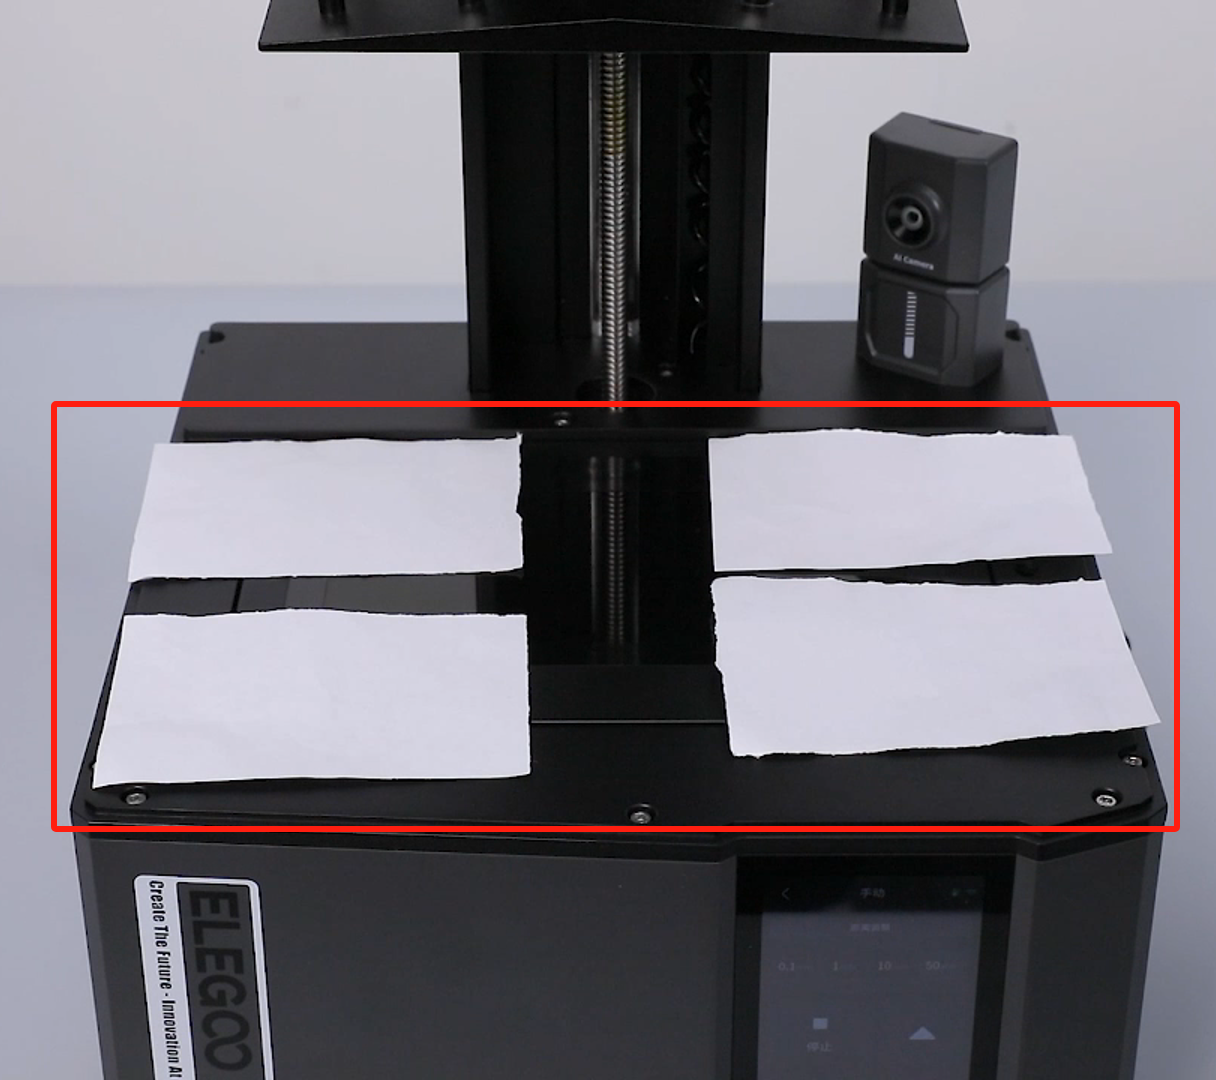
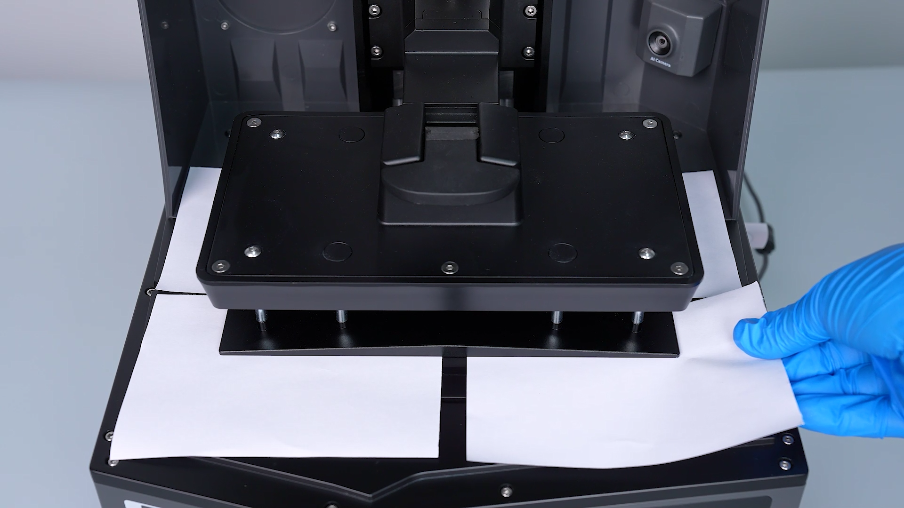
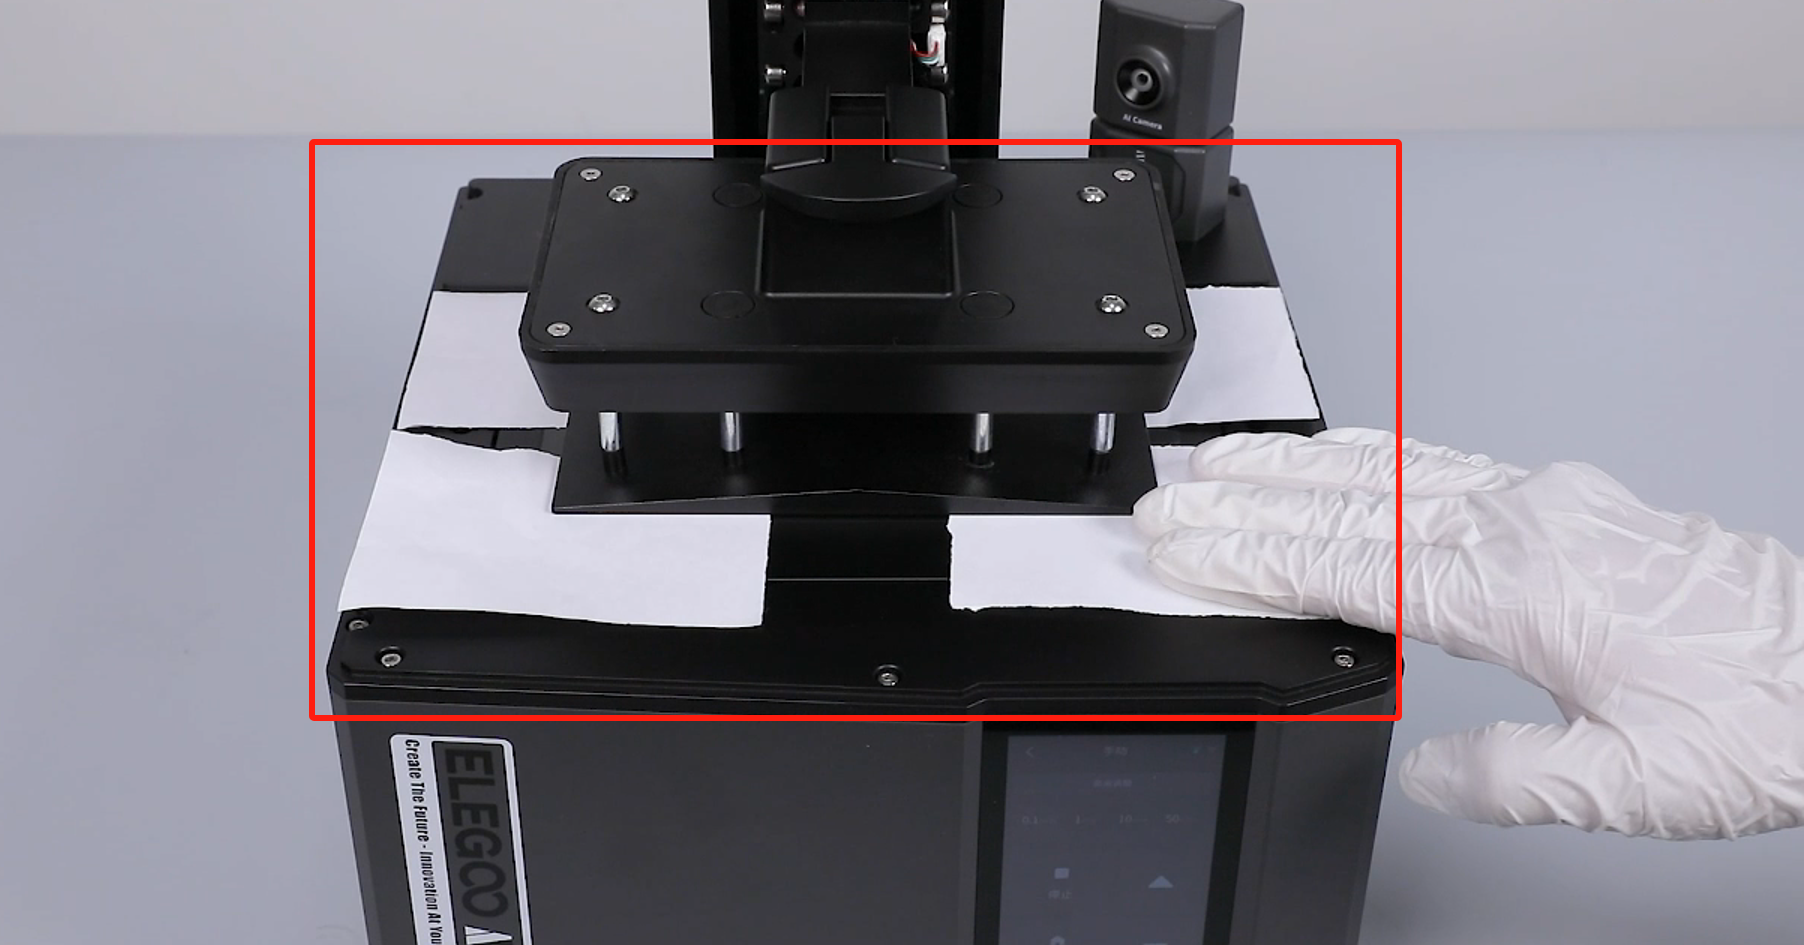
- Tear a piece of A4 paper into 4 equal pieces and place them at the four corners of the LCD screen.
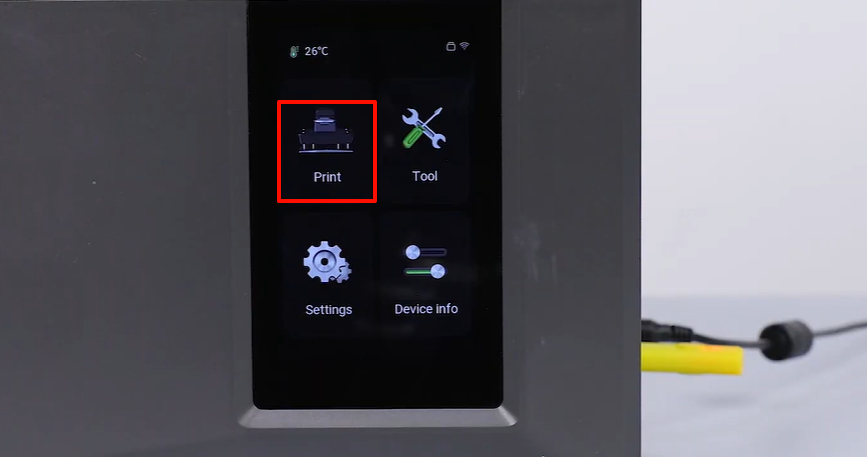
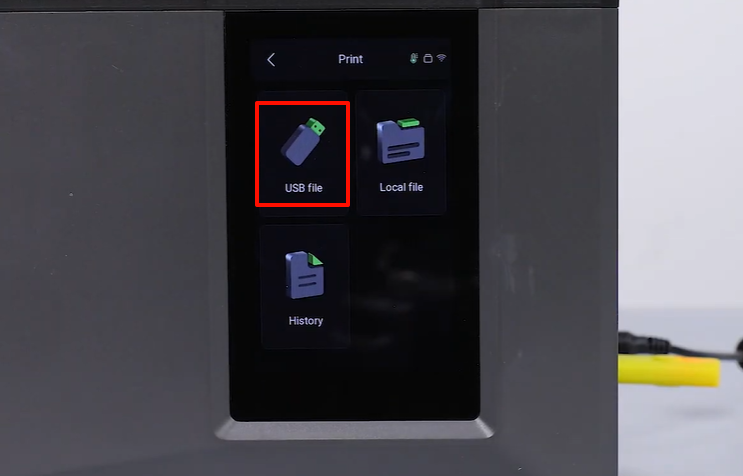
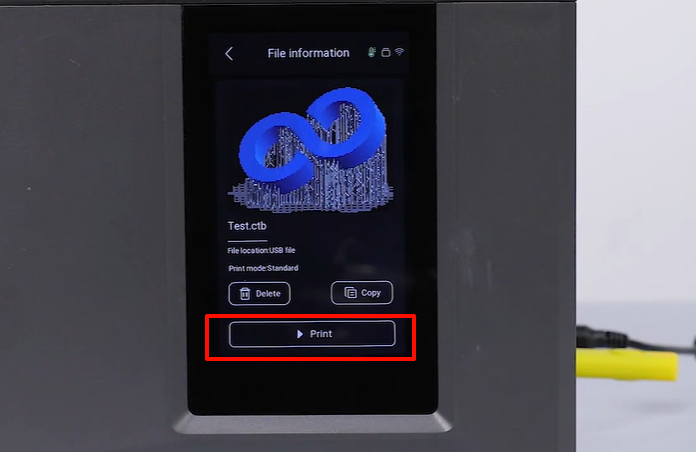
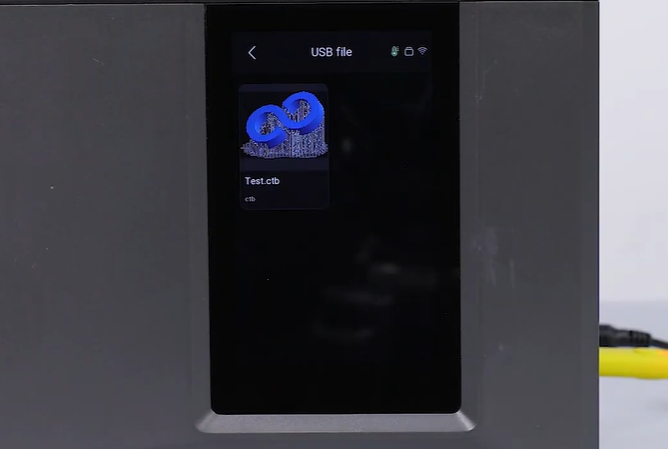
- Power on the printer. Plug in the USB flash drive. On the touchscreen, click "Print - USB File". Select the model to print.
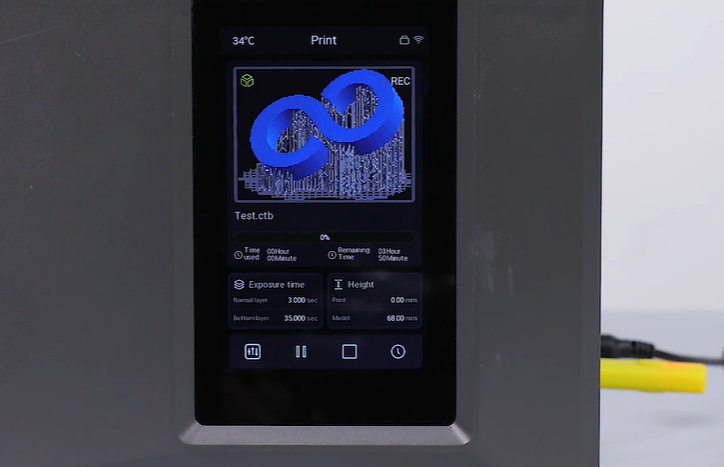
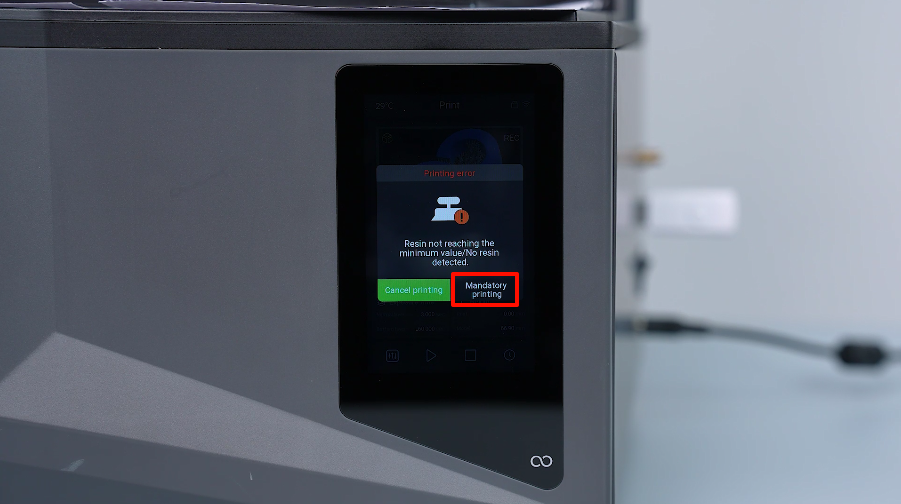
The model is printed without the resin tank.
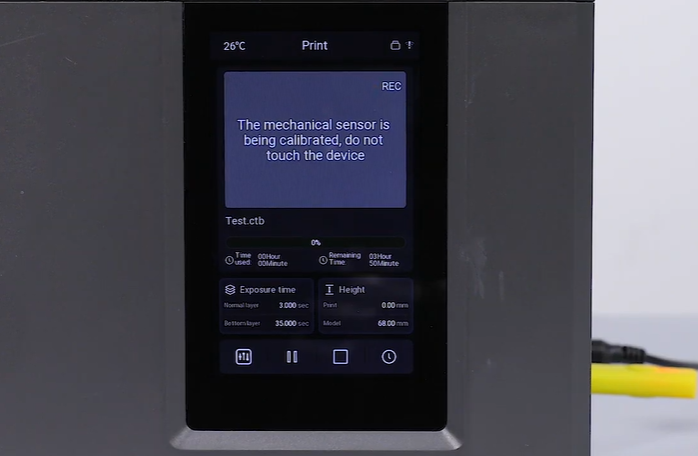
6. If a "Print Abnormal" pop-up window appears, click "Mandatory Printing". The touchscreen shows that the automatic leveling is completed. The printer will start printing the model.
7. During the printing of the first layer of model exposure, pull the A4 paper in the four corners and observe which corner of the paper is obviously loose.
The pressed state refers to that the paper can be pulled out under the print platform, but cannot be pushed back.
8. For the paper that is loose at the corner , loosen the screw at that corner counterclockwise slightly using a 2.5mm Allen key.
Loosen the screw slightly. It is forbidden to tighten the screws drastically to prevent abnormalities of the build plate.

- After adjusting the screws, pull the 4 pieces of paper in the corner of the build plate again to test the tightness. Make sure that the paper is fully pressed and the fine-tunning is completed.
After adjusting either screw, the paper at the four corners needs to be re-tested for tightness.

¶ Step 2 - Reload the patched firmware
- Download the patched firmware
Chitugcode.gcode
Note: Copy and paste the file without creating or putting it into any folder. Do not modify the file name.
- Find Chitugcode.gcode, then copy "Chitugcode.gcode" to the root directory of the USB drive
- Insert the USB drive into the printer and turn on the printer power. Locate "ChituGcode.gcode" and print this file. The firmware will load automatically.
- Recalibrate leveling according to Step 1. If there is no improvement after adjustment, please perform further troubleshooting according to Step 3.
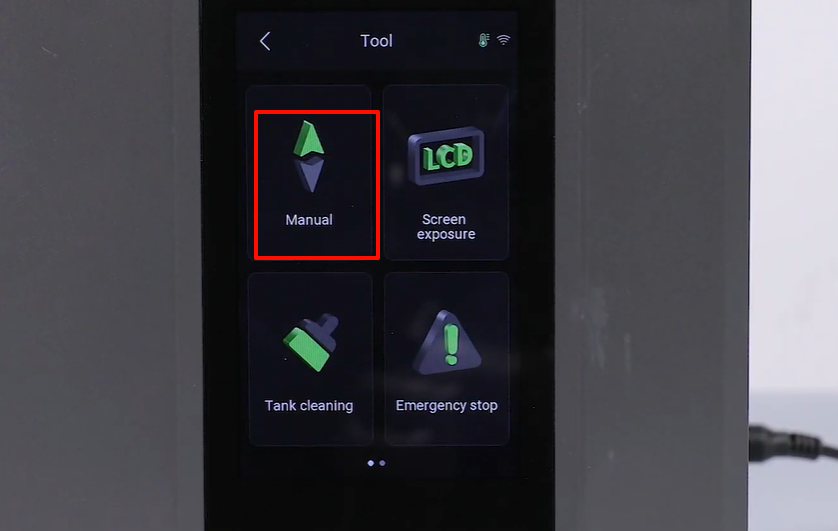
¶ Step 3 - Adjust the screws that secure the cantilever
Tutorial Video: https://youtu.be/fz6KcsglkK4
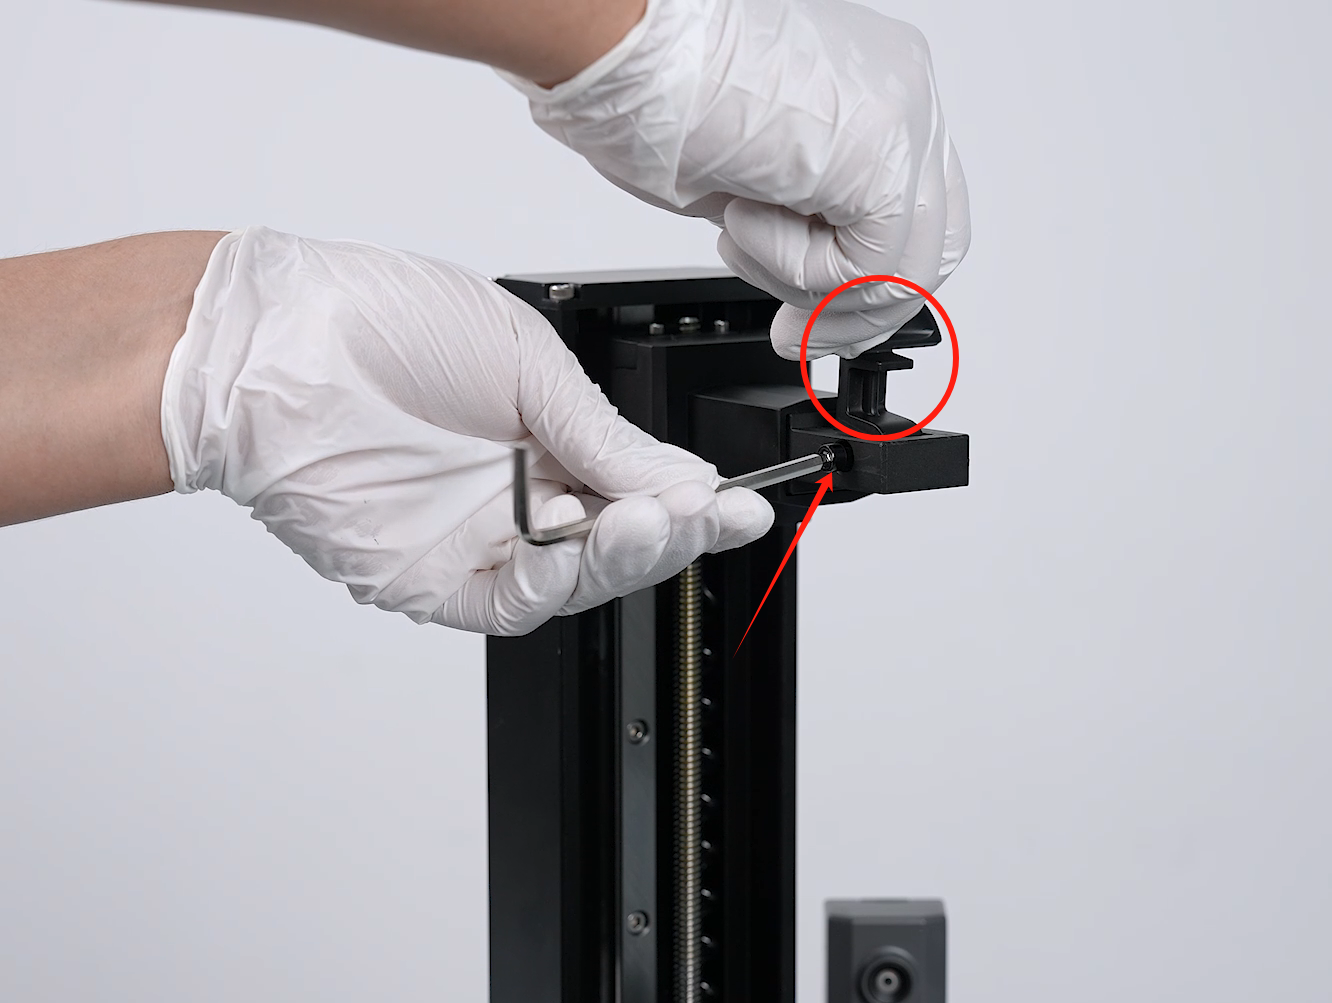
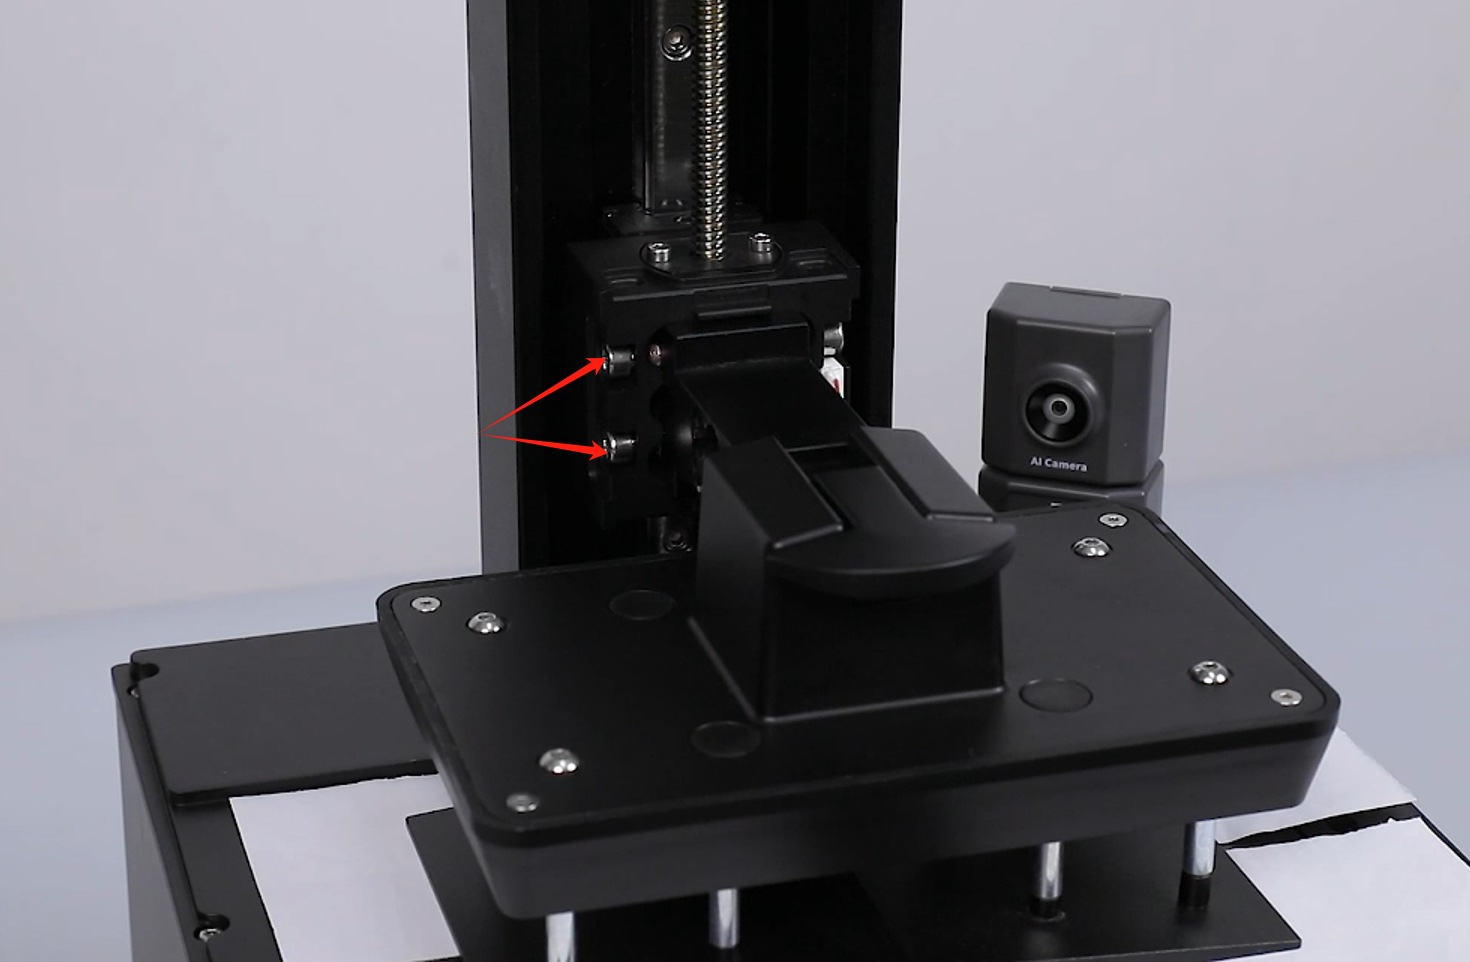
- Power off the printer and unplug the power cord.
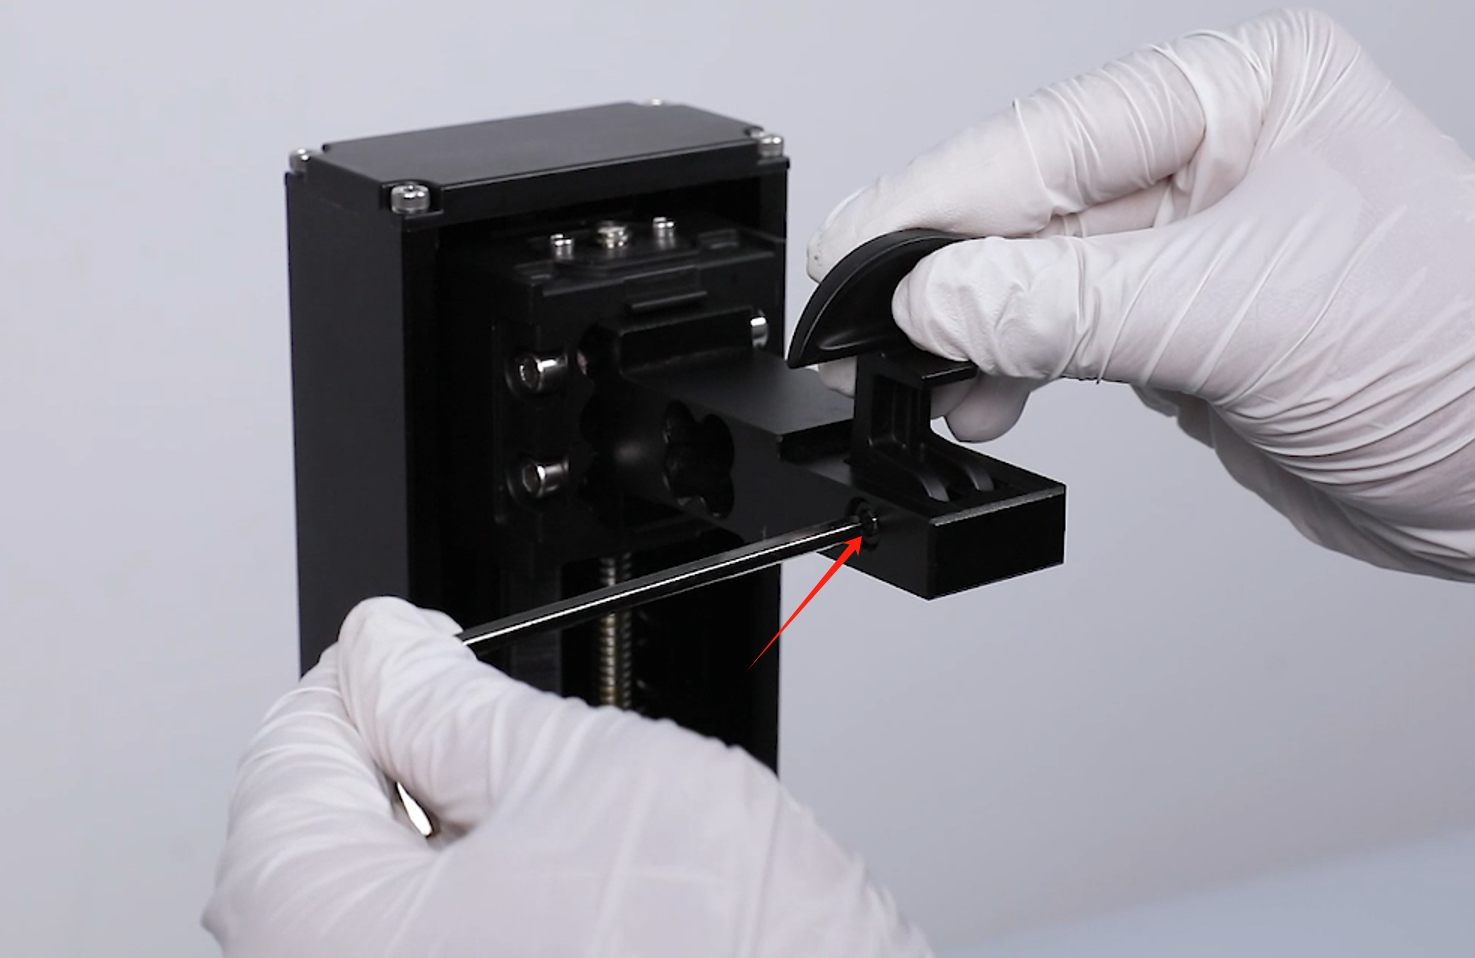
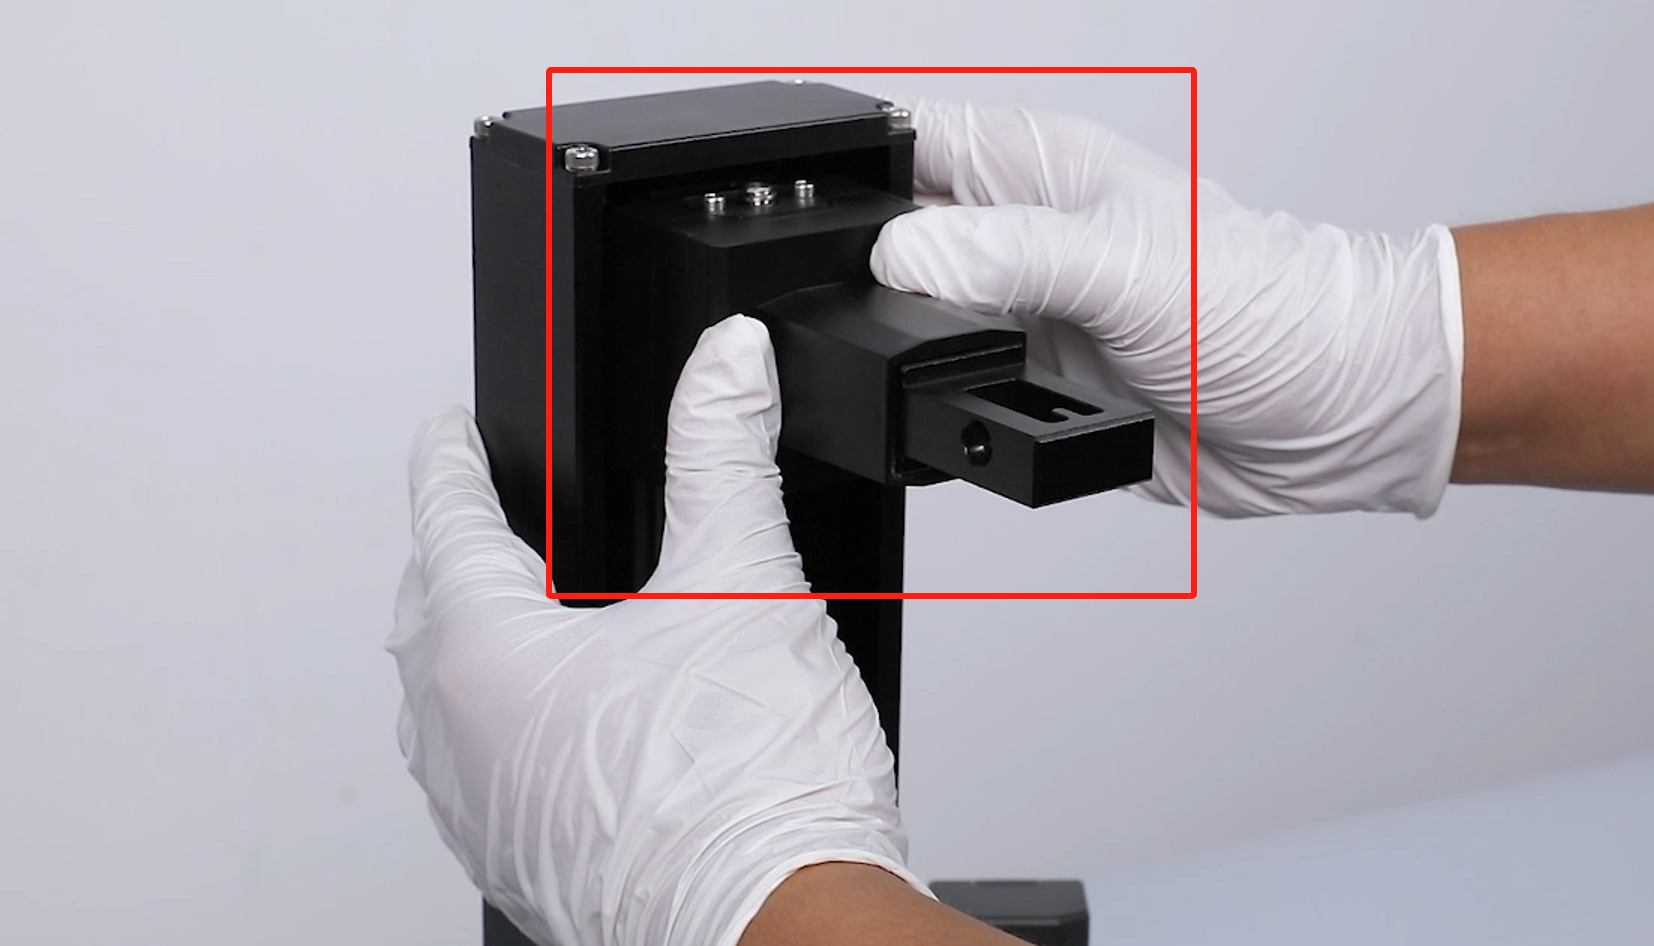
- Using a 4.0 mm Allen key, loosen the screw securing handle, then remove the handle.
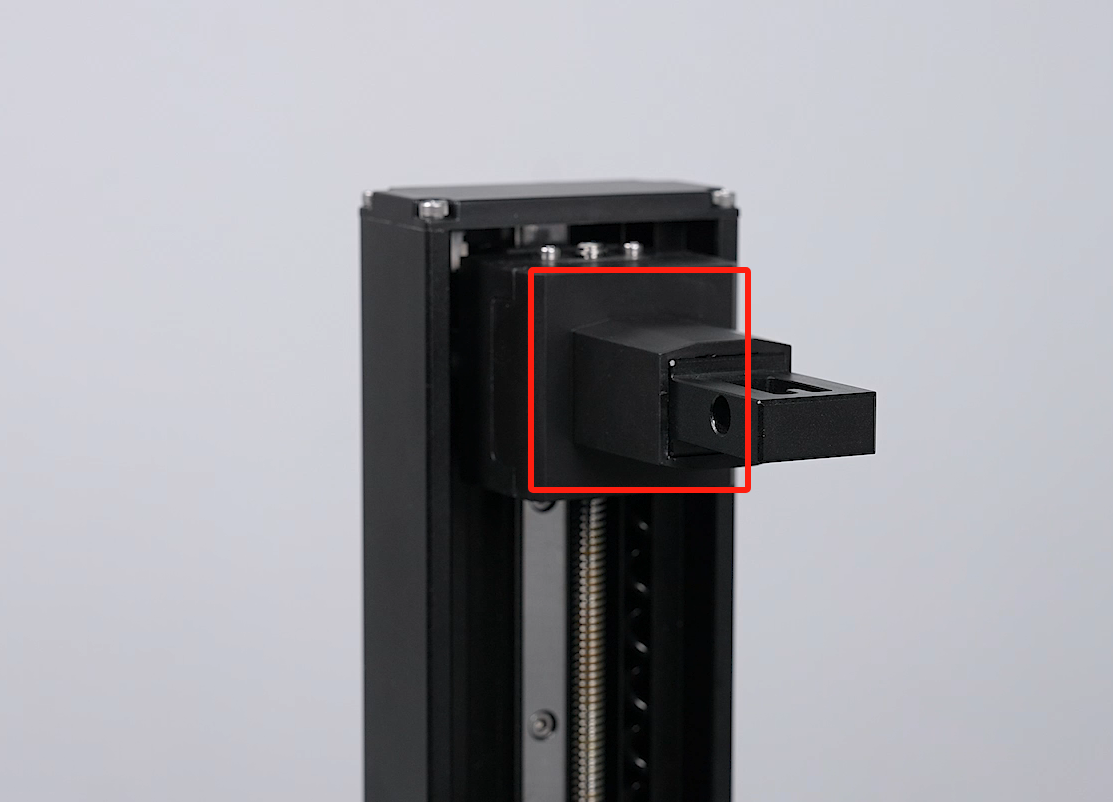
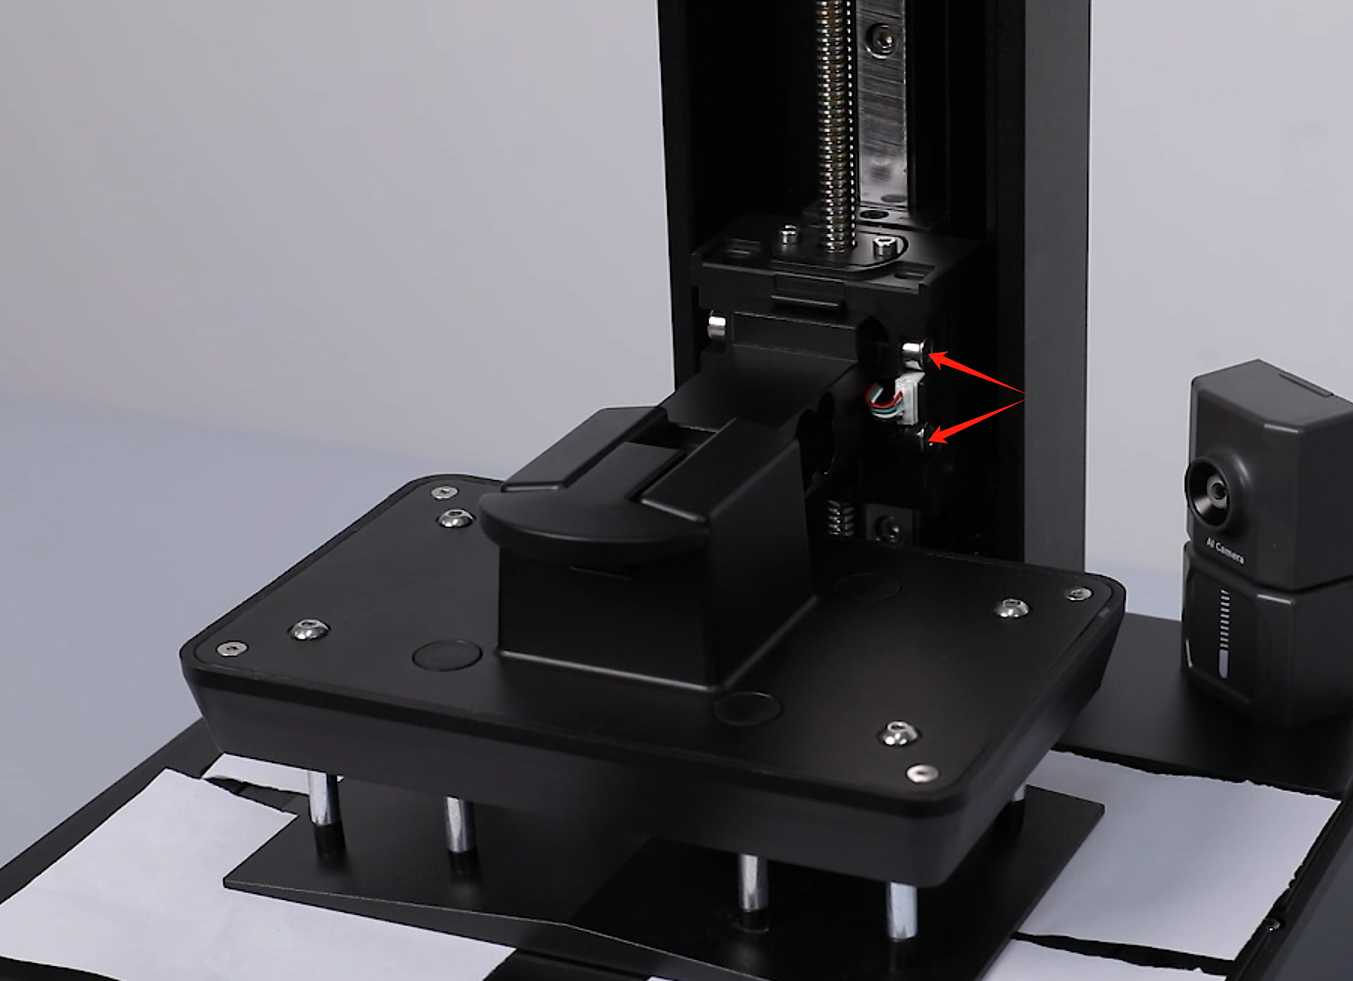
- Remove the protective cover by gently pulling outward.
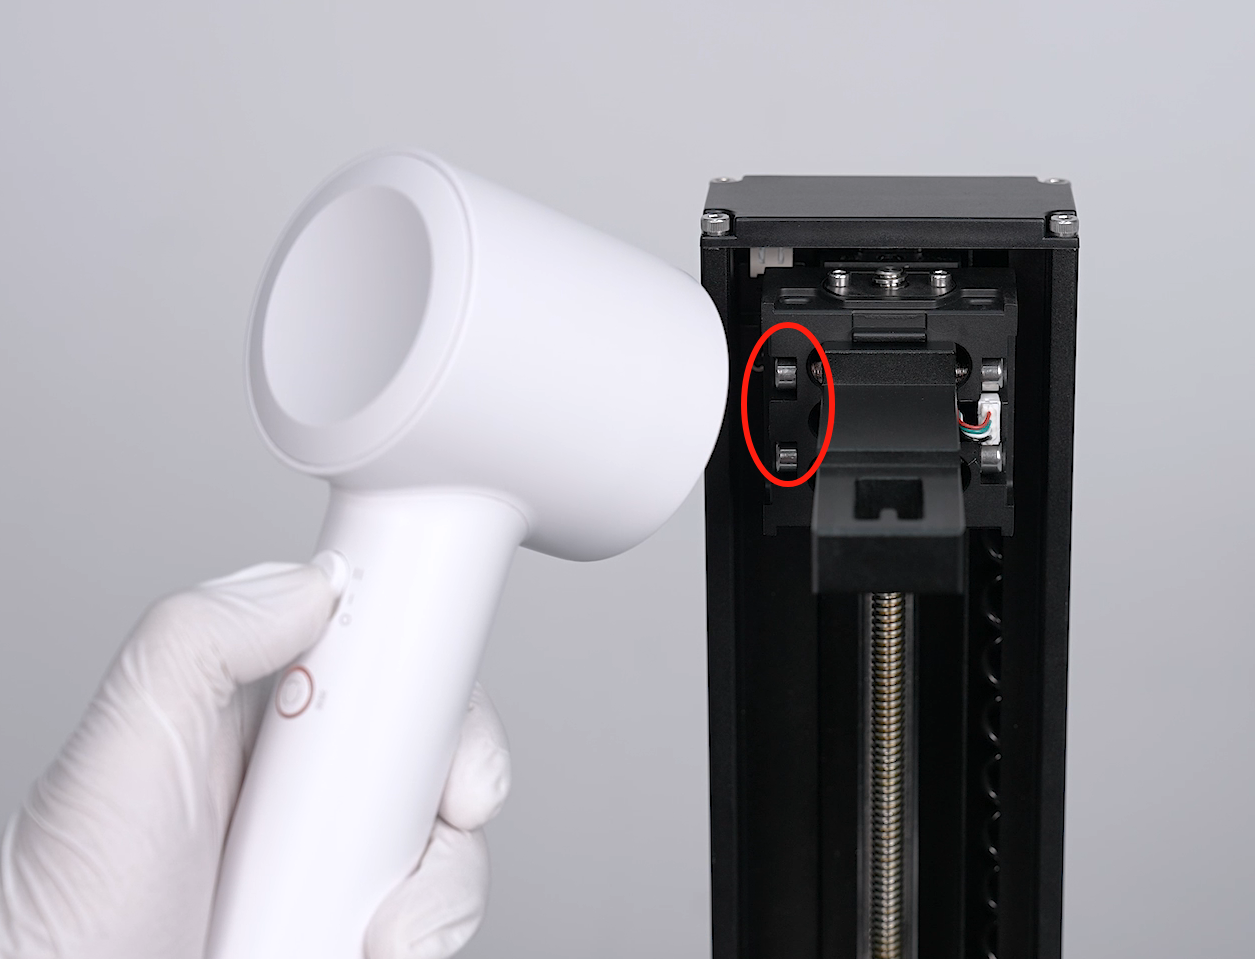
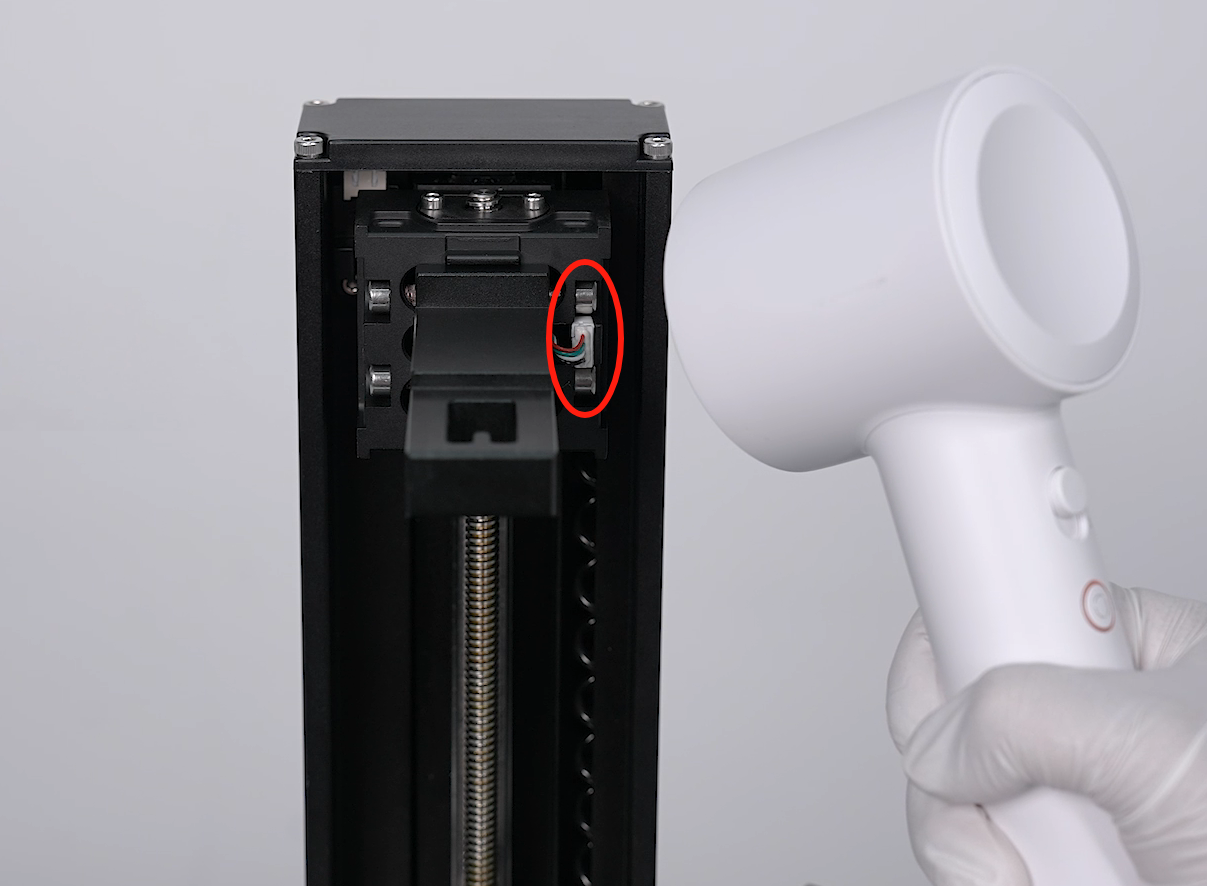
- The threads of the screws are coated with screw glue. Heat the four screws on the two sides with a hair dryer for 2 - 3 min.
Note: If it is still difficult to loosen the screws, continue to heat. (Loosen but not remove the screws.)
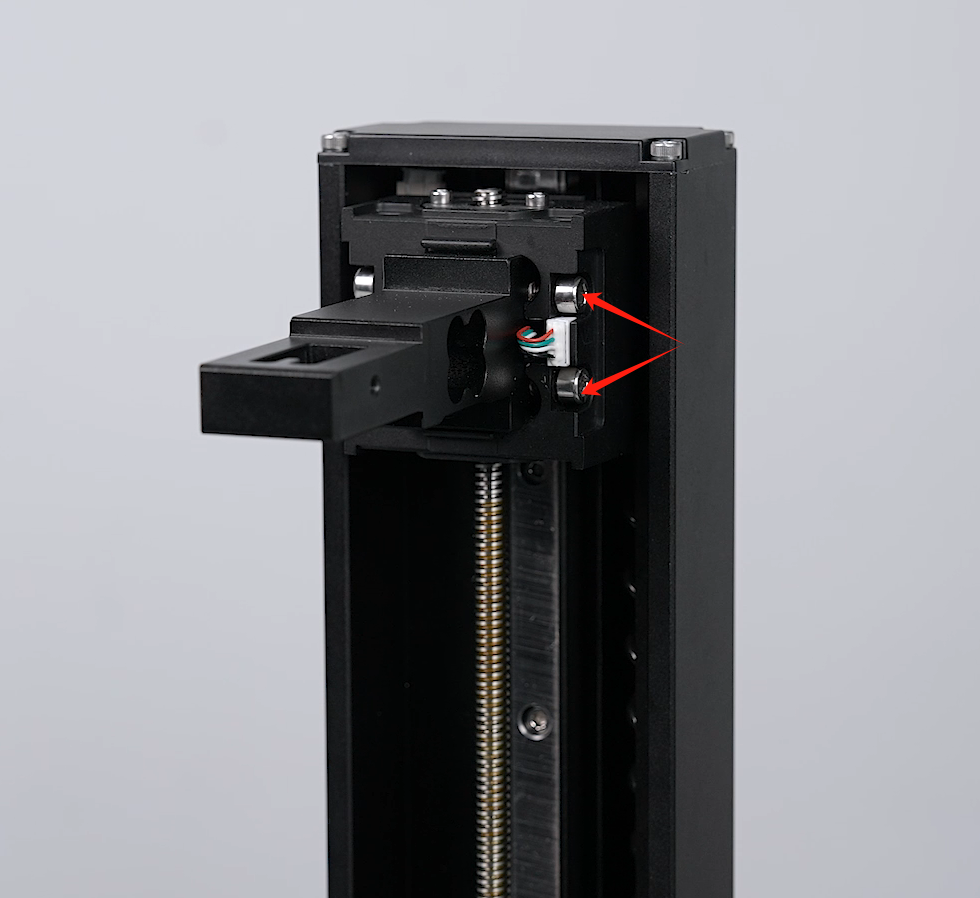
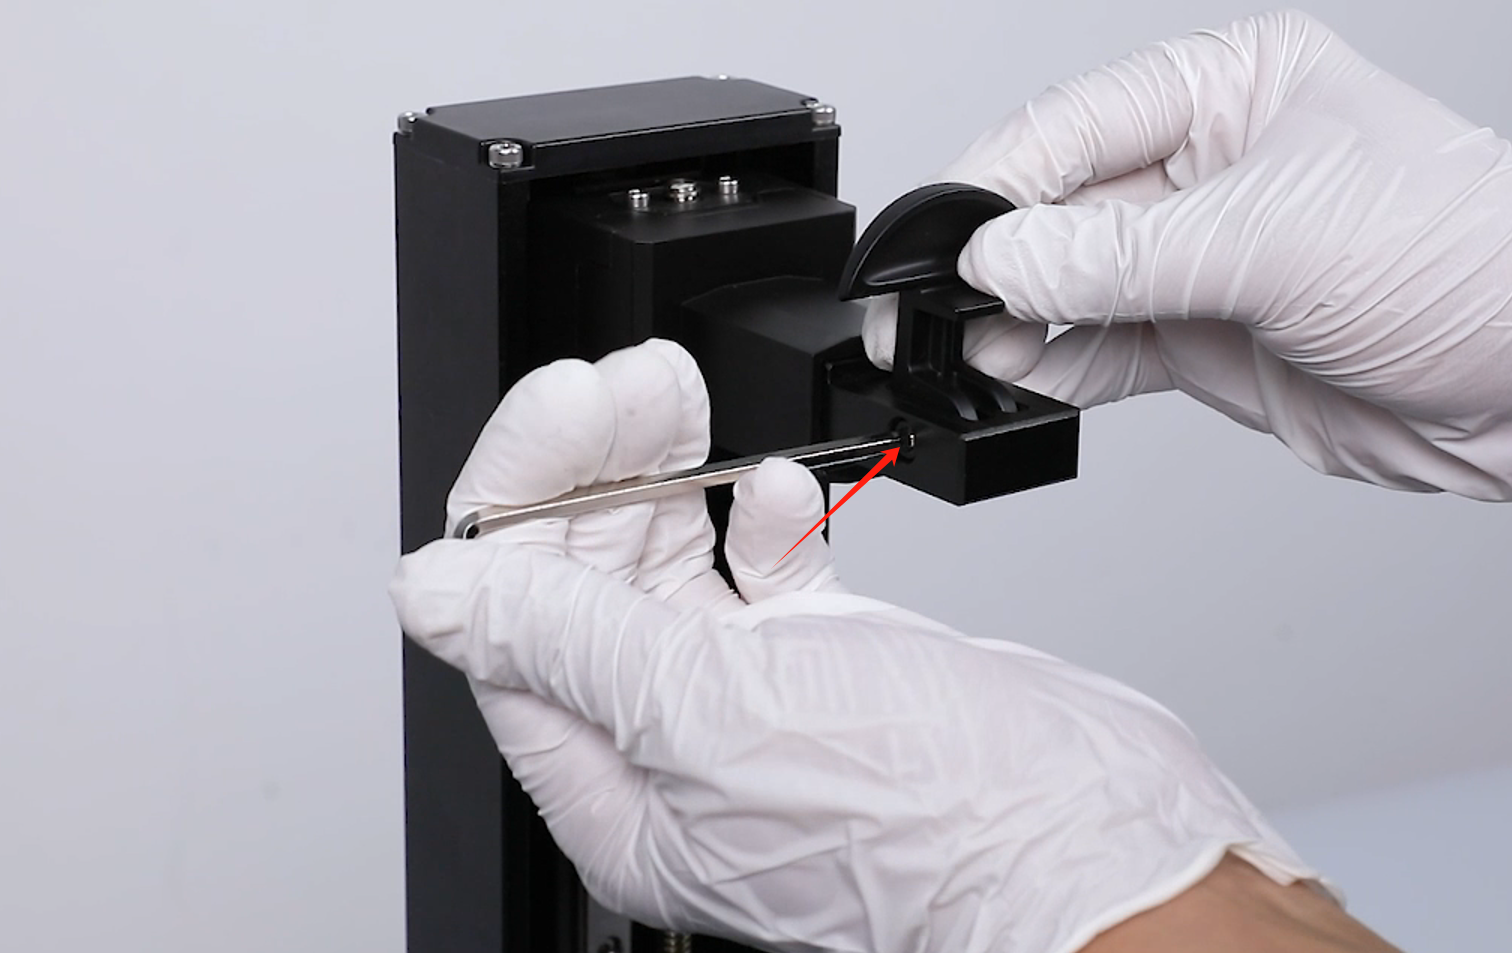
- Using a 4.0 mm Allen key, loosen the four screws securing the cantilever junction blocks.
- Put the handle in the installation position by aligning it with the screw holes. Using a 4.0 mm Allen key, tighten the screw securing the handle.

- Power on the printer. Install the build plate. Tear a piece of A4 paper into four equal pieces and place them at the four corners of the LCD screen.
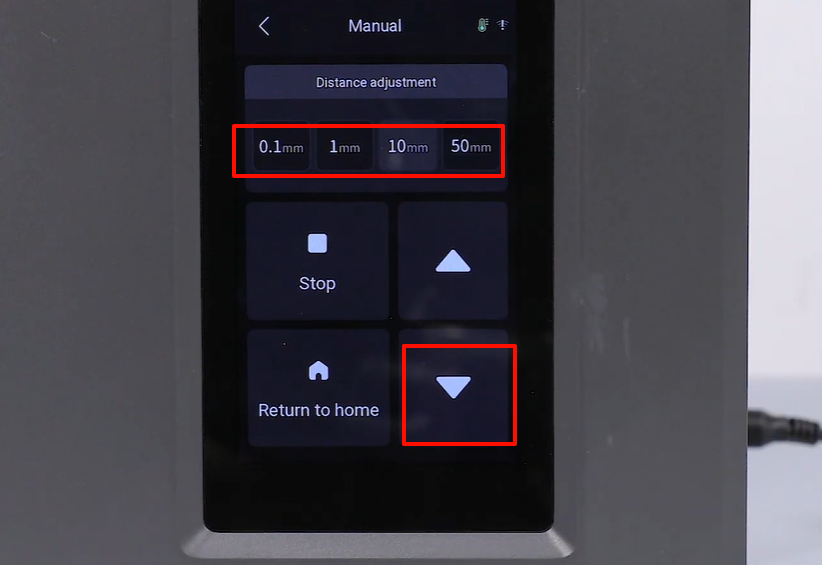
- Select Tools - Manual on the touchscreen. Lower the build plate by 50 mm, 10 mm, 1 mm and 0.1 mm to press the A4 paper.
- Pull the A4 paper at the 4 corners by hand to make sure there is significant resistance to the A4 paper.
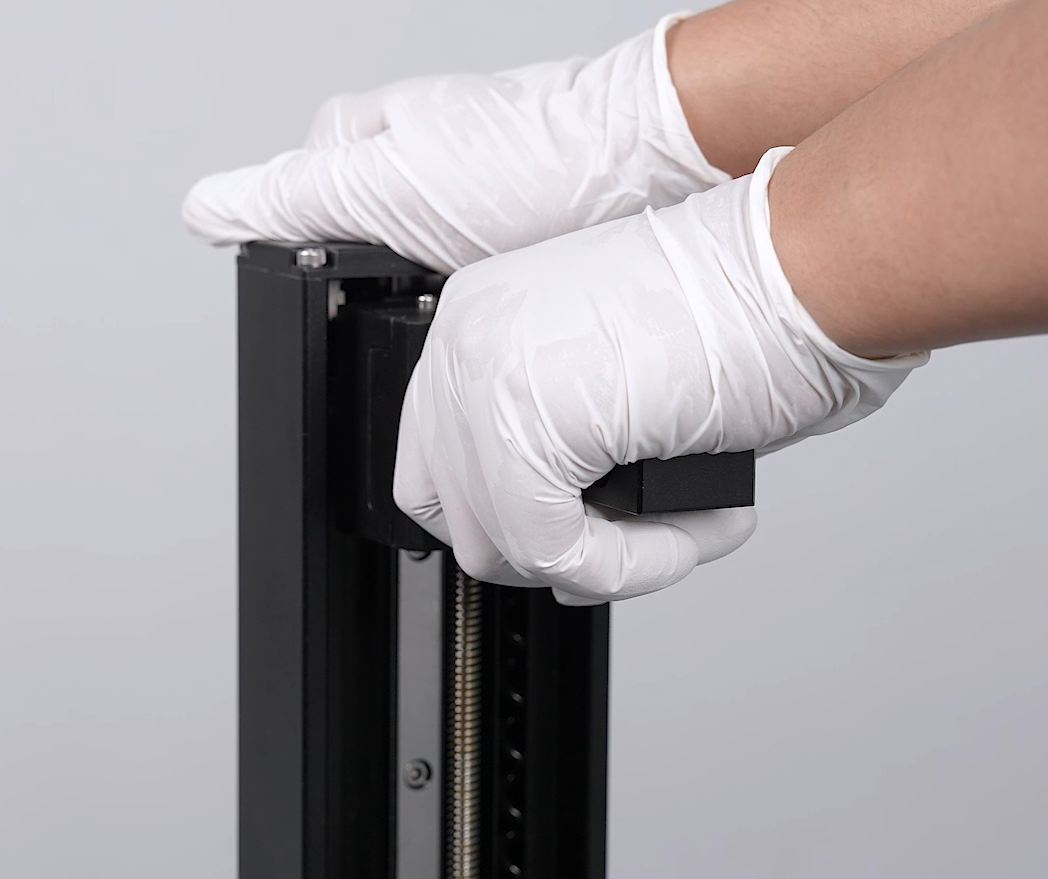
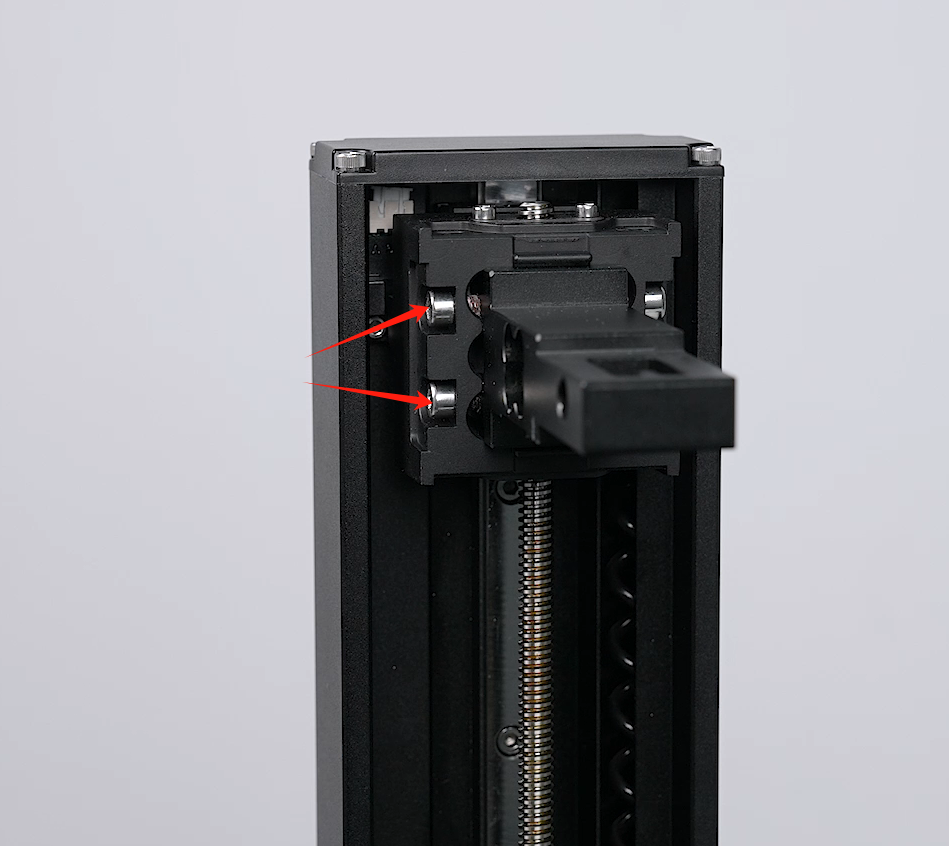
- Using a 4.0 mm Allenkey, tighten the 4 screws in diagonal direction securing the cantilever junction blocks.
- Select Home on the touchscreen, the Z-aixs starts its homing process. Then, remove the A4 paper. Remove the printing platform. Use a 4.0 mm Allen wrench to loosen the screw securing handle, then remove the handle.
- Align the clips and press the protective cover back into place.
- Prepare the handle. Put it in the installation position by aligning it with the screw holes. Using a 4.0 mm Allen key, tighten the screw securing the handle.
- After installing the build plate and resin tank, select Print - USB file on the touchscreen and select the model to be printed.
- Observe the touchscreen. It displays Calibrating the sensor - detecting resin - automatic leveling and function detection is normal without any abnormal alarm. It indicates that the spring wire replacement and leveling compeltes. The printer is ready for use.