¶ Tools and Materials
- A 2.5mm Allen key x 1
- A 2.0mm Allen key x 1
- Phillips screwdriver x 1
- Thermal Paste
- Gloves
¶ Tutorial Video
Coming soon.
¶ Instruction
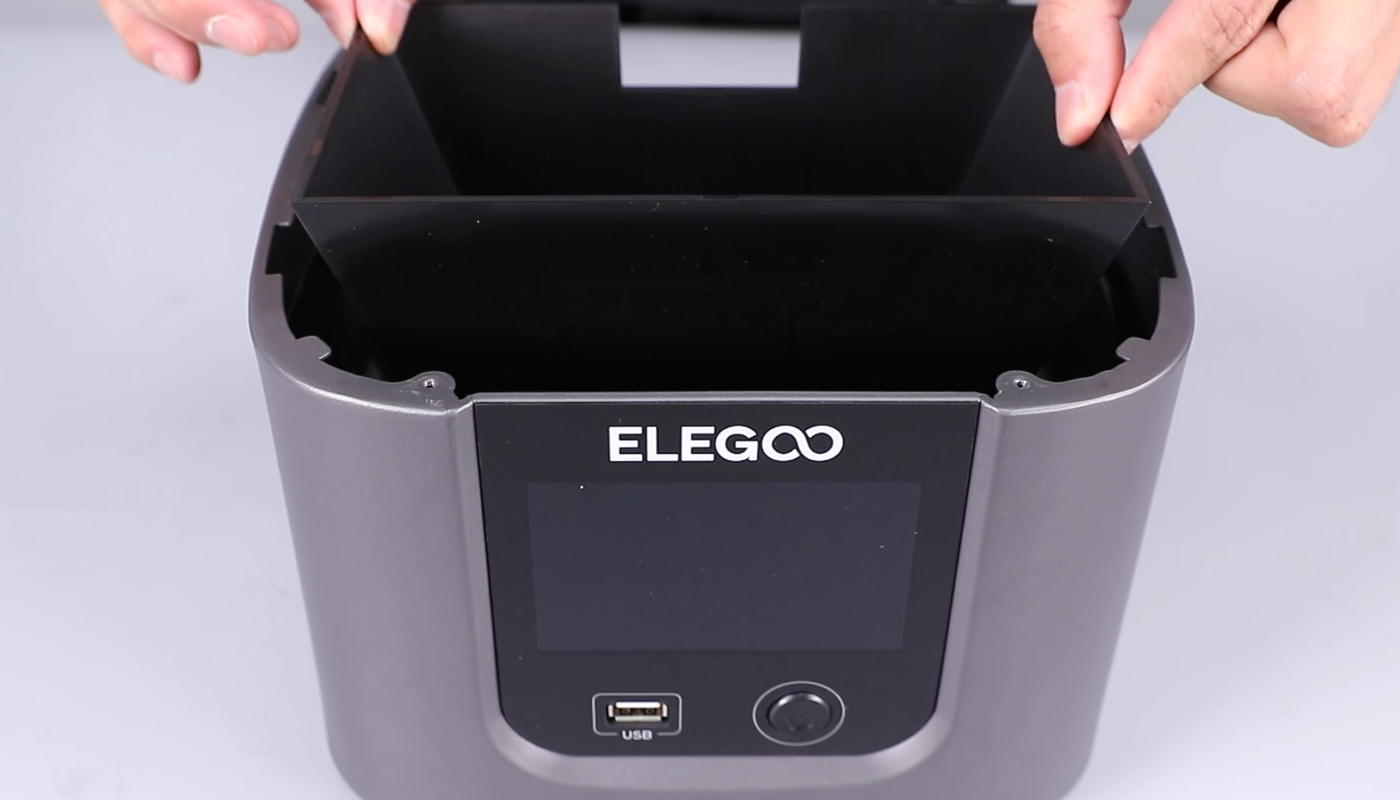
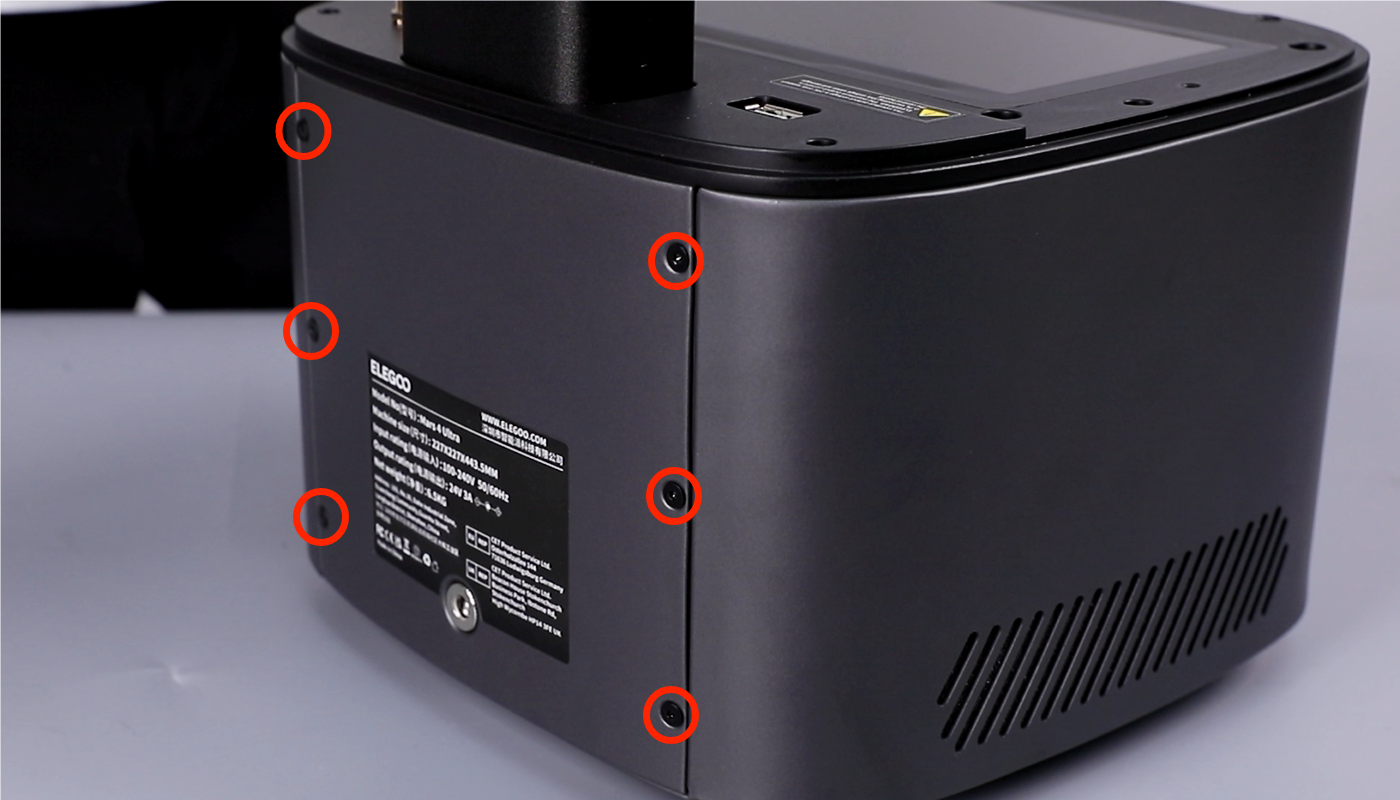
- Using a 2.0mm Allen key, remove the six screws securing the back cover.

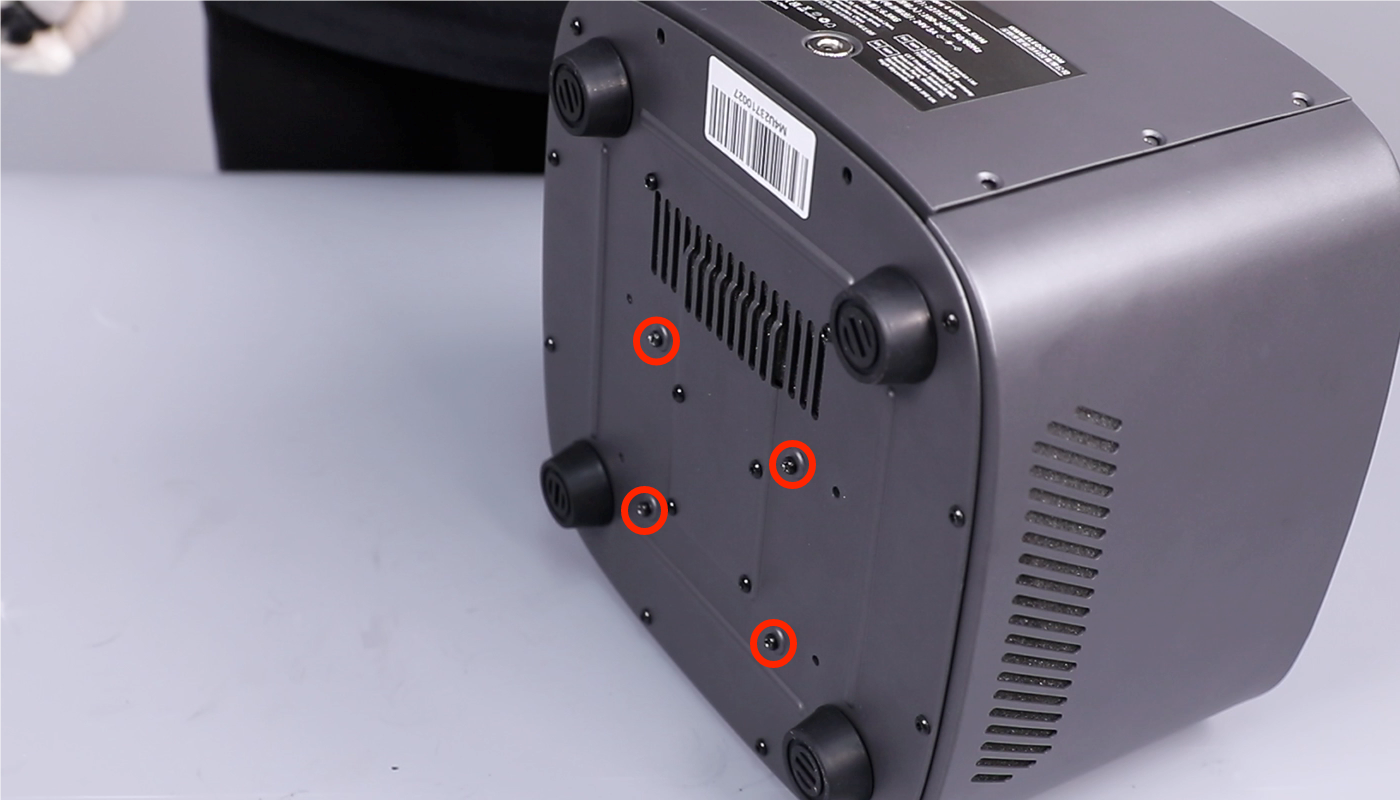
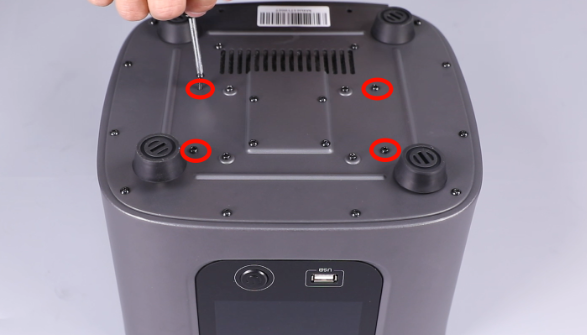
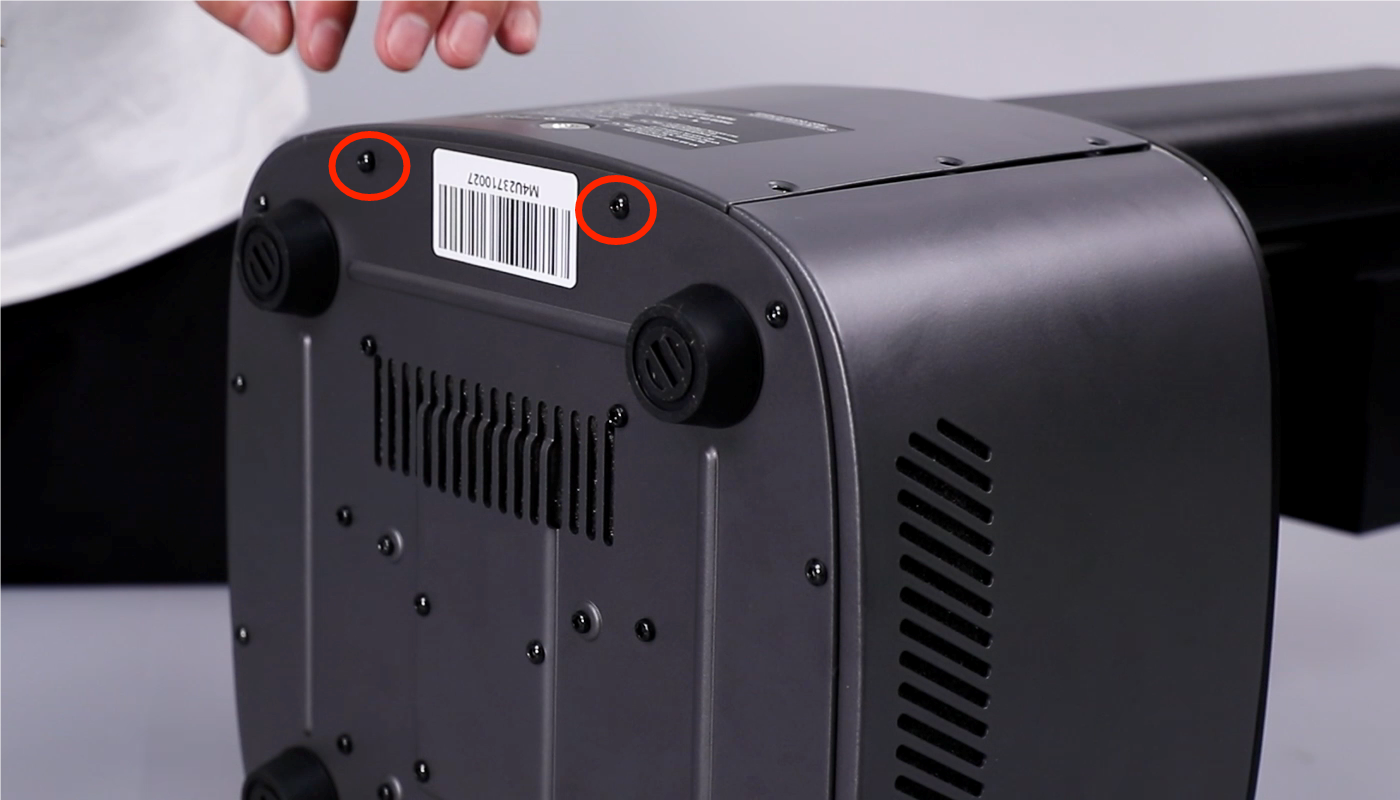
- Using a 2.5mm Allen key, remove the two screws securing the bottom cover of the printer. Remove the bottom cover.


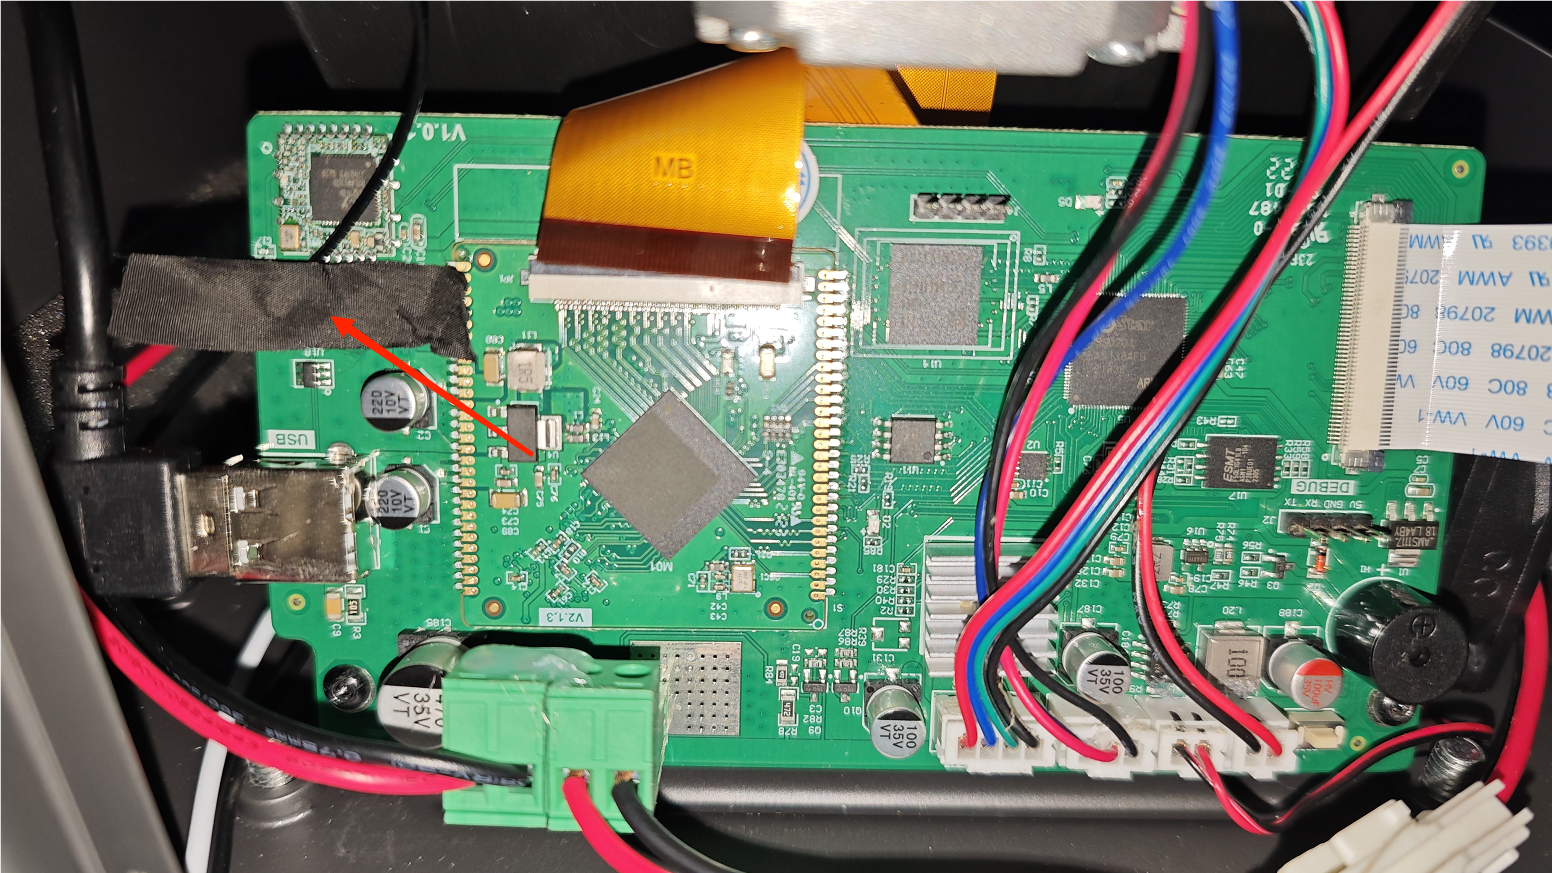
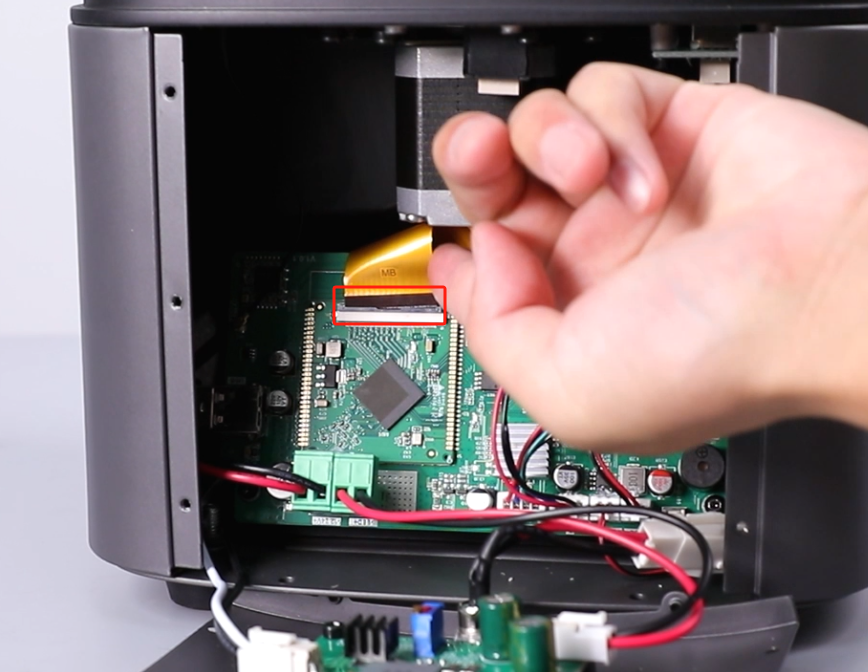
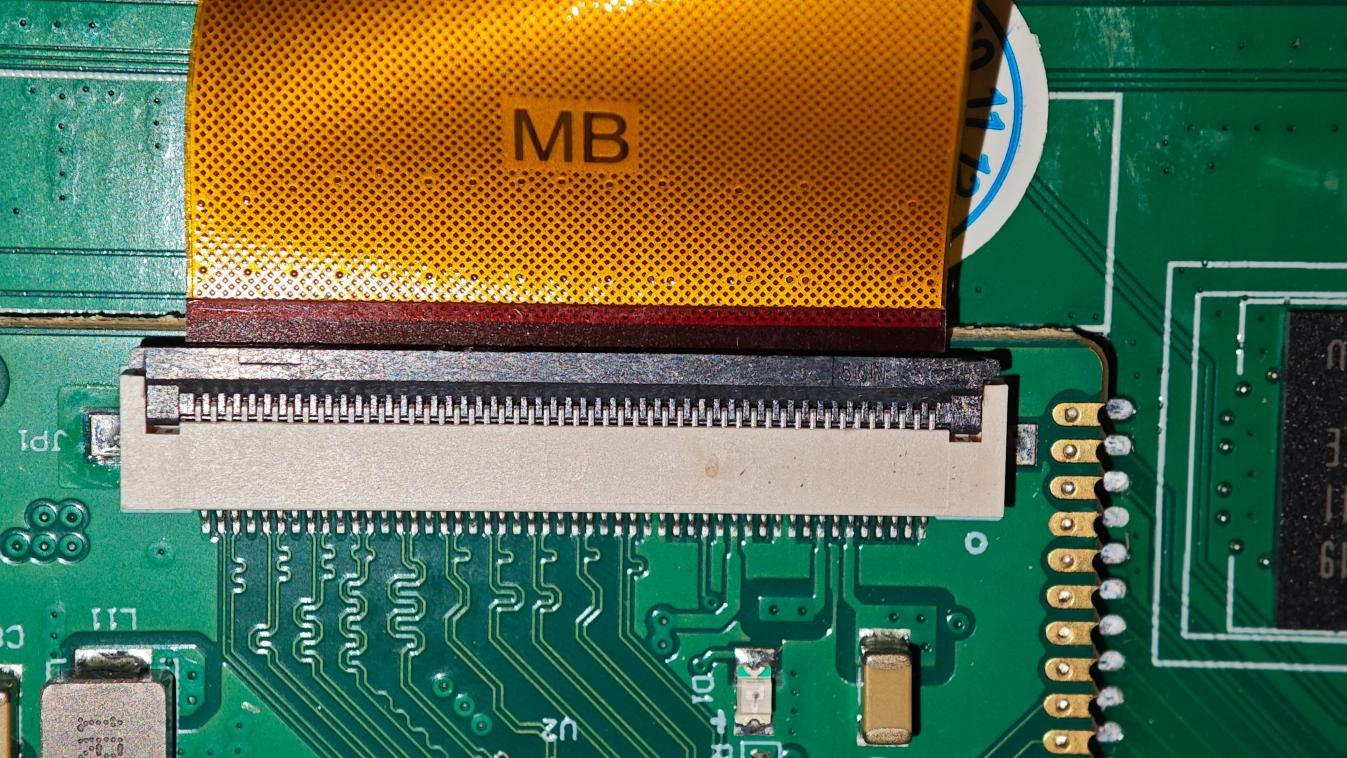
- Peel off the black tape from the LCD ribbon cable port. Lift the cover securing the LCD ribbon cable and remove the ribbon cable.


- Peel off the black tape adhered to the Wi-Fi antenna port. Disconnect the Wi-Fi antenna.


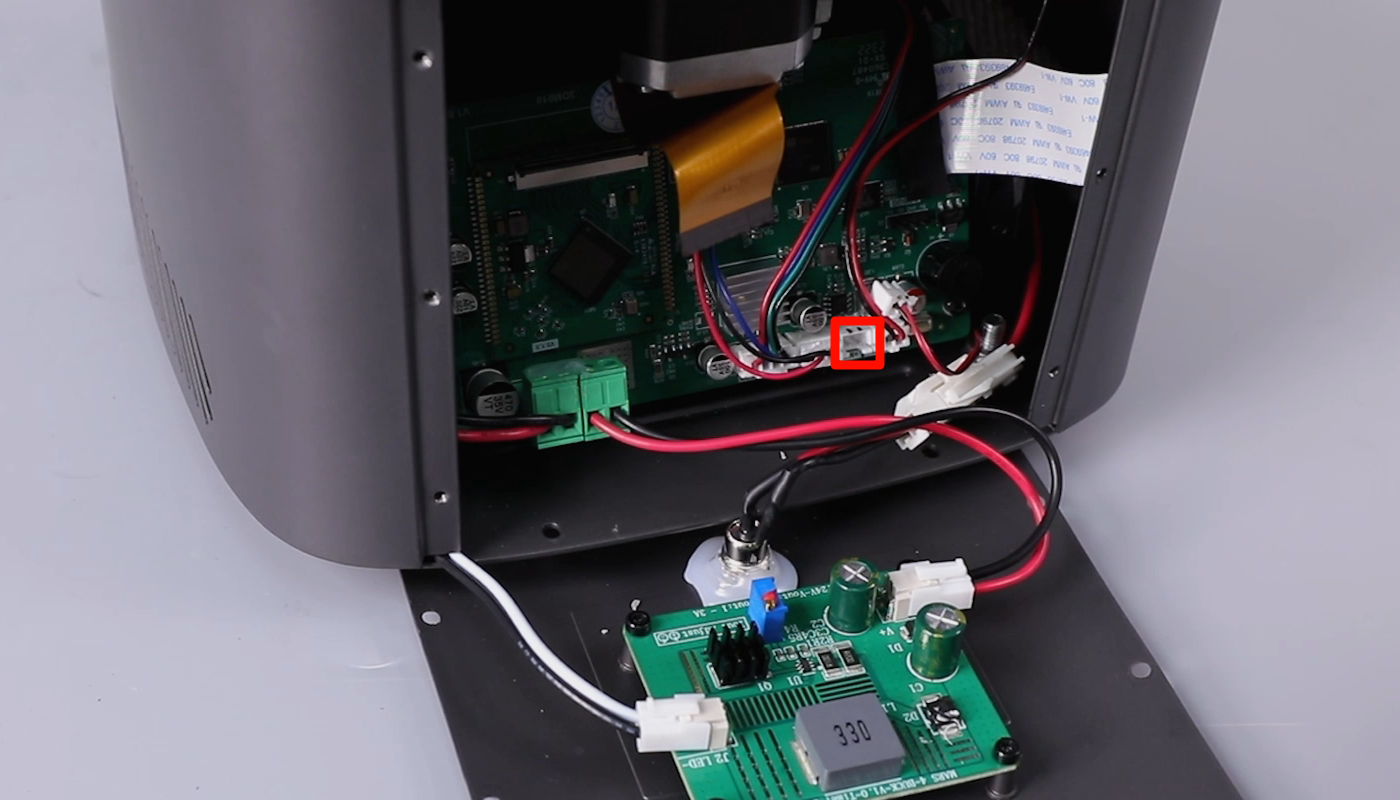
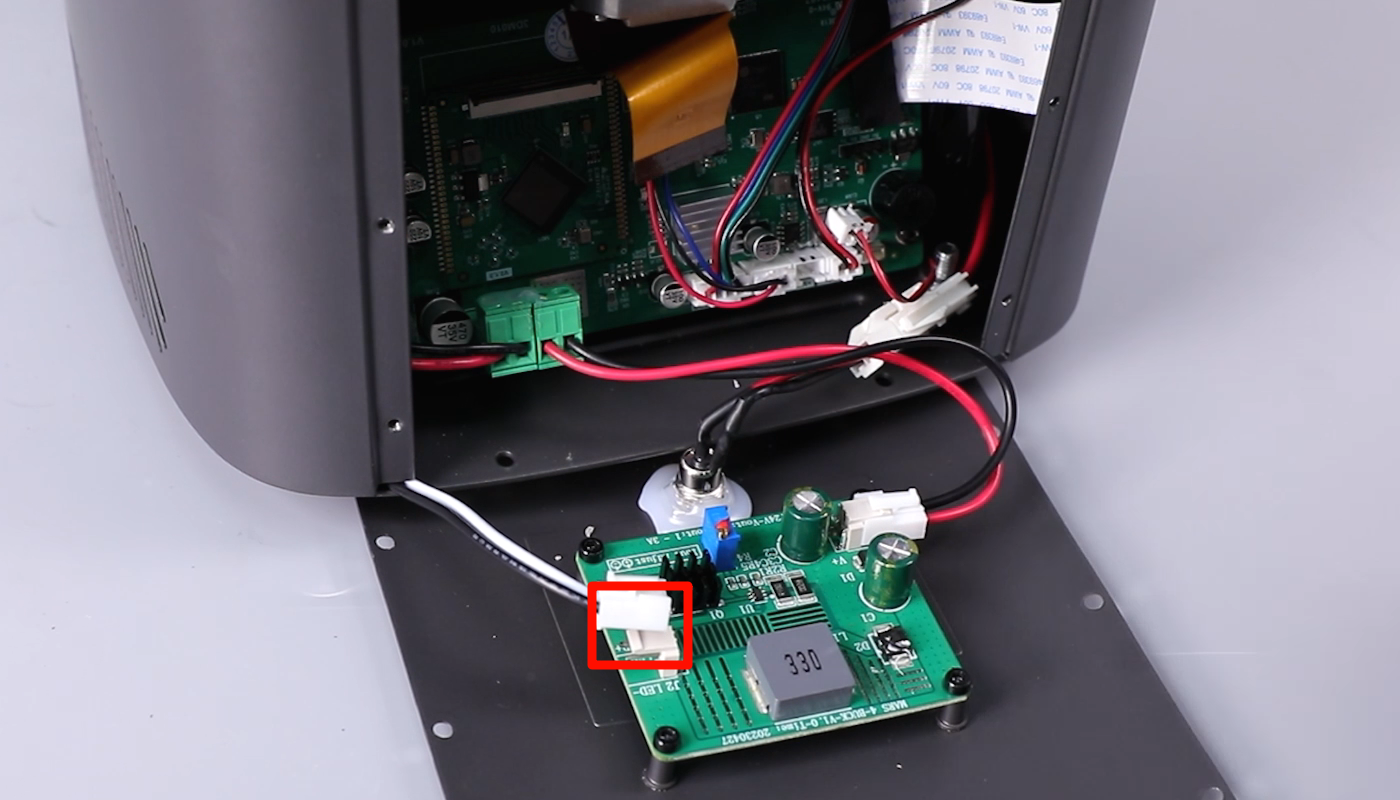
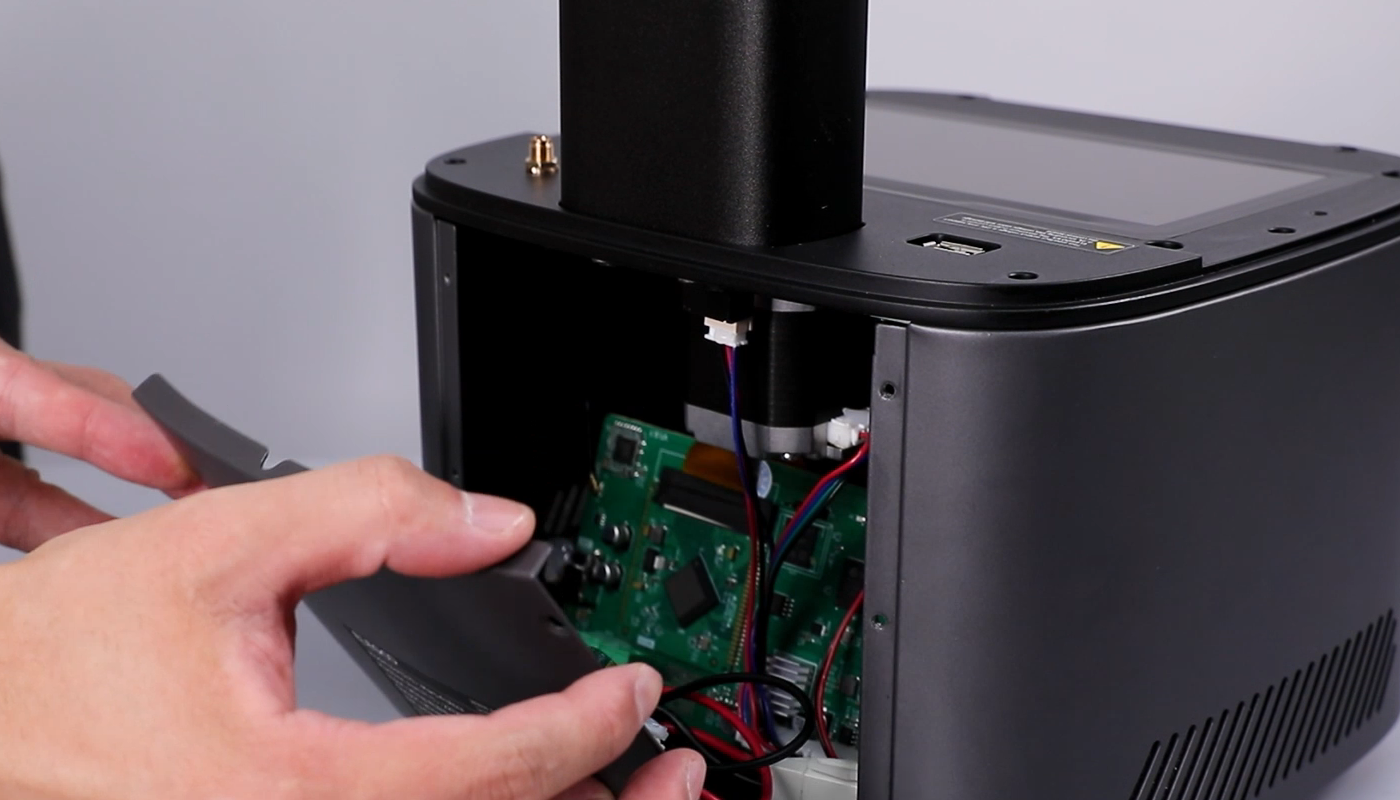
- Disconnect the ① motor connection cable, ② limit switch connection cable, ③ USB connection cable of the purifier.

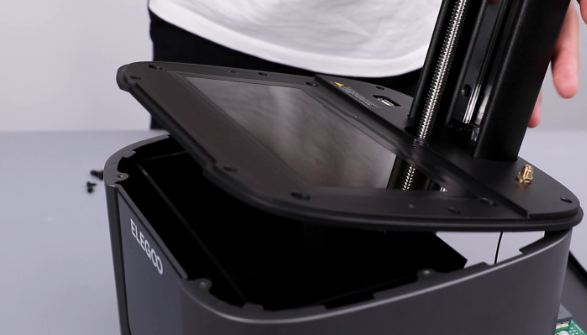
- Using a 2.5 mm Allen key, loosen the six screws securing the middle housing. (Take care of the cables.)


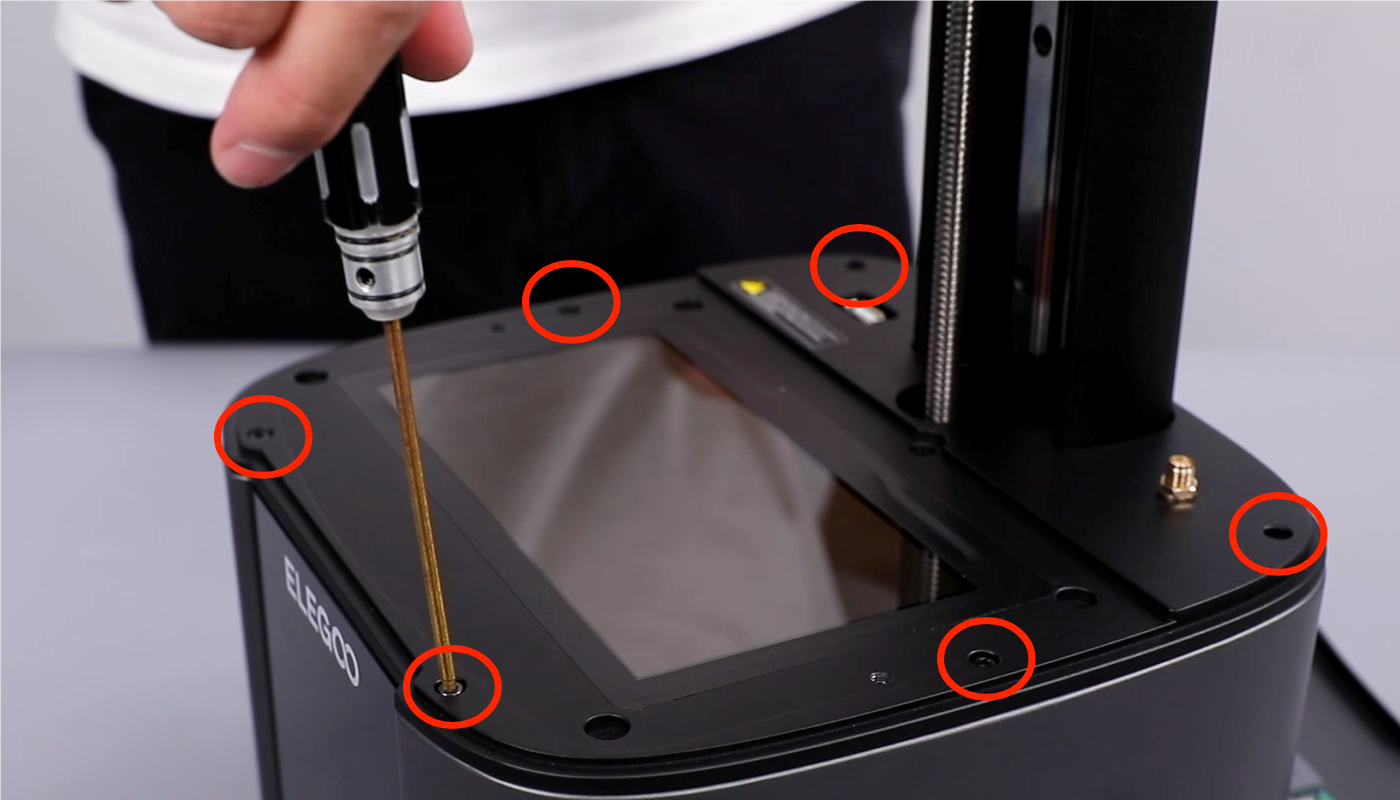
- Using a Phillips screwdriver, loosen the four screws securing the lens shade at the bottom cover of the printer. Disconnect the fan cables on the motherboard. Remove the lens shade.
(NOTE: Above is connected with a cooling fan.)


- Using a Phillips screwdriver, loosen the four screws at the bottom. Remove the lens shade assembly.

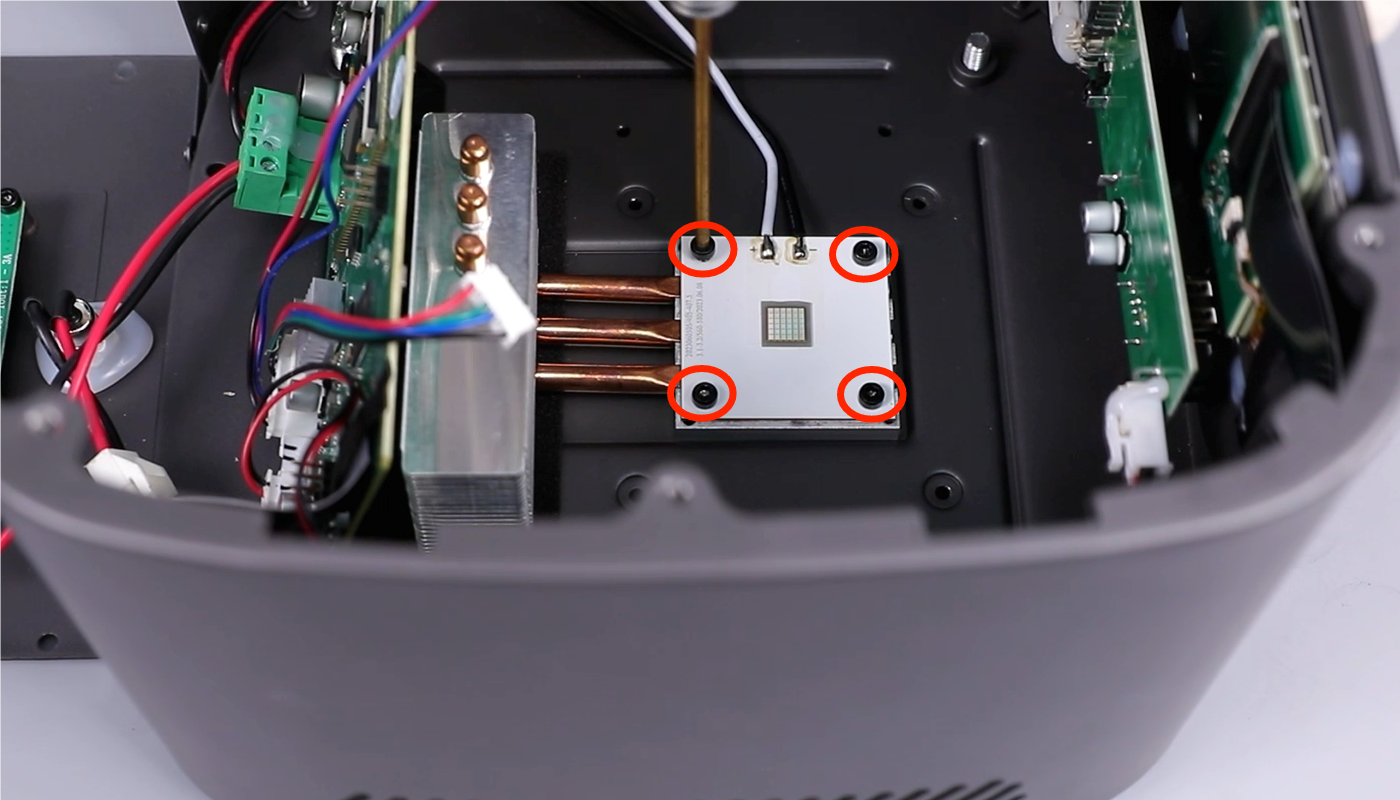
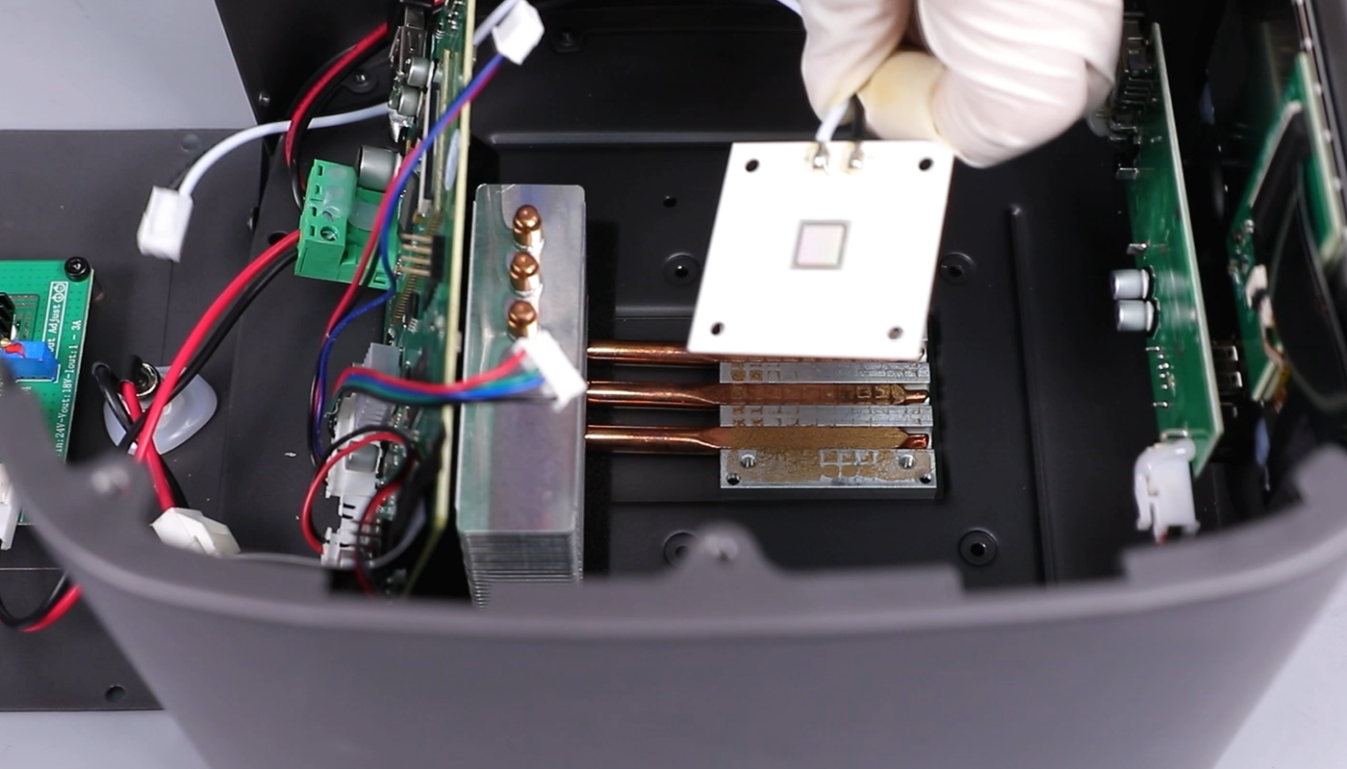
- Disconnect the connection cable of the UV light cable from the constant current board. Using a 2.5 mm Allen key, loosen the four screws securing the UV light board. Remove the light board.
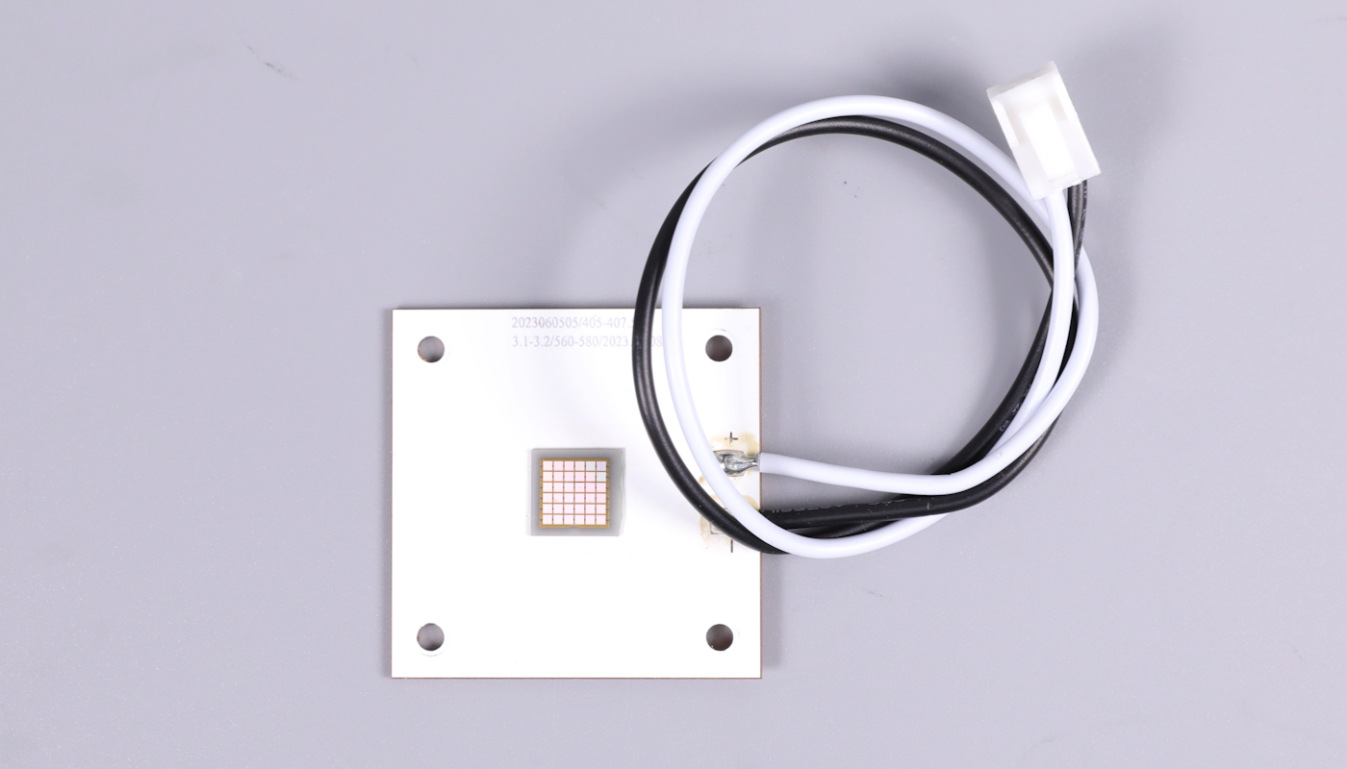
- Prepare the new UV light board. Apply the thermal grease to its underside, holding the new UV light board.

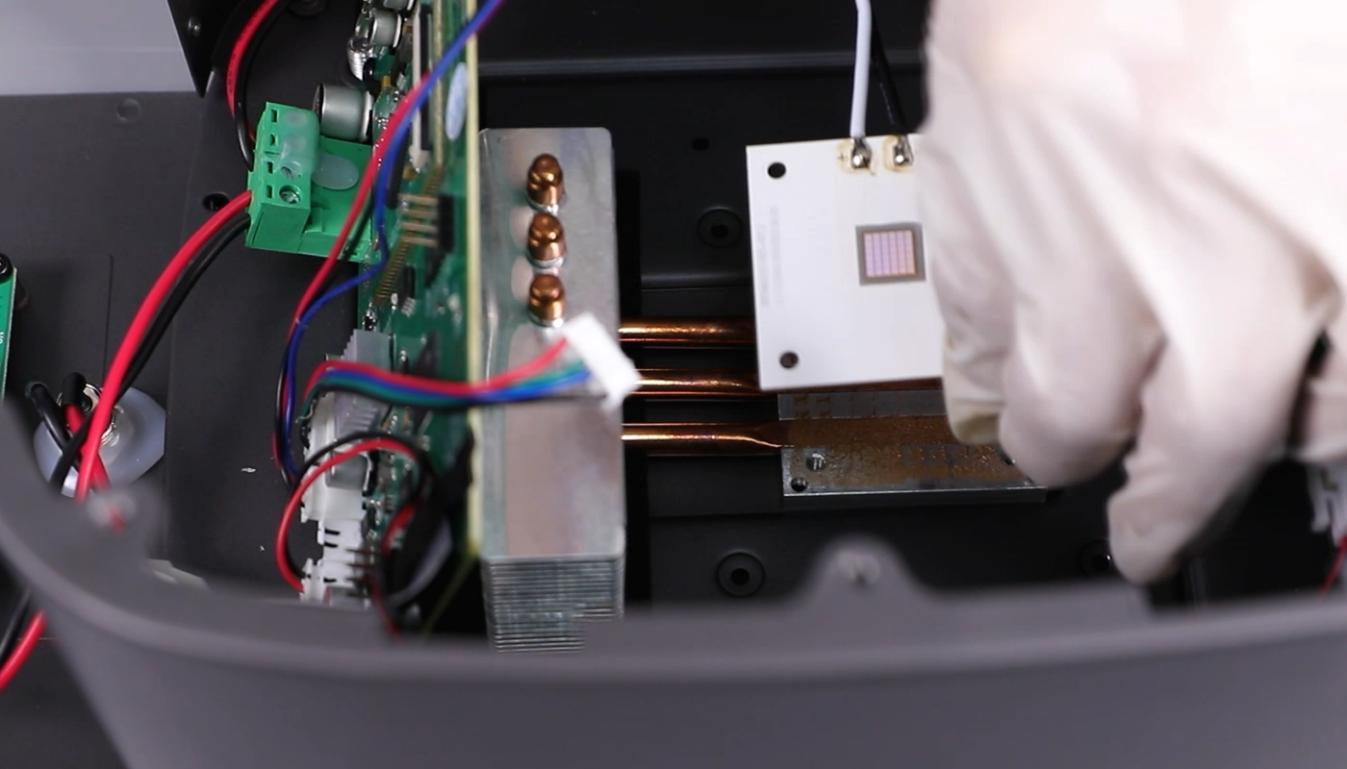
- Align the UV light board with the screw holes and install it in the installation position. Using a 2.5 mm Allen key, tighten the four screws securing the UV light board. Insert the connection cable on the constant current board.


- Align the lens with the screw holes and put it in the installation posistion. Using a Phillips screwdriver, tighten the four screws securing the lens. (Pay attention to the orientation of the lens opening.)
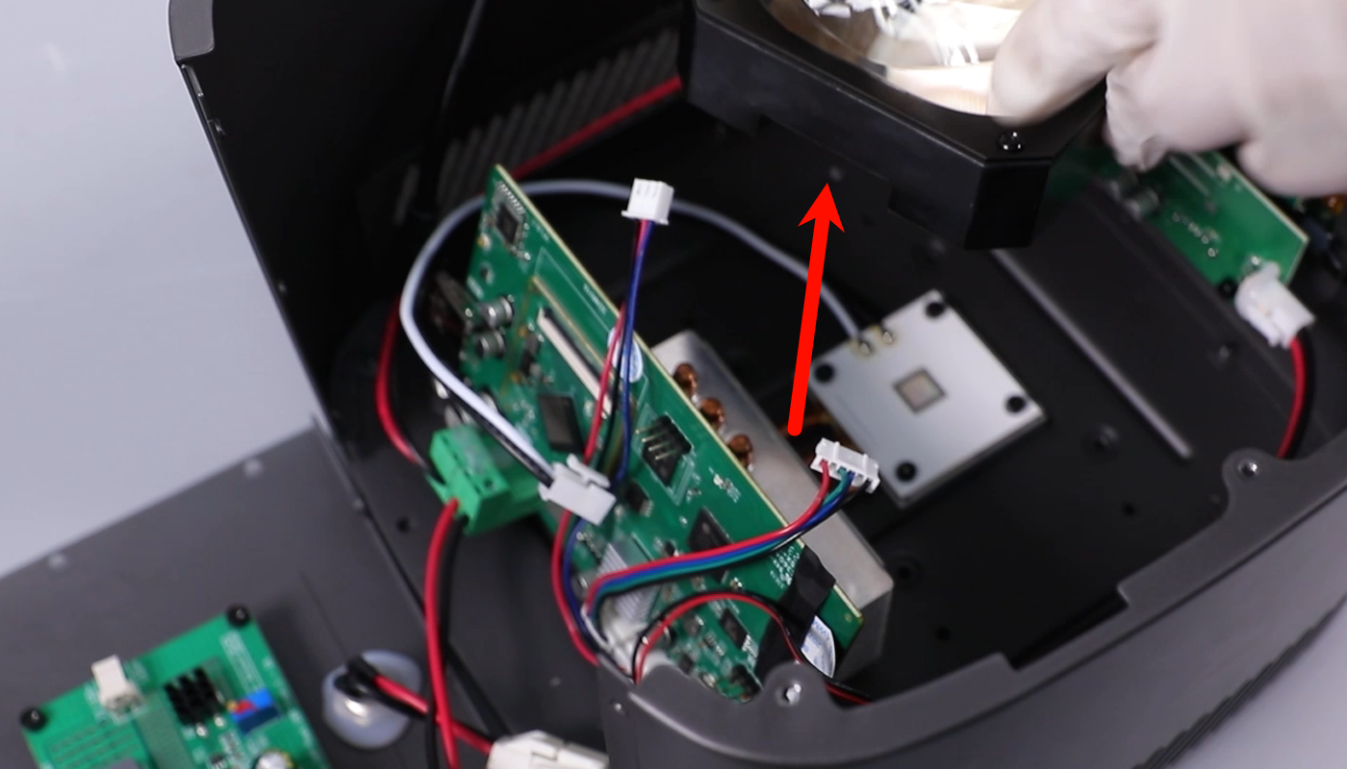

- Align the lens shade with the base plate's mounting holes. Reconnect the fan cable to the lens shade. Using a Phillips screwdriver, tighten the four fixing screws.

- Align the middle housing with the screw holes and put it in the installation position. Using a 2.5 mm Allen key, tighten the six screws securing the middle housing.
- Insert the Wi-Fi antenna. Secure the Wi-Fi antenna using black tape.

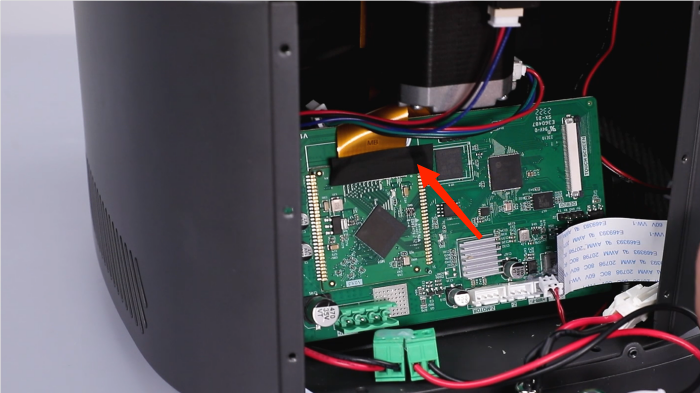
- Lift the LCD ribbon cable cover. Connect the LCD ribbon cable and close the cover. Secure the black tape.
- Connect the ① motor connection cable, ② limit switch connection cable, ③ USB connection cable of the purifier.

- Install the back cover. Using a 2.5 mm Allen key, tighten the two screws securing the bottom cover of the printer.
- Using a 2.0mm Allen key, tighten the six screws securing the back cover.
- Power on the printer. On the touchscreen, select Tool - Screen Exposure - ELEGOO. The printer is ready for use if the LCD screen and the touchscreen works normally.