¶ Tools and Materials
- A 2.5mm Allen key x 1
- A 2.0mm Allen key x 1
- Gloves
¶ Tutorial Video
https://youtu.be/-SqhtVeQTGs?si=MApj-uUcxV1UoF_Y
¶ Instruction
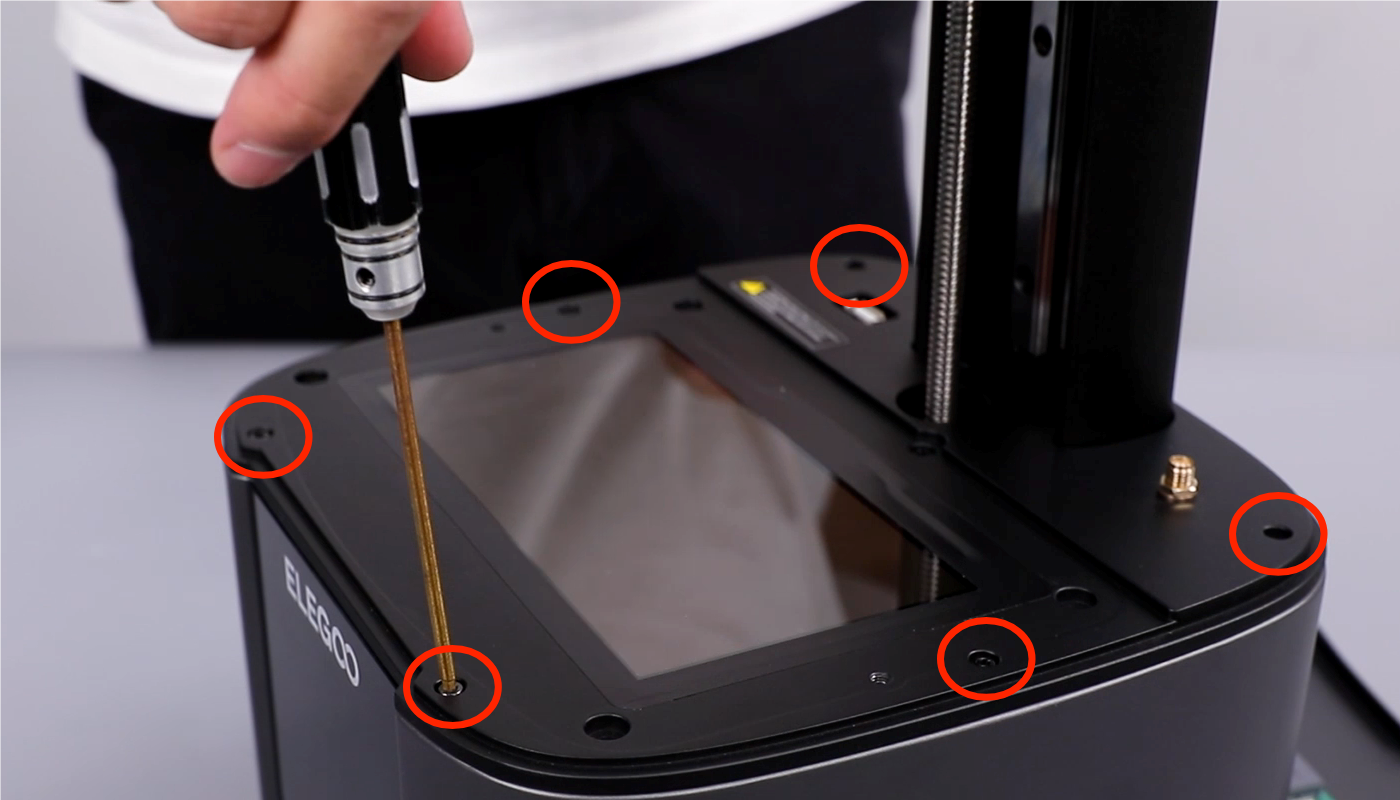
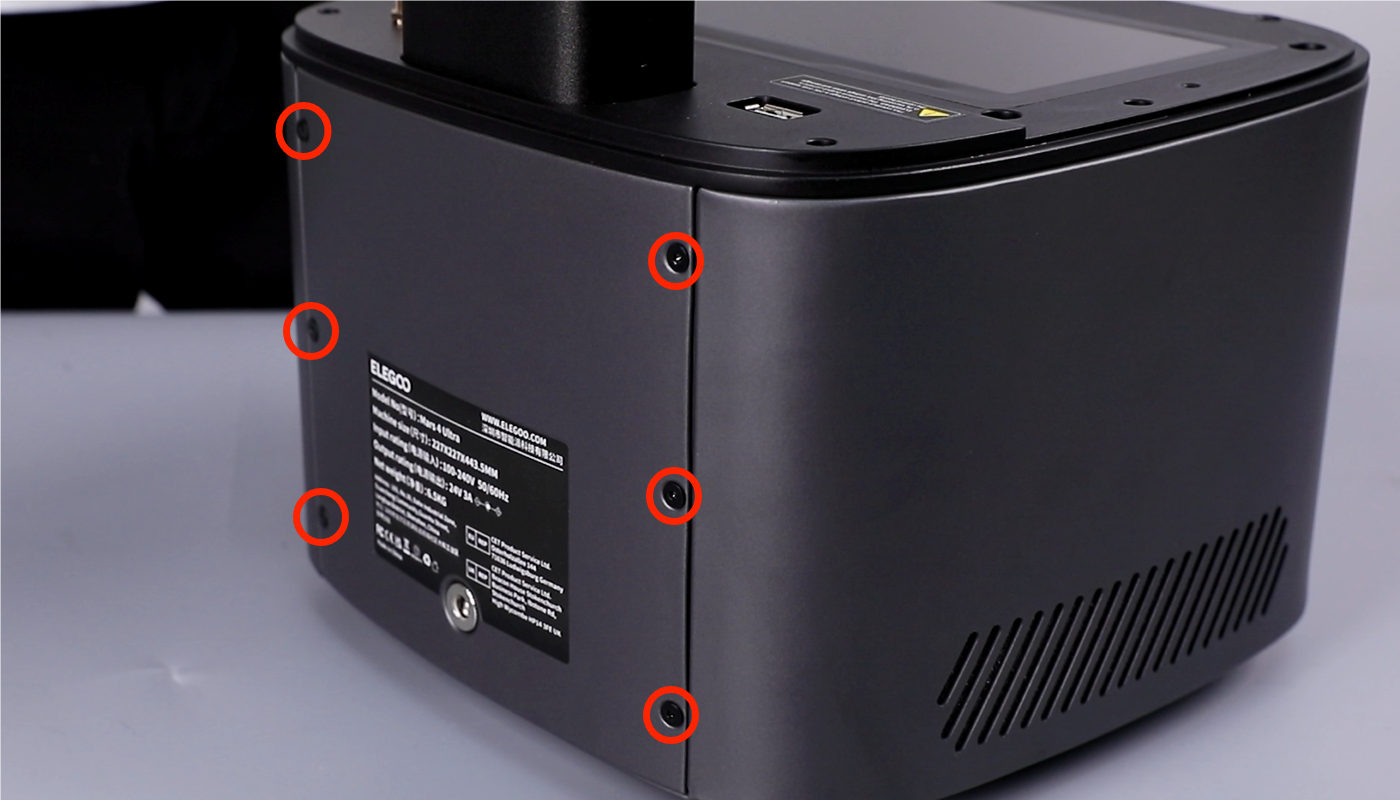
- Using a 2.0mm Allen key, remove the six screws securing the back cover.

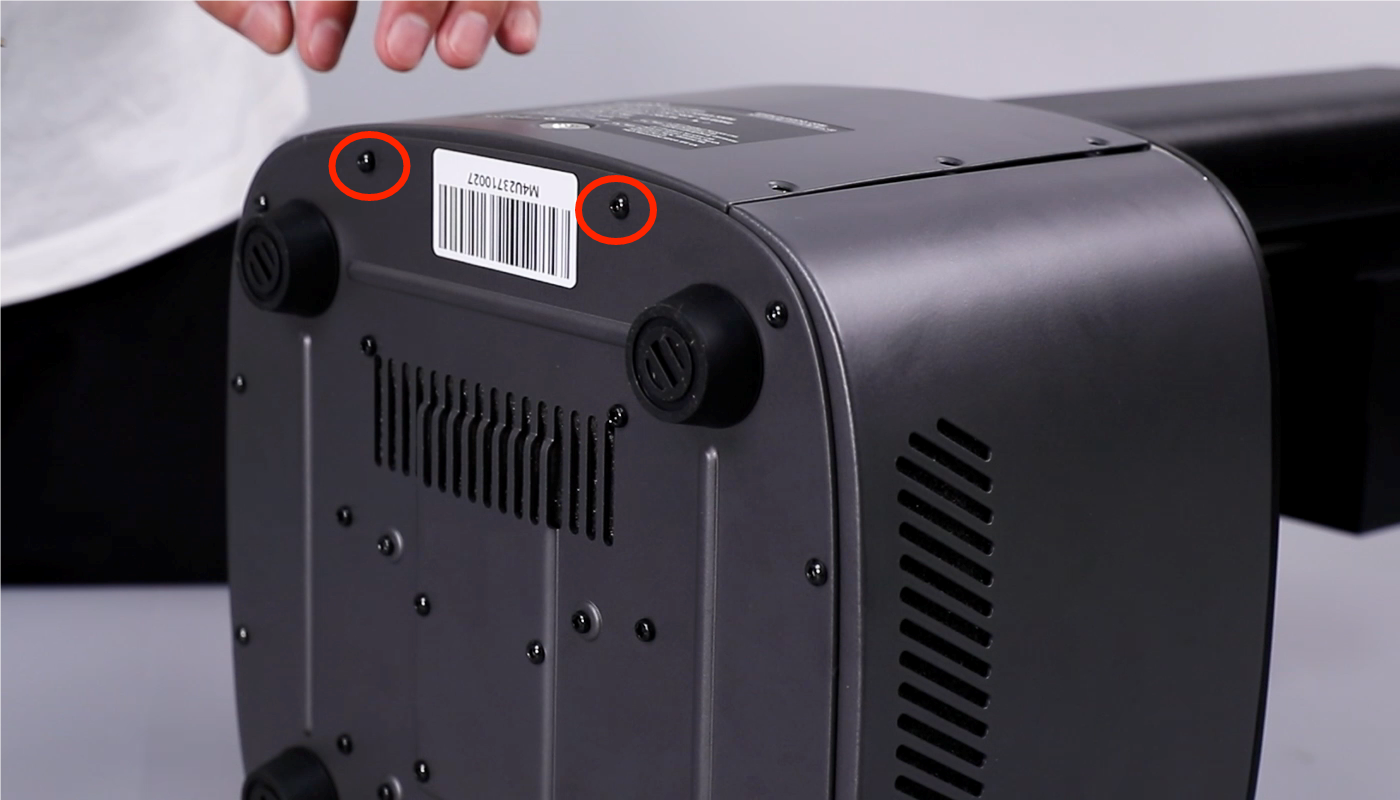
- Using a 2.5mm Allen key, remove the two screws securing the bottom cover of the printer. Remove the bottom cover.

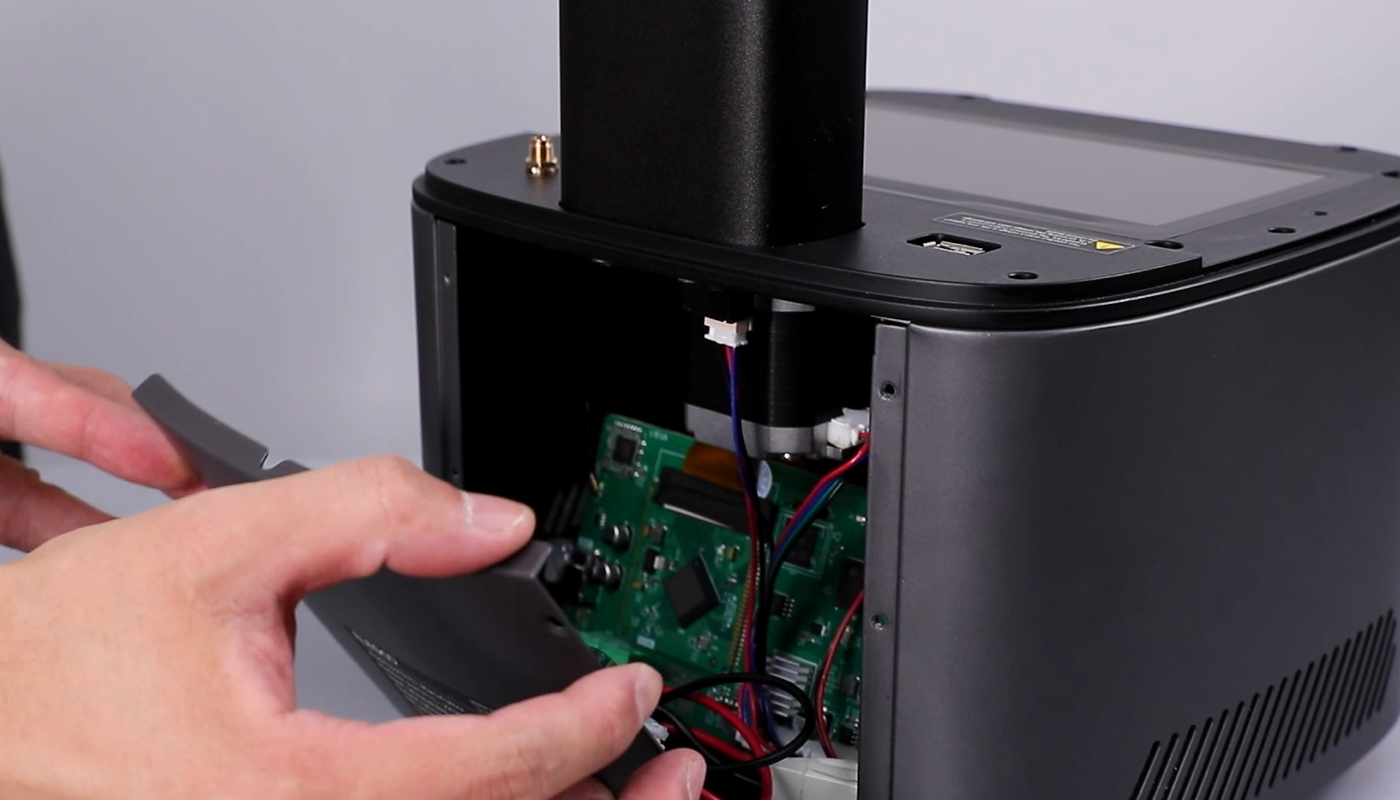
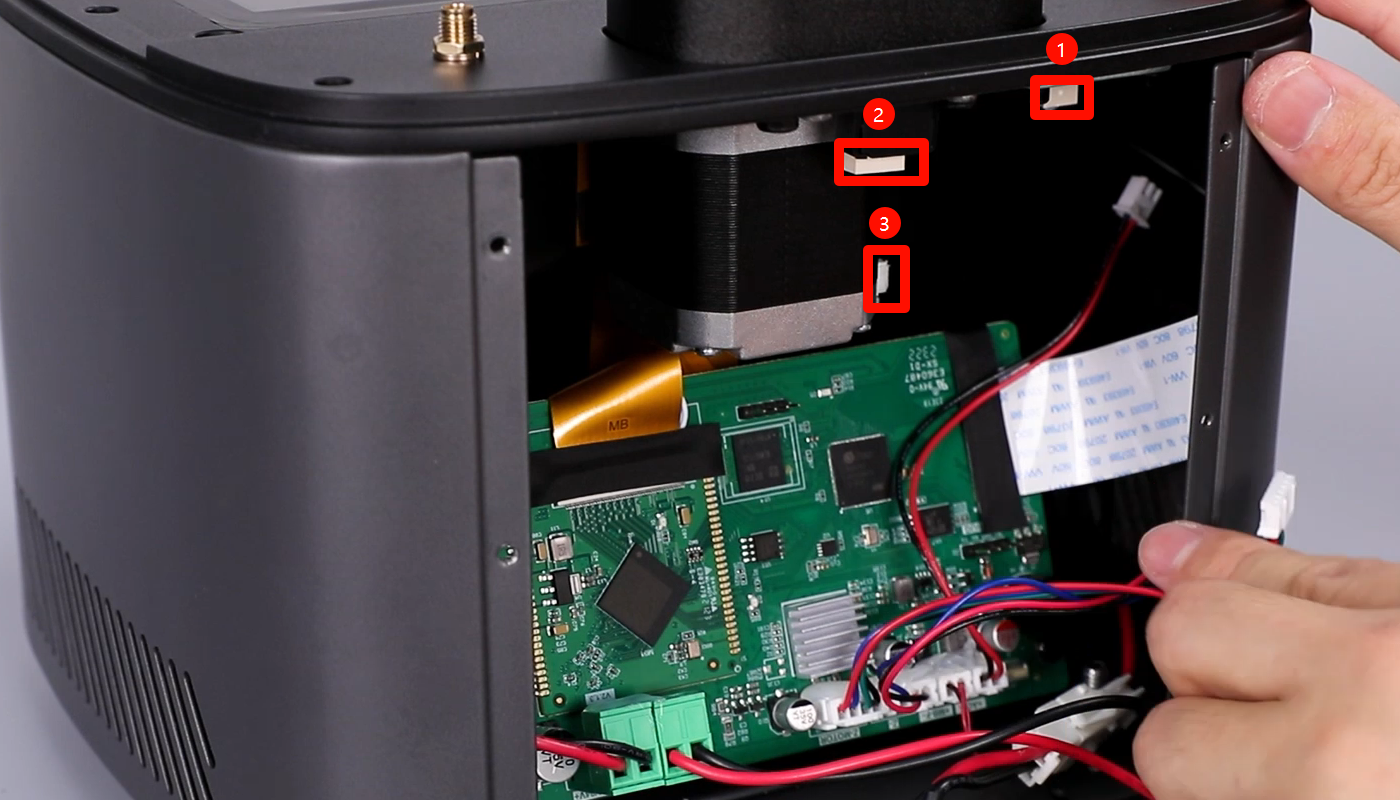
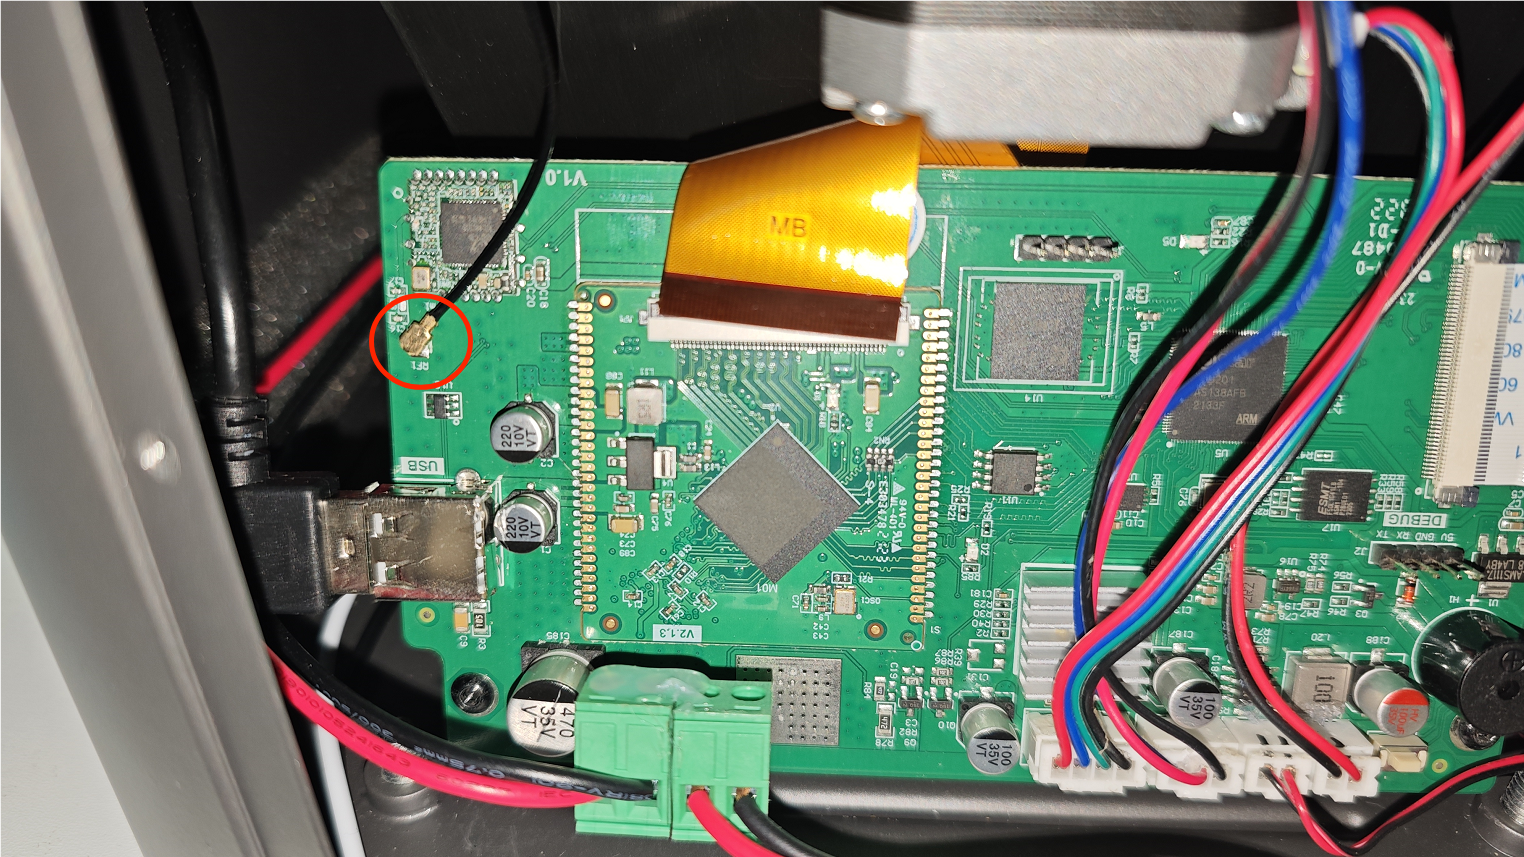
- Disconnect the ① motor connection cable, ② limit switch connection cable, ③ USB connection cable of the purifier.
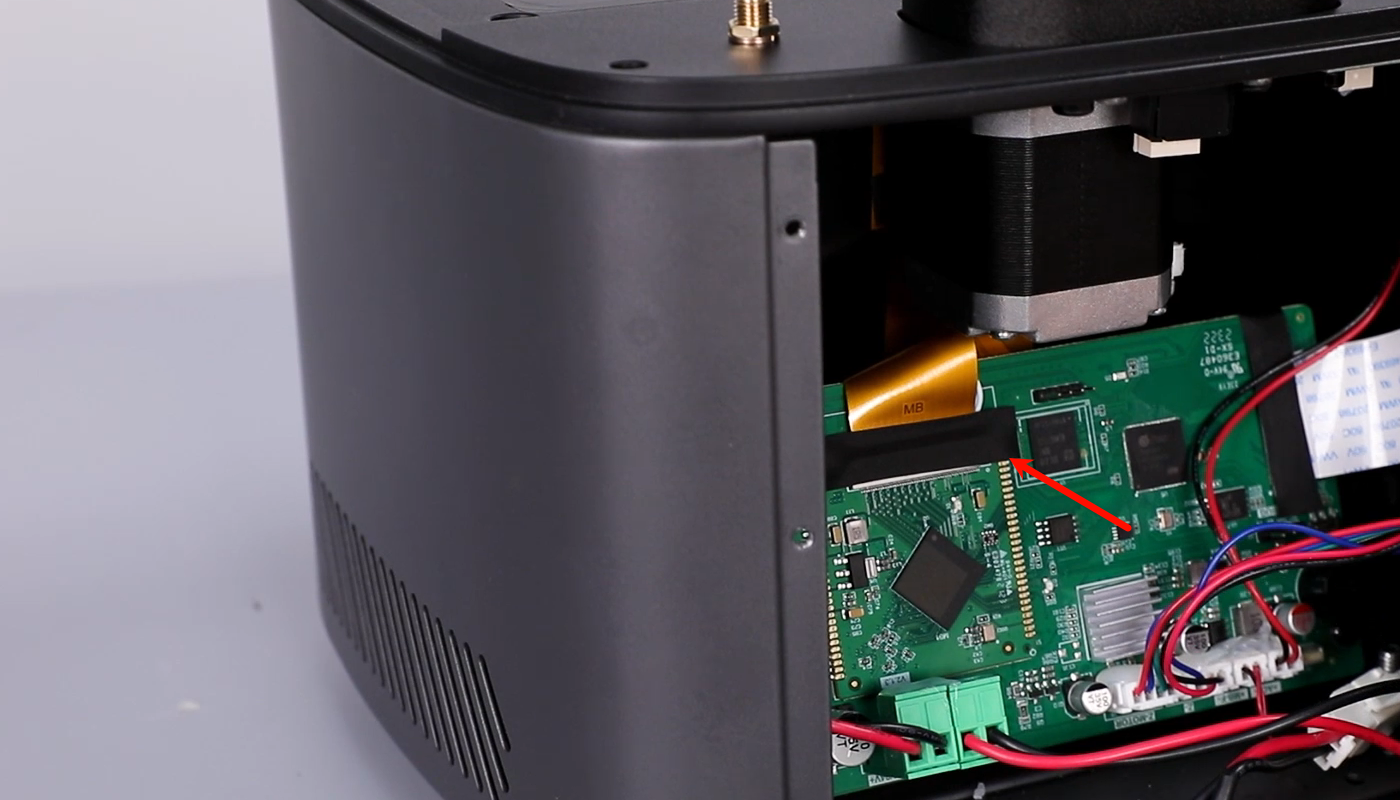
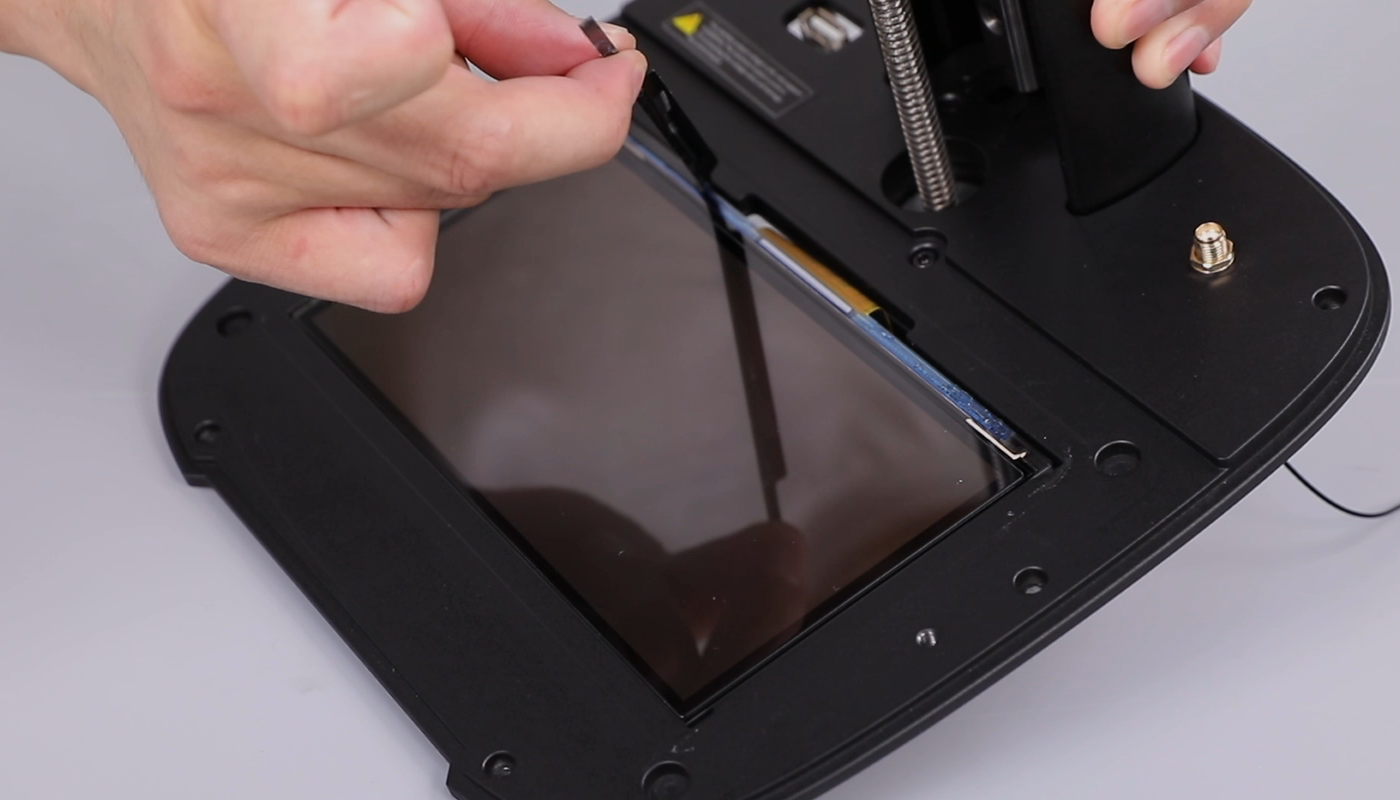
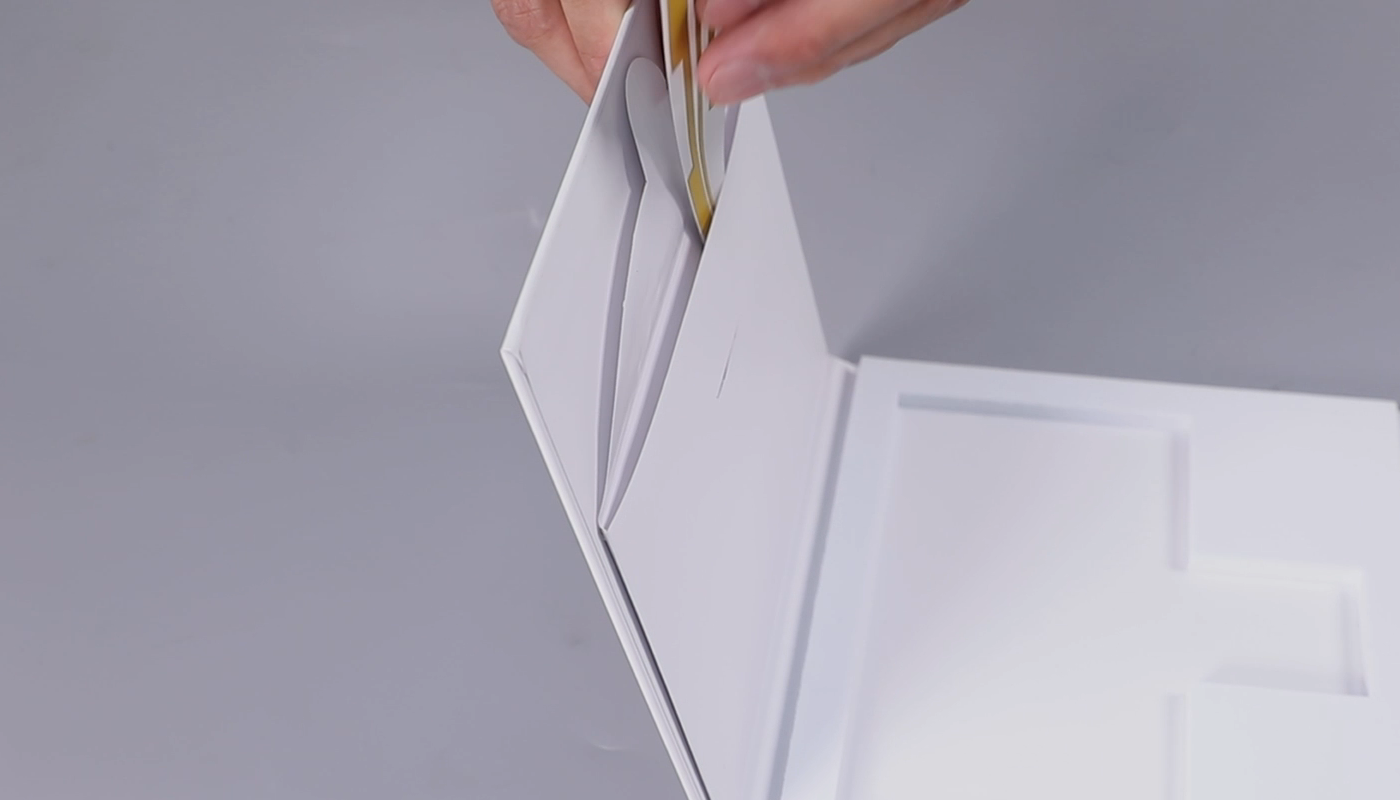
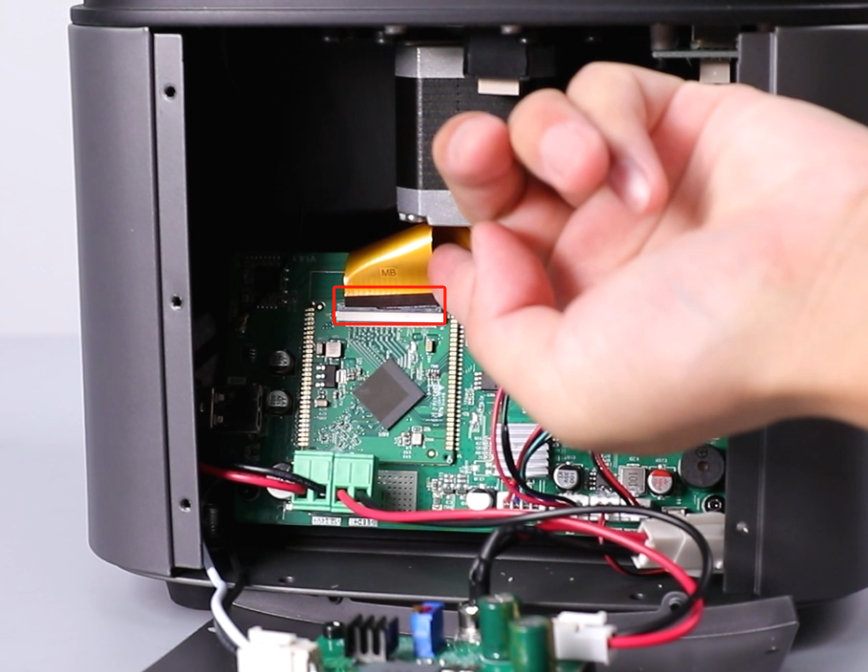
- Peel off the black tape from the LCD ribbon cable port. Lift the cover securing the LCD ribbon cable and remove the ribbon cable.
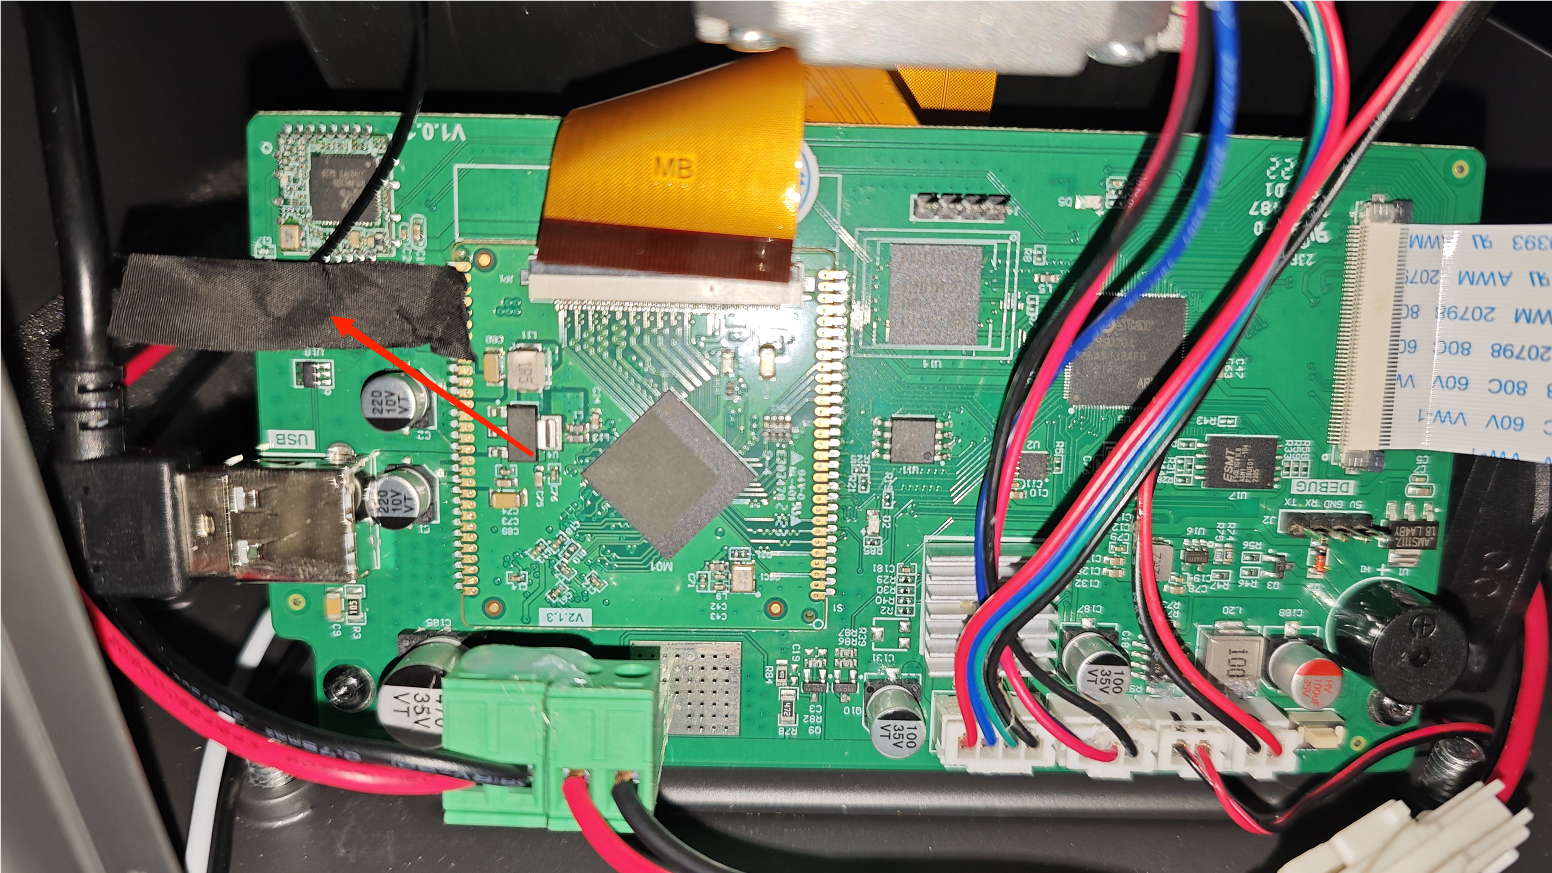
- Peel off the black tape adhered to the Wi-Fi antenna port. Disconnect the Wi-Fi antenna.

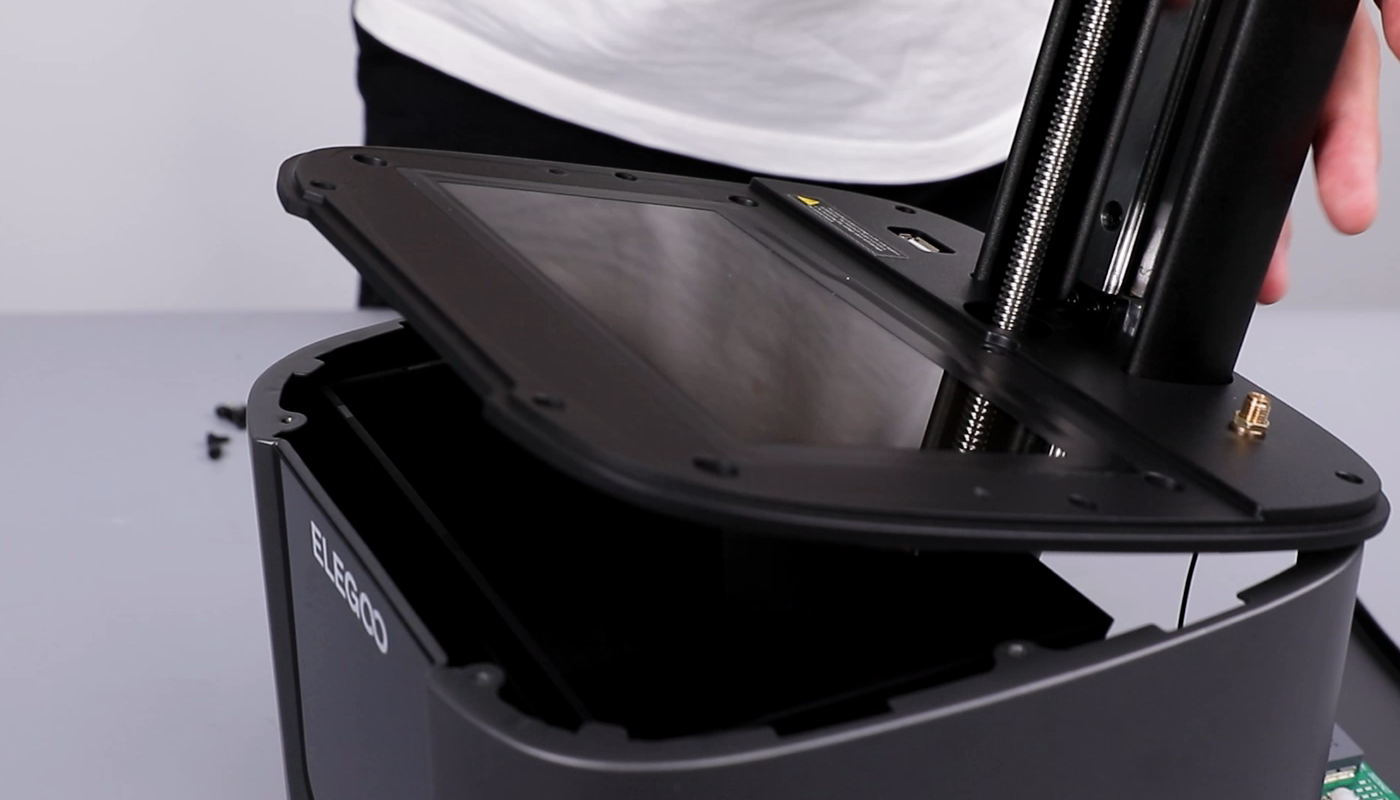
- Using a 2.5 mm Allen key, loosen the six screws securing the middle housing. (Take care of the cables.) Remove the middle housing.

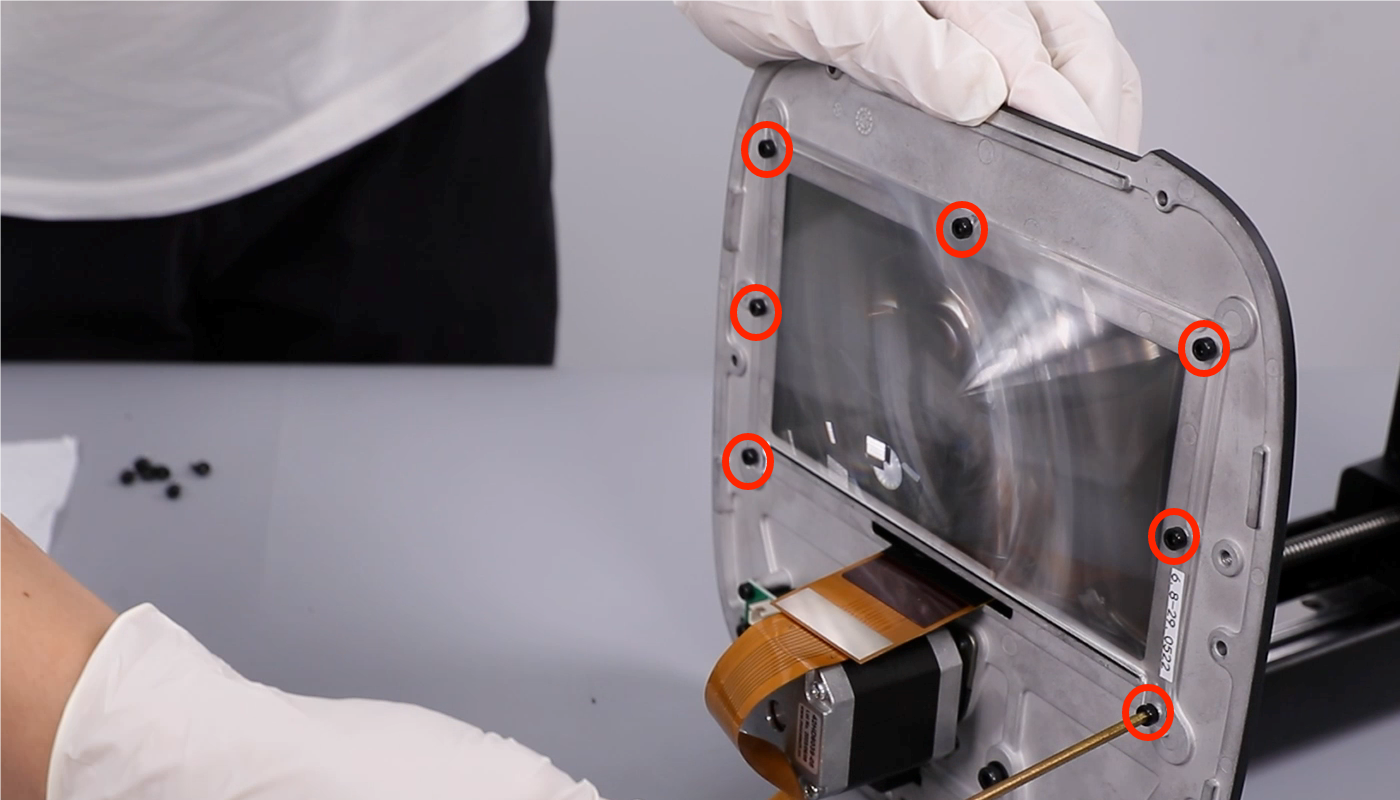
- Using a 2.5 mm Allen key, unscrew the seven screws securing Fresnel lens, then remove the fans. Put it on clean paper or a lint-free cloth.
NOTE: Do not scratch or pollute the surface. Otherwise it will affect the printing results.


- Peel off the black tape adhered to the screen.
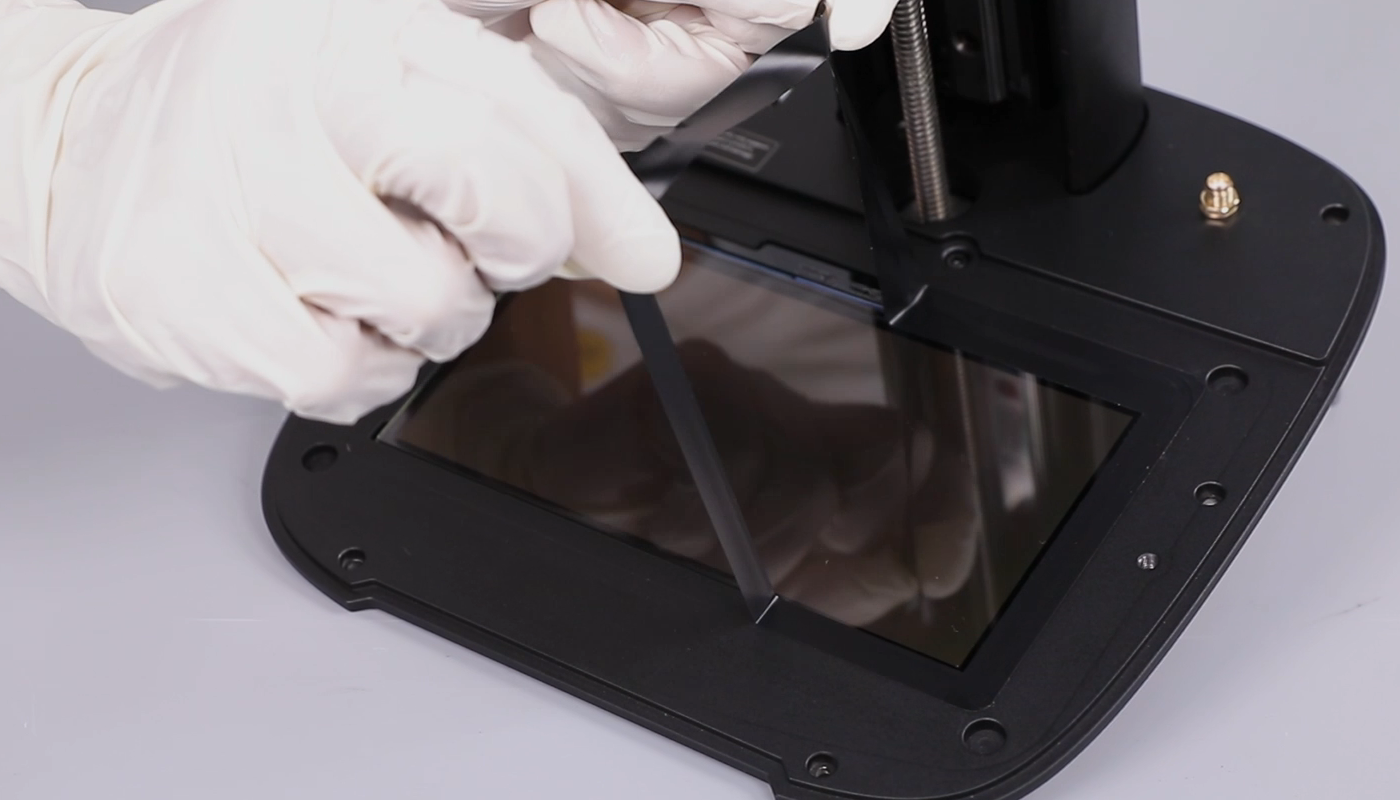
- Using a hairdryer, heat the screen. Push it from one corner of the back and remove it. Clean the excess tape from the middle housing to facilitate the subsequent installation of new tape.
NOTE: If the tape is sticky, clean it using alcohol and plastic scraper.
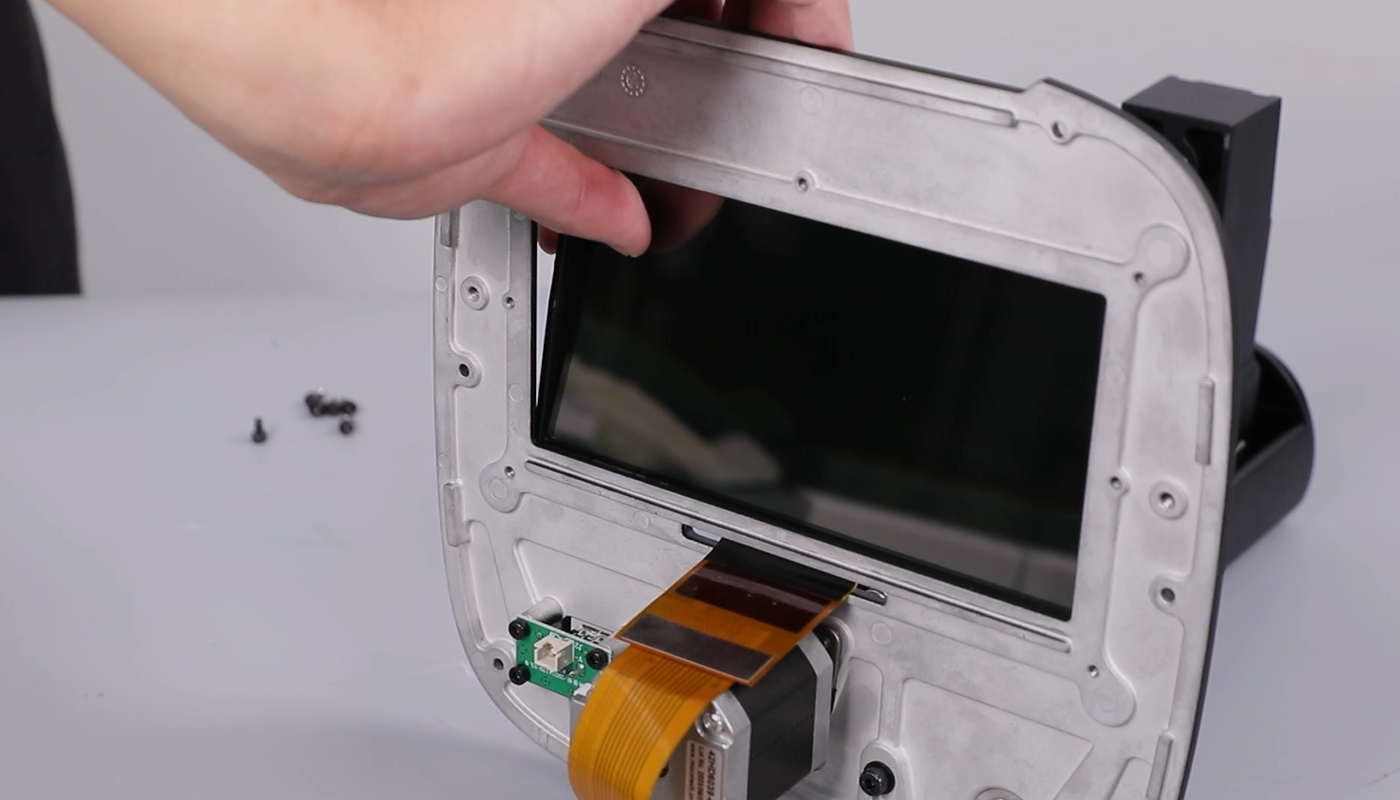
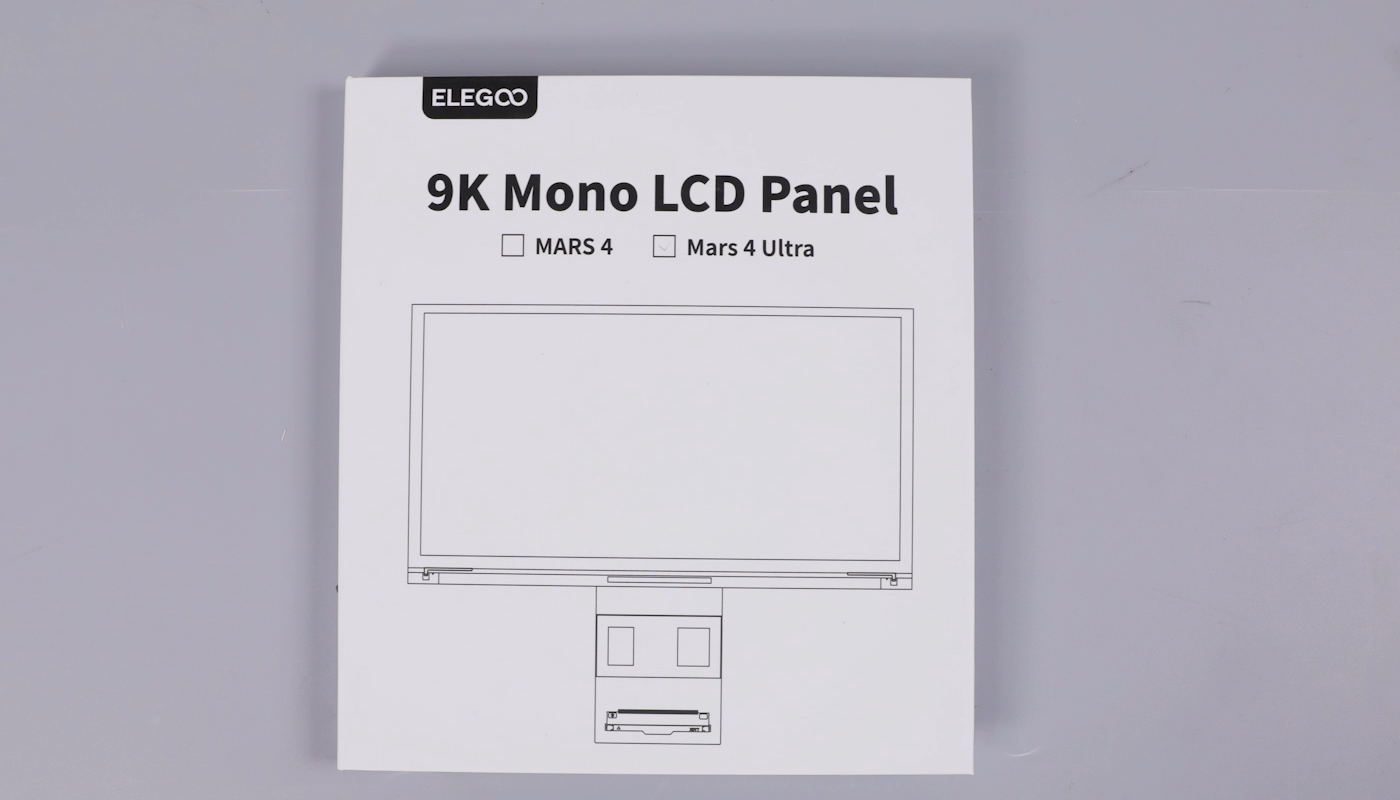
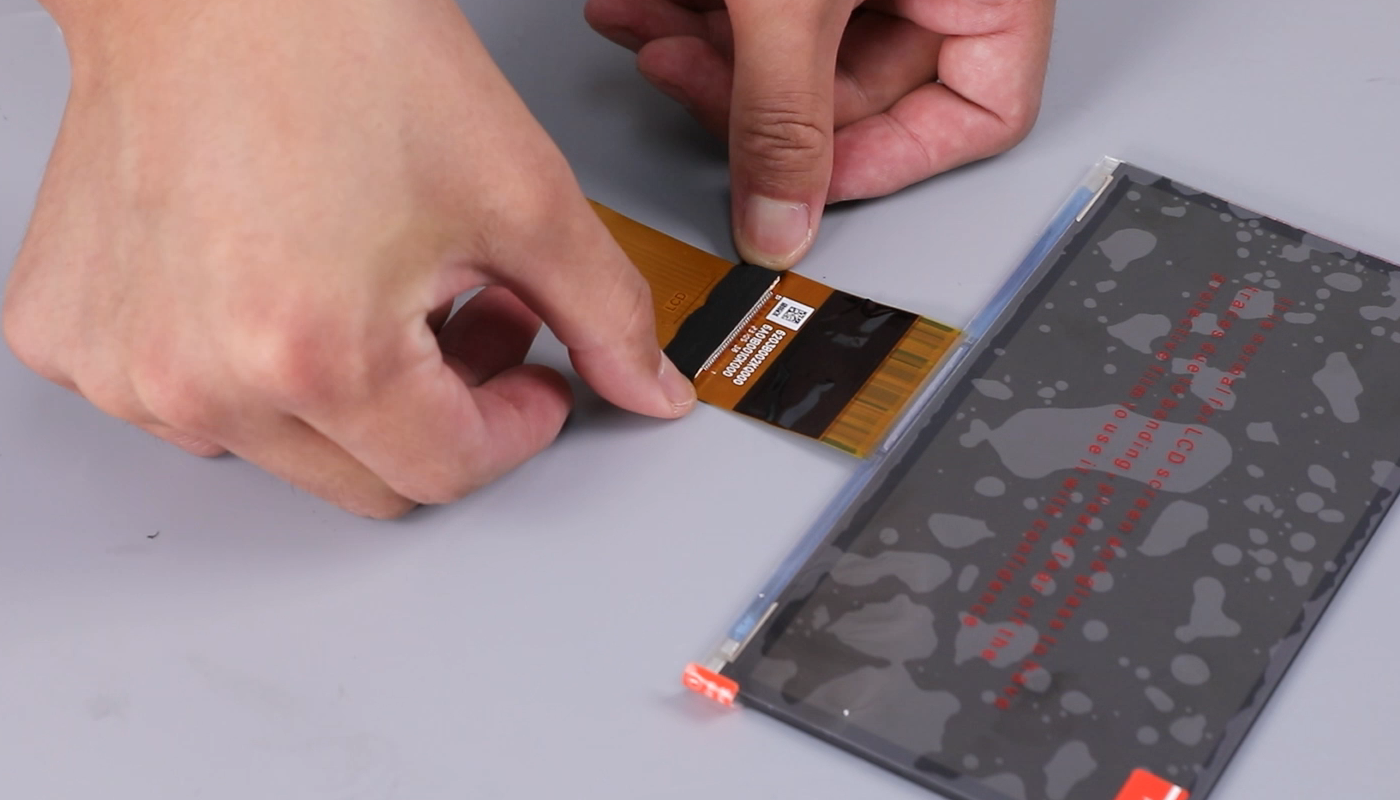
- Prepare the new LCD screen, screen cables and tape.

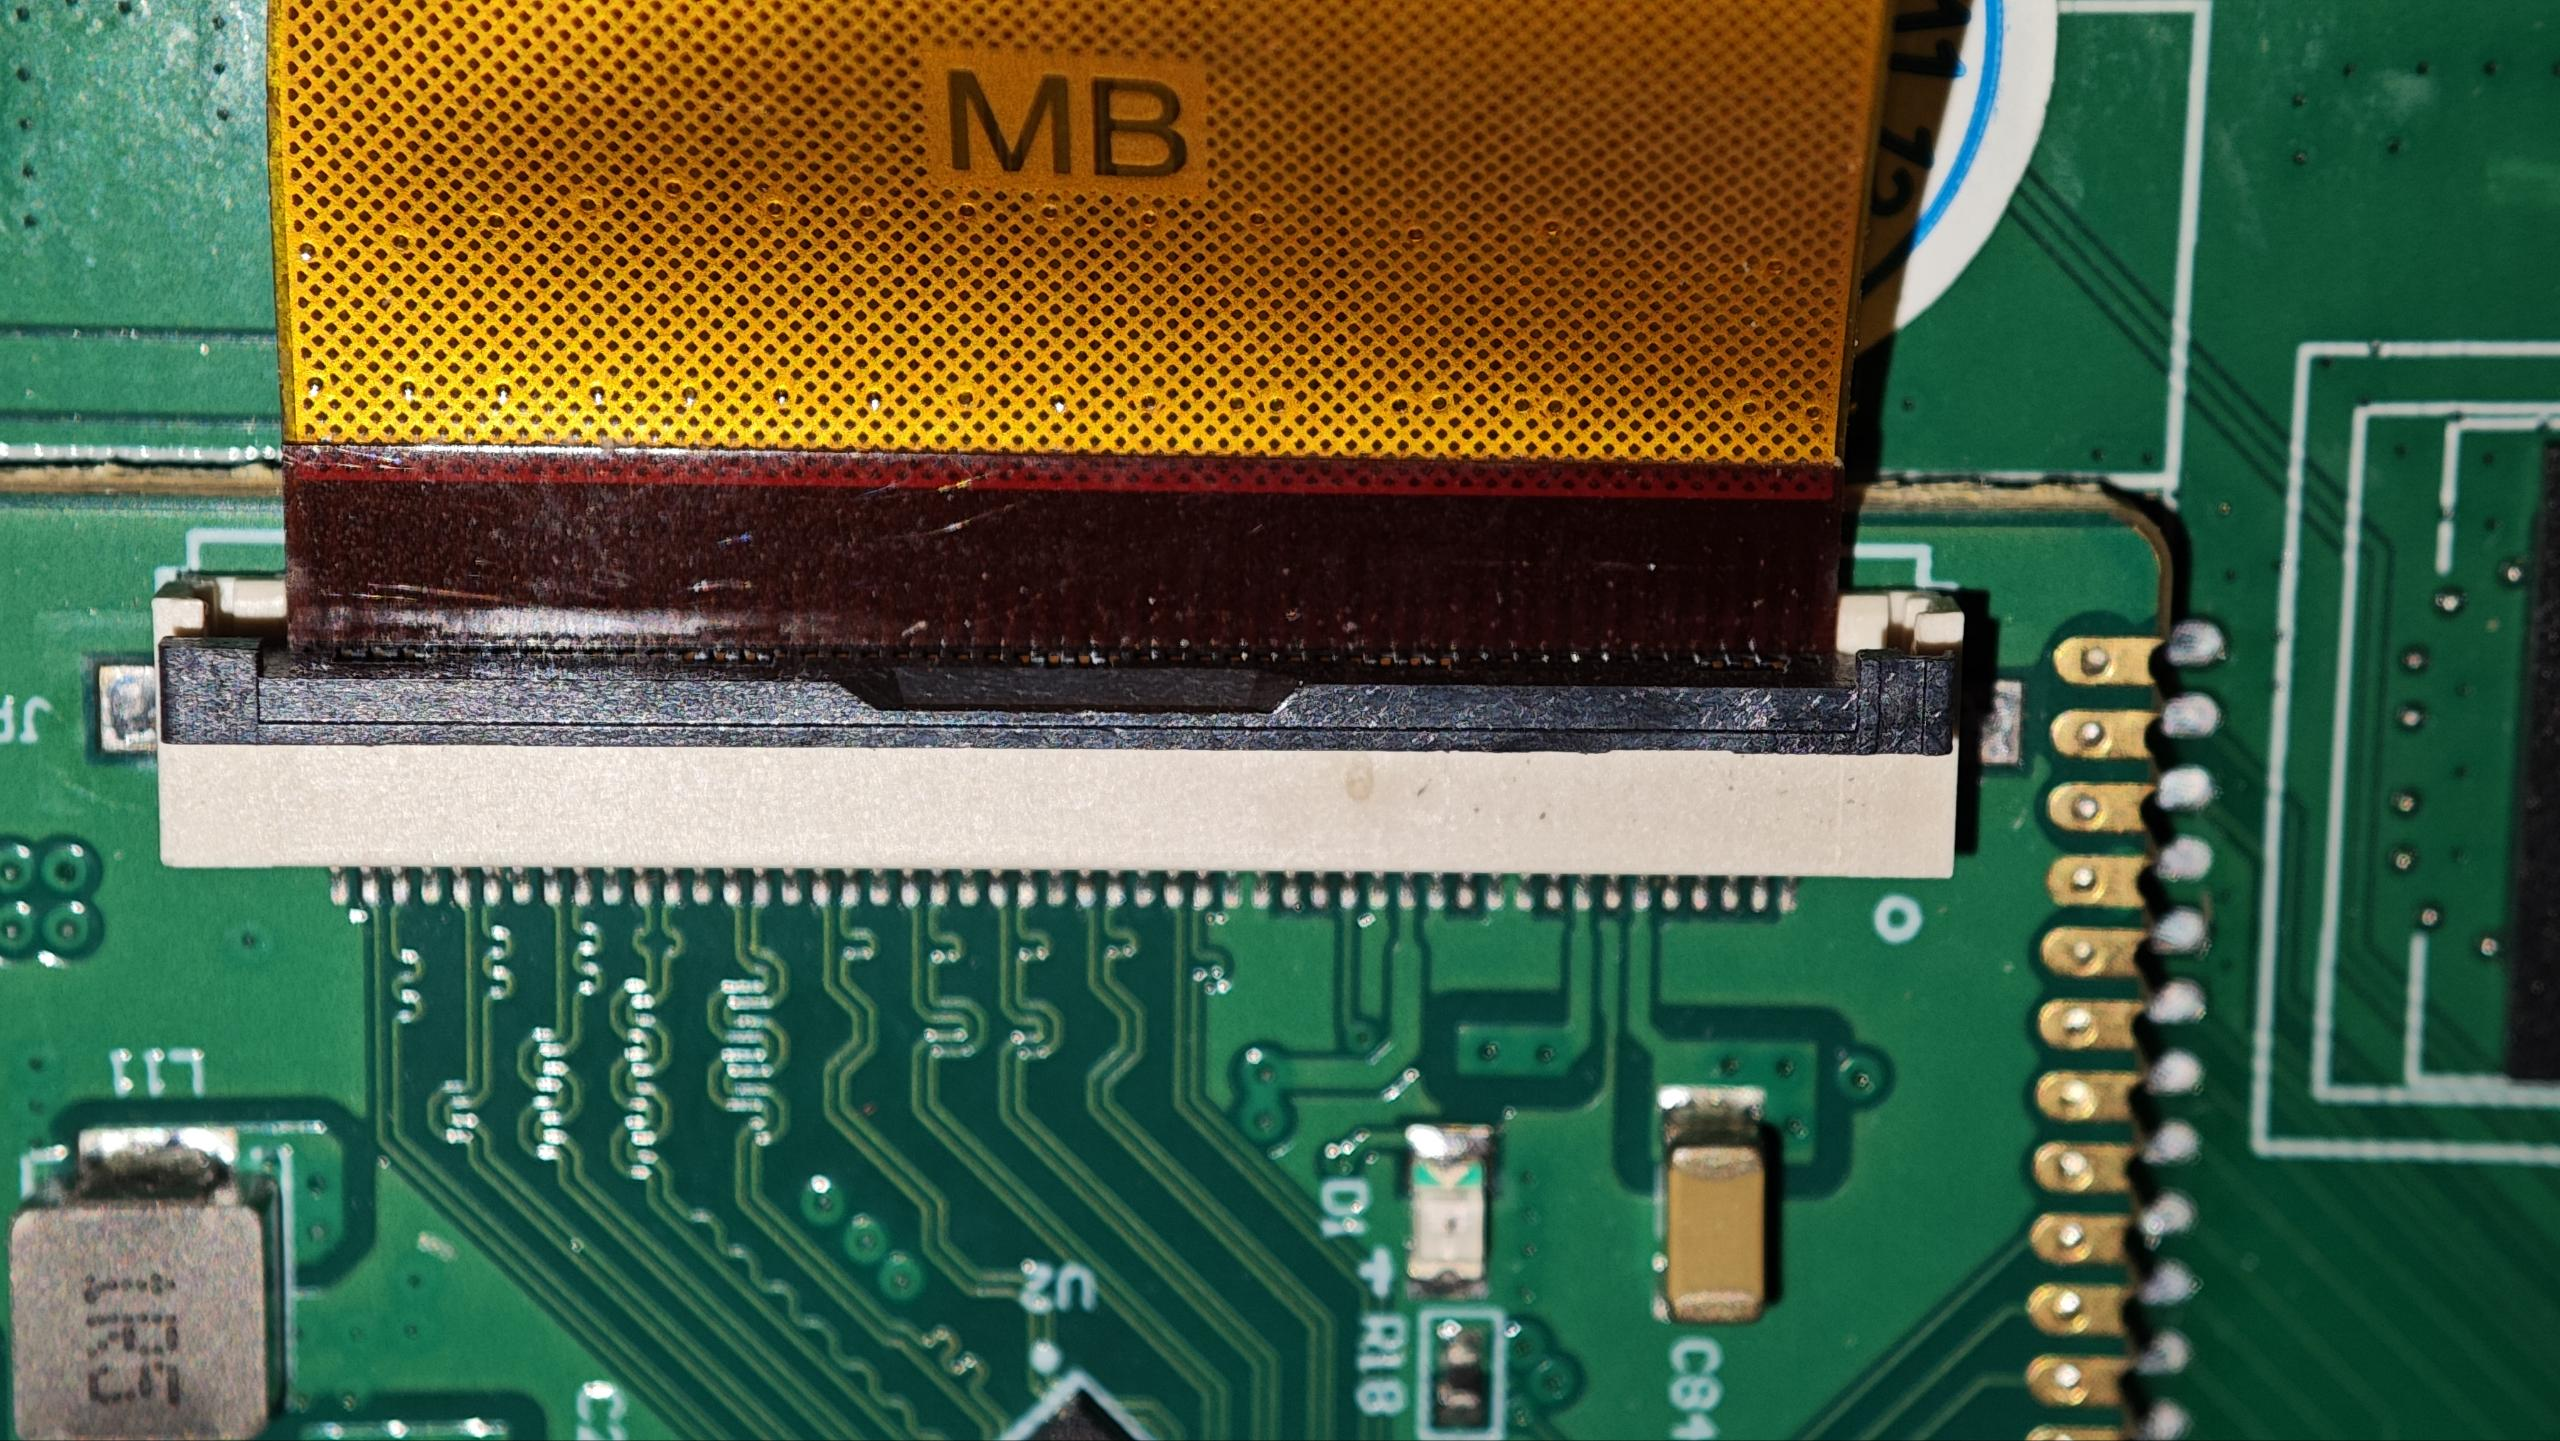
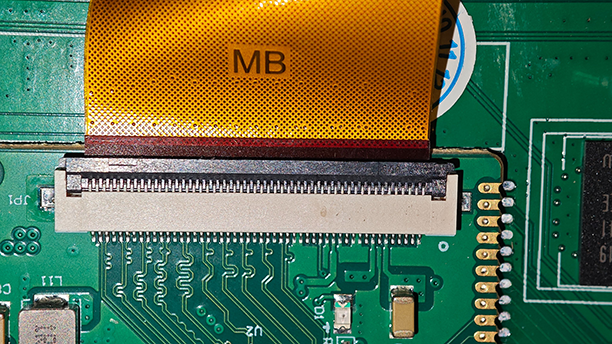
- Insert the ribbon cable onto the PCB of the LCD screen and press the cover. Apply the tape. Remove the protectors from both sides of the screen.
NOTE: Connect the cable with the end marked LCD facing upwards to the screen. Do not plug it in backwards.


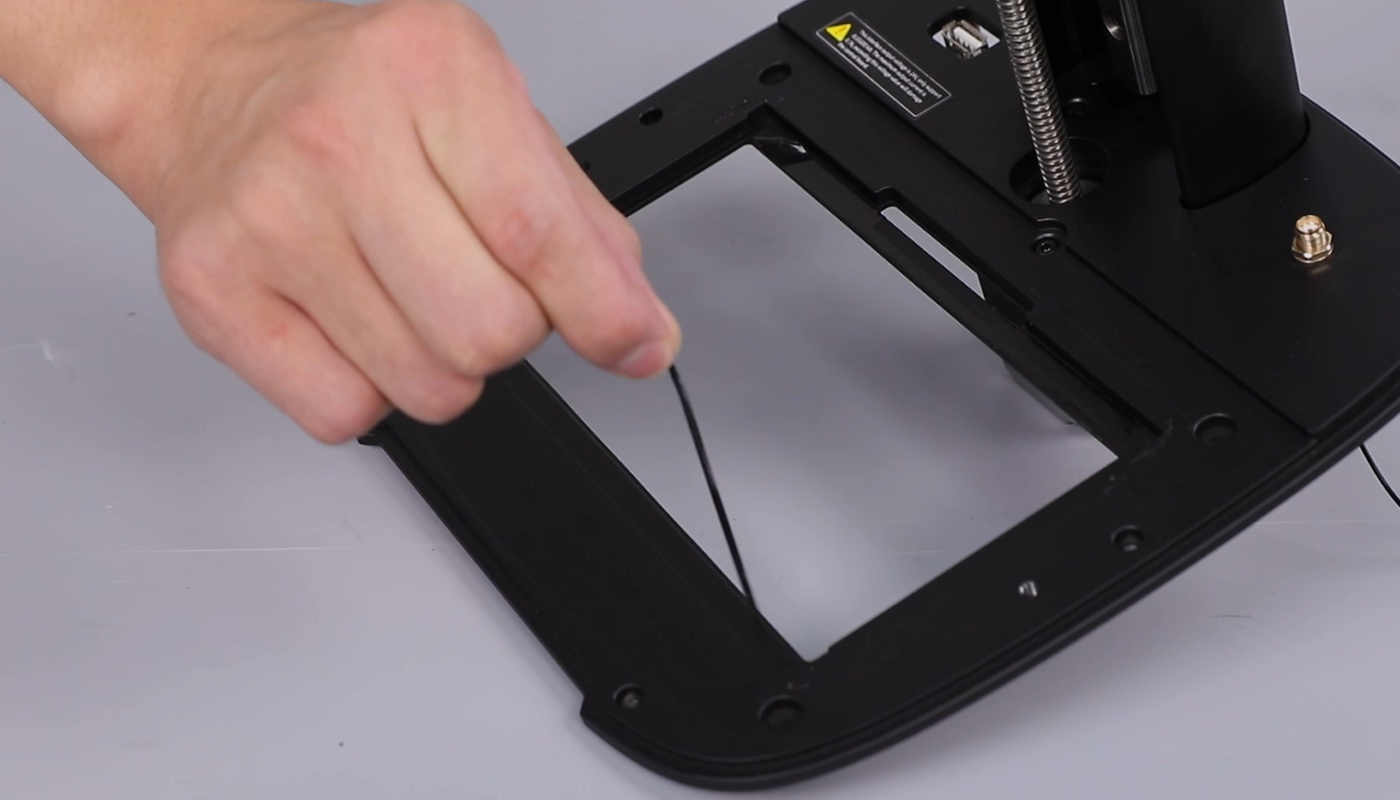
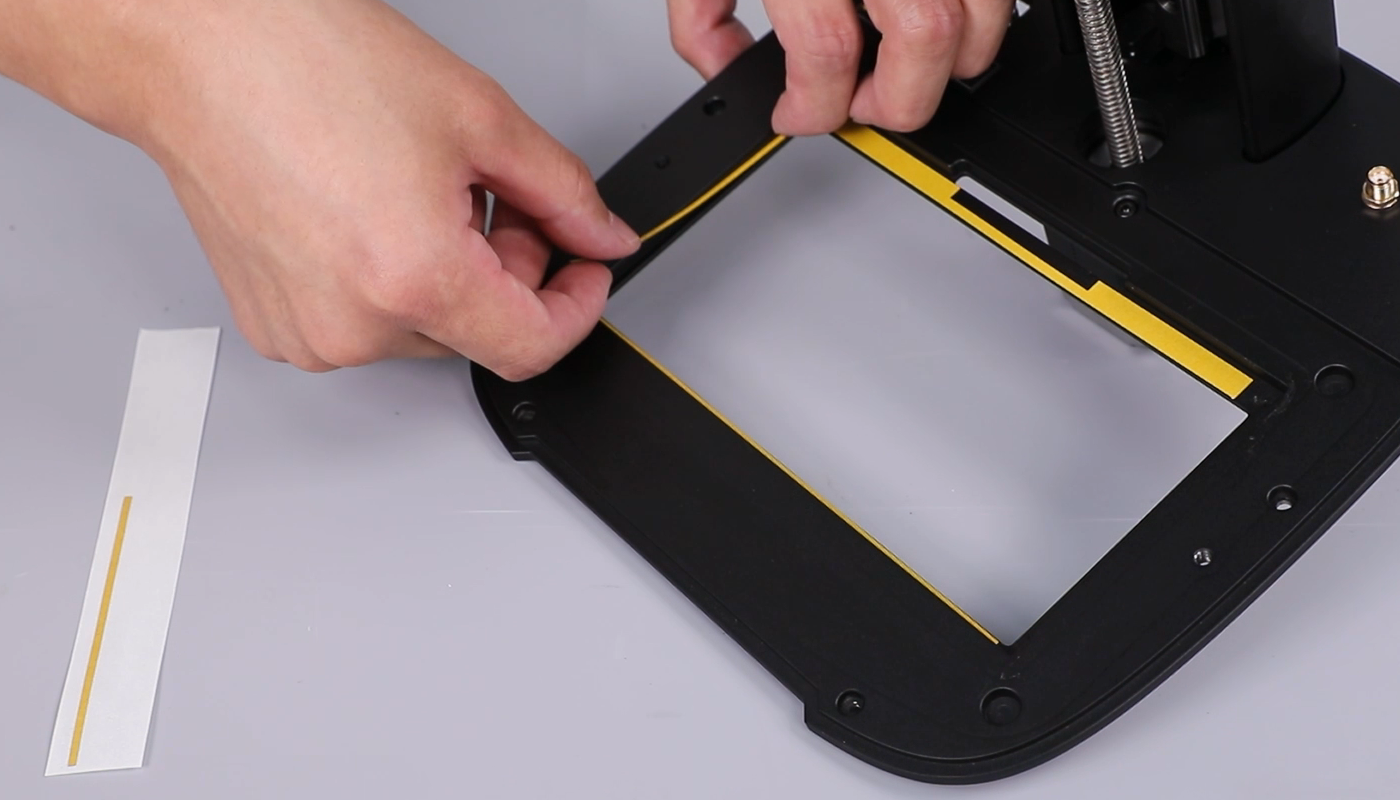
- Adhere the new tape. Peel off the protectors. Install the LCD screen to the middle housing.
NOTE: Align the tape with the groove.


- Align the Fresnel lens with the screw holes and put it in the installation postion. Using a 2.5 mm Allen key, tighten the seven screws securing the lens.
NOTE: The side of the lens with the label should face outwards. Do not place it upside down. Be careful not to scratch the surface.

- Align the middle housing with the screw holes and put it in the installation posistion. Using a 2.5 mm Allen key, tighten the six screws securing the middle housing.

- Connect the ① motor connection cable, ② limit switch connection cable, ③ USB connection cable of the purifier.

- Insert the Wi-Fi antenna. Secure the Wi-Fi antenna using black tape.

- Lift the LCD ribbon cable cover. Connect the LCD ribbon cable and close the cover. Secure the black tape.

- Install the back cover. Using a 2.5 mm Allen key, tighten the two screws securing the bottom cover of the printer.

- Using a 2.0mm Allen key, tighten the six screws securing the back cover.
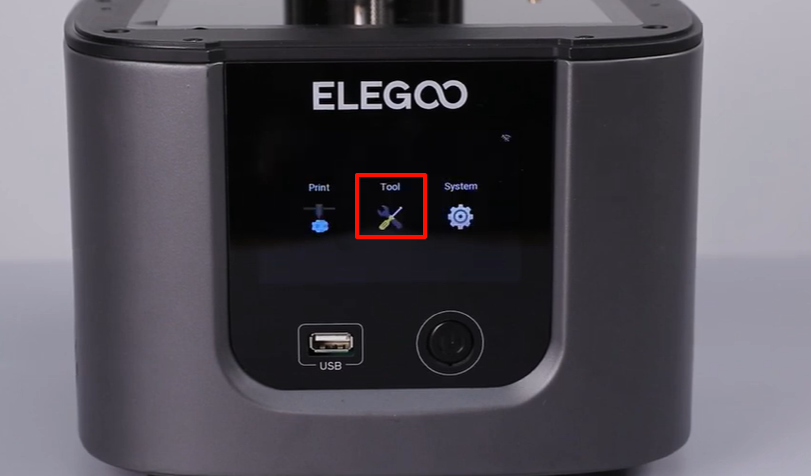
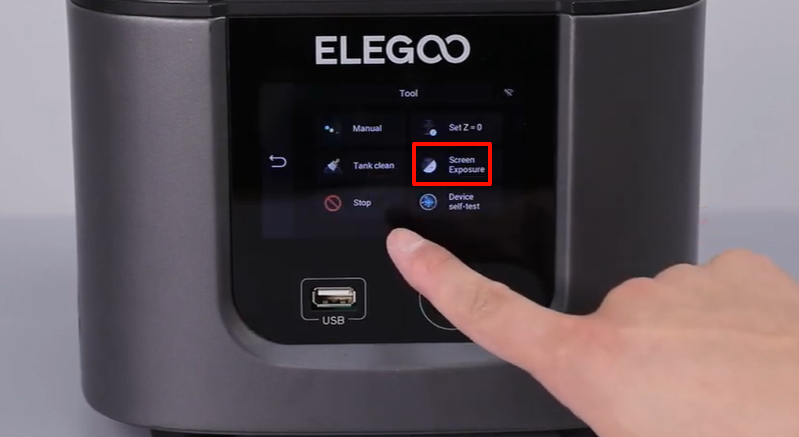
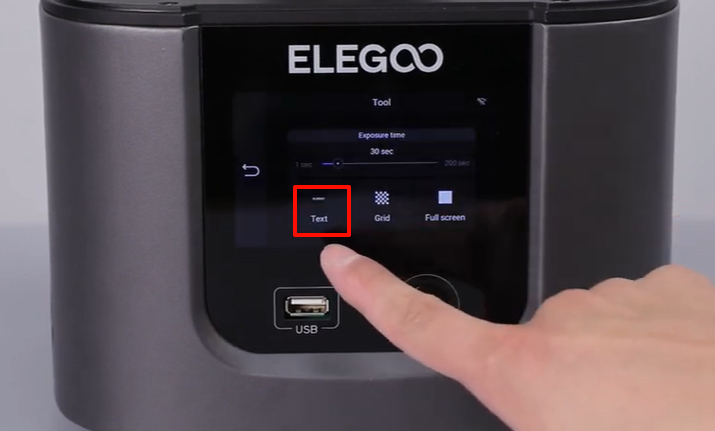
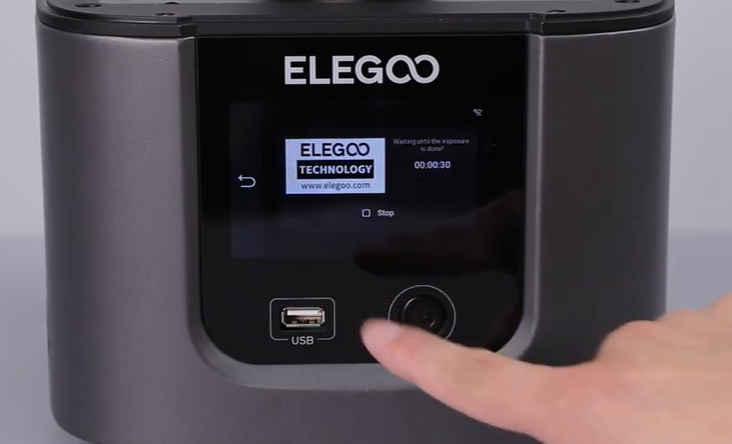
- Power on the printer. On the touchscreen, select Tool - Screen Exposure - ELEGOO. The printer is ready for use if the LCD screen and the touchscreen works normally.