- A 2.5 mm Allen wrench
- A 2.0 mm Allen wrench
- A Phillips screwdriver
- Needle-nose pliers
https://youtu.be/RmCnXPQ4irM
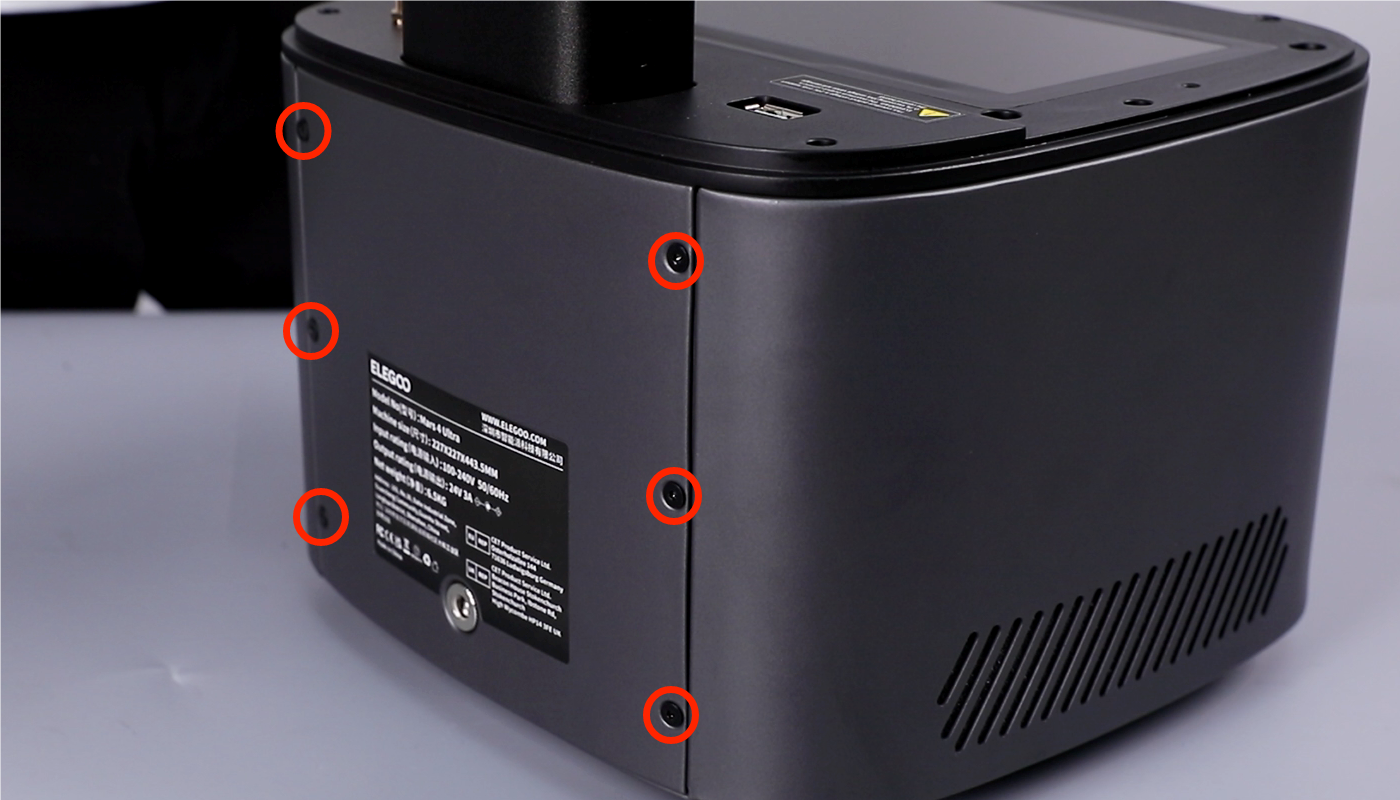
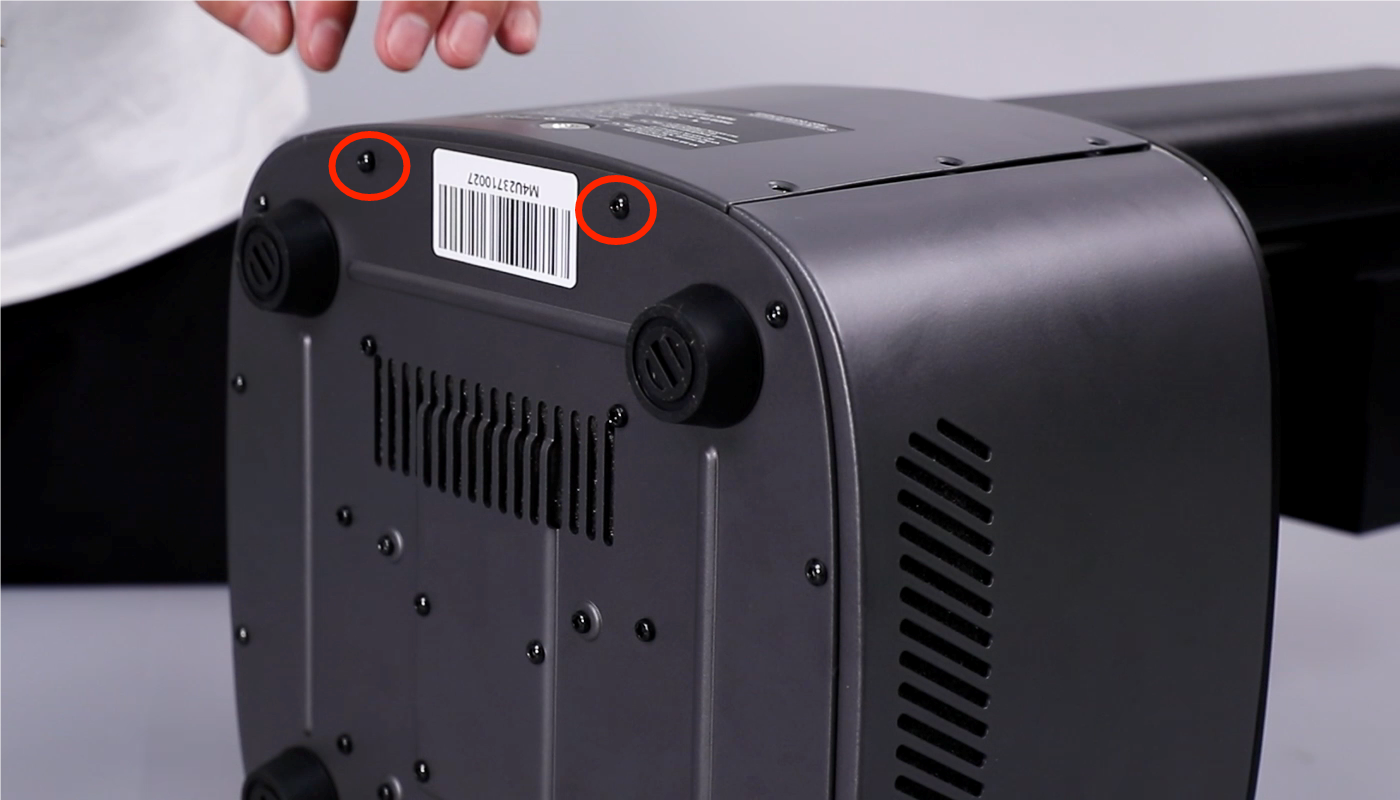
- Using a 2.0mm Allen key, remove the six screws securing the back cover.
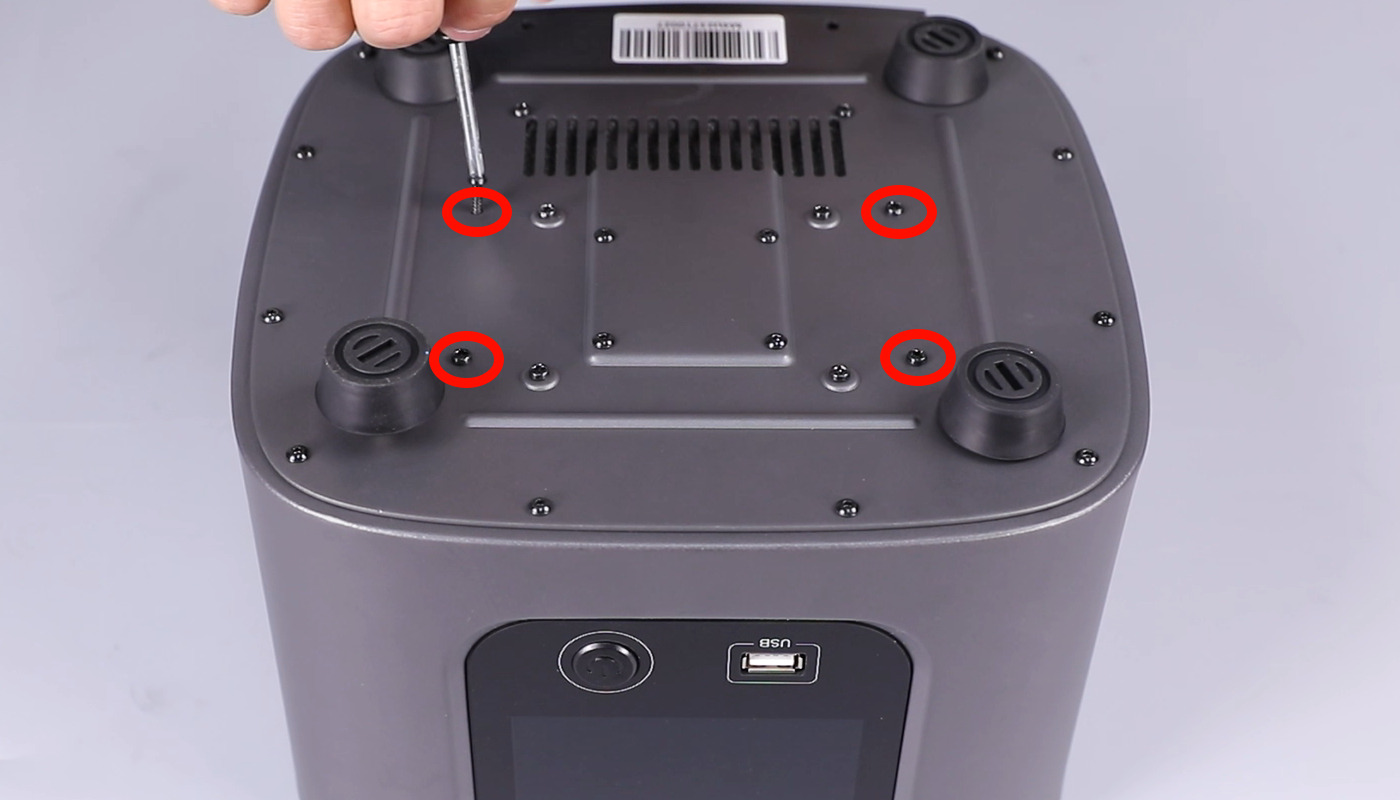
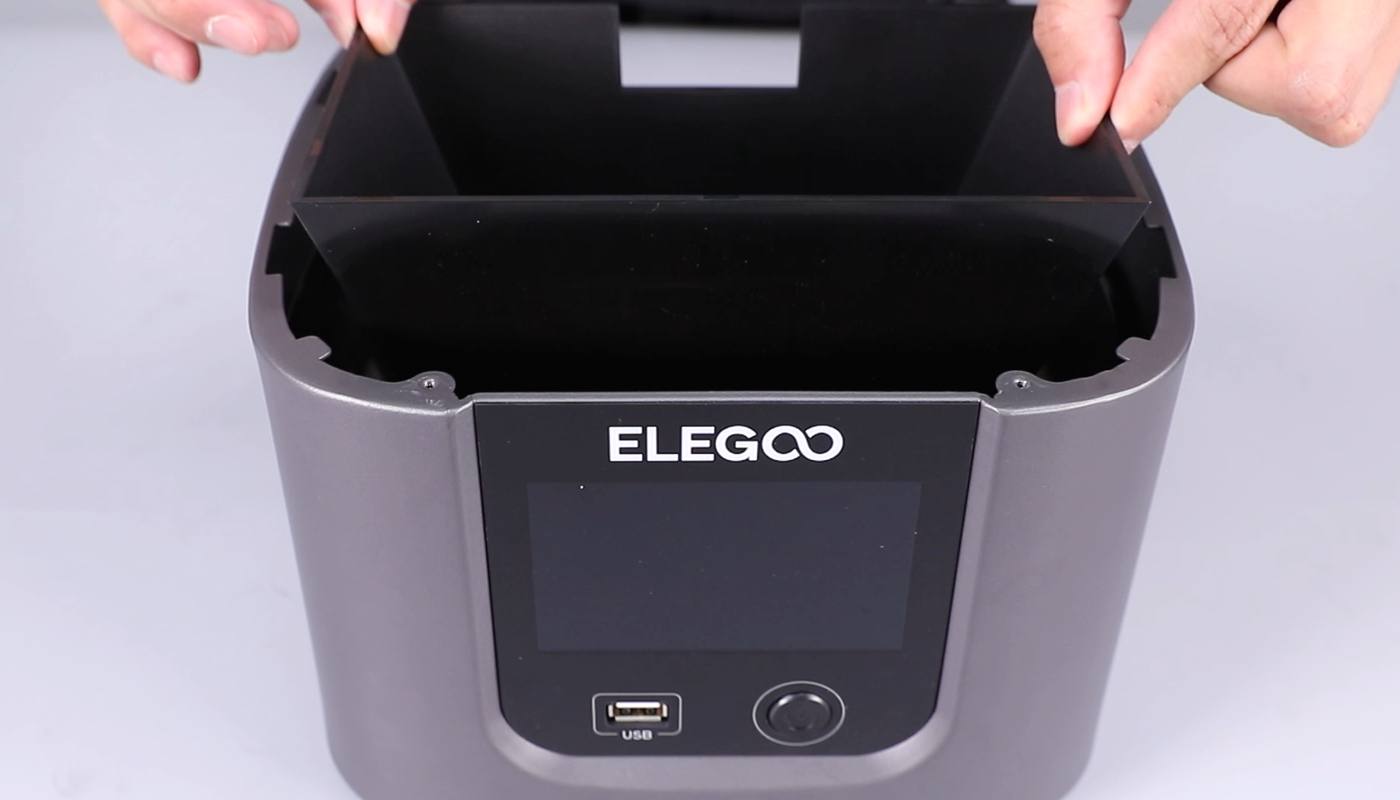
- Using a 2.0 mm Allen key, remove the two screws securing the bottom cover of the printer. Remove the bottom cover.

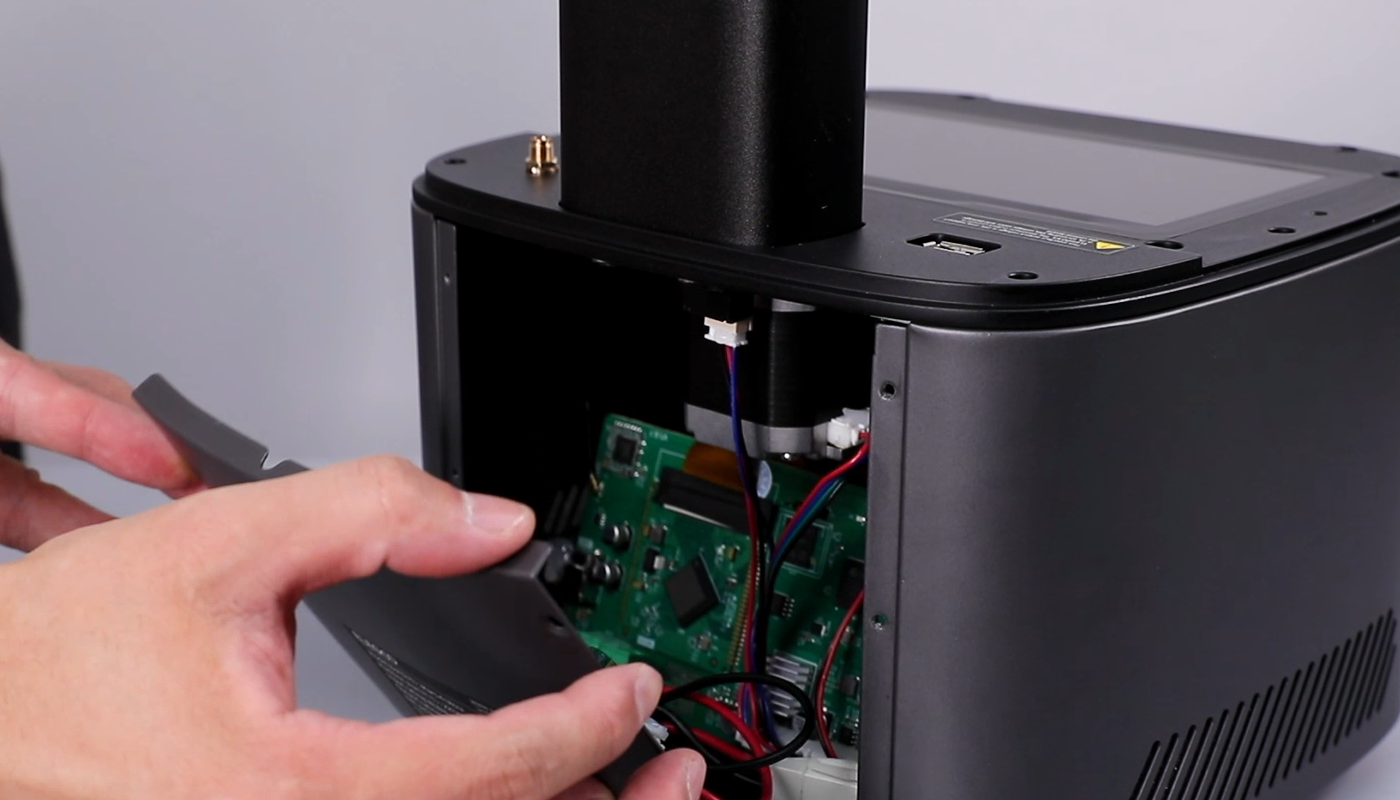
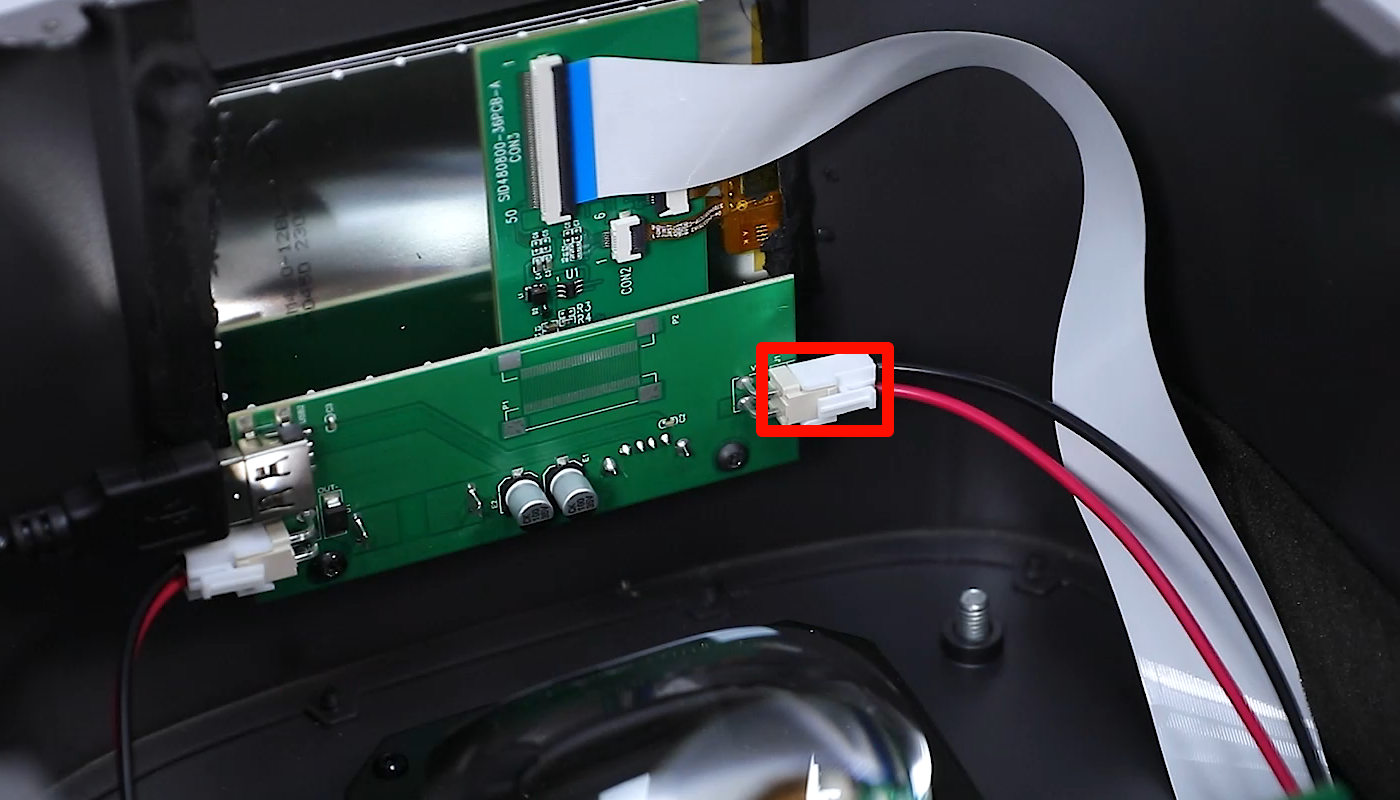
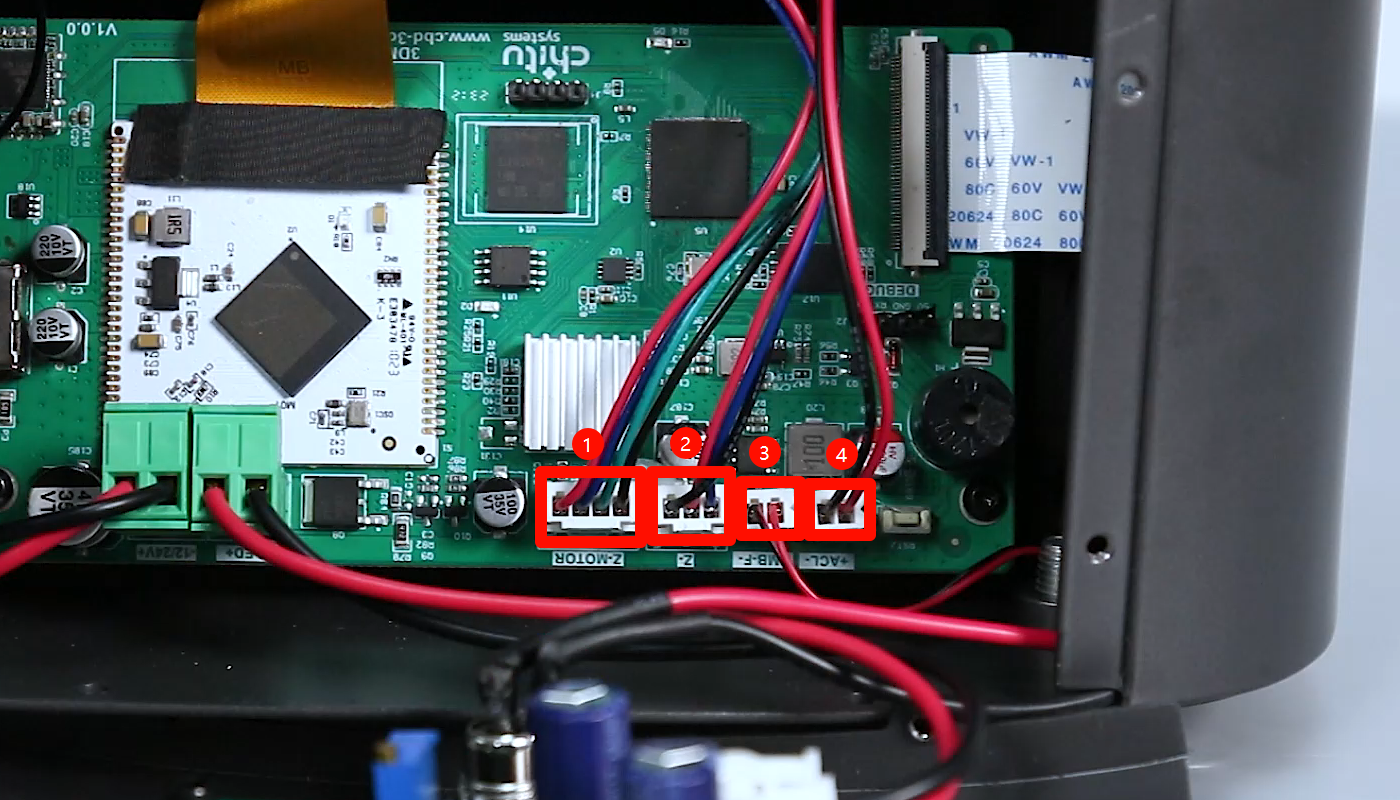
- Disconnect the ① motor connection wire, ② limit switch connection wire, ③ cooling fan connection wire, and ④ USB purifier connection wire sequentially.

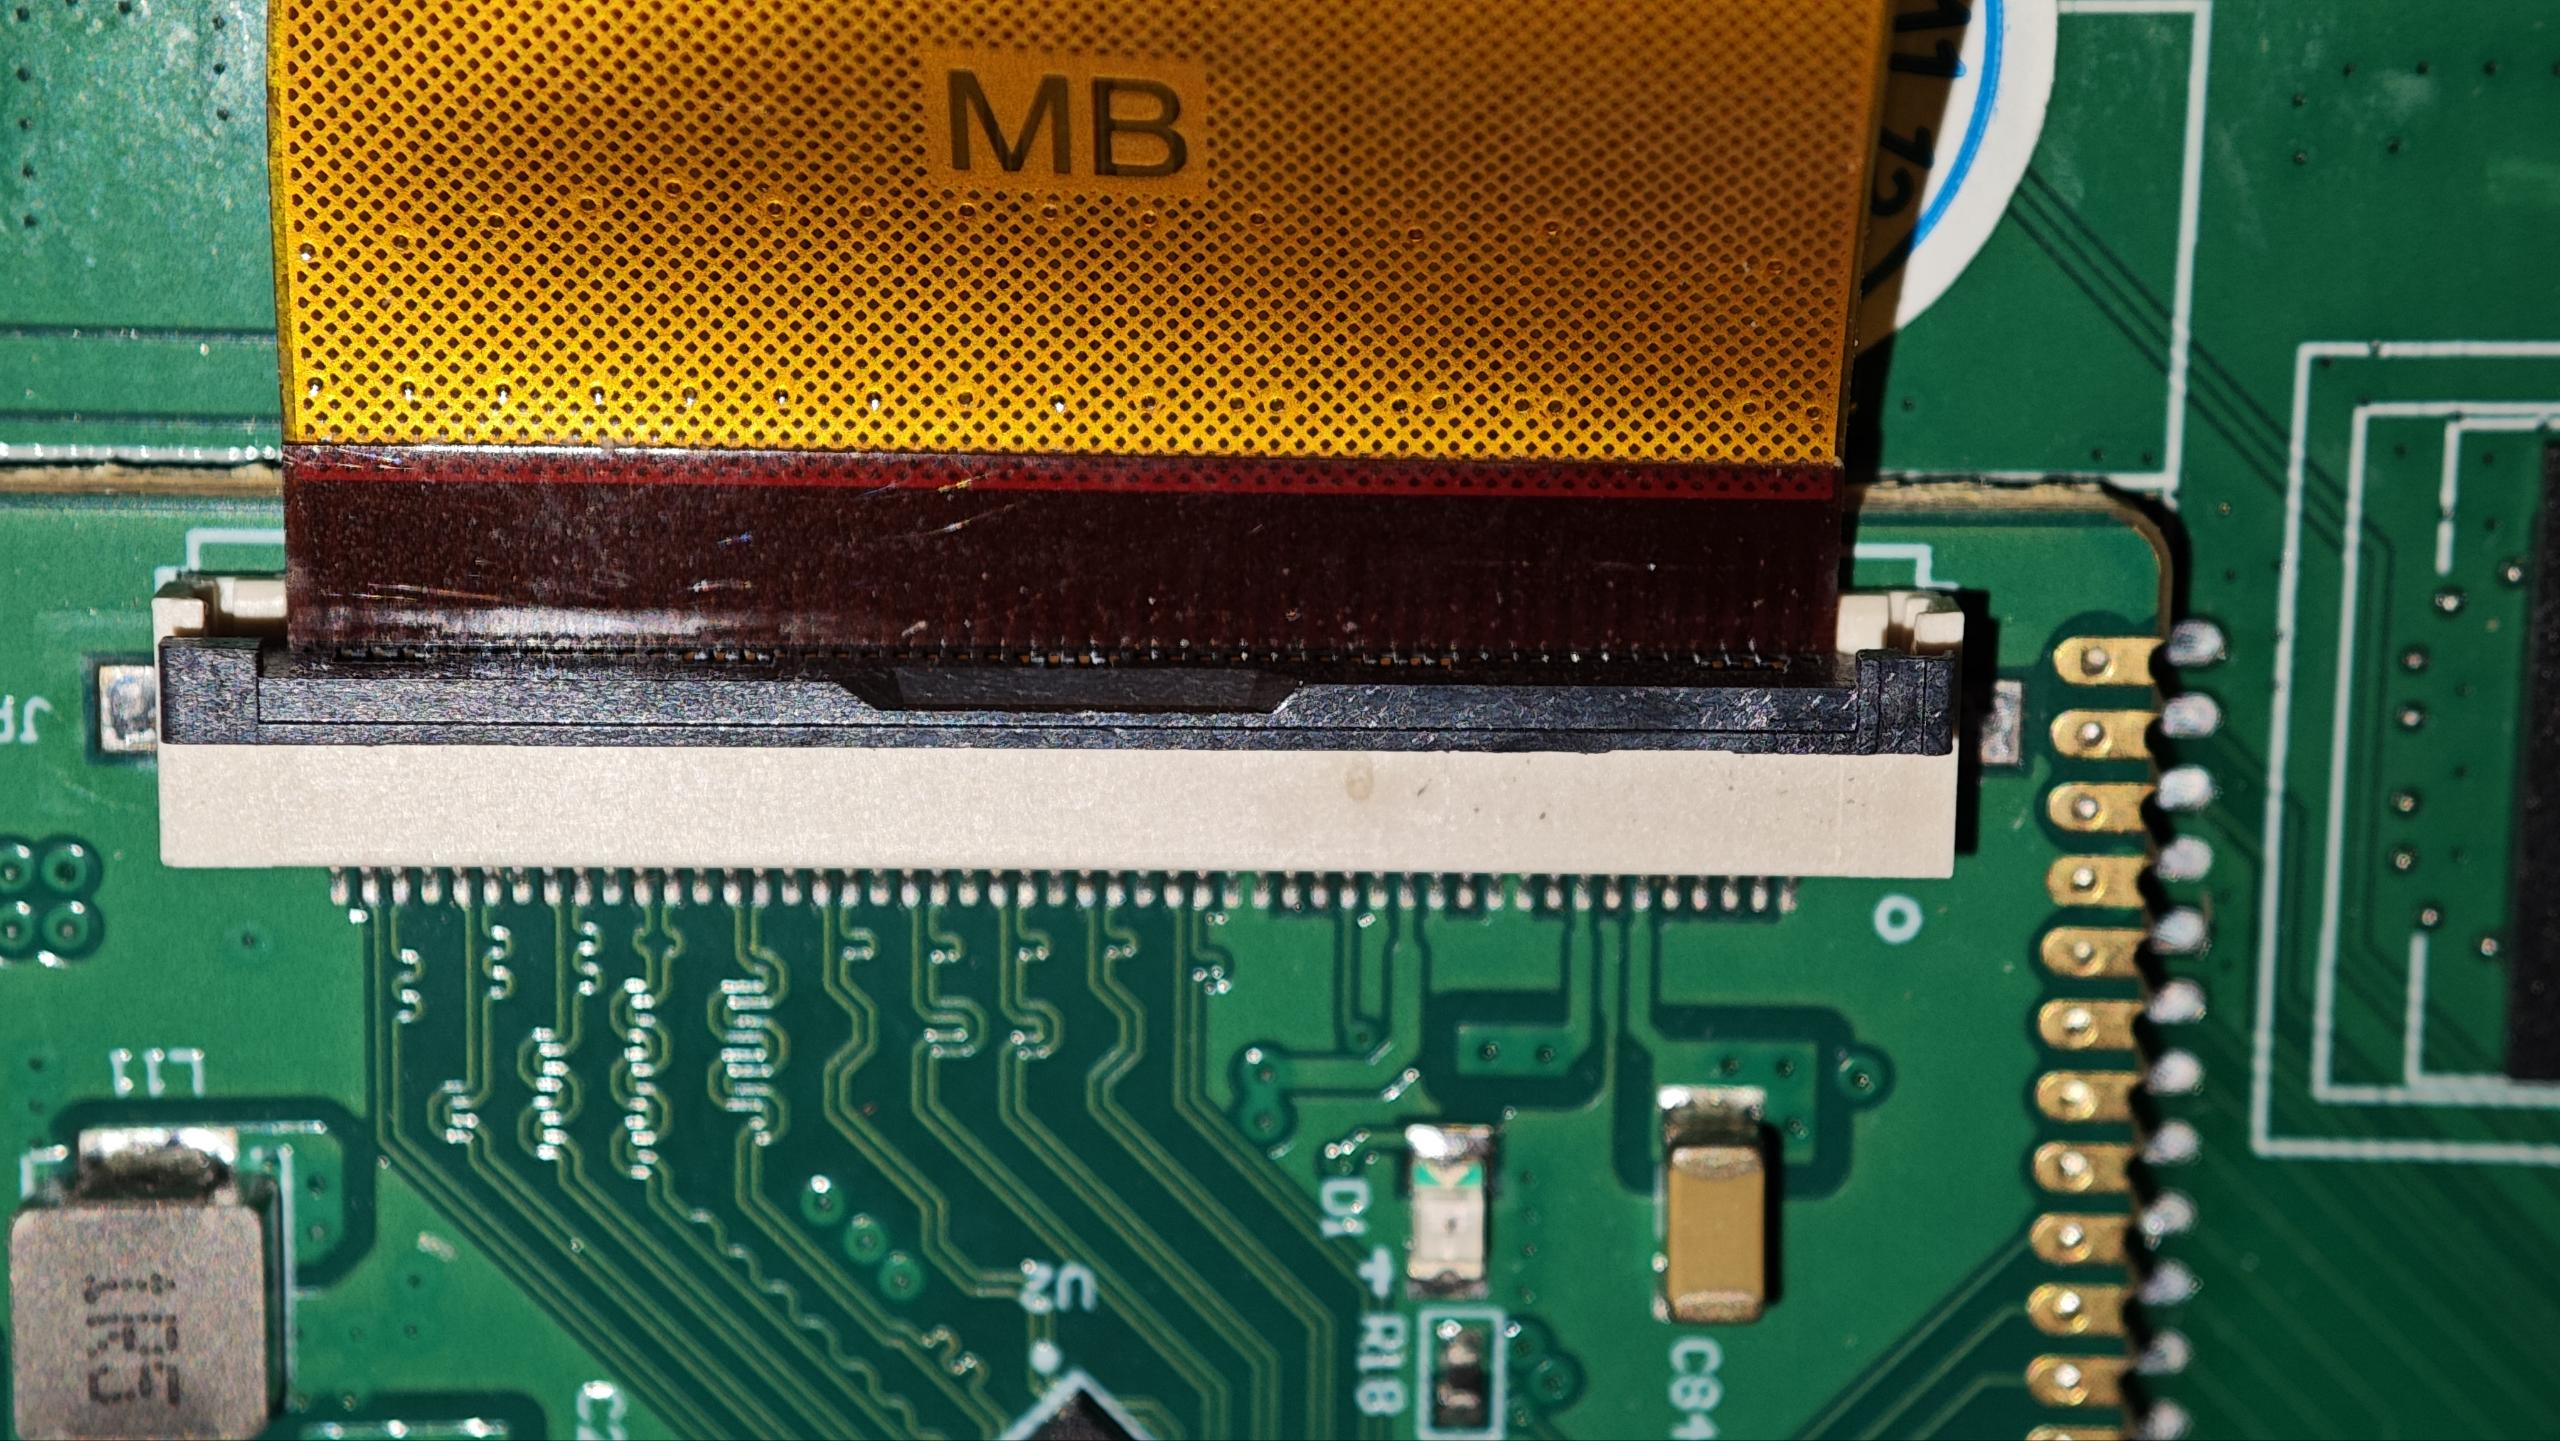
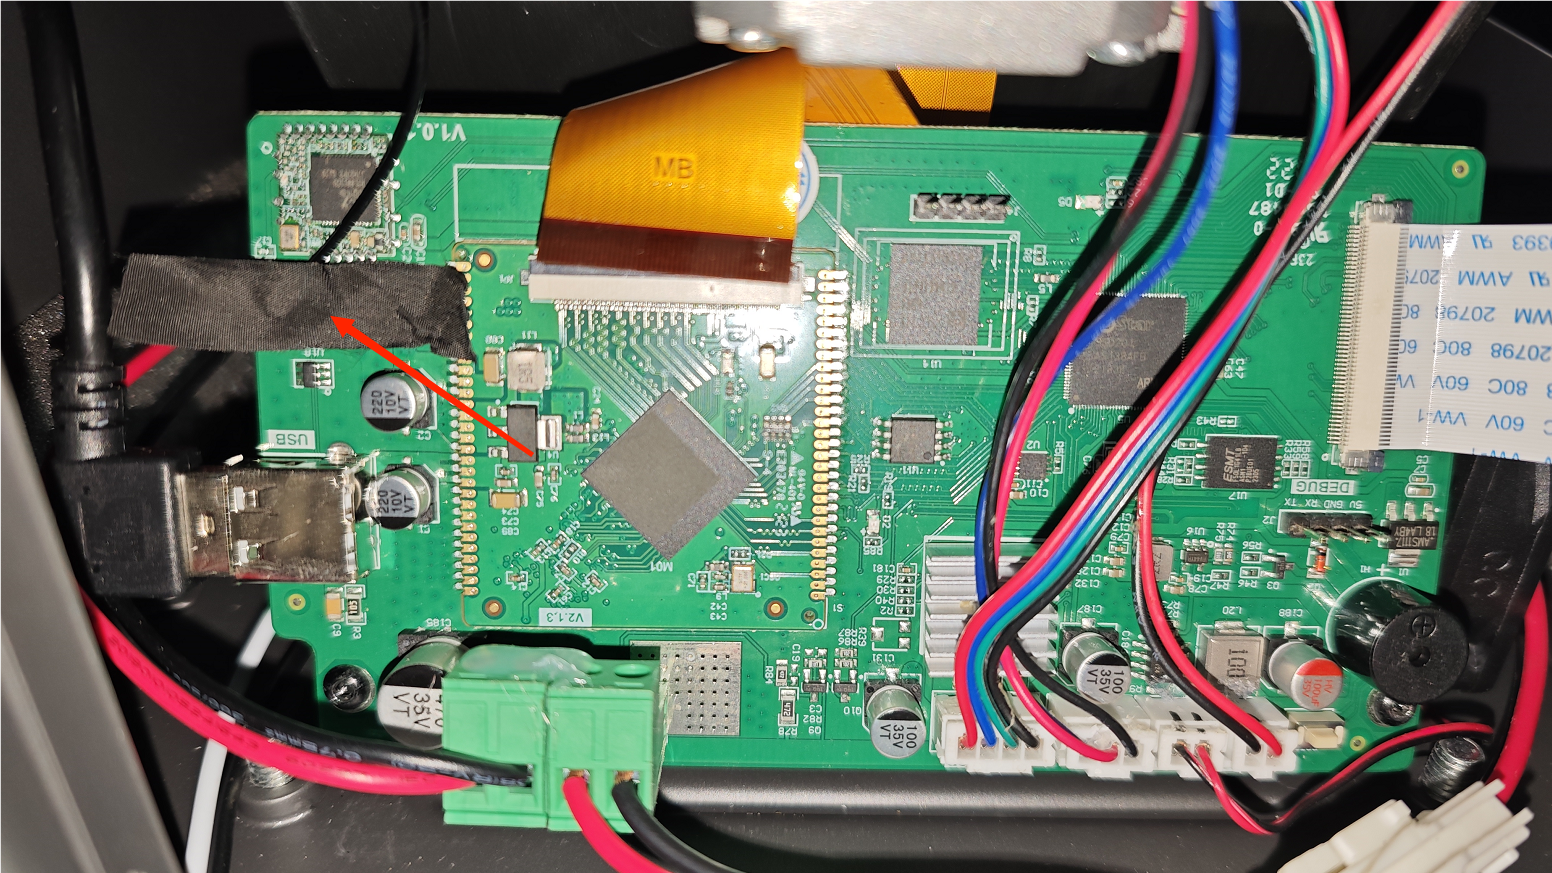
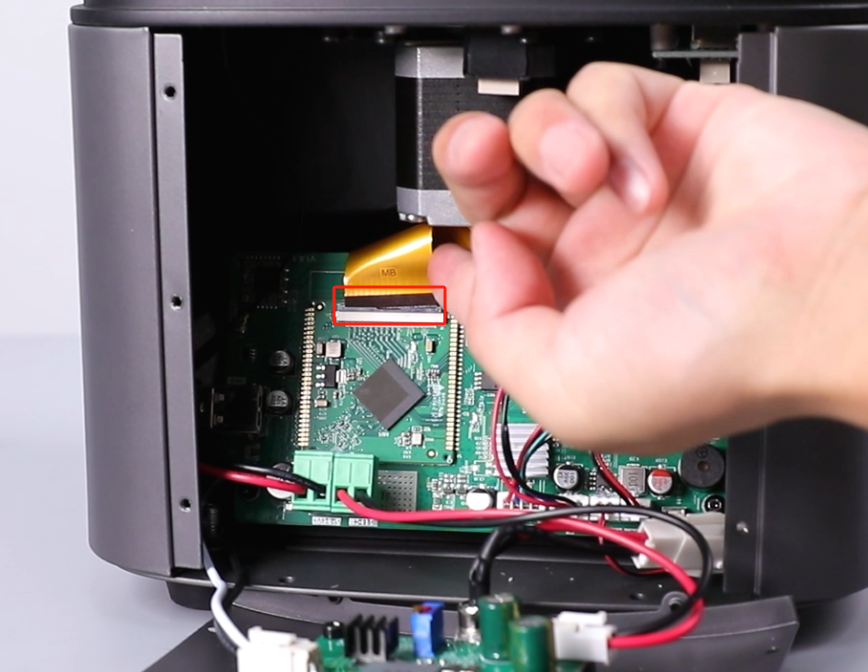
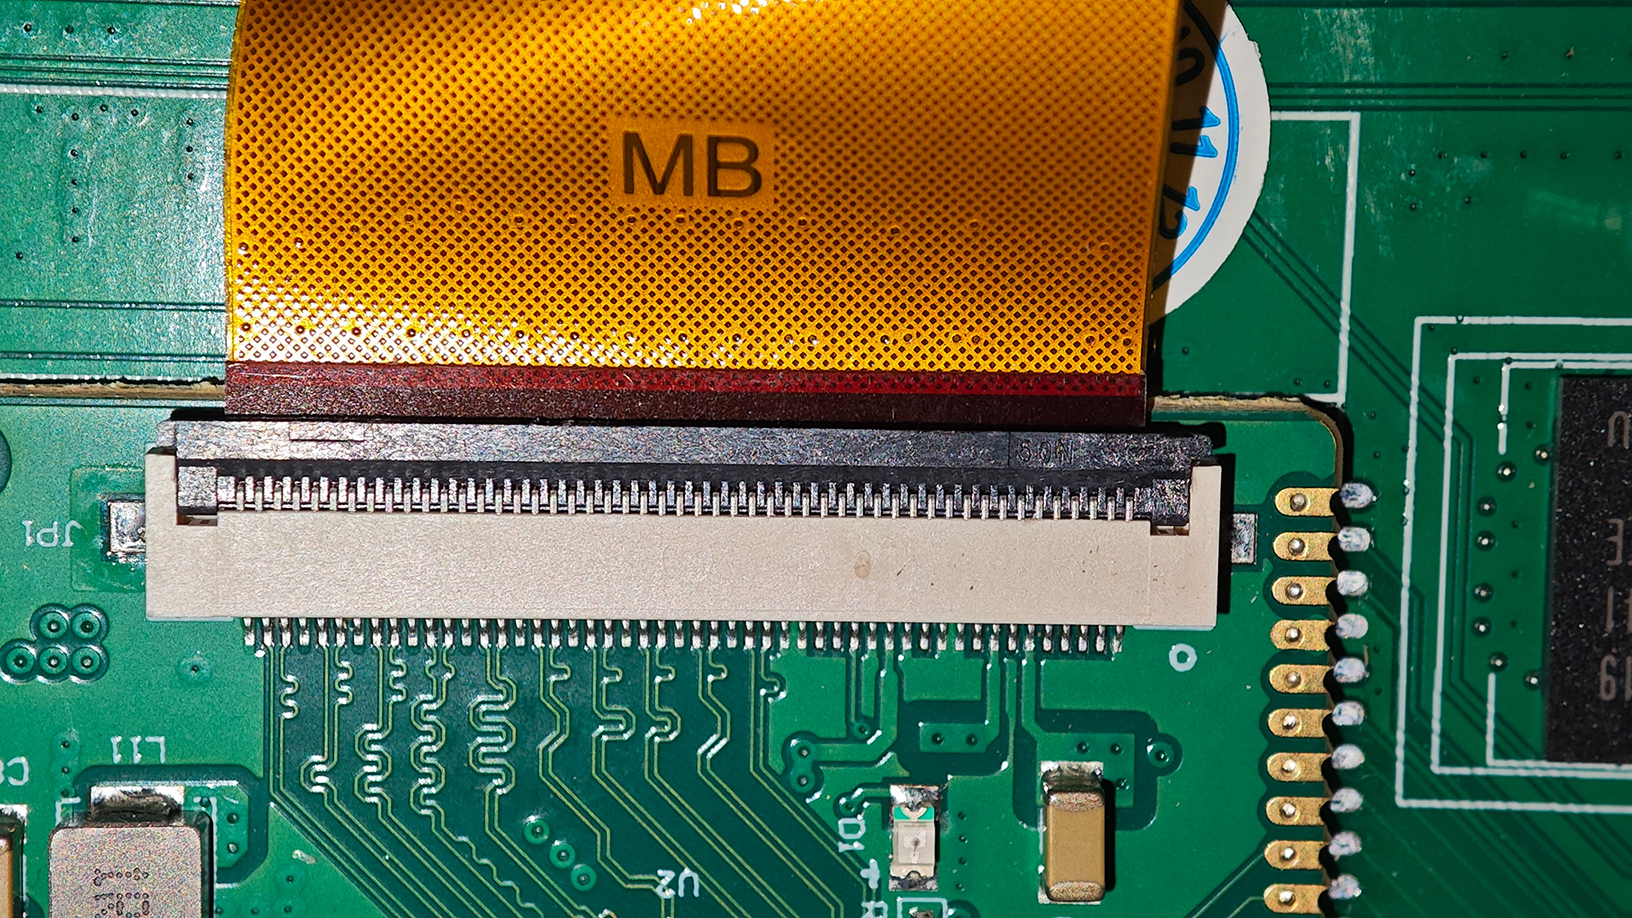
- Peel off the black tape from the LCD ribbon cable port. Lift the cover securing the LCD ribbon cable clamp and remove the ribbon cable.


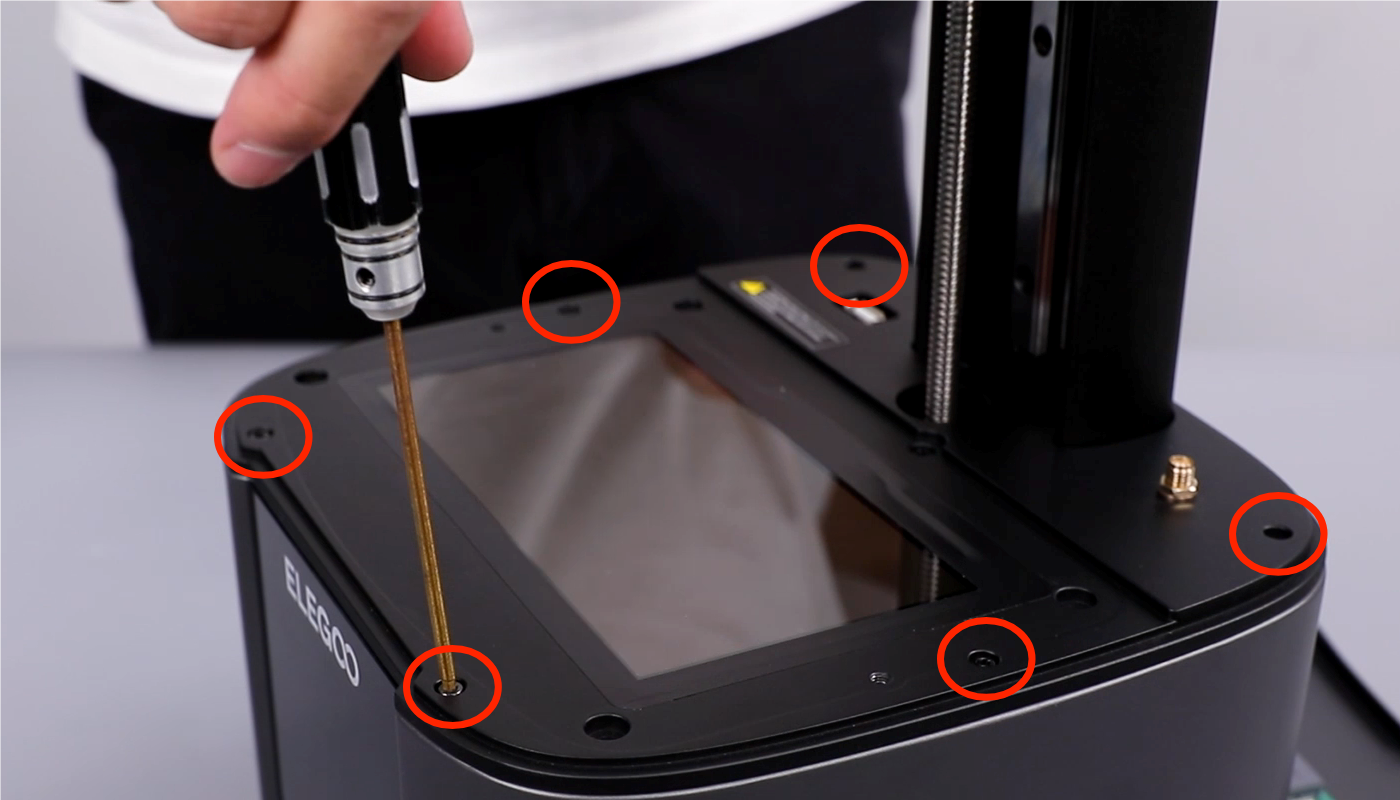
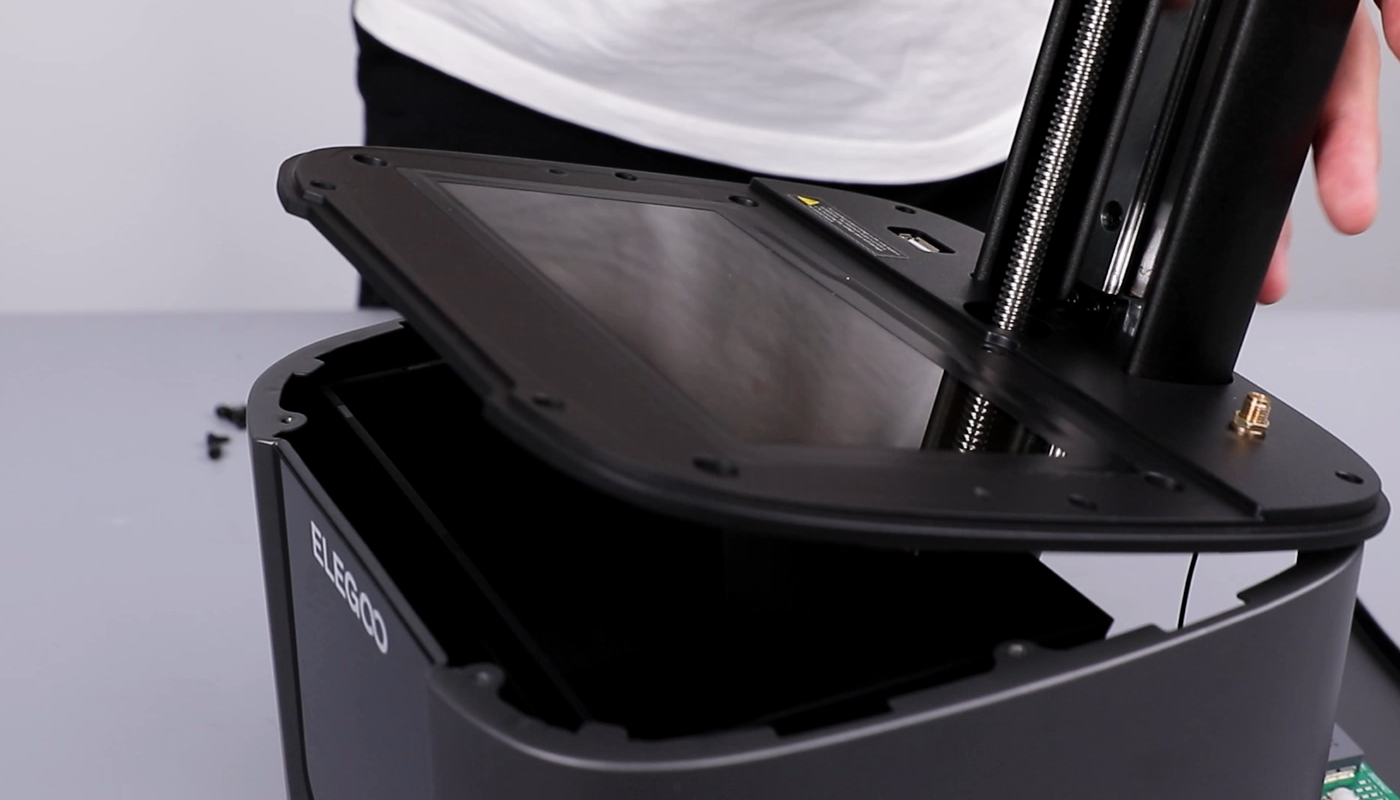
- Using a 2.5 mm Allen key, loosen the six screws securing the middle housing. (Take care of the cables.)
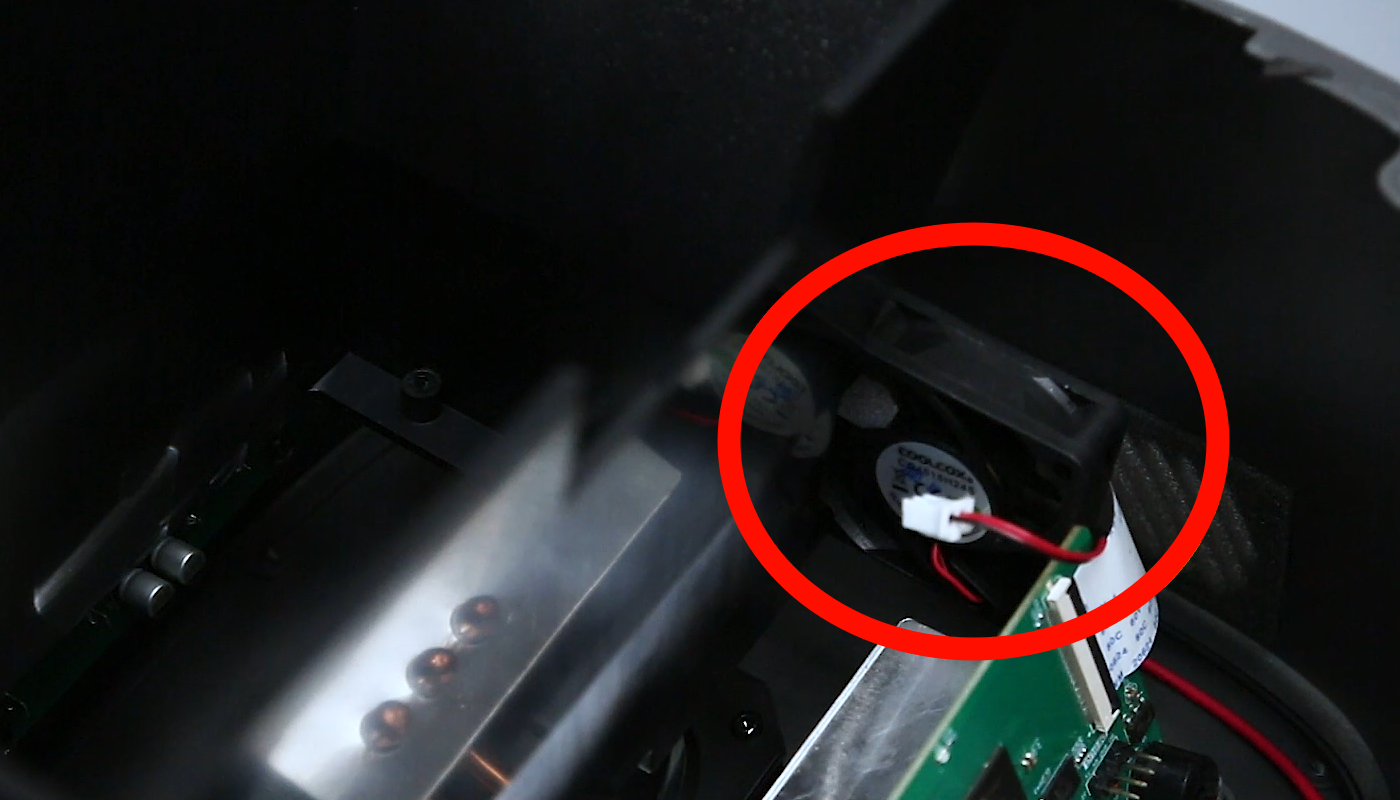
- Using a Phillips screwdriver, loosen the four screws securing the lens shade at the bottom cover of the printer. Remov the lens shade.
(NOTE: Above is connected with a cooling fan.)
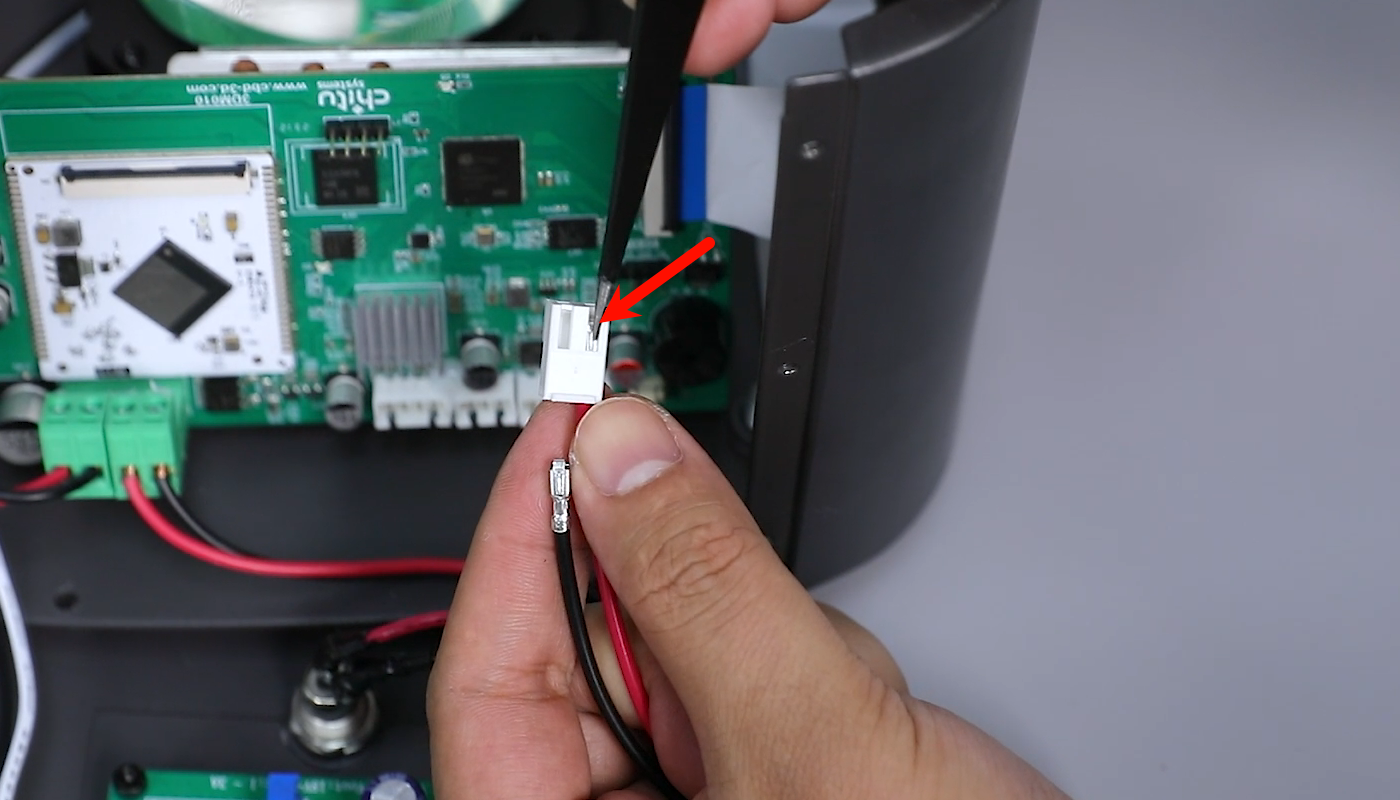
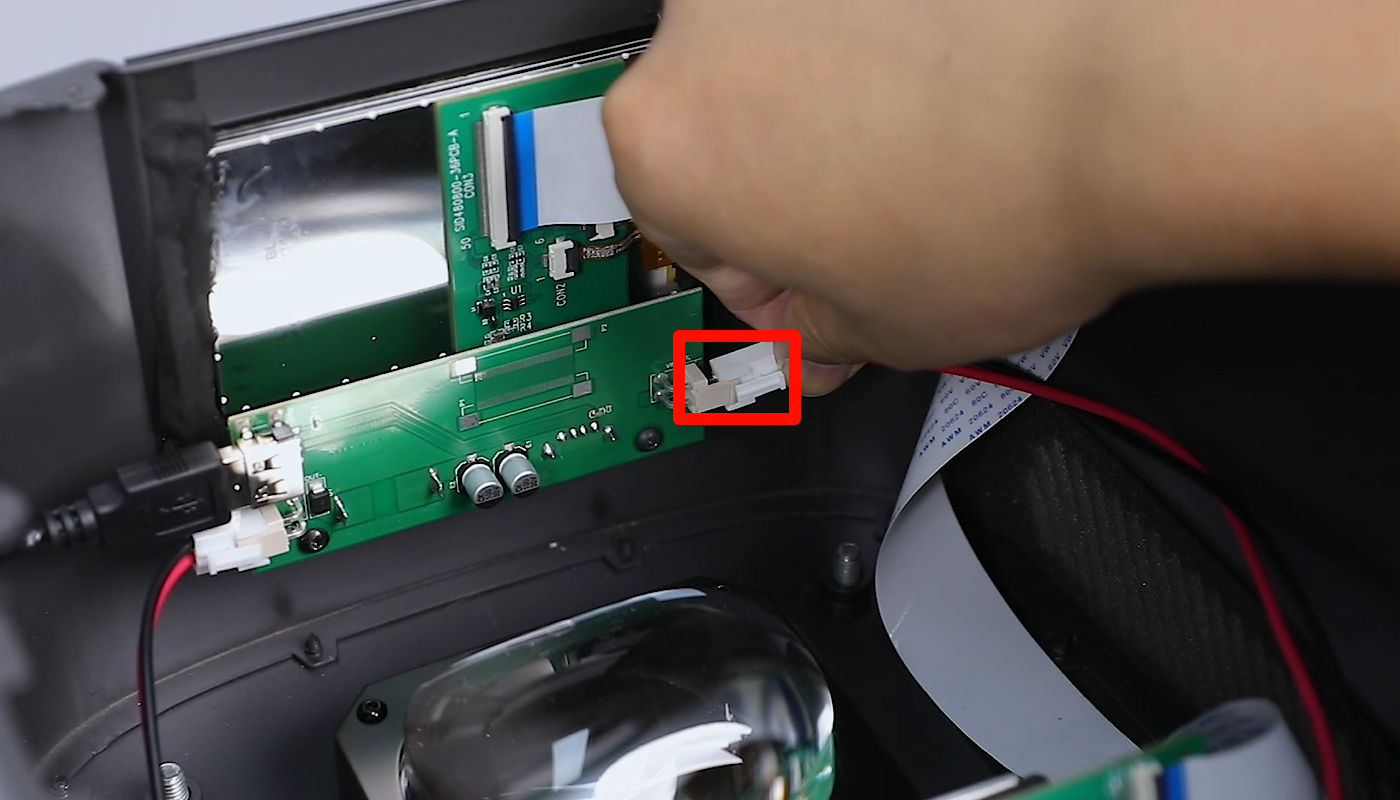
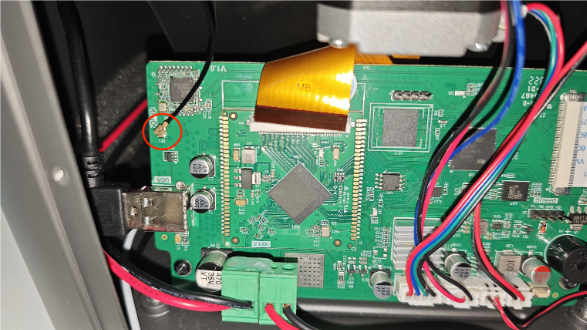
- Disconnect the connection cable of the DC connector port on the touchscreen adapter board. Remove the connection cable. Using a pair of tweezers, press down slightly the cable clip and remove the white connector at the connection point.
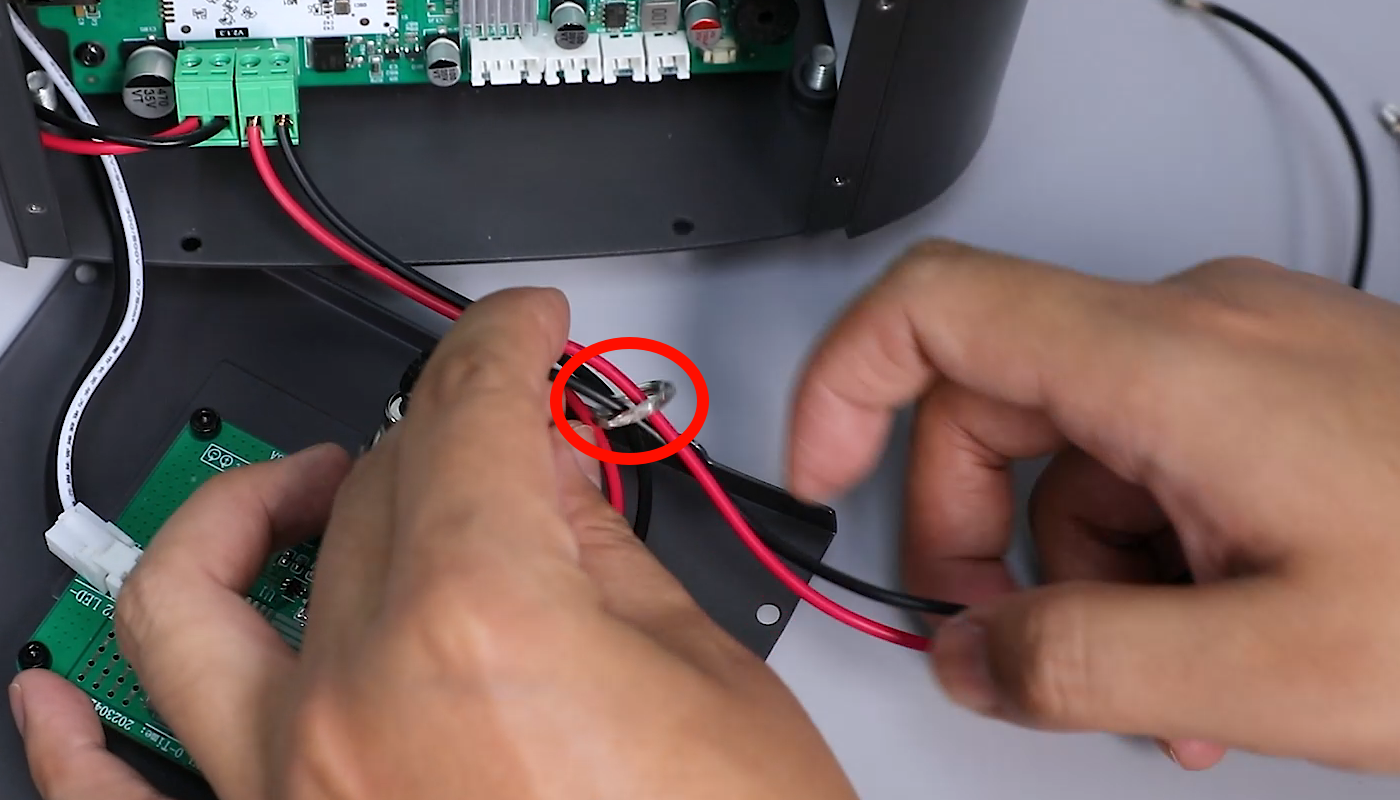
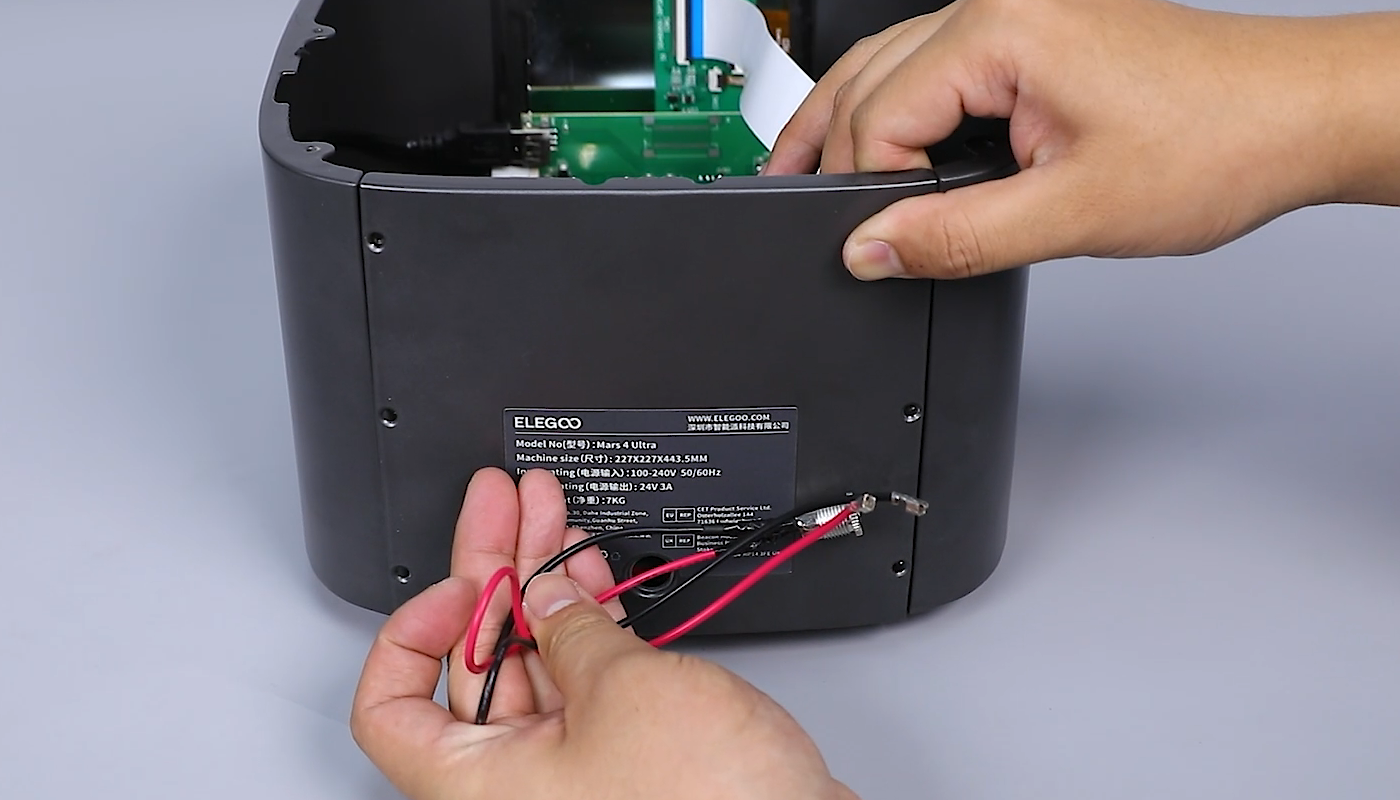
- Using a pair of needle-nose pliers or an open-end wrench, loosen the nut securing the DC connector. Remove the nut and washer from the DC connector.

- Remove the old DC connector assembly from the outer side of the back cover.
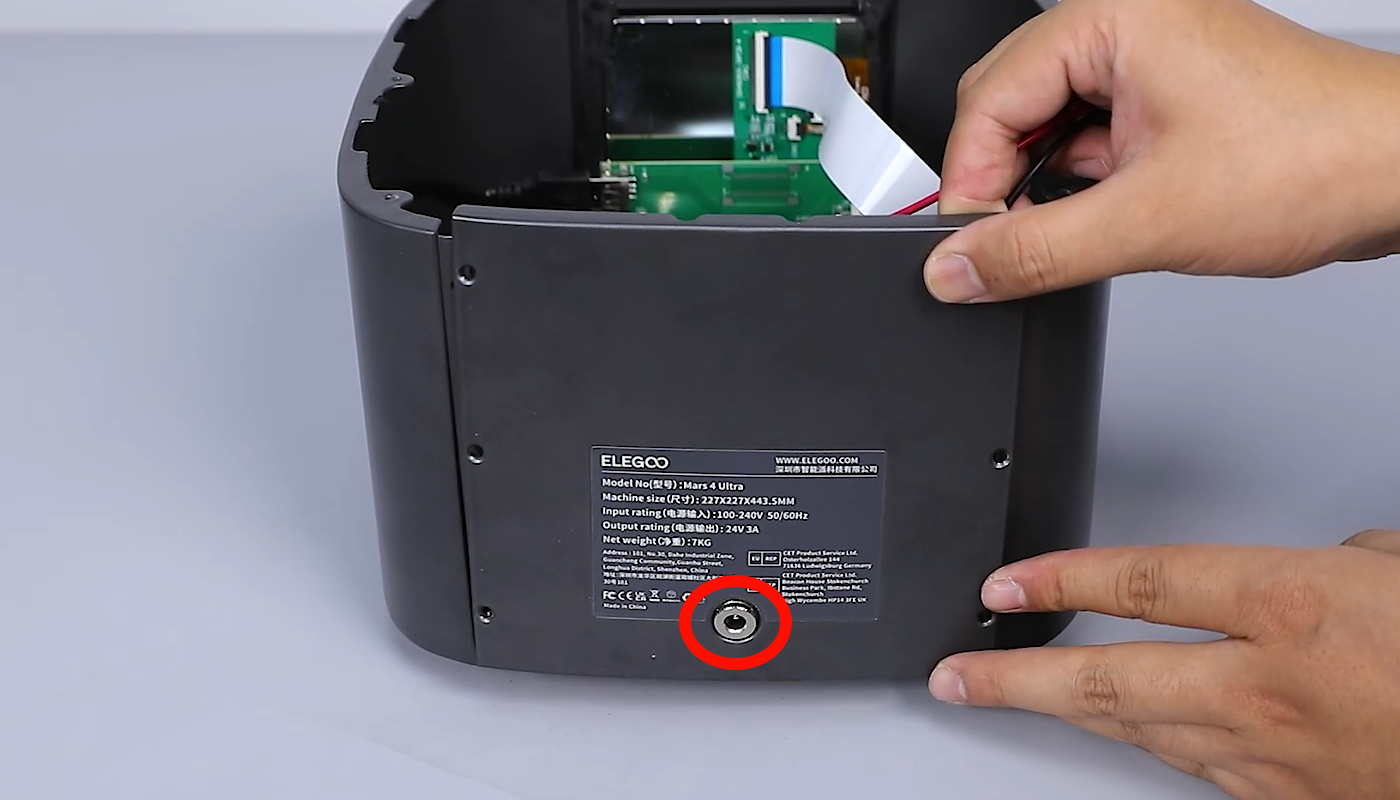
- Prepare the new Dc connector. Pass the connection cable of the DC connector through the reserved hole on the back cover.
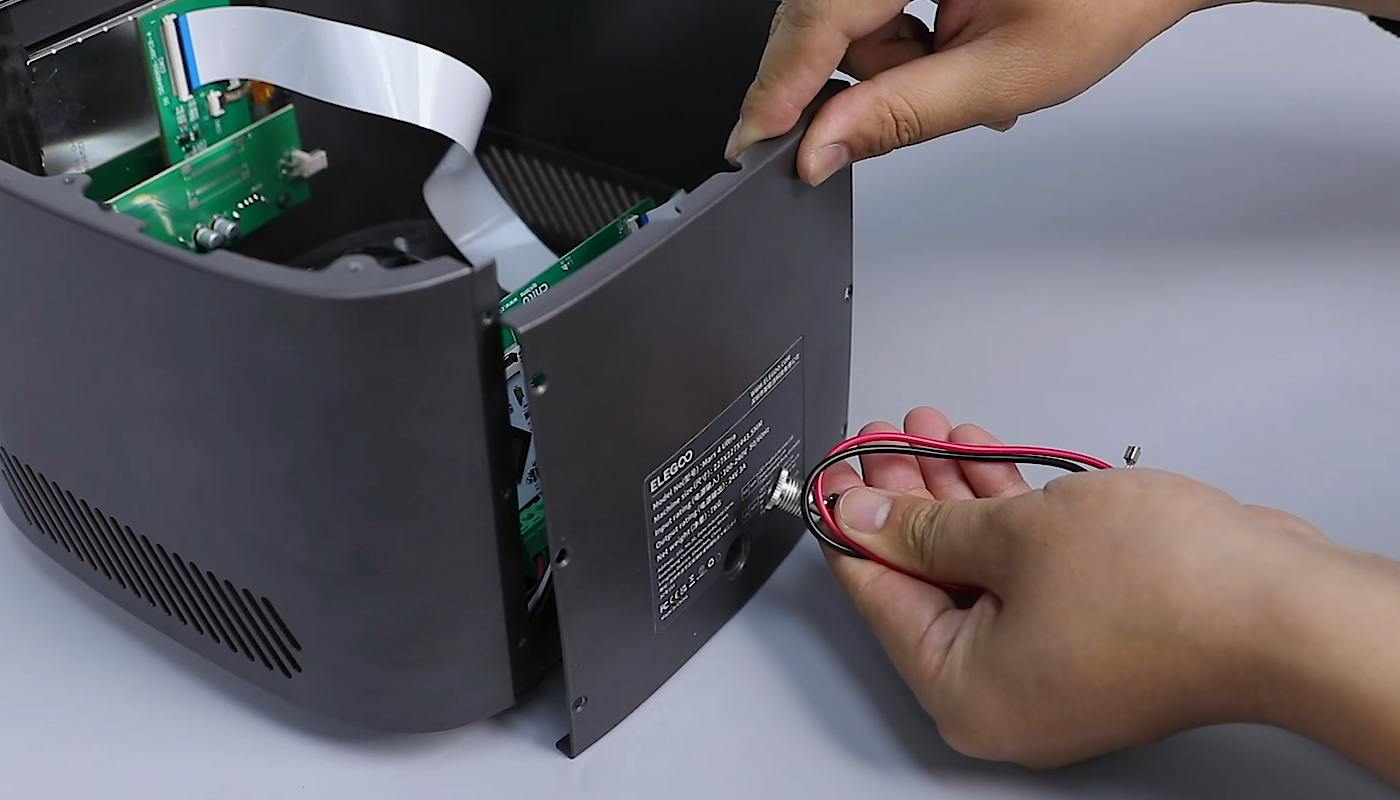
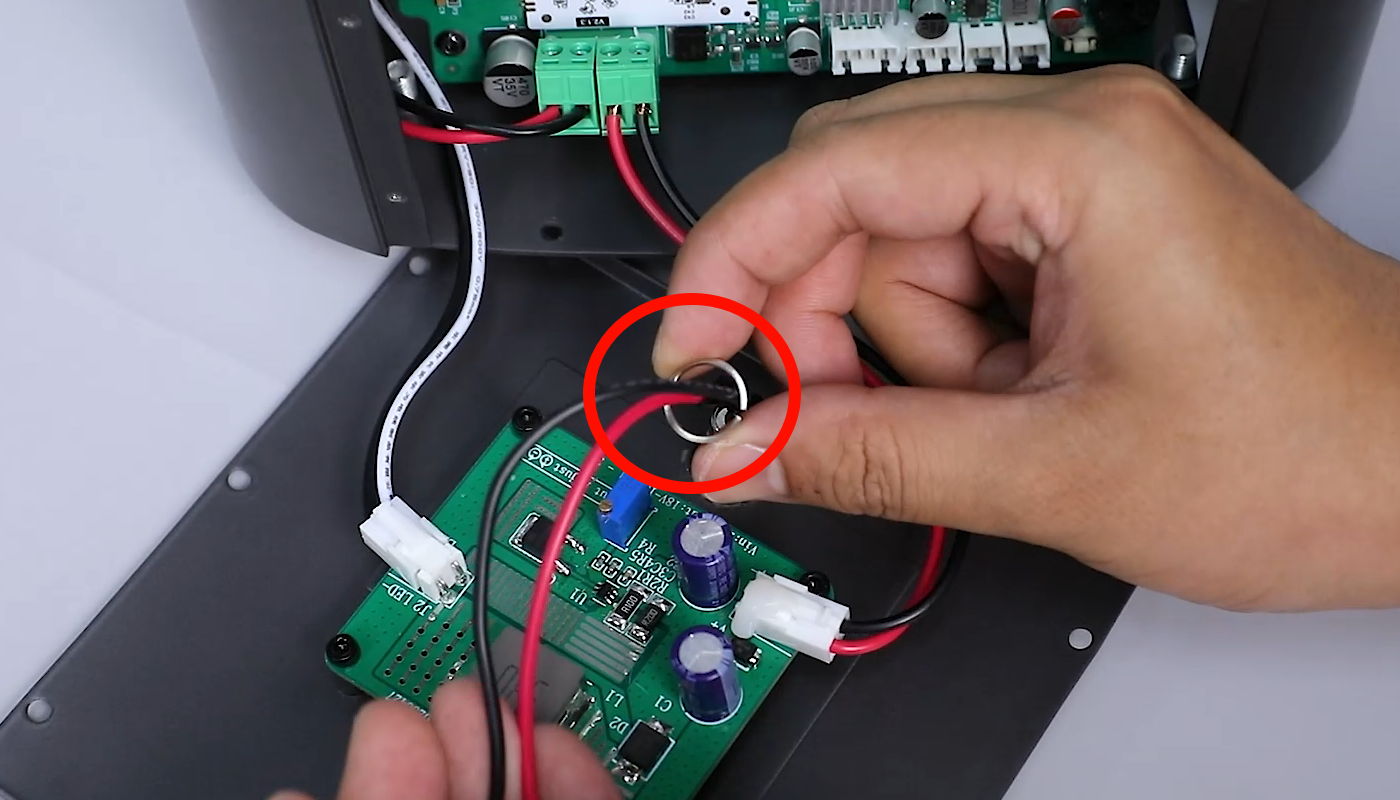
- Pass the washer and the nut through the DC cables. Using a pair of needle-nose pliers or an open-end wrench, tighten the nut securing the DC connector.
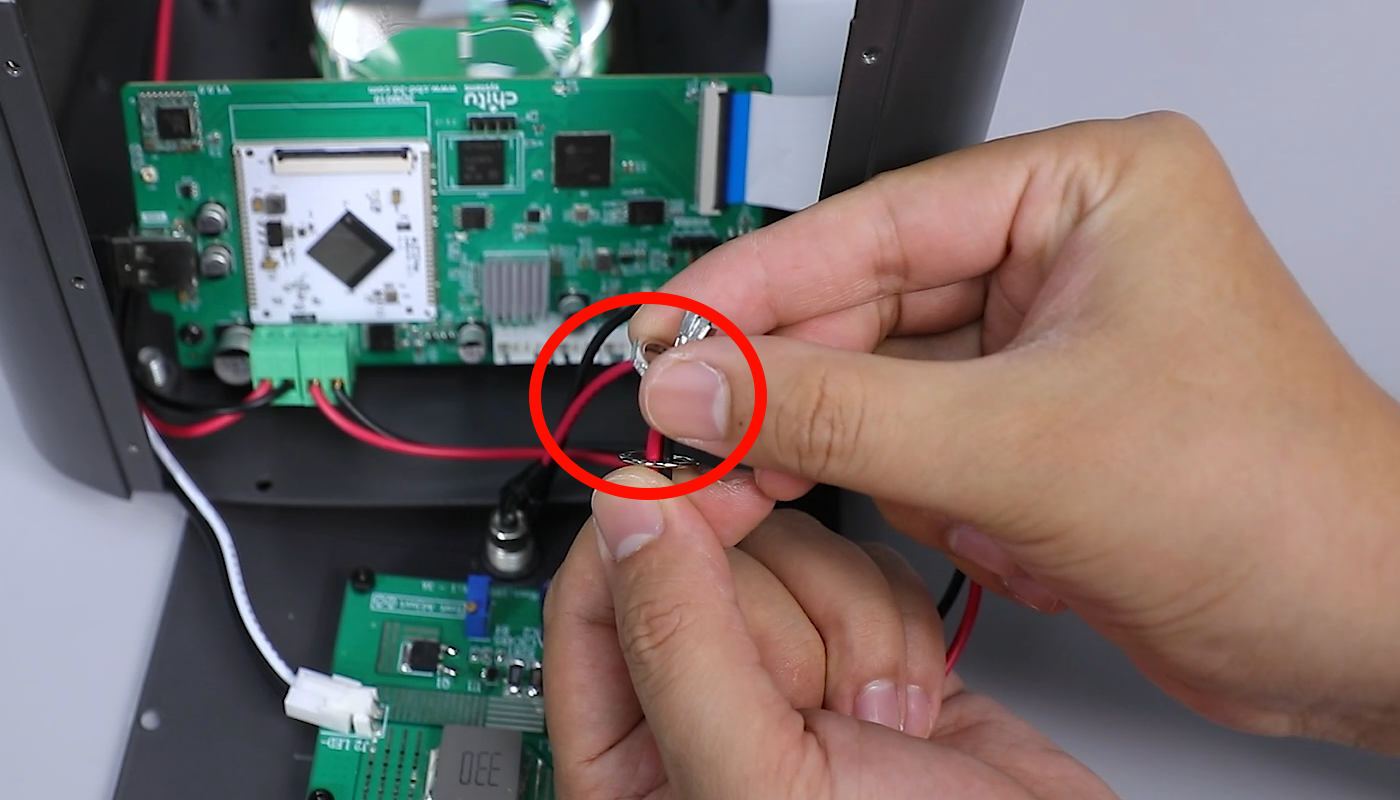

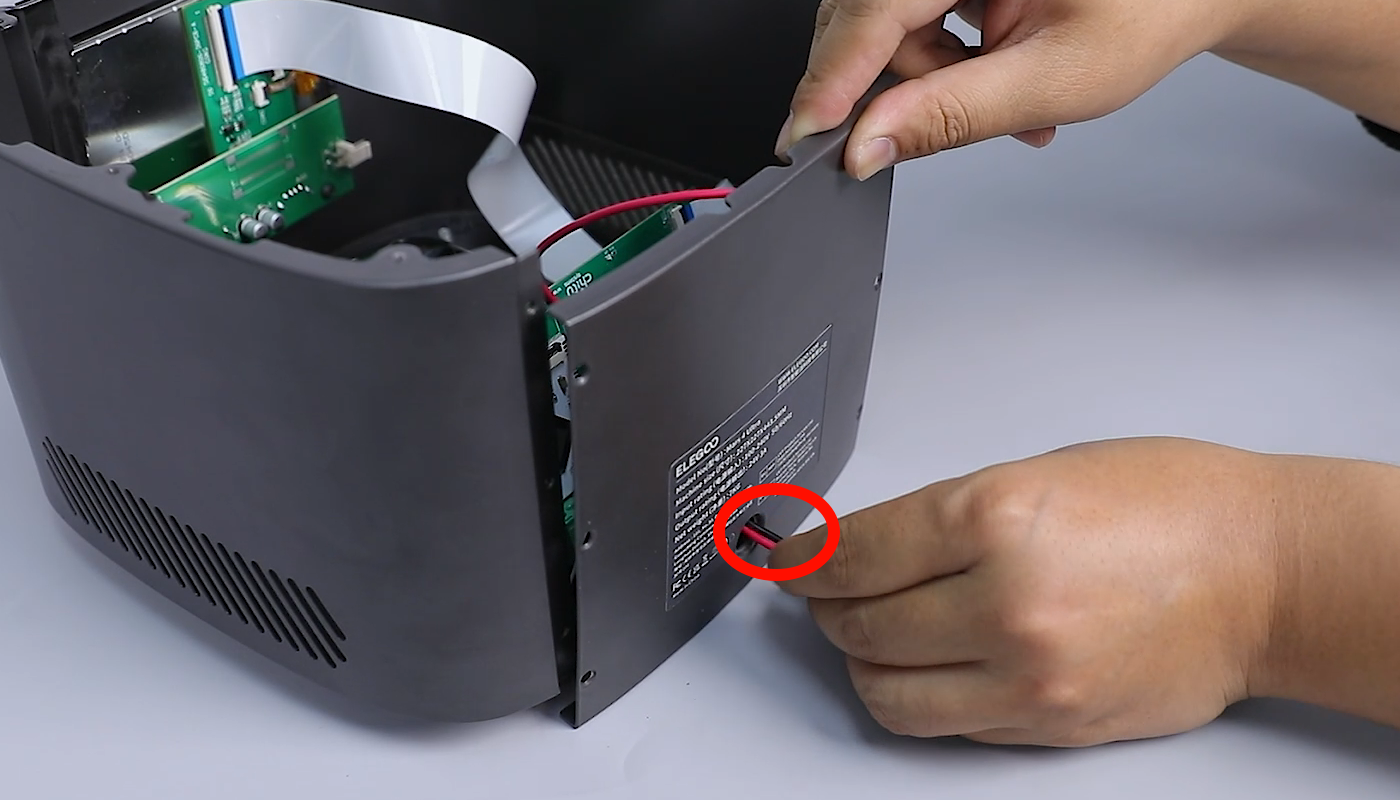
- Prepare the port of the connection cable. Insert the cable clip into the port. Remember to distinguish the left and right side of the clip.
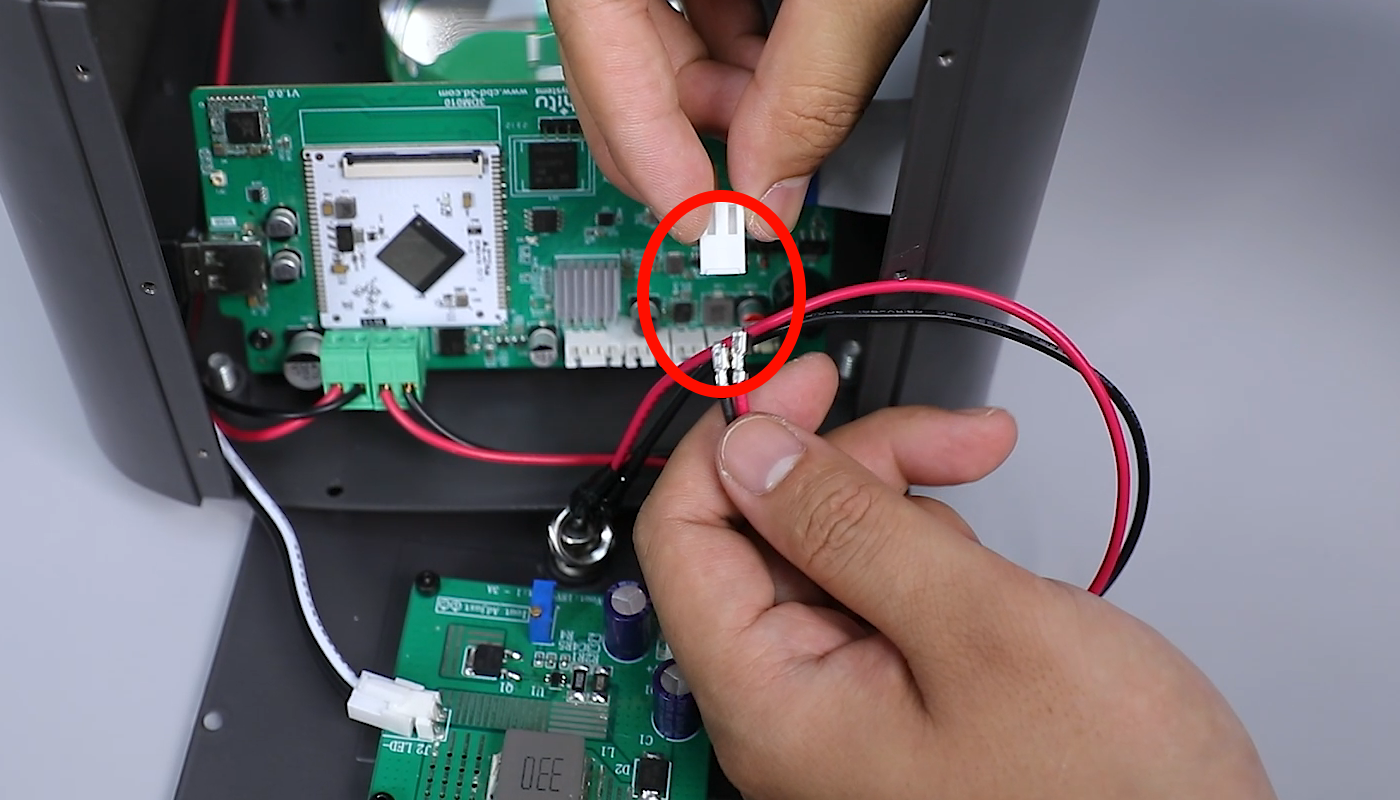
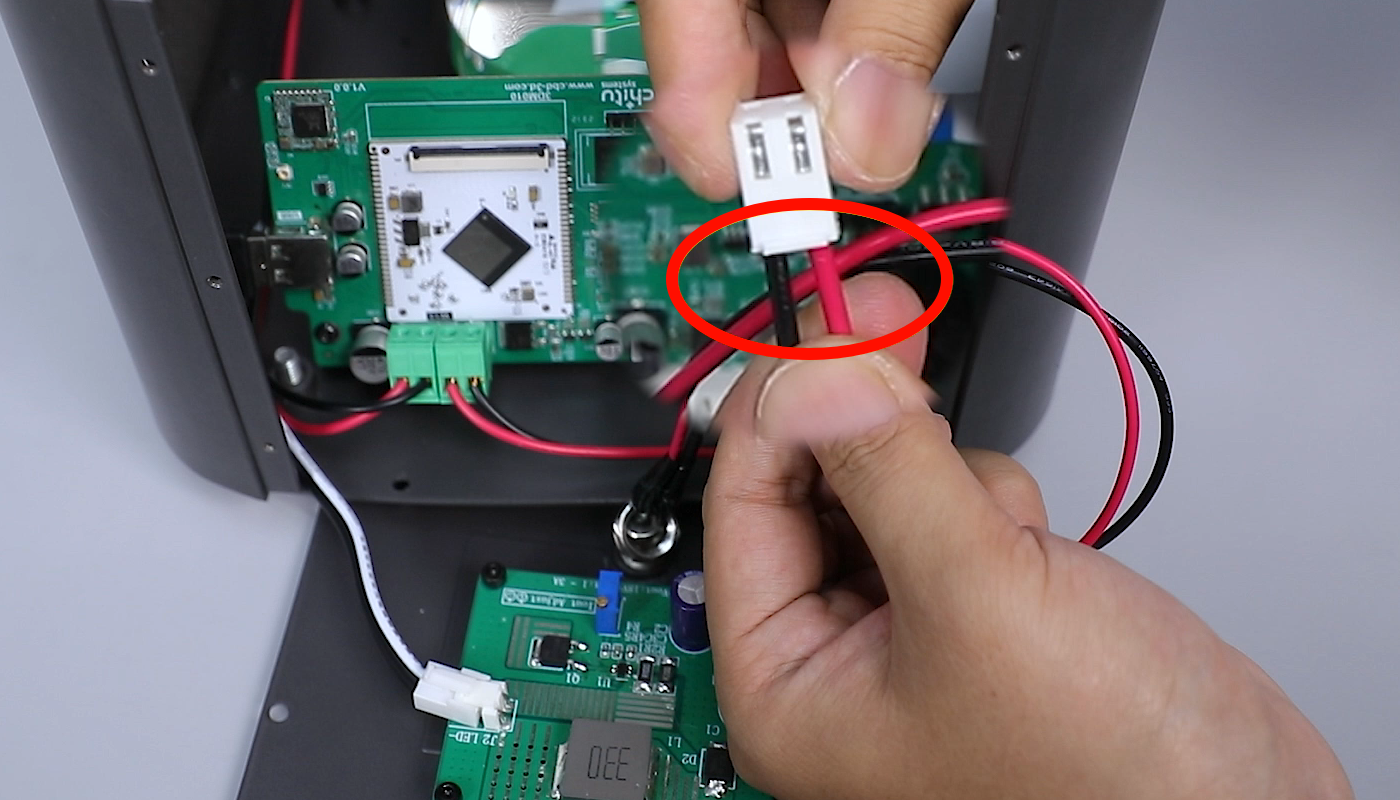
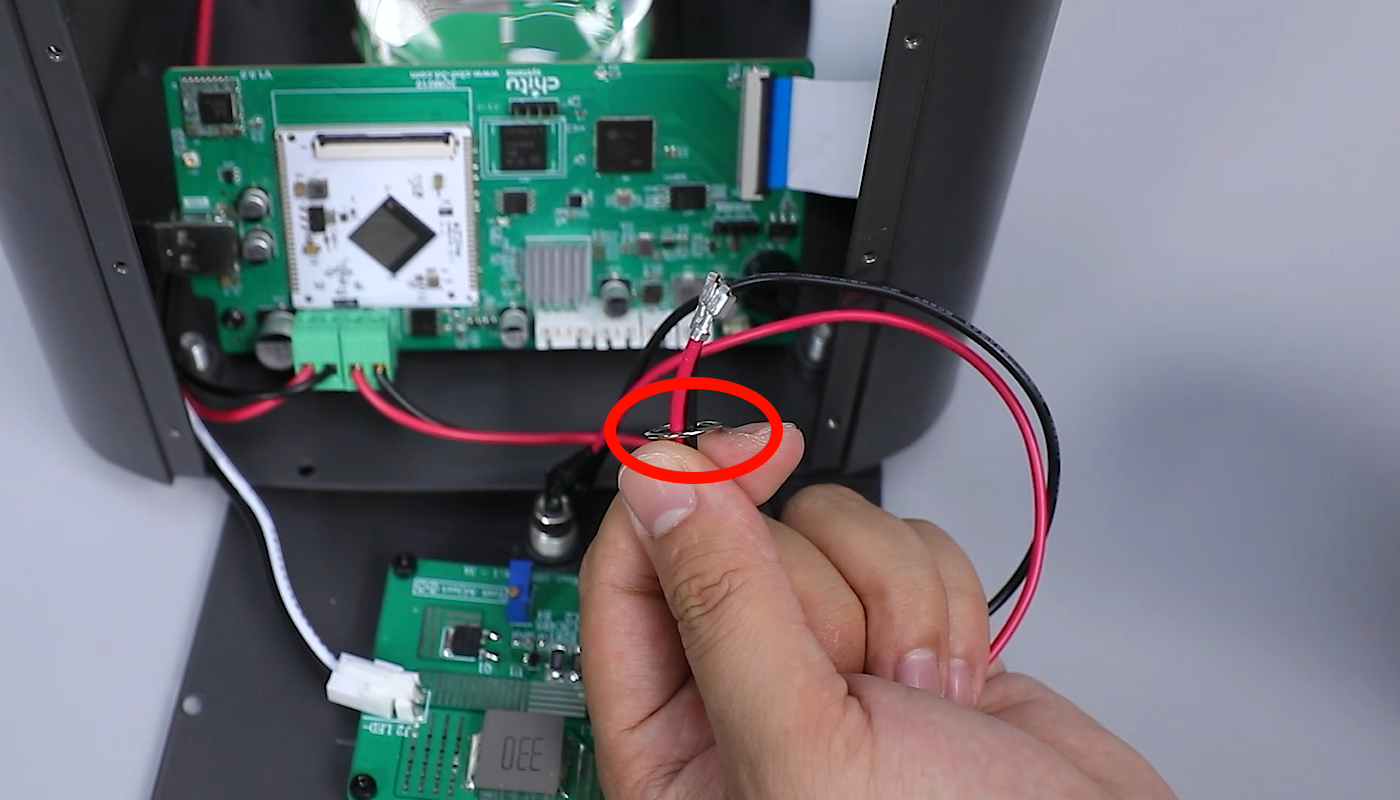
- Insert the connection cable of the DC connector into the DC port on the adapter board.
- Align the lens shade with the cooling fan and the screw holes. Put it in the installation position. Tighten the four screws securing the lens shade using a 2.0mm Allen key.

- Align the middle housing with the screw holes and put it in the installation position. Organize the connection cable of the interior of the printer to avoid being pressed.

- Tighten the six screws securing the middle housing using a 2.5 mm Allen key.

- Connect the ① motor connection wire, ② limit switch connection wire, ③ cooling fan connection wire, and ④ USB purifier connection wire sequentially.
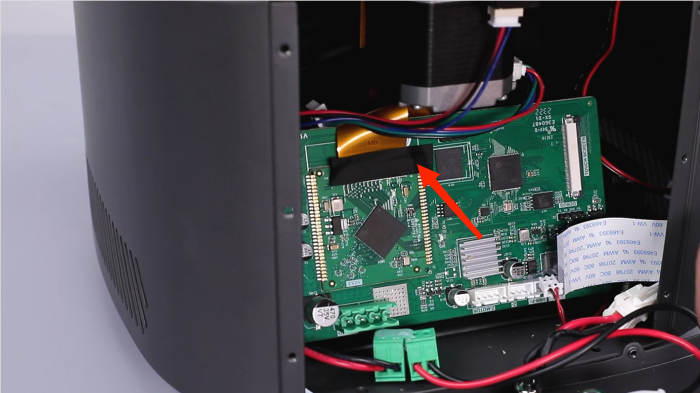
- Insert the Wi-Fi antenna. Secure the Wi-Fi antenna using black tape.
- Lift the LCD ribbon cable cover. Connect the LCD ribbon cable and close the cover. Secure the black tape.
- Install the back cover. Using a 2.5 mm Allen key, tighten the two screws securing the bottom cover of the printer.

- Using a 2.0mm Allen key, tighten the six screws securing the back cover.

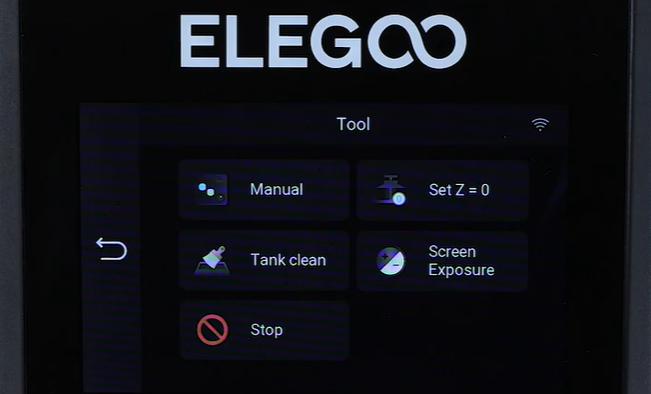
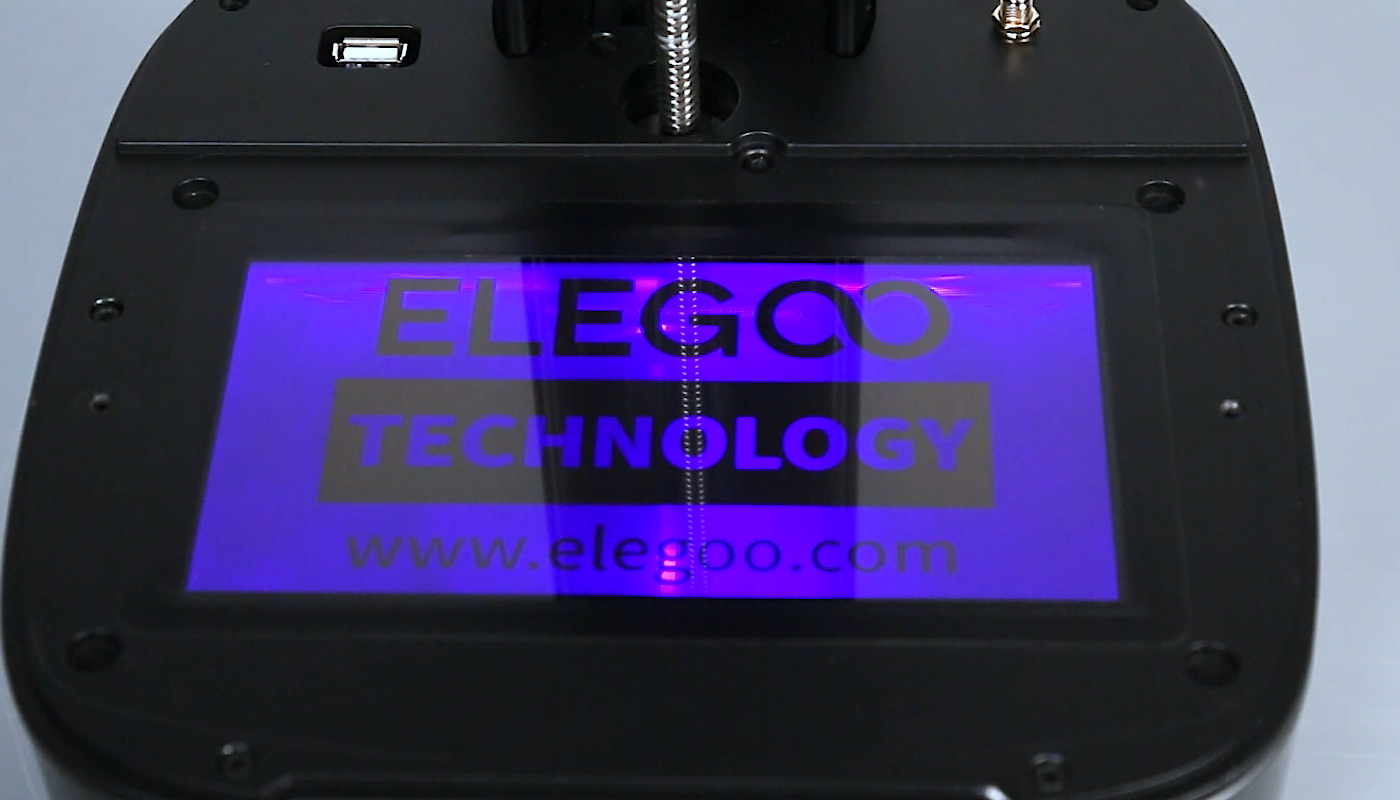
- Power on the printer. On the touchscreen, select Tool - Screen Exposure - ELEGOO. The printer is ready for use if the LCD screen and the touchscreen works normally.