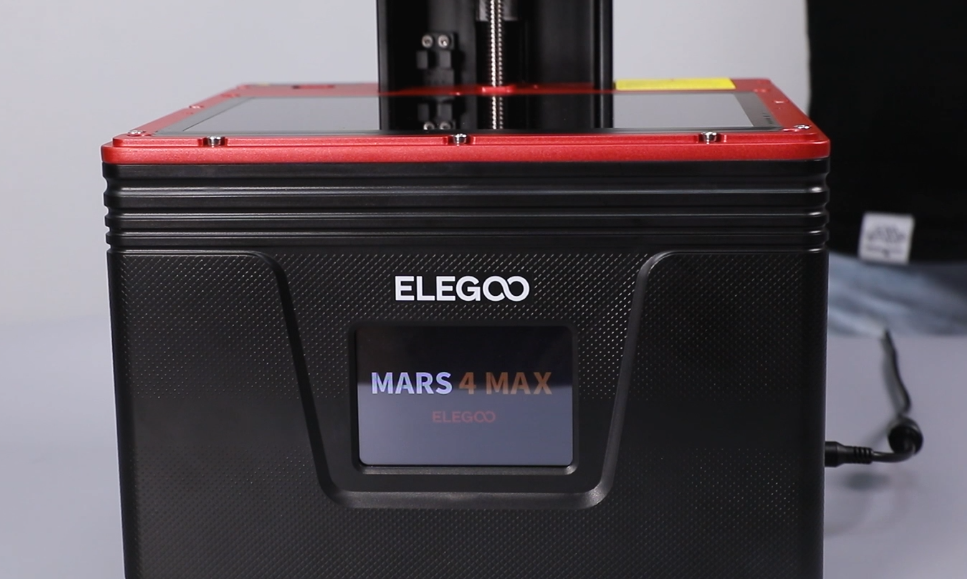
¶ Tools and Materials Needed
- 2.5 mm Allen wrench
- 2.0 mm Allen wrench
¶ Reference Video
Coming soon
¶ Operation Steps
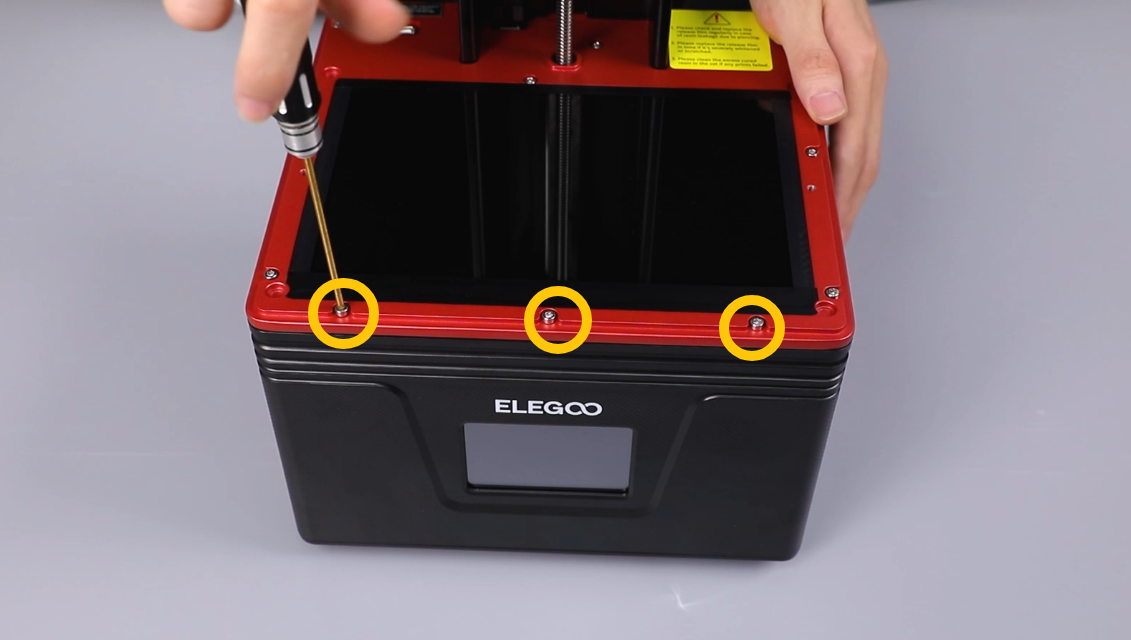
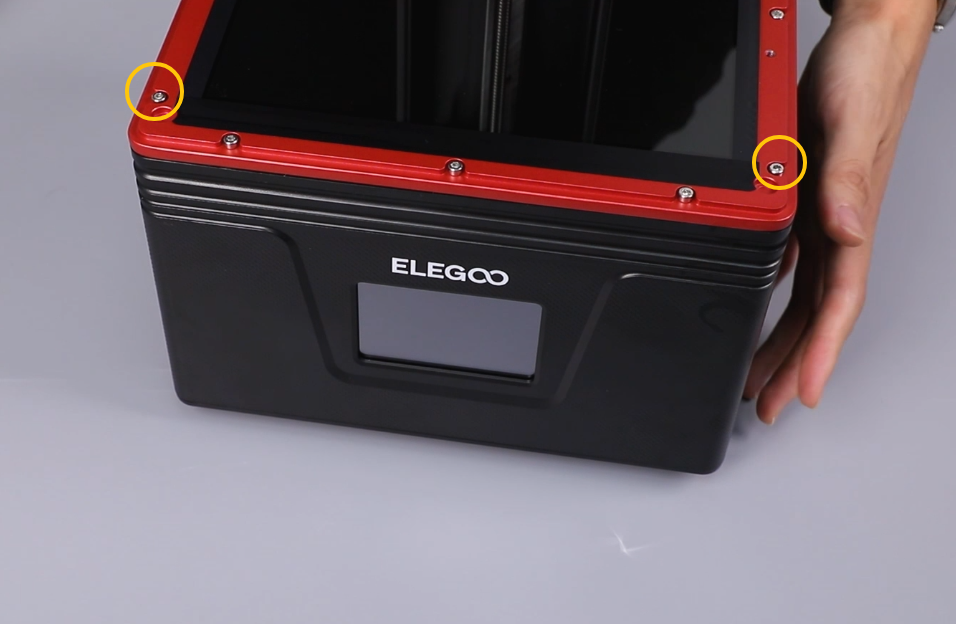
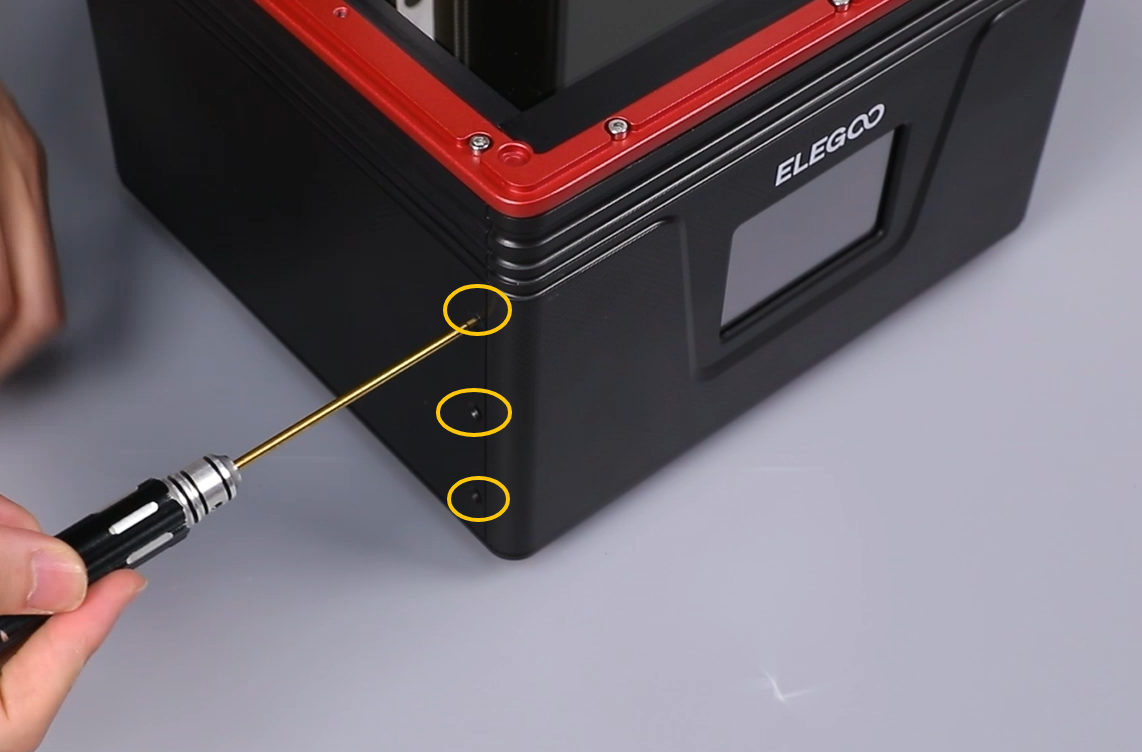
¶ Loosen the Front Cover Top Screws
Use a 2.5 mm Allen wrench to loosen the three screws securing the front cover of the printer base.
¶ Loosen the Left-Side Front Cover Screws
Use a 2.0 mm Allen wrench to loosen the three screws on the left side of the front cover of the printer base.
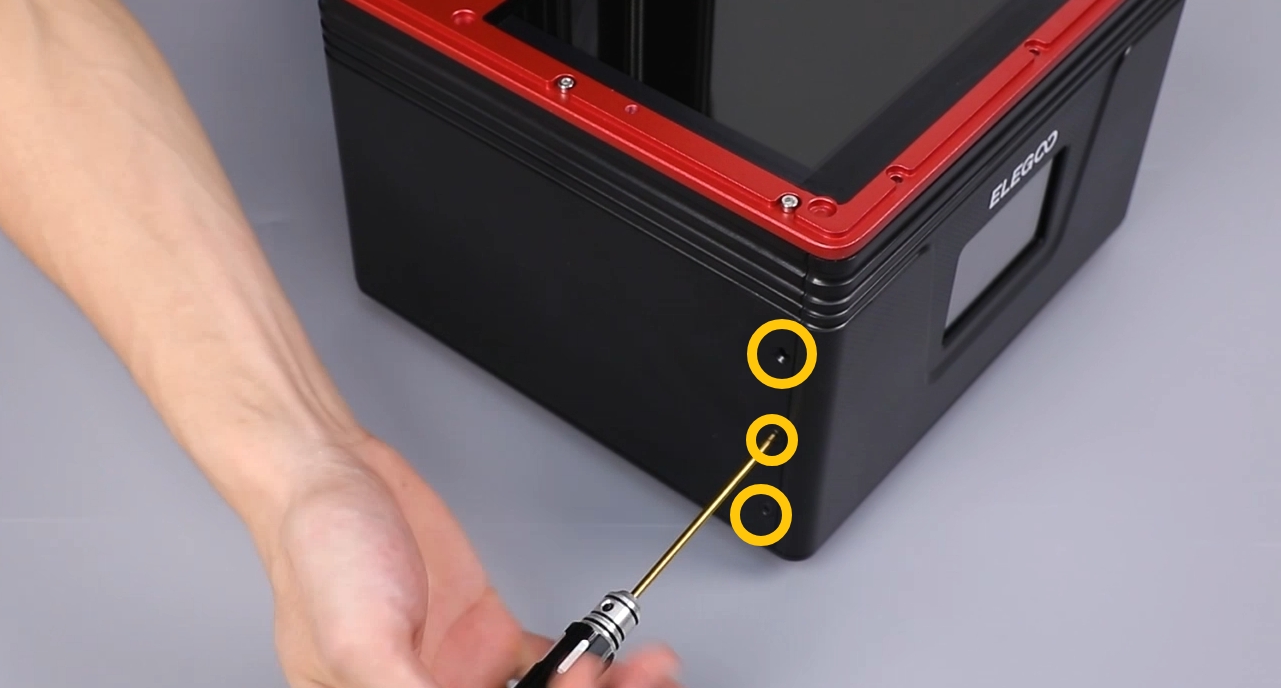
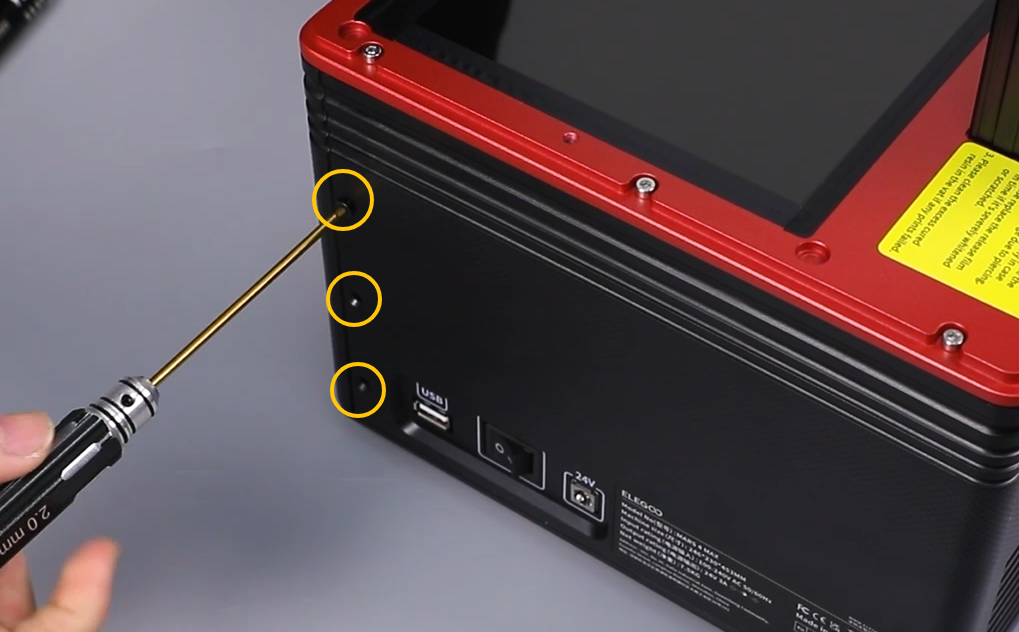
¶ Loosen the Right-Side Front Cover Screws
Use a 2.0 mm Allen wrench to loosen the three screws on the right side of the front cover of the printer base.
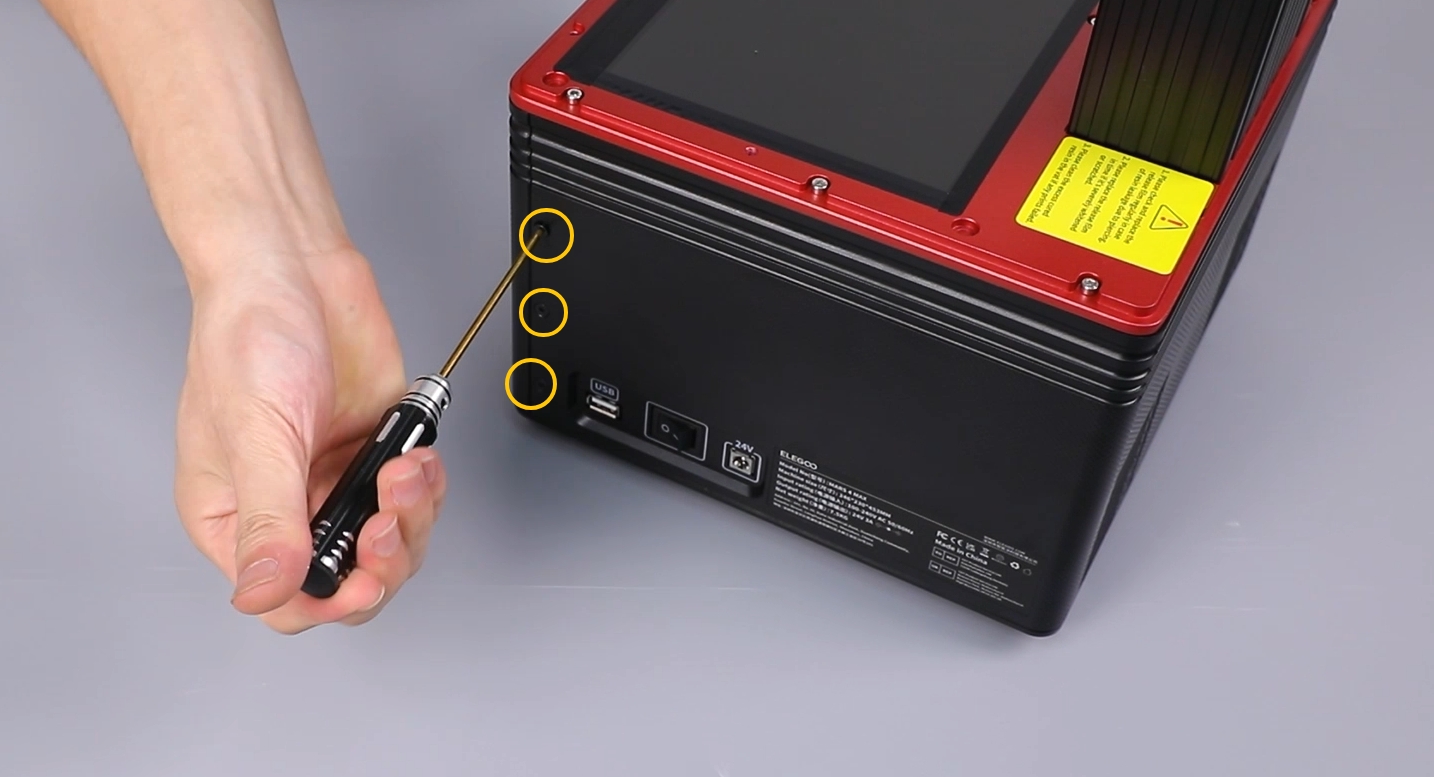
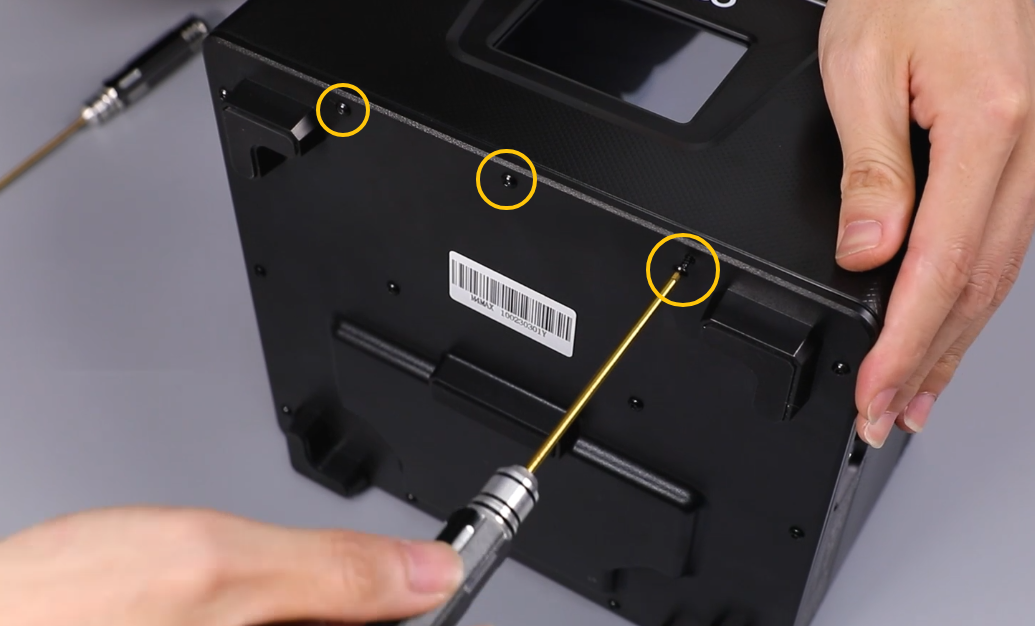
¶ Loosen the Bottom Front Cover Screws
Use a 2.0 mm Allen wrench to loosen the three screws located under the front cover of the printer base.
¶ Loosen the Middle Plate Side Screws
Use a 2.5 mm Allen wrench to partially loosen the two screws on the left and right sides of the middle plate by approximately half a turn.
¶ Remove the Middle Plate
Remove the middle plate and place it flat on a clean work surface.
¶ Disconnect the Touchscreen Cable
Remove the adhesive tape securing the cable on the side of the touchscreen. Lift the locking cover of the touchscreen cable connector, then disconnect the touchscreen cable.
¶ Remove the Touchscreen Fixing Screws
Use a 2.0 mm Allen wrench to loosen the four screws fixing the touchscreen.
¶ Install the New Touchscreen
Position the new touchscreen in its original location, align the mounting screw holes, and use a 2.0 mm Allen wrench to tighten the four fixing screws.
The silkscreen on the back of the touchscreen must face upward and align with the side of the metal threaded hole to prevent incorrect upside-down installation.
¶ Reconnect the Touchscreen Cable
Reconnect the touchscreen cable to the connector, close the locking cover, and reattach the adhesive tape.
¶ Reinstall the Front Panel
Reinstall the front panel.
¶ Secure the Middle Plate
Use a 2.5 mm Allen wrench to tighten the fixing screws on the left and right sides of the middle plate.
¶ Secure the Left and Right Panels
Use a 2.0 mm Allen wrench to tighten the three fixing screws on the left panel and the three fixing screws on the right panel.
¶ Secure the Base Plate
Use a 2.0 mm Allen wrench to tighten the three screws on the base plate.
¶ Test the Touchscreen Function
Power on the printer and test the touchscreen buttons. If the touchscreen responds normally, the replacement is complete.