PrusaSlicer software download
https://github.com/prusa3d/PrusaSlicer/releases
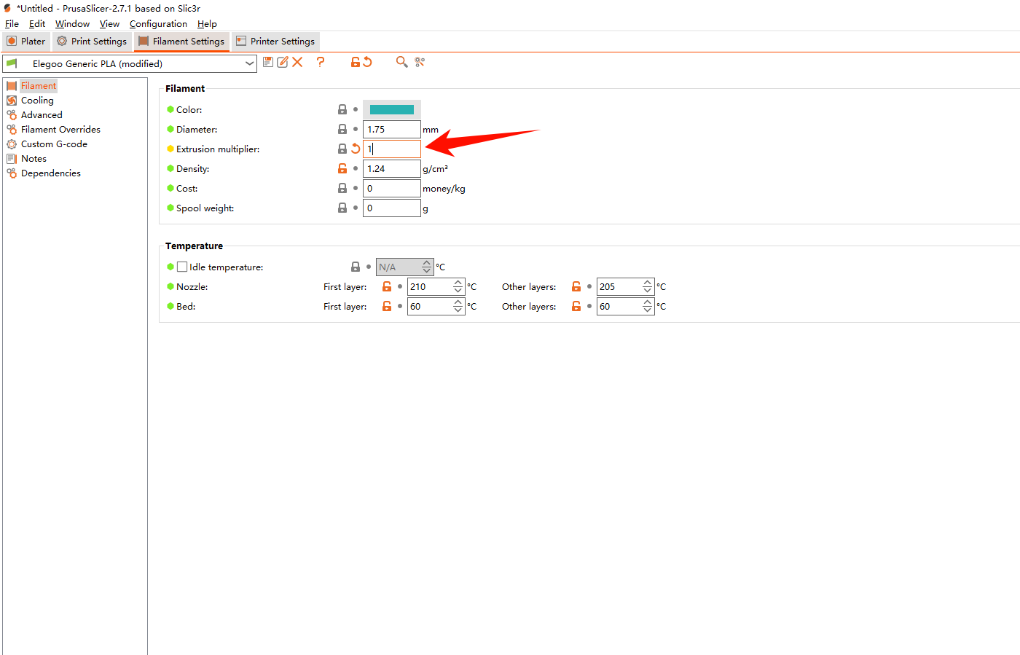
Firmware version
Adapt Neptune 4/Neptune 4 Pro: V1.1.2.28 and later
Adapt Neptune 4 Plus/Neptune 4 Max: V1.2.2.30 and later
If the printer firmware version is earlier, it is recommended to modify the [Filament-Extrusion multiplier] to 1 in [Filament Settings] for better printing results.
PrusaSlicer profile zip file: /n4_series_prusa_configuration_files-20260213t034732z-1-001.zip
¶ (.ini) Profile import steps
1. After installing the PrusaSlicer software, enter the software interface.
2. Click [File-Import-Import Configuration Bundle] in the upper left corner.
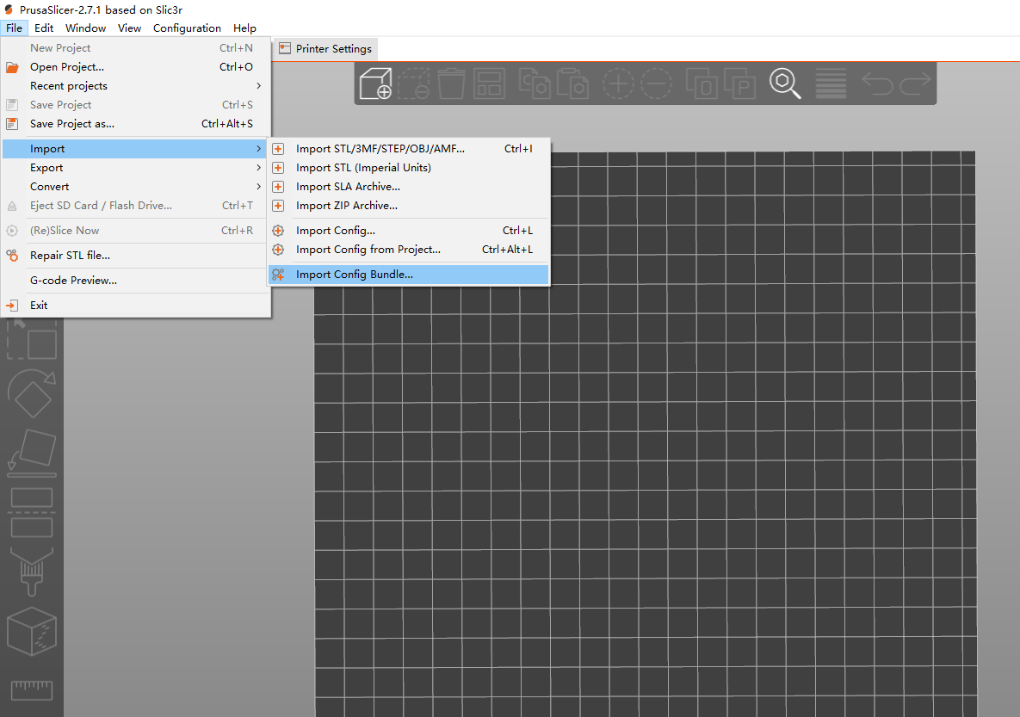
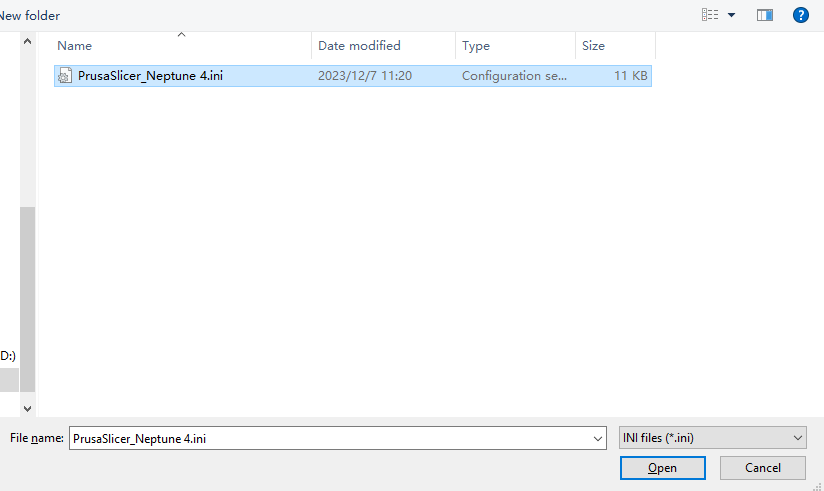
3. Select the profile (.ini suffix file) of the corresponding to the model and import it.
4. Printing settings, filament, and printer configuration parameters will be imported into PrusaSlicer. Once the import is completed, you can slice and print.
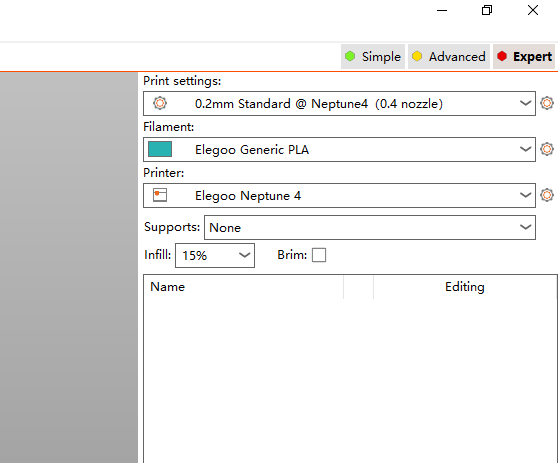
Note: When slicing and printing, you need to select the print settings and filament parameters corresponding to the printer.
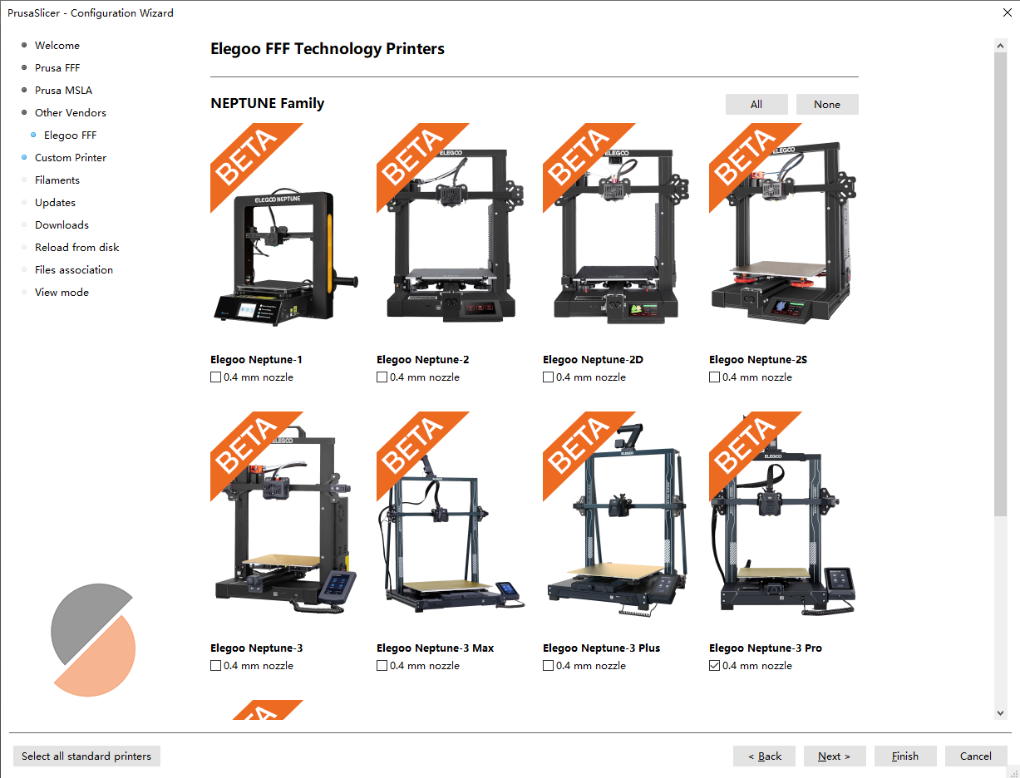
5. Click the [Add/Remove] option in the drop-down box of [Filament] or [Printer] to enter PrusaSlicer's [Configuration Wizard].
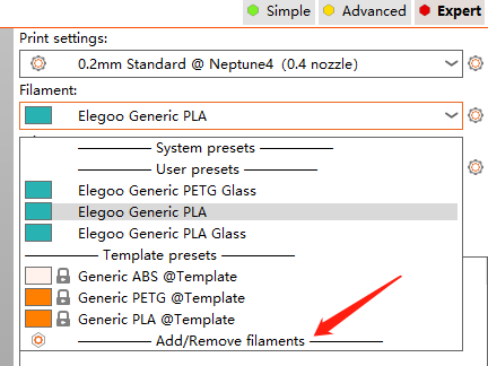
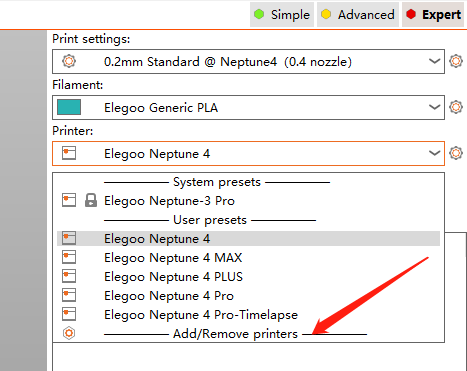
6. You can add/remove printers, presets, and filament parameters in the [Configuration Wizard].
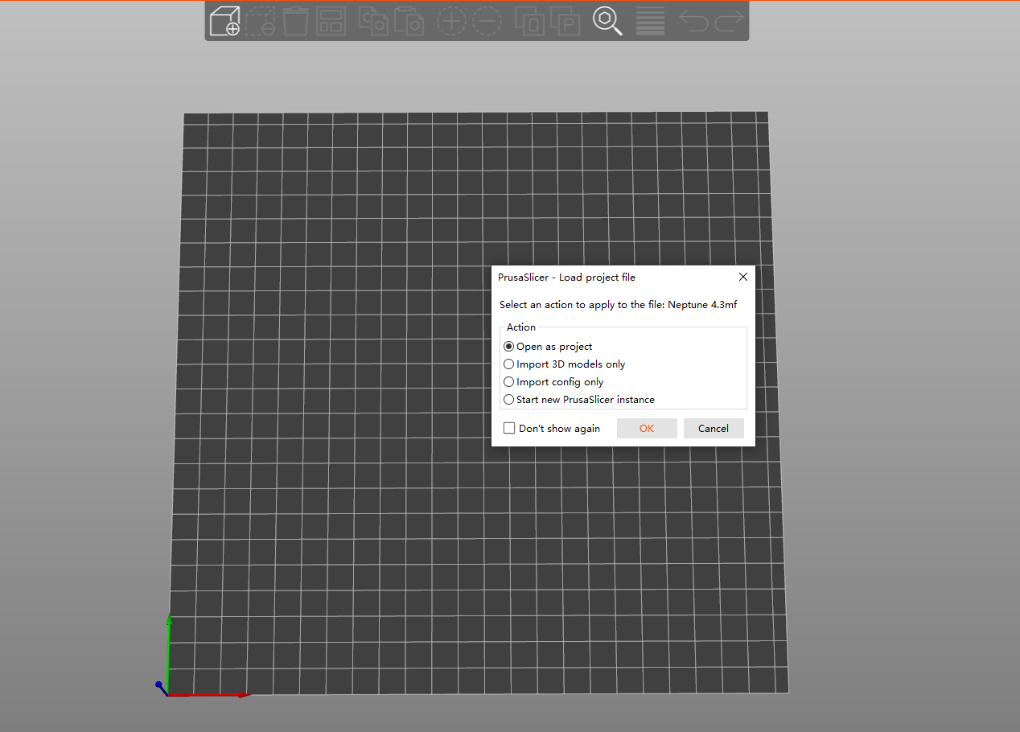
¶ 3mf file usage tutorial
Considering the functional differences between different versions of PrusaSlicer software, a universal 3mf file for PrusaSlicer is created, so that you can use 3mf to slice and print even if you can't import the configuration.
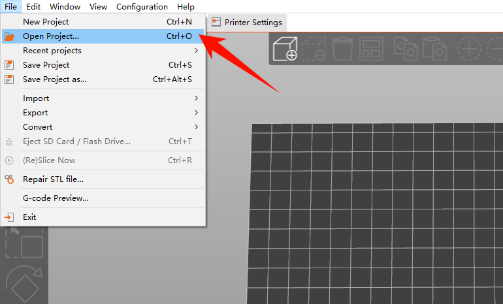
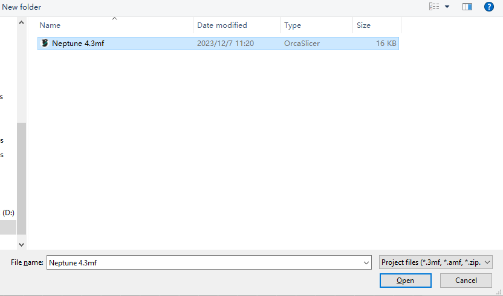
1. Click [File-Open Project] in the upper left corner, select the 3mf file of the corresponding model, open it, import the model, and then slice and print.
2. You can also directly drag the 3mf file into PrusaSlicer to open it, import the model, and then slice and print.