Precautions before operation
Before performing nozzle PID calibration, unload the filament from the extruder to avoid affecting the nozzle temperature calibration due to the thermal melting of the filament.
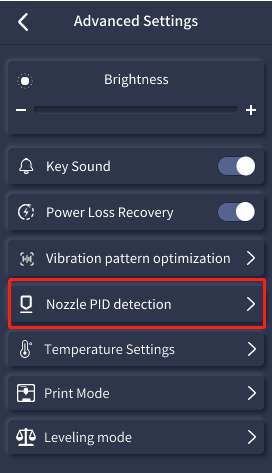
¶ Calibrate PID on touch screen
Neptune 4 Plus/Max supports nozzle PID calibration on the touch screen.
Calibration steps
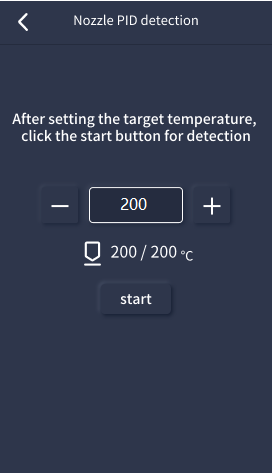
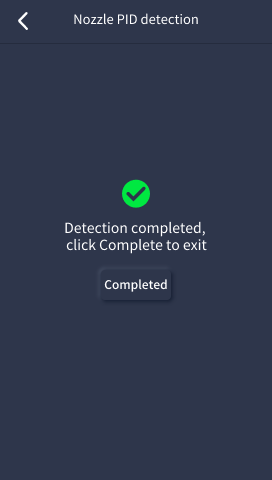
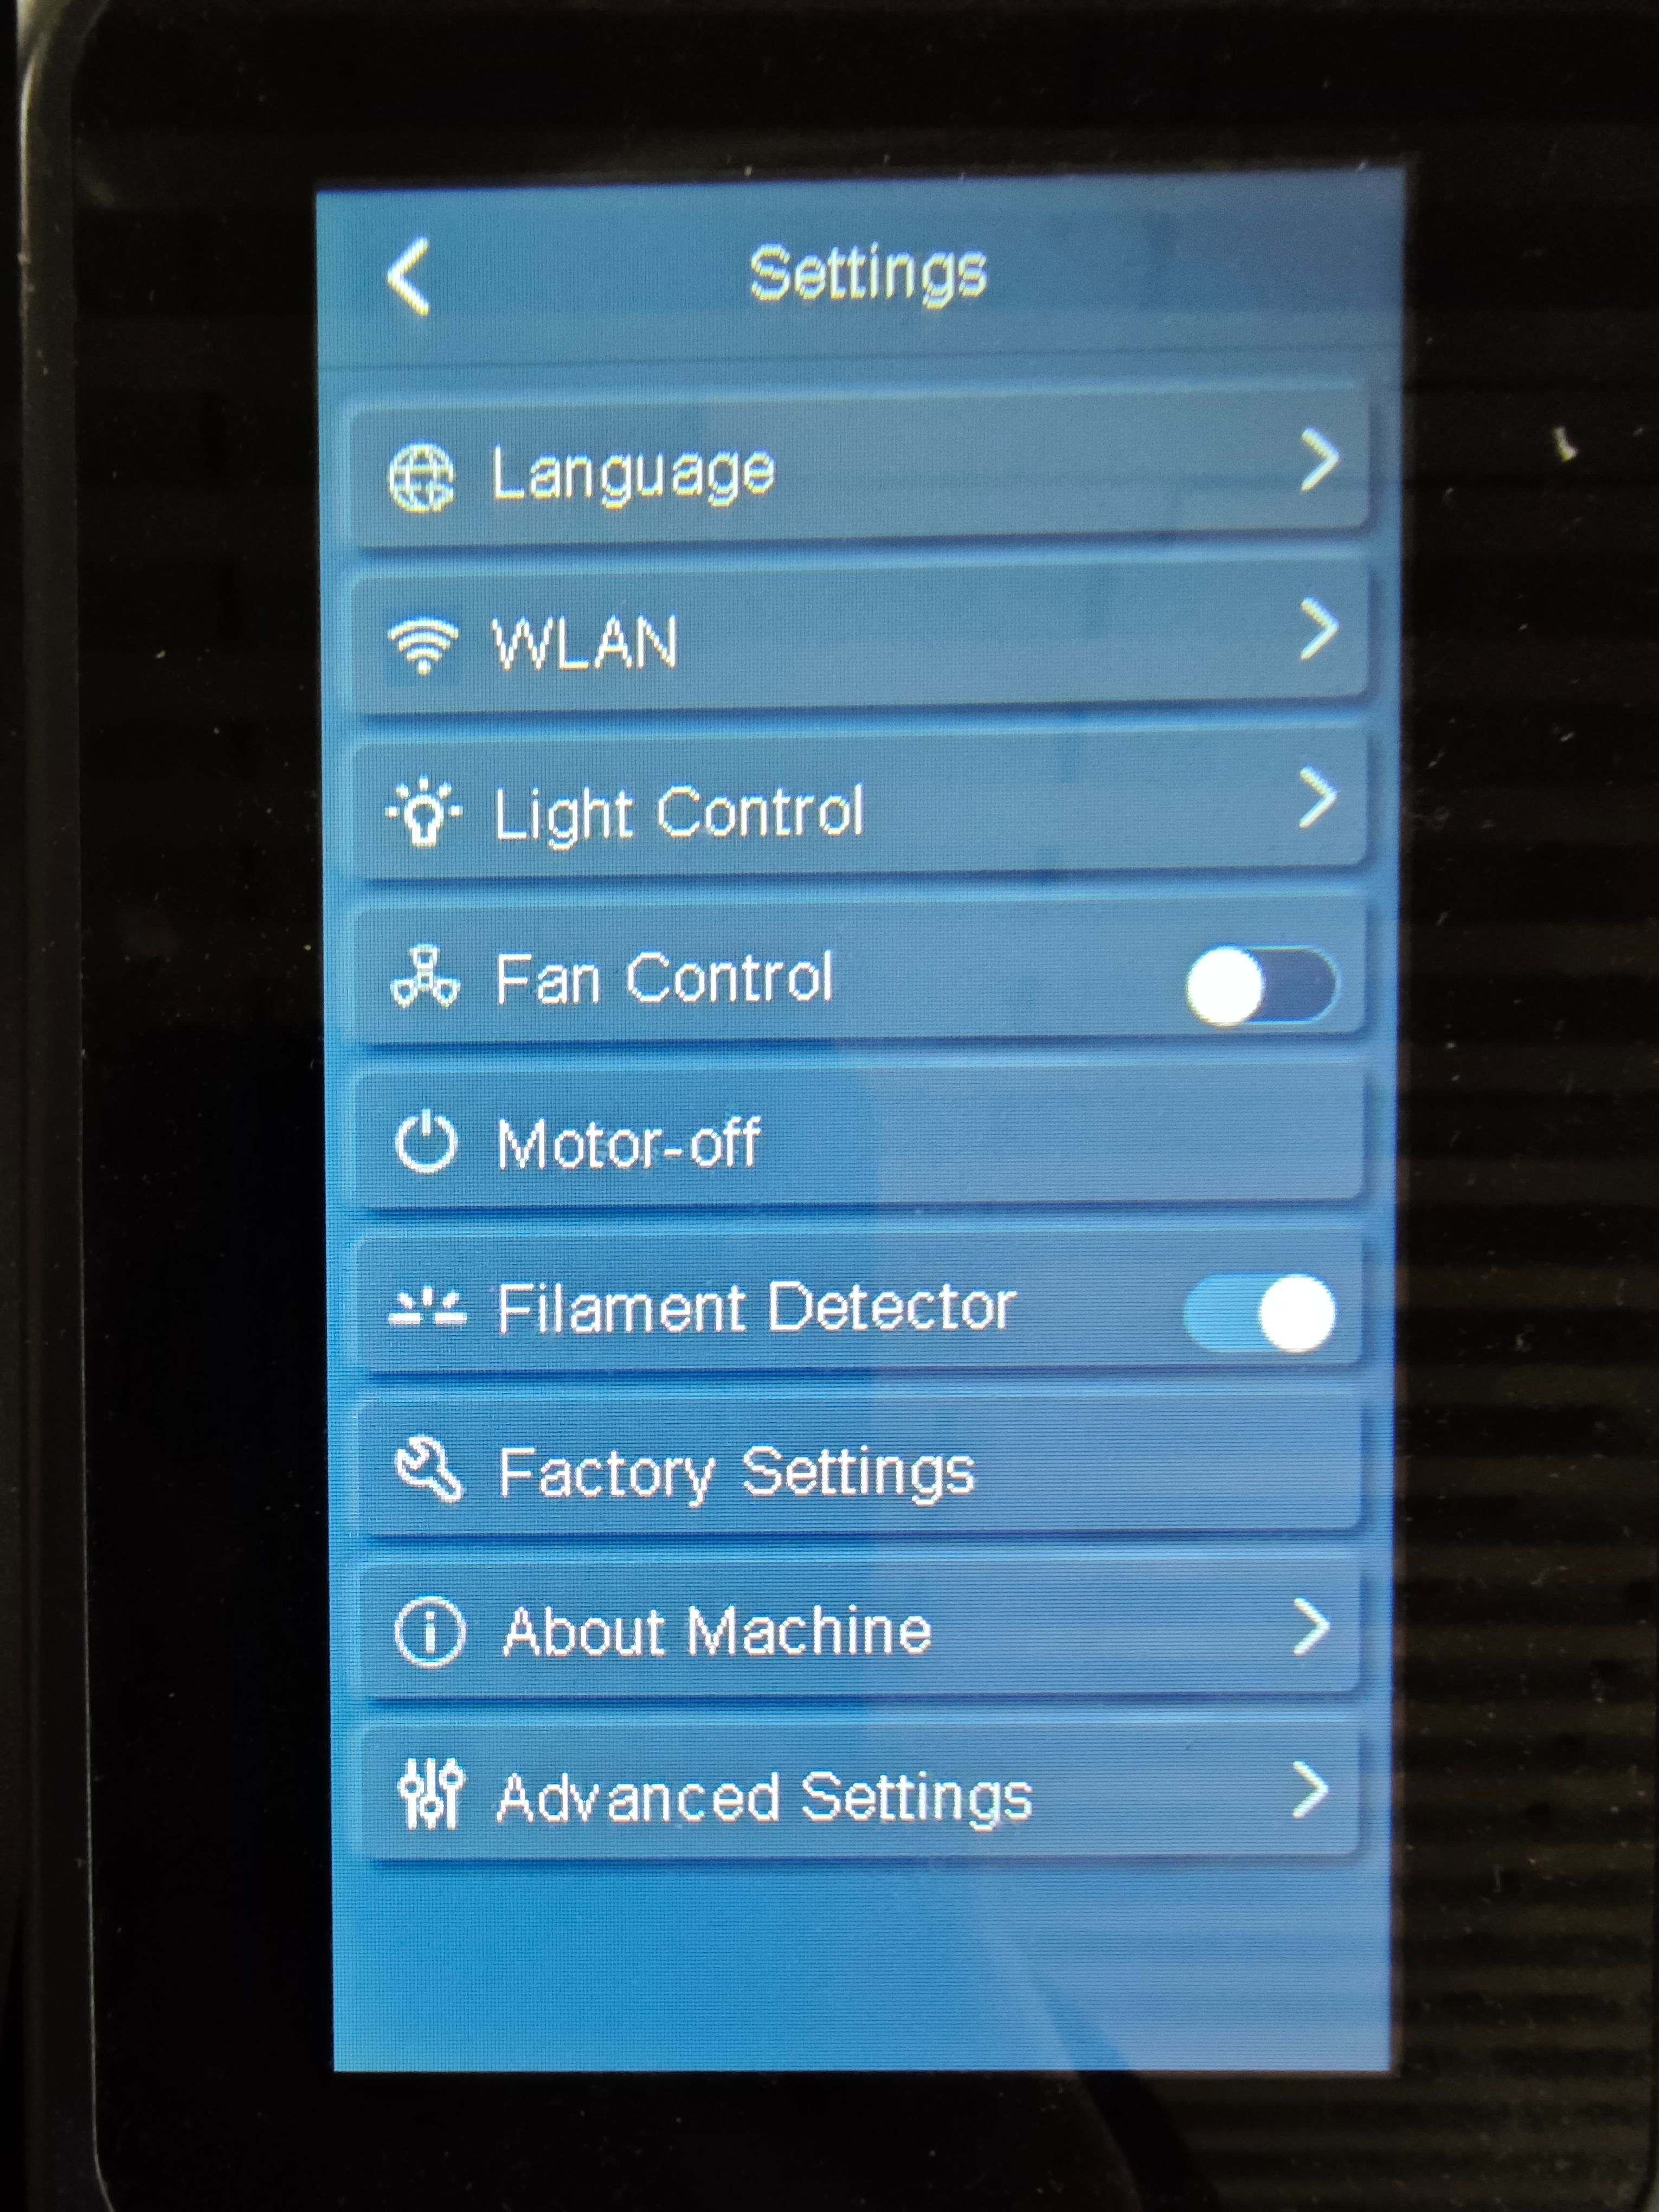
1. In the touch screen [Settings-Advanced Settings-Nozzle PID detection], click the "Start" button, and the machine will automatically perform nozzle PID detection.
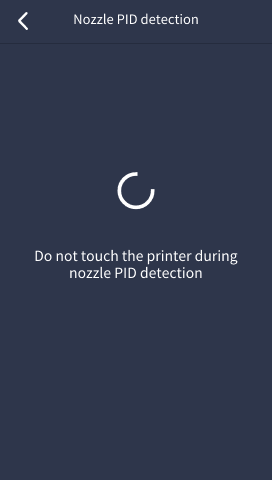
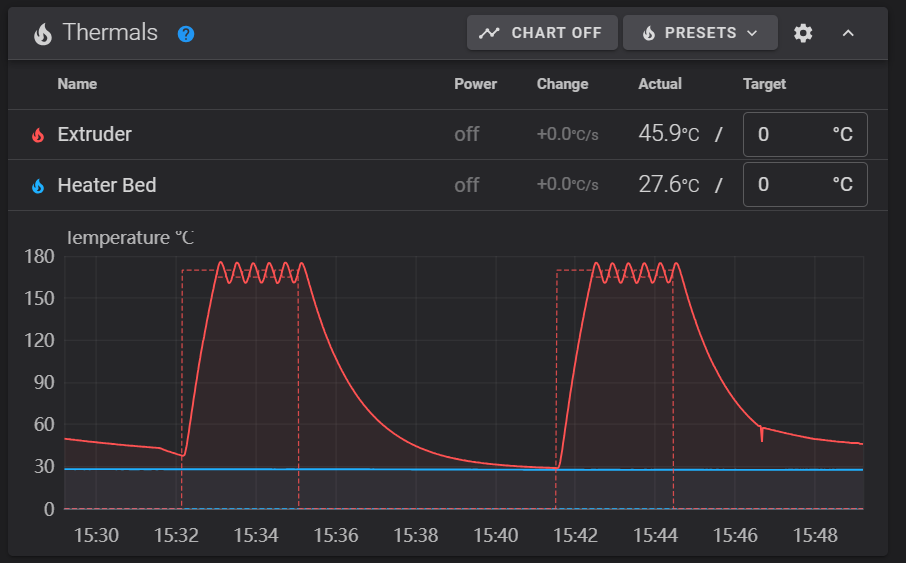
2. During the detection, the nozzle will start heating and all cooling fans will work (do not touch the printer during the nozzle PID detection). After the detection is finished, click "Completed".
¶ Calibrate PID on the web page side
Since Neptune 4/4Pro cannot perform nozzle PID detection on the touch screen, it can only operate by sending commands on the web site.
References
[https://www.klipper3d.org/zh/Config_checks.html#pid](https://www.klipper3d.org/zh/Config_checks.html" \l "pid)
Calibration steps
- Enter the control interface of the web page, in the function area of [console] on the main page.
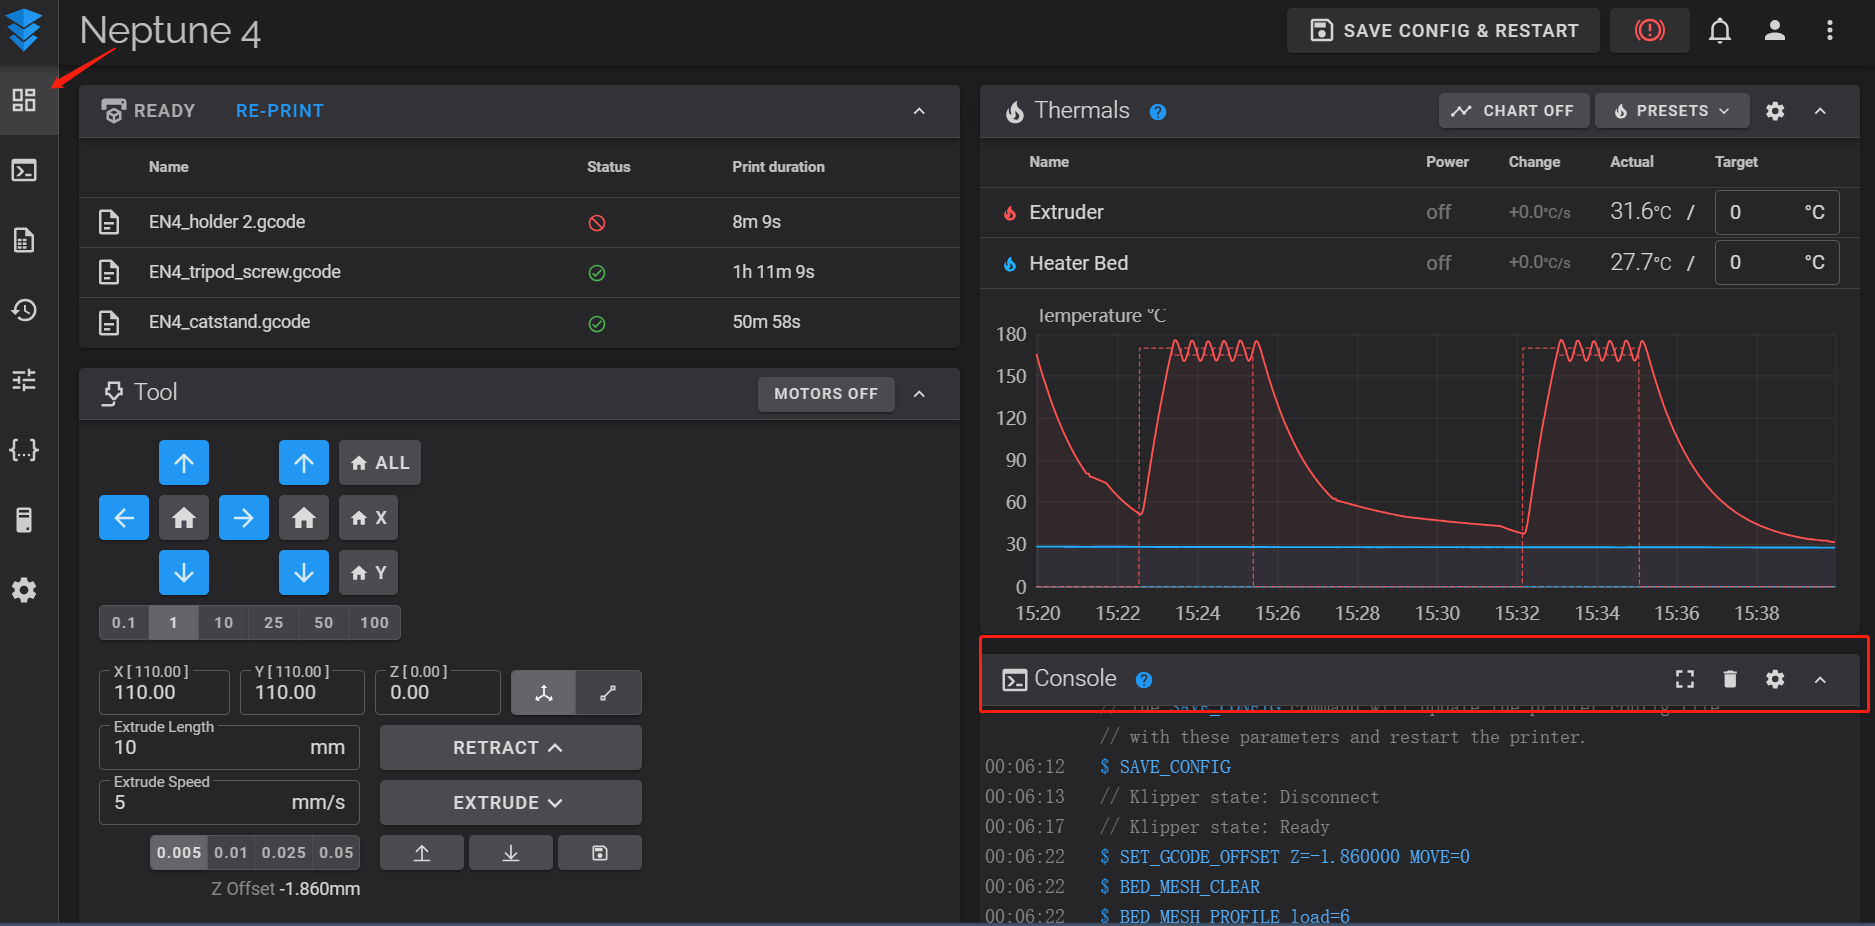
2. First enter the command: M106 S225 to start the fan.
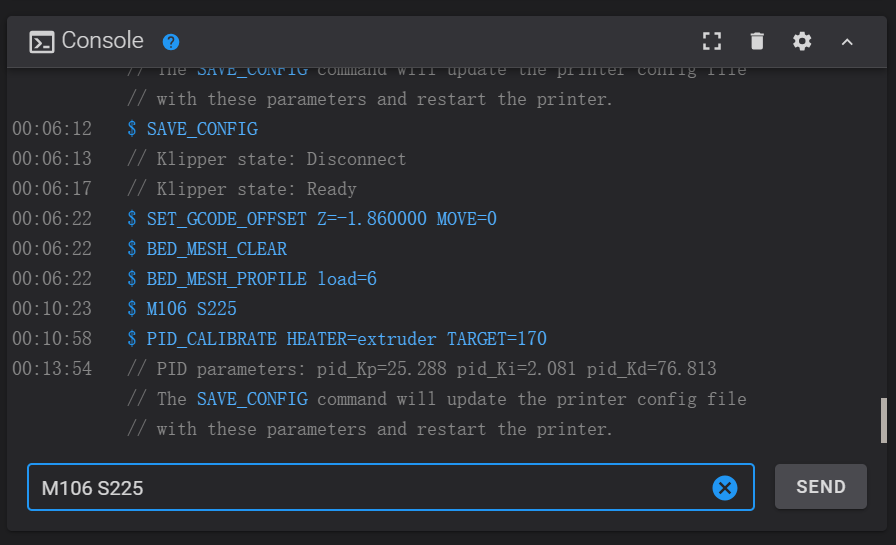
3. Enter the nozzle PID calibration command: PID_CALIBRATE HEATER=extruder TARGET=170, the nozzle starts heating, the temperature curve rises.
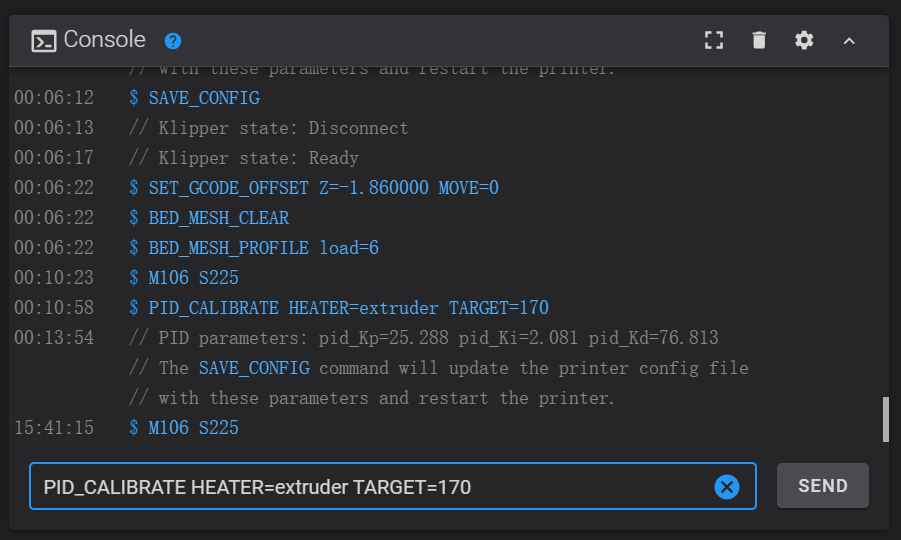
4. After the detection test is completed, enter: SAVE_CONFIG to save the new PID settings to the printer.cfg file.
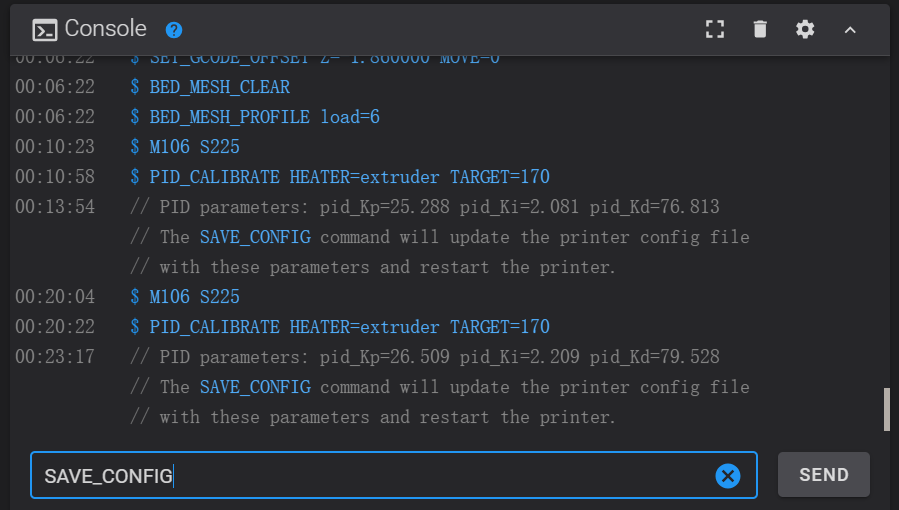
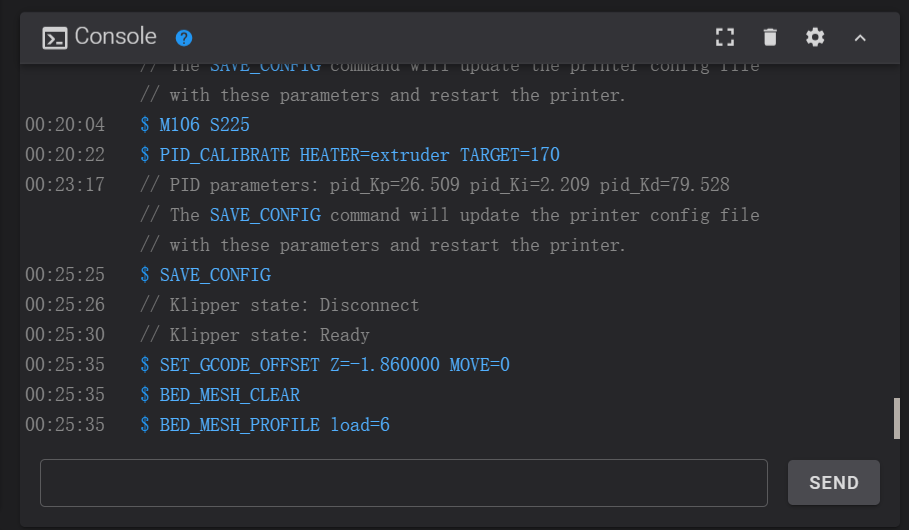
5. After saving, you can go to the bottom of the profile to check whether it is saved successfully.