Touchscreen Replacement
Tools and materials needed
●2.5mm Allen wrench
●2.0mm Allen wrench
●Philips screwdriver
Reference video
Operation steps
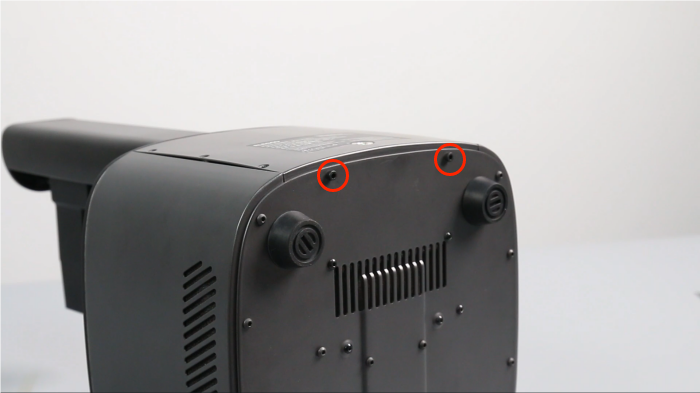
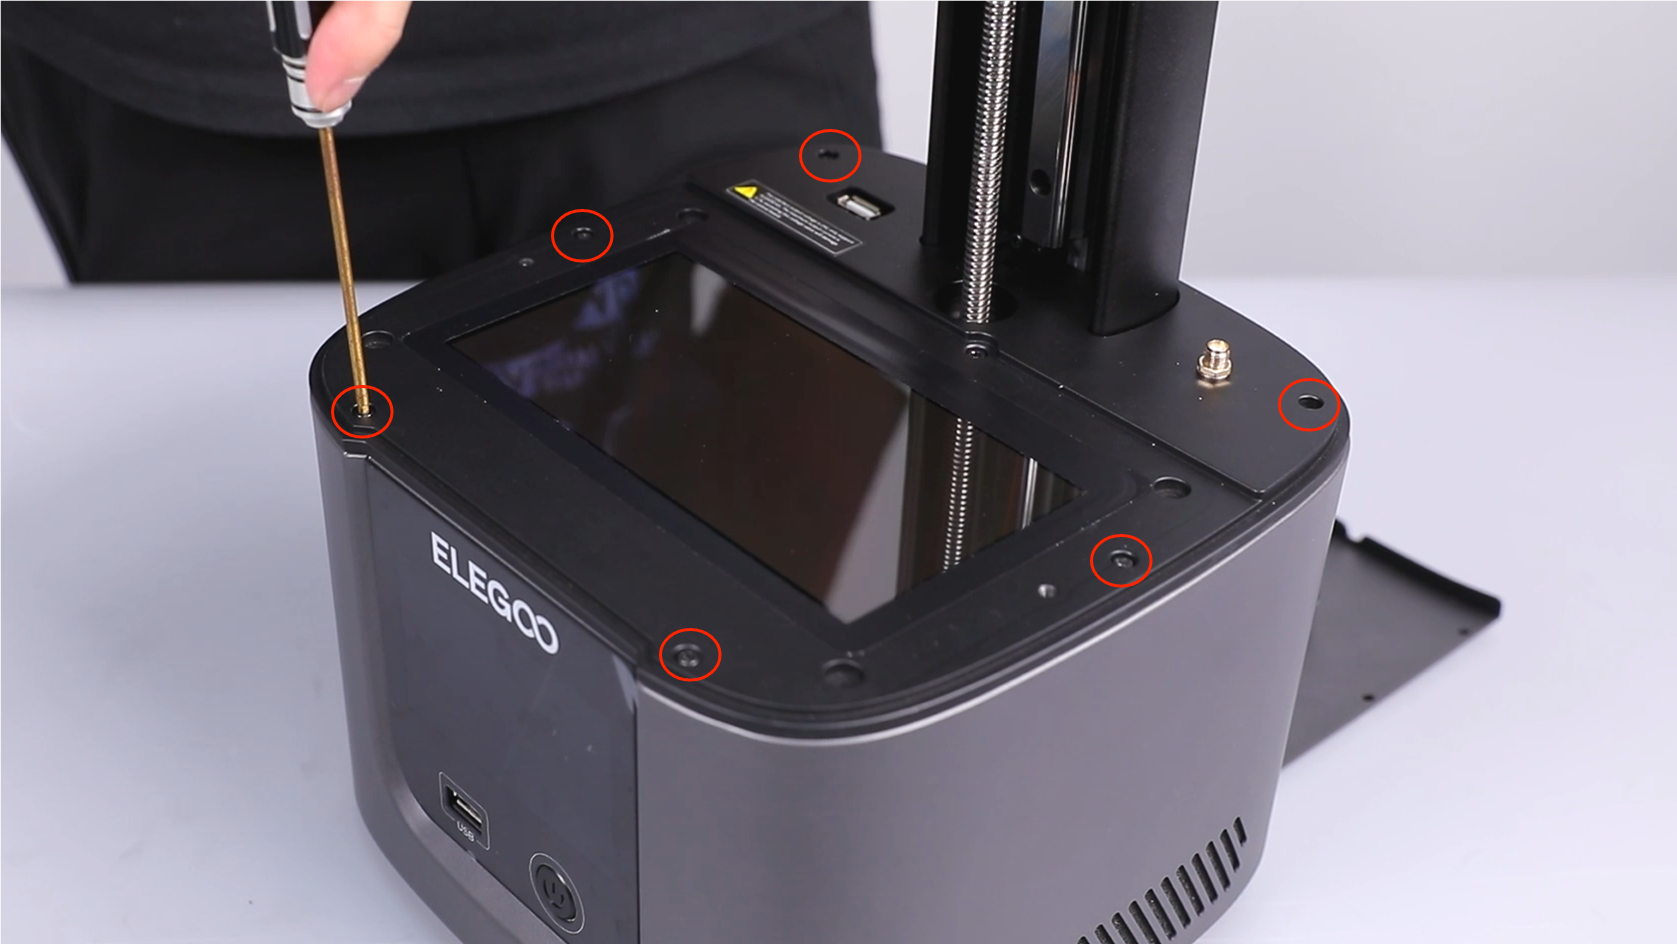
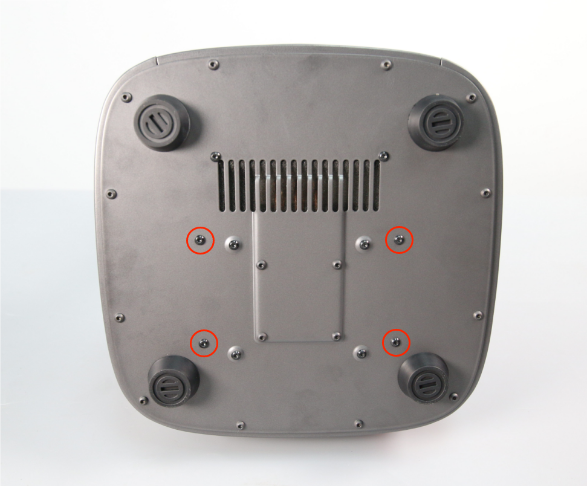
1. Use a 2.0mm Allen wrench to unscrew the 6 fixing screws on the back plate.
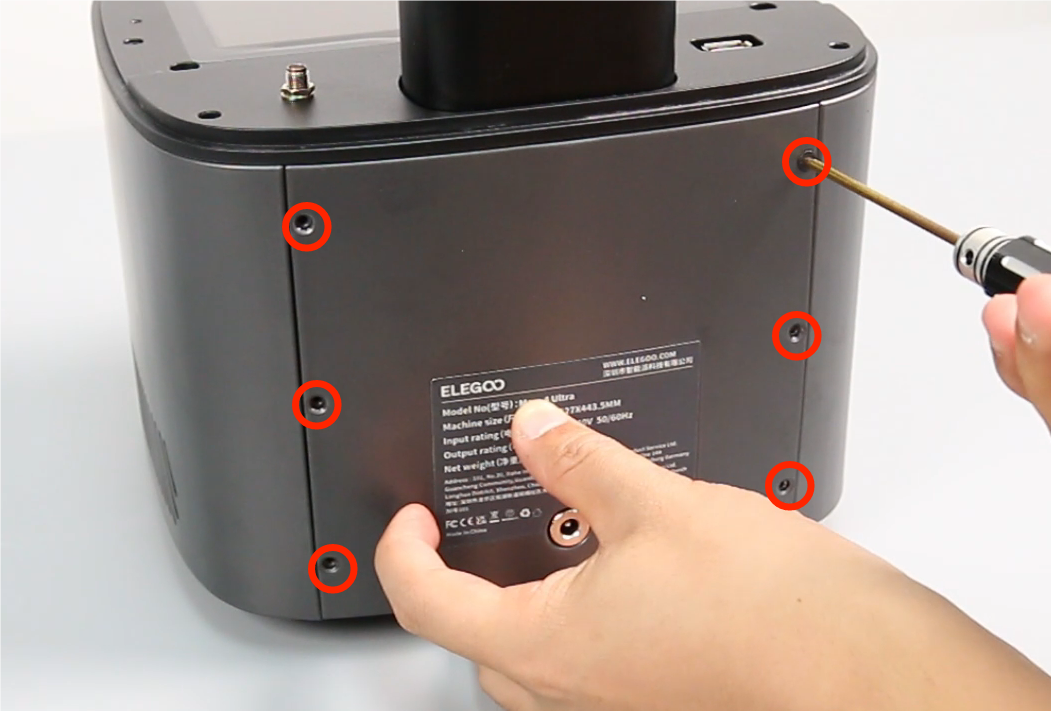
2. Use a 2.0mm Allen wrench to unscrew the 2 fixing screws on the bottom, and lay the back plate flat on the table.
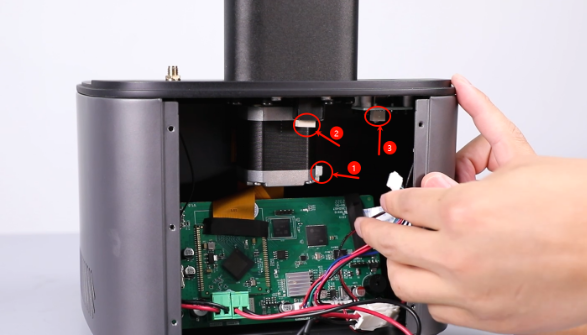
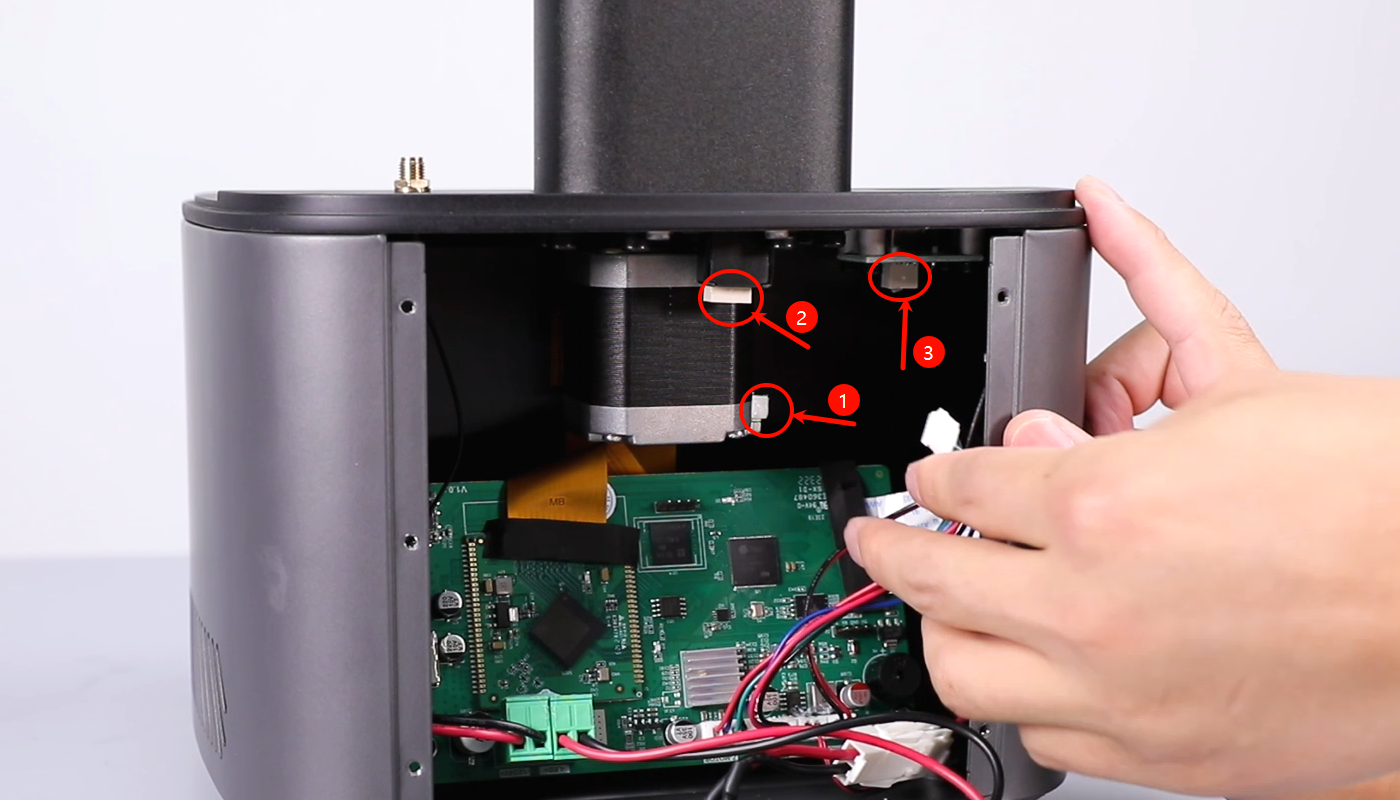
3. Remove the back plate and unplug ① the motor cable, ② the limit switch cable, and ③ the air purifier USB cable in sequence.
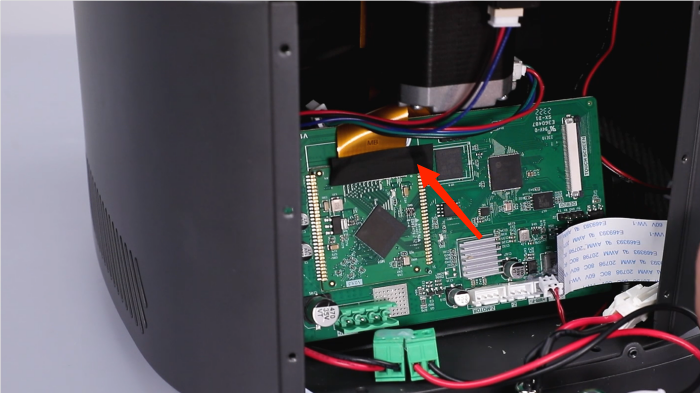
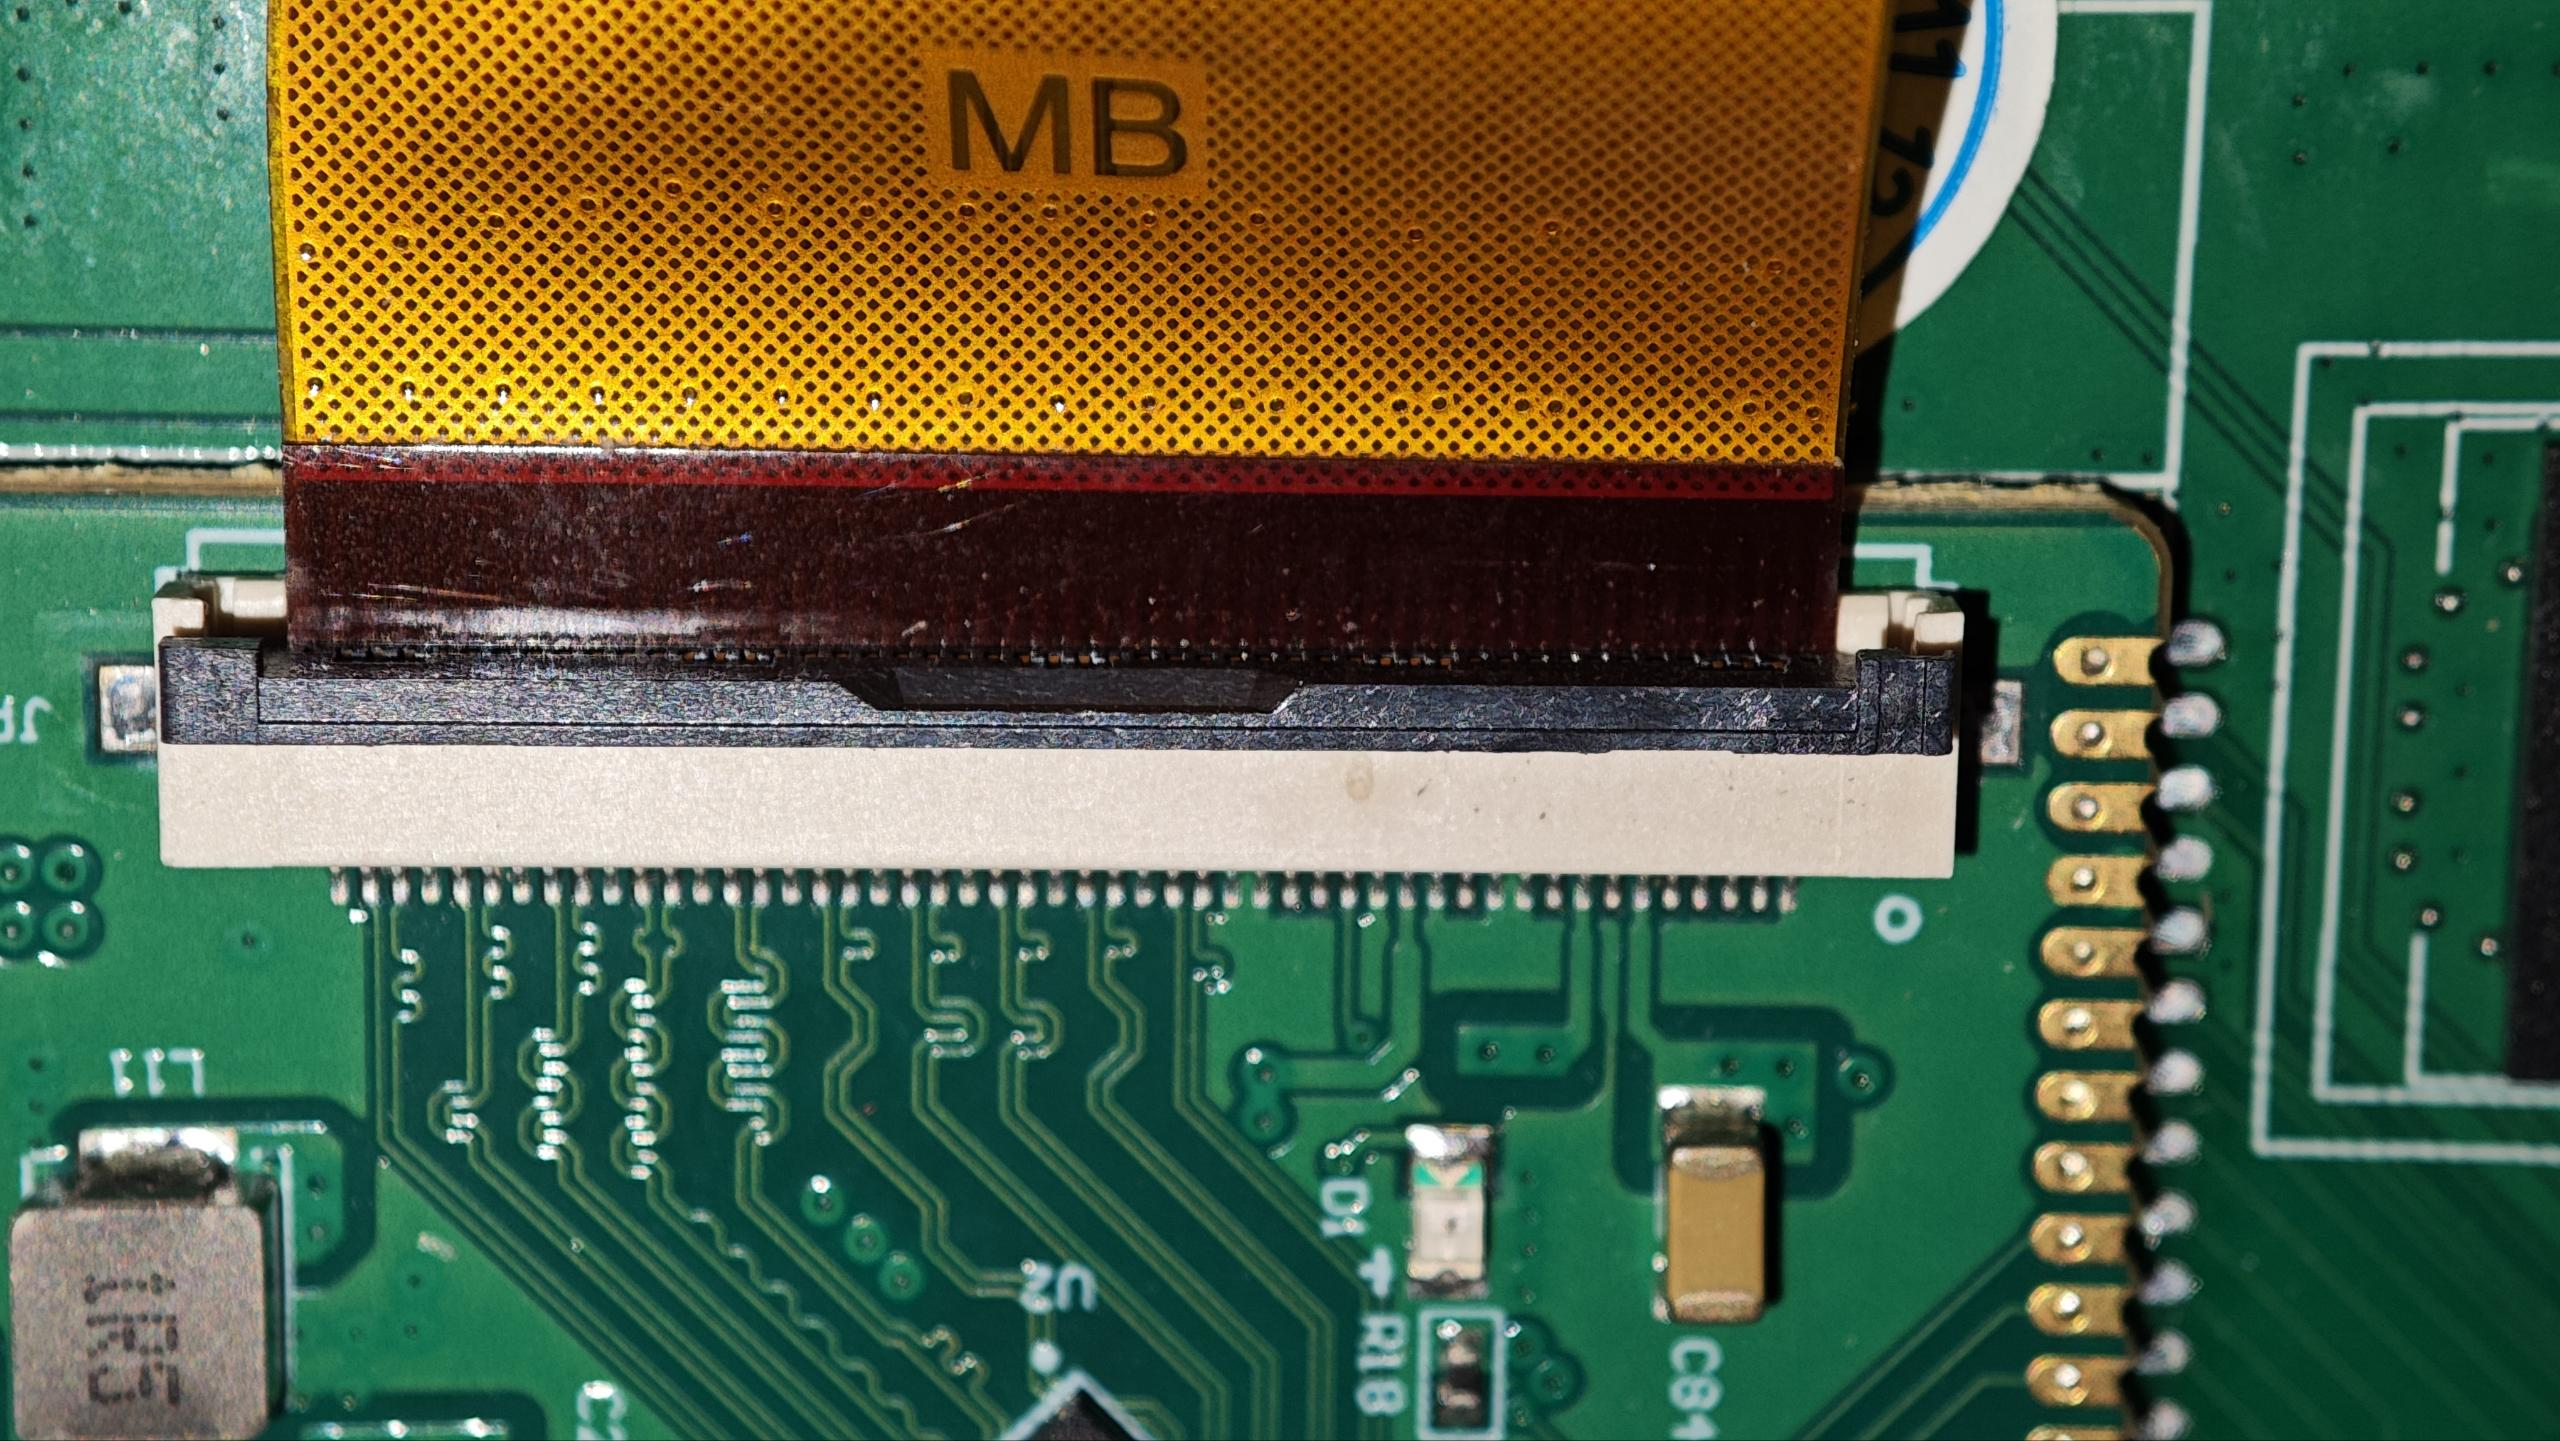
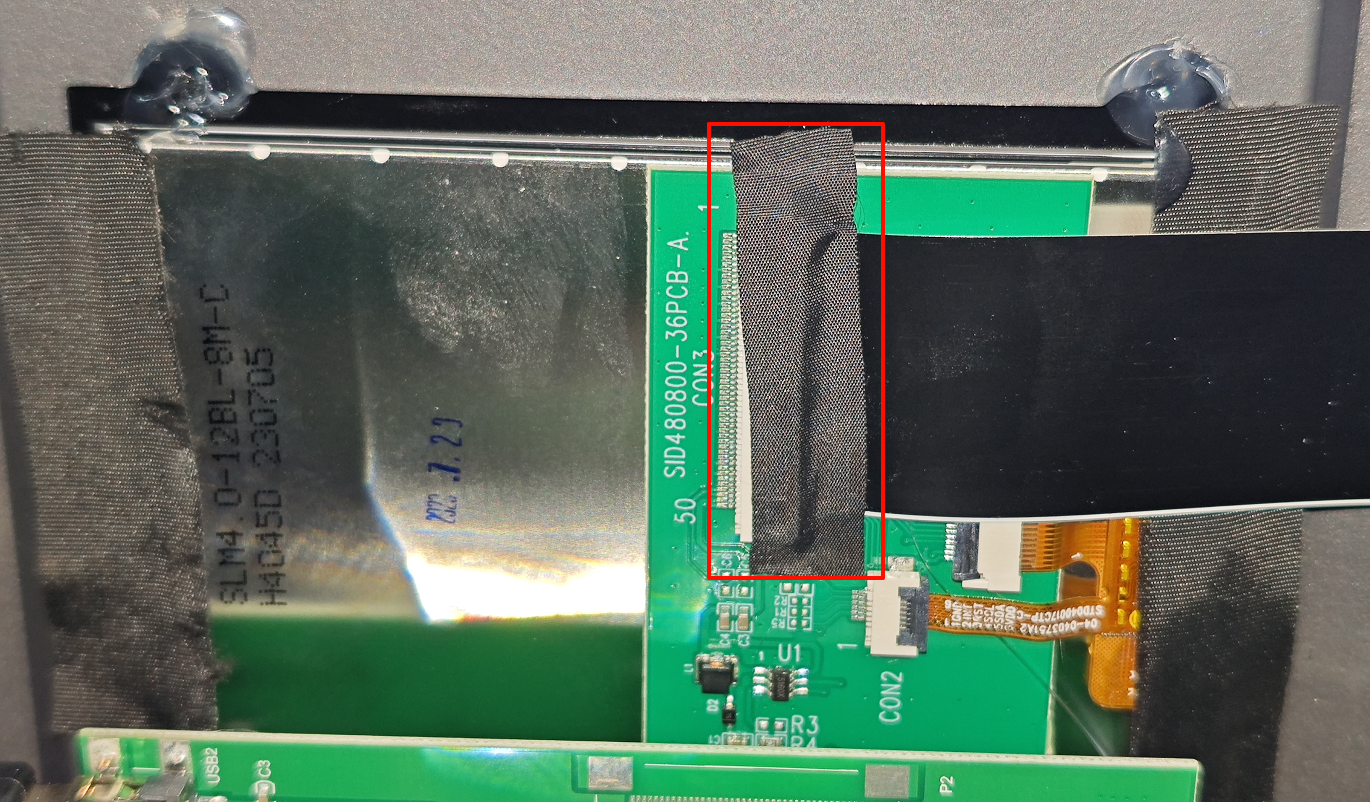
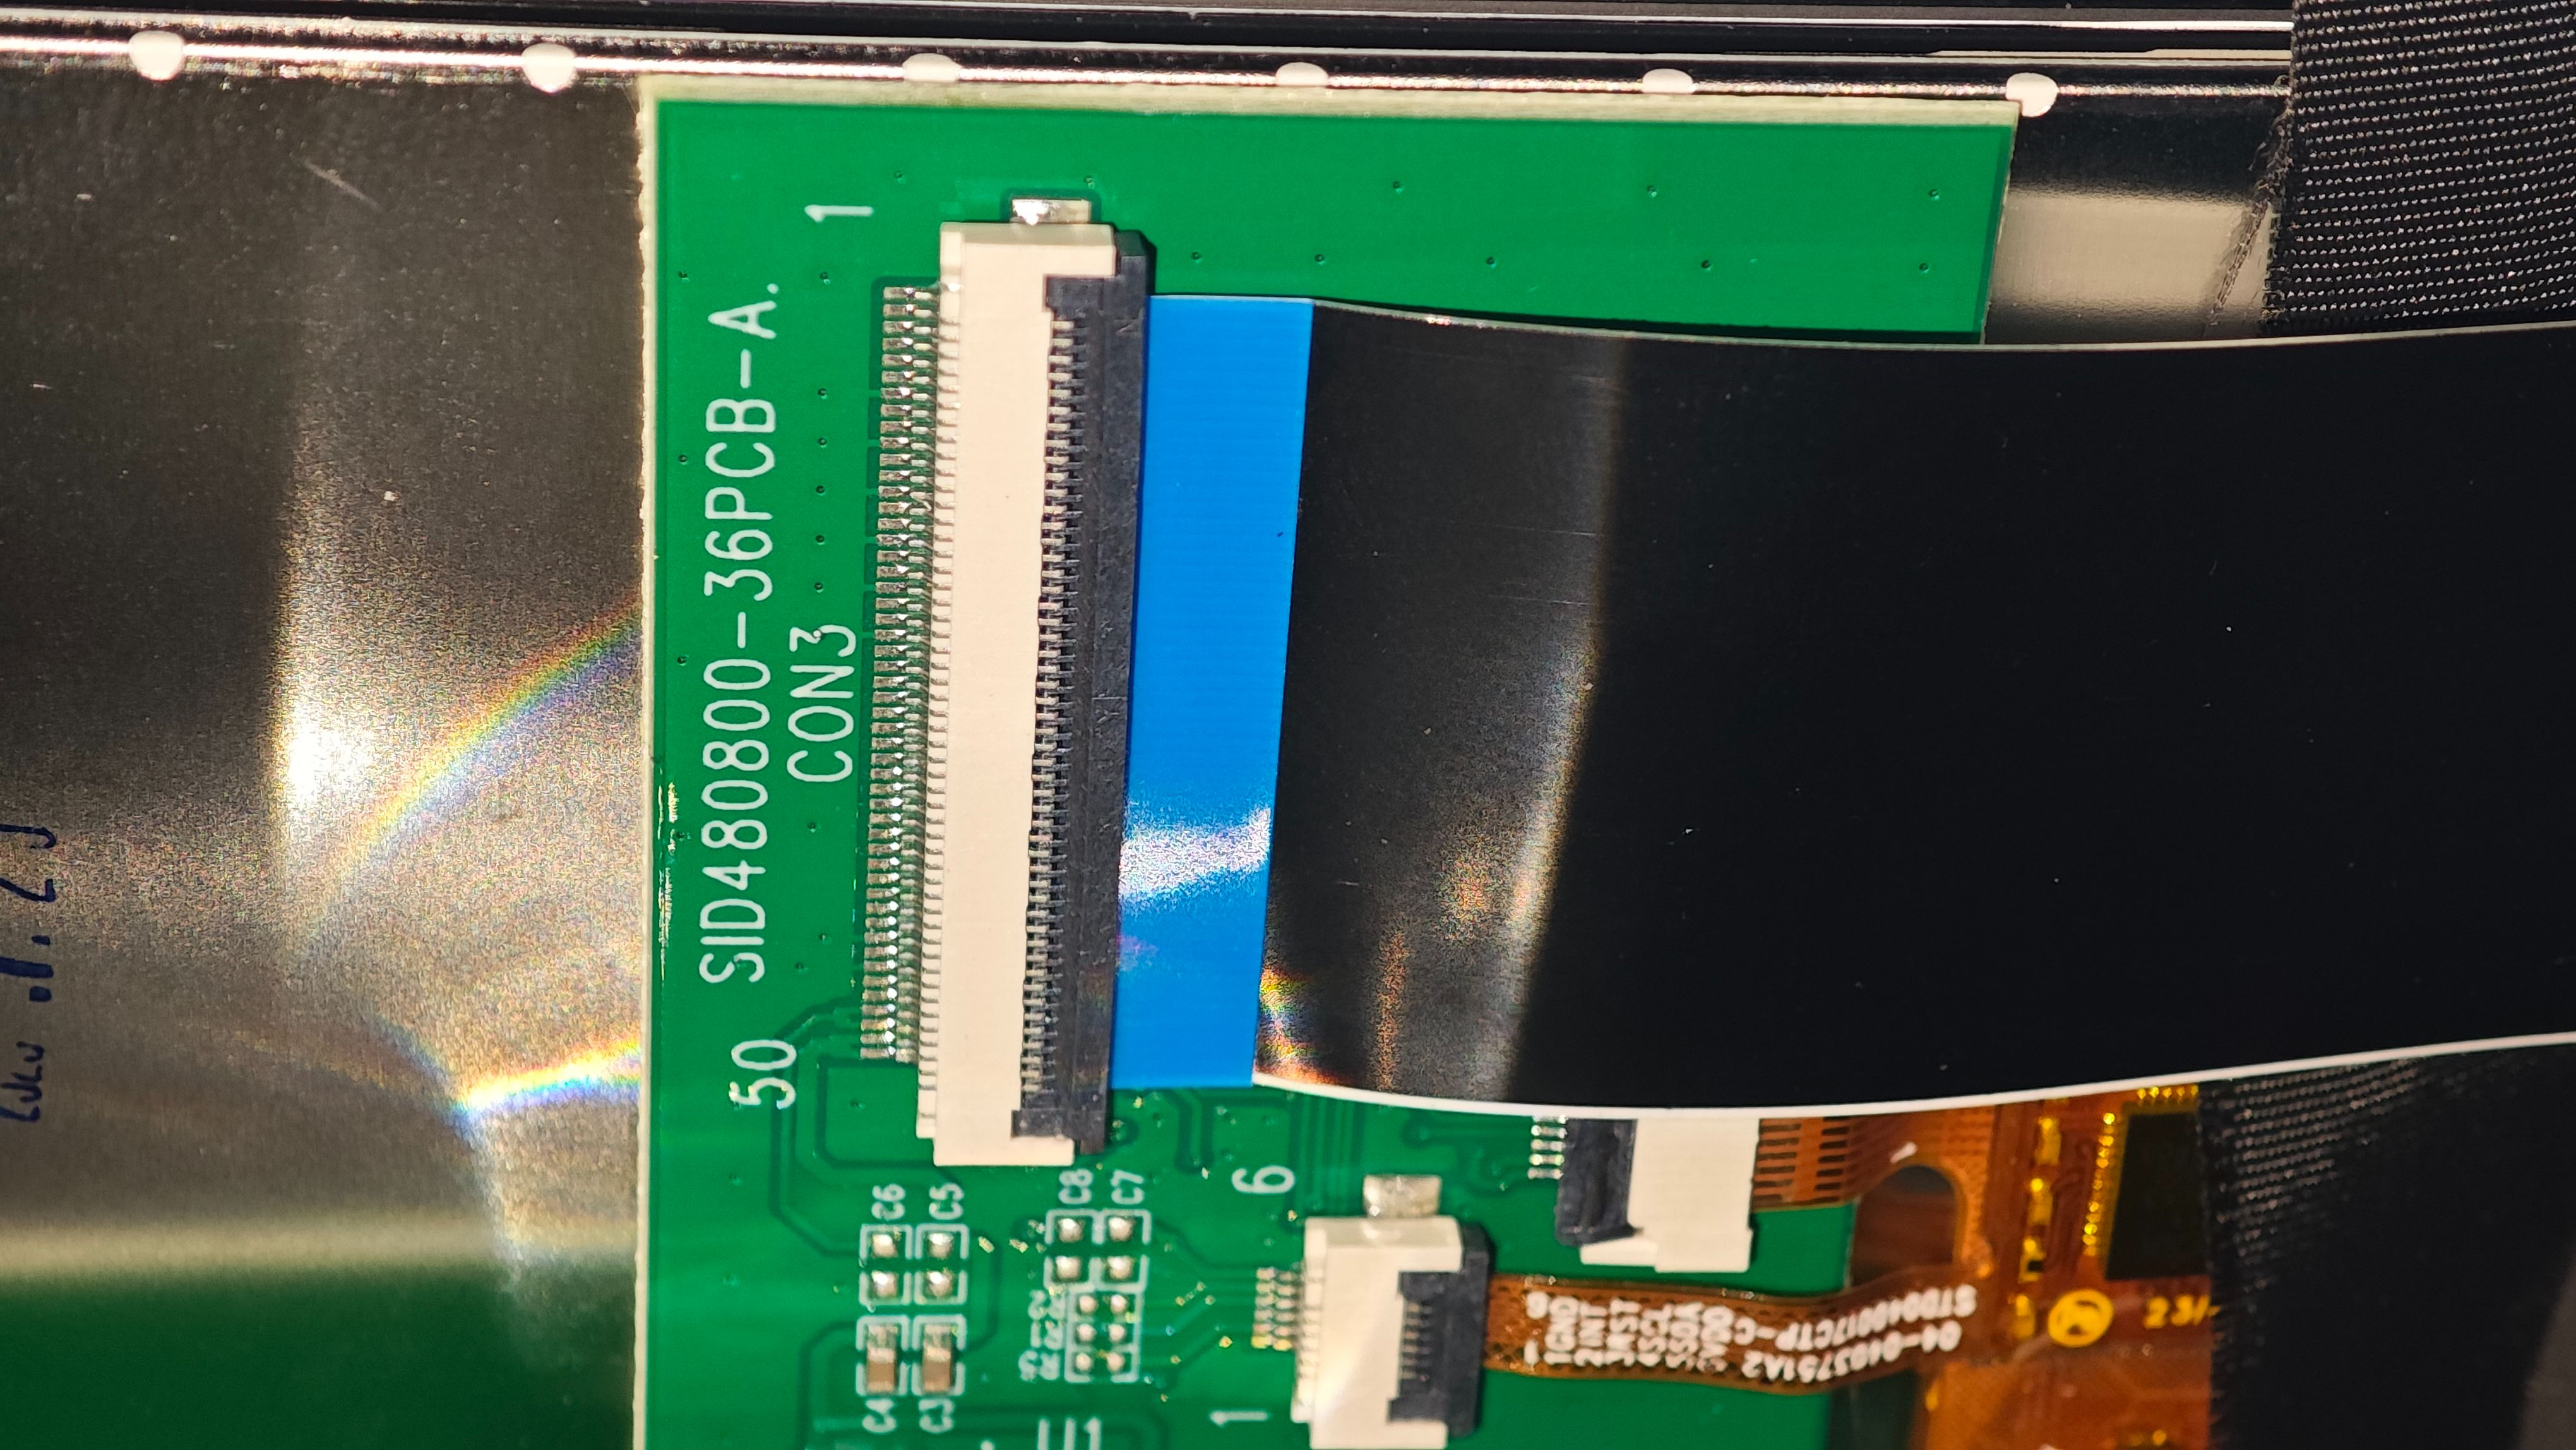
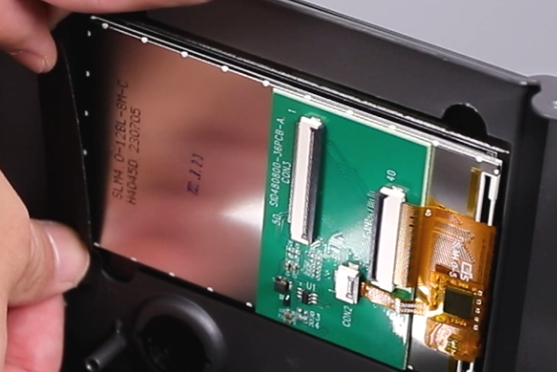
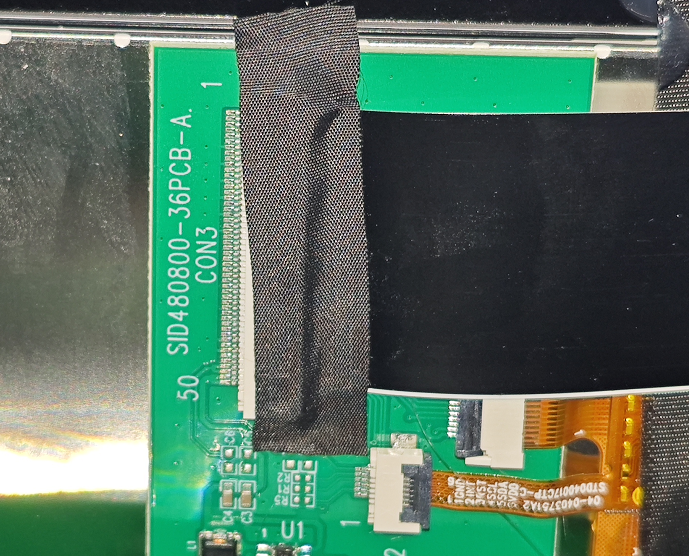
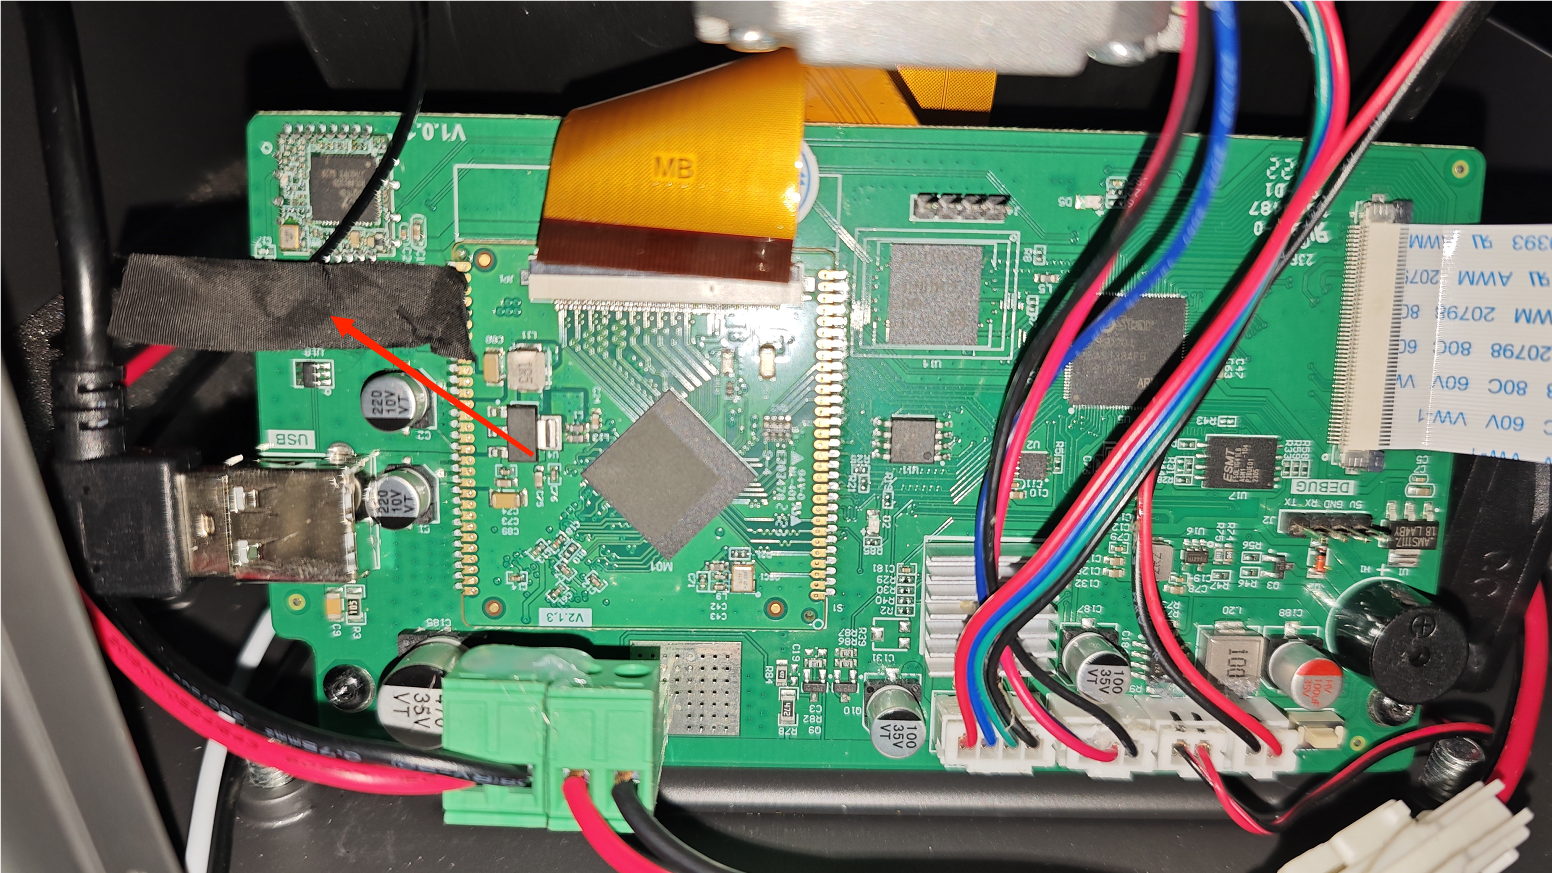
4. Remove the black tape from the LCD cable port, open the LCD cable cover, and remove the cable.

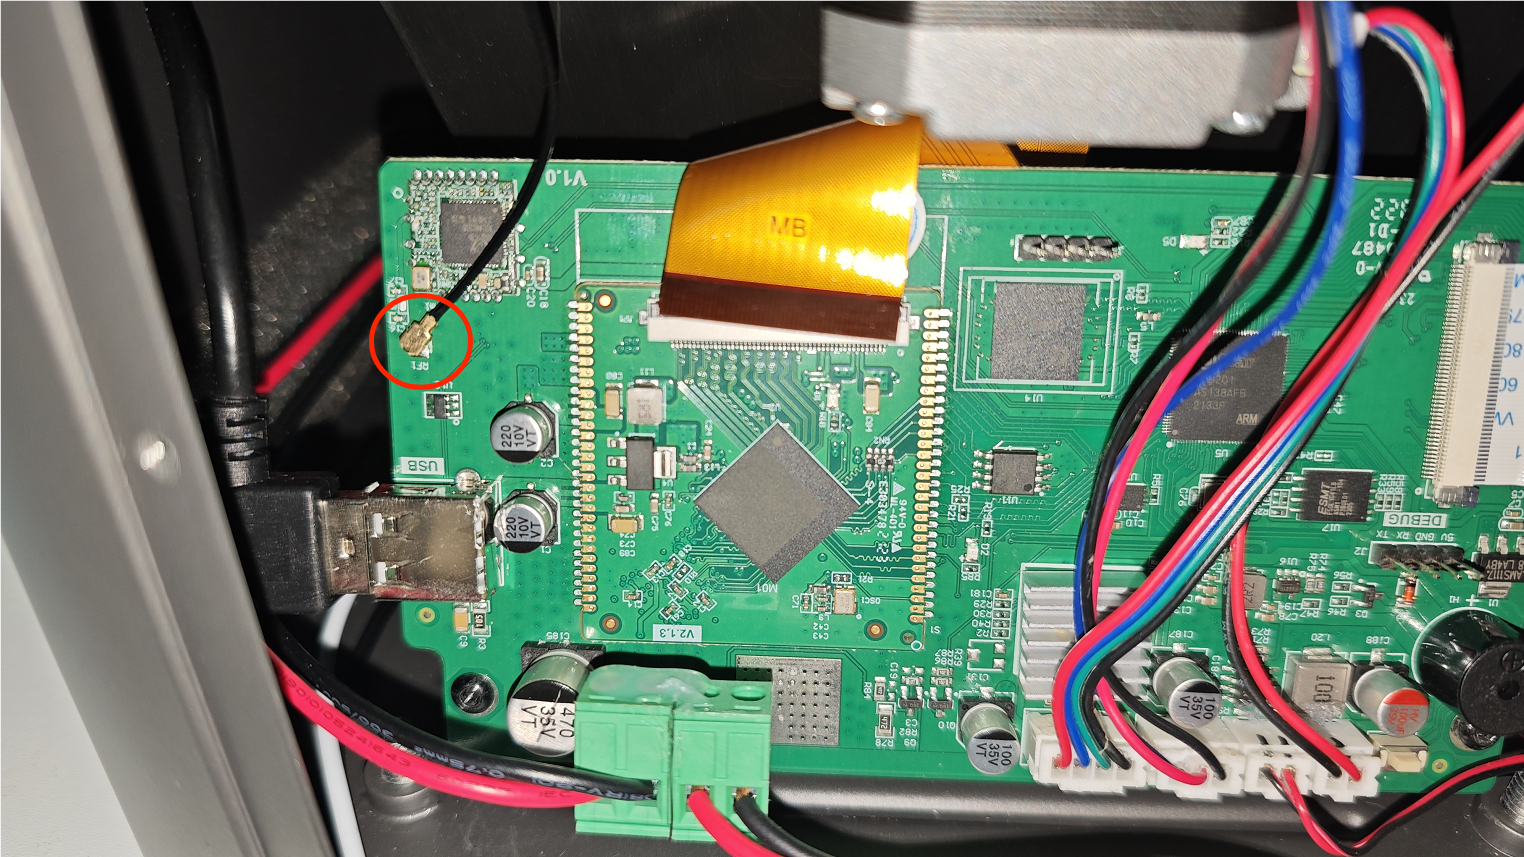
5. Remove the black fixing tape from the WiFi antenna port and pull out the WiFi antenna.


6. Remove ① the SMA cable from the constant current board end and ② the cooling fan cable.

7. Use a 2.5mm Allen wrench to twist out the 6 fixing screws of the middle plate, and remove the middle plate. (Be careful not to tear off the cables)
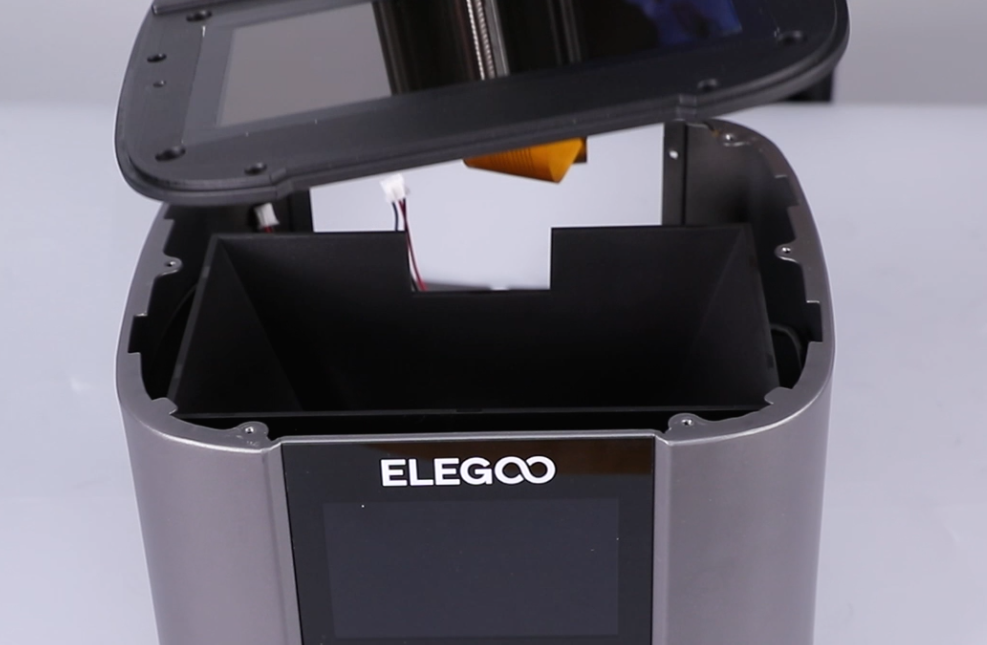
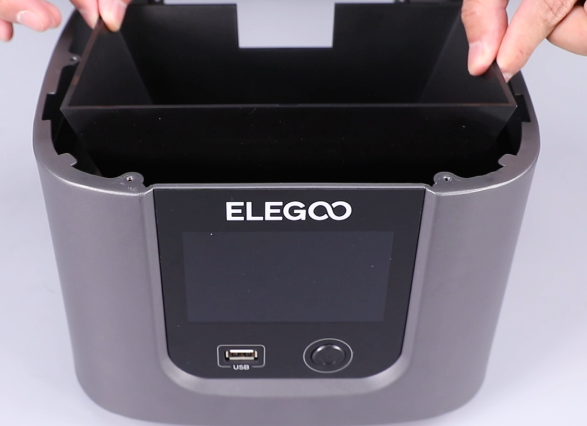
8. Use a Phillips screwdriver to unscrew the 4 screws fixing the hood at the bottom and remove the hood. (Note: There is a fan connected to the hood)

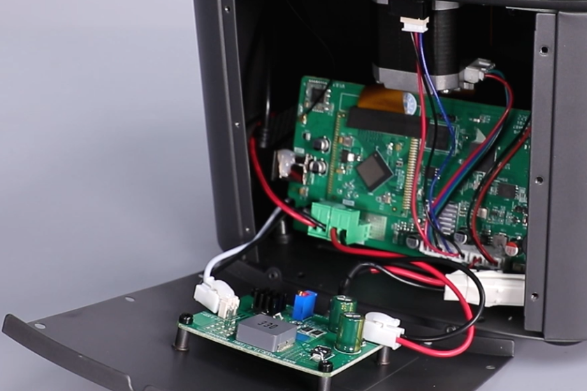
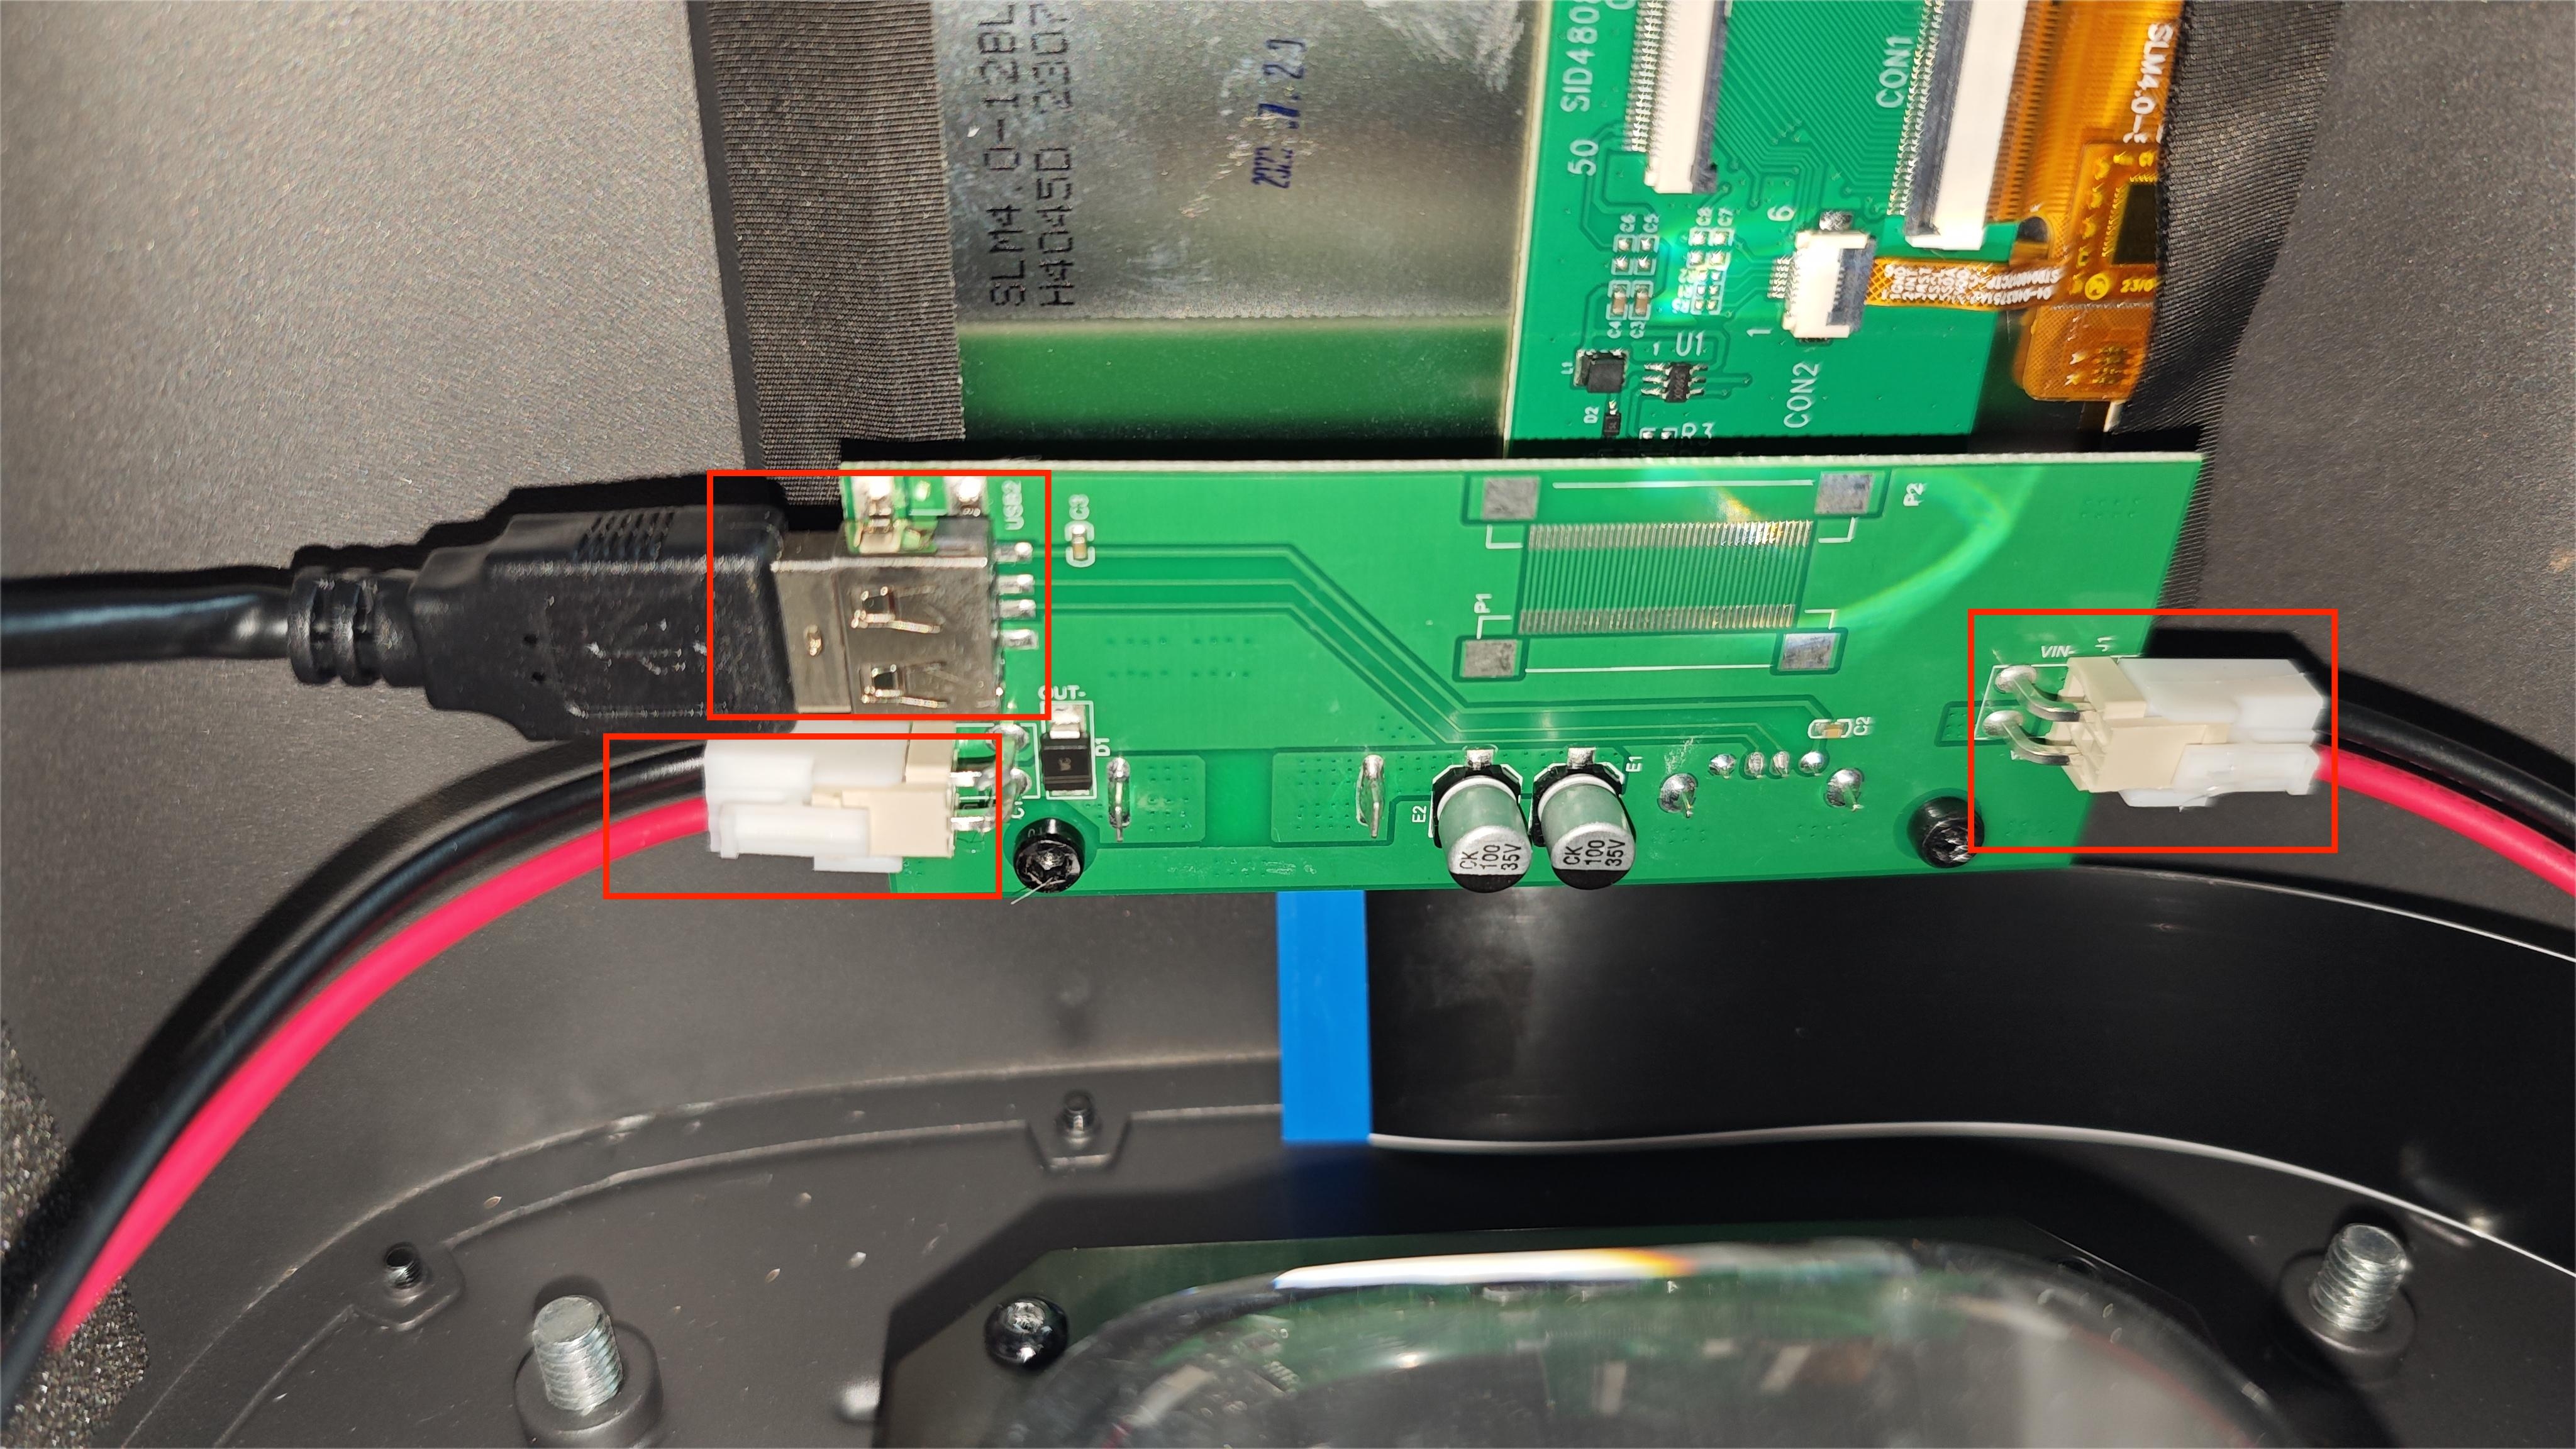
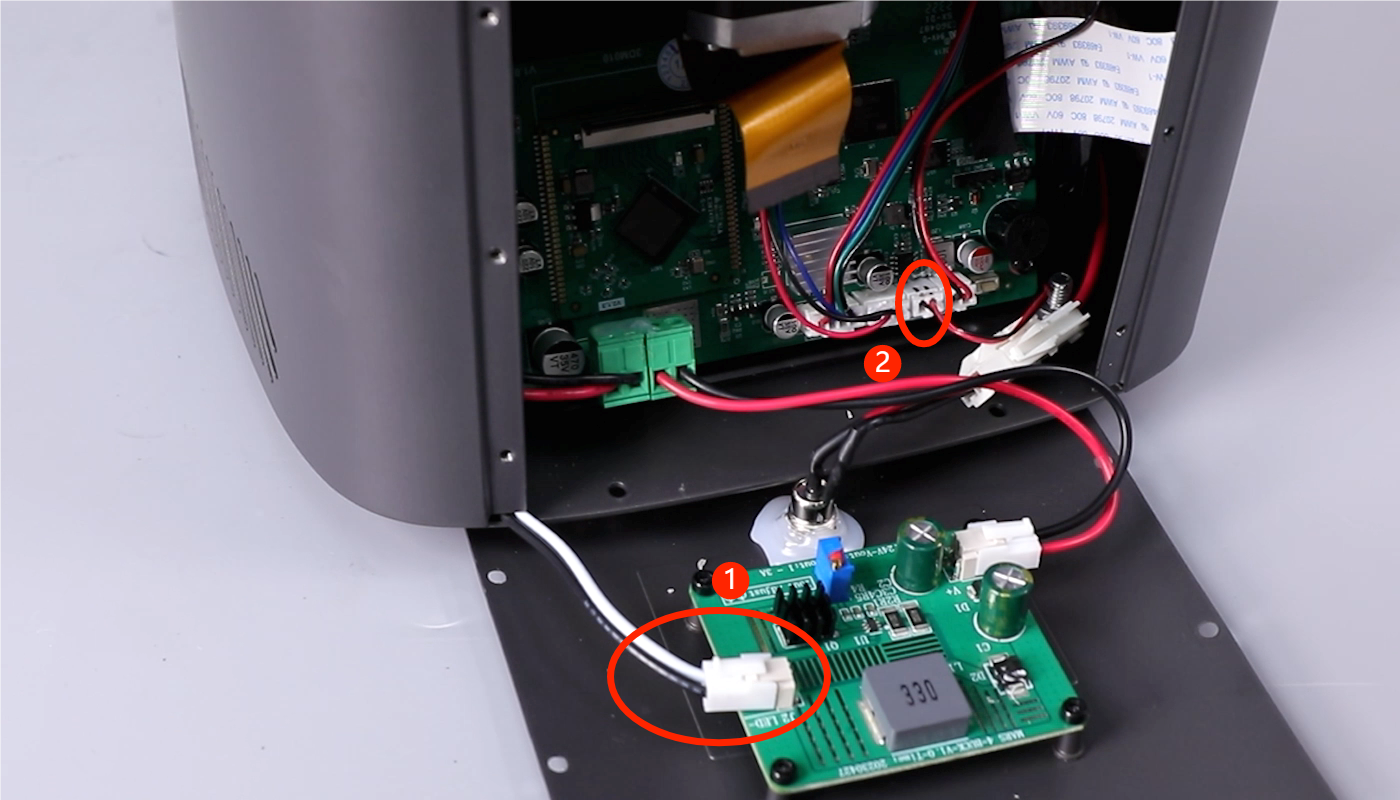
9. Pull out the three connecting wires on the power PCB board, use a 2.5mm Allen wrench to remove the two fixing screws, and remove the PCB board.
Note: Be careful not to scratch the surface of the glass lens.

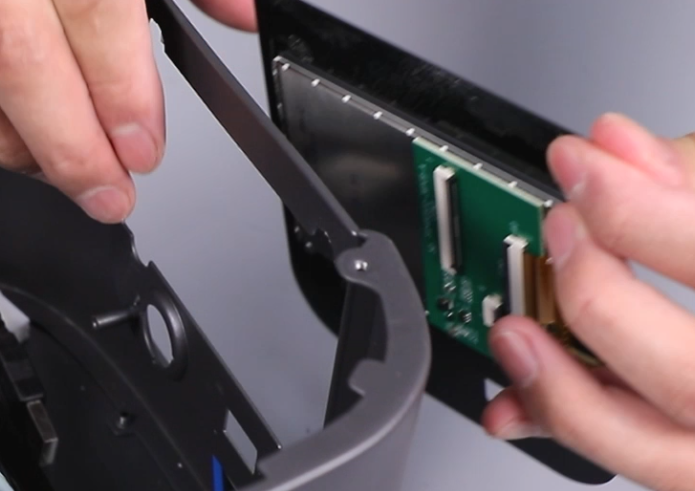
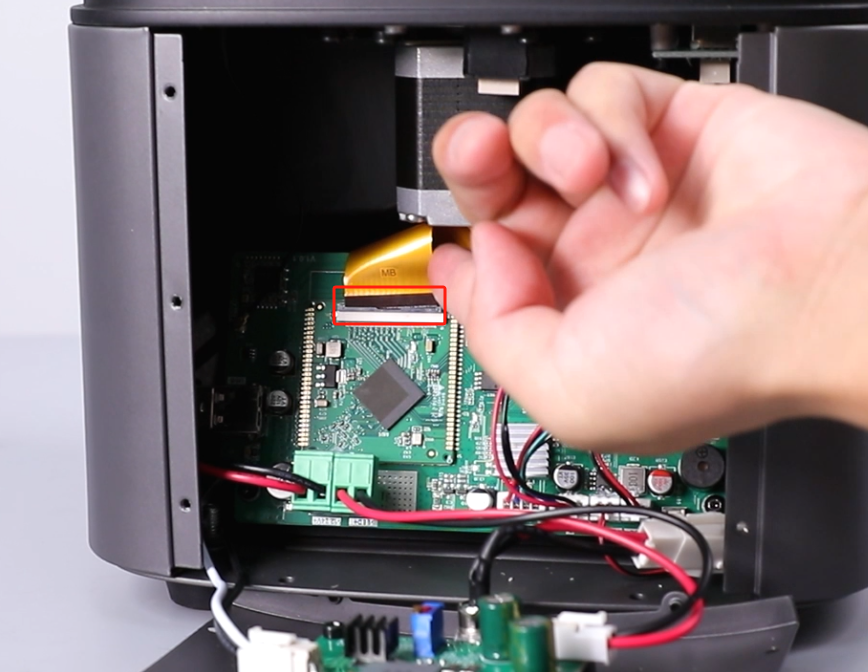
10. Tear off the tape fixing the LCD cable, flip open the cover of the LCD cable holder, and remove the LCD cable.
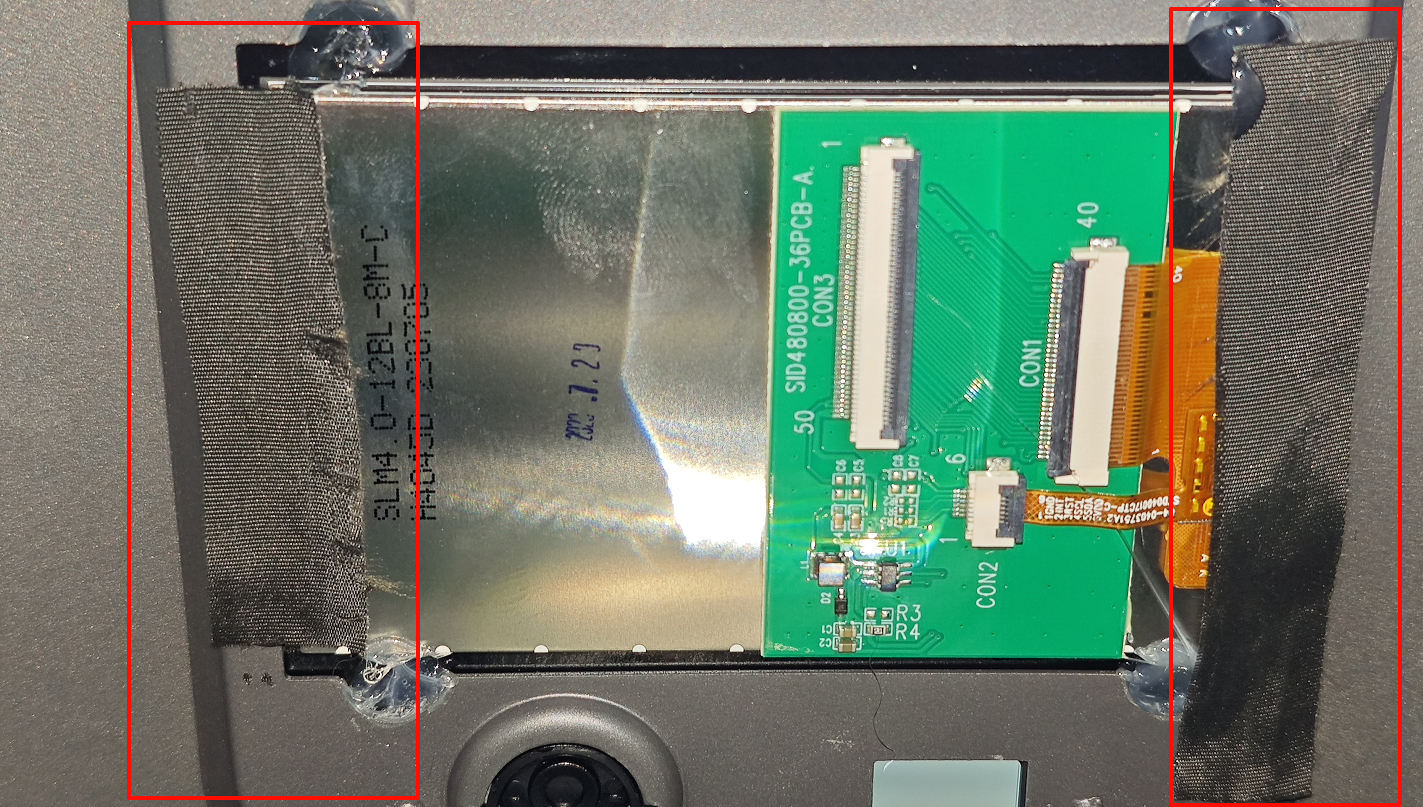
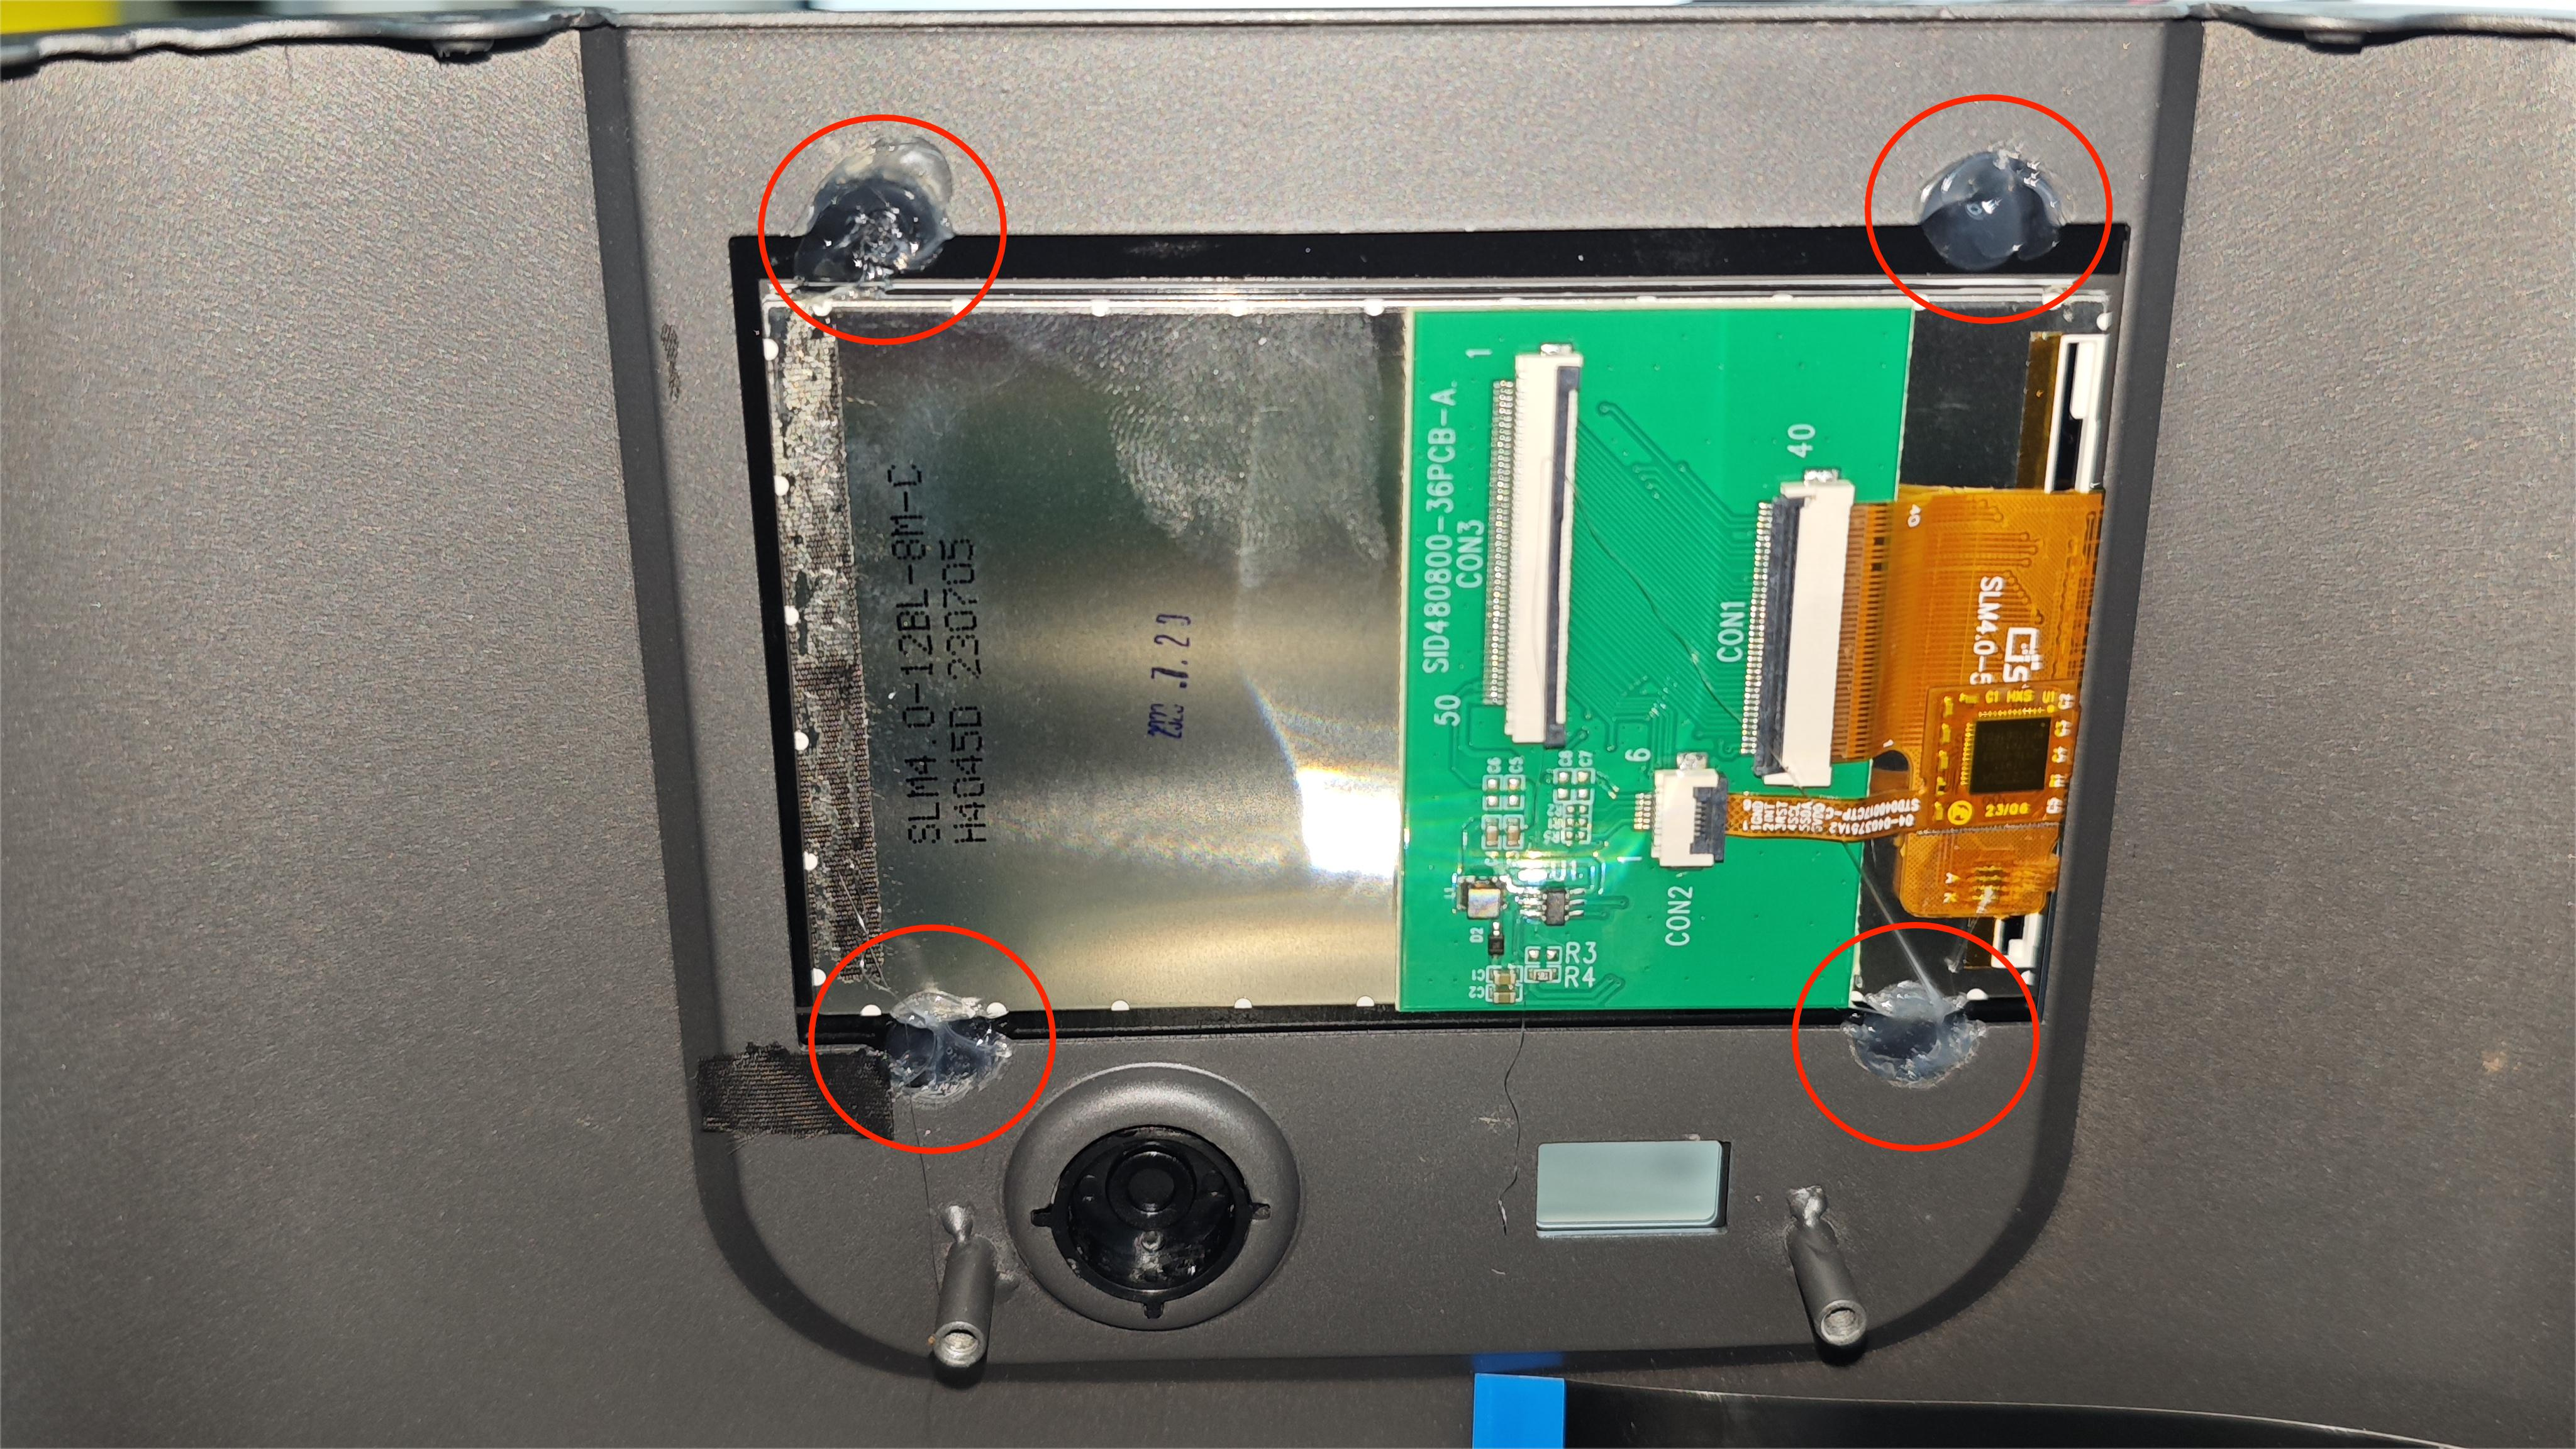
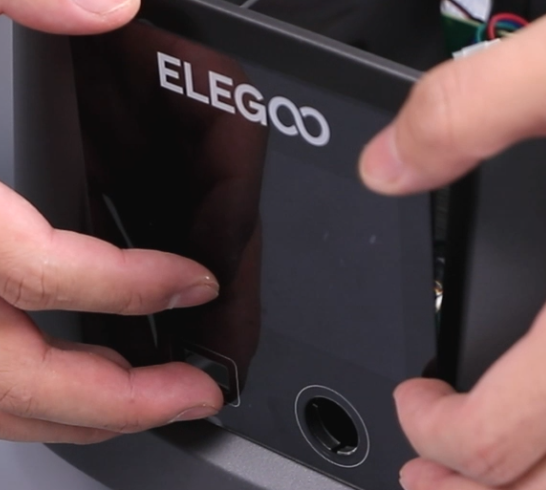
11. Remove the black tape on both sides of the touch screen and the hot melt adhesive fixing the touch screen, and push it from the inside out to remove the touch screen.
(Note: If you can’t push it off, you can use a hair dryer to heat the edges of the screen to make it easier to remove the screen)
12. Remove the button cap and button pad from the old screen.
(Note: these do not need to be removed if included in the screen kit)


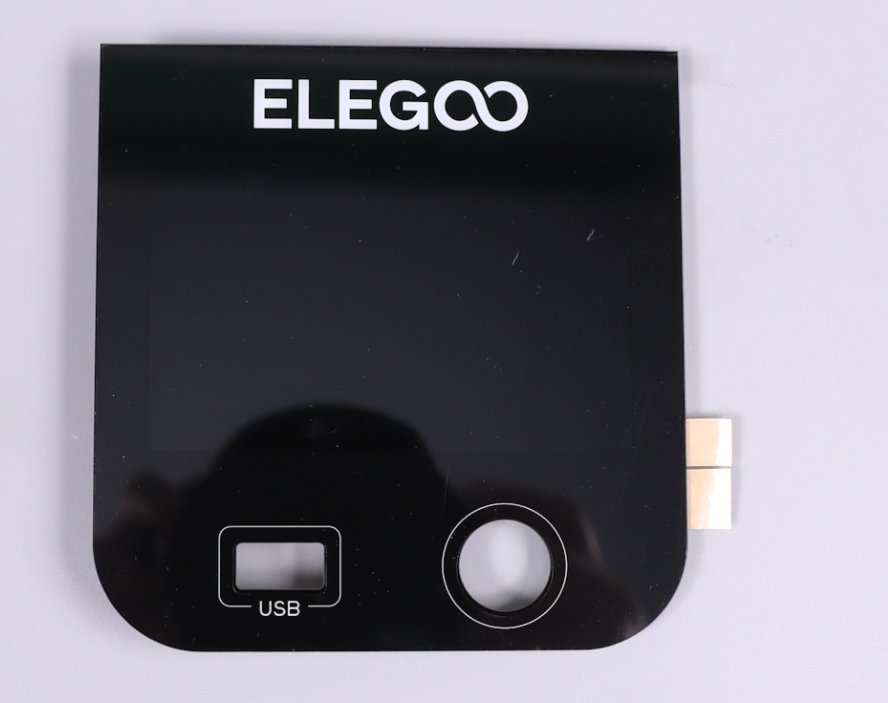
13. Take out the new touch screen and remove the protective backing adhesive
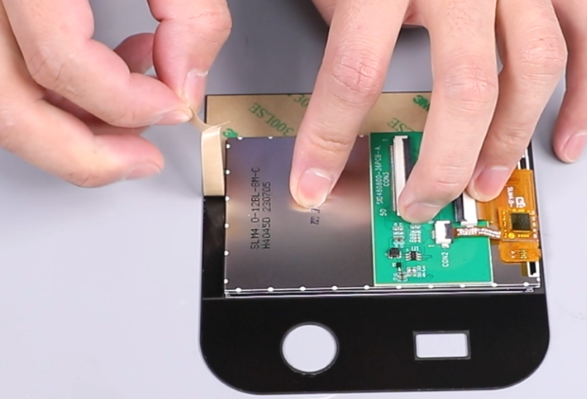
14. Align the button pad sticker with the outline and stick it on the base.

15. Install the new touch screen, install the button cap, and secure it with adhesive tape.
16. Insert the touch screen cable back in and fasten the snap of the touch screen cable holder. After fastening, stick the black tape back.


17. Place the power PCB board in the mounting position and use a 2.5mm Allen wrench to tighten the 2 fixing screws.

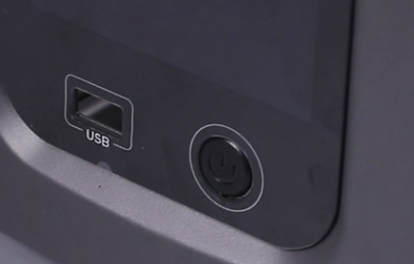
18. Plug the USB cable and the two cables back into the power PCB board.

19. Place the hood in the mounting position, and use a Phillips screwdriver to tighten the 4 screws at the bottom to secure the hood.
20. Place the middle plate in the mounting position, and tighten the 6 fixing screws on the middle plate with a 2.5mm Allen wrench.

21. Reinstall the ① motor cable, ② limit switch cable, and ③ air purifier USB cable in sequence.
22. Reinstall ① the SMA cable on the constant current board end and ② the cooling fan cable in sequence.
23. Install the WiFi antenna back to the motherboard port, and stick the removed black fixing tape of the WiFi antenna port back.
24. Open the LCD cable cover, plug in the LCD cable, snap the LCD cable cover, and apply black tape.


25. Install the back cover, use a 2.0mm Allen wrench to tighten the 6 screws on the back plate, and use a 2.5mm Allen wrench to tighten the 2 fixing screws at the bottom.


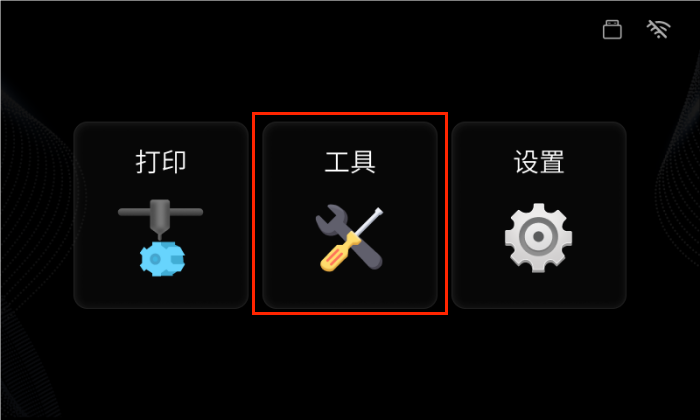
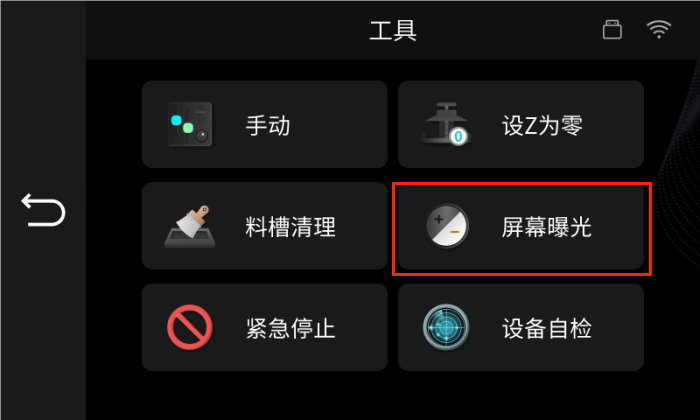
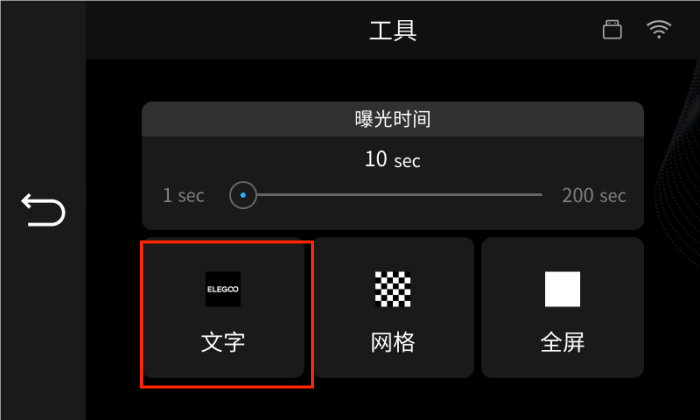
26. Power on the machine, and manually click [Tools]-[Exposure]-[Next]. After testing that the touch screen function is normal, you can use the machine normally.