¶ Required Tools and Materials
- 2.0 mm Allen key
- 2.5 mm Allen key
- Sealing Bag
- Cable Ties
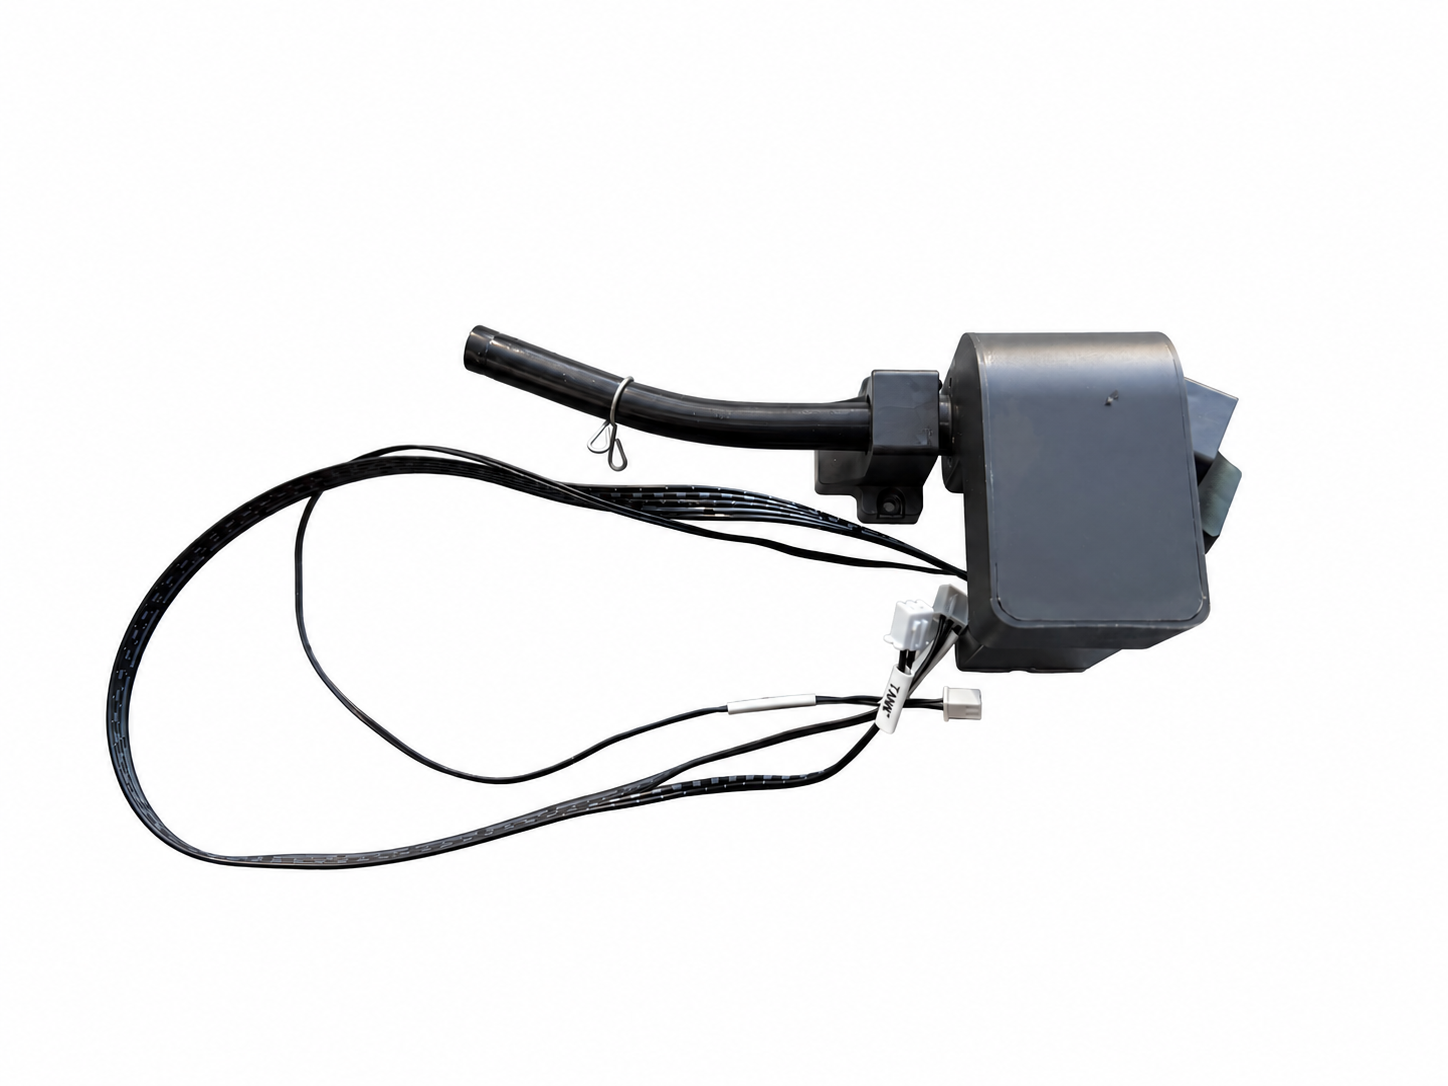
- New Resin Dispensing Assembly
- Protective Gloves
¶ Disassembly
Preparation: Turn off the printer using the power switch and unplug the power cord. Wear protective gloves when handling resin-related components. Prepare a suitable container to catch any dripping resin and prevent it from contaminating the LCD screen or entering the machine.
¶ 1. Remove the Right Panel
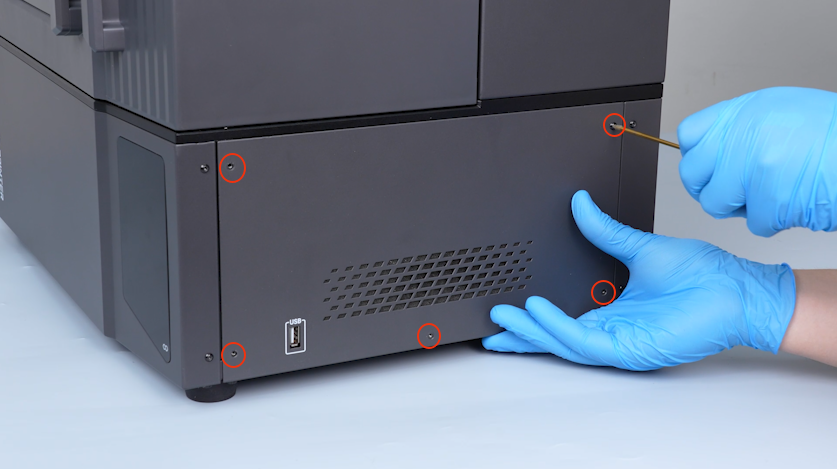
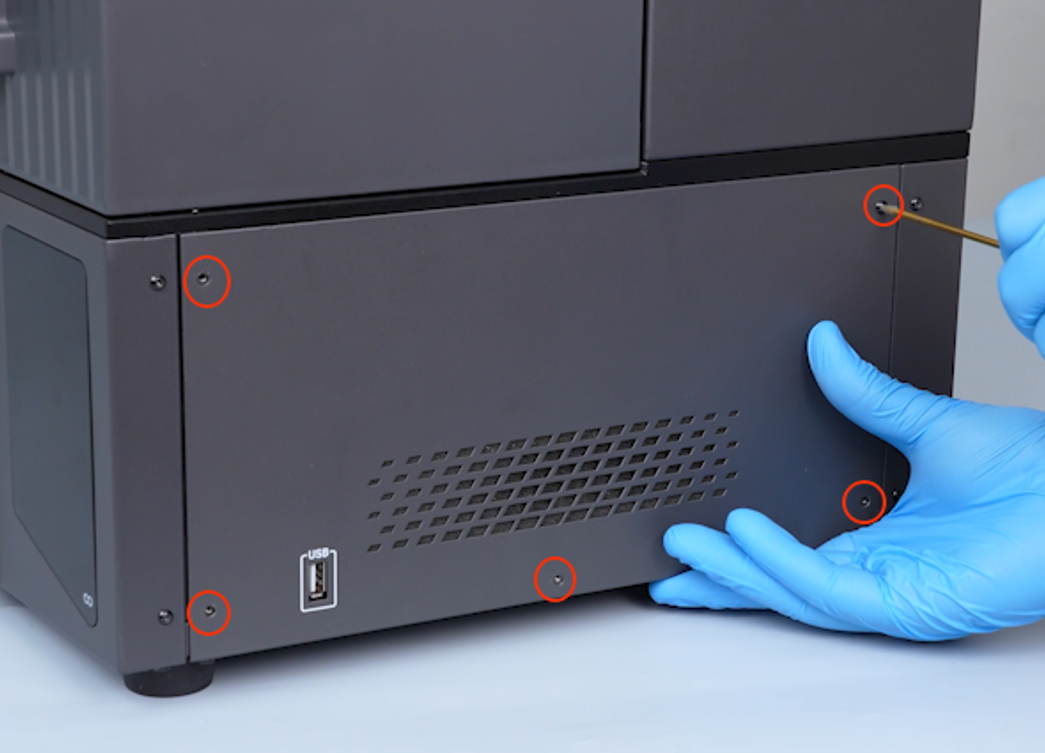
Use a 2.0 mm hex screwdriver to remove the five screws securing the right panel.
¶ 2. Disconnect the Resin Dispensing Assembly Cables
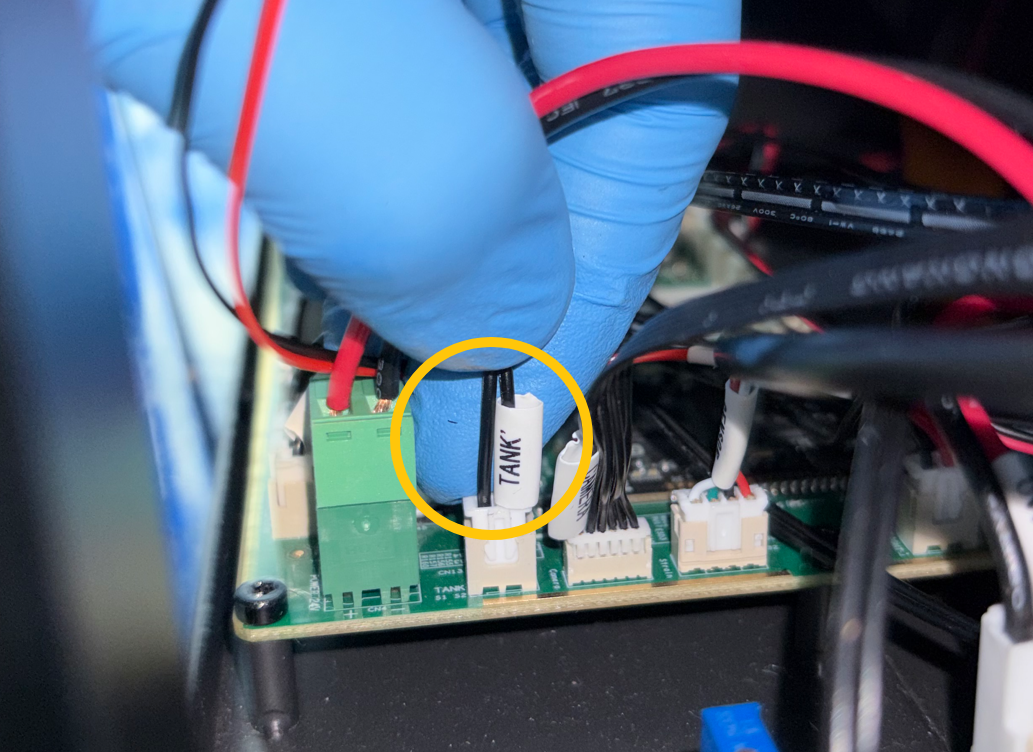
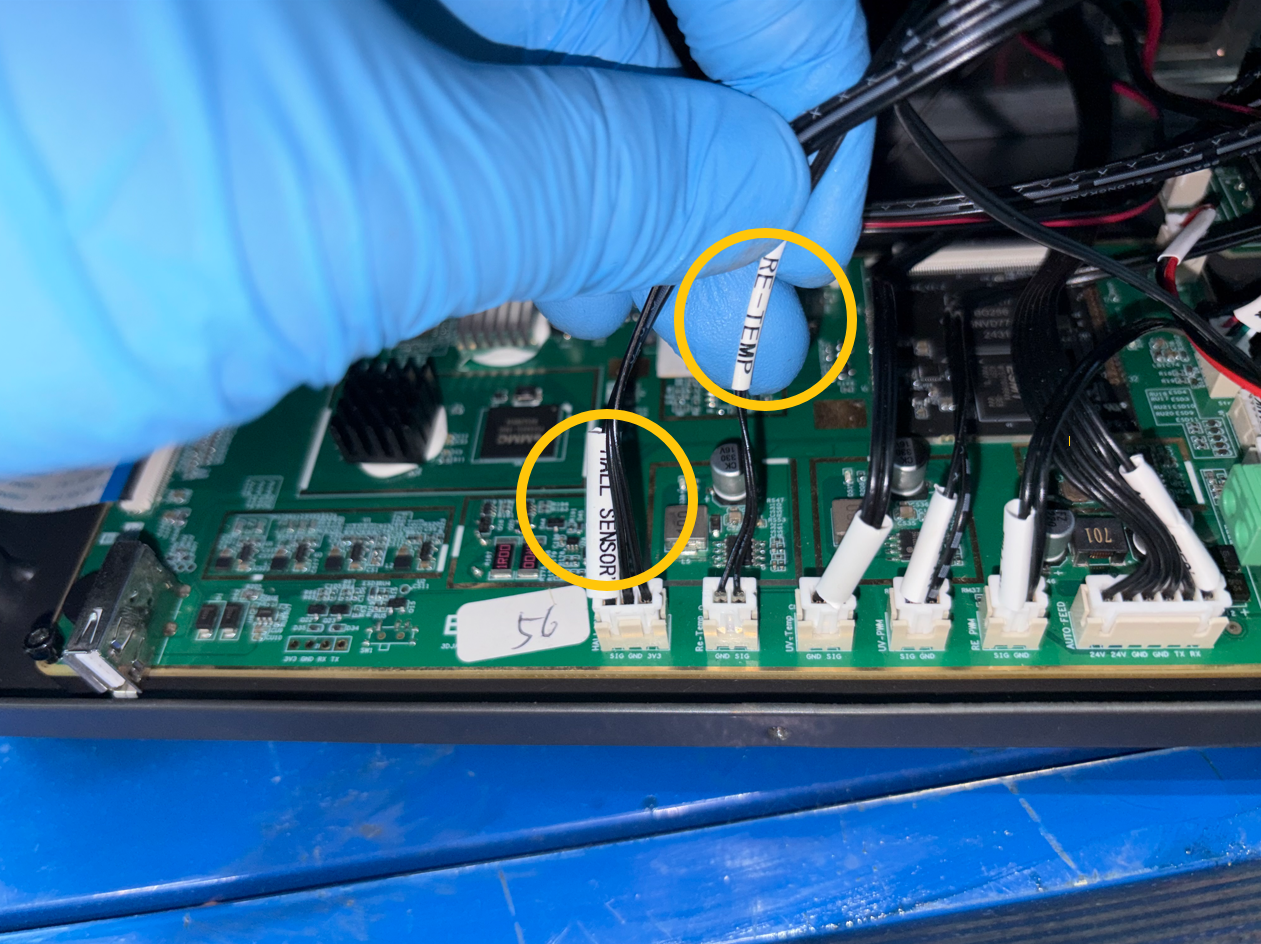
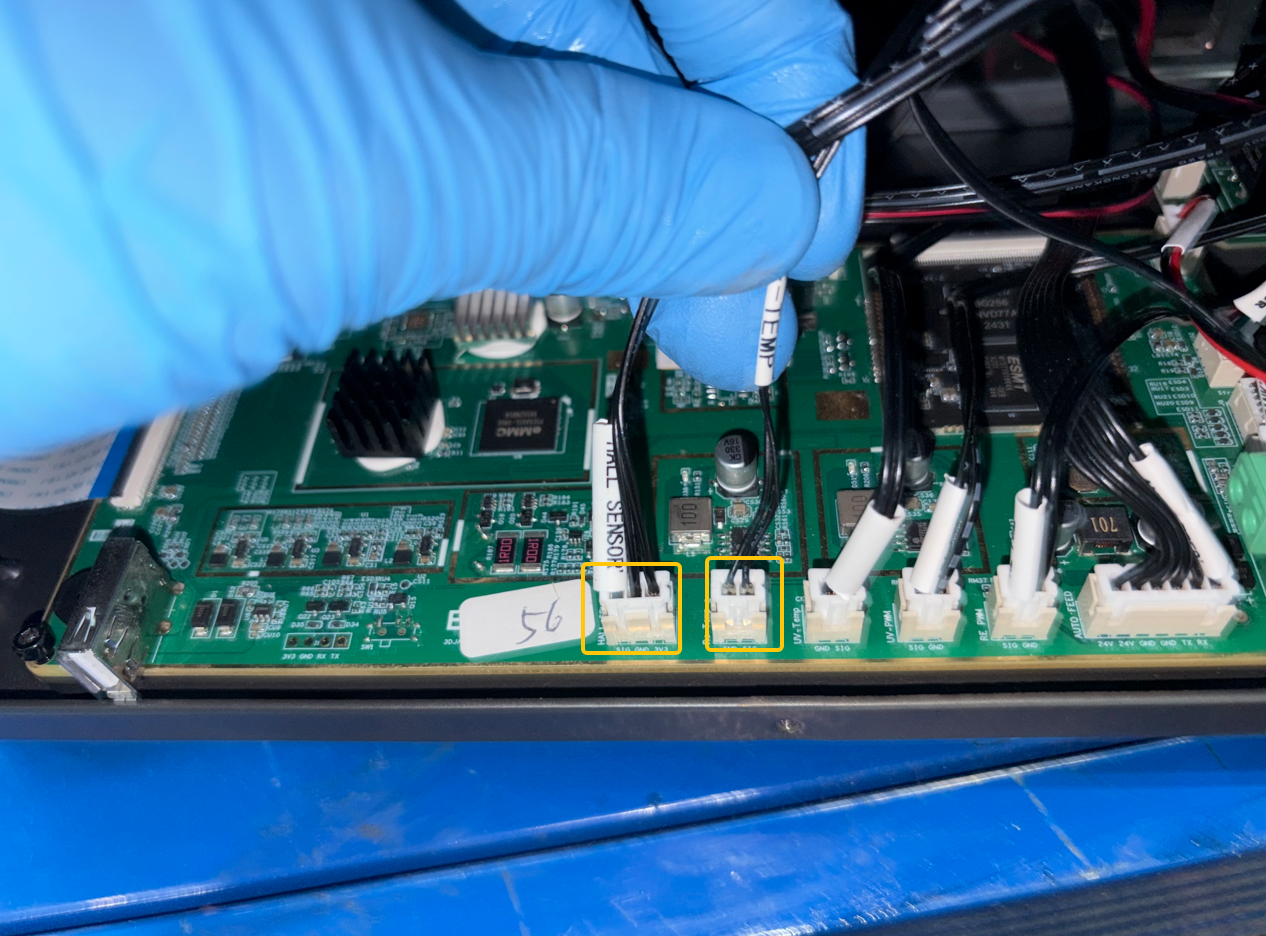
Locate and disconnect the connectors labeled TANK, RE-TEMP, and HALL SENSOR.
¶ 3. Remove the Rear Panel
Note: Remove the rear panel to facilitate subsequent cable routing.
3.1 Disconnect the Auto-feeding connector.
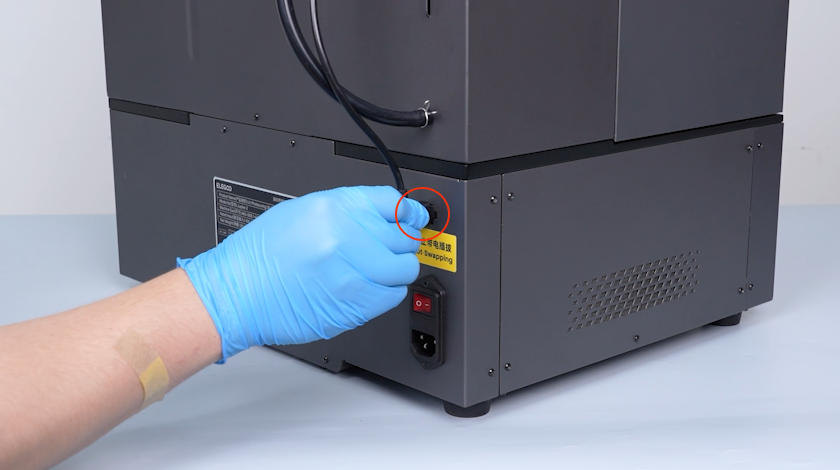
3.2 Use a 2.0 mm hex screwdriver to remove the four screws securing the left and right sides of the rear panel.
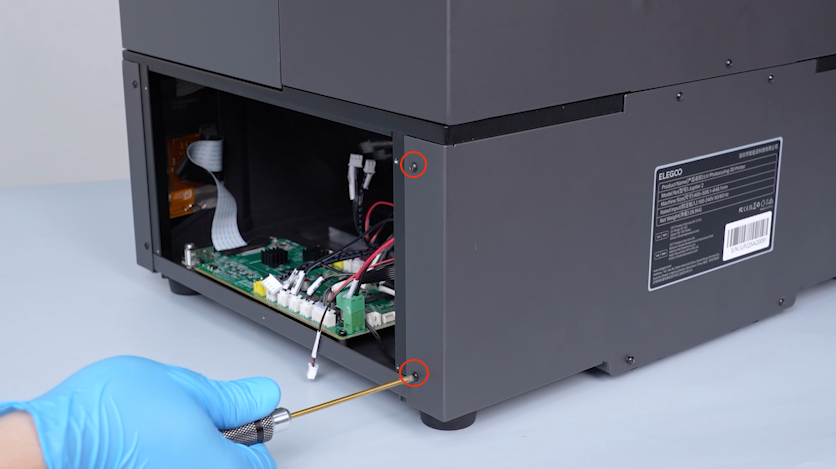
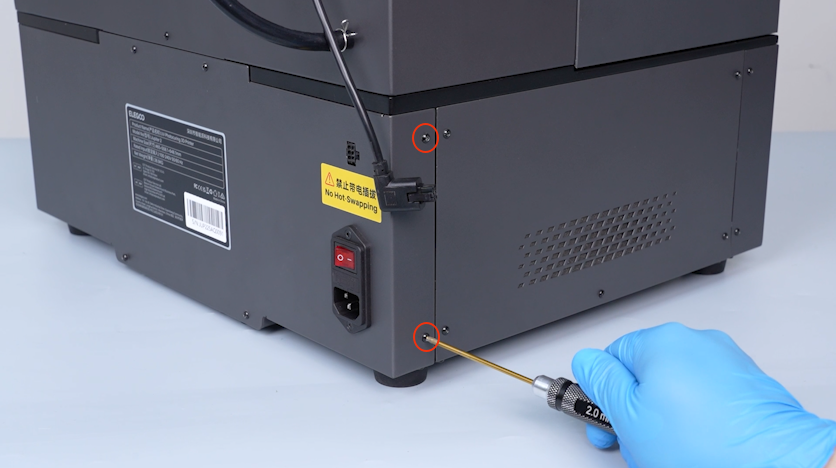
3.3 Use a 2.0 mm hex screwdriver to remove the four screws securing the rear of the rear panel.
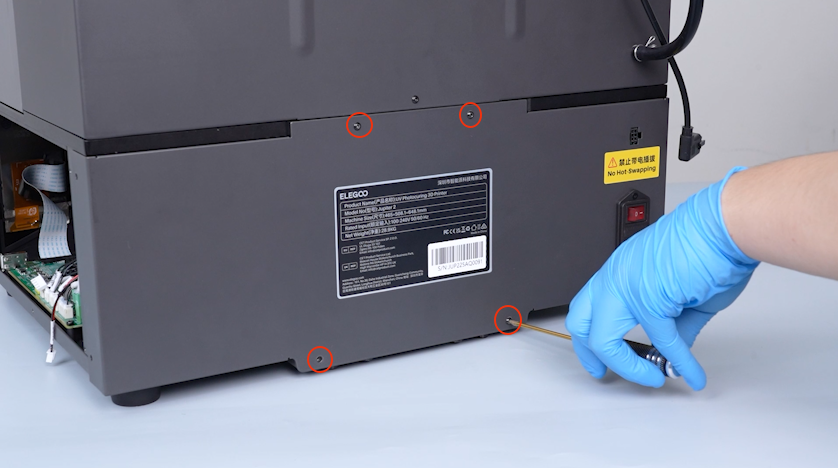
3.4 Slowly open the rear panel.
Caution: Do not pull or damage the internal wiring.
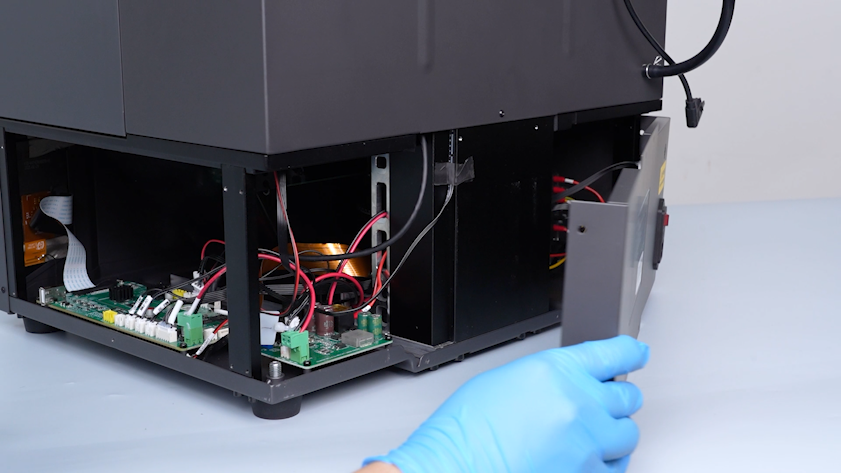
¶ 4. Remove the Screw Knobs and Resin Tank
4.1 Open the front door.
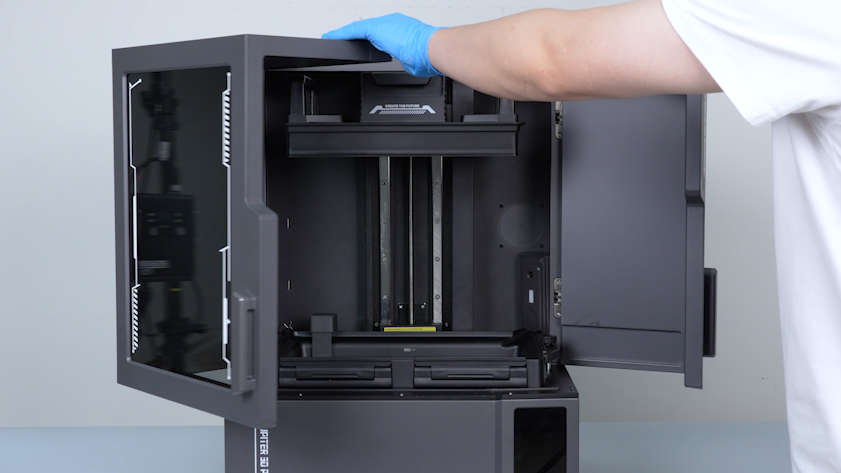
4.2 Lift the resin transfer nozzle of the resin dispensing assembly.
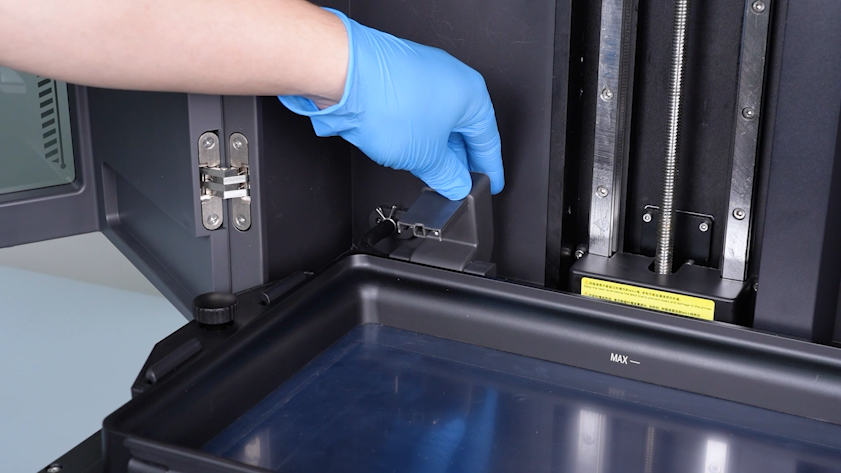
4.3 Remove the two screw knobs.
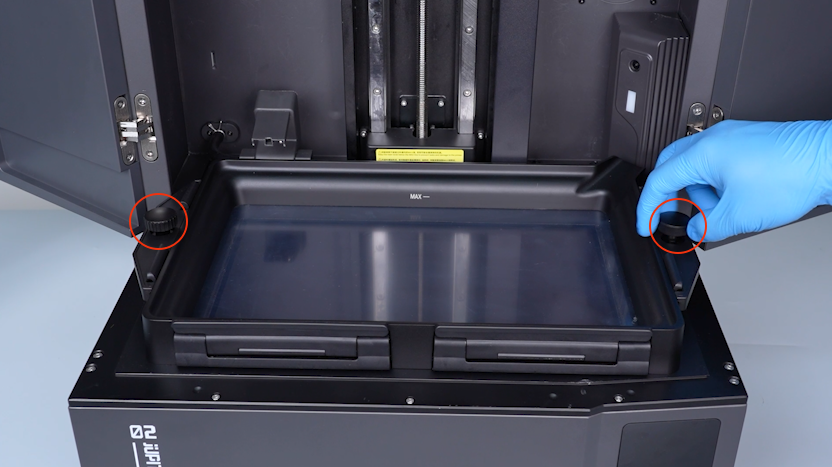
4.4 Remove the resin tank.
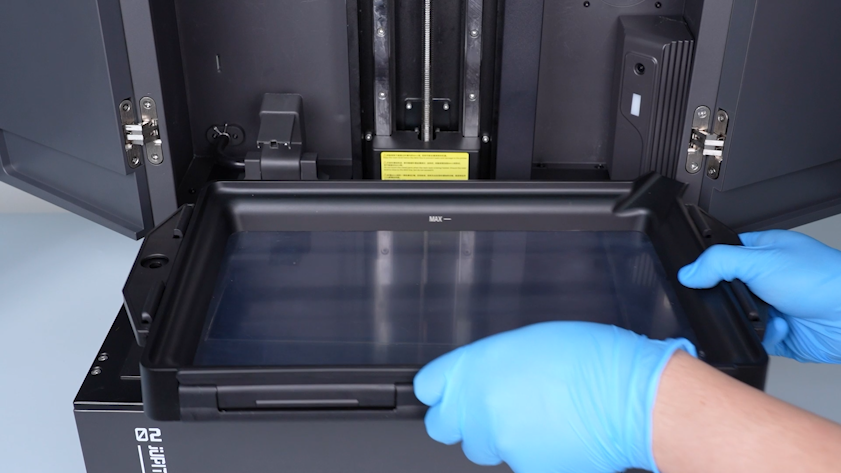
Caution: Secure the resin transfer nozzle with a sealing bag and cable ties to prevent dripping resin from contaminating the LCD screen.
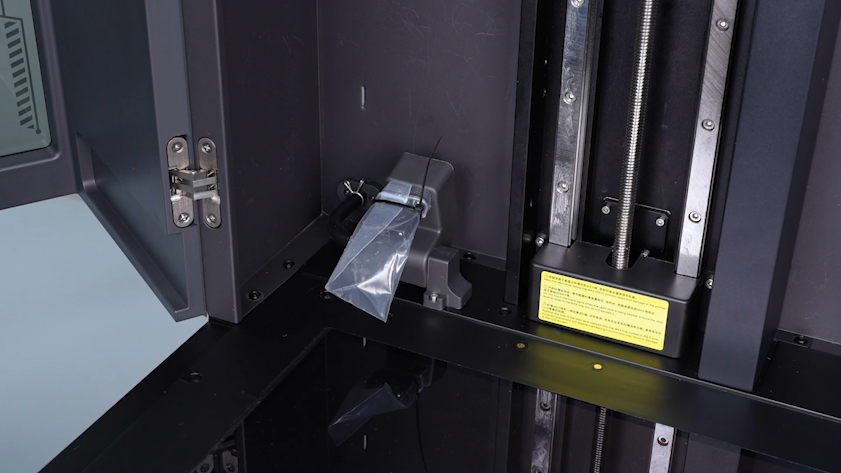
¶ 5. Remove the Resin Dispensing Assembly
5.1 Use a 2.5 mm hex screwdriver to remove the four screws securing the resin dispensing assembly.
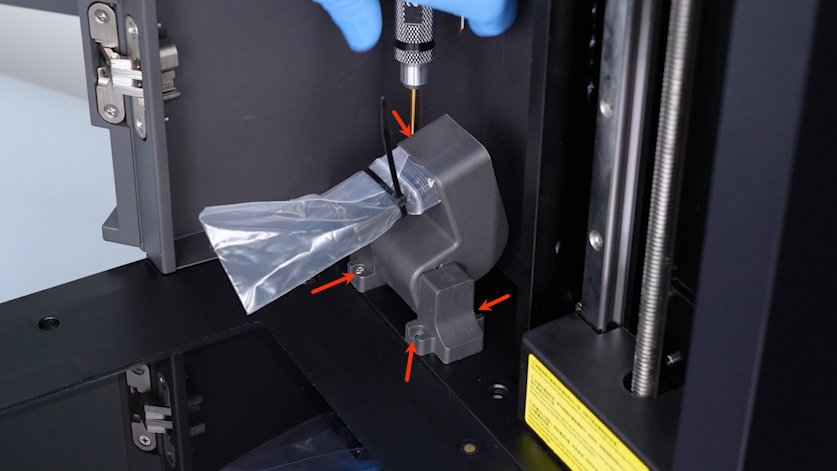
5.2 Pull the cables out through the cable opening.
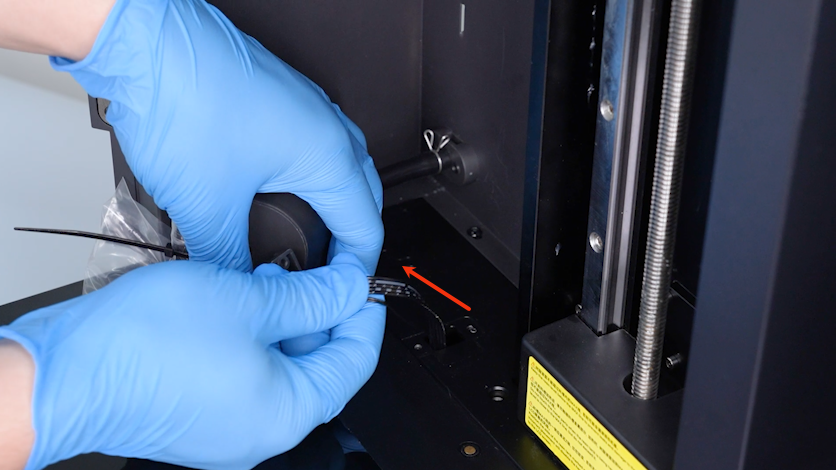
5.3 Release the silicone tube clamp.
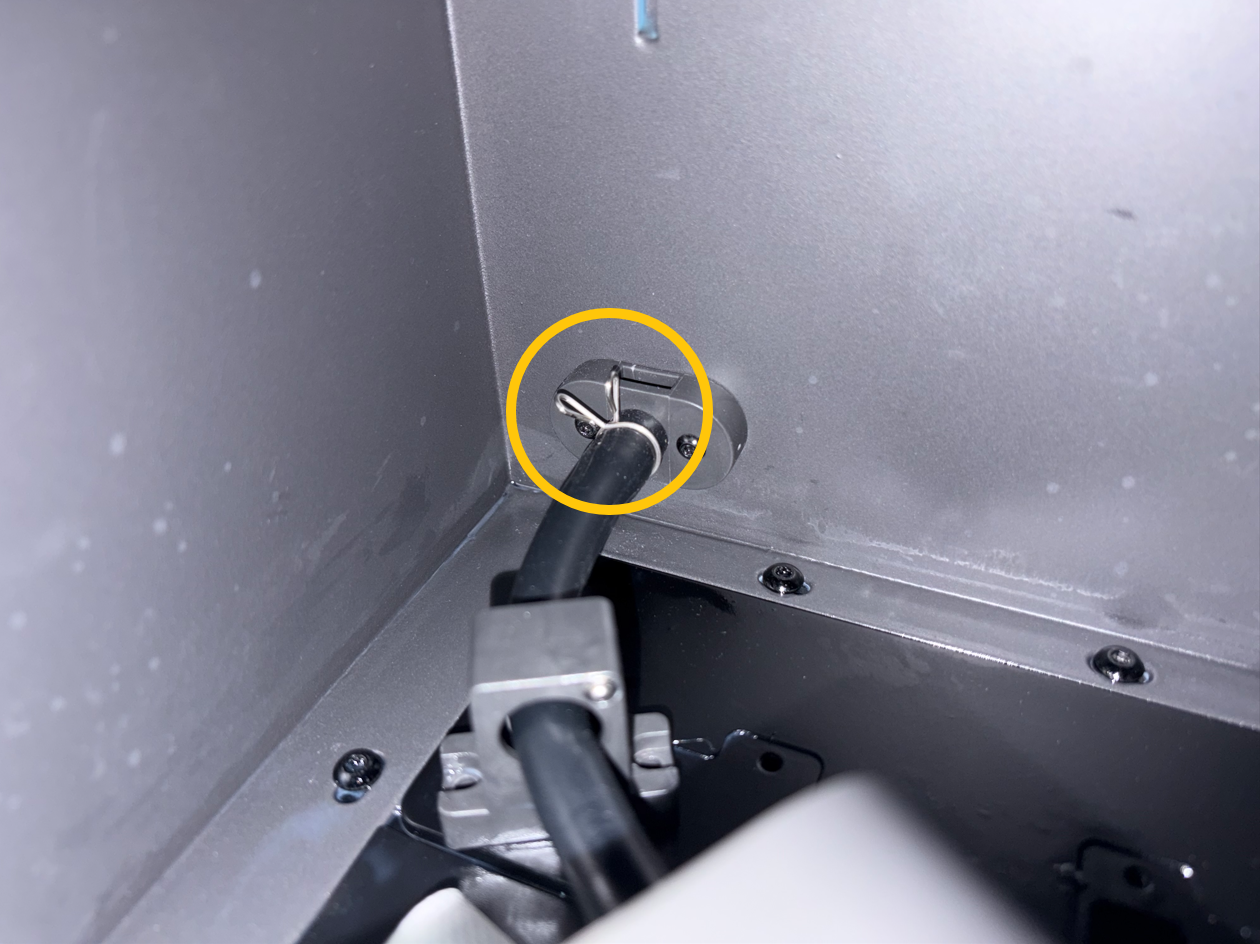
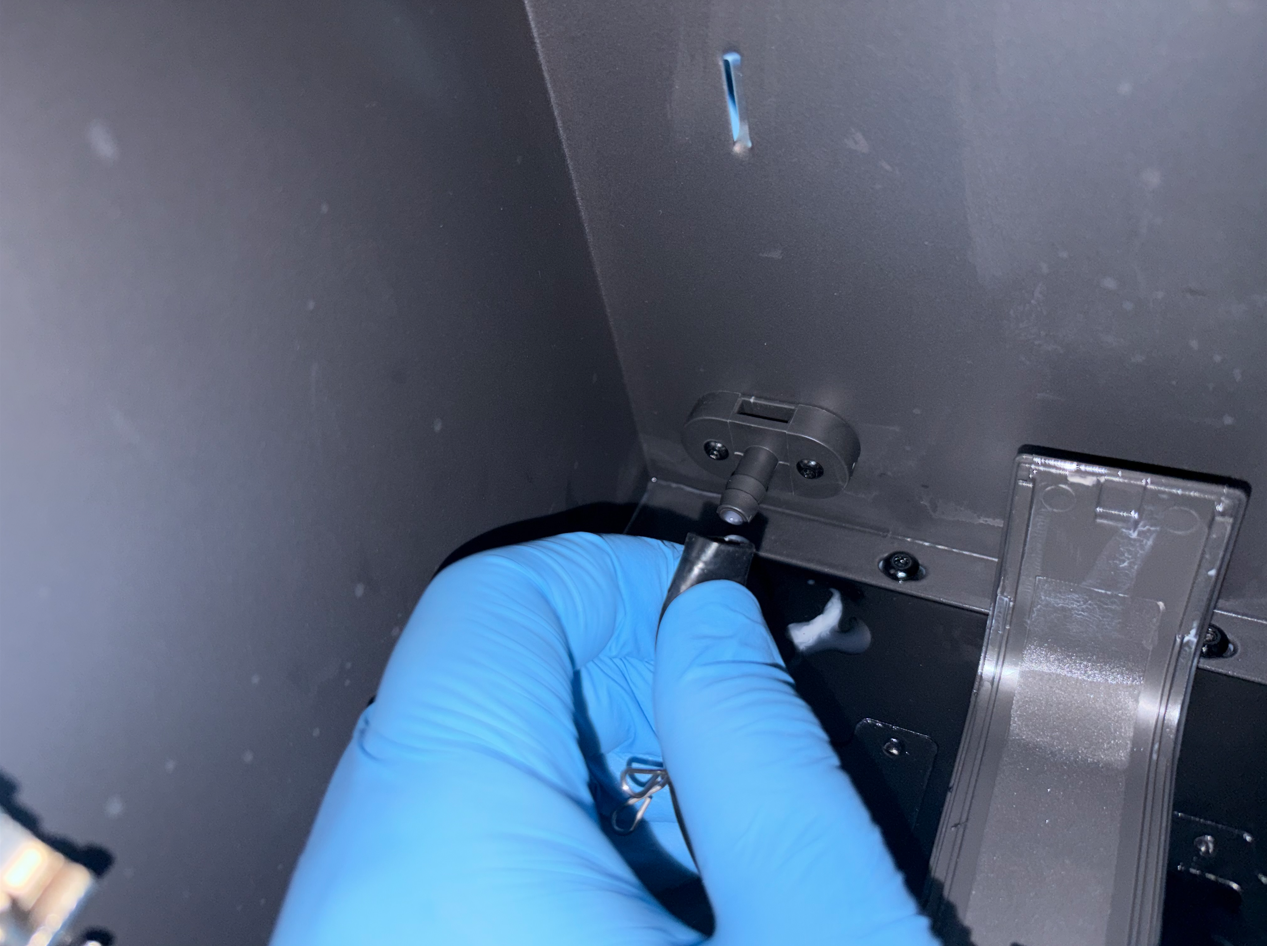
5.4 Disconnect the silicone tube and remove the old resin dispensing assembly.
Note: To prevent resin from dripping, hold the end of the silicone tube securely or seal the inlet with a sealing bag.
¶ Installation
¶ 1. Install the Resin Dispensing Assembly
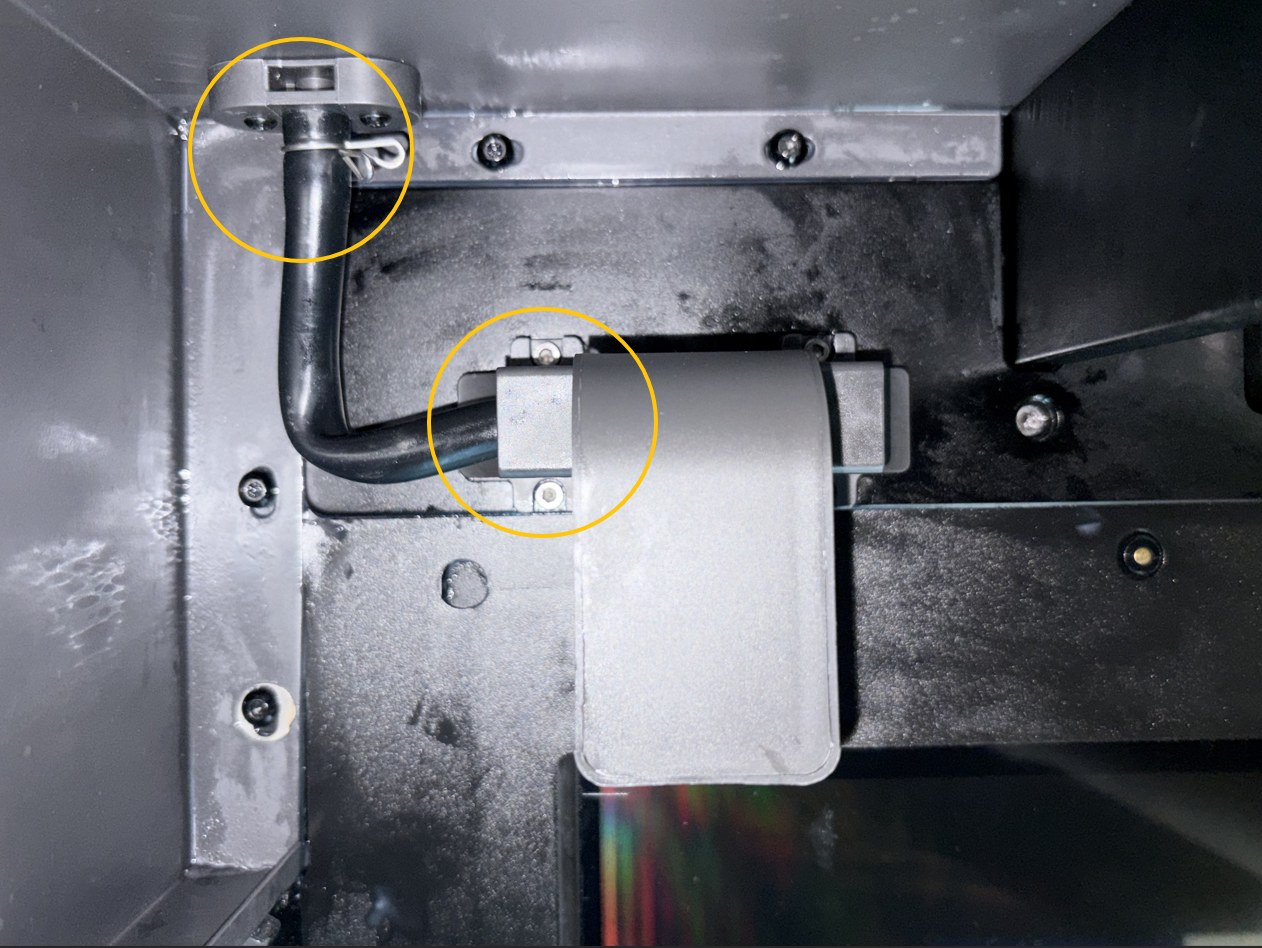
1.1 Route the three connectors of the new resin dispensing assembly into the machine enclosure.
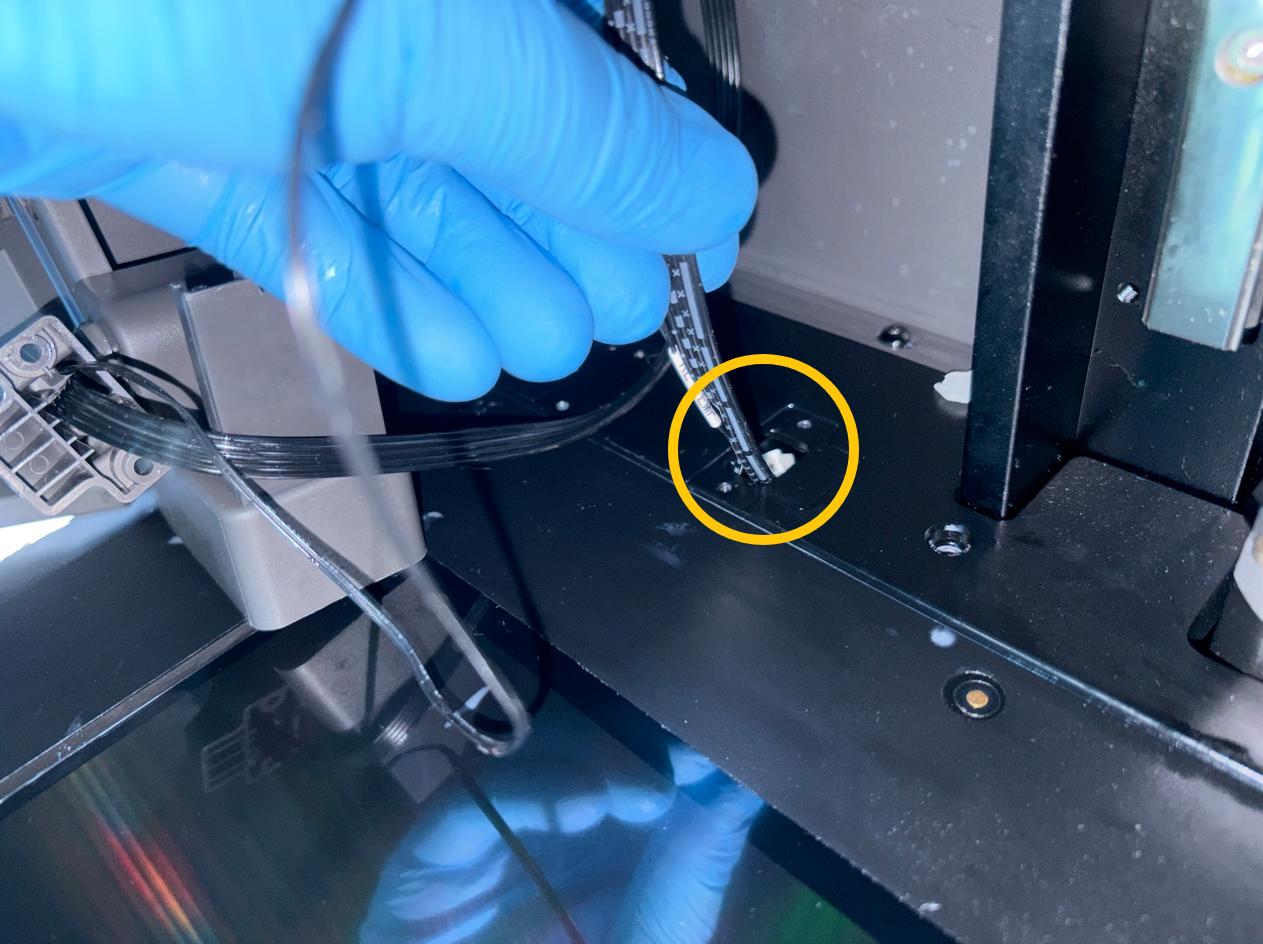
1.2 Route the connectors toward the mainboard.
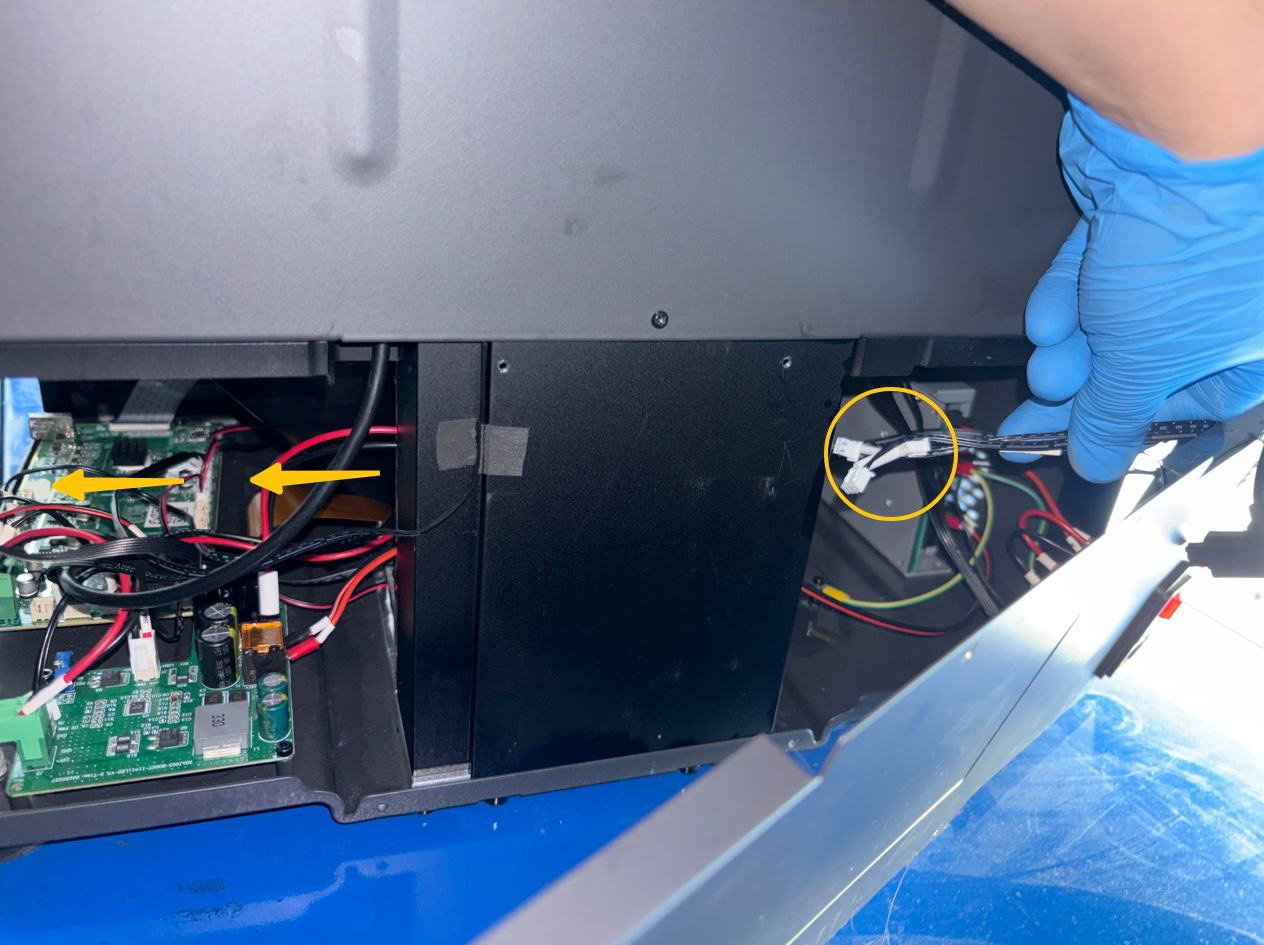
1.3 Connect the silicone tube to the resin transfer nozzle and secure the clamp.
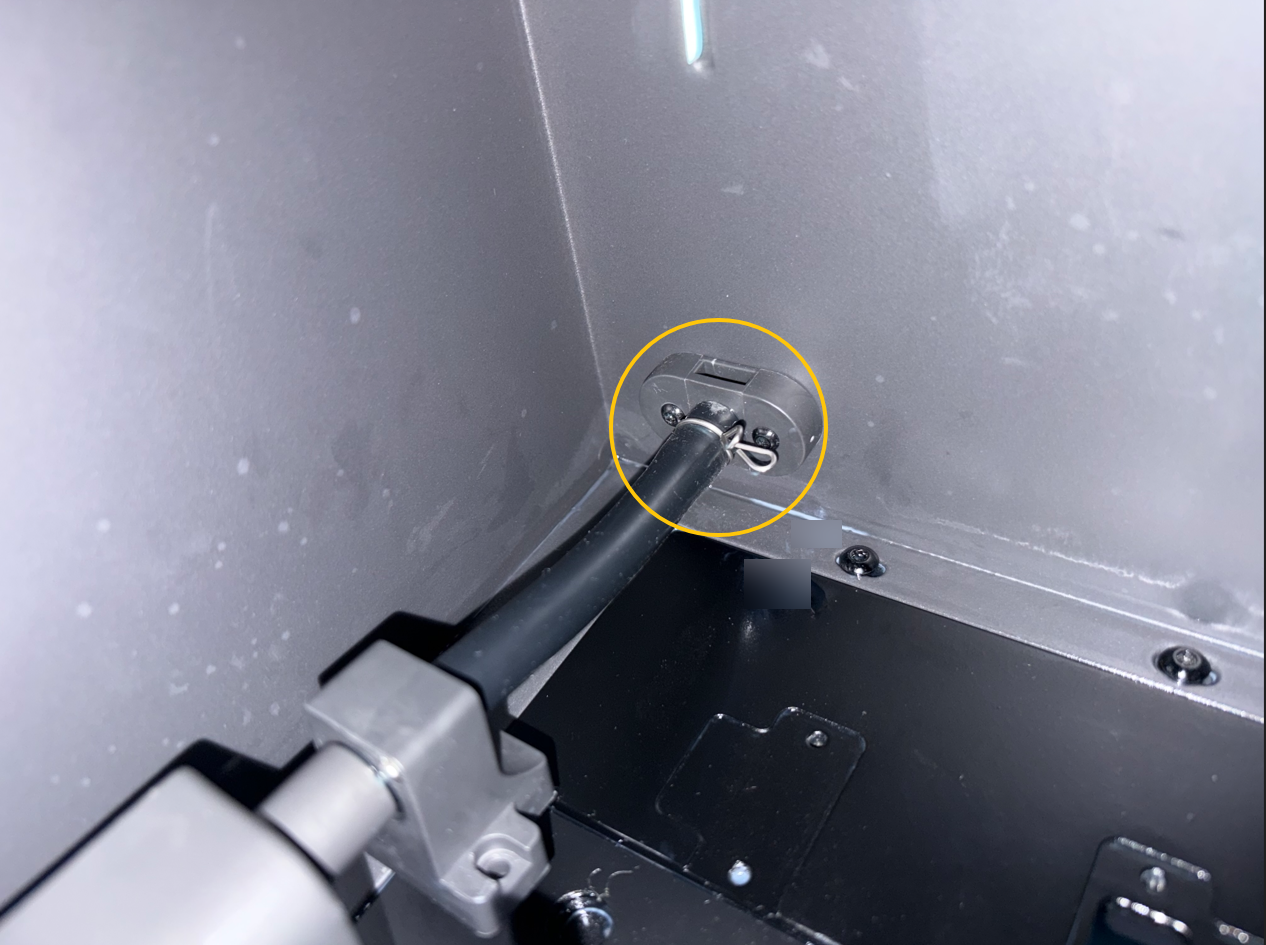
1.4 Align the resin dispensing assembly with the screw holes.
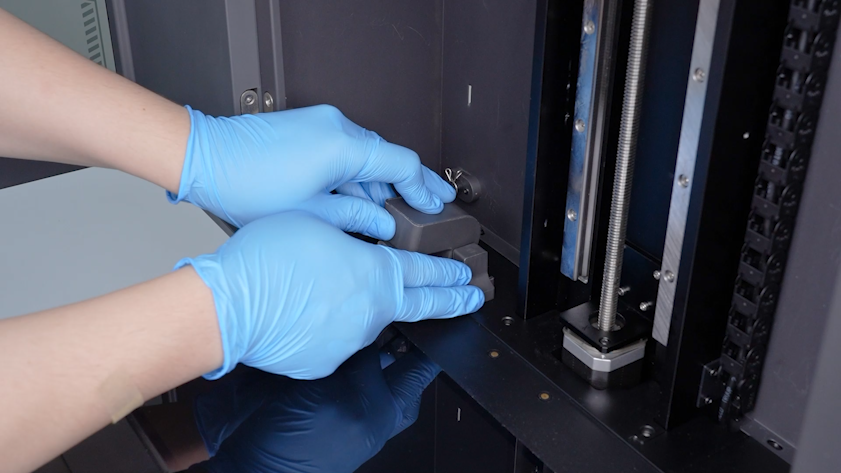
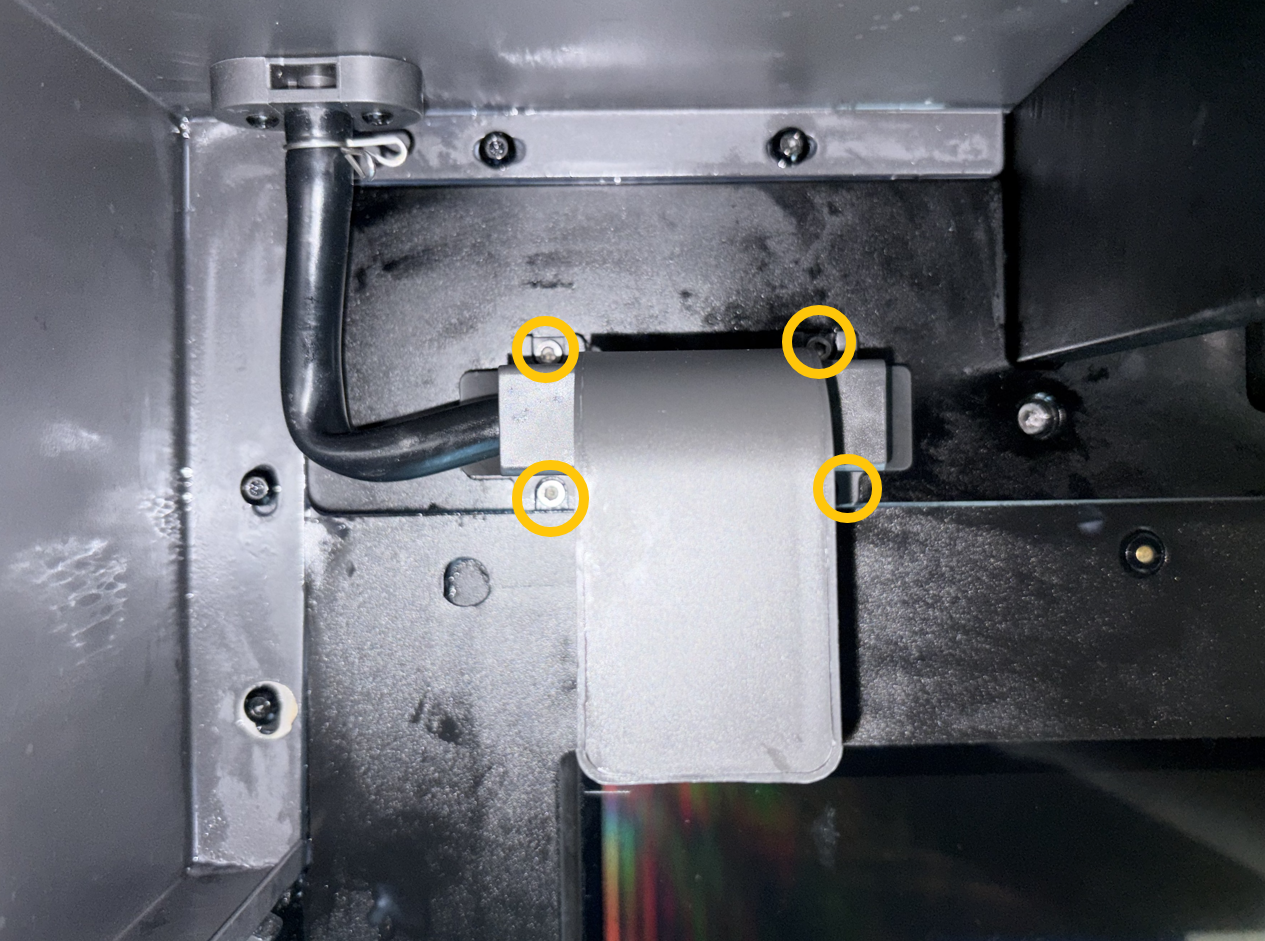
1.5 Tighten the four screws to secure the resin dispensing assembly.
Note: After installation, lift the resin dispensing assembly to facilitate the subsequent installation of the Resin Tank.
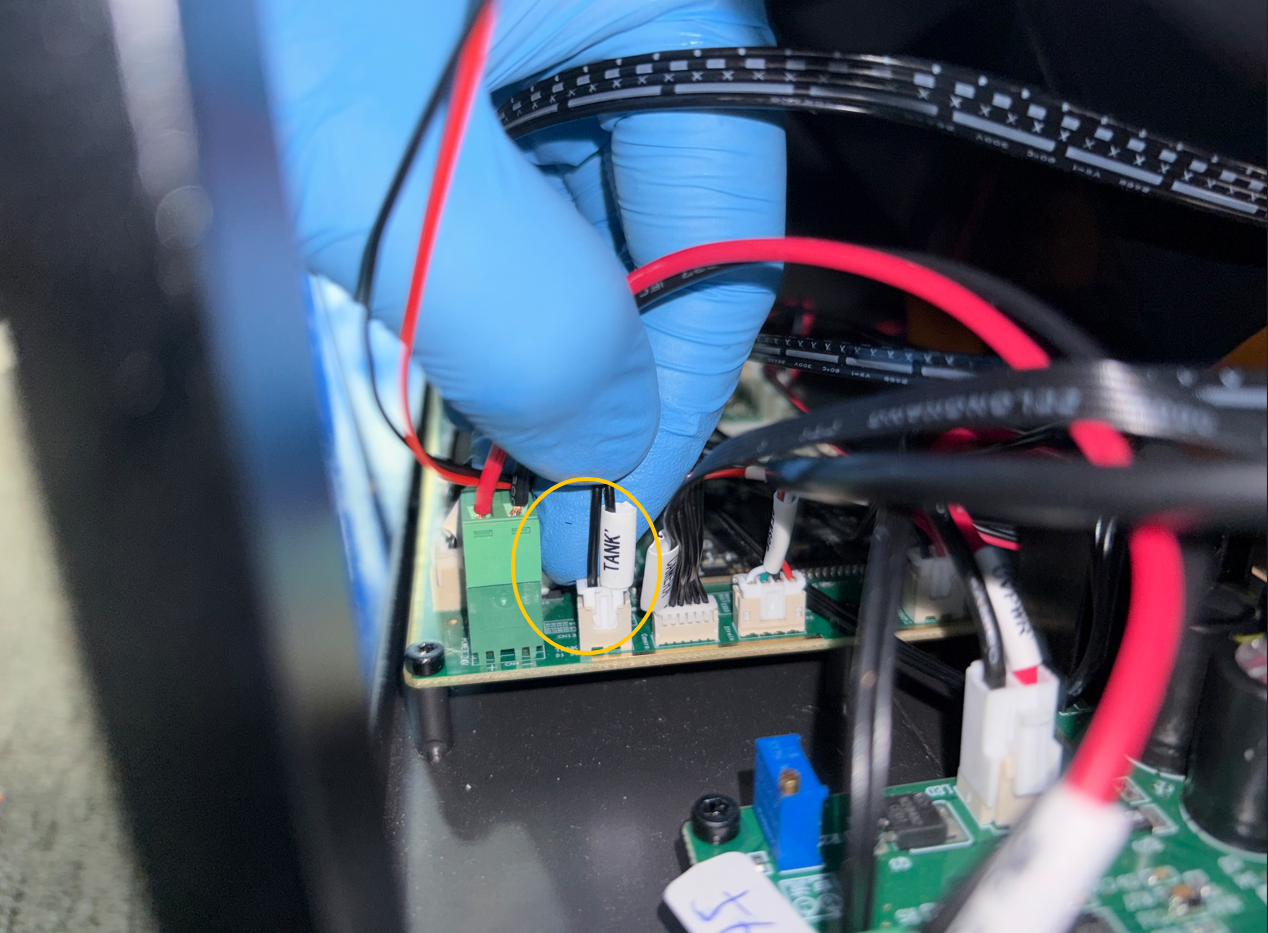
¶ 2. Connect the Resin Dispensing Assembly Cables
Reconnect the TANK, HALL SENSOR, and RE-TEMP connectors to their original positions.
¶ 3. Install the Right Panel
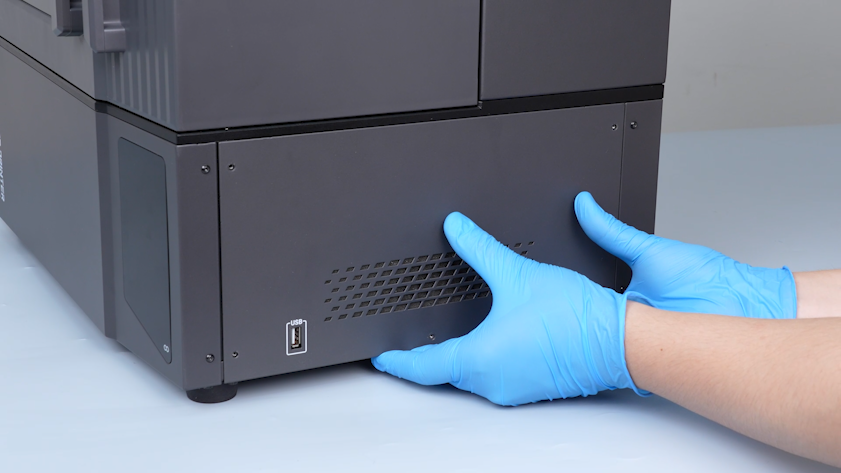
3.1 Position the right panel in its original place.
3.2 Tighten the five screws, securing the right panel.
¶ 4. Install the Rear Panel
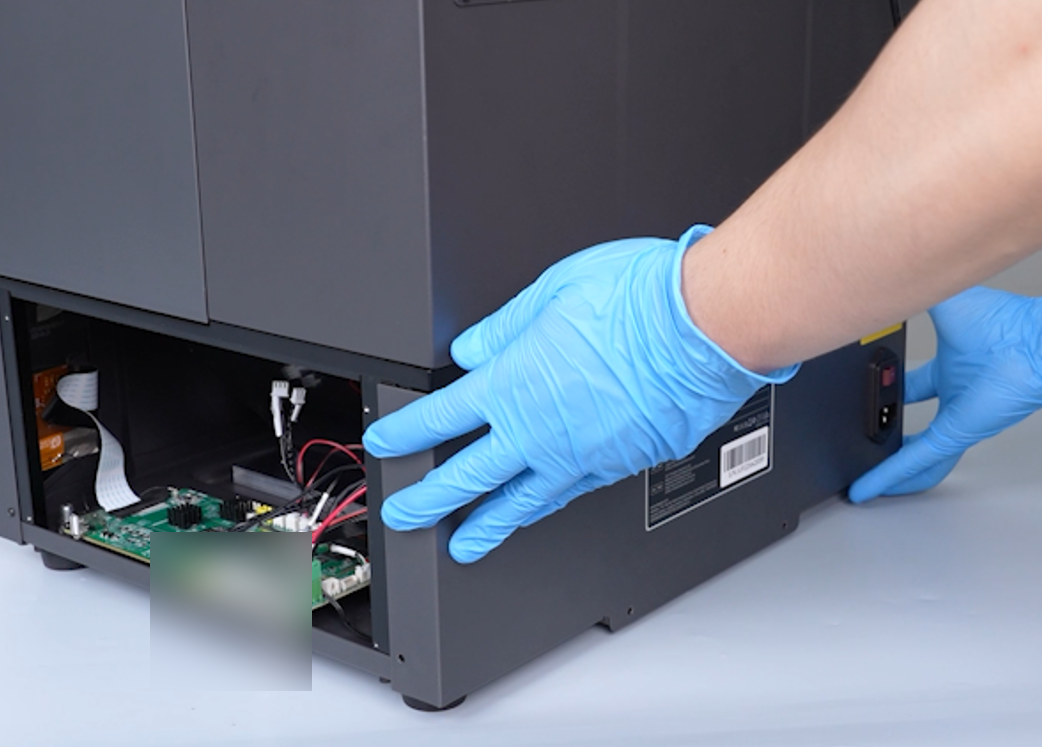
4.1 Close the rear panel.
4.2 Tighten the four screws, securing the rear of the rear panel.
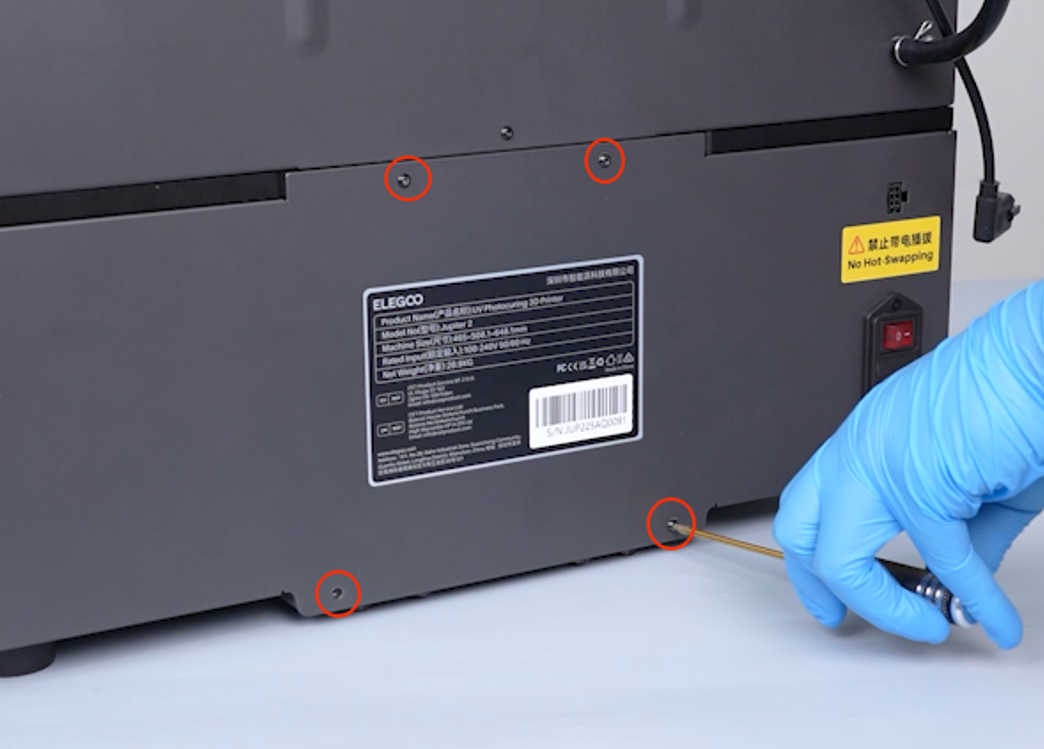
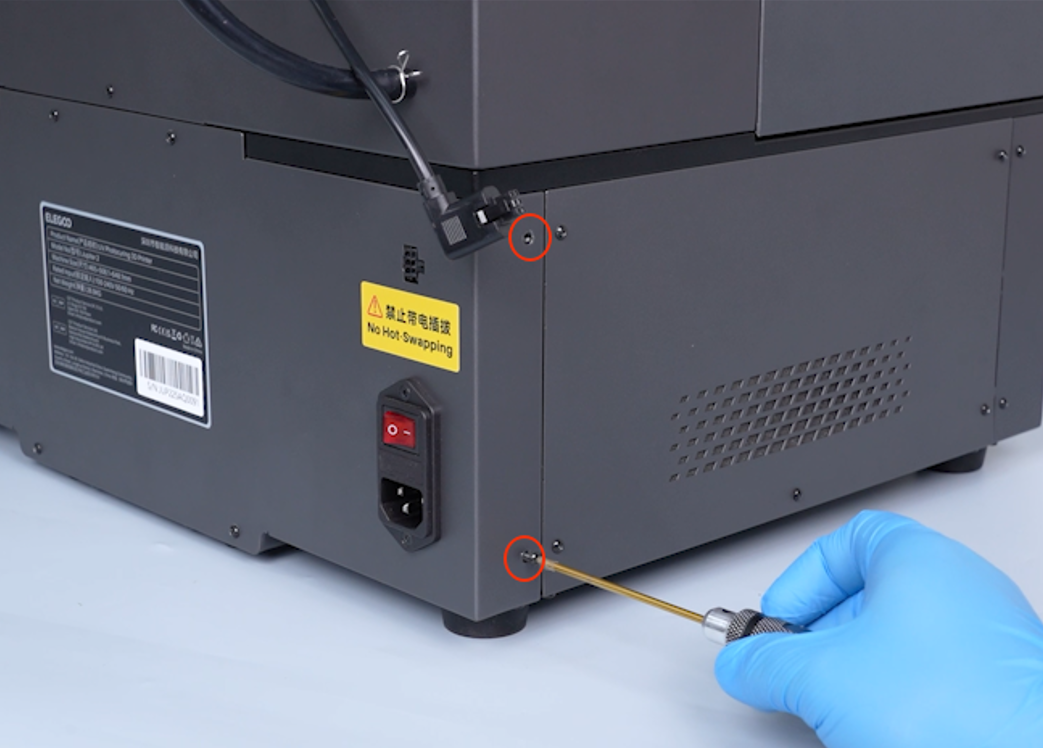
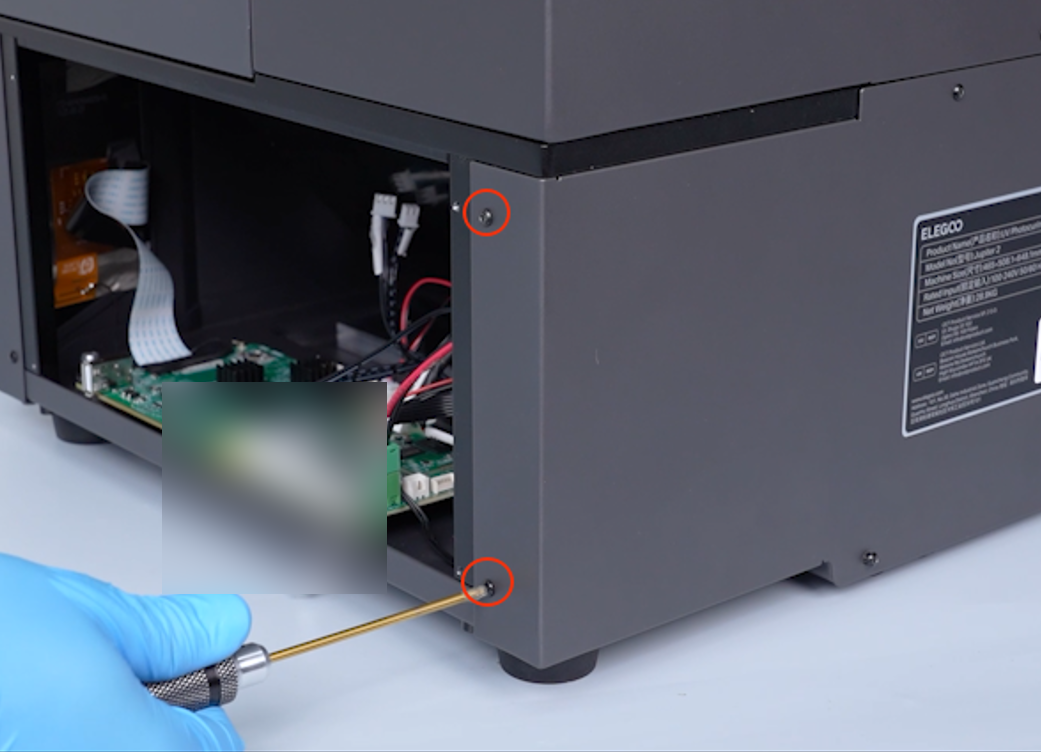
4.3 Tighten the four screws securing the left and right sides of the rear panel.
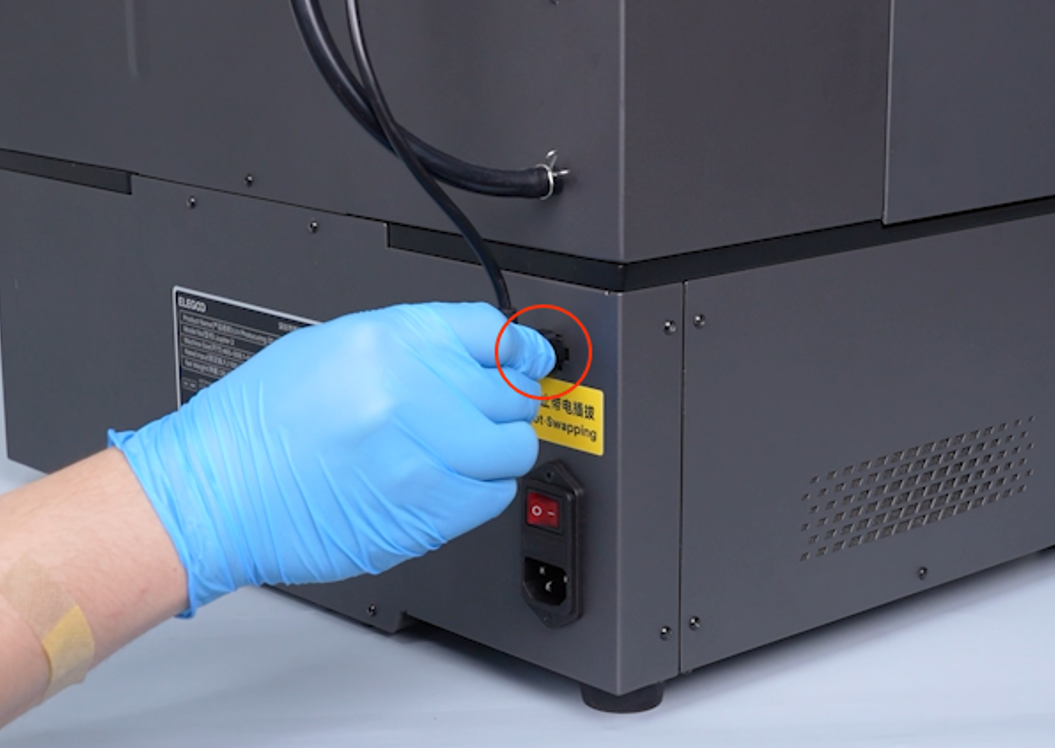
4.4 Reconnect the Auto-feeding connector to its original position.
¶ 5. Install the Resin Tank and Screw Knobs
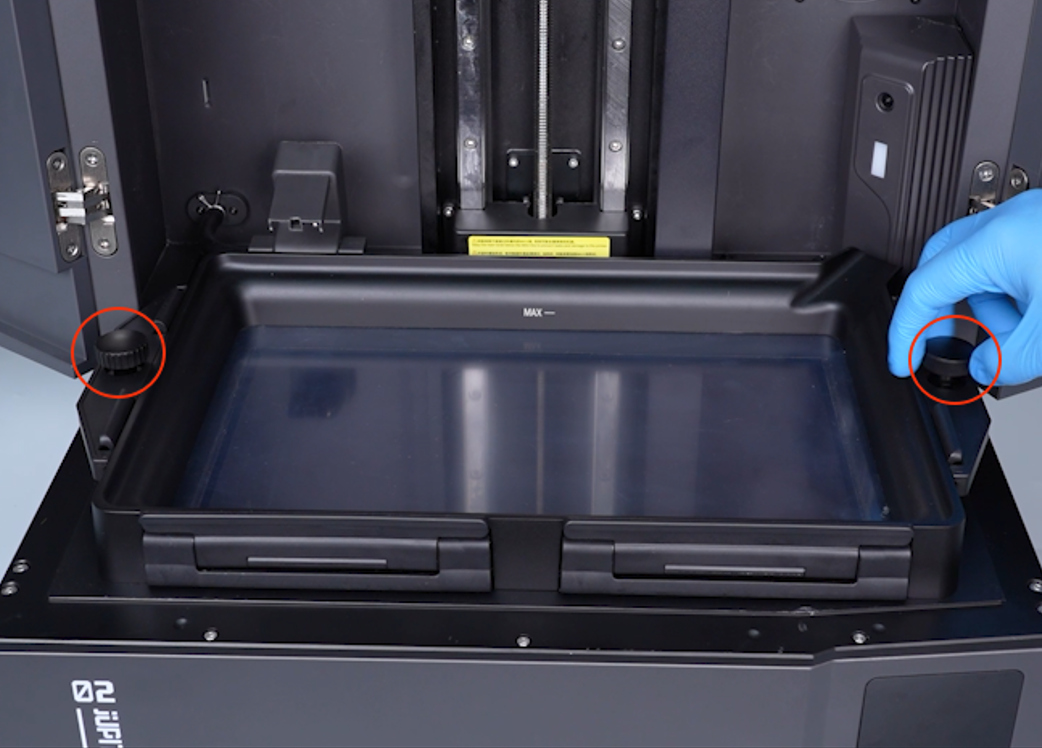
5.1 Place the resin tank in its original position and tighten the two screw knobs.
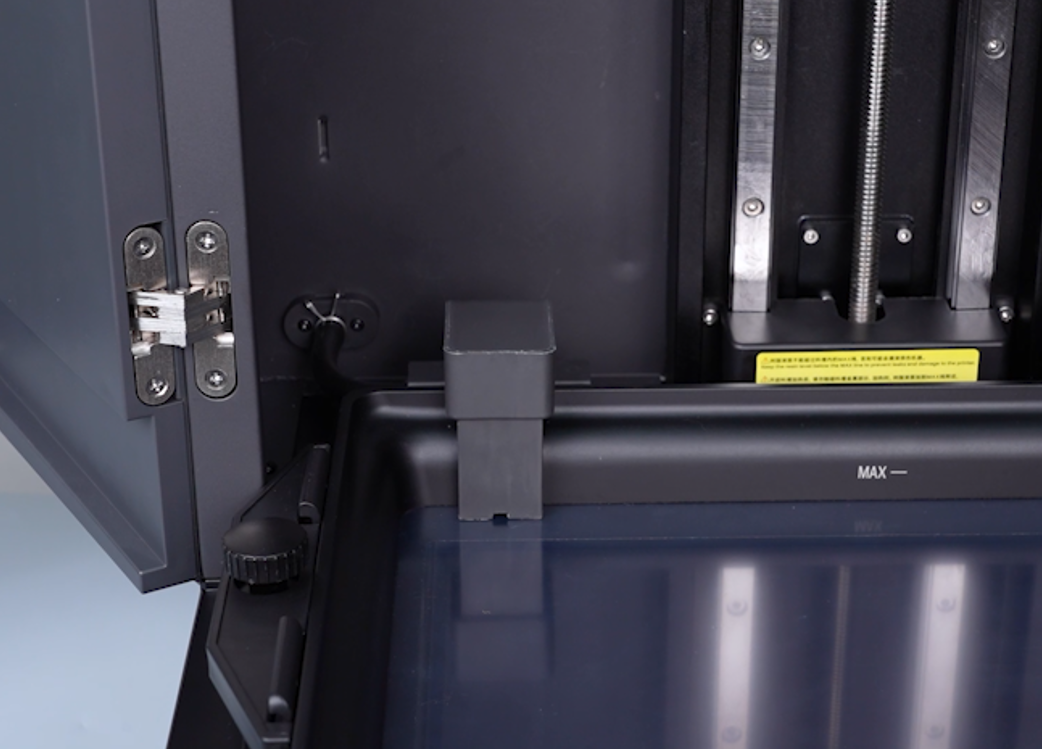
5.2 Return the resin transfer nozzle to its original position.
¶ Verification
- Connect the power cord and turn on the power switch.
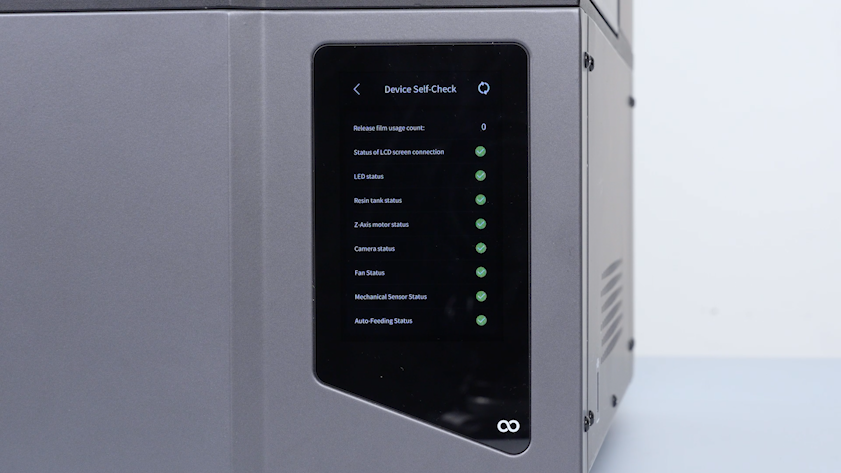
- Confirm that the printer passes the self-check.
- Load resin and check for leaks around the silicone tube connections. The replacement of the resin dispensing assembly is now complete.
¶ Help us improve
If you have any ideas about the wiki pages, please let us know via ELEGOO official feedback channel