¶ Required Tools
- 2.0 mm hex screwdriver
- 2.5 mm hex screwdriver
- 3.0 mm hex screwdriver
- A4 paper
- Heat-resistant gloves
- Hair dryer
- Sealed bag
- Cable tie
¶ Disassembly
¶ 1. Mainboard-side Connector
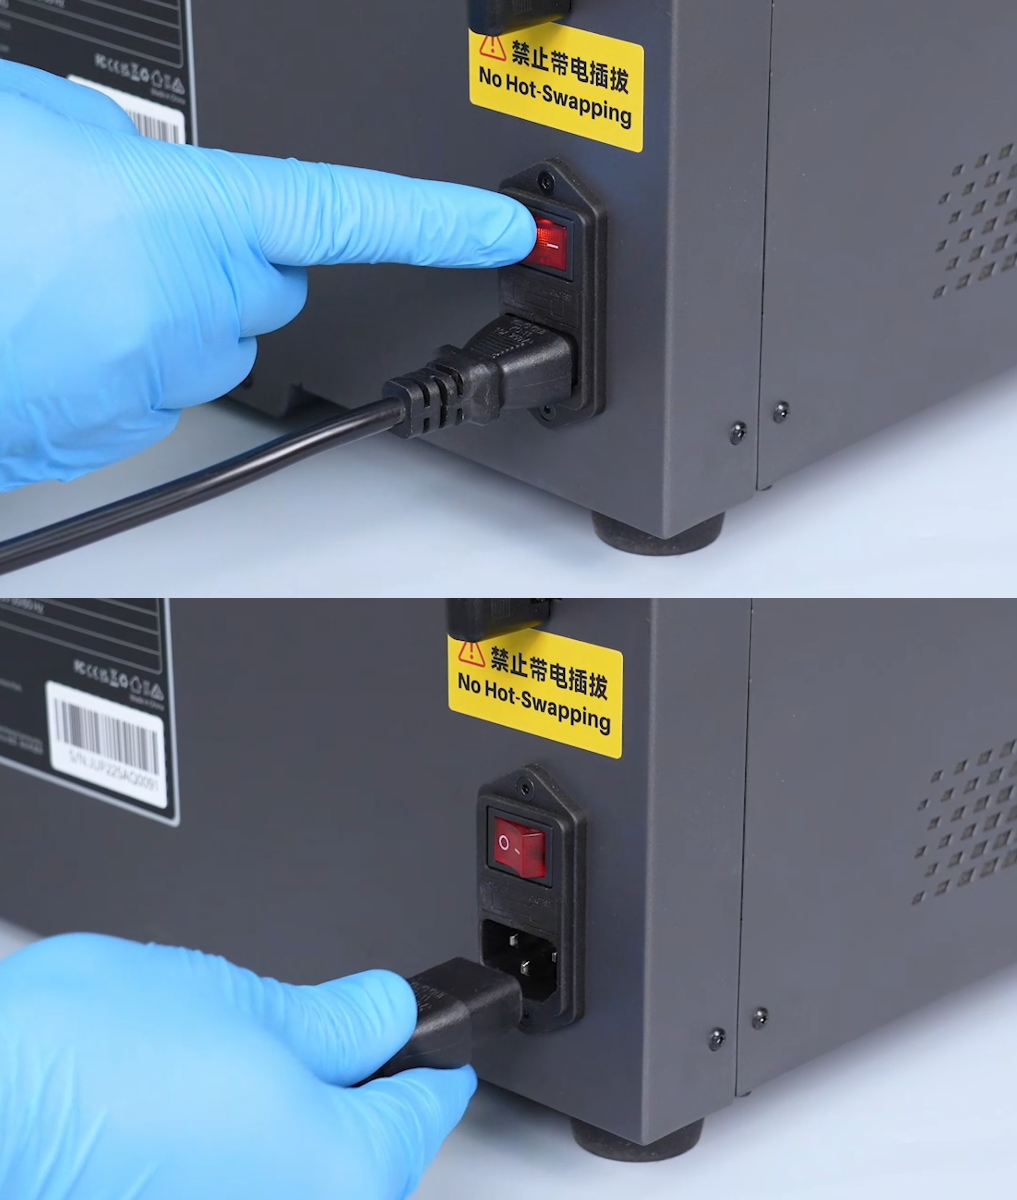
- Turn off the printer using the Power Switch and unplug the power cable.
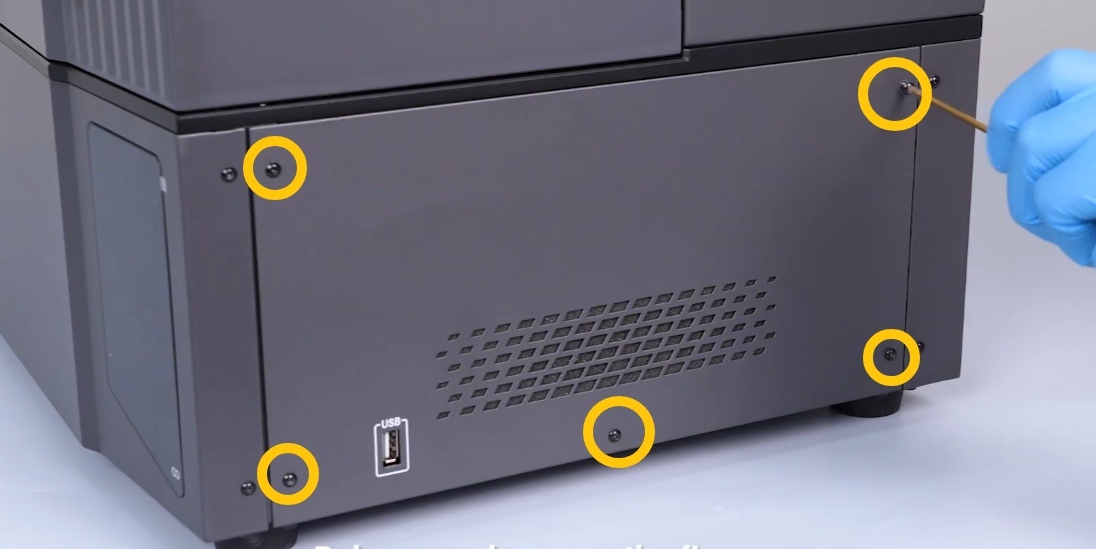
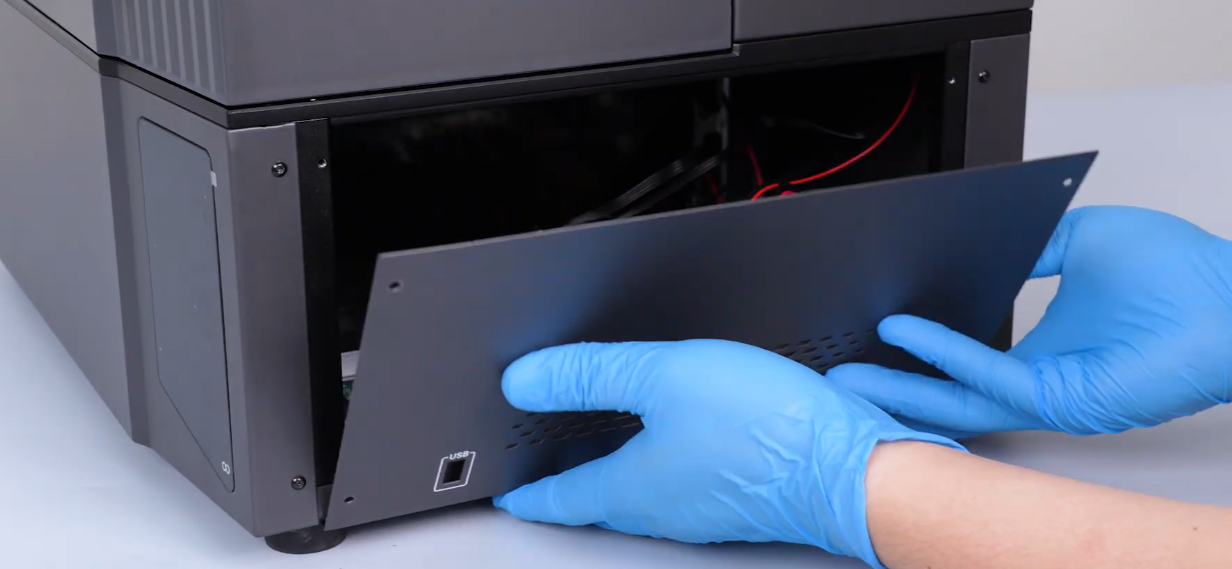
2. Use a 2.0 mm hex screwdriver to remove the five screws securing the right-side panel, then remove the panel.
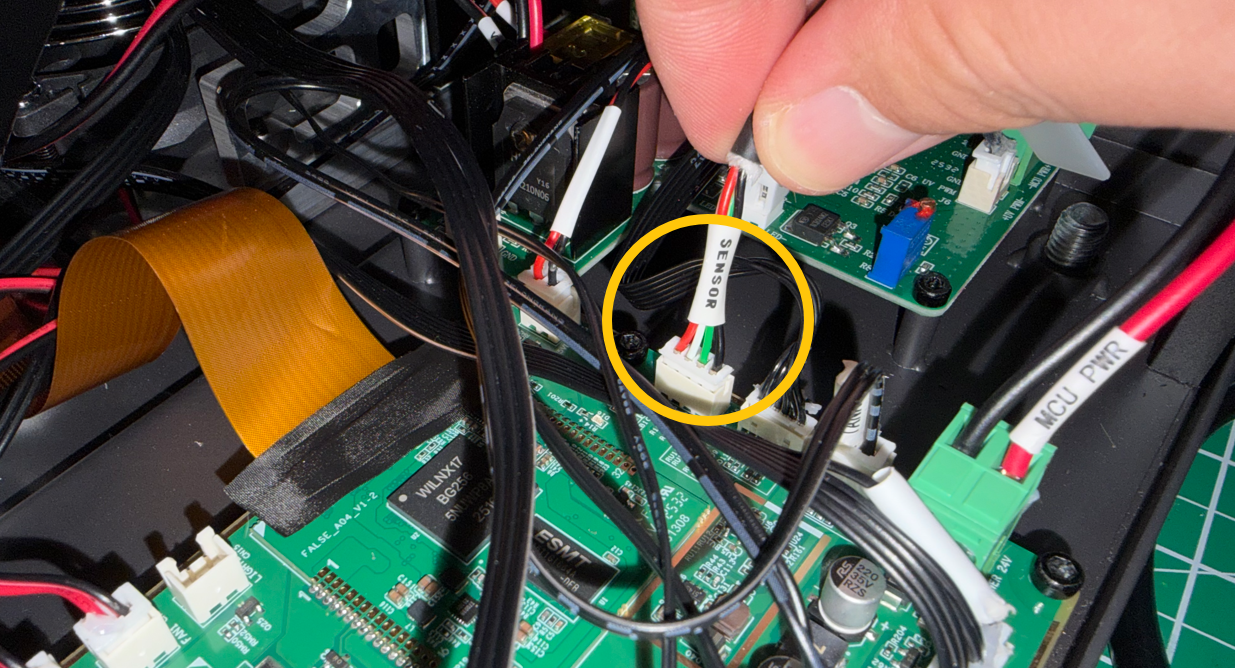
- Disconnect the magnetic tool head cable (SENSOR) from the mainboard.
¶ 2. Build Plate
- Open the front door.
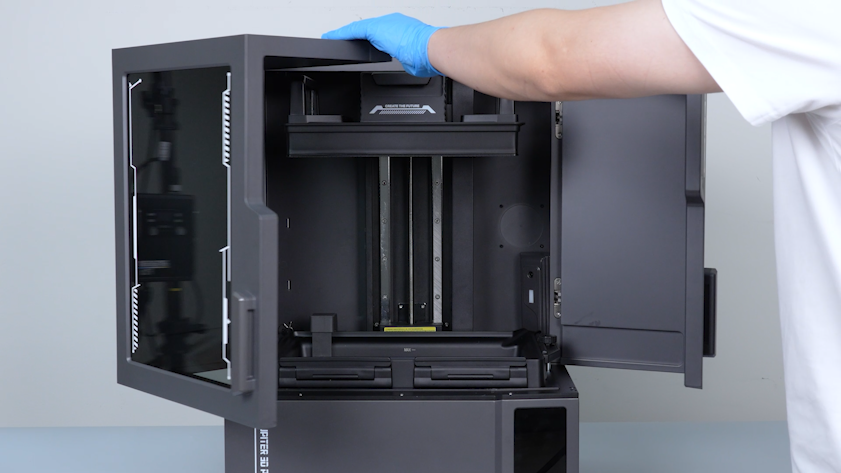
- Release the latch and remove the Build Plate.
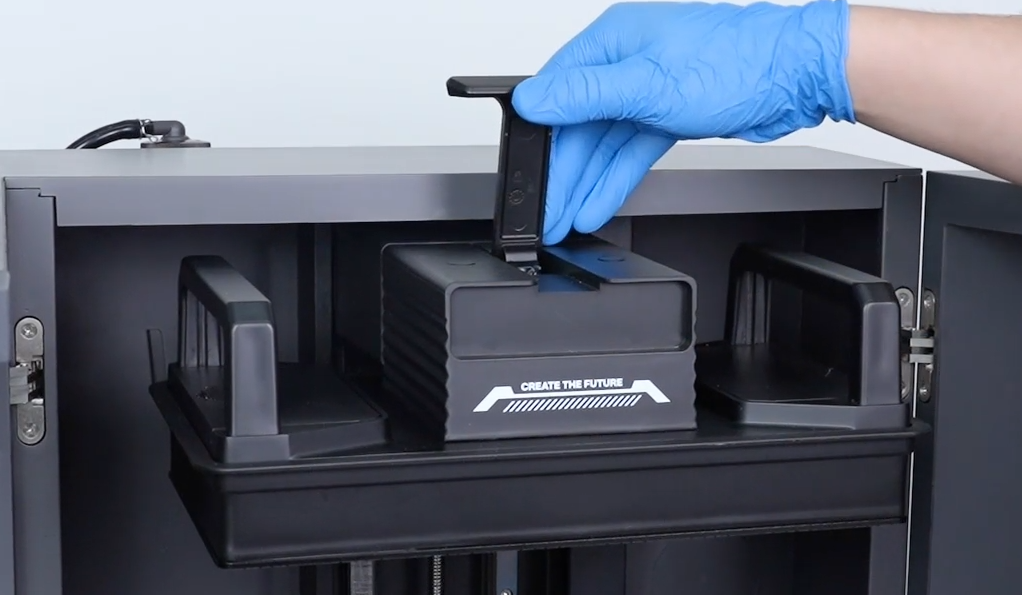
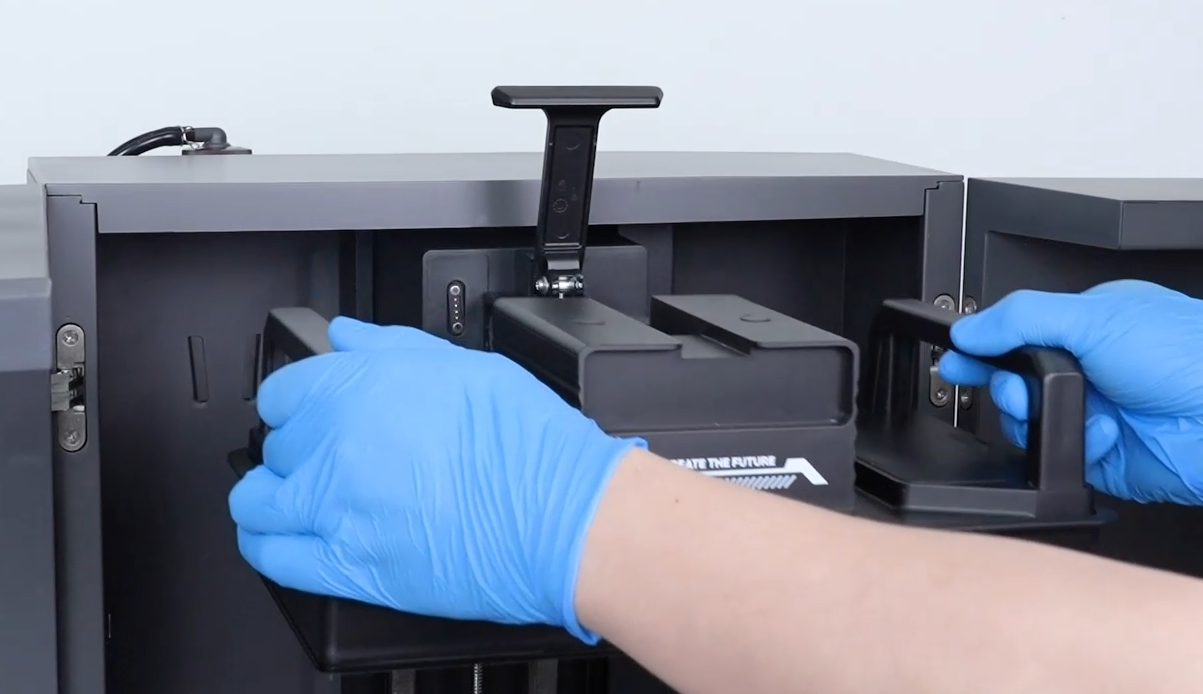
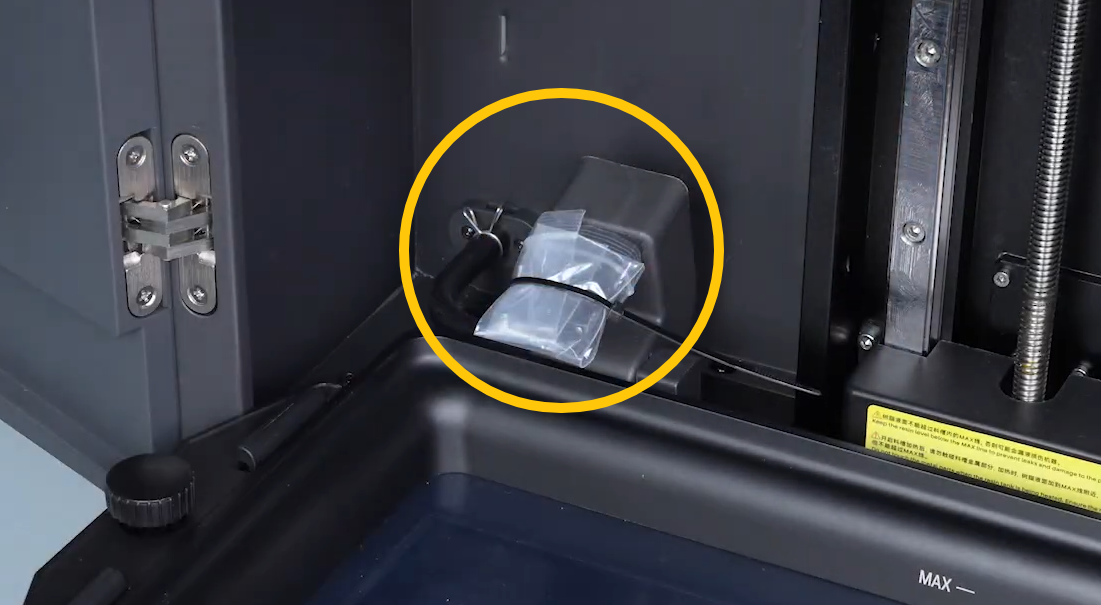
- Lift the Automatic Resin Feeding and Recycling Module.
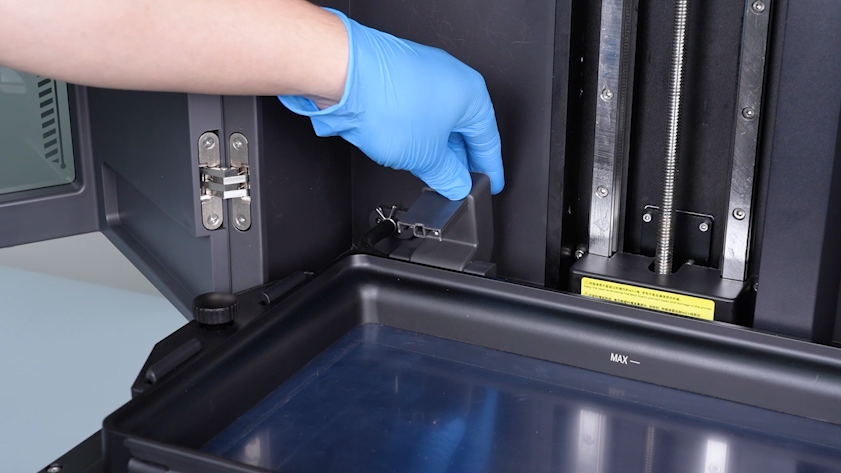
- To prevent resin leakage, secure the outlet using a sealed bag and cable ties.
¶ 3. Resin Tank
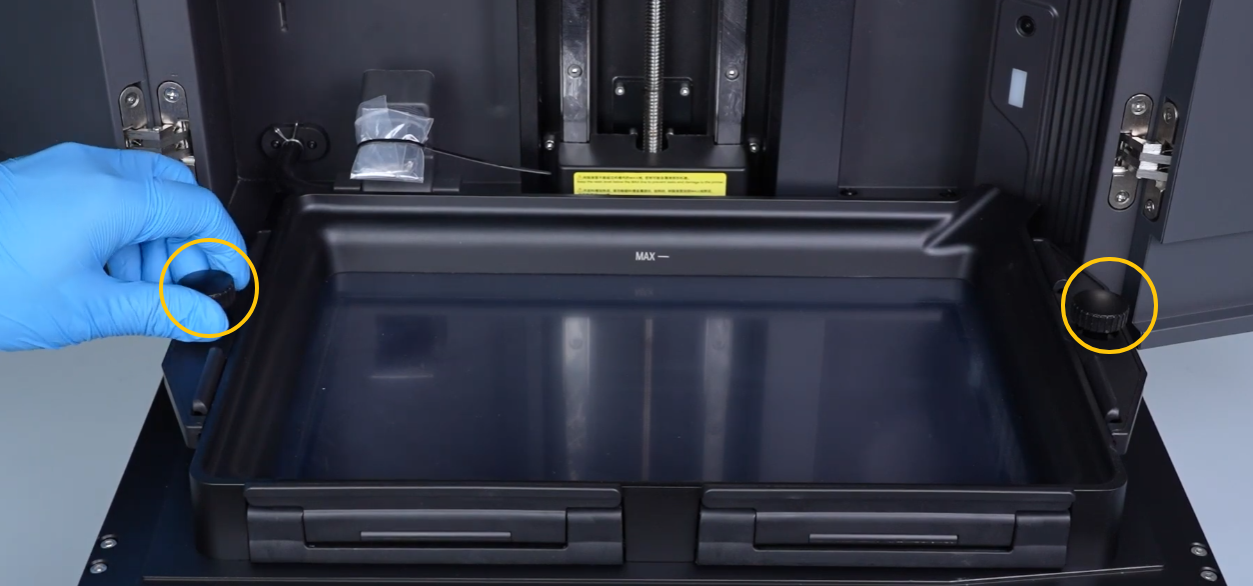
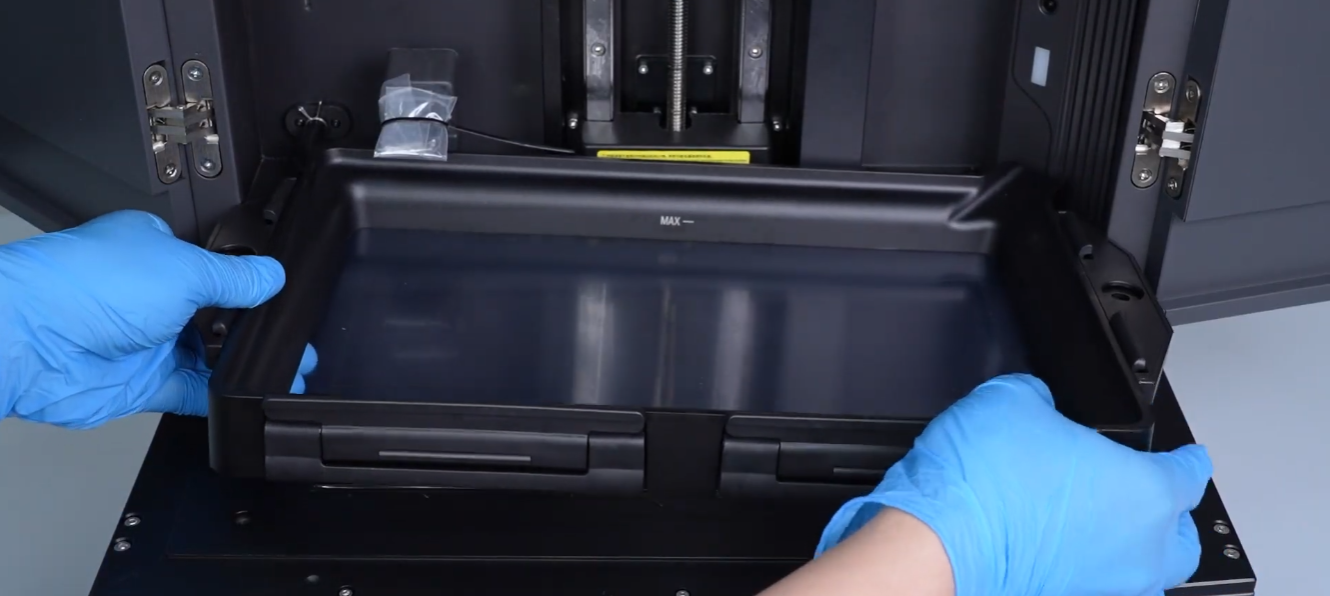
Remove the two Screw Knobs and take out the Resin Tank.
¶ 4. Drag Chain Cover
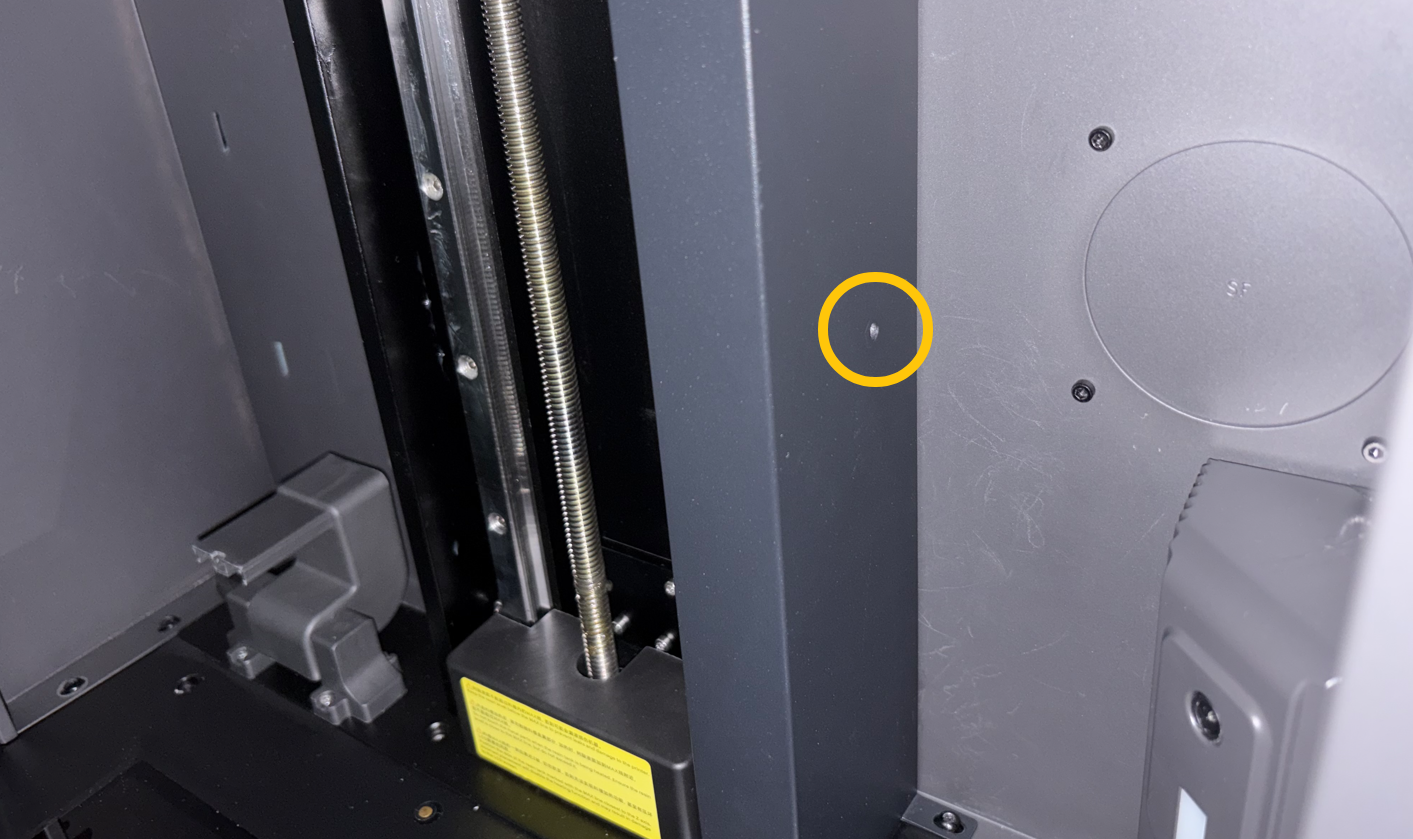
- Use a 2.5 mm hex screwdriver to remove screws from the upper, middle, and lower sections of the drag chain cover.
- Remove the cover.
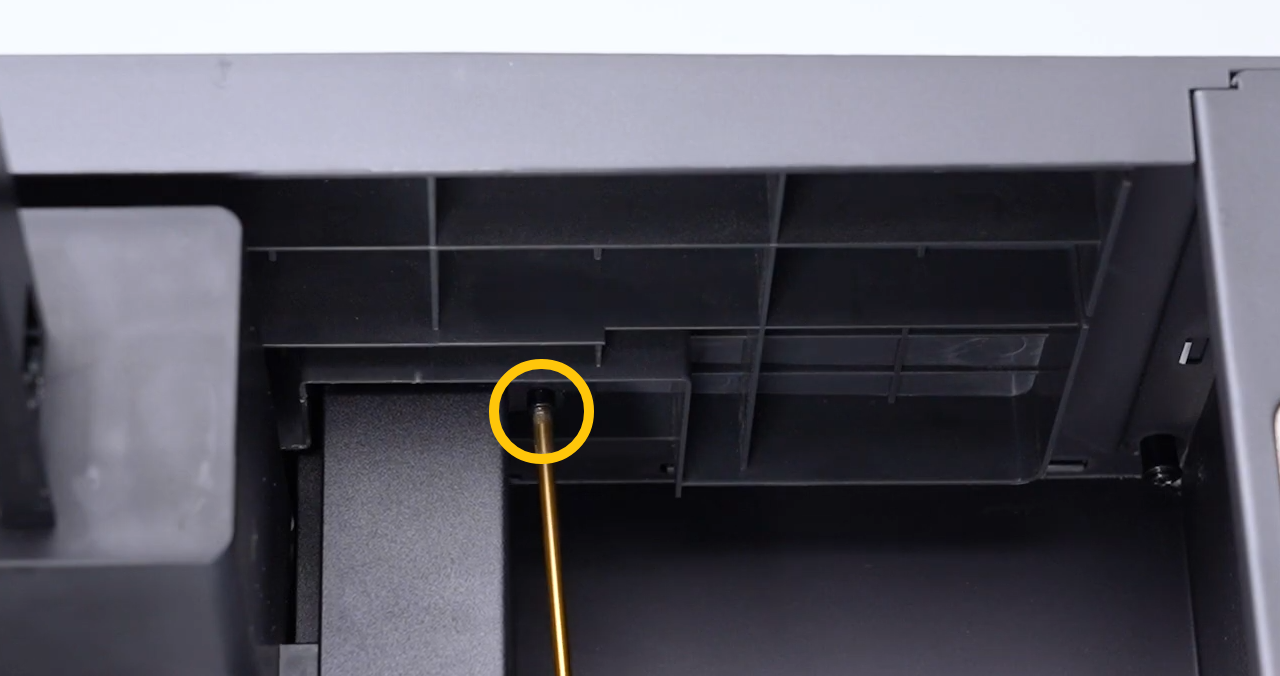
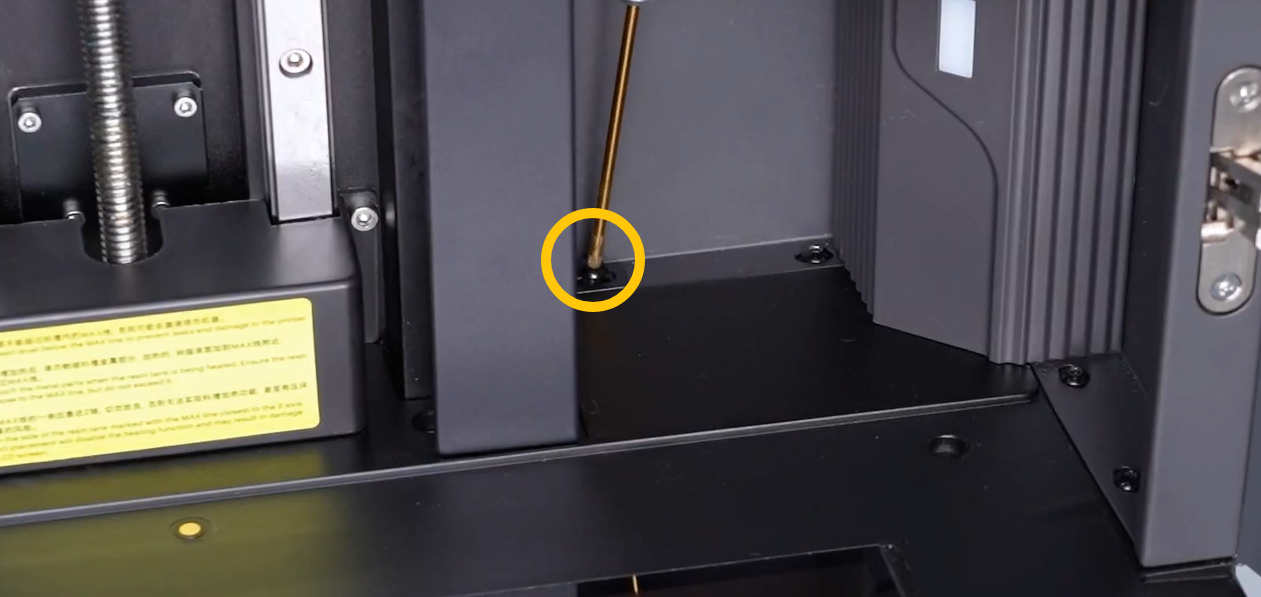
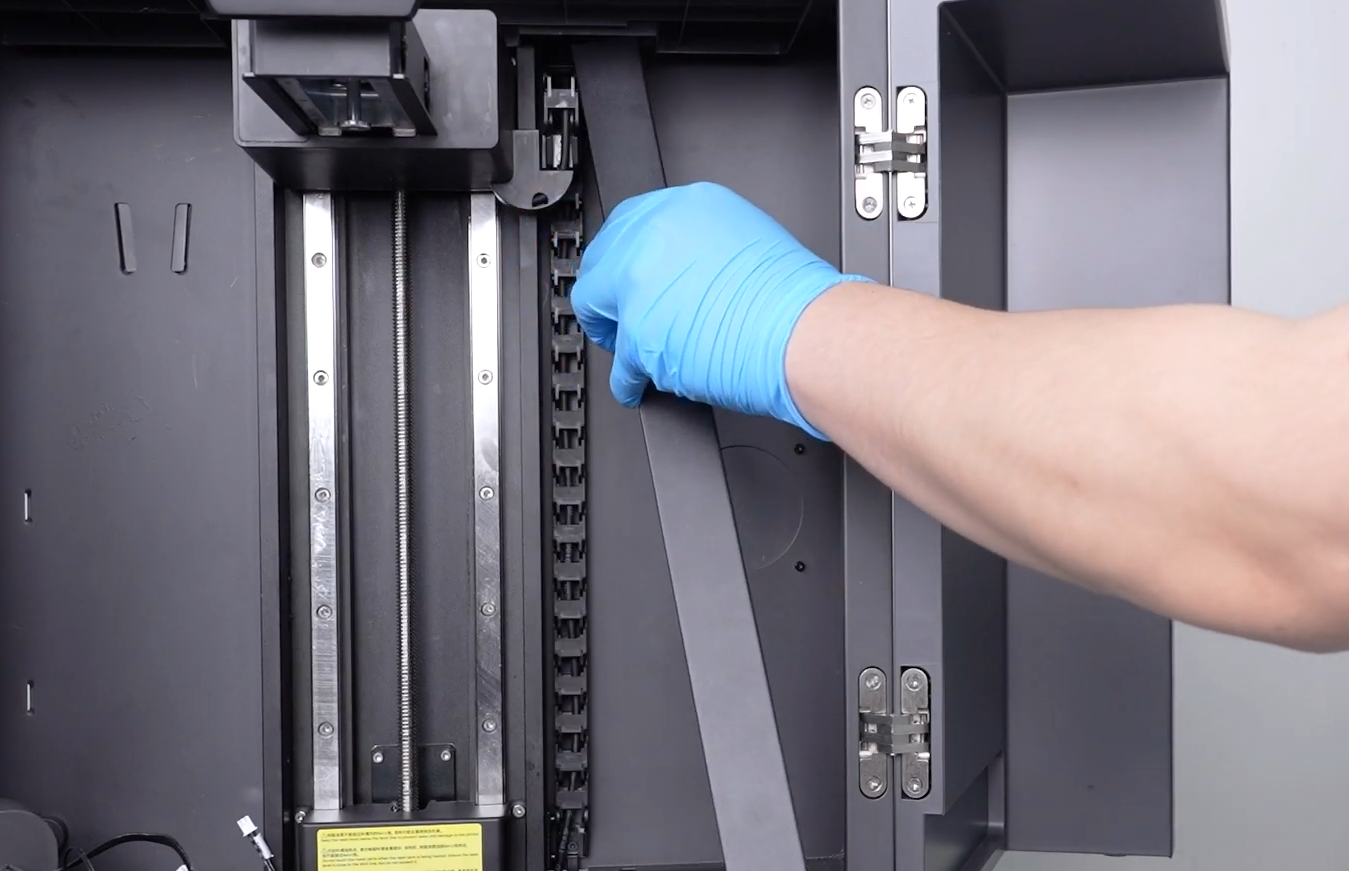
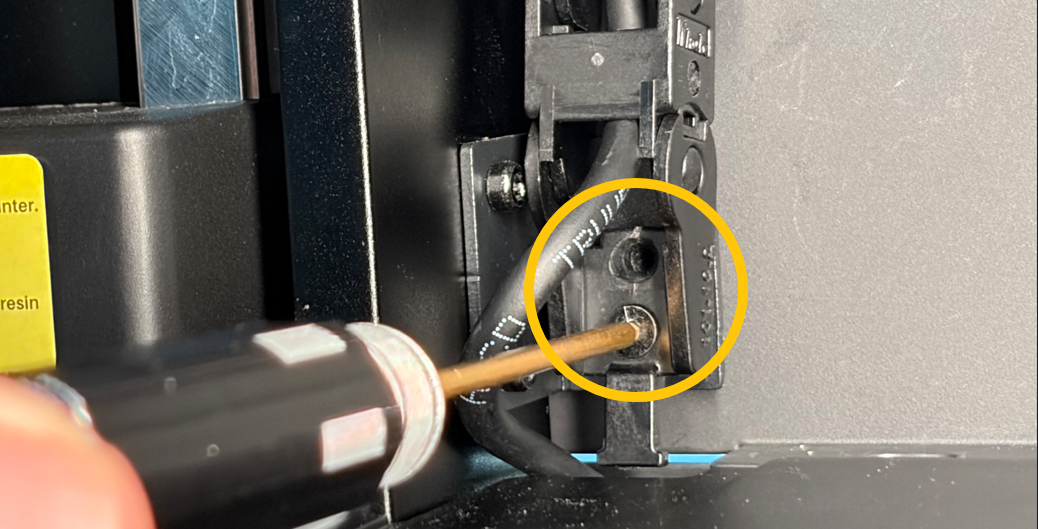
3. Use a 2.0 mm hex screwdriver to remove the two screws at the lower drag chain section.
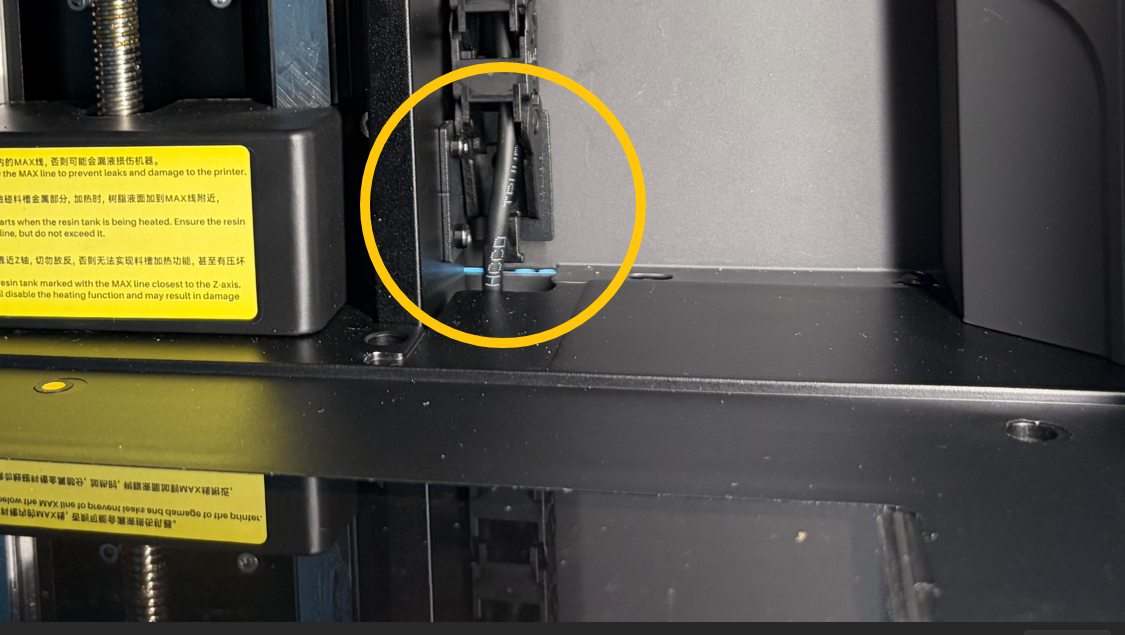
¶ 5. Platform Components
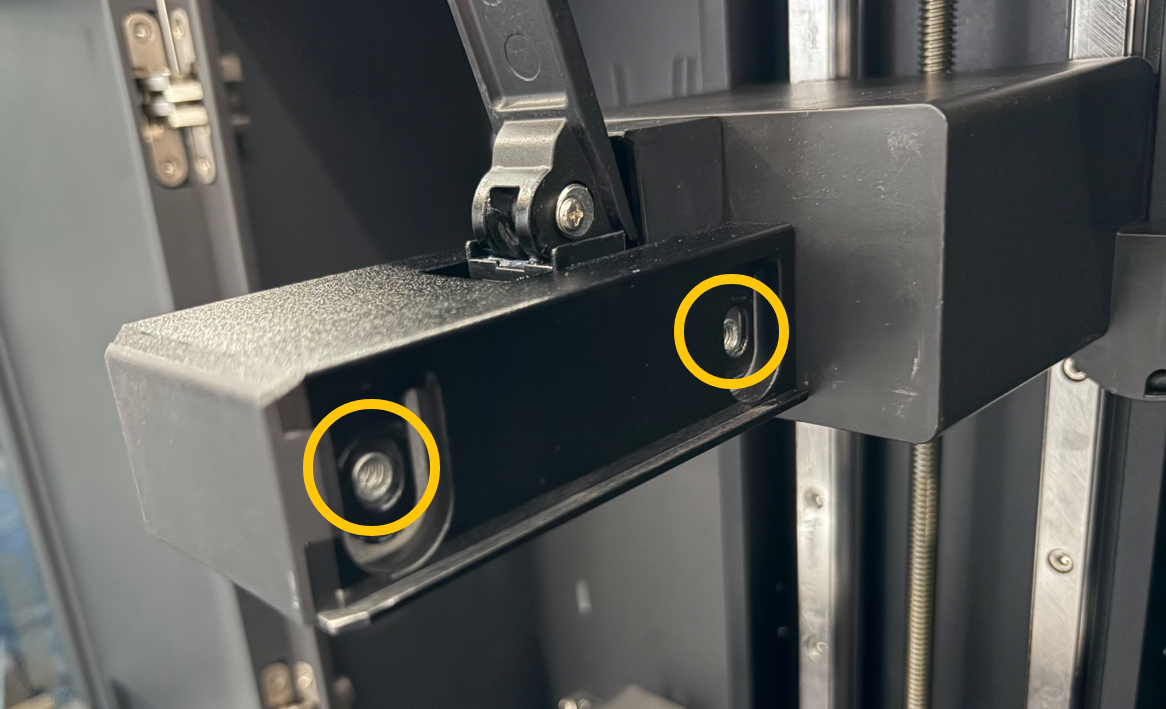
- Use a 3.0 mm hex screwdriver to remove the two screws on the right side of the arm.
- Remove the locking bolts, screws, and washers.
Note: If the screws are difficult to remove, use a hair dryer to heat the marked area for 3–5 minutes. After heating, avoid touching the arm directly. Wear heat-resistant gloves.
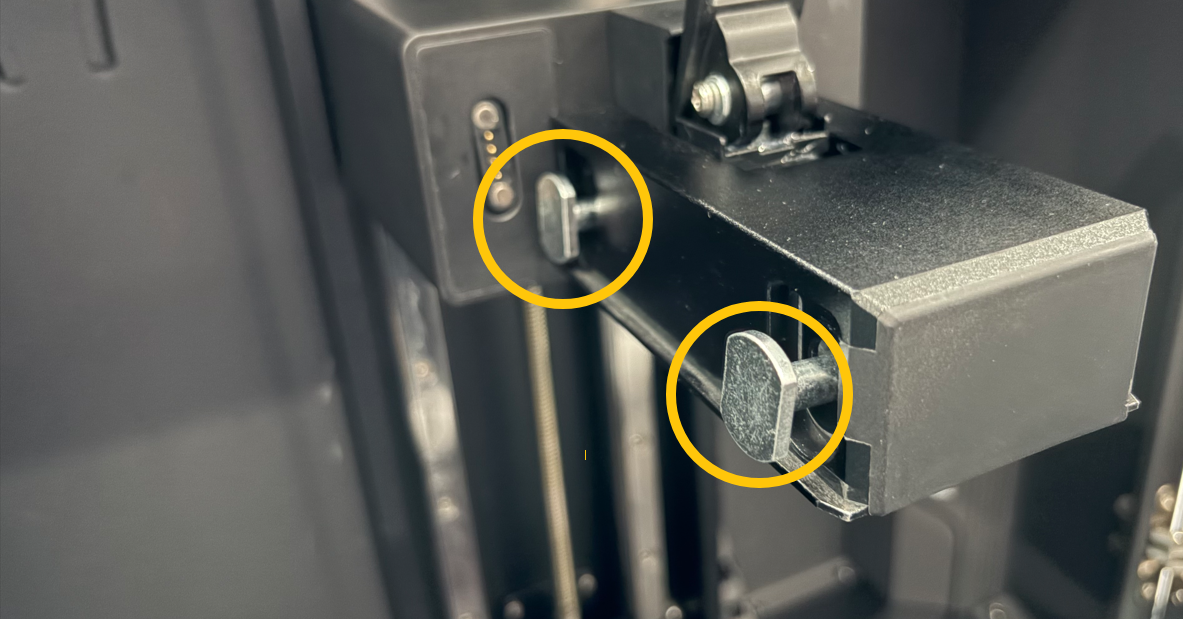
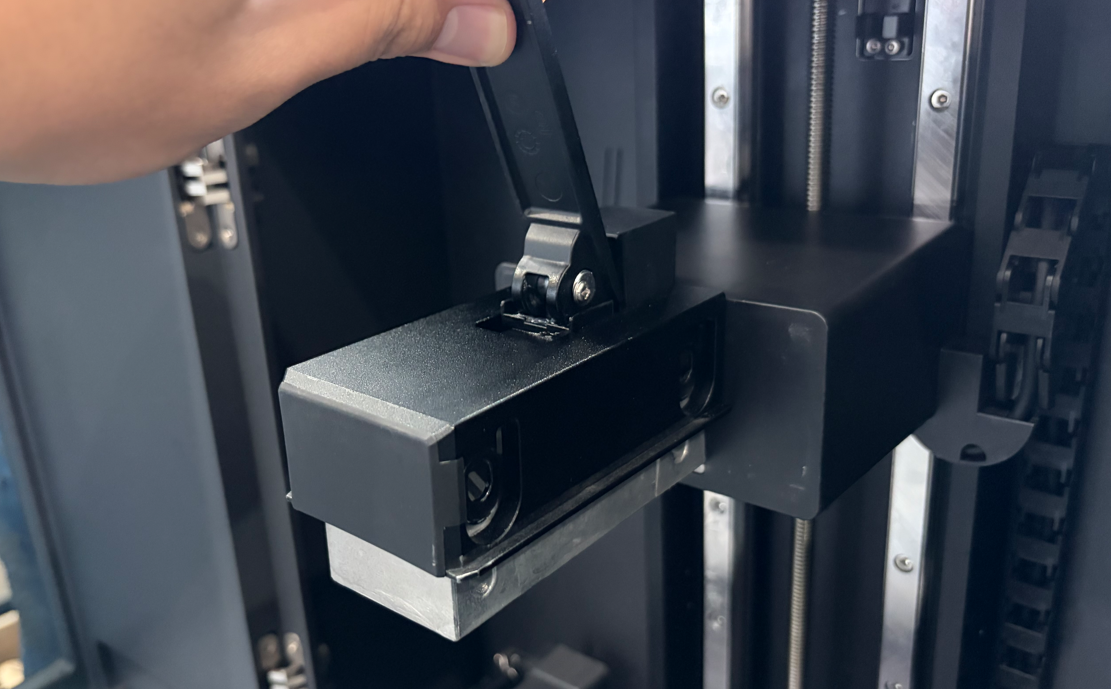
3. Lift and remove the platform assembly.
¶ 6. External Housing
-
Use a 2.0 mm hex screwdriver to remove the screws securing the connector housing.
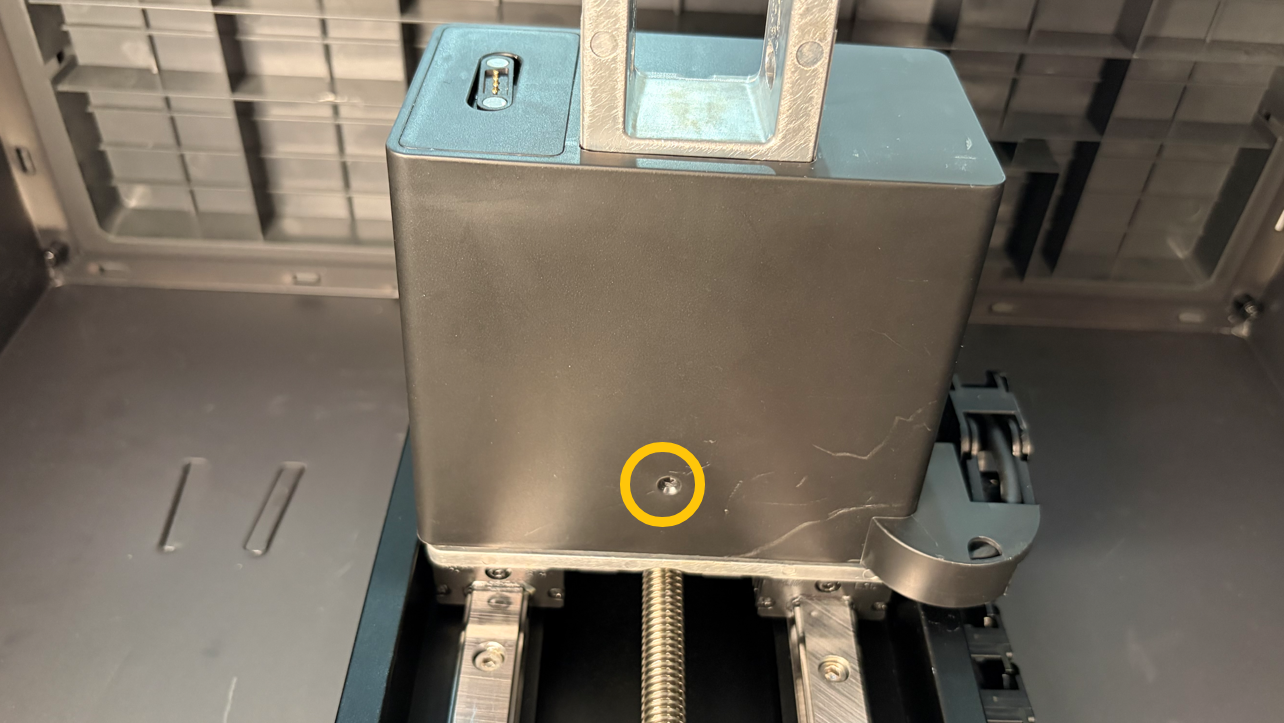
-
Remove the housing and drag chain.
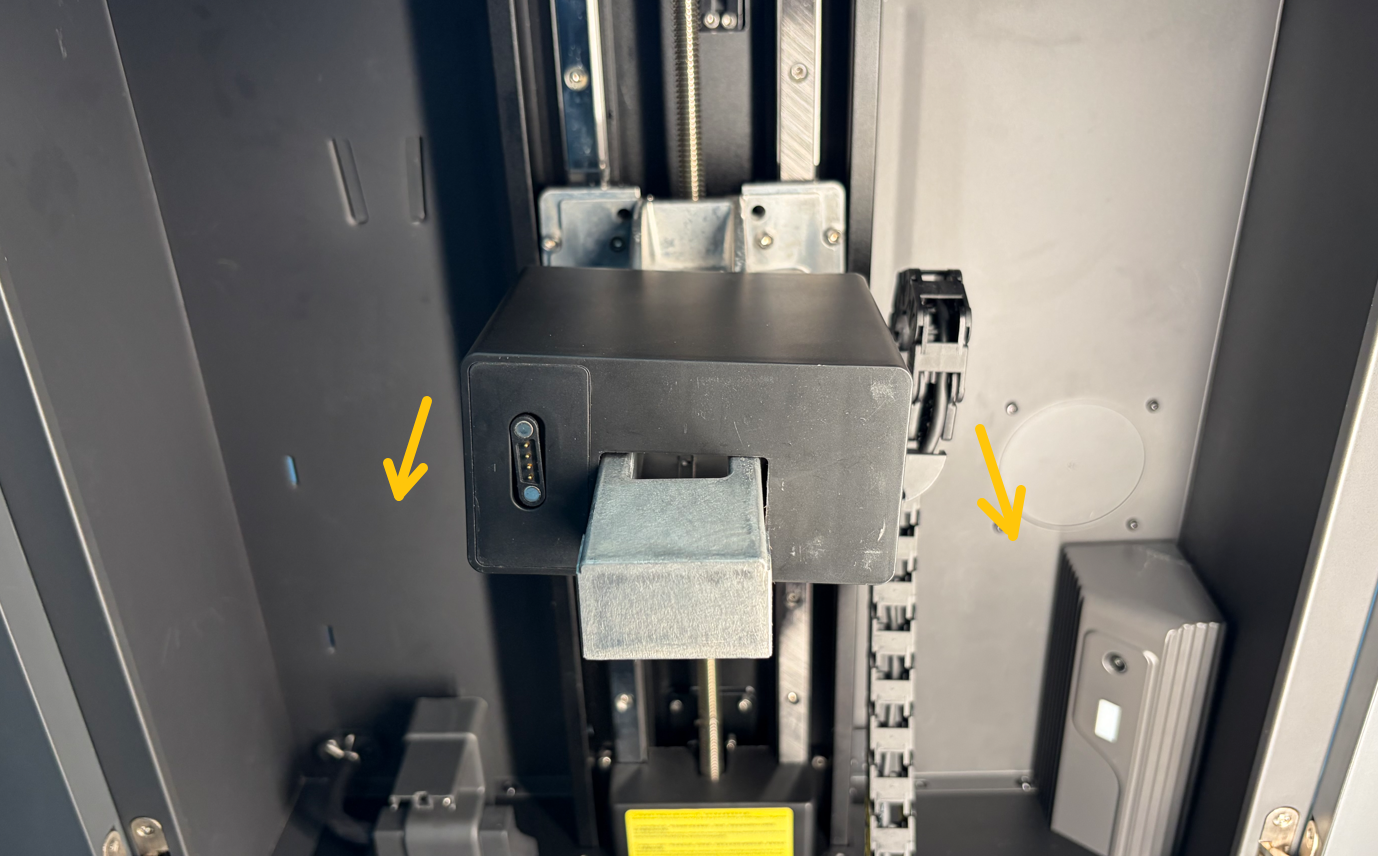
-
Use a 2.0 mm hex screwdriver to remove the two upper drag chain screws.
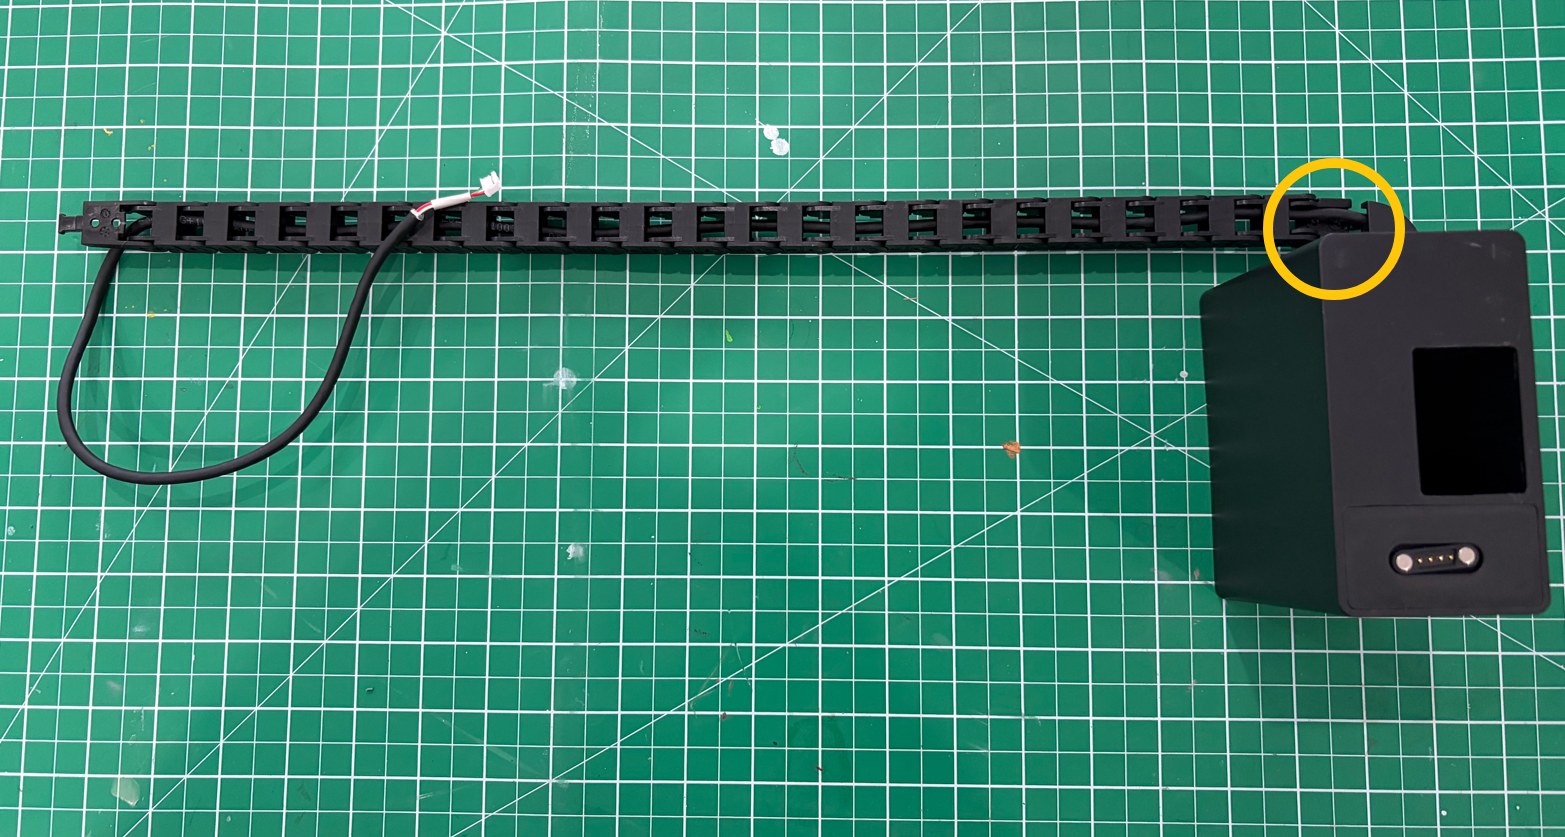
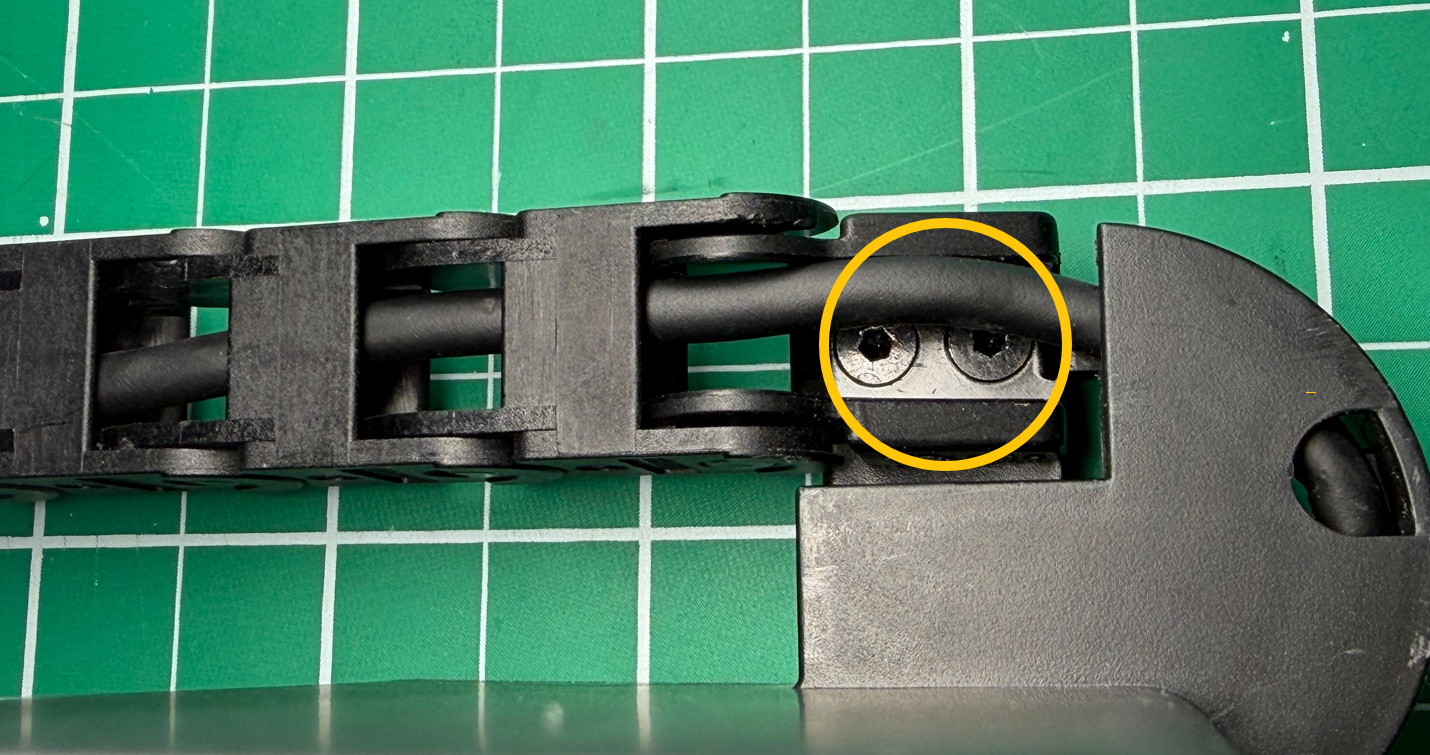
-
Extracting the cable
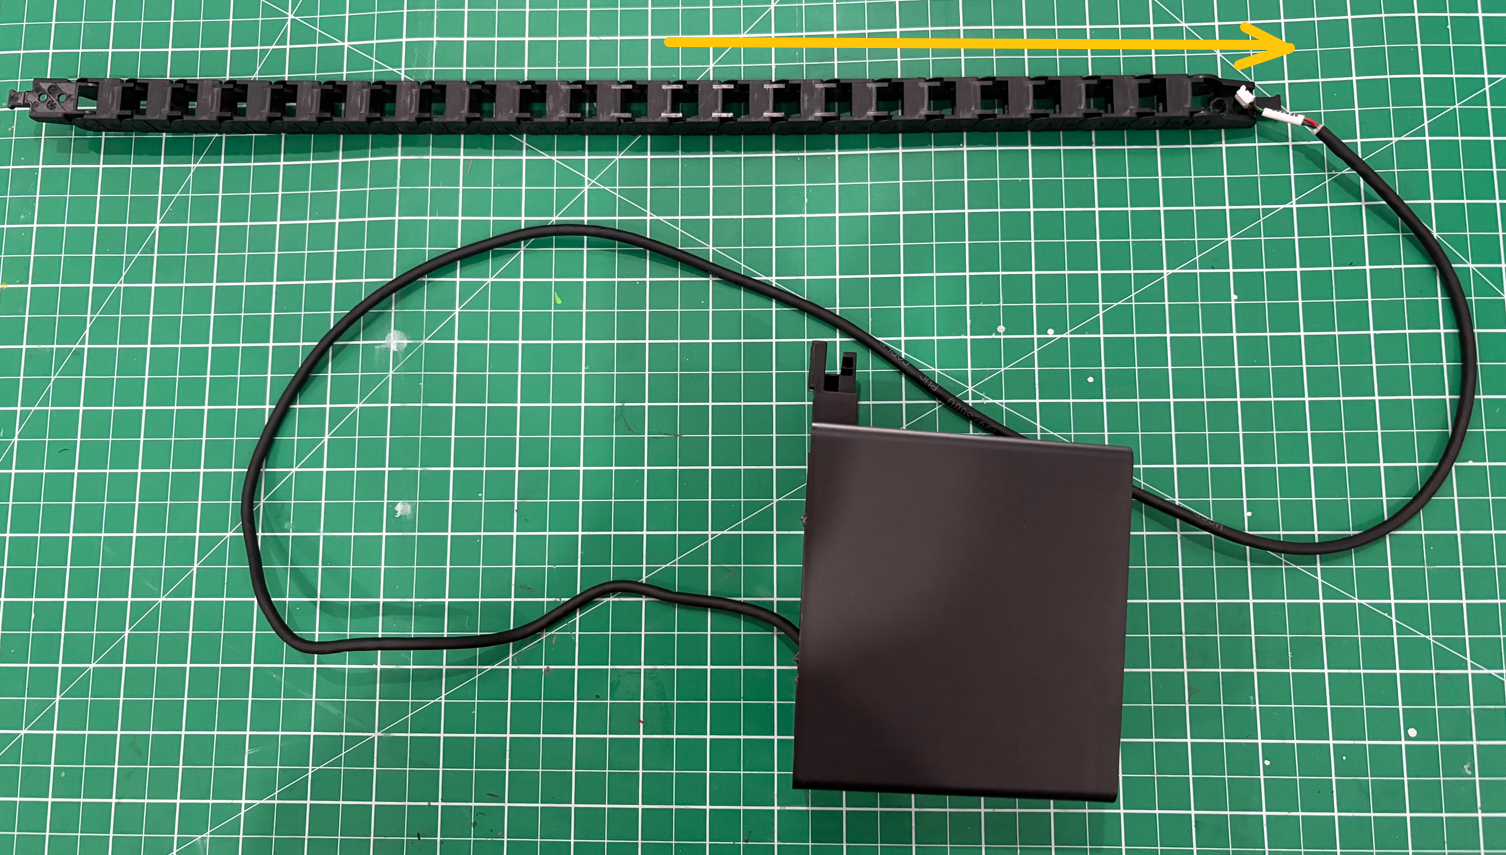
-
Remove the two screws securing the magnetic connector fixing bracket.
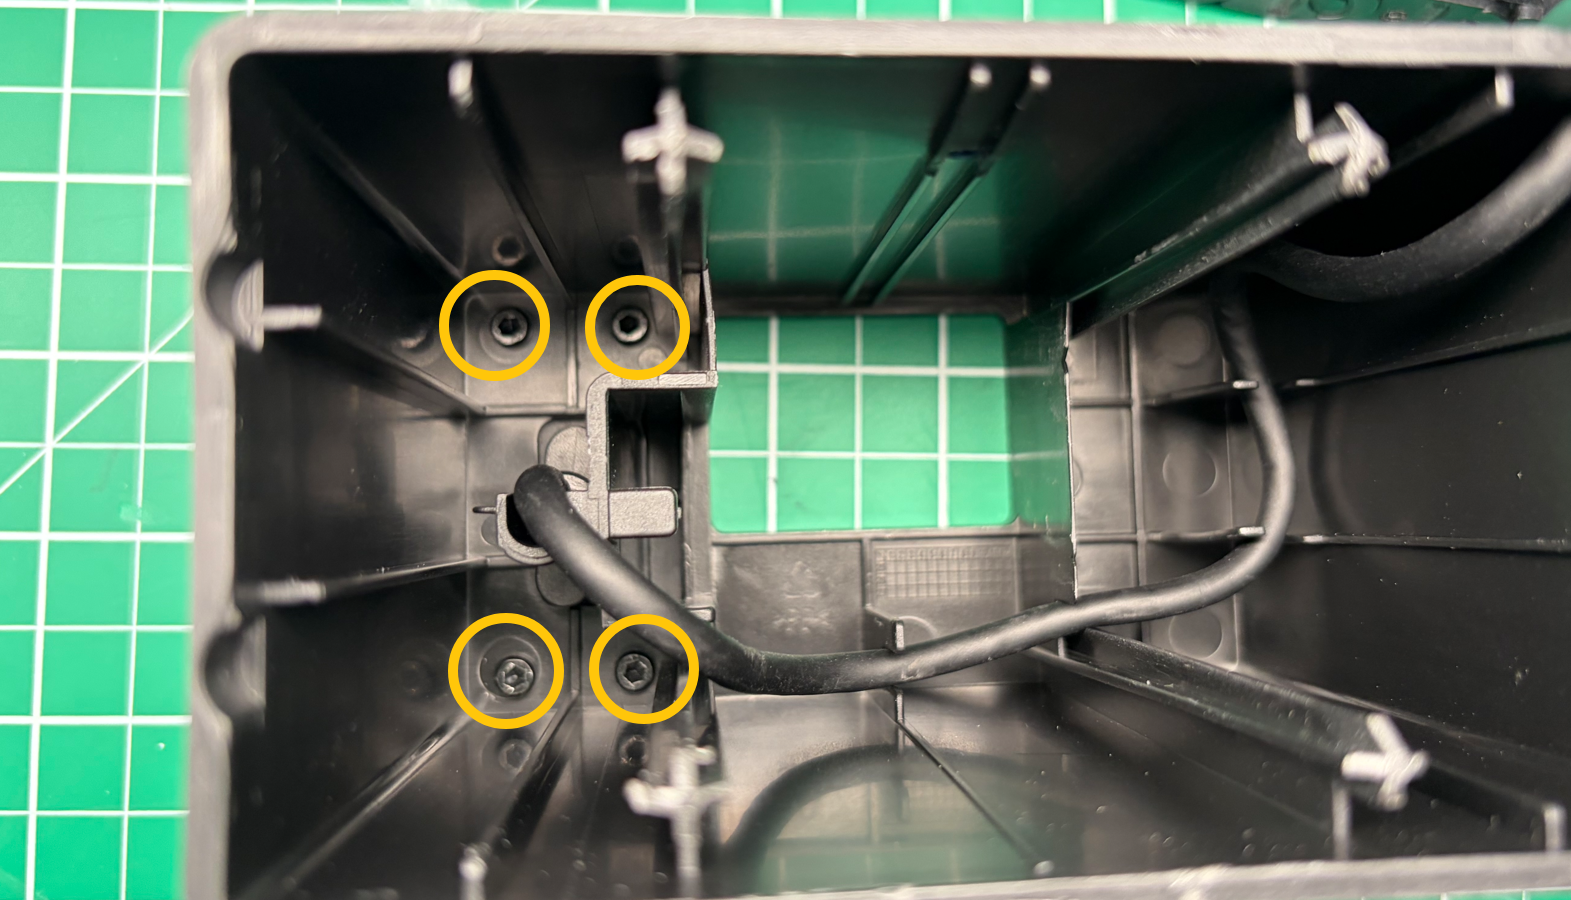
-
Push the yellow copper nut outward until the fixing bracket detaches.
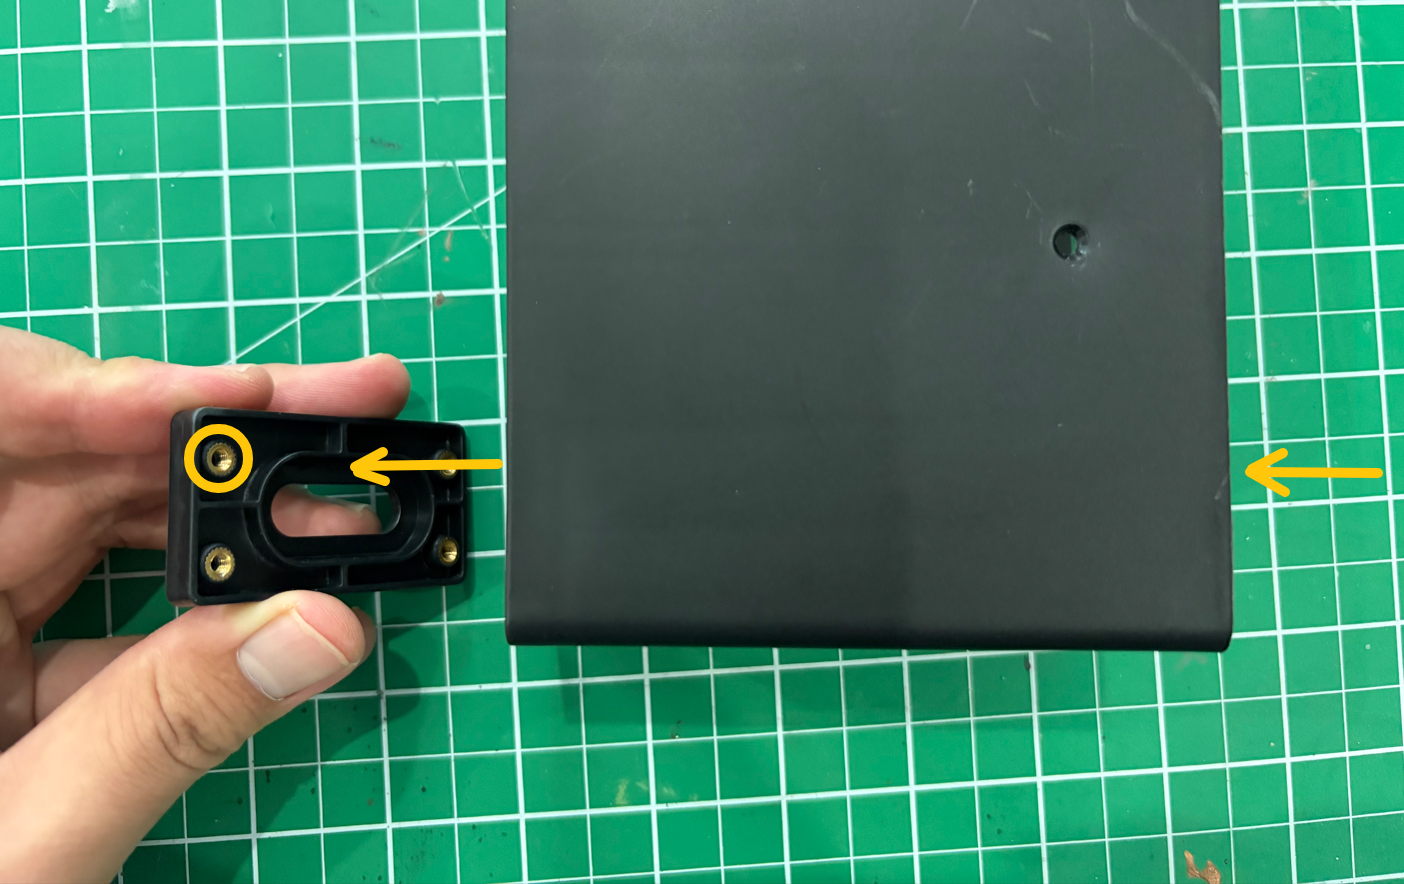
-
Pull the cable out along the marked direction.
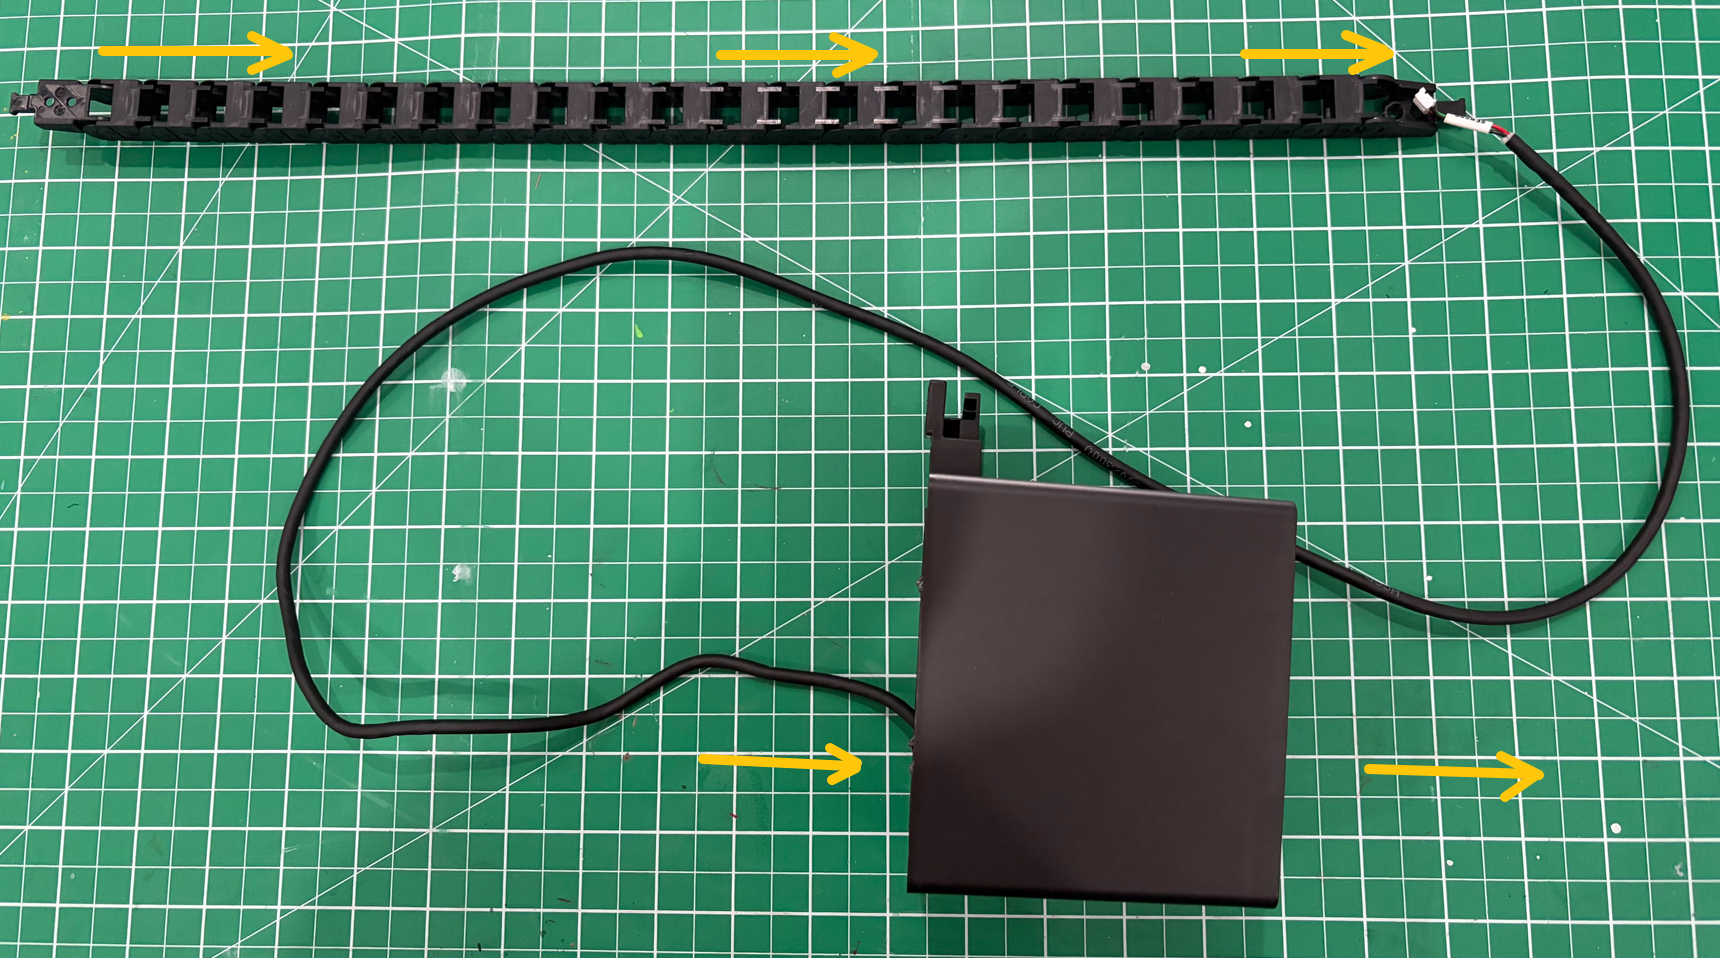
¶ Installation
¶ 1. Cable Routing
Insert the white connector of the cable through the connector housing from the outside.
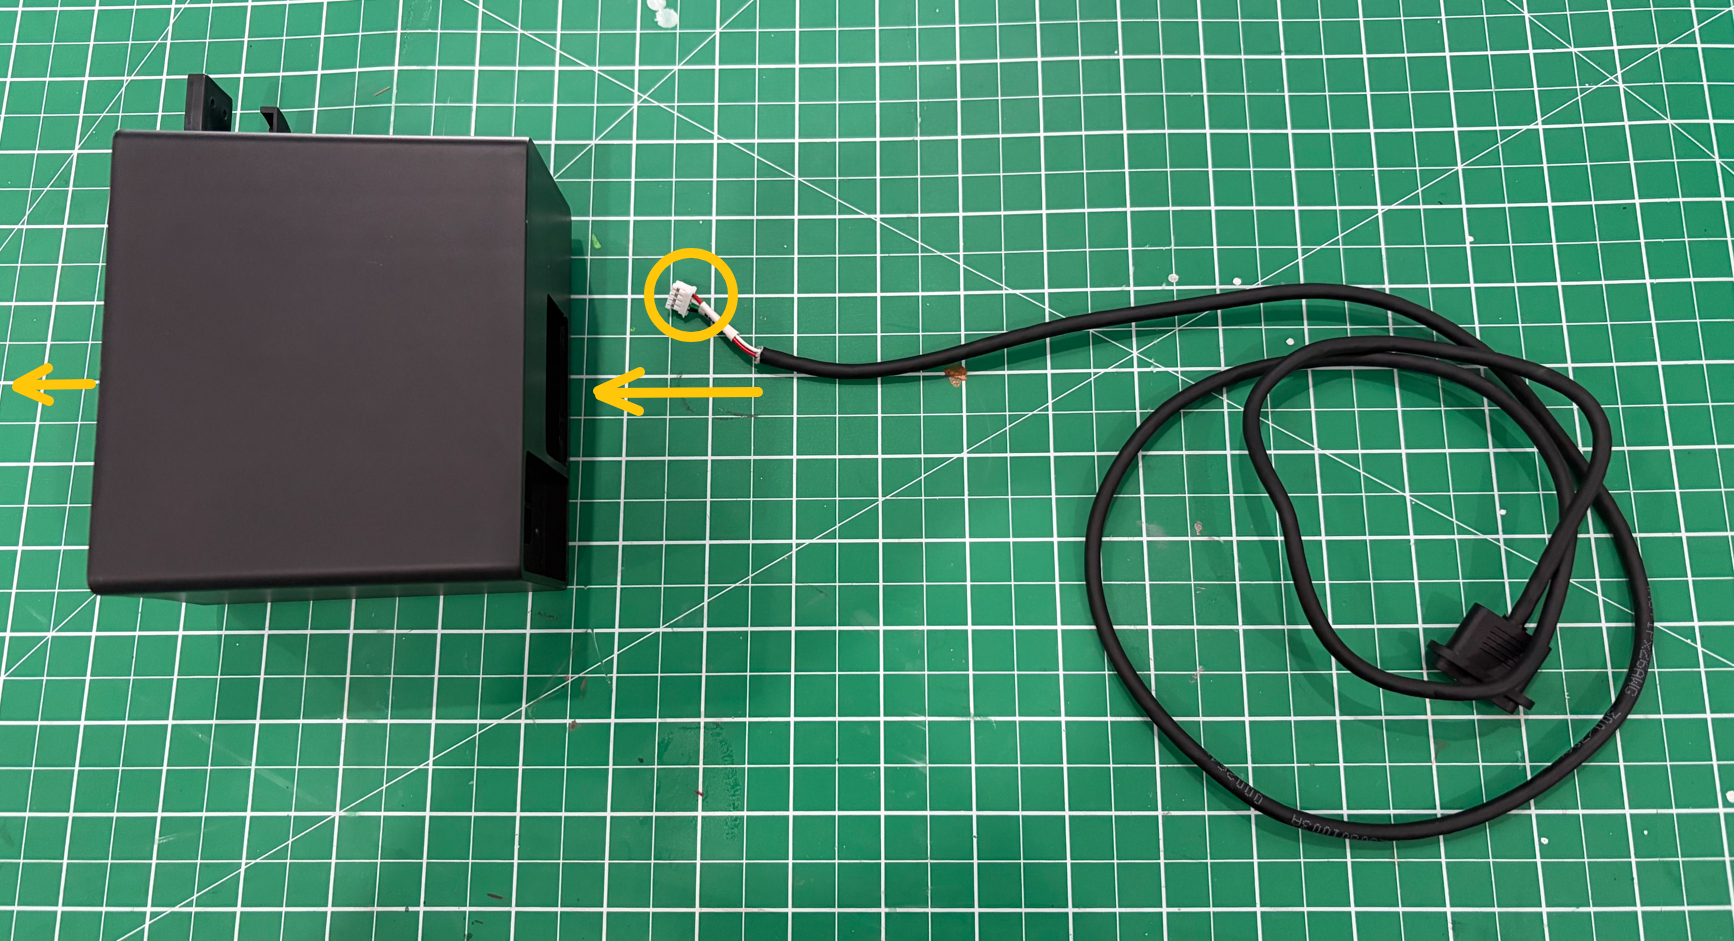
Notes:
-
The white connector must pass through the cable channel.
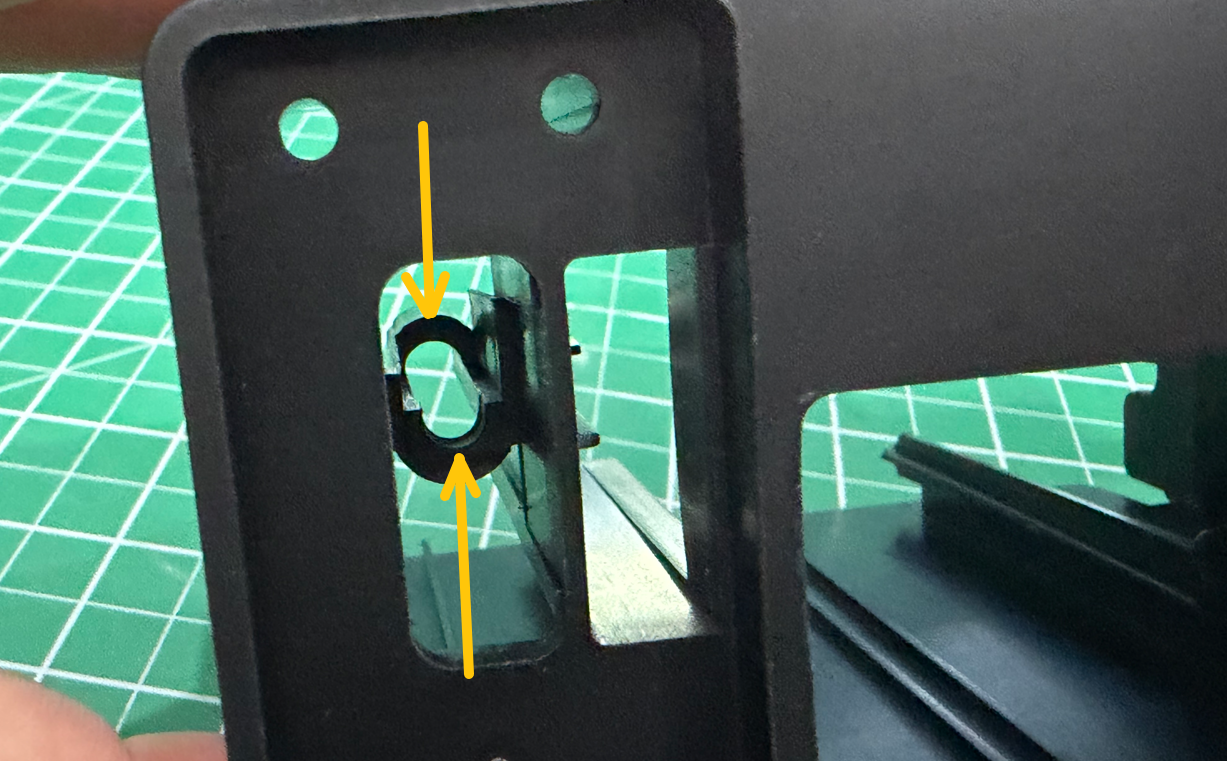
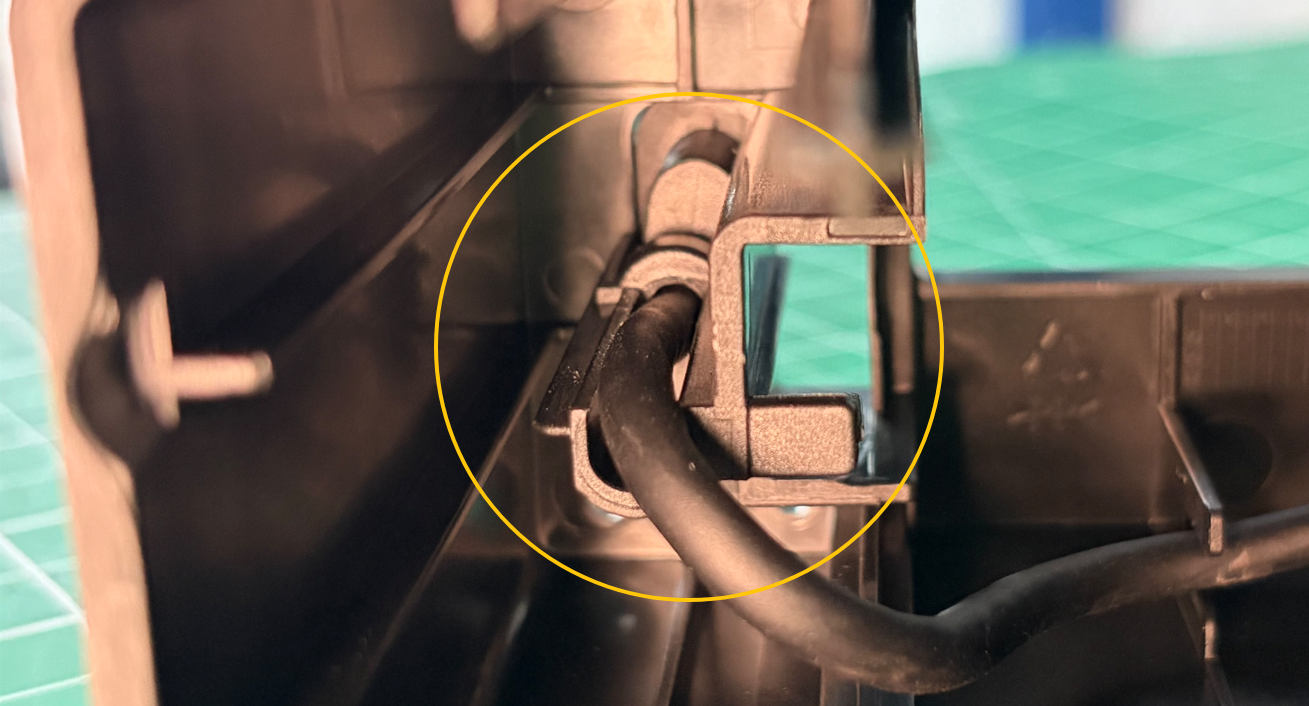
-
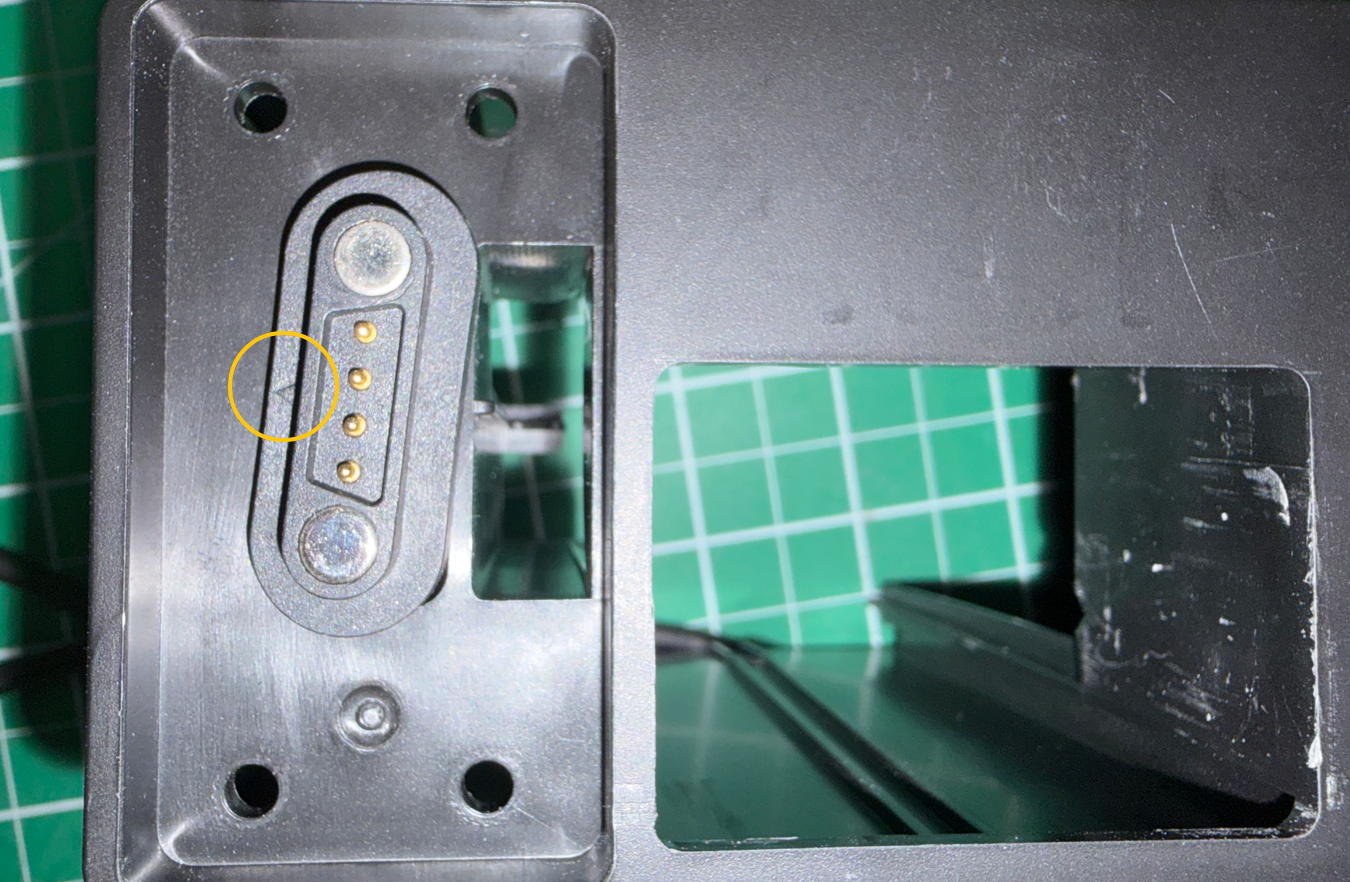
The arrow must face left.
¶ 2. External Housing
- Reinstall the magnetic connector fixing bracket in its original position.
Note: The arrow must face left.
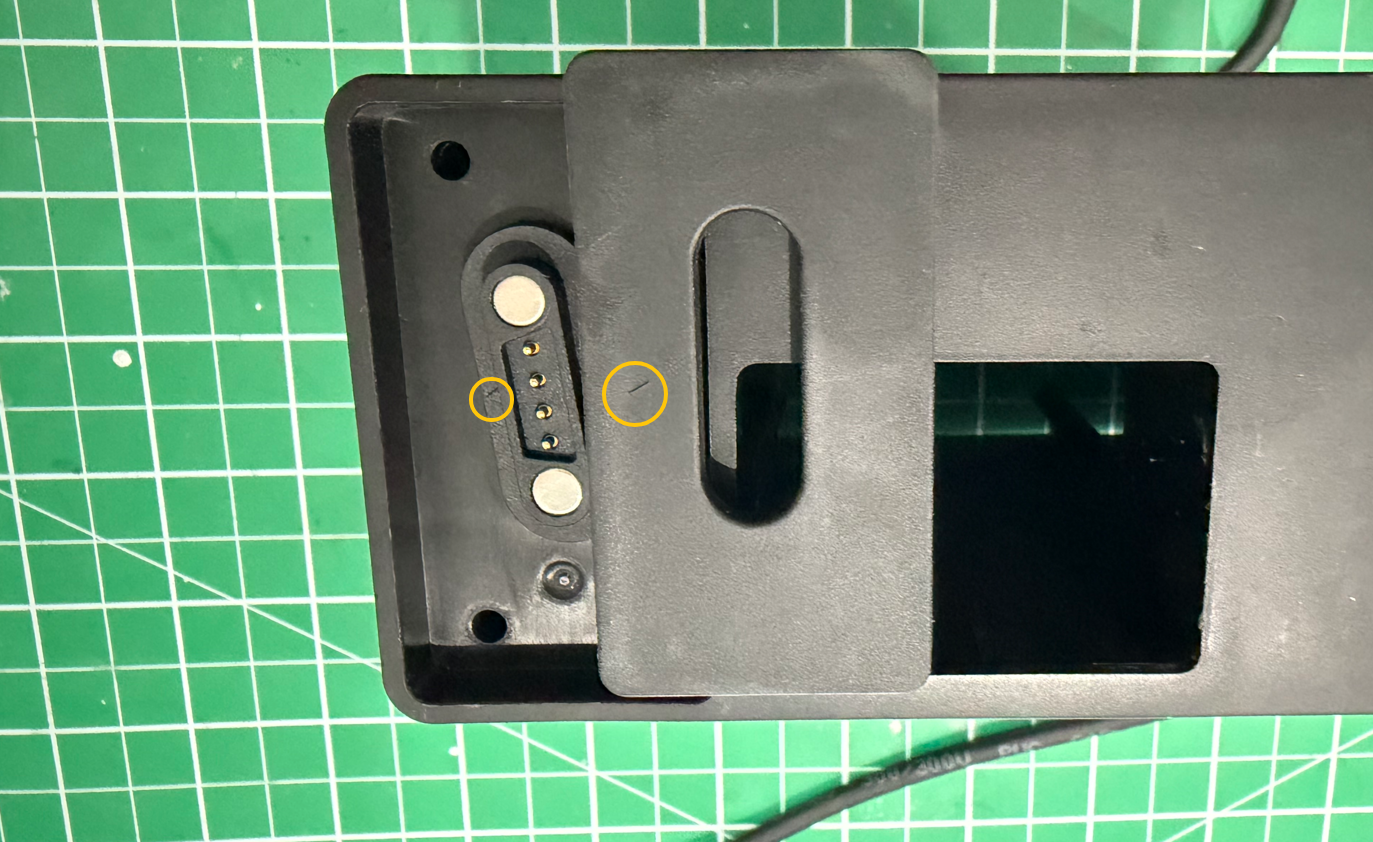
- Place the cable into the housing cable channel.
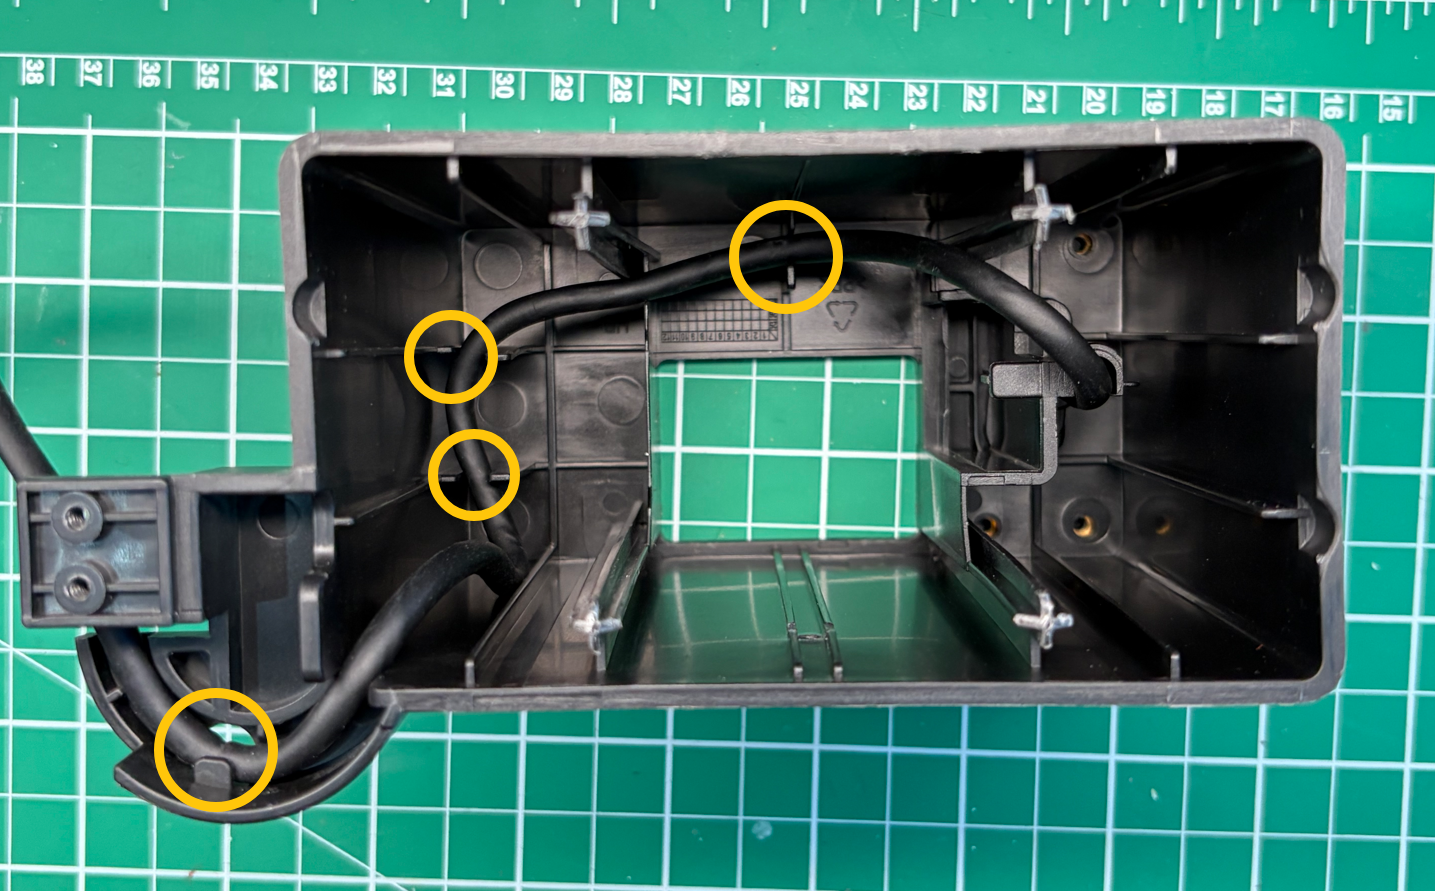
- Tighten the four screws.
- Route the white connector into the drag chain.
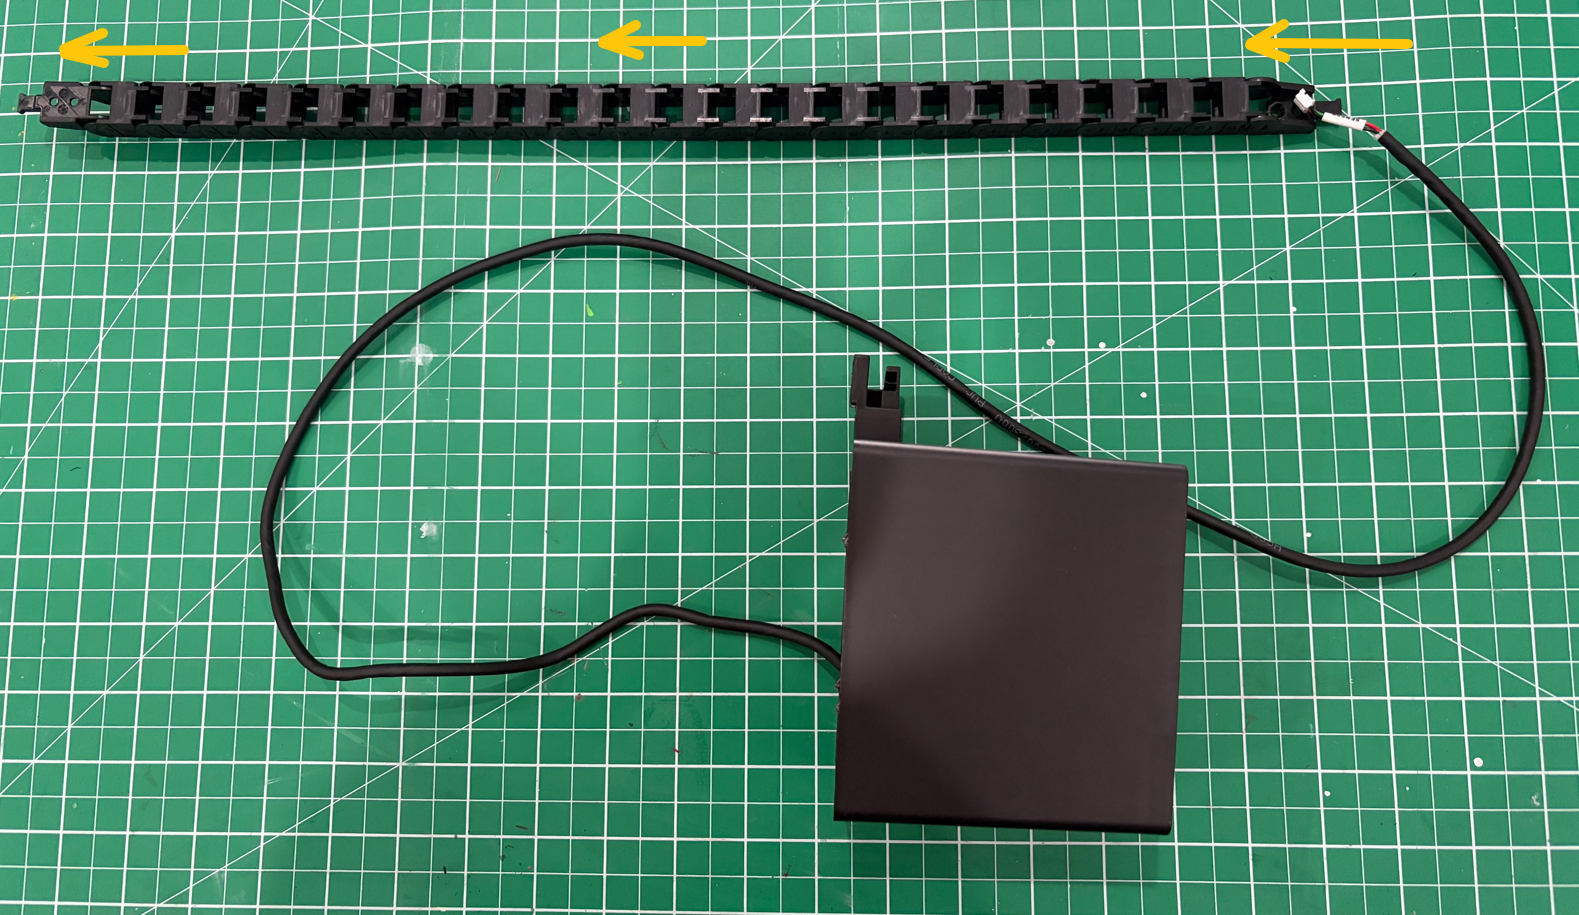
Note: Pay attention to the orientation of the drag chain. If installed incorrectly, it will not rotate properly.
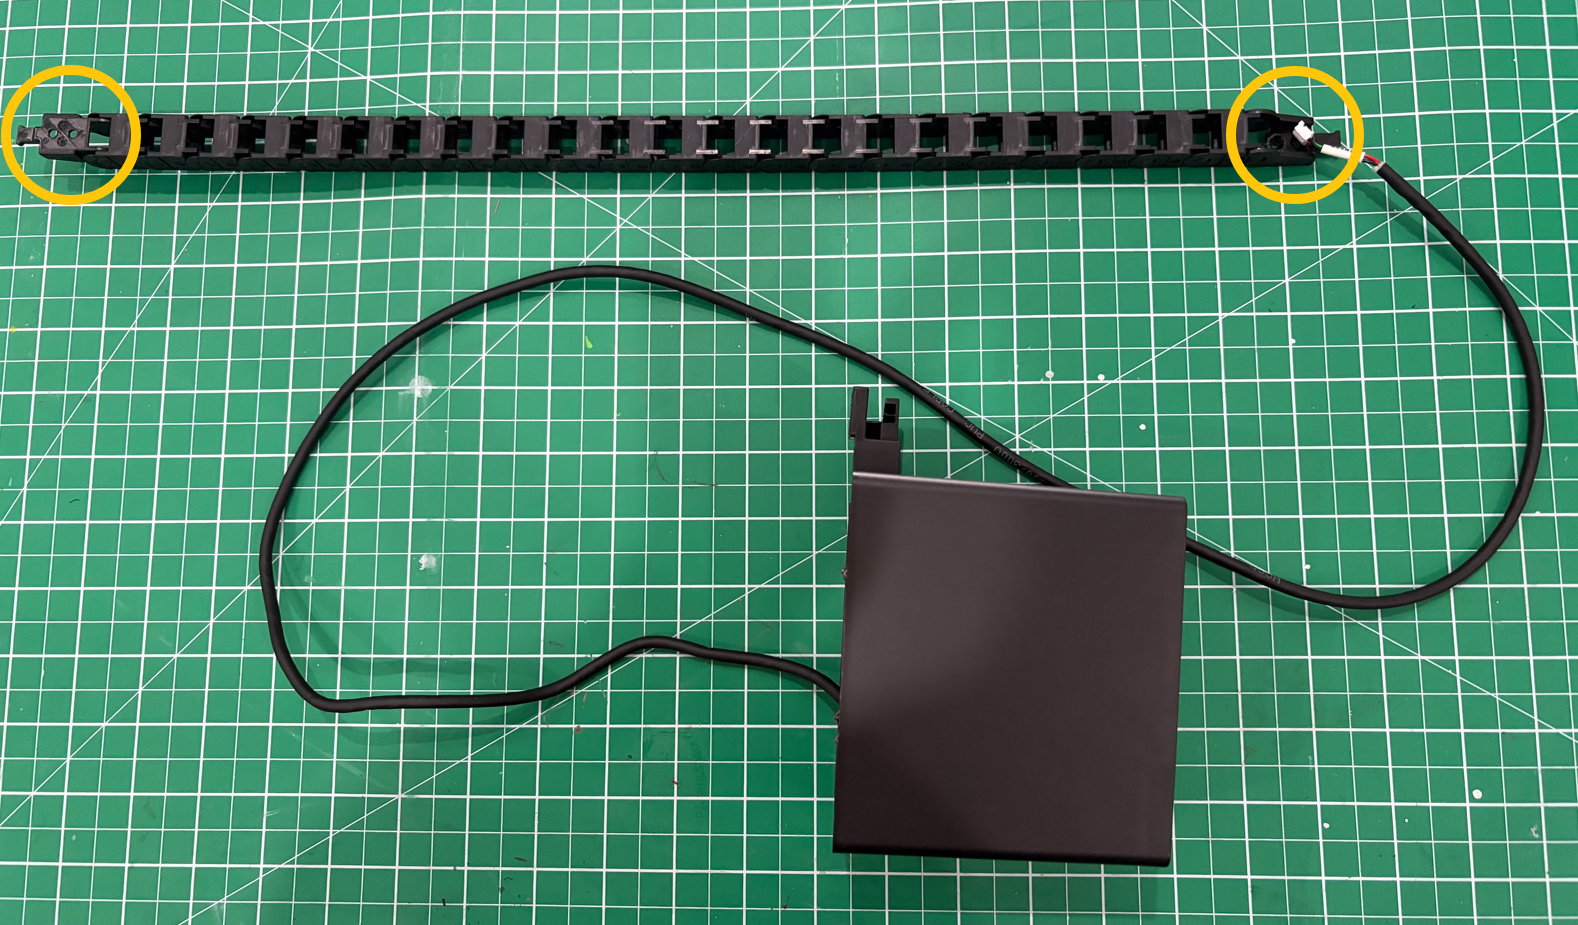
-
Use a 2.0 mm hex screwdriver to tighten the two screws securing the drag chain on one side of the arm.
-
Confirm the drag chain moves freely.
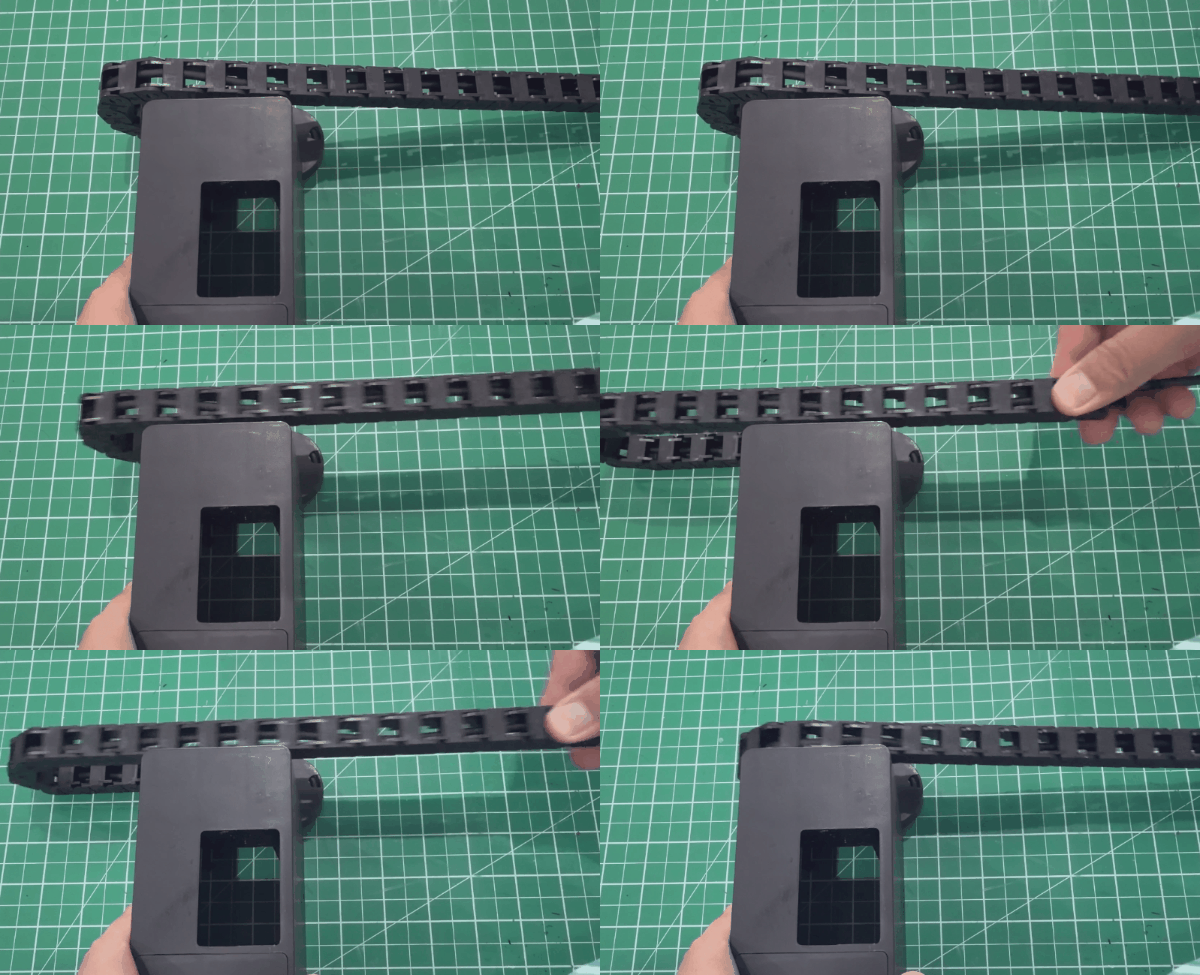
- Reinstall the connector housing and drag chain assembly.
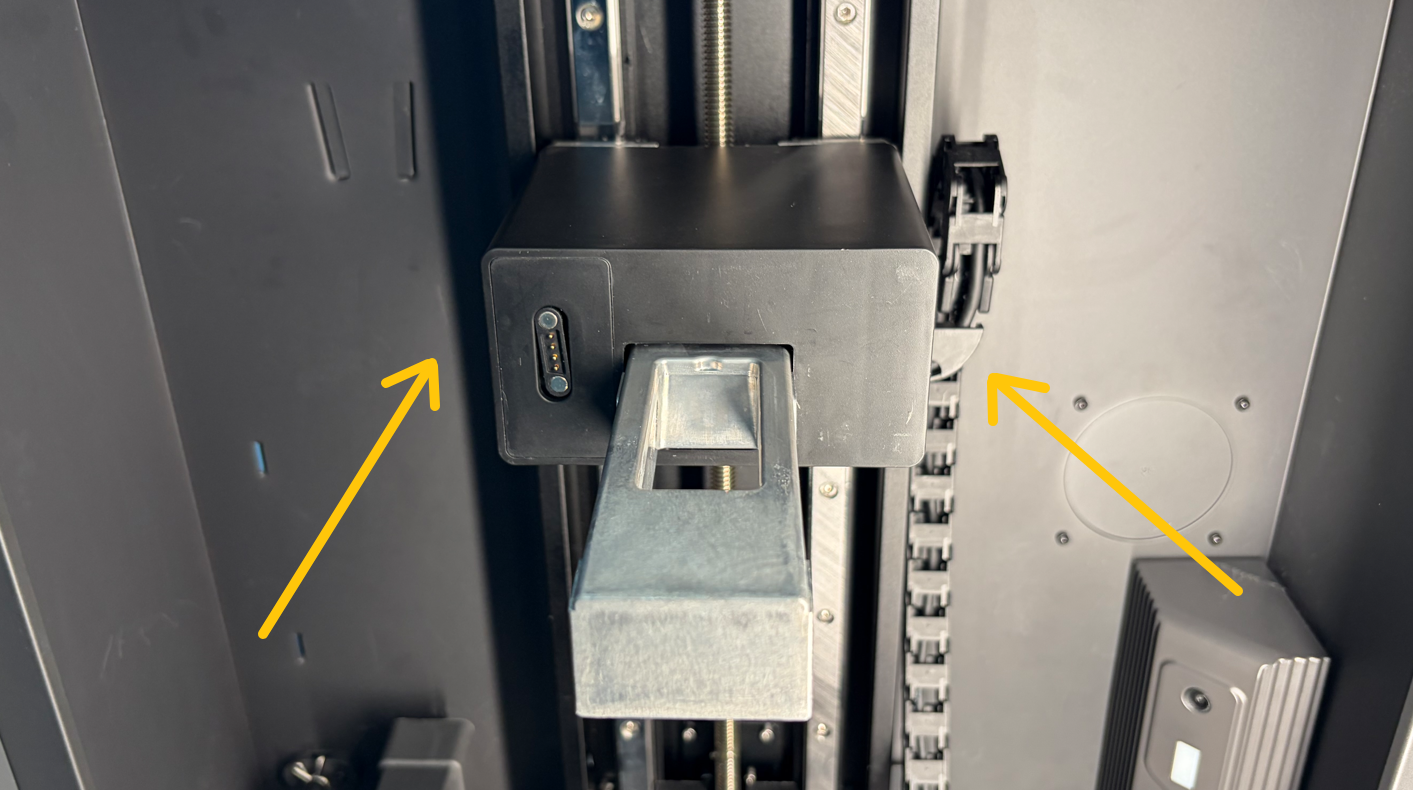
- Tighten the housing screws.
¶ 3. Drag Chain Cover
- Reinstall the drag chain cover.
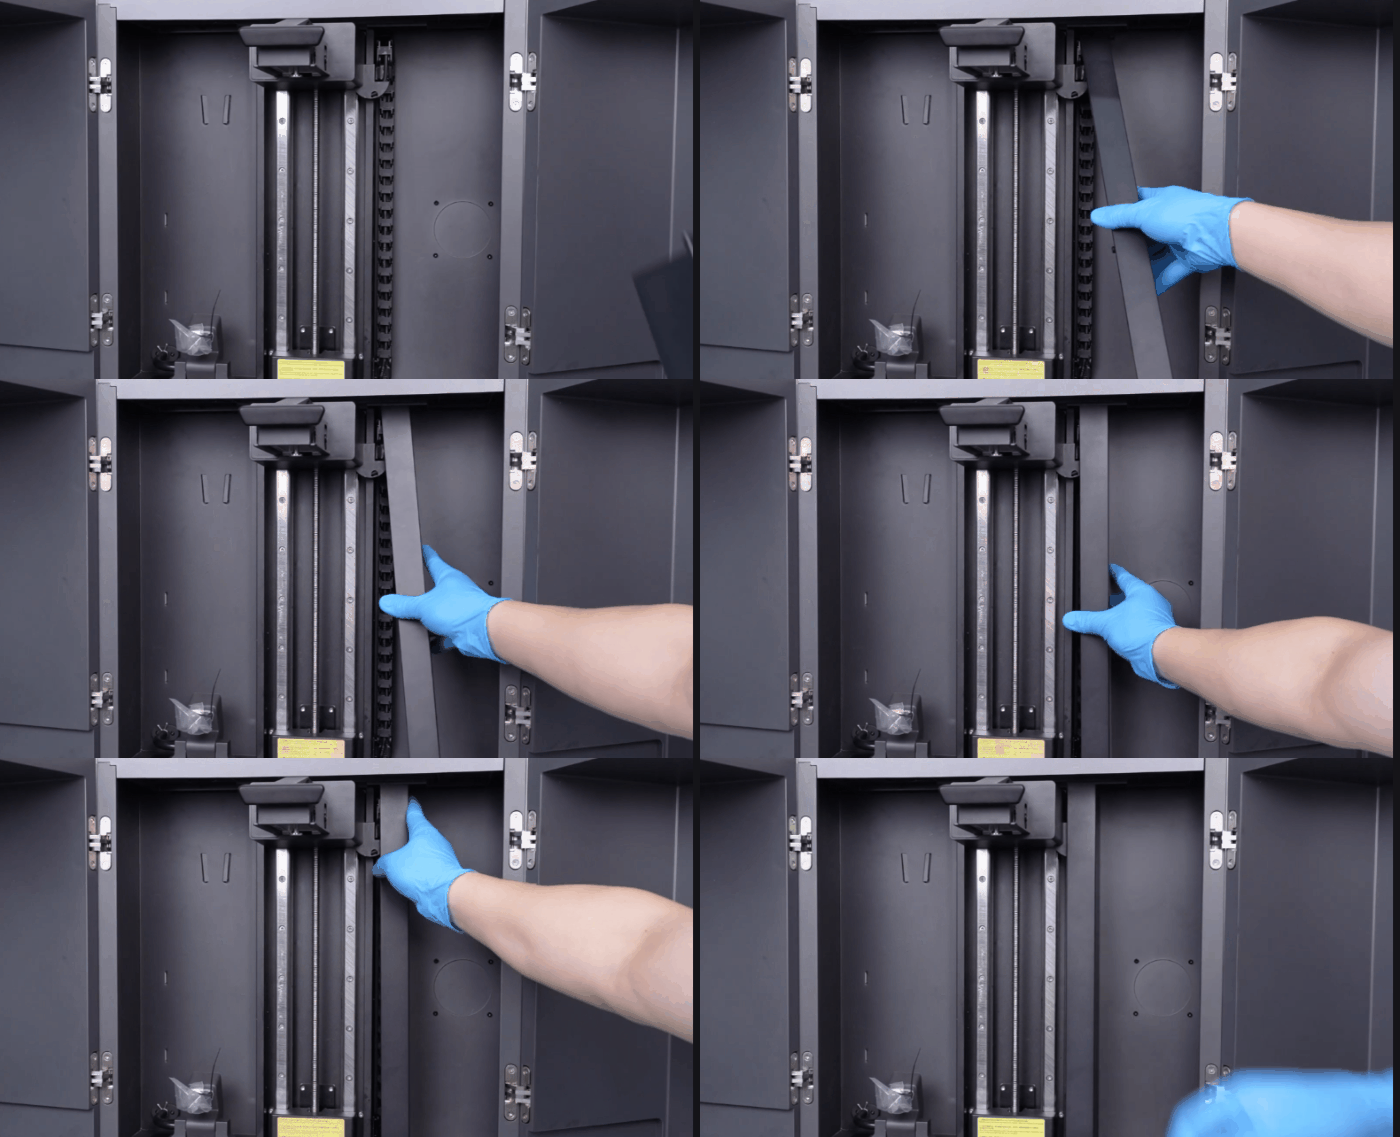
- Tighten the three screws.
¶ 4. Platform Components
- Place the platform assembly back into position.
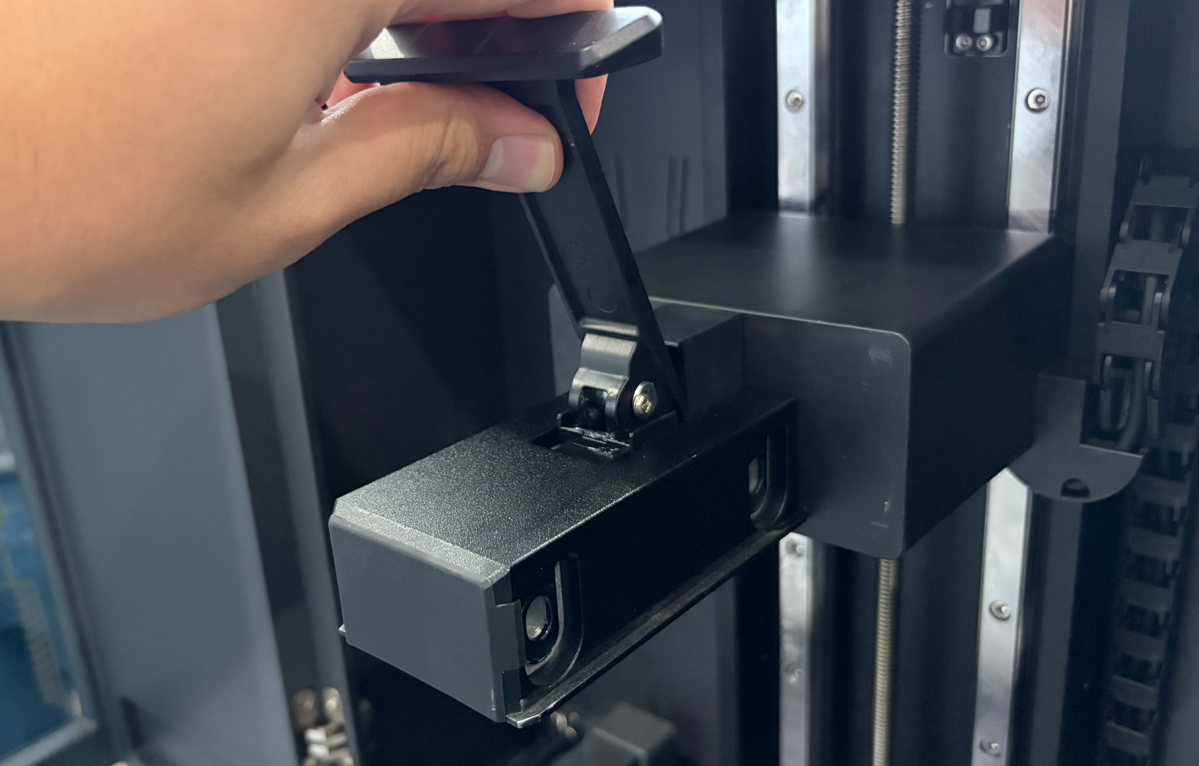
- Install the locking bolt on the left side of the arm.
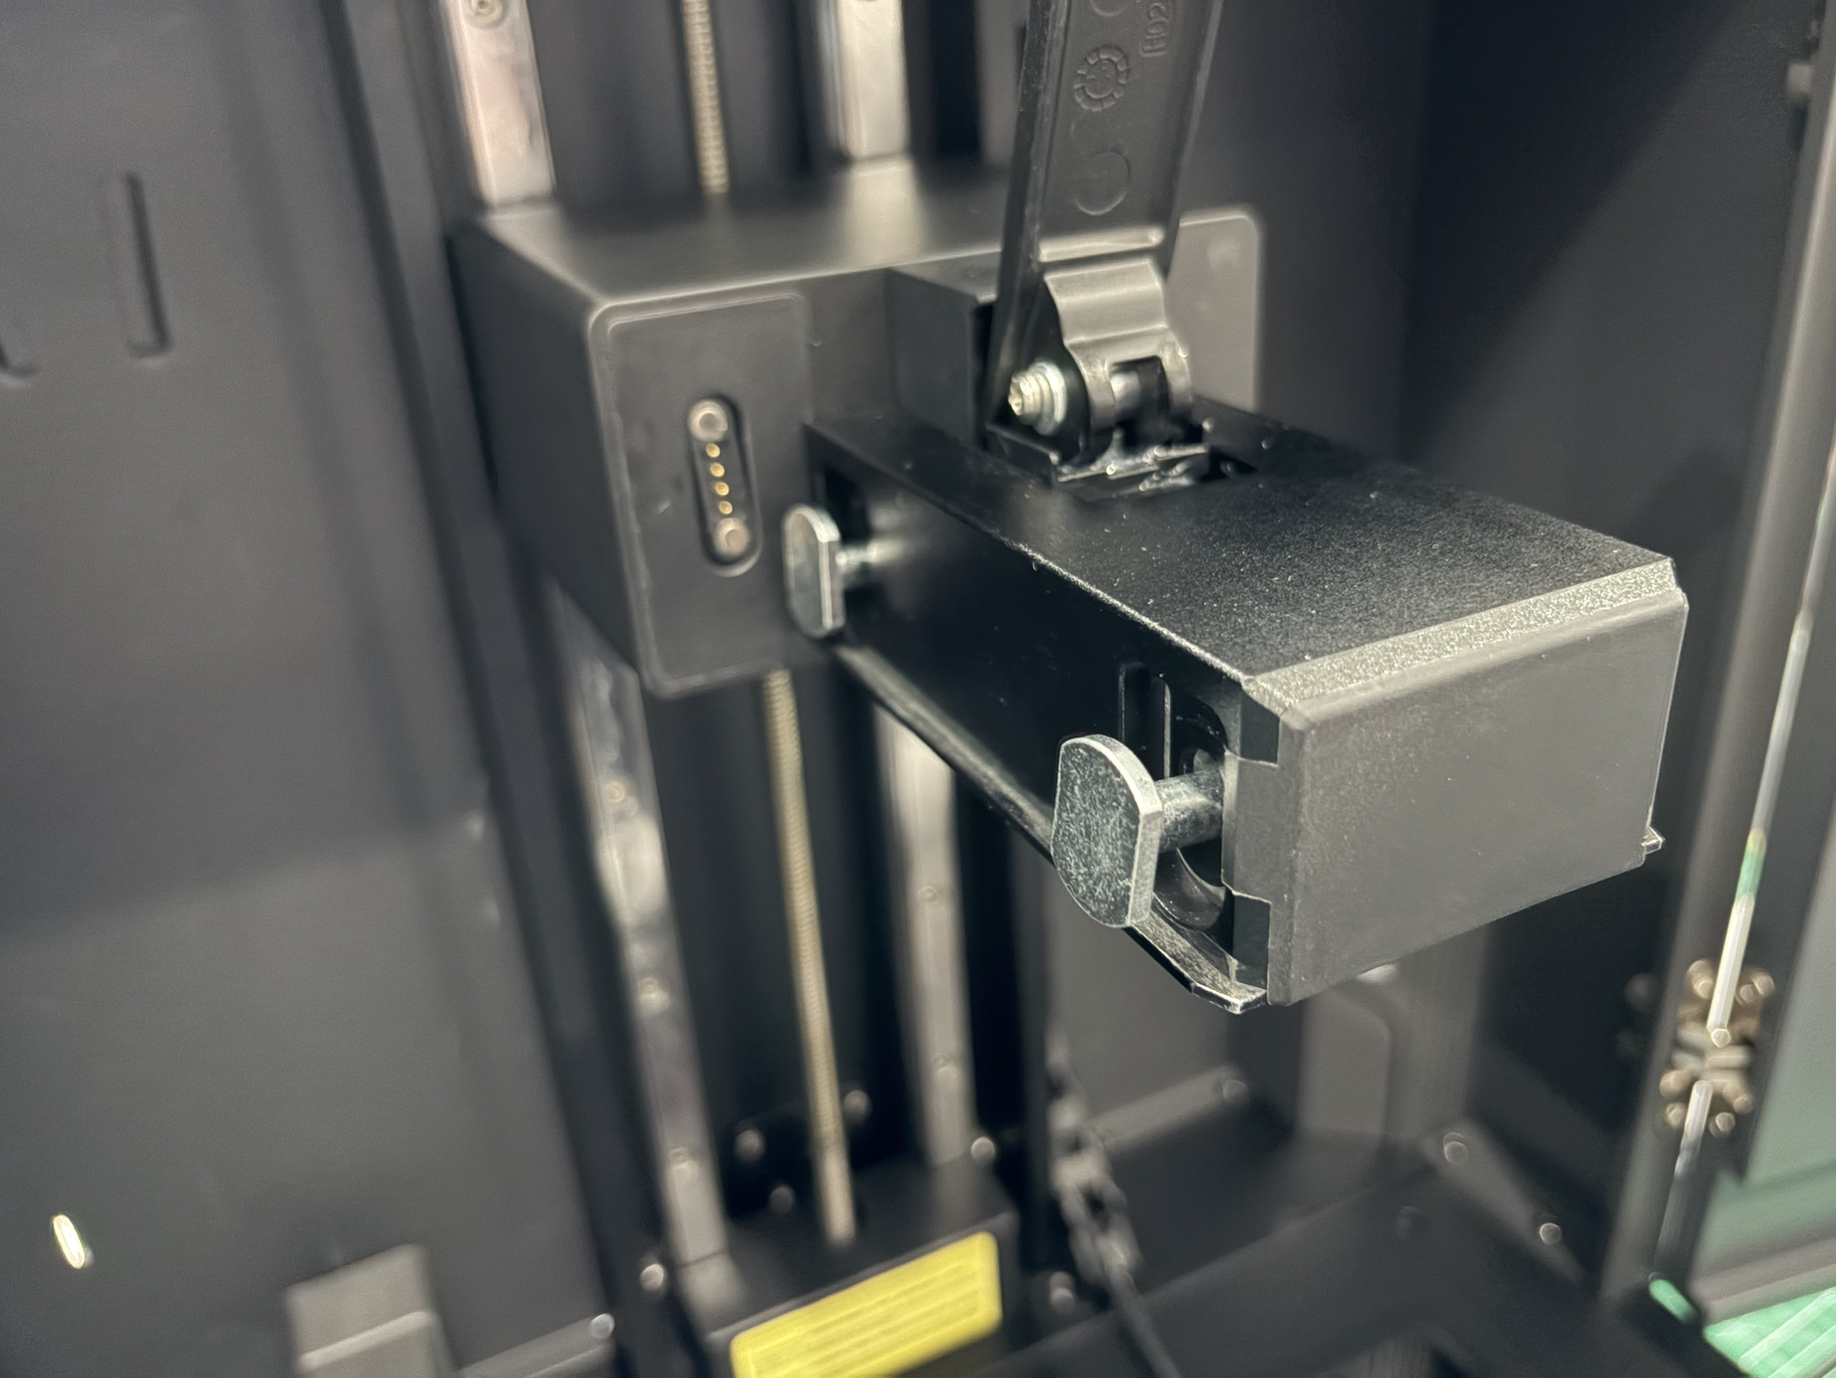
- Install the screw and washer into the locking nut.
Note: The arm still needs to be calibrated later, so do not fully tighten the screws for now.
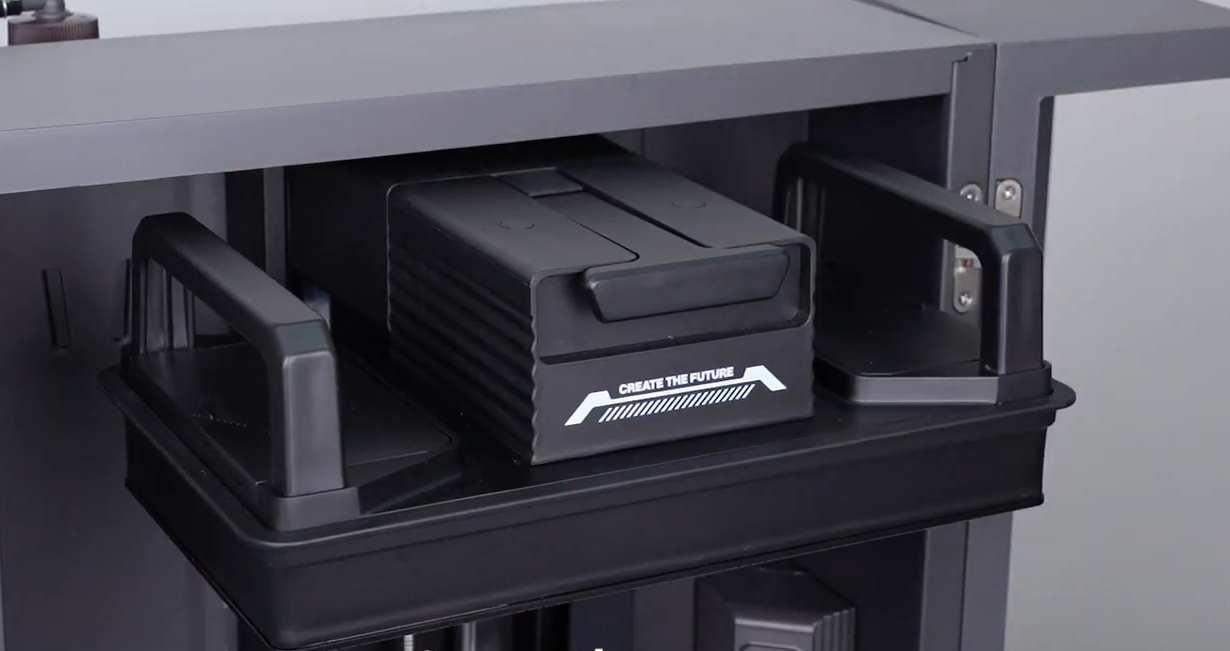
¶ 5. Build Plate
Reinstall the Build Plate.
¶ 6. Mainboard-side Connector
- Reconnect the magnetic tool head cable (SENSOR) to the mainboard port.
- Reinstall the right-side panel and tighten the five screws.
¶ Calibration
¶ 1. Arm Calibration
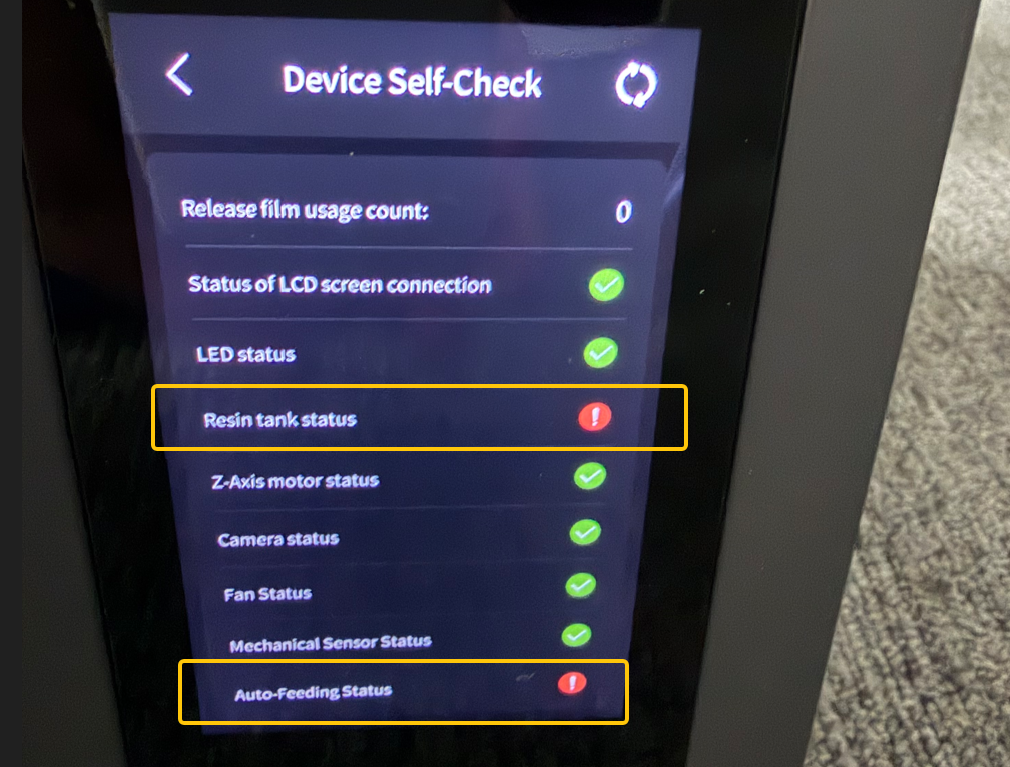
- Plug in the printer power cable and turn on the Power Switch. Wait for self-check and homing.
Note: If the Resin Tank is not installed and the Automatic Resin Feeding and Recycling Module is in the raised position, errors may occur during self-check. Tap Confirm to ignore the error. Then tap the top-left back button to return to the menu screen.
-
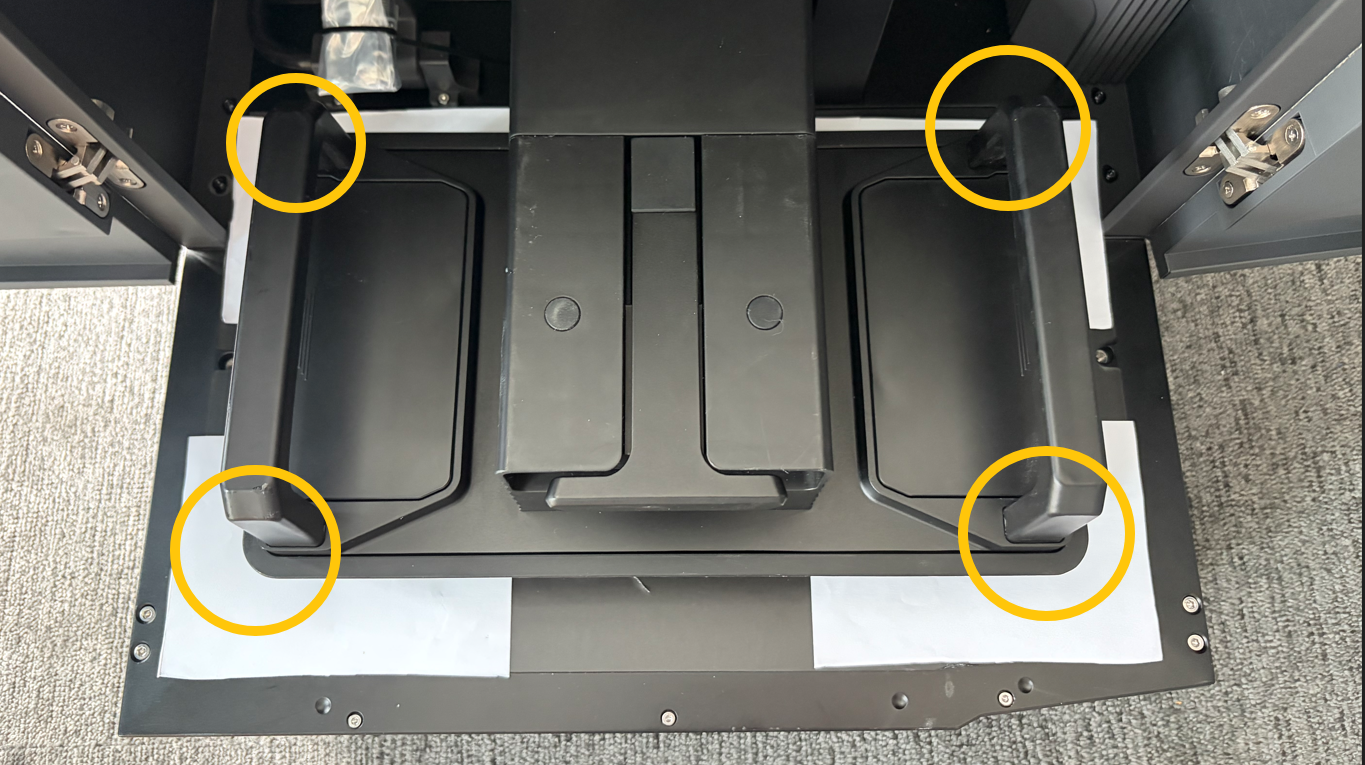
Cut A4 paper into four equal pieces and place them on the four corners of the Build Plate.
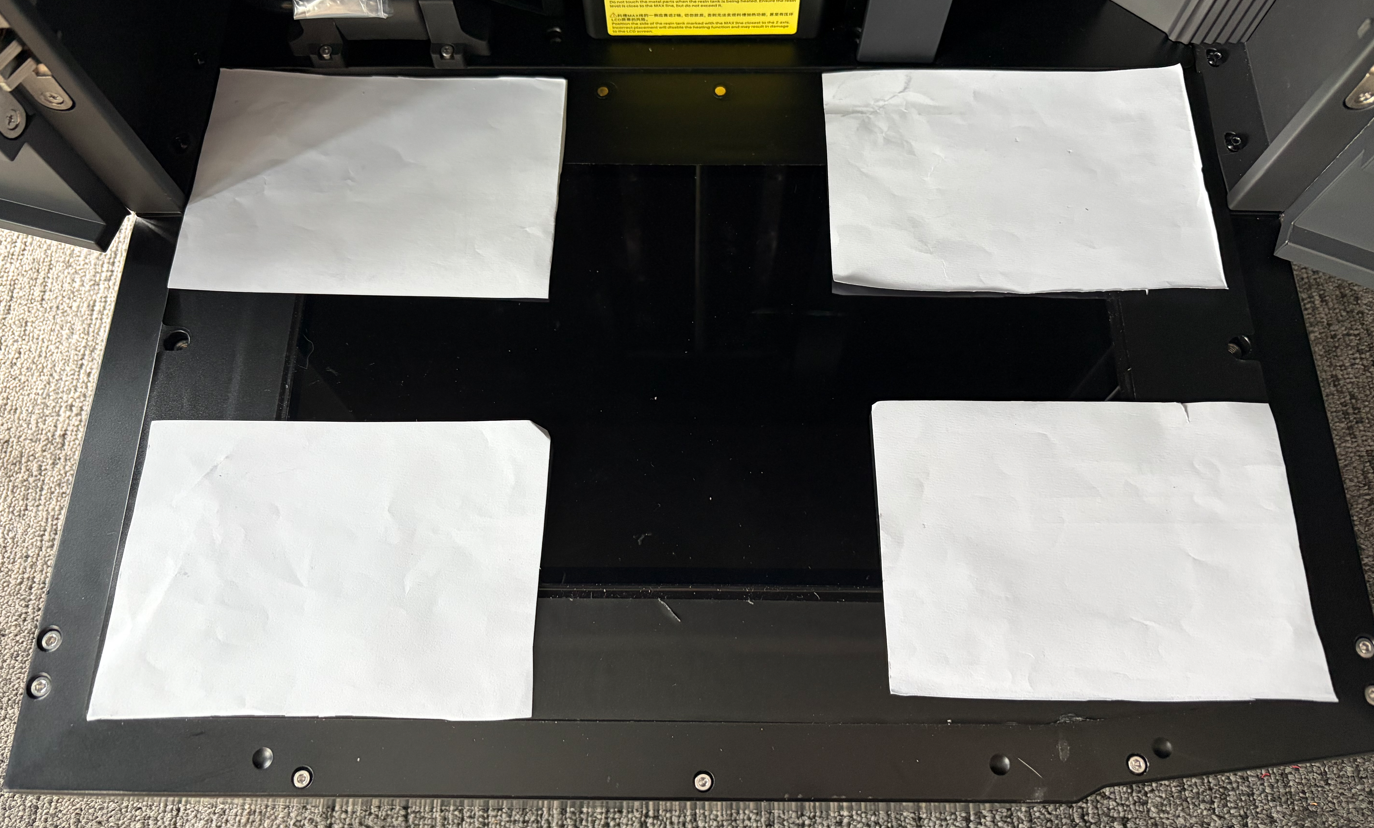
-
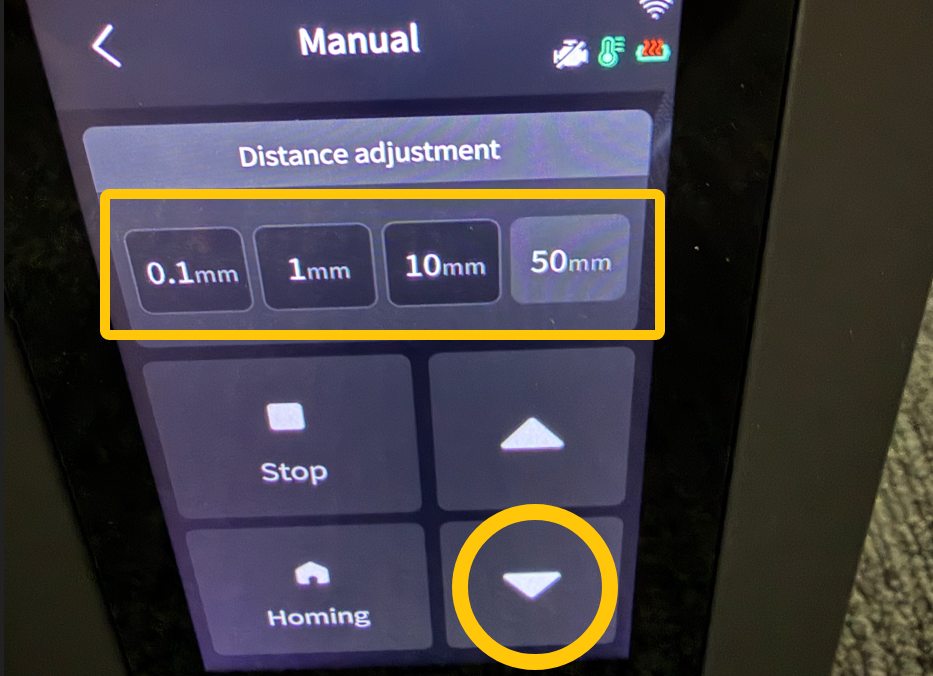
Lower the Z-axis until the Build Plate approaches the LCD screen.
Note: Avoid LCD damage. After the Z-axis reaches 306 mm, it must be switched to 0.1 mm steps for further adjustment.Then use the Touch Screen to lower the Z-axis until the Build Plate approaches the LCD screen, and the paper shows slight resistance when moving.
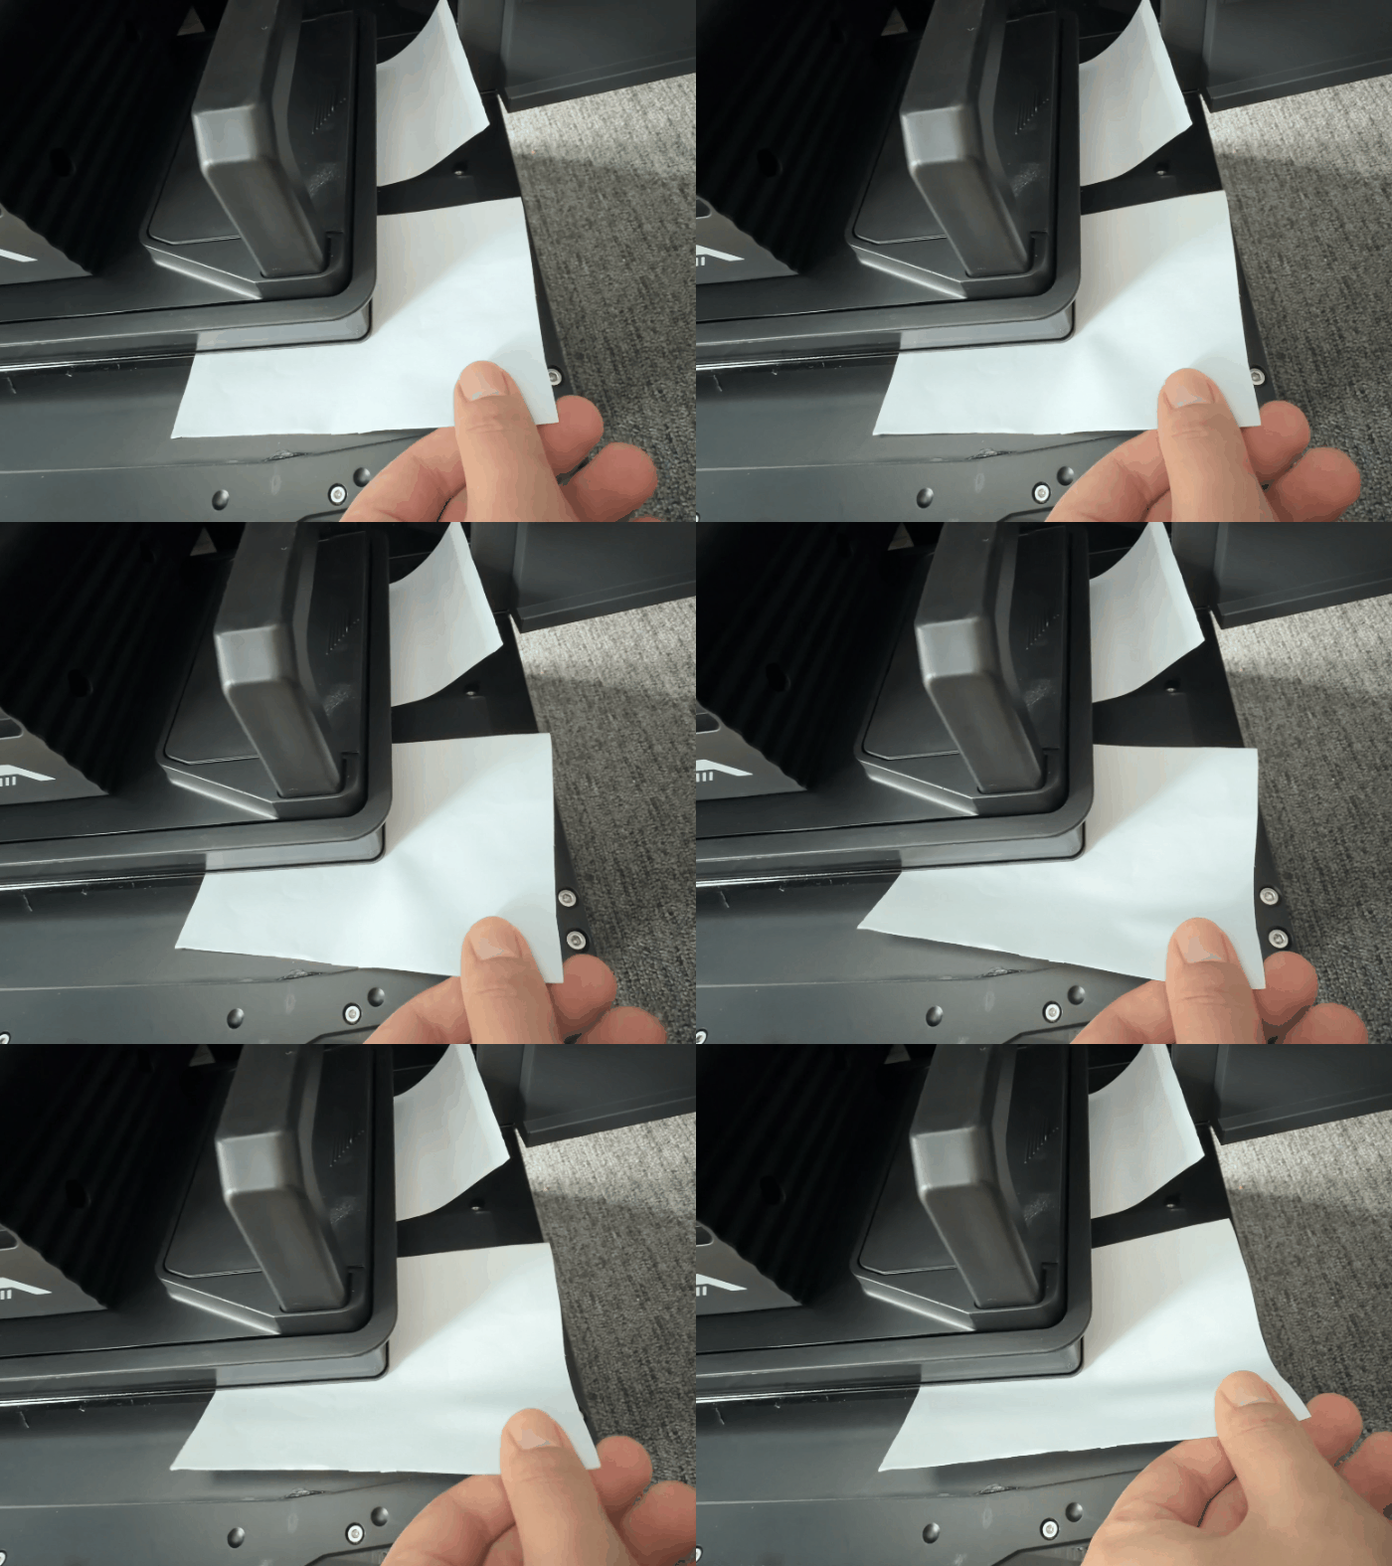
- Ensure equal friction across all four corners, then tighten screws.
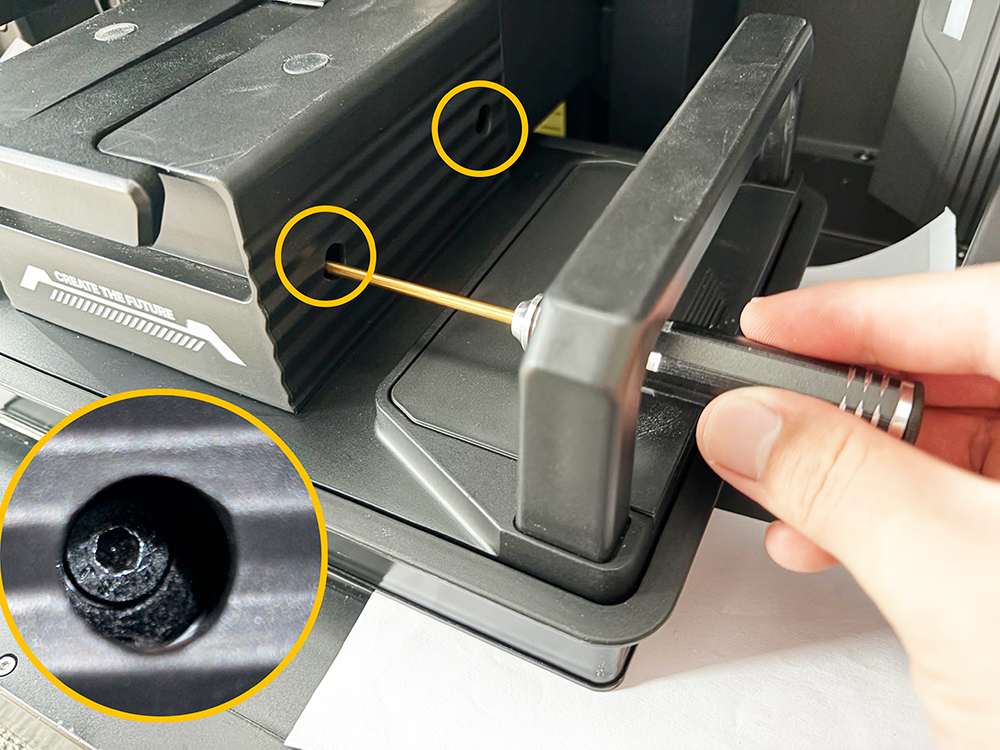
Notes:
- If there is a difference in paper friction between the four corners, loosen the screws through the adjustment hole on the right side of the Build Plate, then set the Z-axis motor movement distance to 0.1 mm via the Touch Screen to control Z-axis lowering. Continue adjusting until all four corners of the Build Plate are evenly pressed against the LCD screen, and the paper shows consistent friction resistance at each corner.
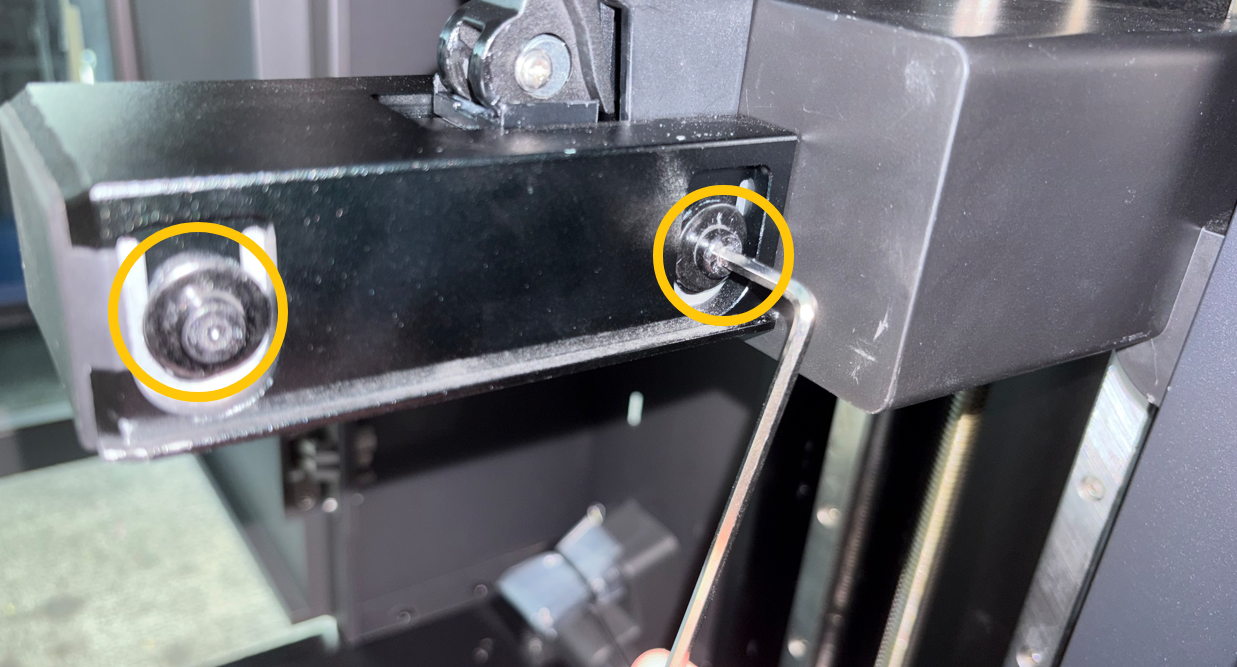
- After calibration, remove Build Plate and fully tighten arm screw using short end of wrench.
¶ 2. Manual Leveling
After calibration, perform manual leveling again.
Reference video:
https://youtu.be/eUFnPV5au6k